Crocheted stripes, sewn stripes, quilted stripes, embroidered stripes, sewing with striped fabric – I love it all!
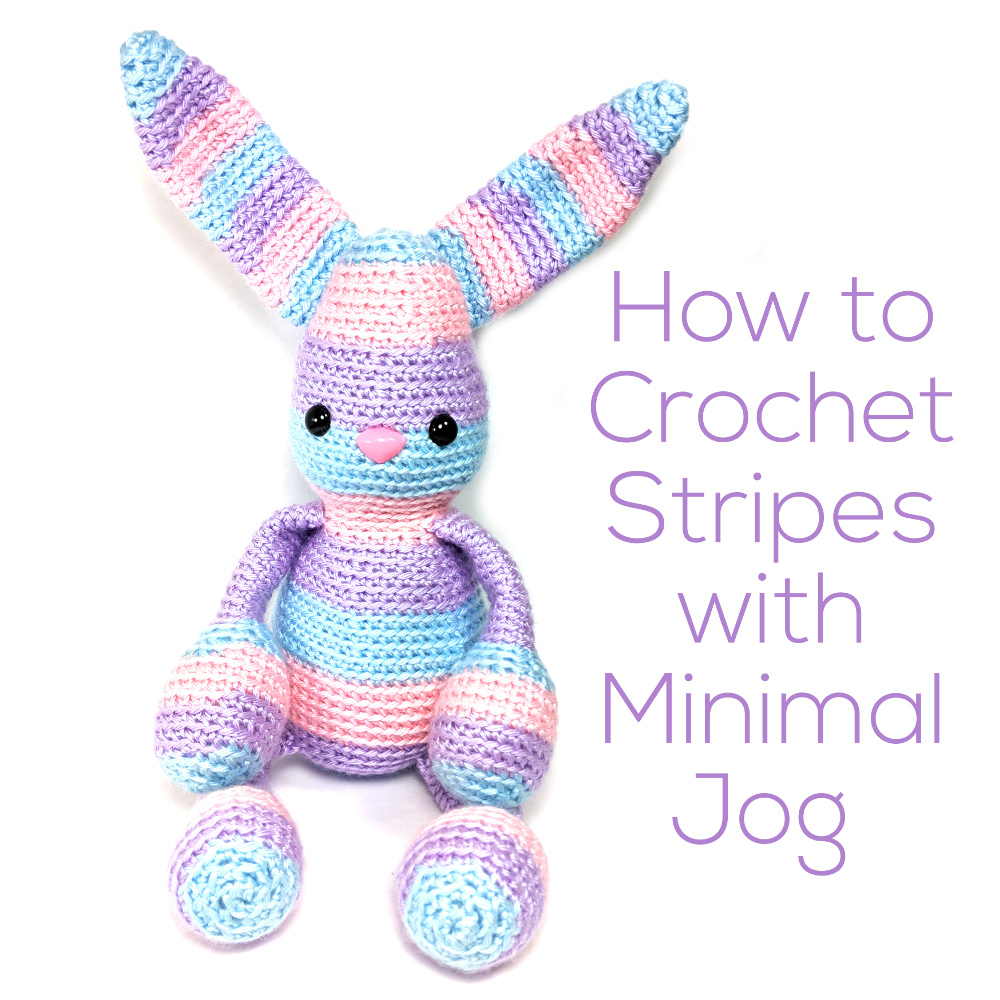
When you change color in crochet, it leaves an abrupt step between the colors. That’s called a jog.
Most of the time that doesn’t bother me at all, but sometimes I want to make it smoother. There are a lot of ways to do that – including some pretty crazy complex methods – but I’ve found a very simple method that’s super easy. It’s not perfect, but it smooths that abrupt step between crocheted stripes into a gentle ramp. Much better!
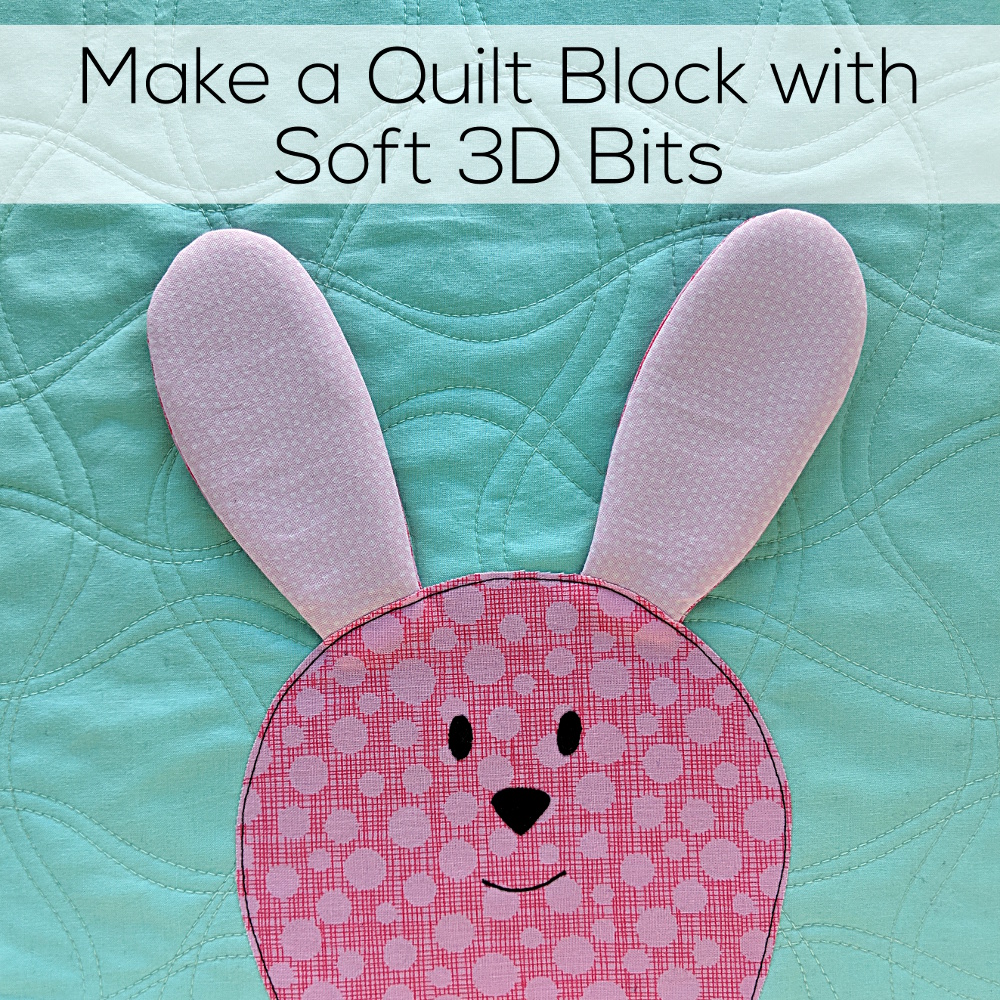
The technique for 3D quilts is basically the same – but it’s a tiny bit more involved because applique template pieces have no seam allowances – and you need to account for that if you’re going to sew them into flappy ears.
Don’t worry – it’s easy. I show you how to do it in this video.
Here are links to all the posts showing how to applique with fusible adhesive – my favorite method. It’s fast and easy and (with the right materials) it holds up beautifully to rough use and repeated washing.
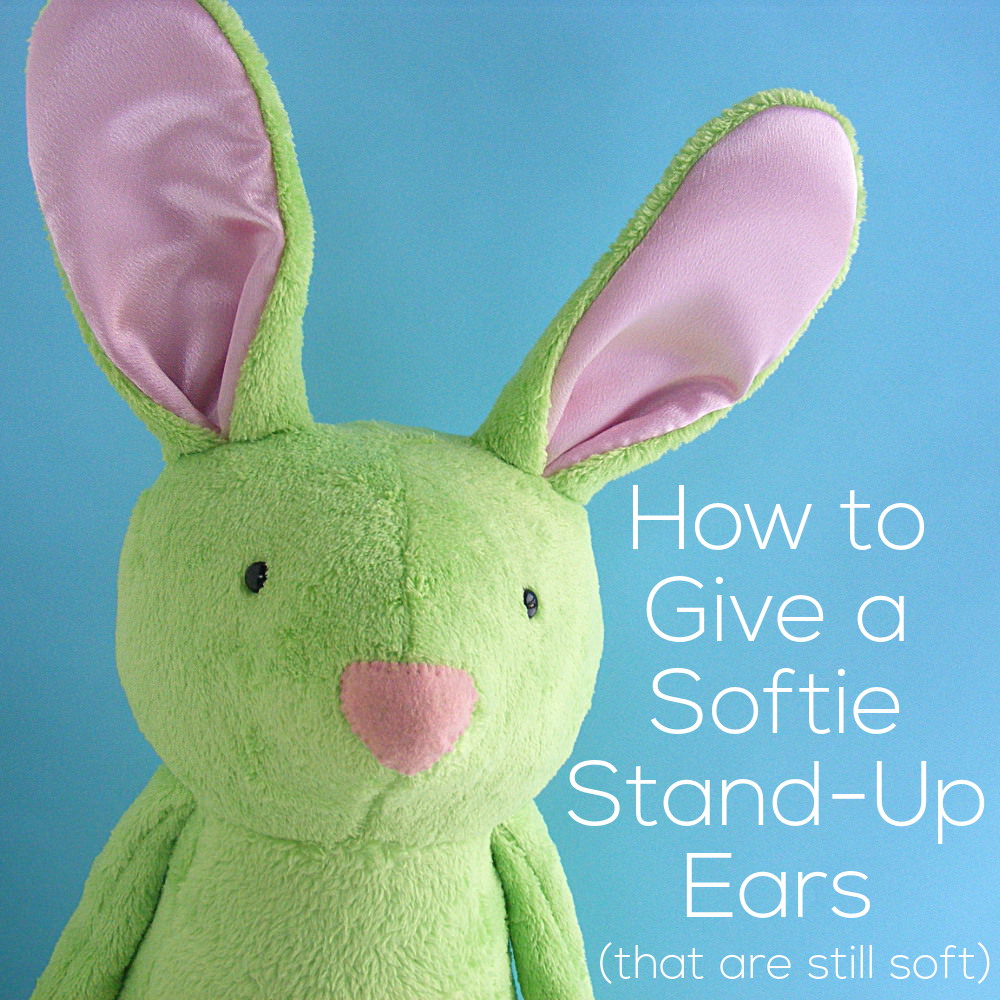
I usually design my softies with floppy ears – often with a satin lining. I’ve known SO MANY kids who use softie ears like a blankie – clutching them or rubbing them as they fall asleep – that making blankie-like ears is kind of my default setting.
When I designed Benson Bunny (that spring green bunny you see in the top image) I wanted him to have ears that stood up straight.
I realized I had never made a stuffed animal with ears that stand up and I wasn’t sure how to do it!
Every stabilizer and interfacing I tried was either too floppy – or downright crunchy and hard. In desperation I turned to Betz White – bag-maker extraordinaire – and she suggested a product called Soft & Stable right away. She even sent me a sample to try and it was perfect!
Here’s what I love about it. . .
It’s easy to work with. You can sew right through it.
It’s stiffer than batting and really maintains its shape – but is still soft and cuddly. You can fold those ears over and they’ll spring right back up.
It’s very lightweight.
It’s machine washable and dryable.
It gives a really professional look to your finished softies.
I included instructions for using it in Benson’s pattern. But I realized I never posted general instructions for it here.
The thing is – you can use this with ANY pattern – even one that I designed with floppy ears!
So – here’s how to give any stuffed animal ears that stand up – but are still soft and cuddly.
Any pattern will have you cut an ear front and an ear back for each ear. They’ll always be cut from the same pattern piece so they go together. You need to cut an extra layer of Soft & Stable from that same ear pattern piece.
So for each ear you’ll have an ear front (I do love making that piece satin or other contrasting fabric), an ear back (usually out of the main fabric), and a third piece that will be hidden inside the ear cut from the Soft & Stable.
The sometimes mind-bendy part is assembling the layers. You want the front and back sewn together with the foam in between, but how do you stack the layers so when you turn it right side out it works?
Easy.
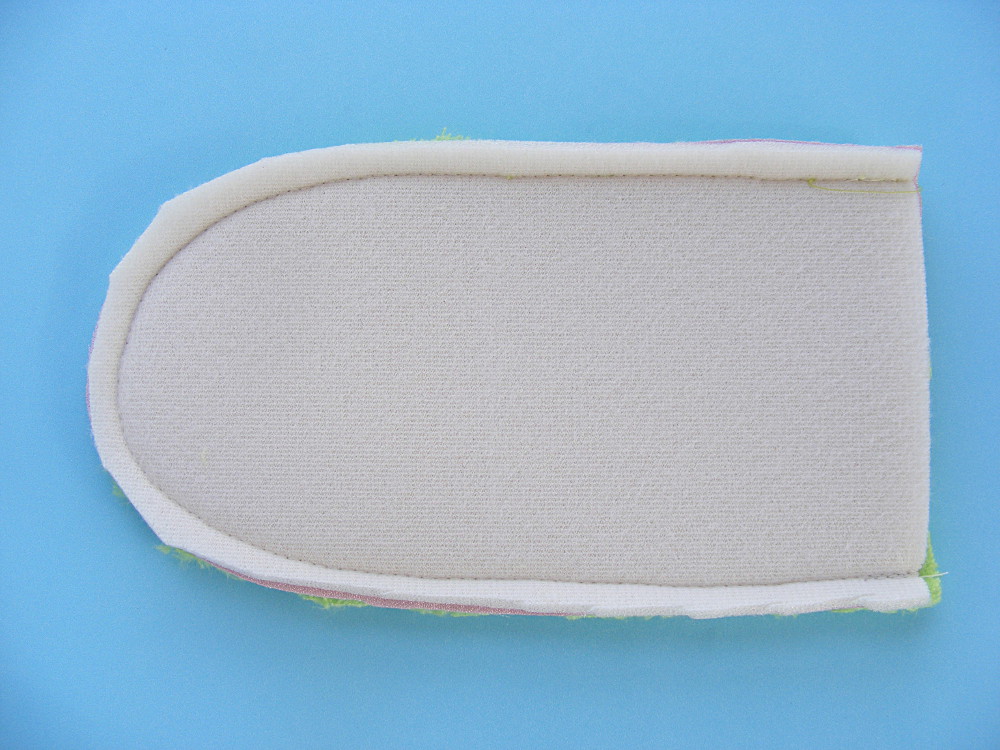
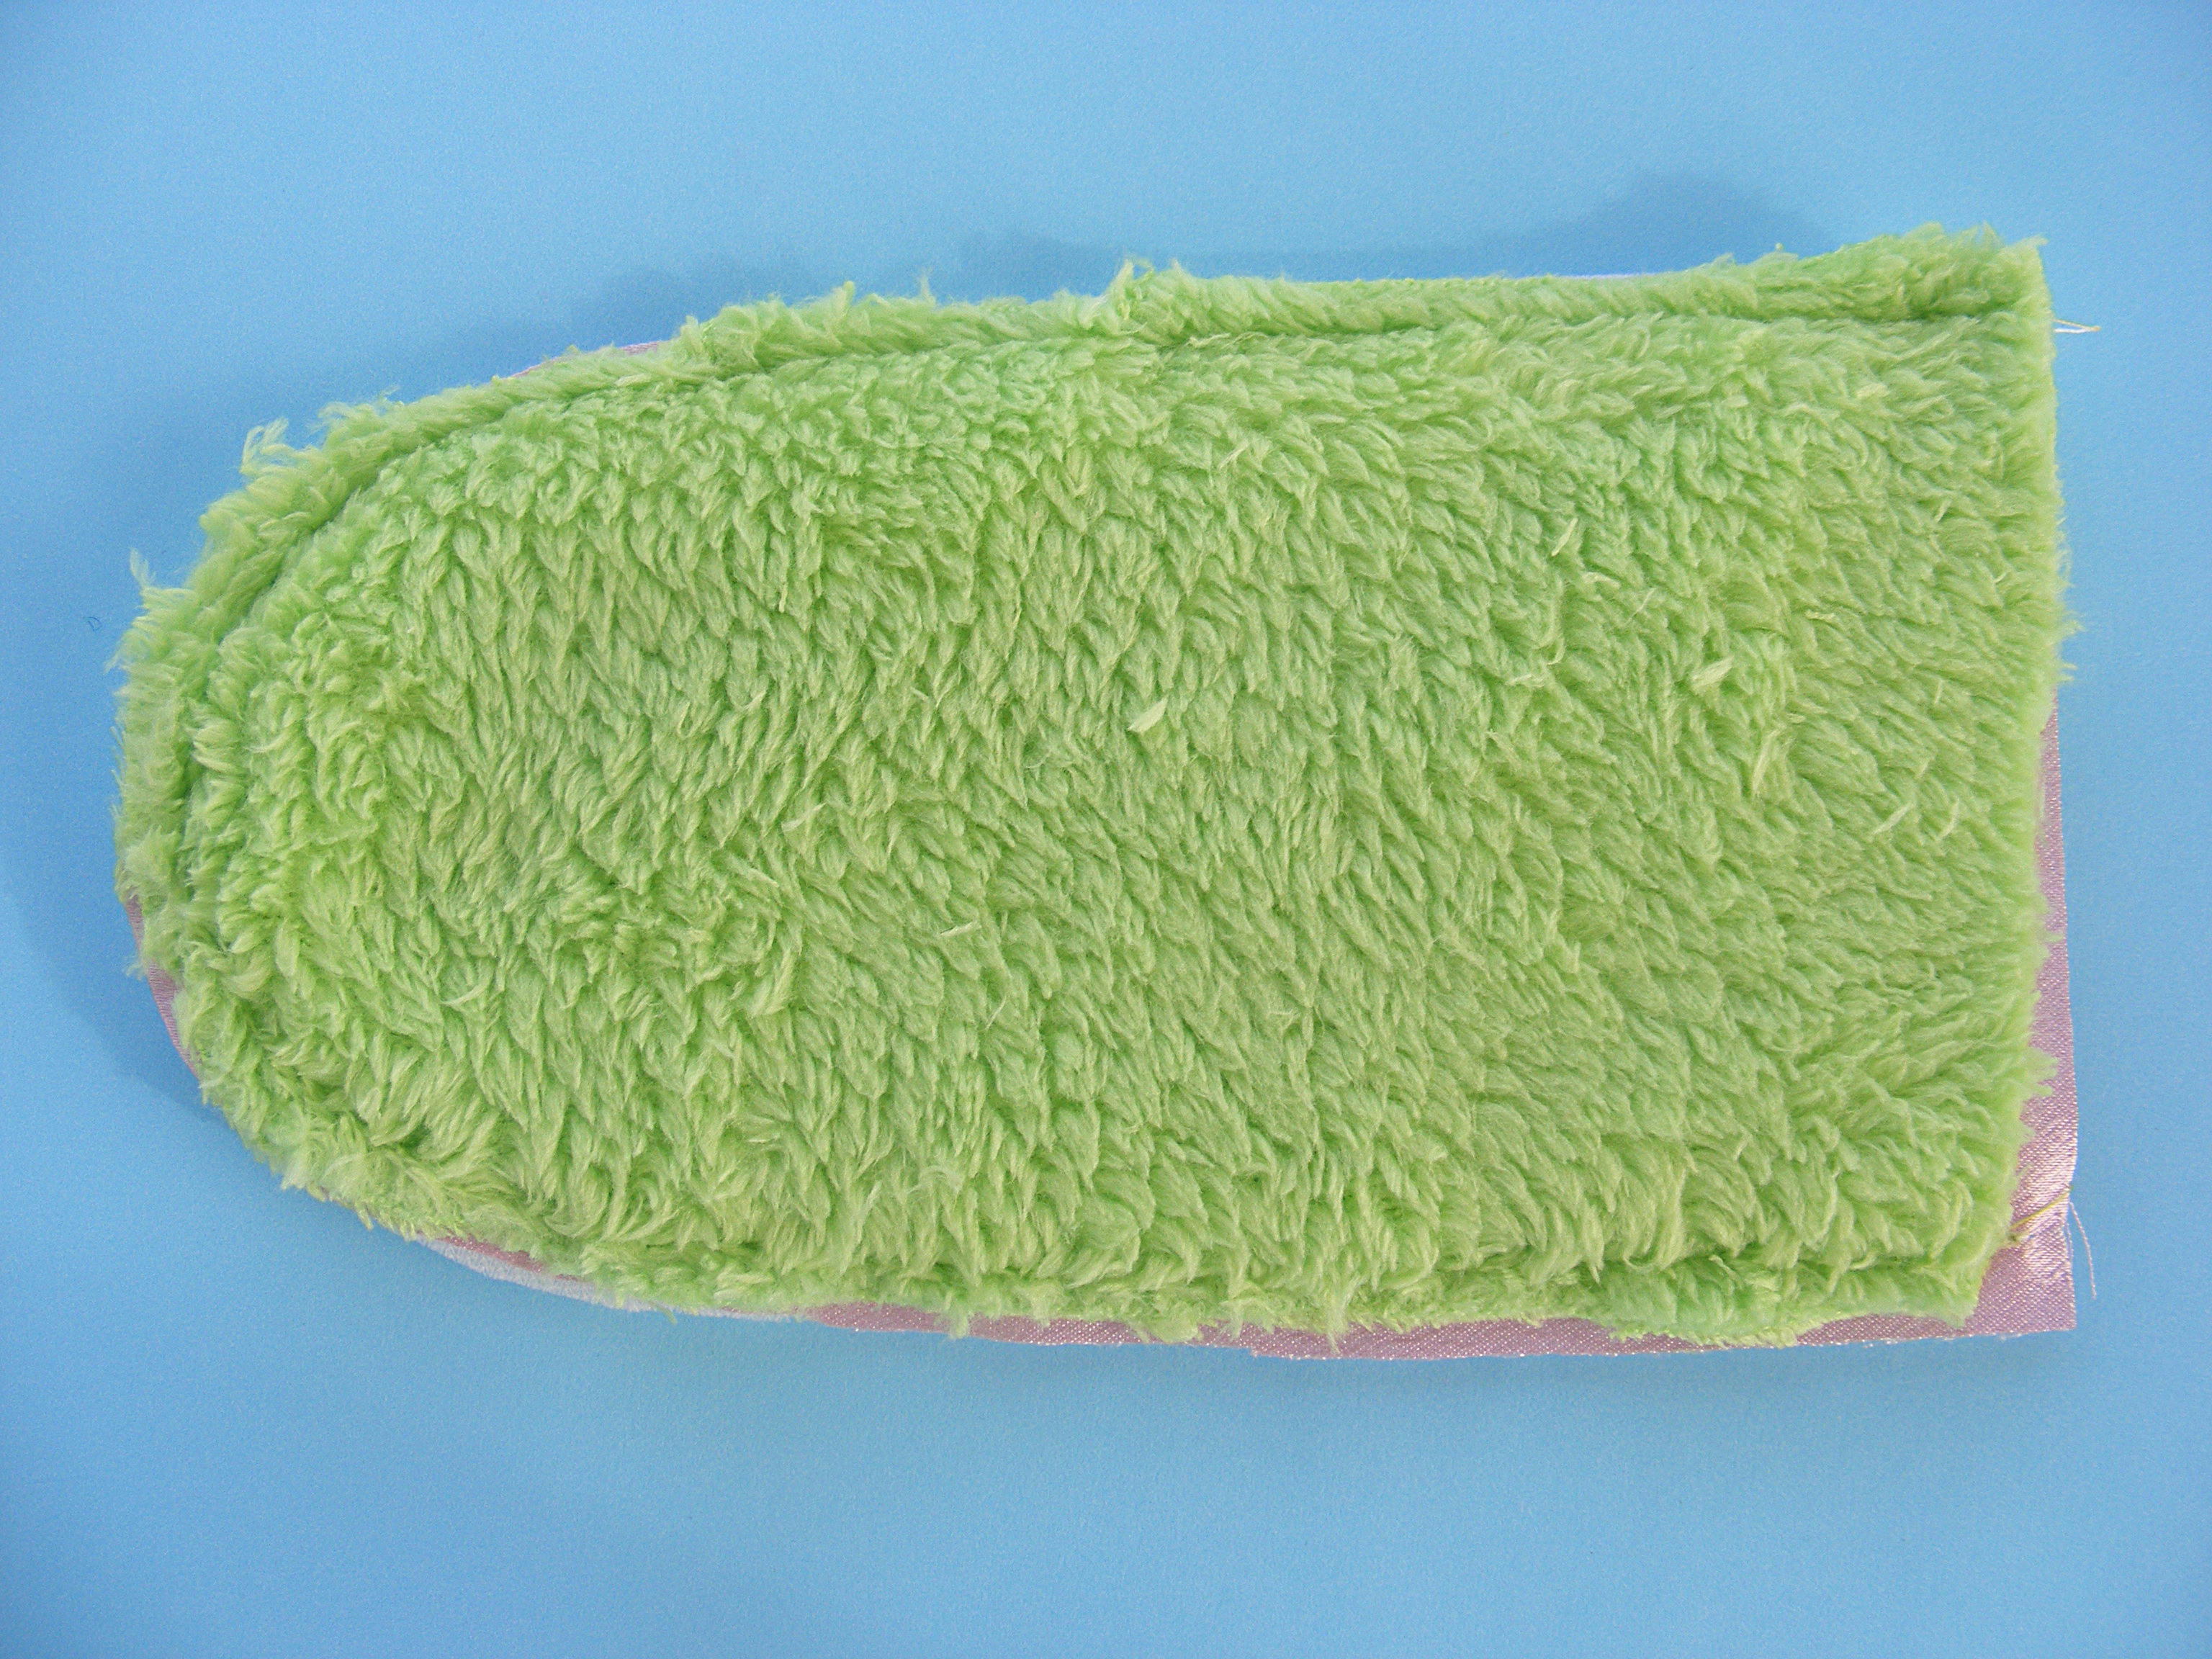
Stack the front and back ear pieces just like you normally would – right sides together. I like to start with the main fabric piece face up, then the lining fabric piece face down. Now just add the foam piece to the stack.
That’s it!
Sew around the edge of the ear just like the pattern says.
Here’s Benson’s sewn ear from the foam side of the stack.
And here it is from the main fabric side of the stack.
See the pink lining fabric peeking out between the green and the foam?
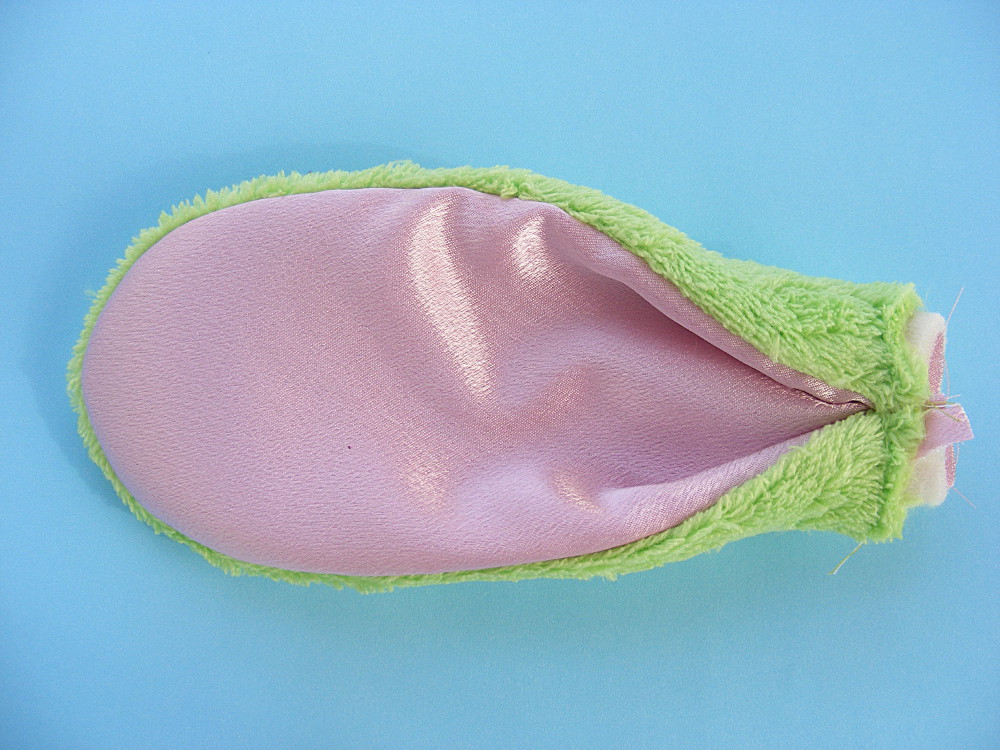
When you turn it right side out (I love to use turning tubes) make sure to reach in and turn between the main layer and the lining layer. That way you’ll end up with the foam between the two layers. 🙂
Done!
Now treat it just like an ear that doesn’t have the layer of foam in there.
If the pattern says to fold the sides in – that’s fine!
You can fold and sew through the foam just like batting or almost any other stabilizer. It’s beautiful stuff!
You can use the same method to add 3D parts to quilt blocks! See that tutorial here.
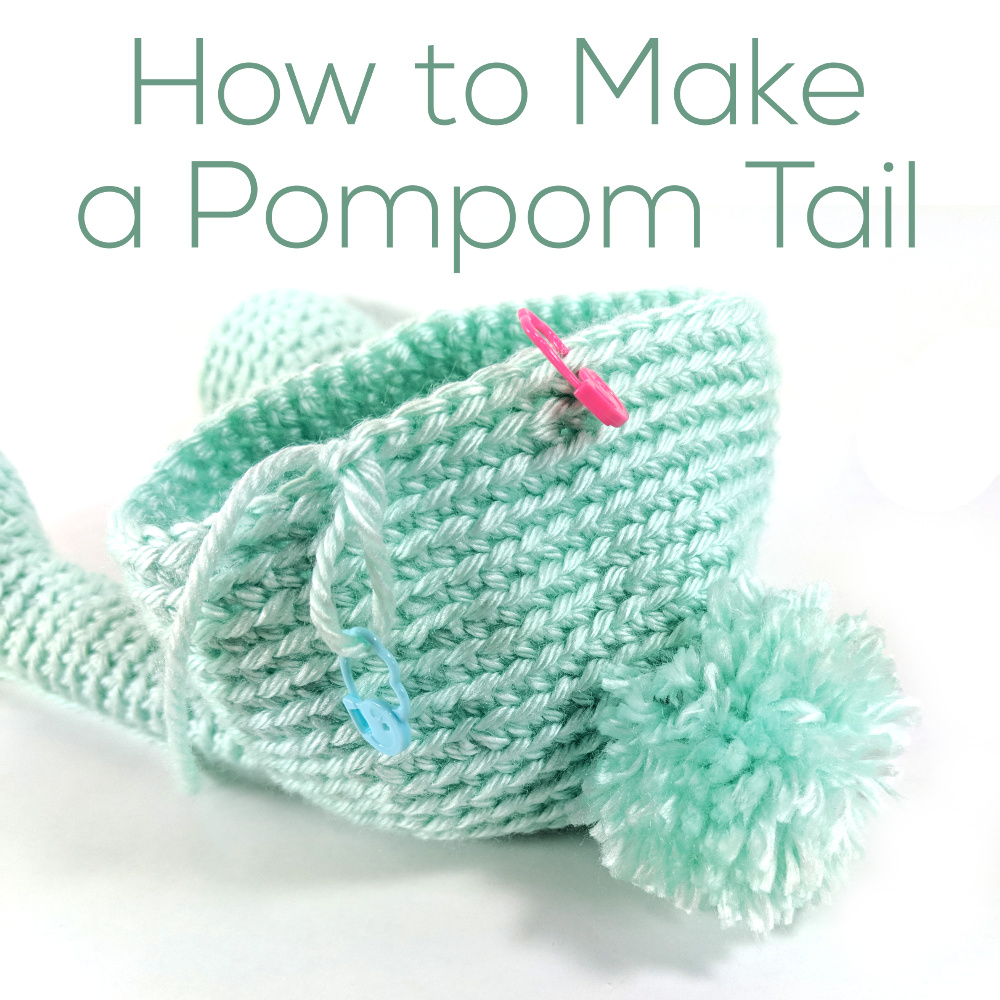
We’re hopping into spring – which means it’s a useful time to know how to make a quick and easy pompom tail. 🙂
There are lots of great pompom tools out there (I especially love this adorable llama-themed one from Betz White) but sometimes you just have your hands and a pair of scissors on hand. That’s all you need for this method. 🙂
Be super careful not to cut those long tails! You saw how useful they are for attaching your bunny tail. 🙂
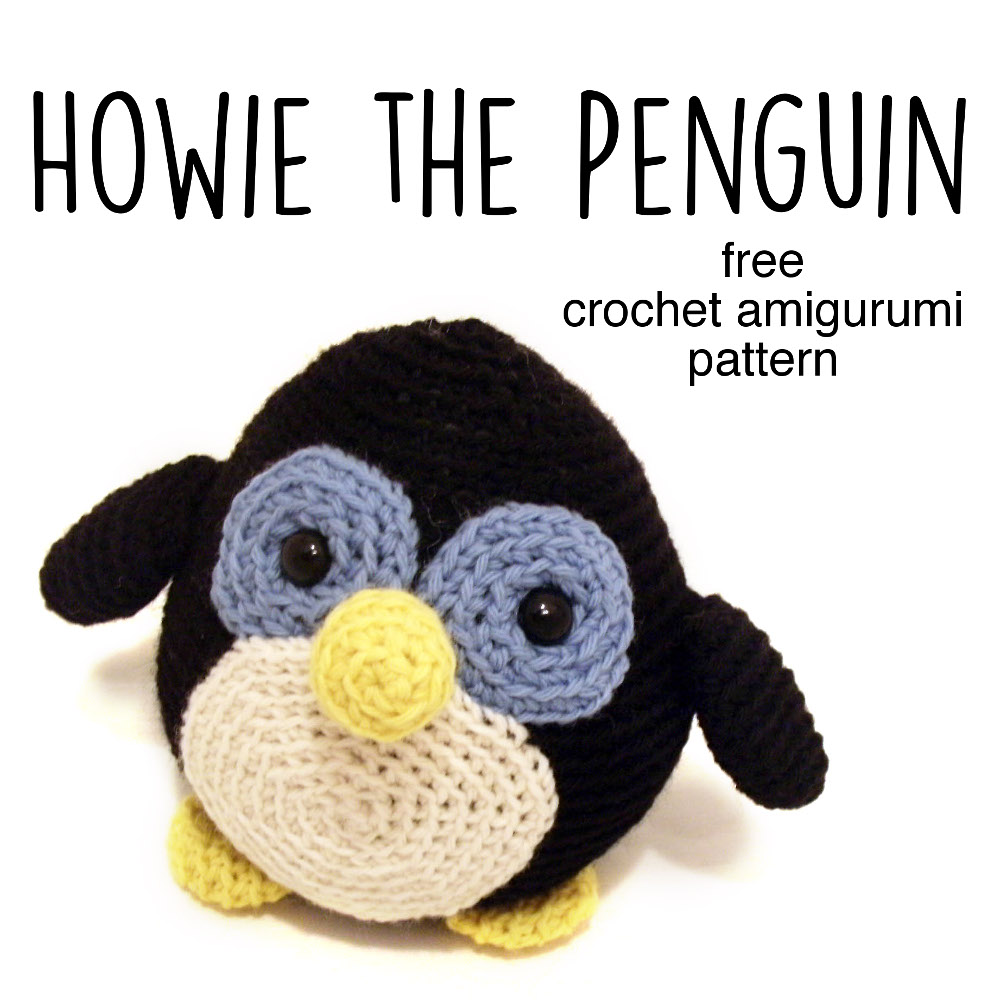
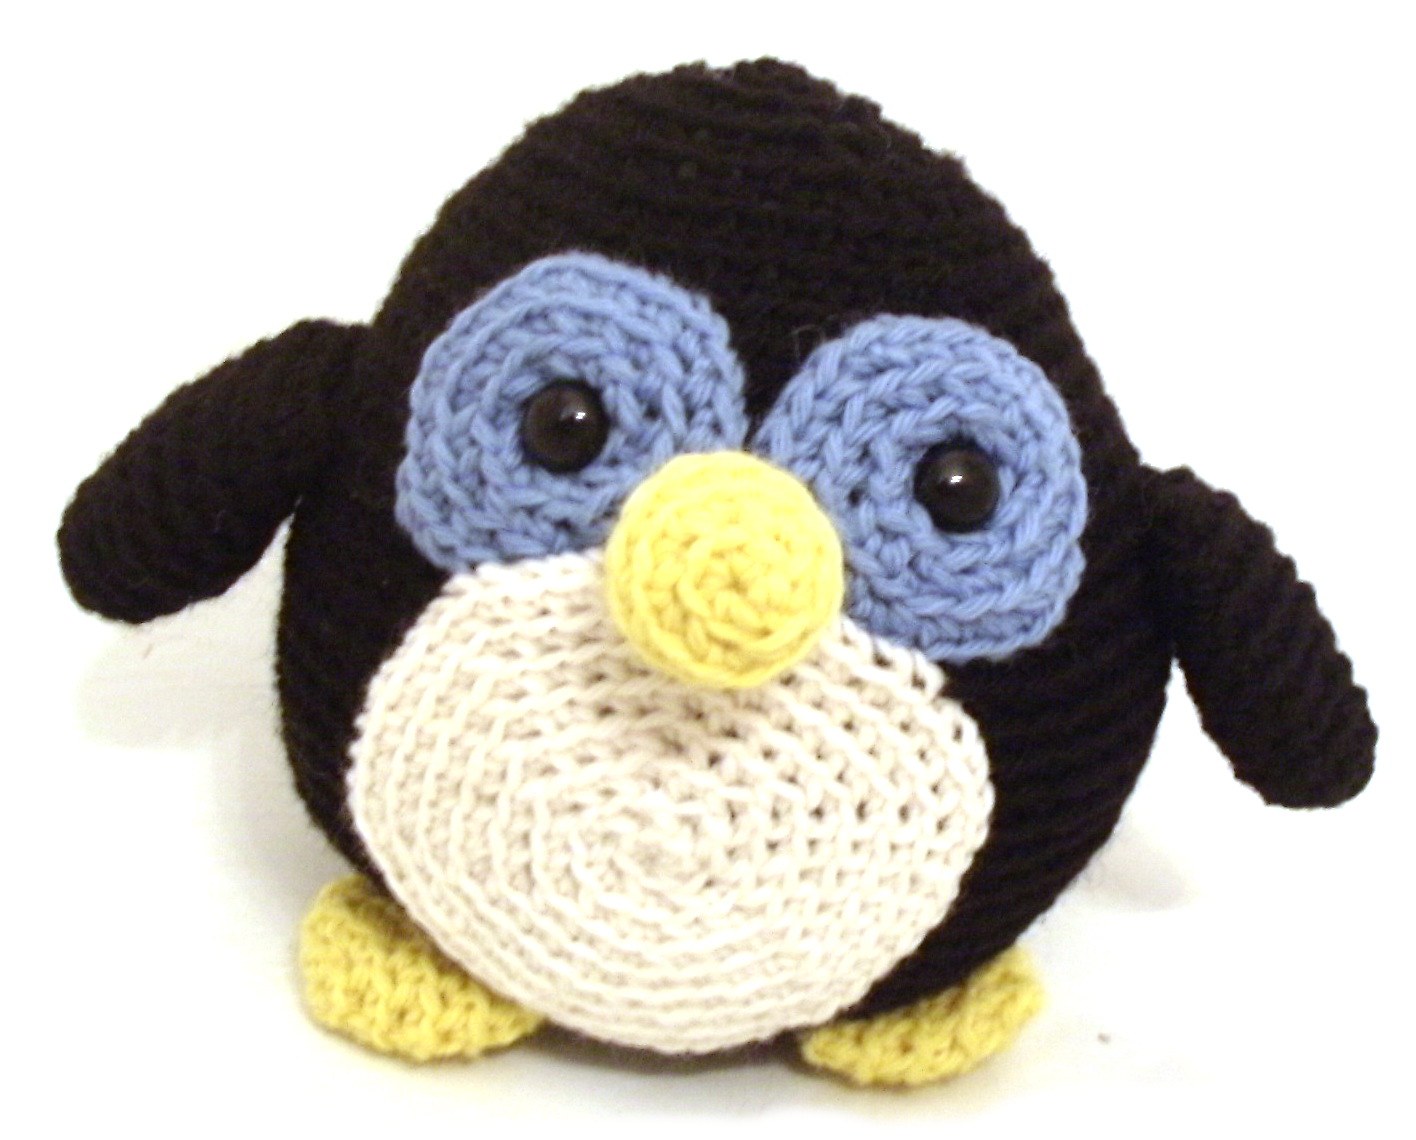
Howie is a great pattern for those just getting started, because he uses only a few of the most basic skills. You’ll find links to those skills sprinkled throughout the pattern wherever you need them – that way you can learn as you go! Just click on the link to hop to the tutorial.
There are loads of free video lessons here that take you through everything you need to know to get started with amigurumi. You can work your way through those lessons using this free pattern if you like. 🙂
The skills you’ll need for just about any amigurumi are. . .
You can go through all those posts now, or just hop to them as you get to those points in the pattern – whatever works best for you!
Yarn
This pattern can be used with any weight yarn! Just use the hook recommended on the ball band, and adjust as needed (see ‘gauge notes’ below). For a bigger, super-cuddly animal, try a bulky weight yarn! Just keep in mind that you’ll use more yardage than recommended. The sample is crocheted in worsted weight yarn, and all yardage/ hook recommendations are calculated based on the sample.
Less than 220 yards (1 skein) is required of each color. For the yarn, Stacey used 100% wool worsted weight (Ella Rae Classic the brand used in the sample). However, any worsted weight yarn can be substituted.
This pattern doesn’t specify a gauge. It’s a stuffed animal, and you don’t need to be too picky about exact sizing. The most important thing is that you use a hook size that creates a nice looking fabric for your yarn. If you use the recommended hook size, and your fabric looks very loose (so that stuffing would show through), then you will want to use a smaller hook. Other than that, no measuring required!
In case you’re curious about getting the exact gauge Stacey does, it’s 5 rounds=2 inches. Note that you will need to have this gauge for the yardage suggestions to provide an accurate estimation.
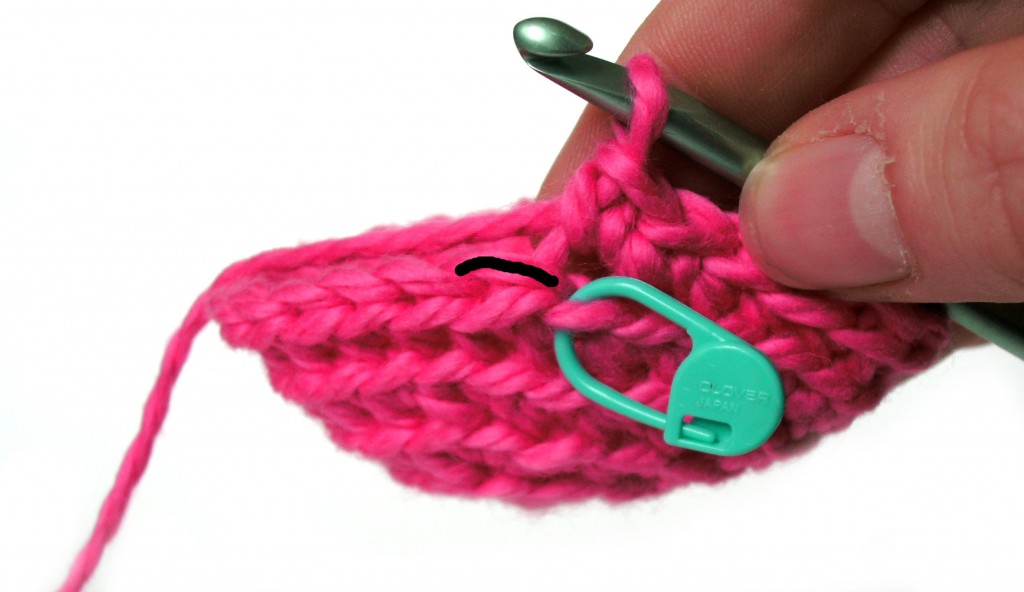
Stitch into the Back
All stitches in this pattern (that are worked in the round) are worked through the back loop only, unless otherwise directed. Look at this picture.
See how one loop is highlighted in black? This is the back loop, and it’s what you’ll stitch into. Stitching into the back loop creates ridges on the right side of the piece.
Want to see crocheting through the back loop in action? Check out this blog post. It talks all about why Stacey crochets through the back loop and even has a handy dandy video showing how to find that loop. 🙂
Abbreviations
ch: chain
sc: single crochet
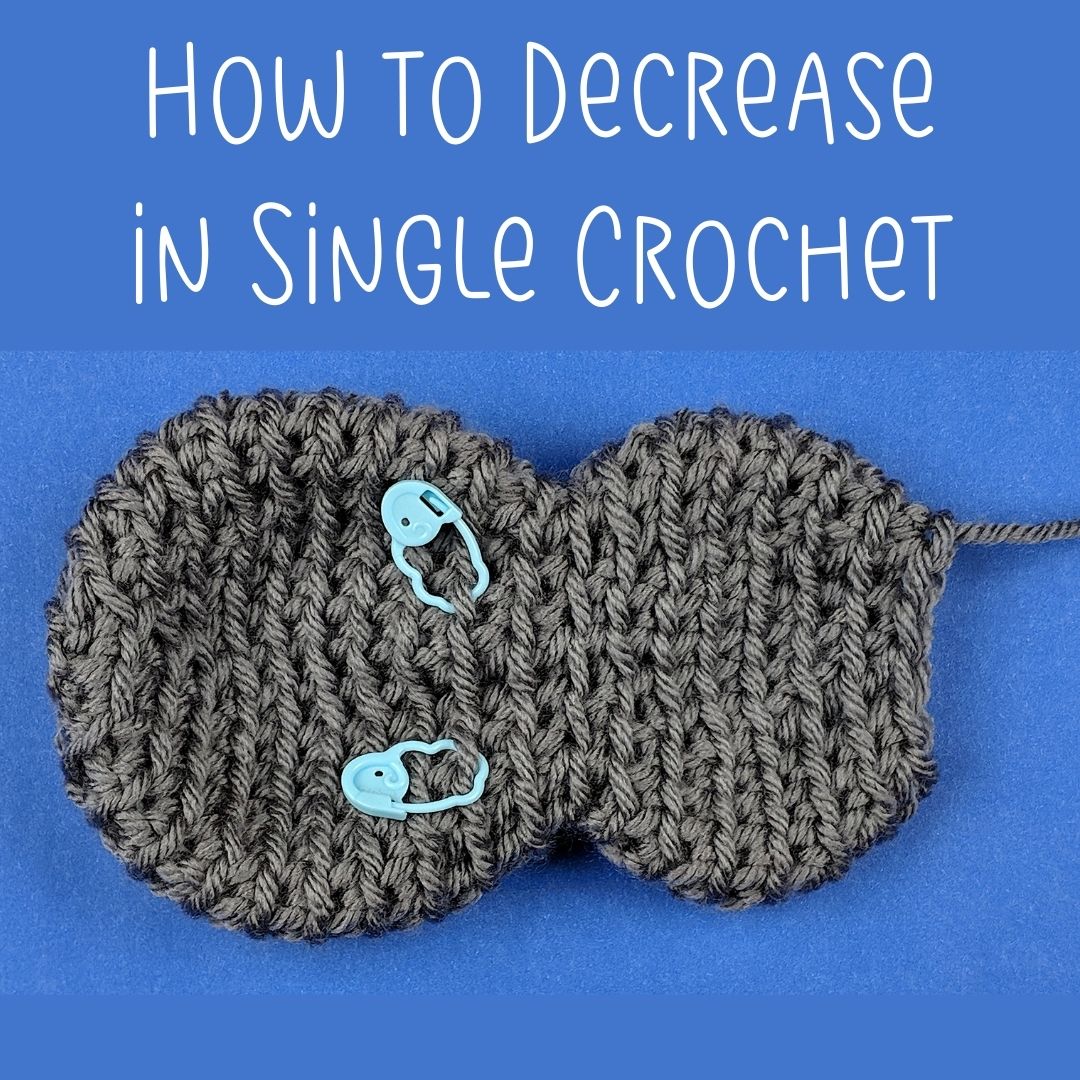
sc2tog: single crochet 2 stitches together
st(s): stitch(es)
Ready? Let’s jump in!
The Pattern
Eye Circles
Make 2.
With AC2, ch 2 (I like to start with a sloppy slip knot. This video shows how. And this video shows how to chain.) Round 1 sc 6 in 2nd ch from hook (6) This post will help you find that second chain from the hook. Round 2 sc twice in each st (12) This video will help you if you find it tricky to start the second round. Round 3 [sc twice in next st, sc in next st.] 6 times (18) (Whoa! What’s with the brackets? It’s just telling you that set is going to repeat. So do everything in the brackets, and then repeat that same series for a total of six times. No big deal. And the 18 in parentheses is telling you that this round is a total of 18 stitches. It’s a good way to check your work.) Round 4 [sc twice in next st, sc in next 2 sts.] 6 times (24)
Make 2.
With AC1, ch 2 Round 1 sc 6 in 2nd ch from hook (6) Round 2 sc twice in each st (12) Round 3 [sc twice in next st, sc in next st.] 6 times (18) Rounds 4-5 sc in each st (18, 2 rounds)
Fasten off with long tail.
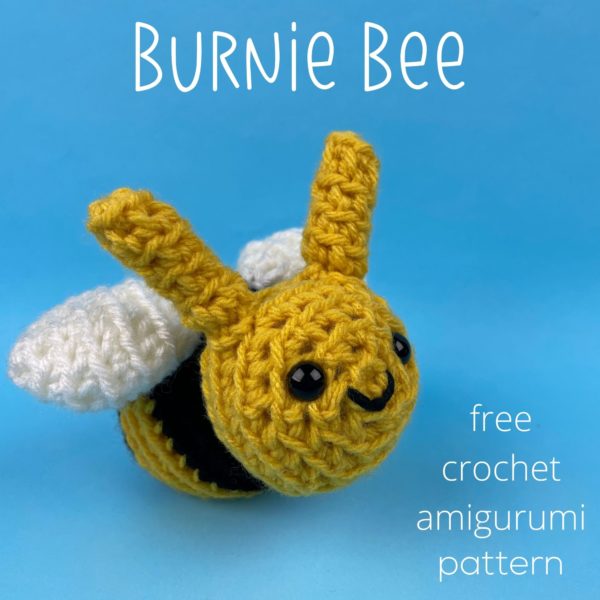
Wings
Make 2.
With MC, ch 2 Round 1 sc 6 times in 2nd ch from hook (6) Round 2 sc twice in each st (12) Rounds 3-4 sc in each st (12, 2 rounds) Round 5 [sc twice in next st, sc in next st] 6 times (18) Rounds 6-9 sc in each st (18, 4 rounds) Round 10 [sc2tog, sc in next st] 6 times (12)
Fasten off with long tail.
Beak
With AC1, ch 2 Round 1 sc 6 times in 2nd ch from hook (6) Round 2 sc twice in each st (12) Rounds 3-5 sc in each st (12, 3 rounds)
Fasten off with long tail.
Tummy Circle
With SC, ch 2 Round 1 sc 6 times in 2nd ch from hook (6) Round 2 sc twice in each st (12) Round 3 [sc twice in next st, sc in next st] 6 times (18) Round 4 [sc twice in next st, sc in next 2 sts] 6 times (24) Round 5 [sc twice in next st, sc in next 3 sts] 6 times (30) Round 6 [sc twice in next st, sc in next 4 sts] 6 times (36) Round 7 [sc twice in next st, sc in next 5 sts] 6 times (42) Round 8 [sc twice in next st, sc in next 6 sts] 6 times (48)
Fasten off with long tail.
Body
With MC, ch 2 Round 1 sc 6 times in 2nd ch from hook (6) Round 2 sc twice in each st (12) Round 3 [sc twice in next st, sc in next st] 6 times (18) Round 4 [sc twice in next st, sc in next 2 sts] 6 times (24) Round 5 [sc twice in next st, sc in next 3 sts] 6 times (30) Round 6 [sc twice in next st, sc in next 4 sts] 6 times (36) Round 7 [sc twice in next st, sc in next 5 sts] 6 times (42) Round 8 [sc twice in next st, sc in next 6 sts] 6 times (48) Round 9 [sc twice in next st, sc in next 7 sts] 6 times (54) Round 10 [sc twice in next st, sc in next 8 sts] 6 times (60) Rounds 11-21 sc in each st (60, 11 rounds) Round 22 [sc2tog, sc in next 8 sts] 6 times (54) Round 23 sc in each st (54) Round 24 [sc2tog, sc in next 7 sts] 6 times (48) Round 25 sc in each st (48) Round 26 [sc2tog, sc in next 6 sts] 6 times (42) Round 27 sc in each st (42) Round 28 [sc2tog, sc in next 5 sts] 6 times (36) Round 29 sc in each st (36) Round 30 [sc2tog, sc in next 4 sts] 6 times (30) Round 31 sc in each st (30)
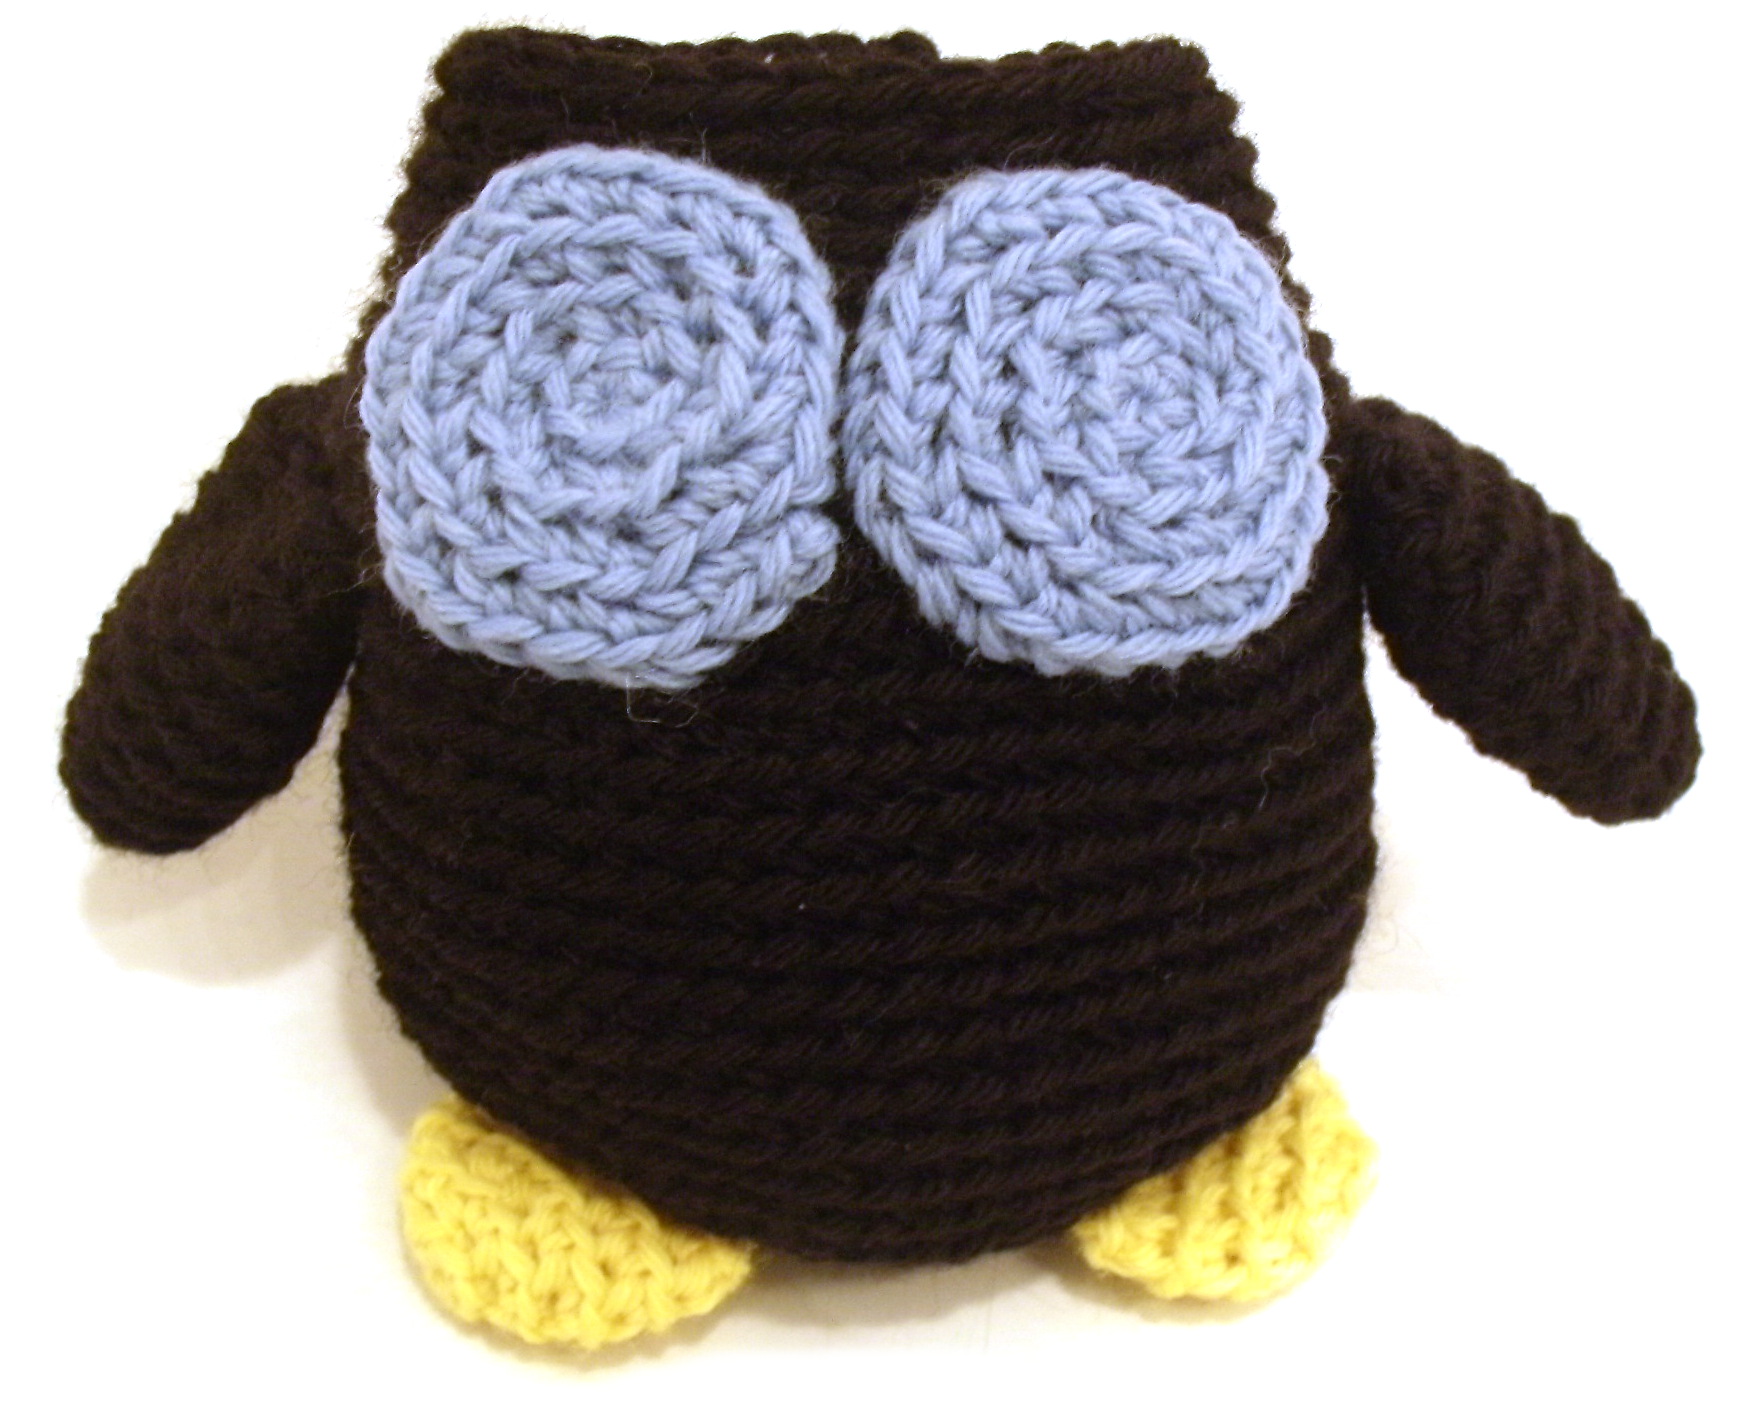
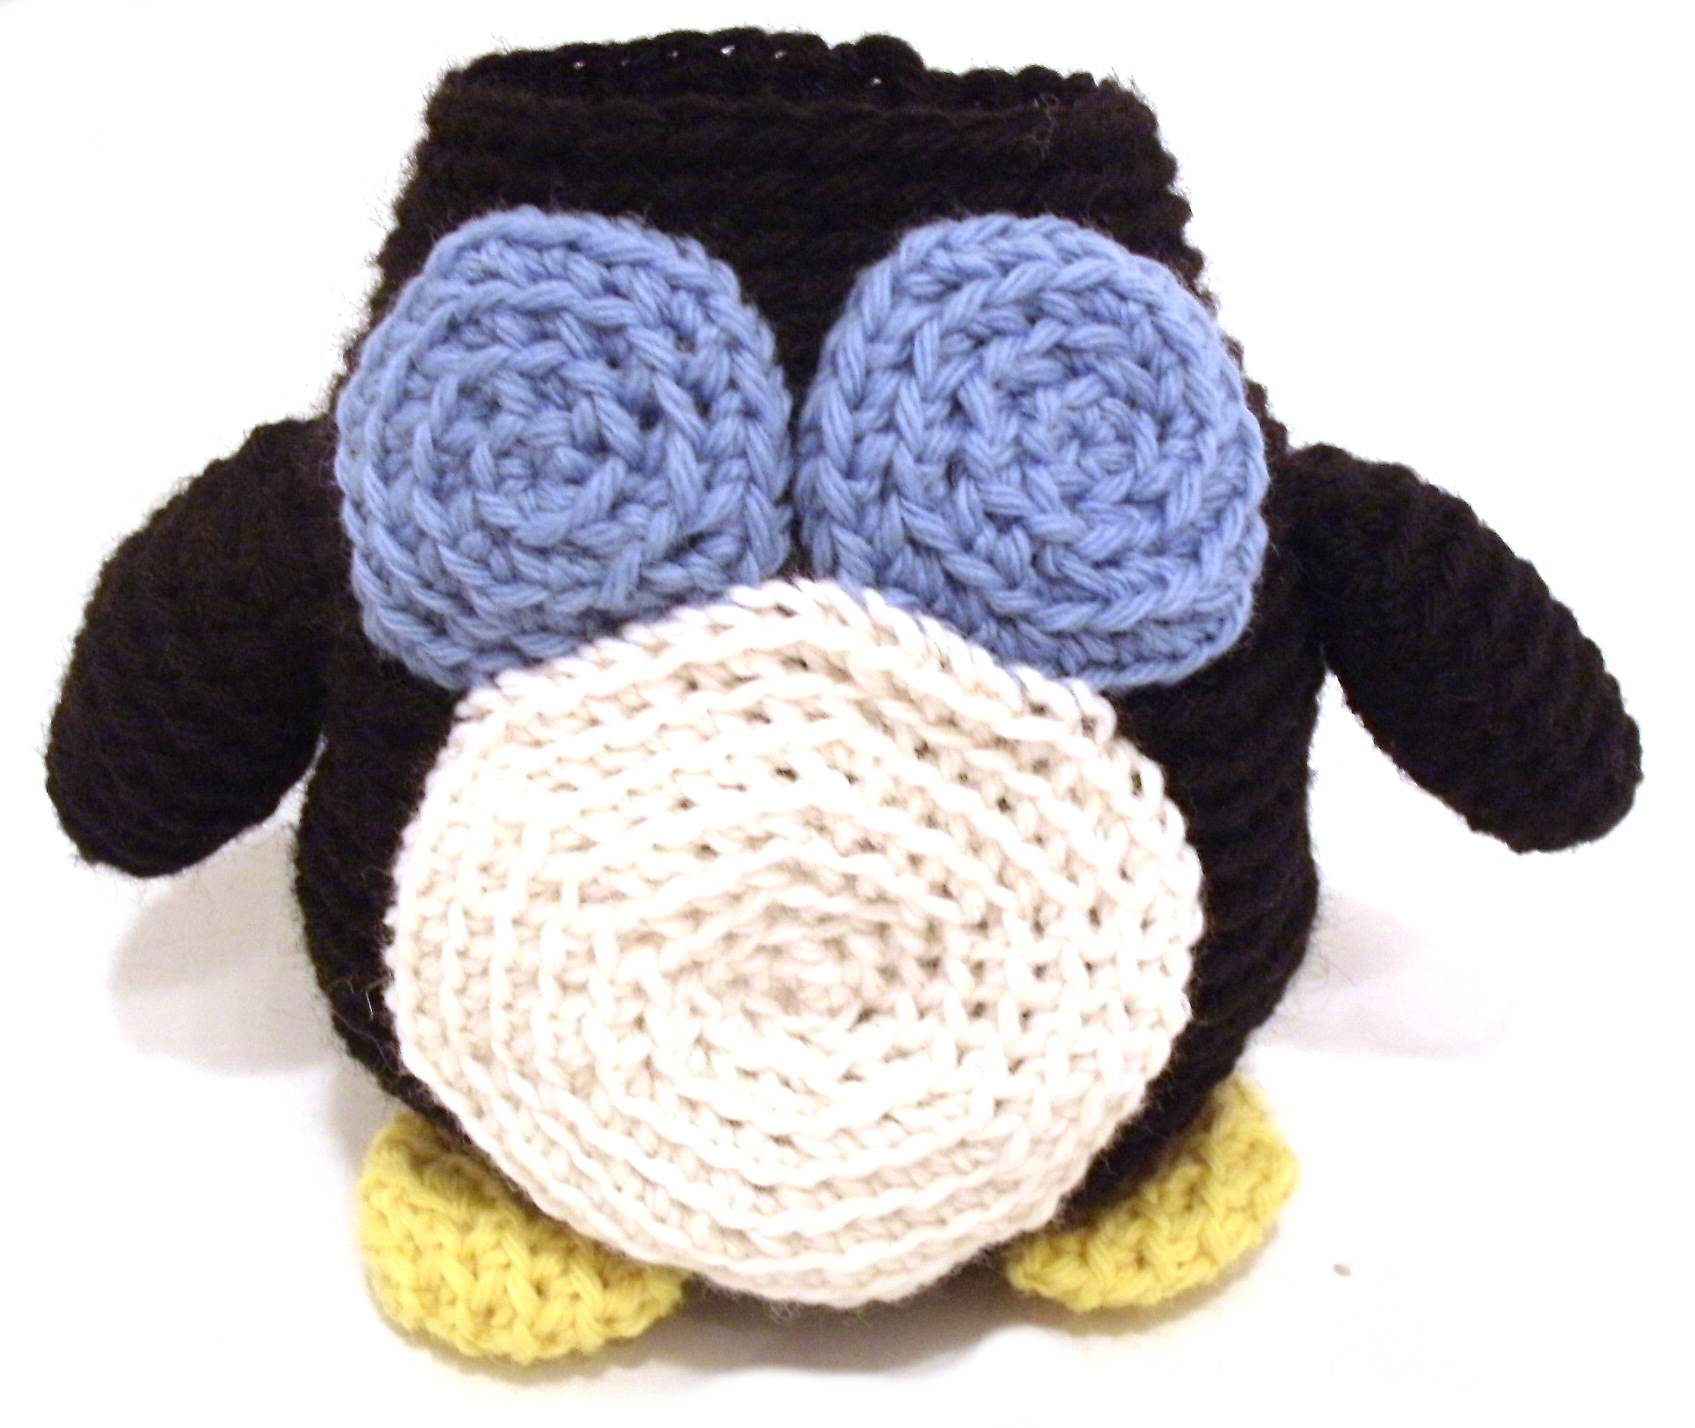
Attach tummy circle to body. The bottom should be attached at round 9 (two rounds above the feet), and slightly overlap the bottom of the eye circles at the top.
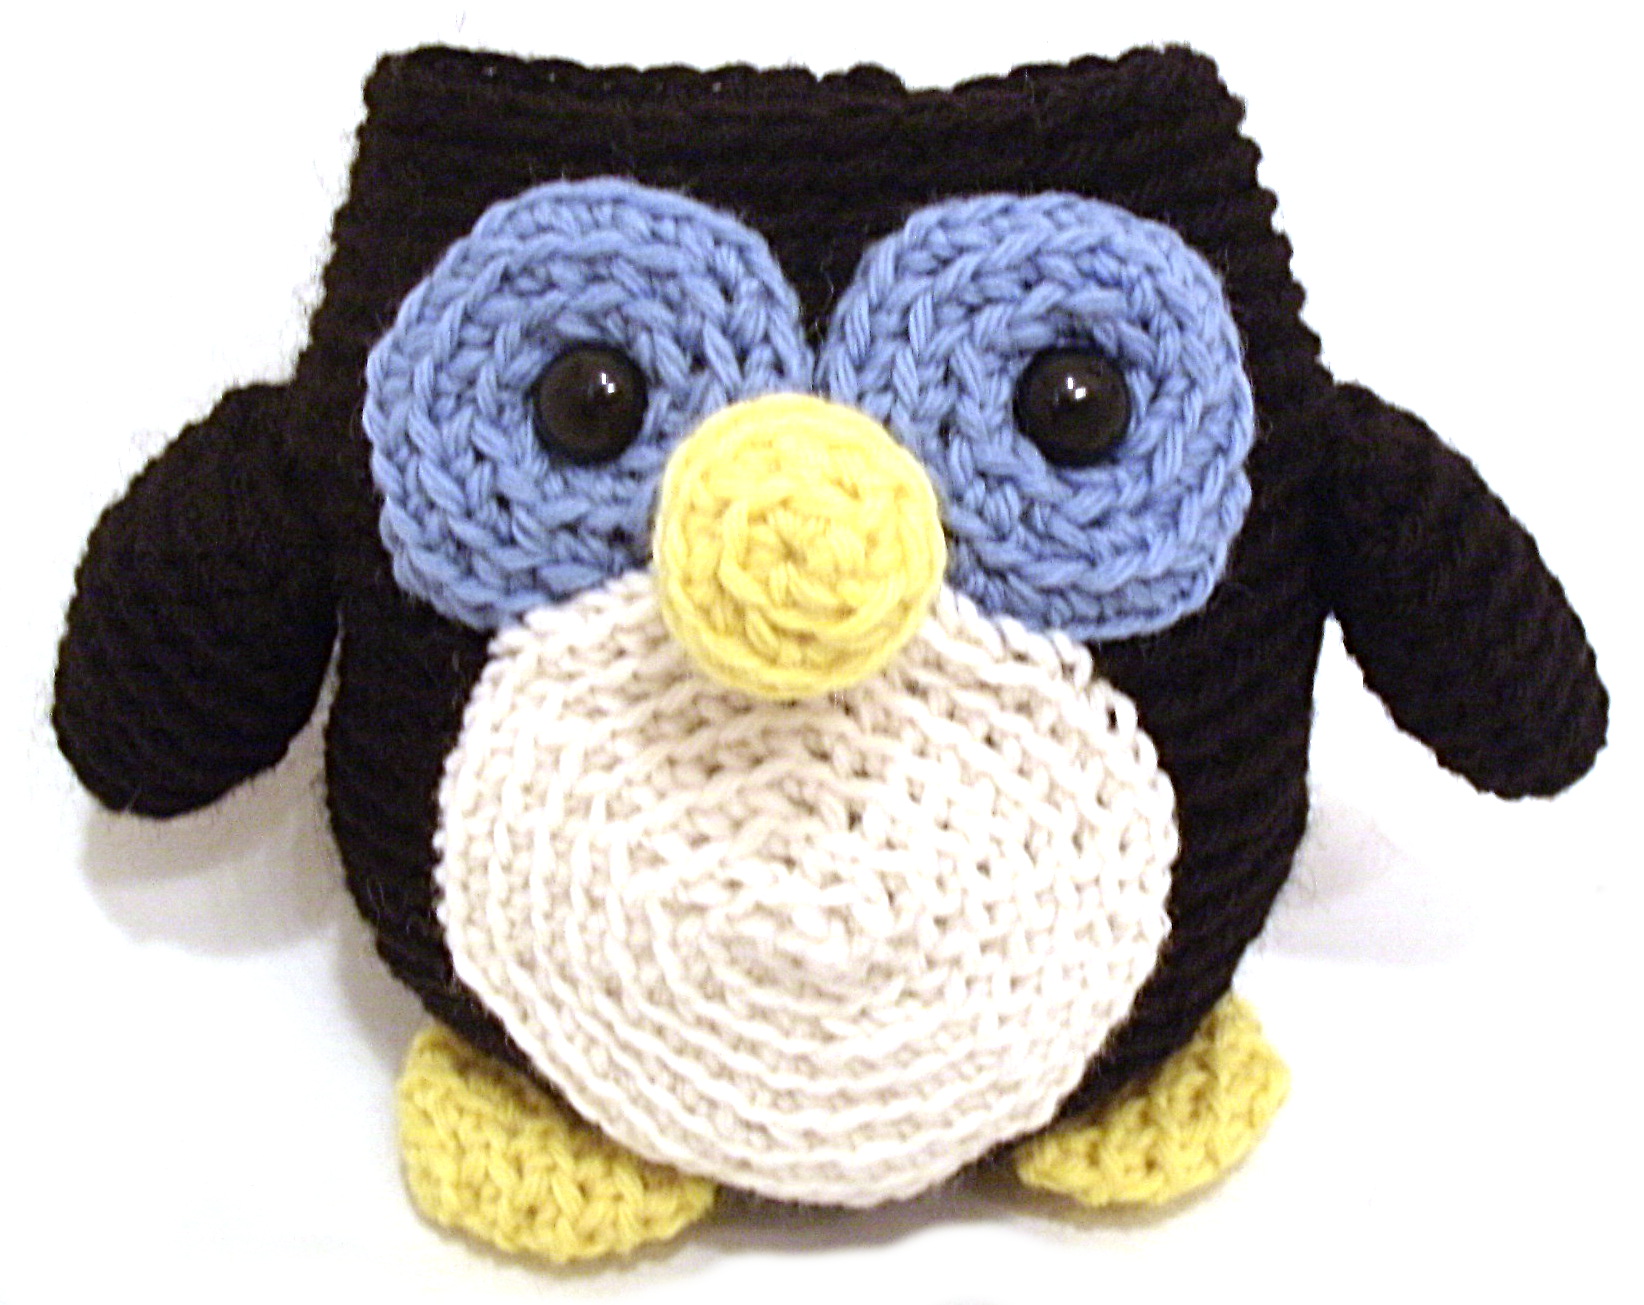
Fasten eyes onto the head. To do so, just insert the post where you want the eye to go (for Howie it’s in the center of his eye circles) and press the washer onto the back post to secure. Make sure the washer is pushed on all the way.
Round 32 [sc2tog, sc in next 3 sts] 6 times (24) Round 33 [sc2tog, sc in next 2 sts] 6 times (18) Round 34 [sc2tog, sc in next st] 6 times (12) Round 35 [sc2tog] 6 times (6)
Snap a photo and share it with us over in the Shiny Happy People group! If you share it on social media, tag with with #shinyhappyworld so I can see it. 🙂
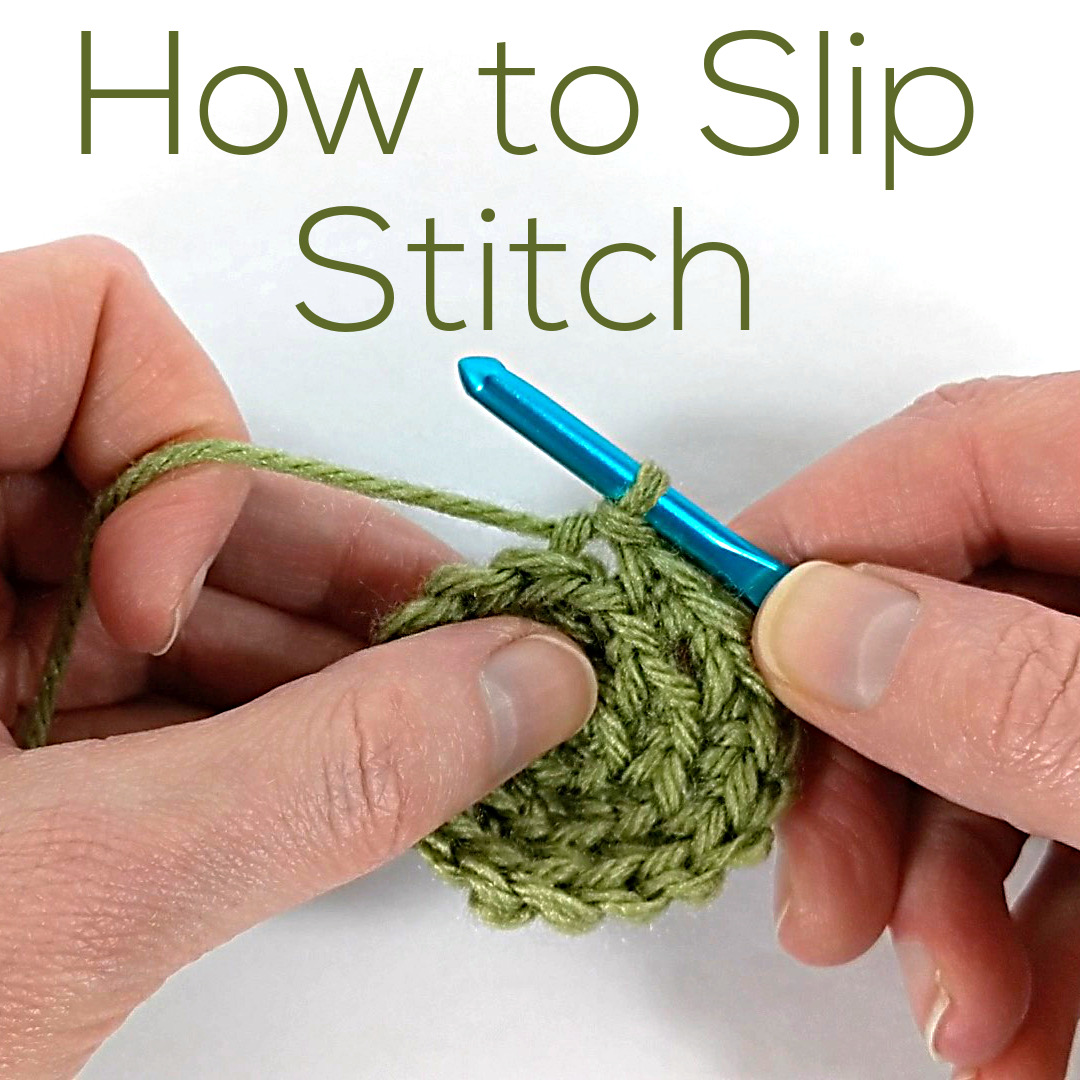
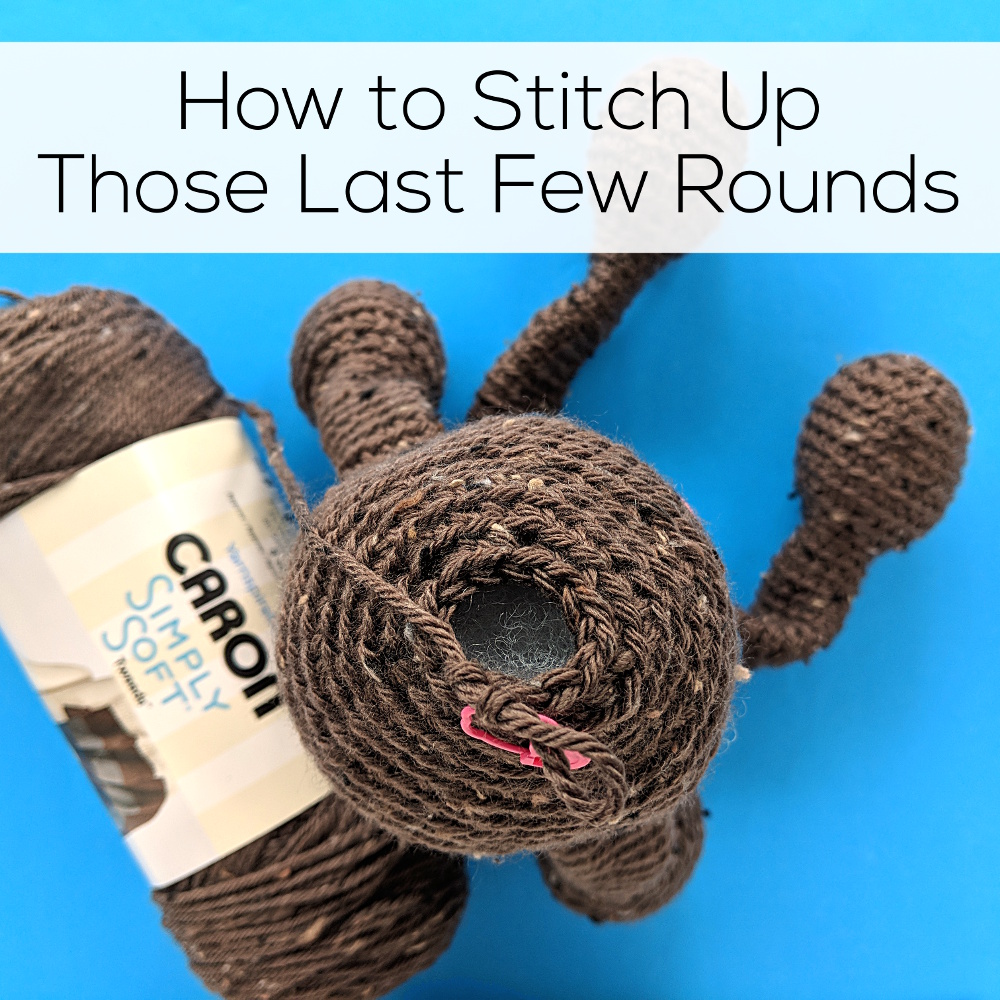
Slip stitch is a really easy – and very handy – stitch to have in your toolbox.
It’s one way to close up the very final tiny hole in the top of an amigurumi.
I also use it any time I want to shift from the “step” of a single crochet stitch, to a more gradual “ramp.” You’ll see what I mean in the video – and also how to do it. 🙂
See how easy that is?
Here are handy links to all the posts teaching the basic crochet stitches. . .
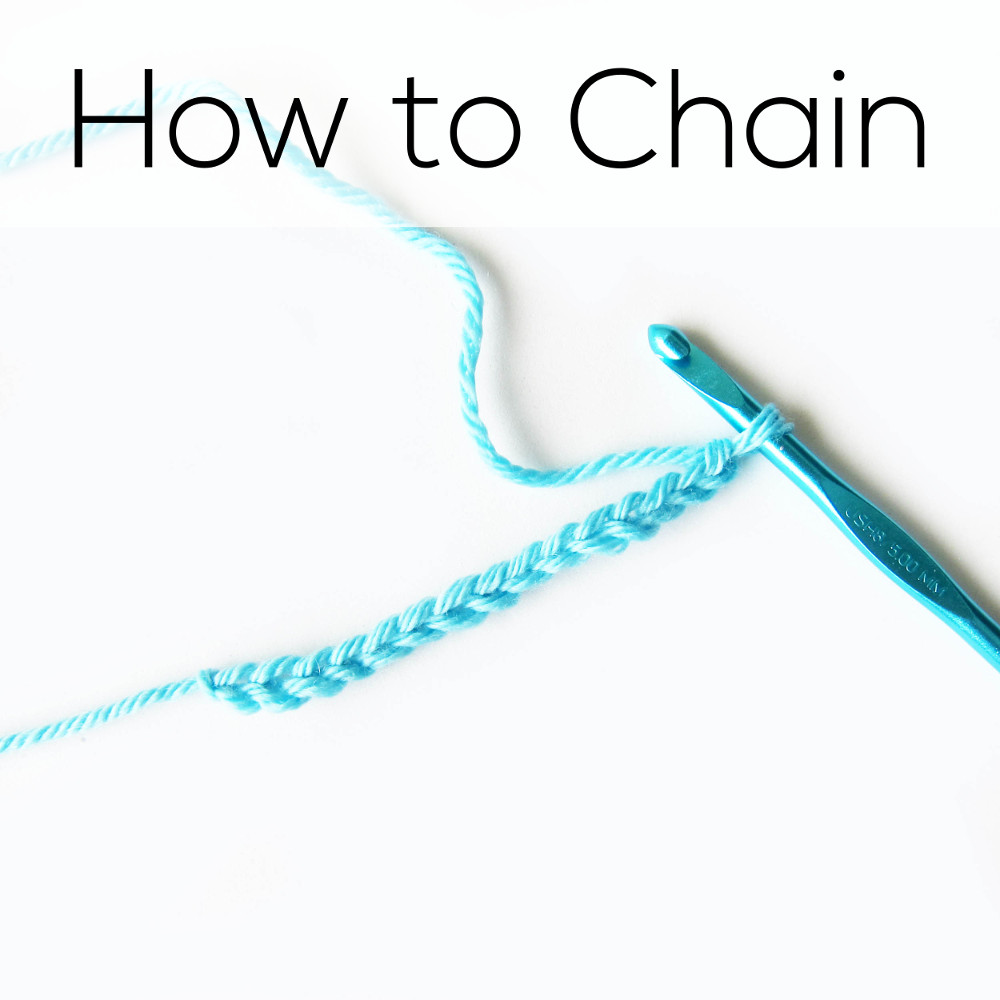
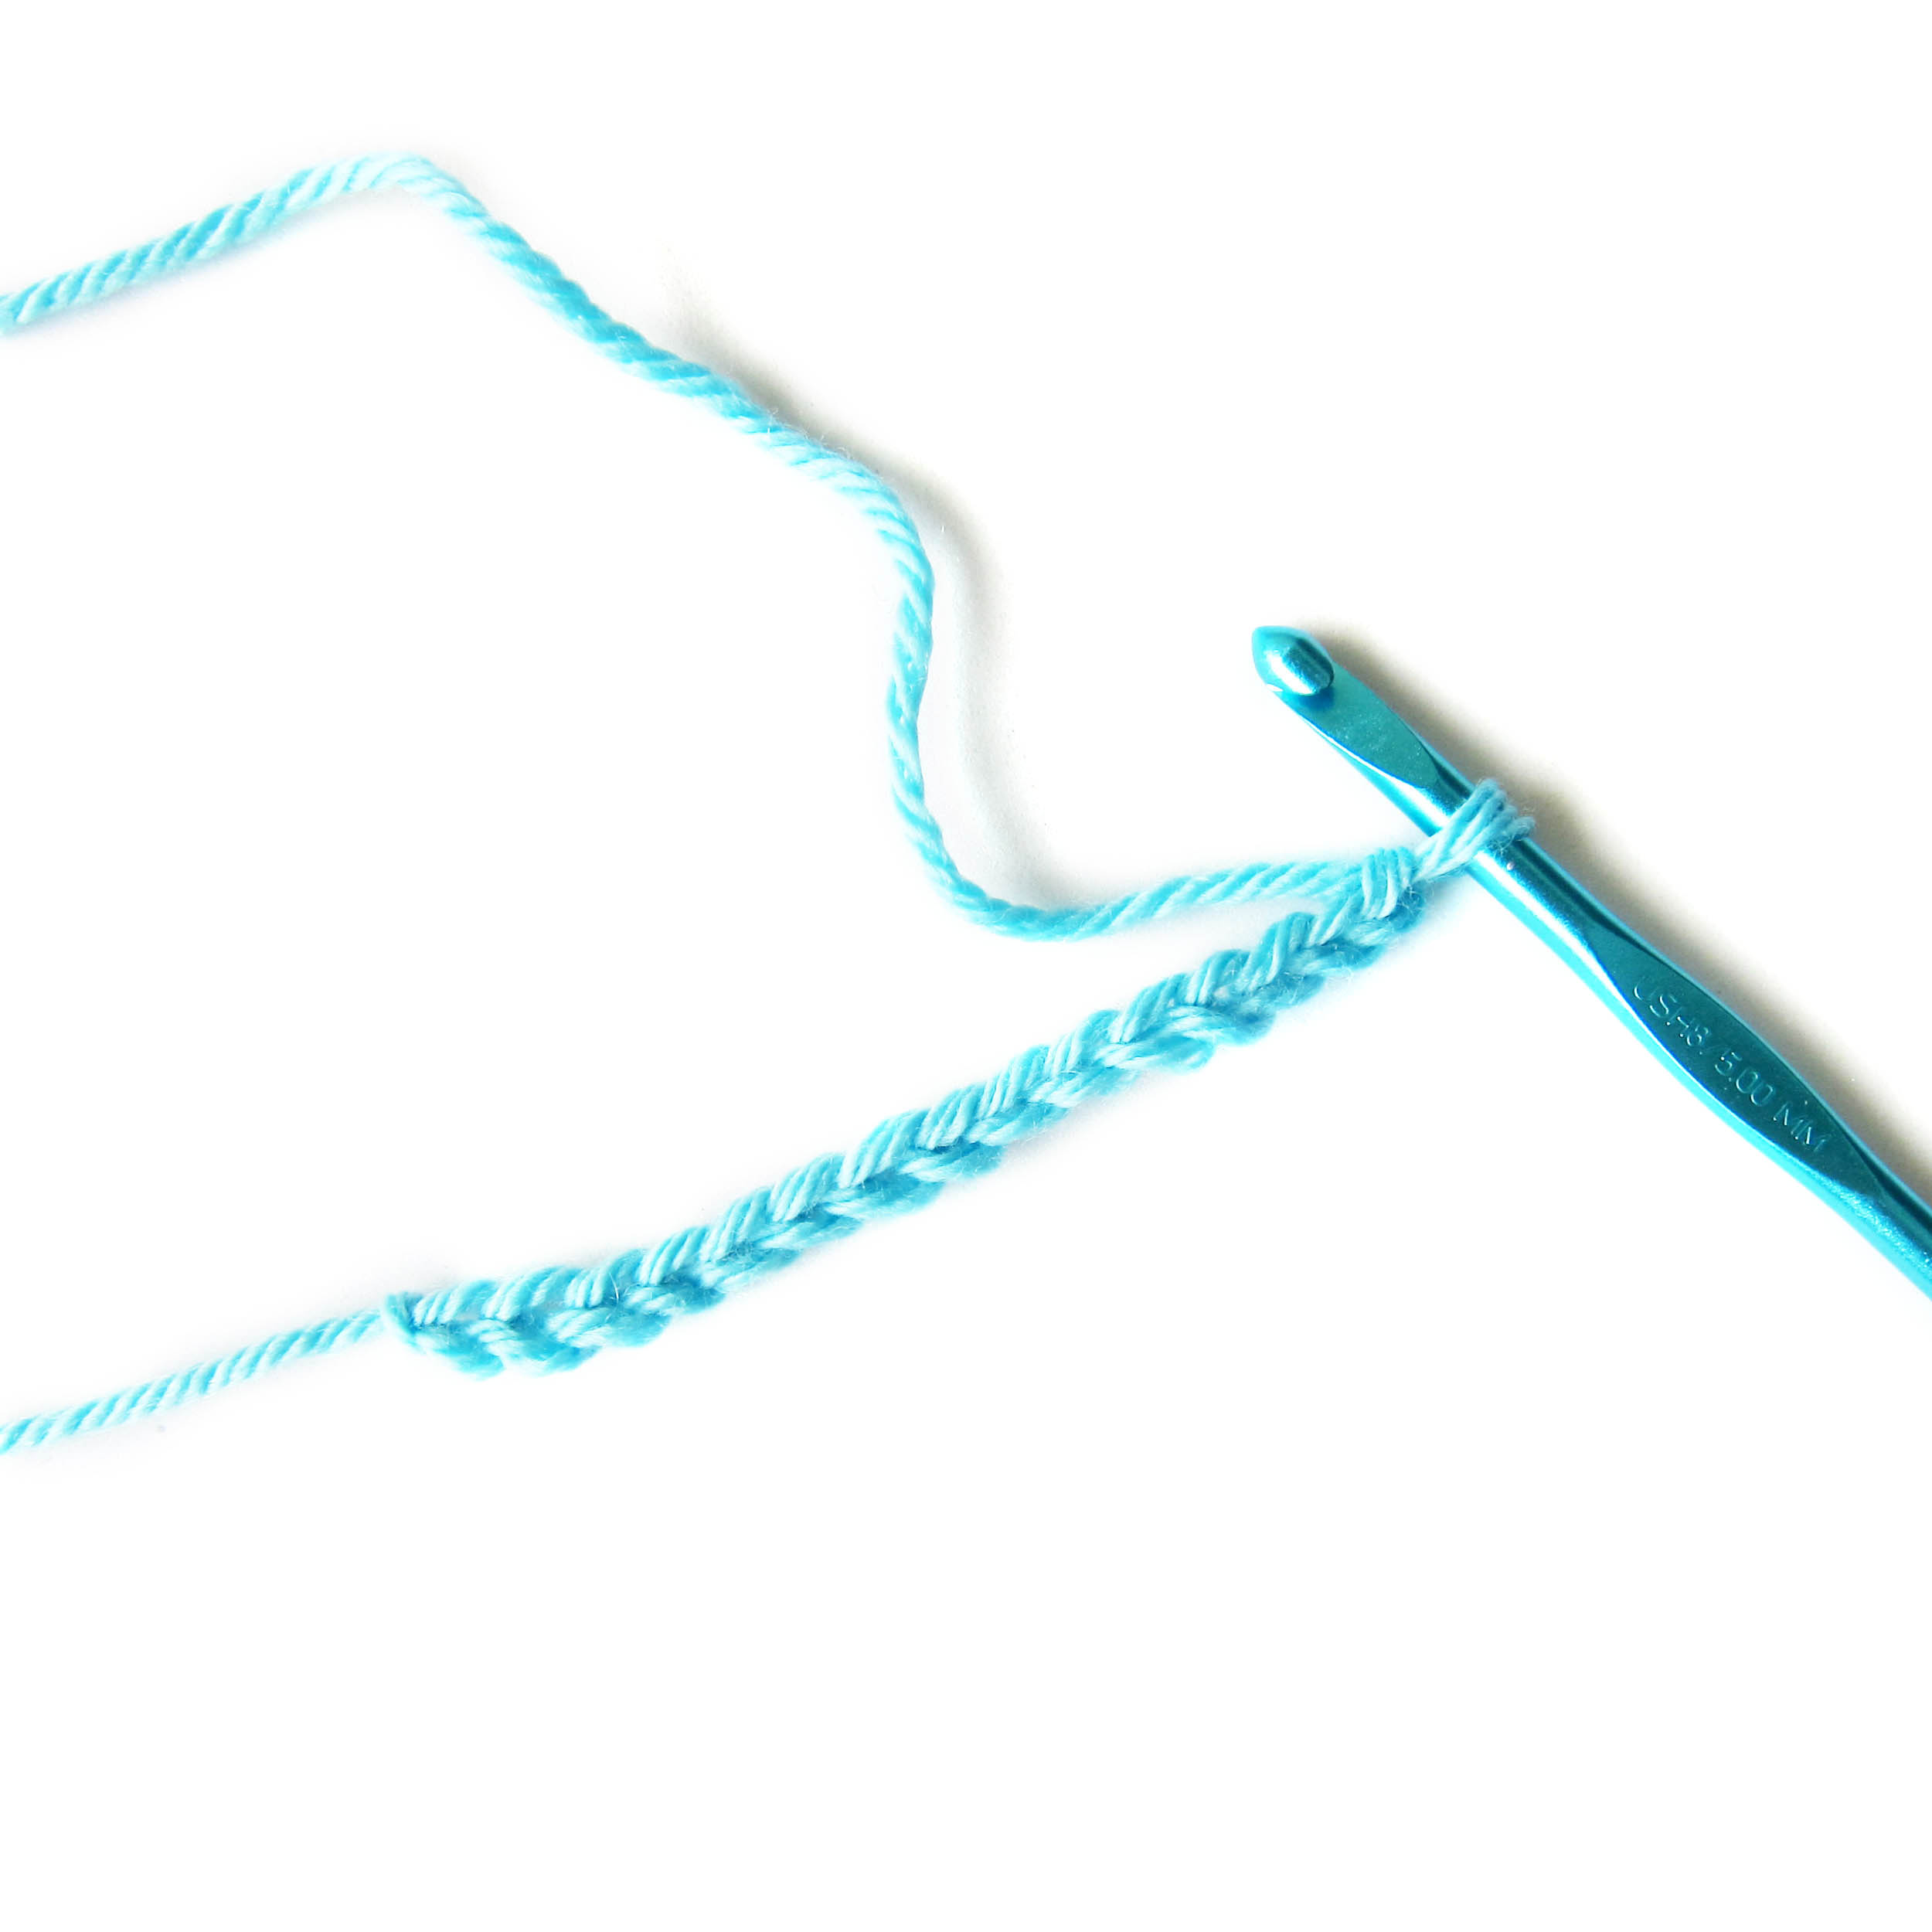
Chain stitches are the foundation for most crochet work – and they’re really easy to do.
Watch this video – Stacey will show you how to do it.
It’s kind of crazy that all crochet is just one long, continuous piece of yarn wrapped and looped around itself. 🙂
If you’re just getting started with crochet and want to really get a feel for how to hold your hook, just starting crocheting a chain. Keep chaining until the hook feels natural in your hand!
You can either unravel the finished chain or use it like bulky yarn to crochet something else. 🙂
Here are handy links to all the posts teaching the basic crochet stitches. . .
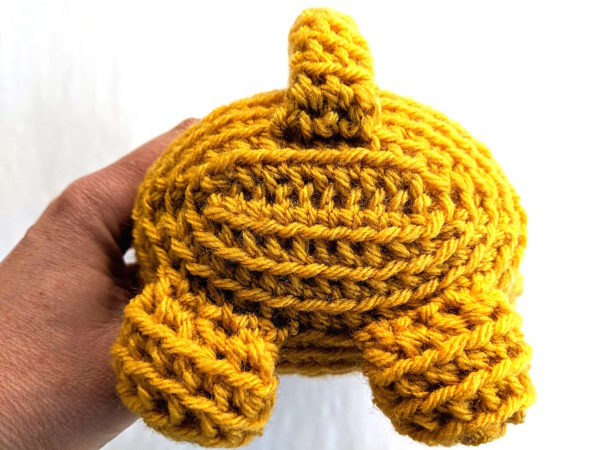
Why would you need to learn how to crochet an oval?
Well, I love making softies with oval bases. They require shaping that’s a little different than your usual amigurumi rounds – but they’re not hard to do.
There are two basic techniques for creating an oval. Each one gives you a slightly different look, so I’ll show you both.
Start with a Chain
Chain until the piece is as long as you want. You’re creating the center of the oval, so keep in mind that this piece will grow in all directions!
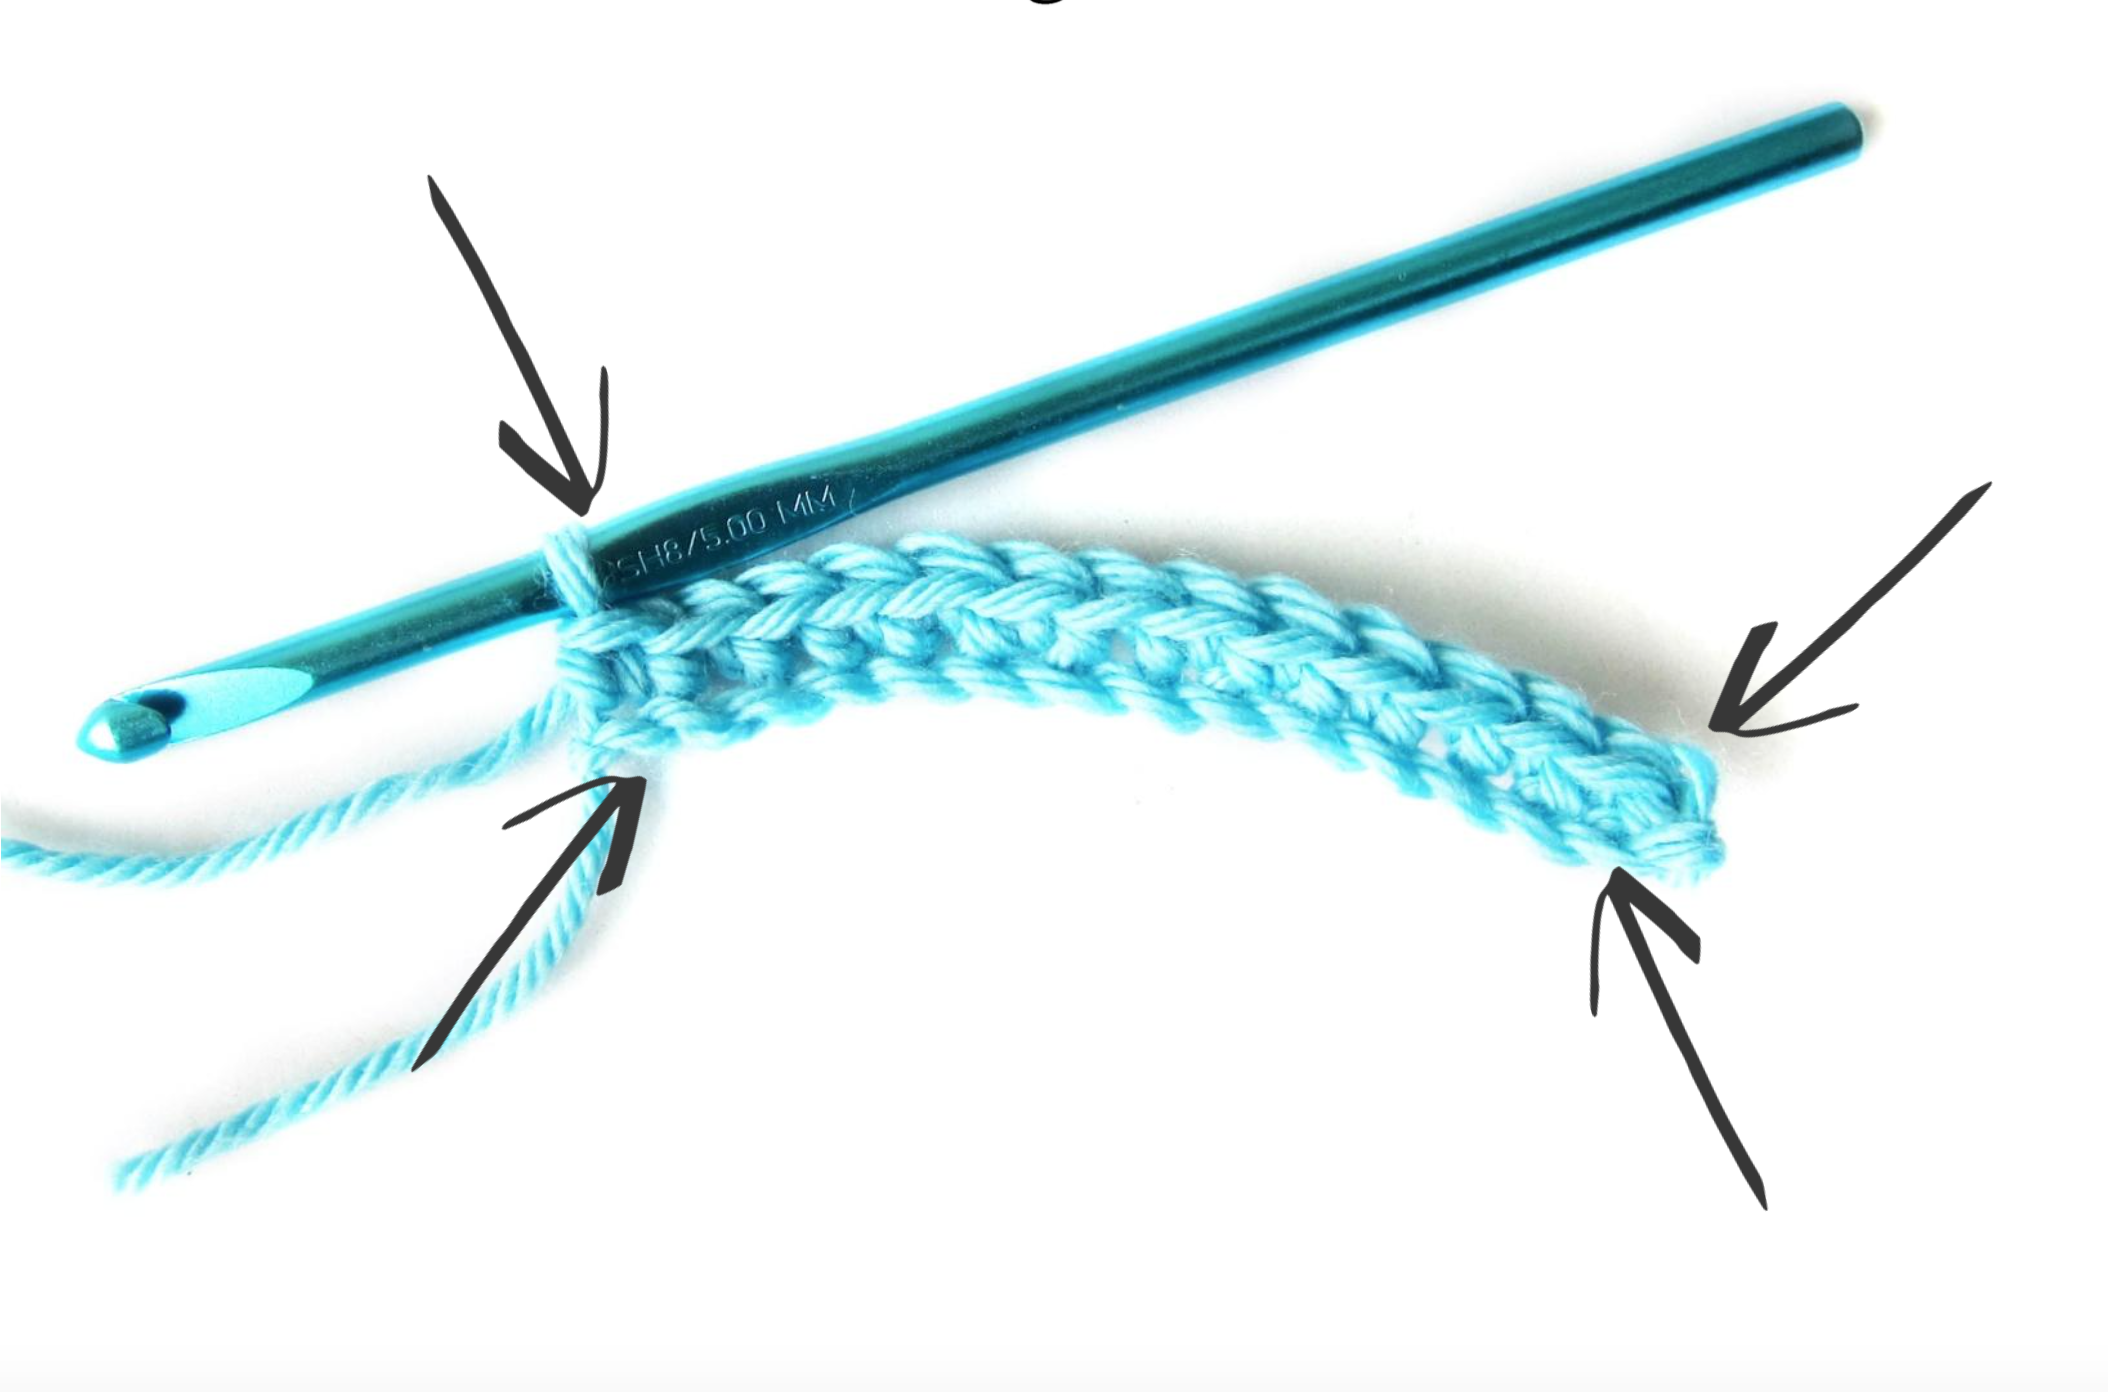
Crochet around the Chain to Grow Your Oval
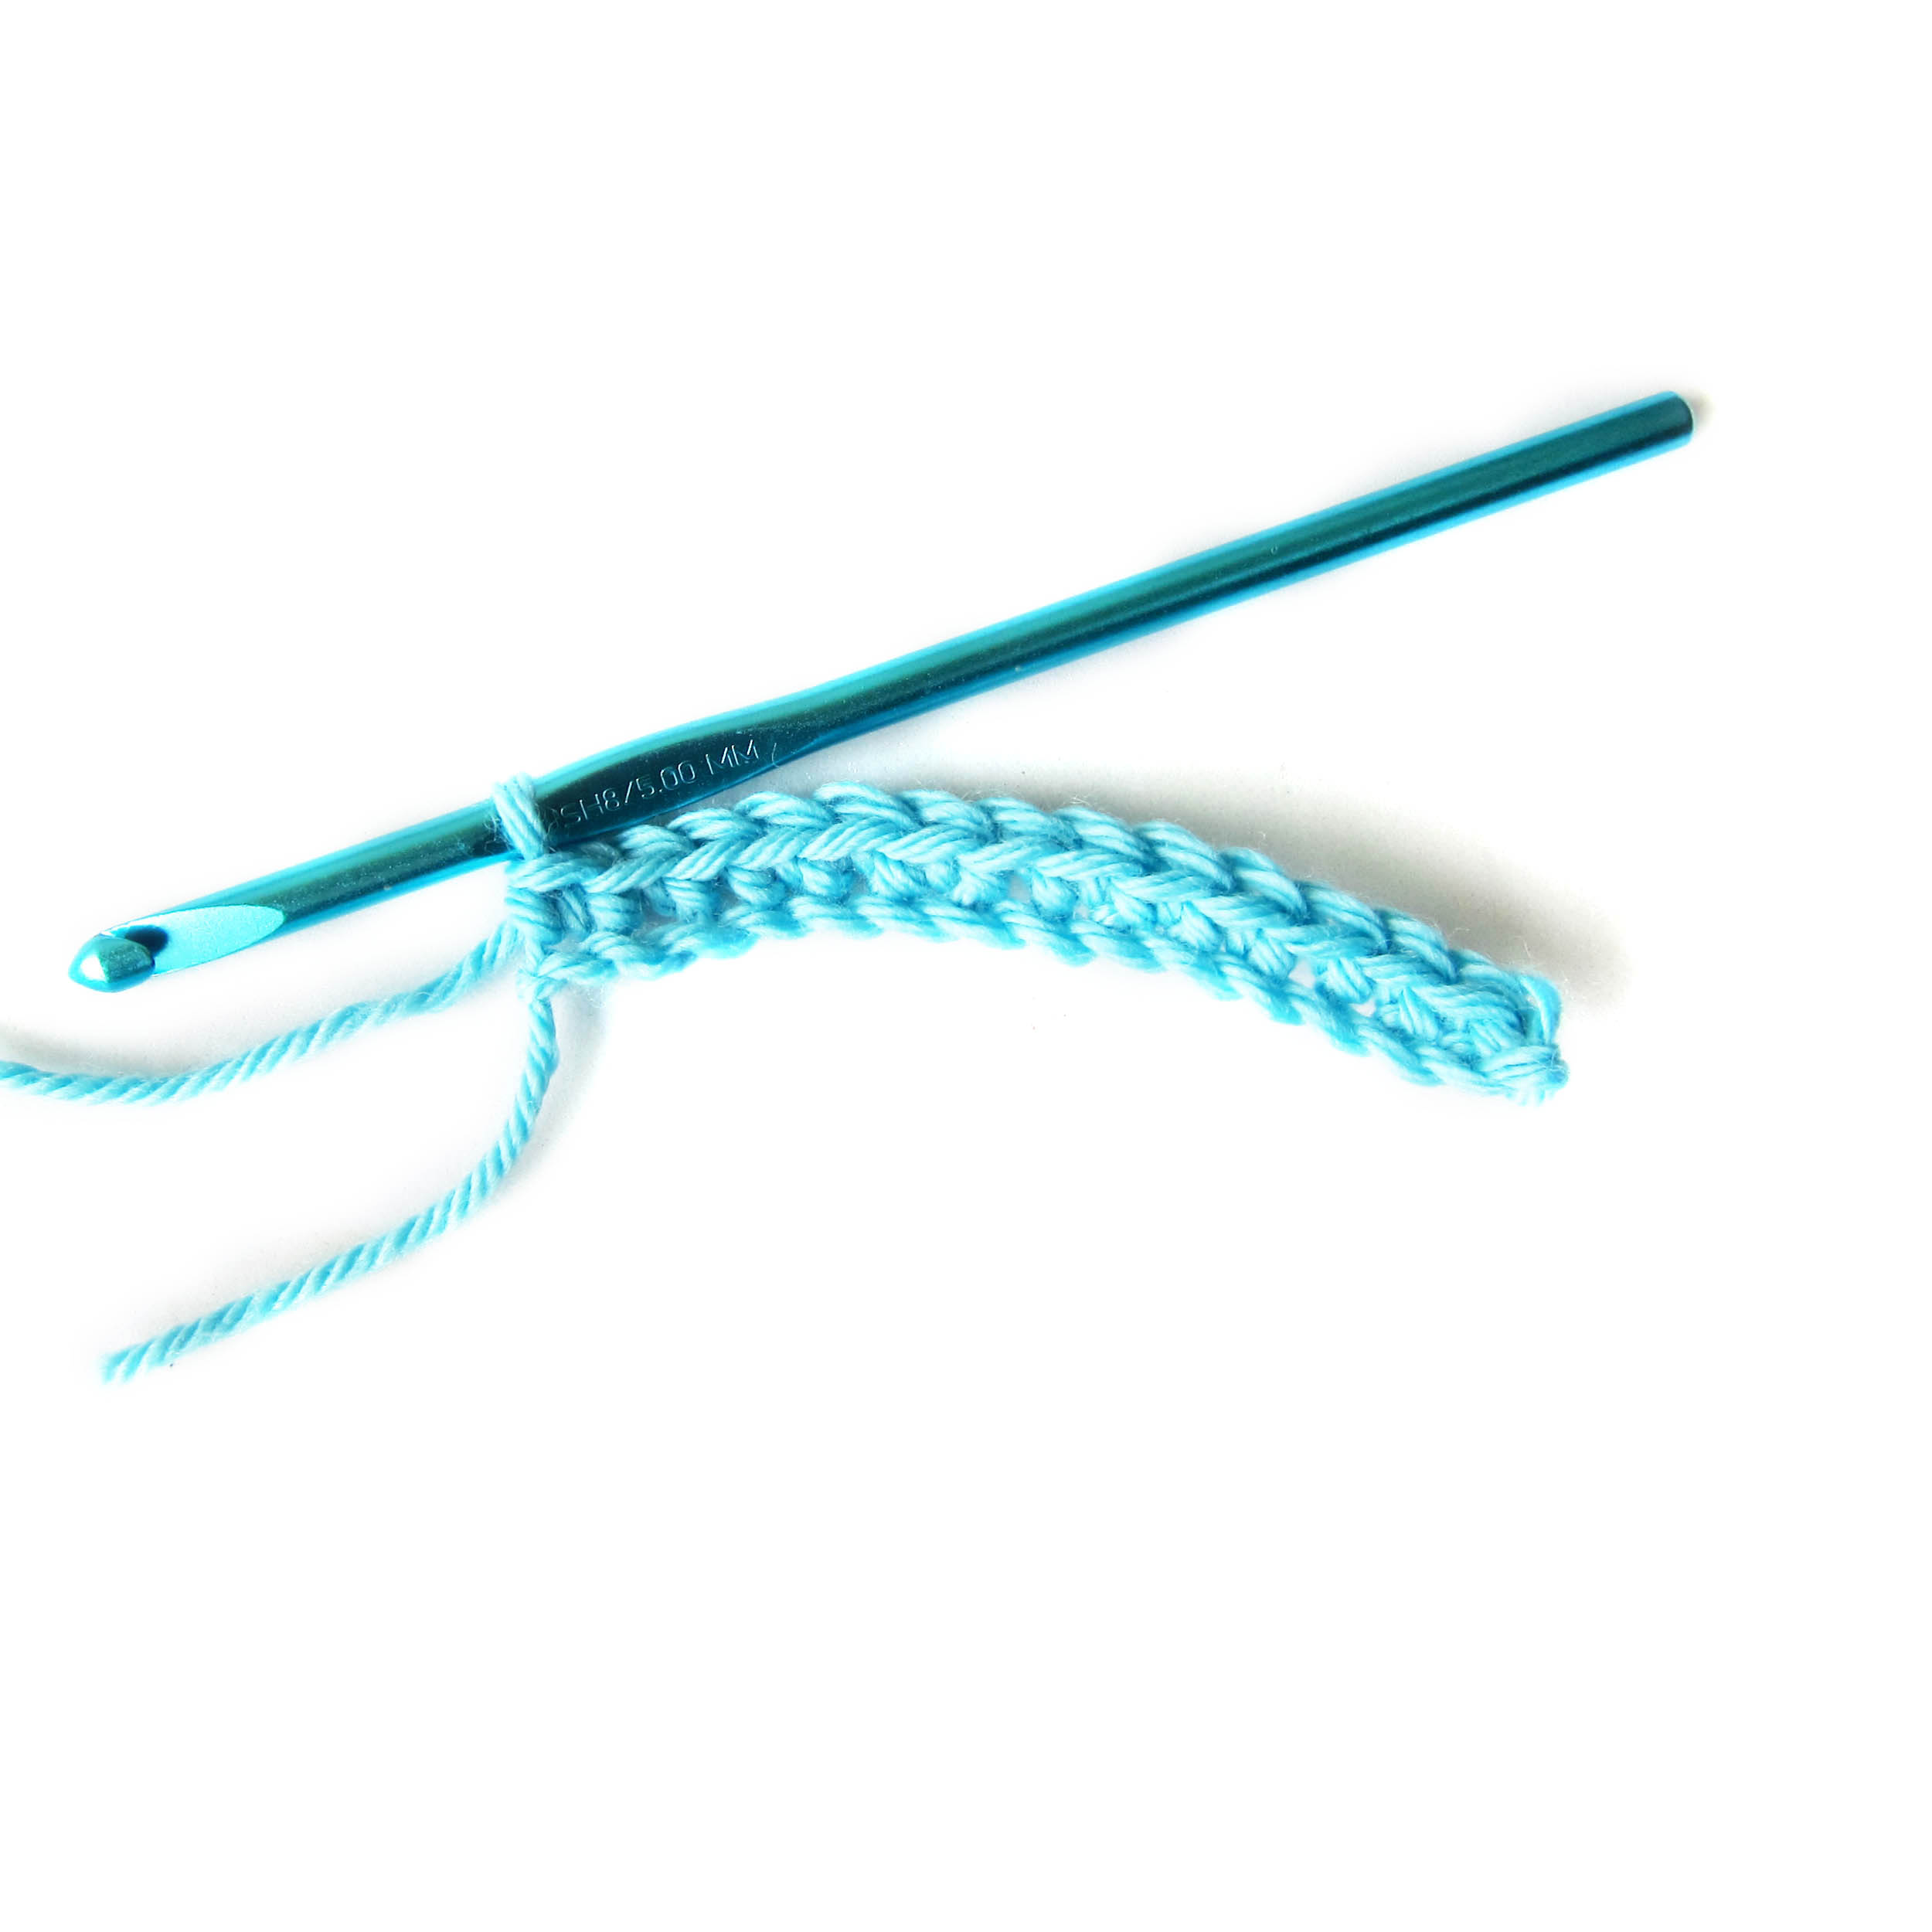
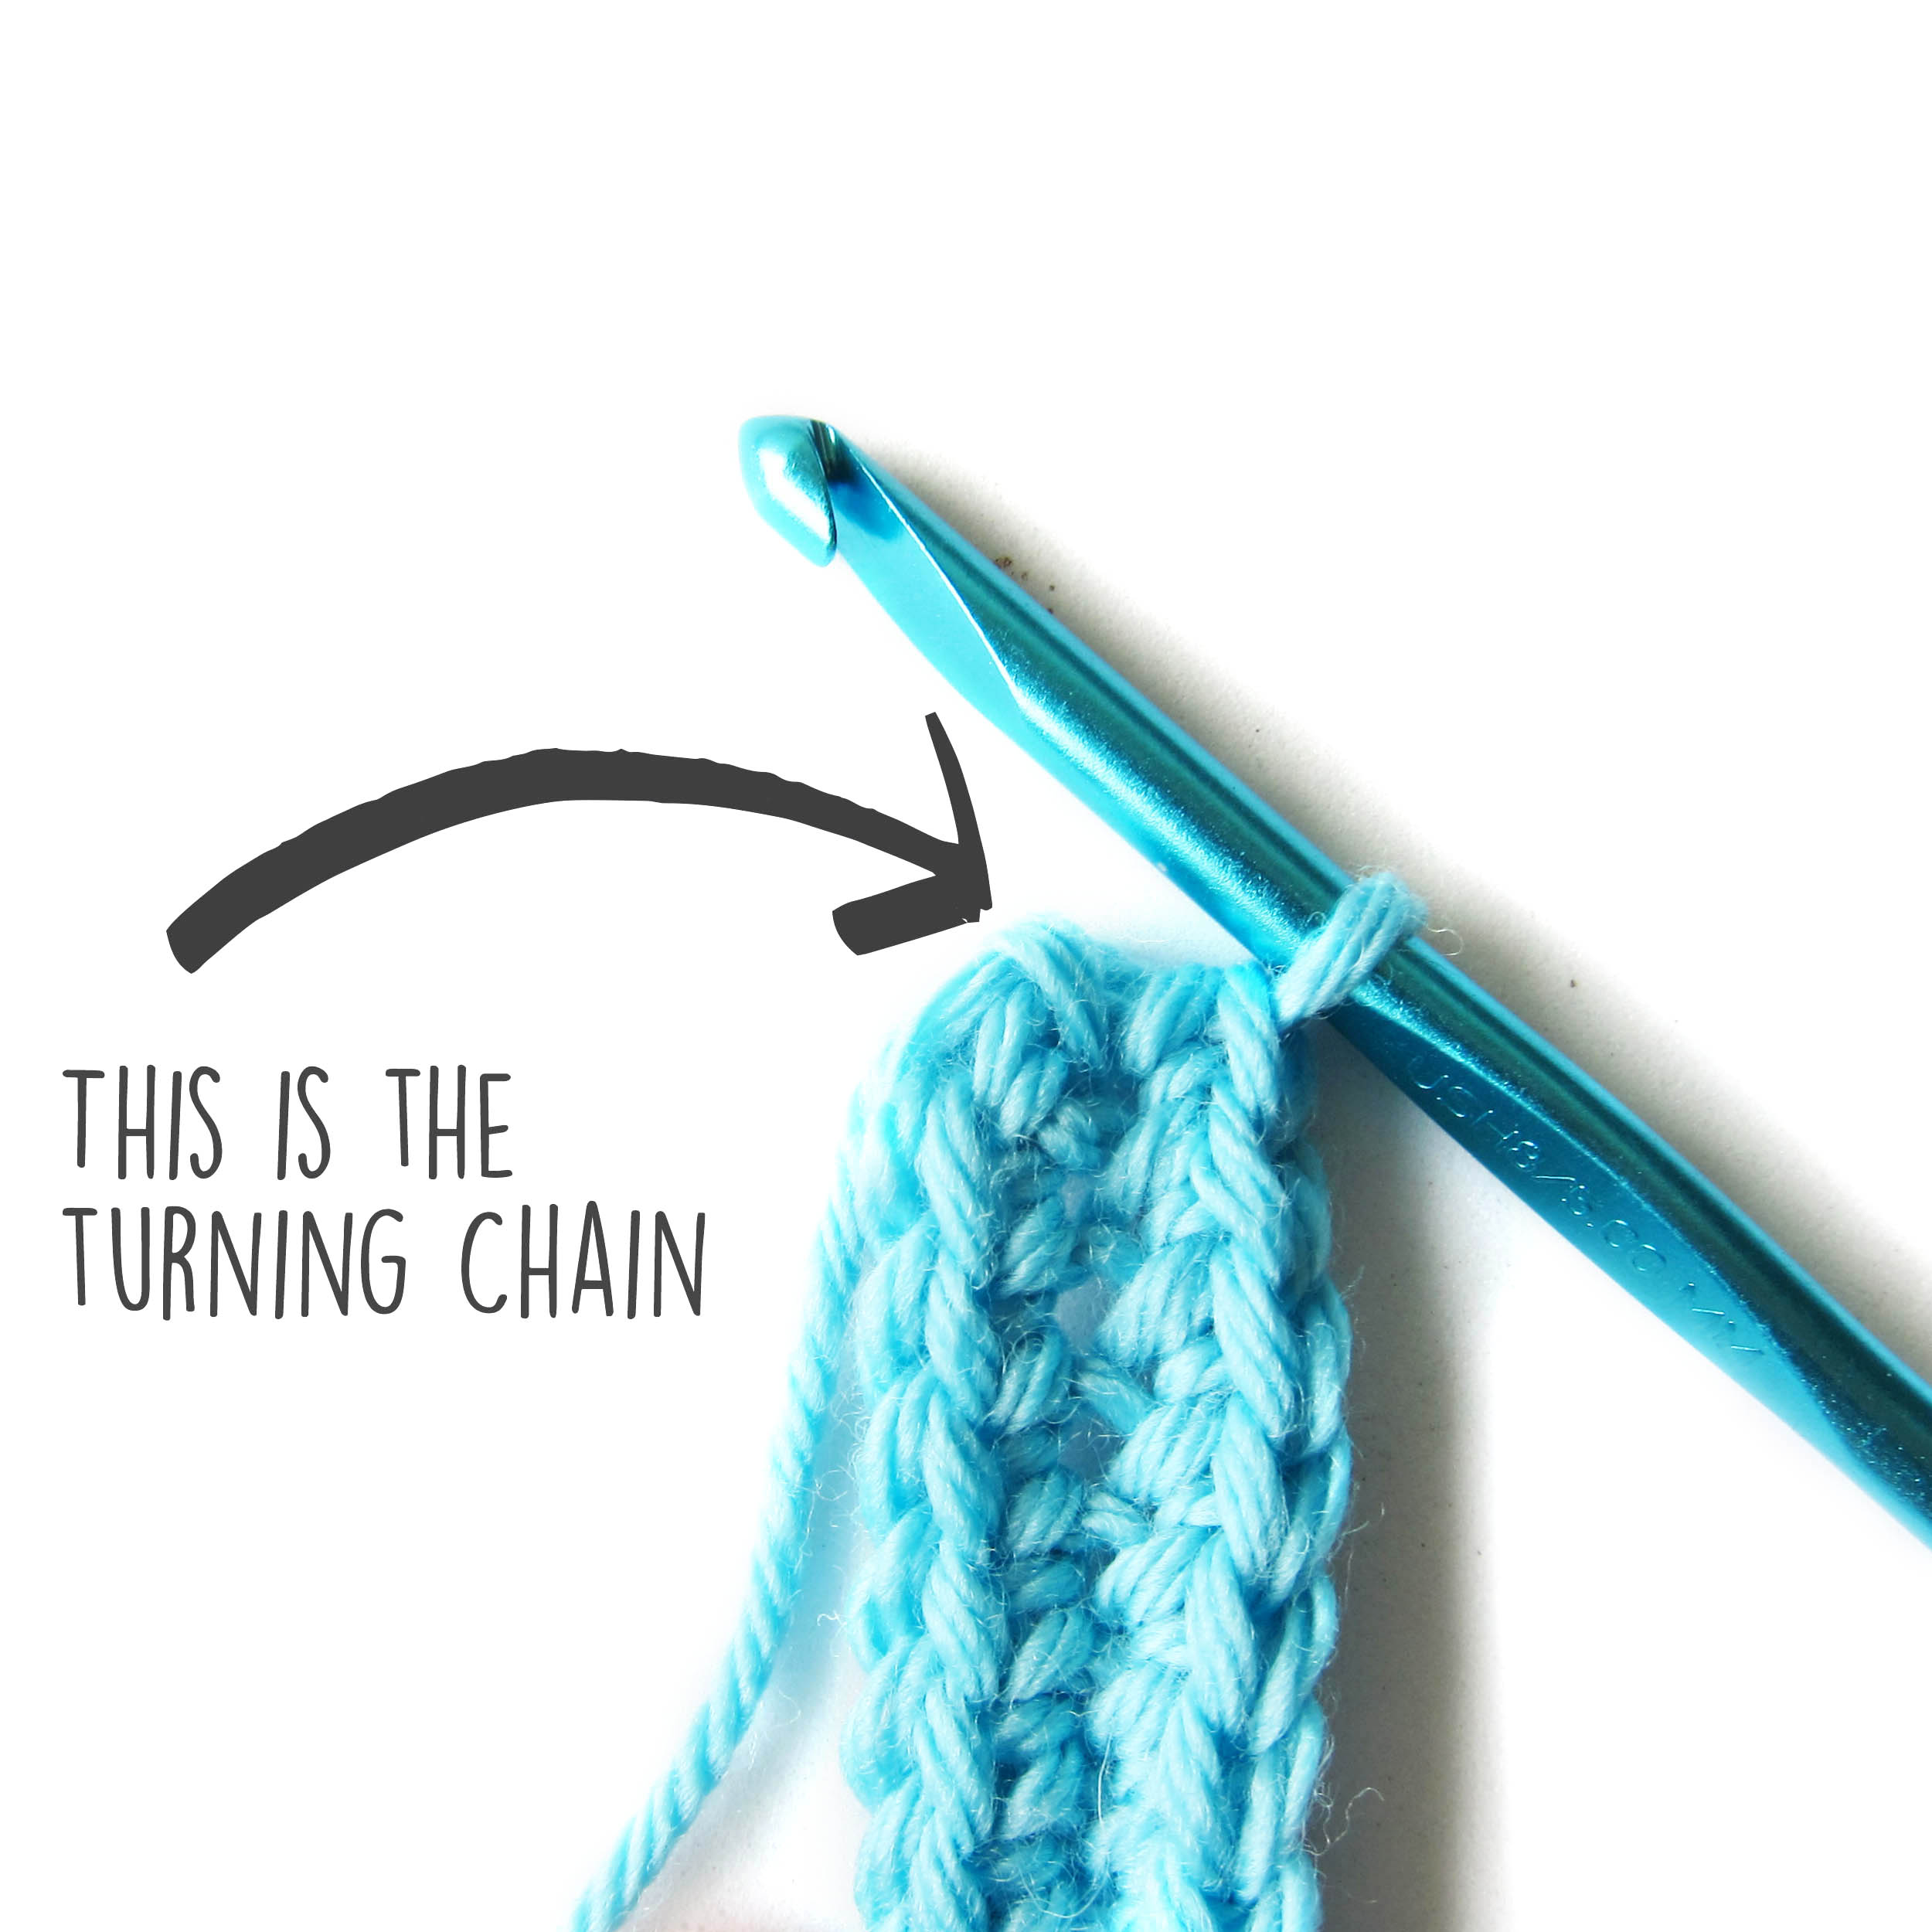
Turn and sc in 2nd stitch and each remaining stitch.
You will end up with one stitch fewer than the number of chains you started with. (That’s because one of those chain stitches became a turning chain.)
That grew one side of your oval. To grow the other side you’ll need to work the bottom side of the foundation chain
Now we’re going to start looking at the two different ways to crochet an oval. Each results in a slightly different shape.
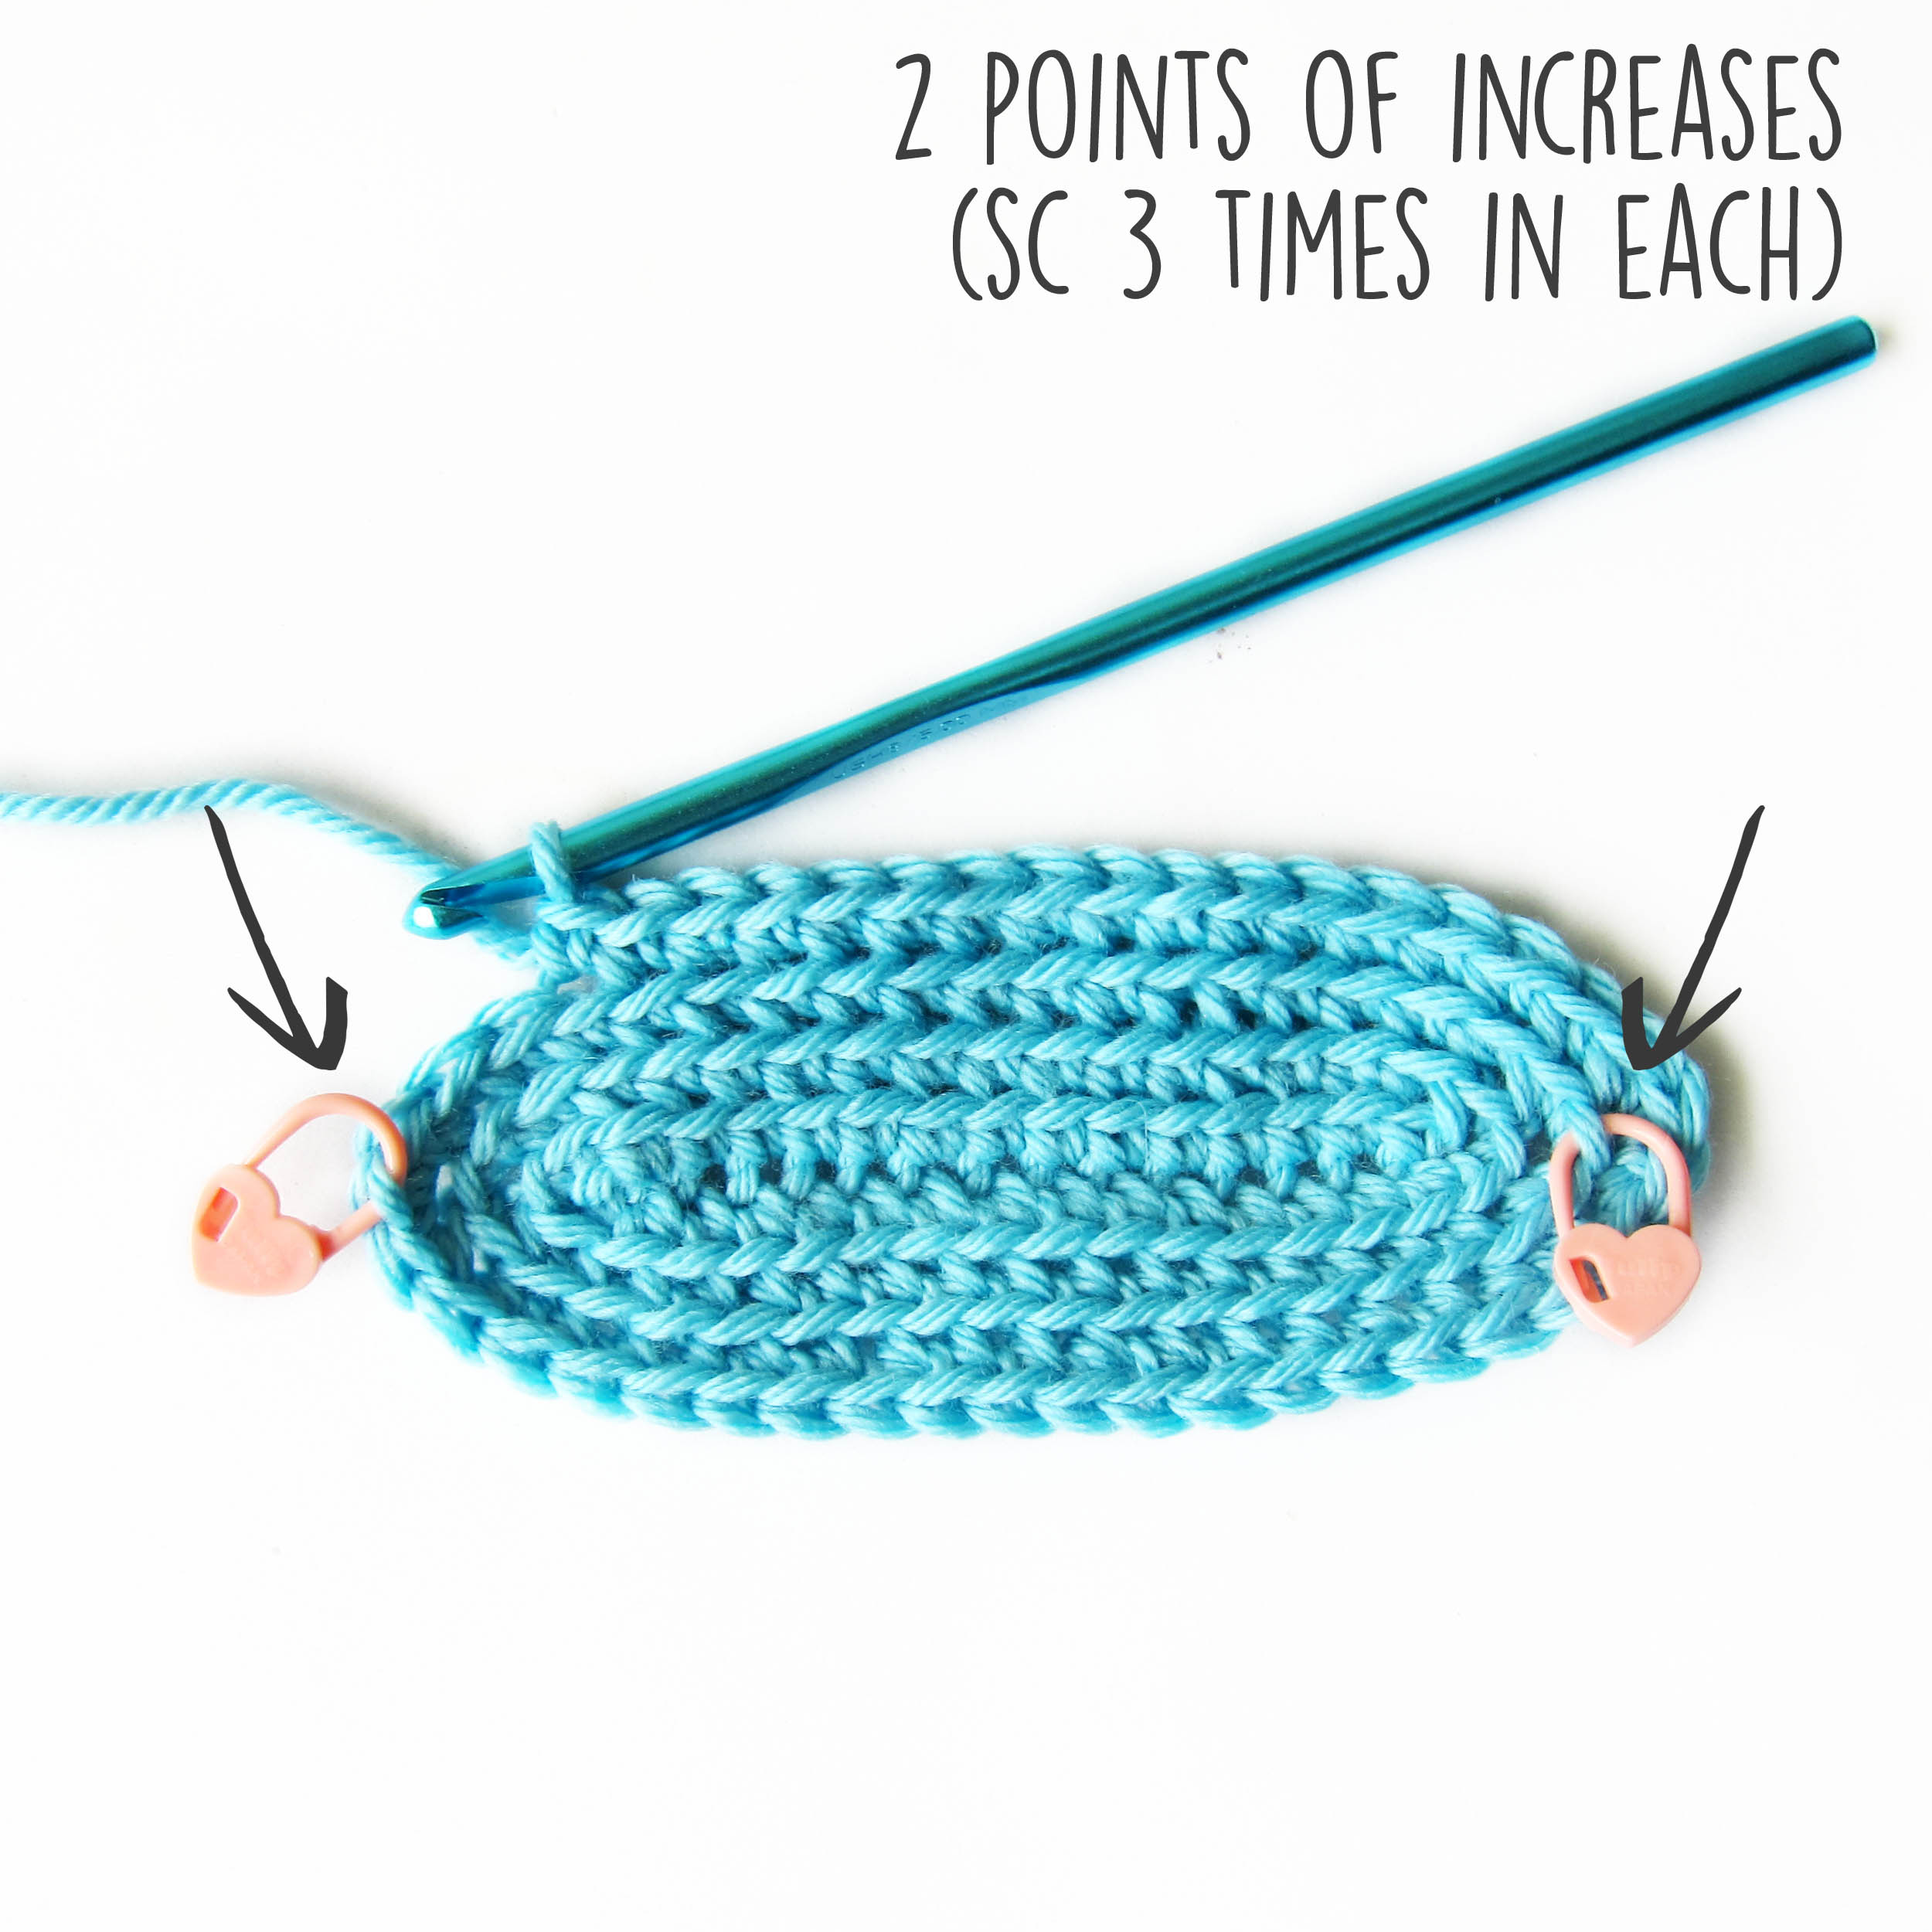
Technique 1: Increase at ends
One way to achieve an oval is to sc 3 times in each of the end stitches. You want to use stitches *directly* on the ends to get an even oval.
To do this, single crochet into the turning chain and the starting knot (unusual, I know!)
Put a locking stitch marker in the center of the 3 single crochet stitches, and increase (3 stitches in 1) on each side every round.
You increase 4 stitches each round. The result is a flatter oval with more pointy-looking ends.
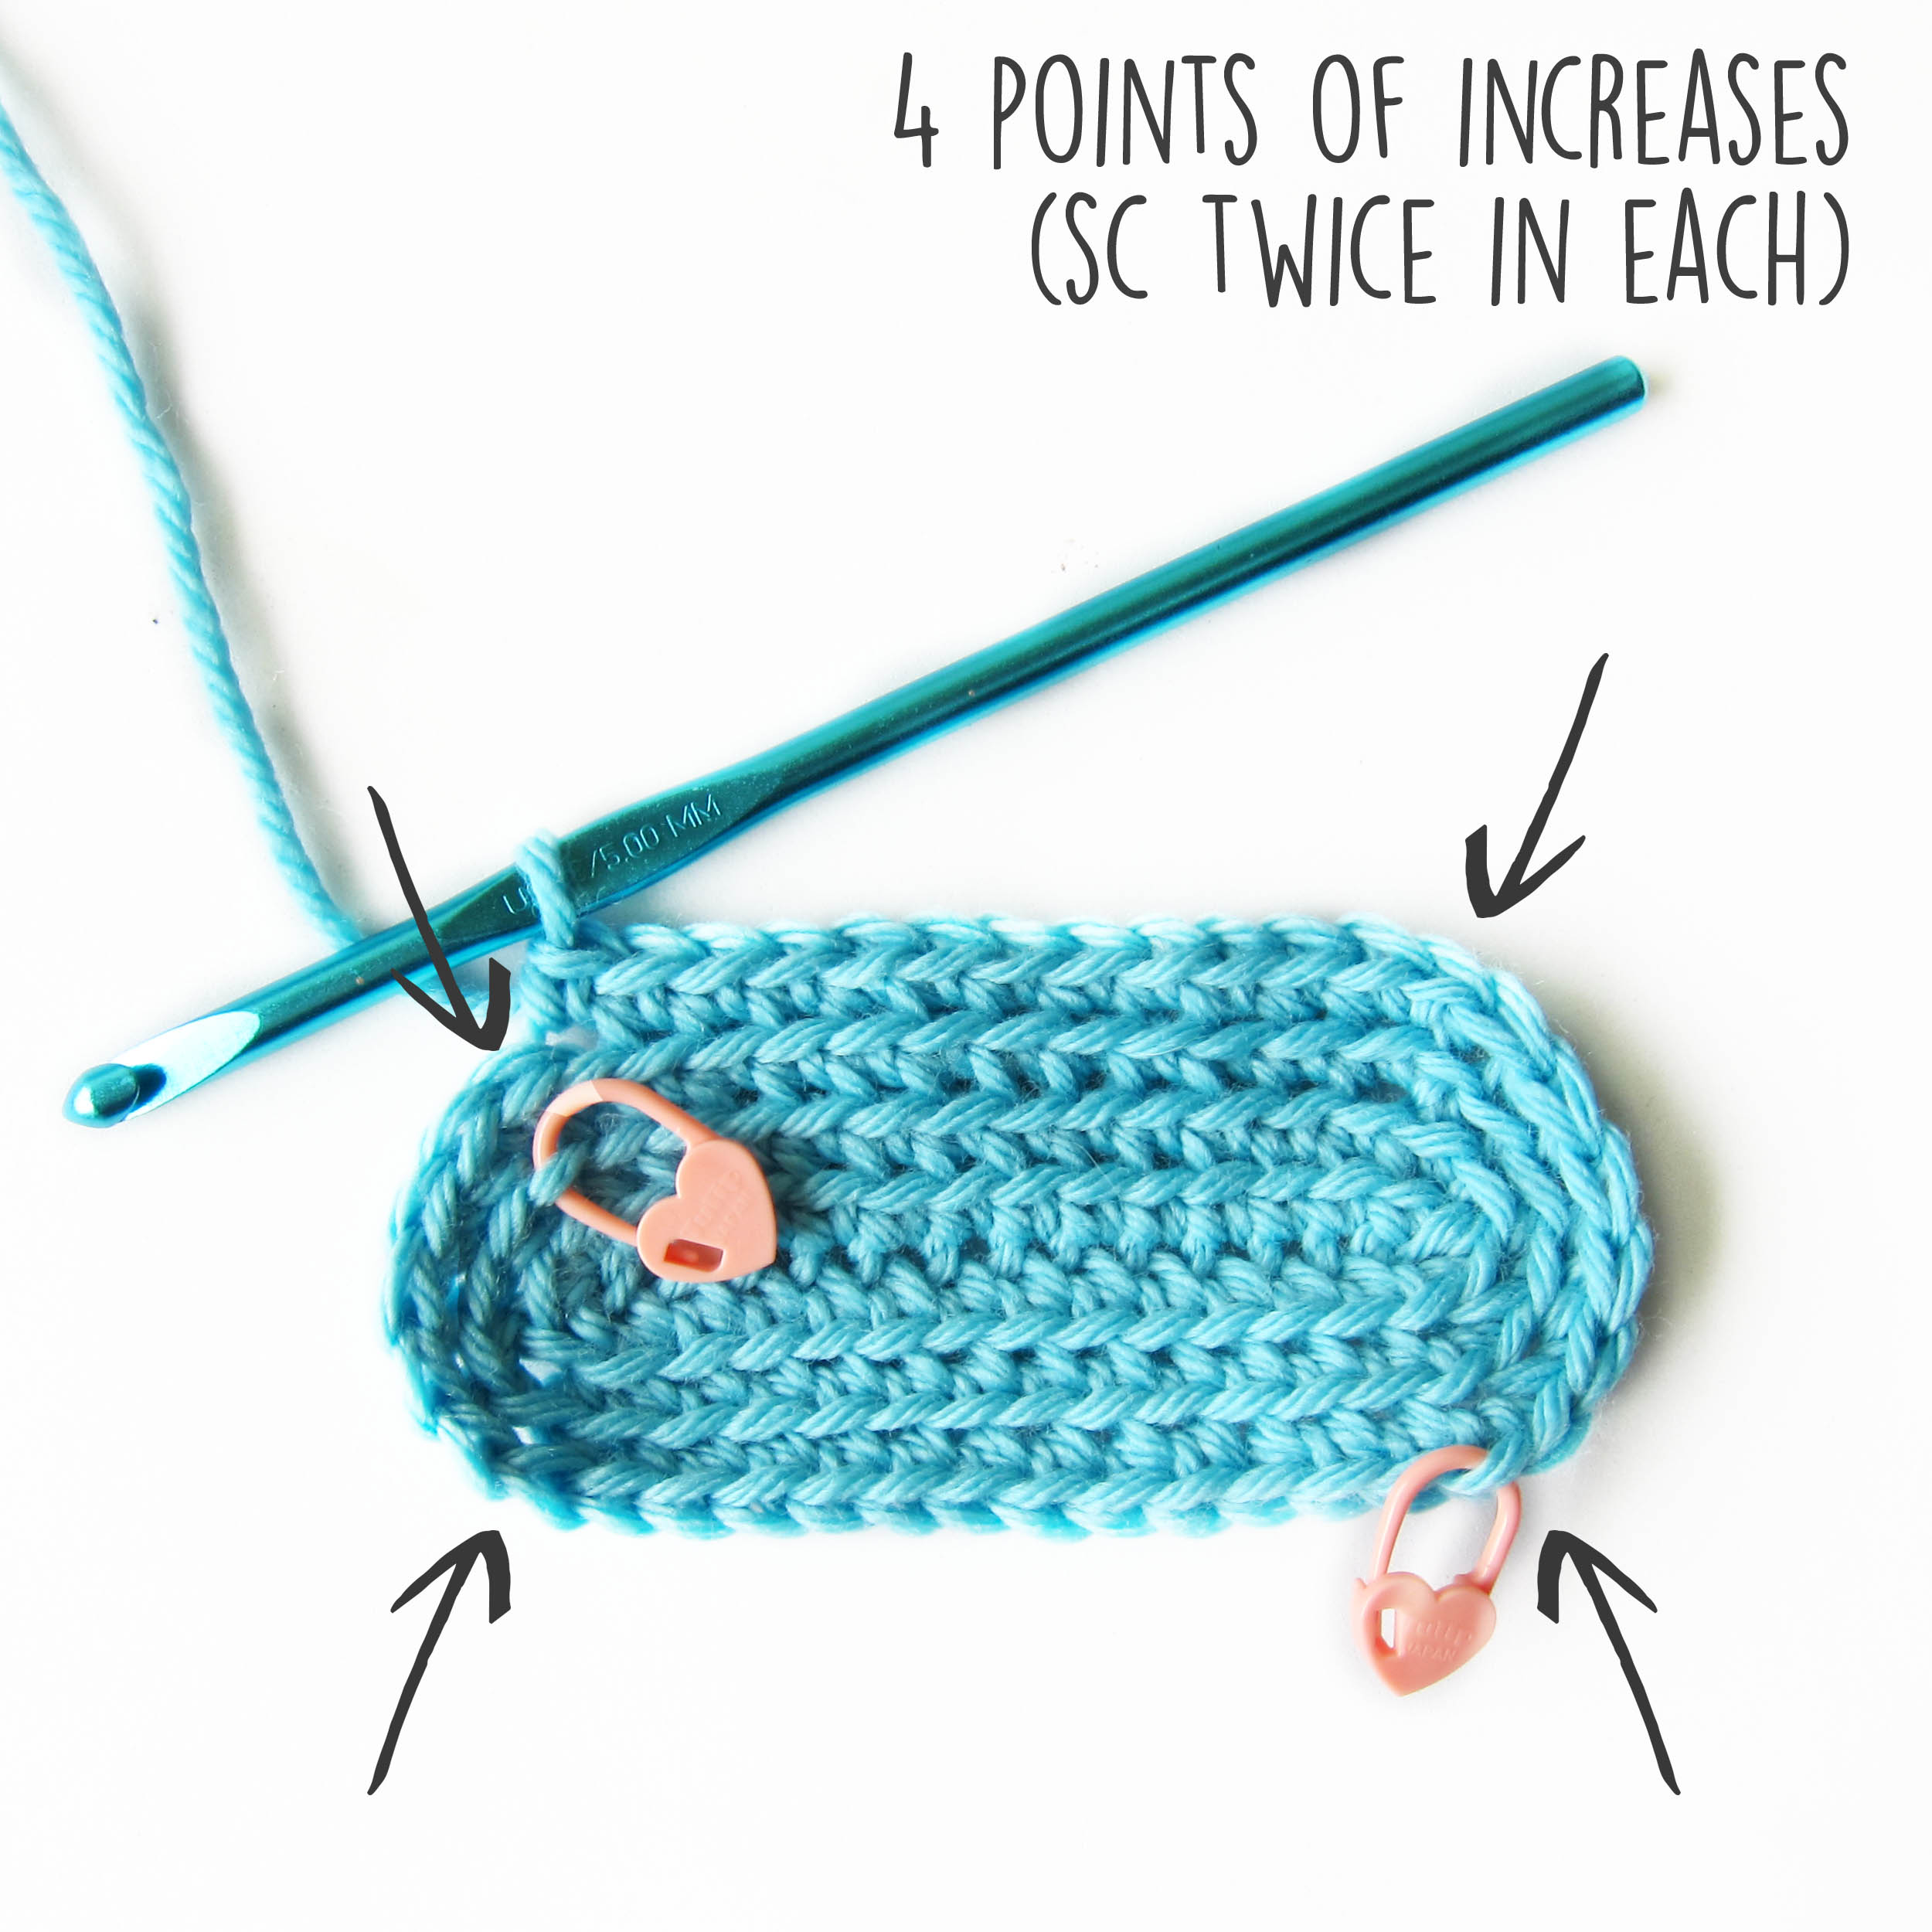
Technique 2: Increase at ‘corners’
To begin this technique, sc twice in each of the 4 ‘corners’ of your piece, that is the first and last stitch of each side.
Do not work the turning chain or knot.
Place a locking stitch marker in the increase stitch furthest away from the end points.
The result is a nicely rounded oval. Just like technique 1, you are increasing by 4 sts/round.
Continue increasing (sc twice in 1 stitch) at the stitches with the stitch marker. The stitch markers will move apart by 2 stitches each round (put differently, the ‘increased stitch’ goes towards the short side of the rectangle).