How to Dye a Rainbow Gradient Yarn (using a sock blank!)

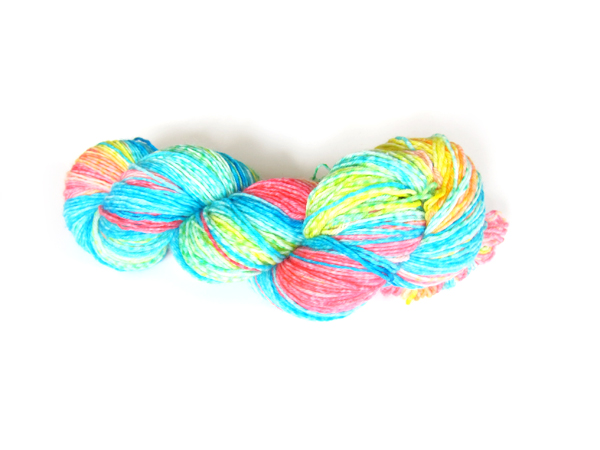
Today I’m going to show you how I dyed this beautiful skein of yarn:

Gradient Rainbow yarn dyed with Wilton Icing Dyes by FreshStitches

I’ve talked about how to dye a gradient before, but today’s technique is a bit easier (but costs a little more). For this project, I used a sock blank.

What is a sock blank?

A sock blank is basically length of undyed yarn knitted up using the stockinette stitch. I purchased mine from Knit Picks. It’s more expensive than buying yarn in a skein, but having the yarn already knitted up makes it easier to dye a gradient.

How to dye

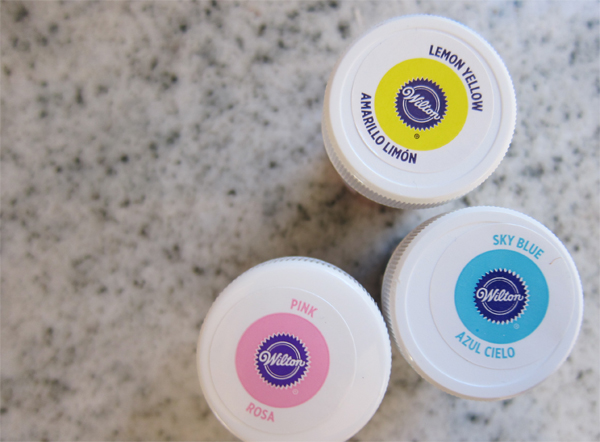
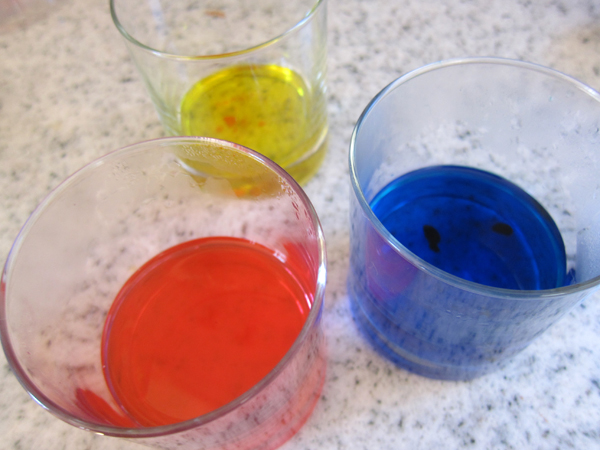
You can dye yarn lots of different ways (check this post for how to use Kool-Aid), but for this project, I used Wilton Icing Dye. (check this post for a tutorial on how to dye with Wilton Icing Dye).

color card for wilton icing dye on yarn, freshstitches

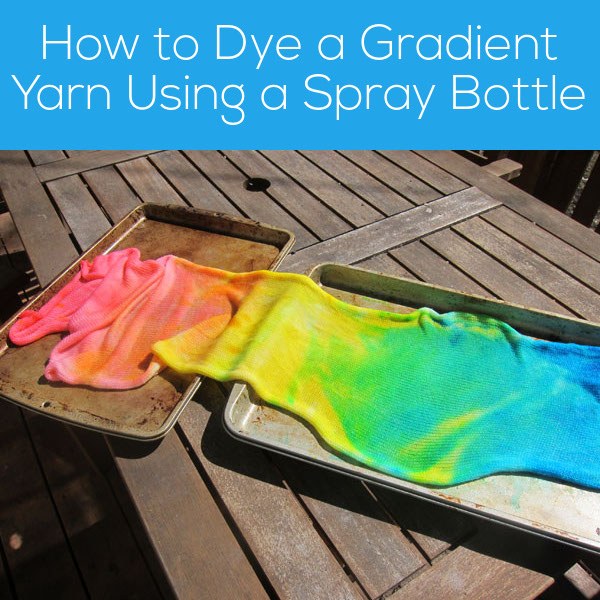
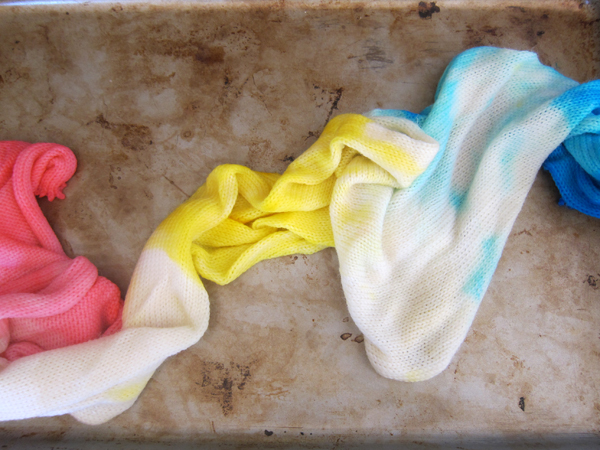
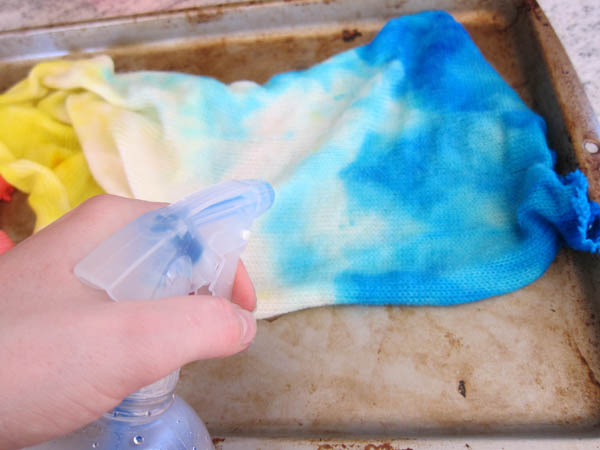
Once you’ve set up your dye, you’ll want to apply a little bit to the sock blank… basically making rainbow stripes. You want the stripes to be horizontal (along with the direction of the stitches) in order to get a gradient.

gradient rainbow yarn by freshstitches 2

I used a silicone pastry brush to apply the dye and put the blank on a big cookie sheet (you don’t want that dye getting on anything else!

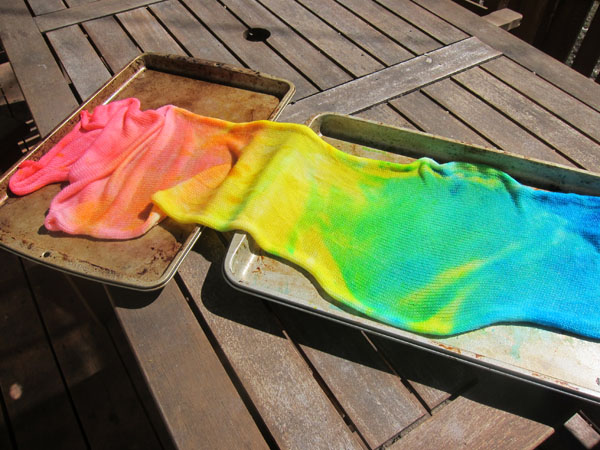
gradient rainbow sock blank freshstitches

To get the best gradient effect, overlap the colors a little bit (that is, you want a little green over top of the edge of the blue stripe… otherwise, you’ll get very definite stripes)

How to finish the yarn

You just let the yarn dry, and it’s dyed! But, you’ll want to wash and unravel the yarn before knitting with it, or else it will be all kinky (just like when you frog a project).

I washed the yarn (I guess it’s not a blank anymore!), and then unraveled it and wound it onto a niddy noddy. This makes a nice skein (and has the benefit of allowing the yarn to dry well).

niddy noddy freshstitches

Pop it off, and you have a skein!

gradient rainbow yarn by freshstitches 1

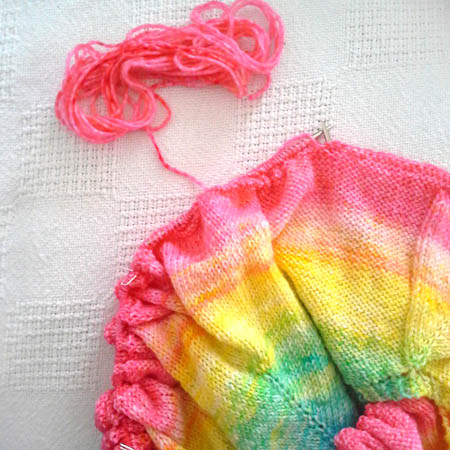
You can see the true beauty of the yarn when it’s wound into a cake:

Gradient Rainbow yarn dyed with Wilton Icing Dyes by FreshStitches

Amazing, right?

Tips and Tricks

  • If you’re not sure how a particular color will come out, do a test swatch! You don’t want to mess up an entire skein because one color comes out different than you wanted!
  • The disadvantage to a sock blank is that the bits of yarn that are tucked inside the stitches are a little harder to soak with dye, so a light application of dye may result in splotchy yarn. (although… it’s a cool look, so experiment. You may want that on purpose!)
  • Be careful what you put your blank on. Keep in mind that excess dye will be carried along with the liquid… and if it touches other parts of your yarn, it’ll dye that, too!
  • You can make your own blank, particularly if you have a knitting machine!
  • This same technique works with any kind of dye!

Happy stitching!

Best,
Stacey

Free Felt Matroyshka Pattern

Free Felt Matroyshka Pattern from Shiny Happy World

Make a simple ornament with this free felt matroyshka pattern, or use it to applique onto a phone case or anything else.

The links take you to a tutorial for any skill you’ll need.

What you’ll need. . .

  • wool felt (I used scraps of lavender, blue bayou, banana cream, fuchsia, Tahitian sunset and blushing bride)
  • embroidery thread (I used DMC #601, 726, 3846, 958, 3858 and 3371)
  • Sulky Sticky Fabri-solvy

You might also want. . .

  • Thread Magic
  • size #8 embroidery needle

You can find sources for all my favorite supplies here.

Download the pattern here.

free felt matroyshka pattern

Trace or print the pattern onto Sulky Sticky Fabri-solvy. Cut the pieces apart and stick them to the felt color indicated on the pattern piece.

Stitch right through the stabilizer.

Cut the pieces out right on the solid lines. Where there’s a dotted line, leave a little extra seam allowance. You can see that around the face, and at the top of the hair, apron and dress pieces in the photo.

Soak the stabilizer away in cold water. Let the pieces soak for a good long time, then rinse the softened stabilizer off under cold running water. Hit any stubborn bits with the kitchen sprayer, but don’t rub the surface of the felt.

Set them to dry on a towel. Don’t wring, twist or even smoosh them. Just let them dry.

Use two strands of thread for all stitching. You can, of course, use any colors and stitches you like, but here’s what I used on each piece. . .

free felt matroyshka pattern

For the dress, backstitch the vines and stripes with DMC #601 and #958. The leaves are lazy daisy stitches with DMC #958 and the dots are French knots with DMC #726.

free felt matroyshka pattern

Backstitch the mouth with DMC #3371. The eyes use this stitch.

free felt matroyshka pattern

For the apron, the French knots are DMC #601. The drops are lazy daisy stitches in DMC #726.

free felt matroyshka pattern

The dots on the scarf are French knots in DMC #958. The flowers are lazy daisy with DMC #601. The little stars and the centers of the flowers are DMC #726.

That’s all the pieces. Time to applique! I use this simple whipstitch and two strands of matching thread for all applique.

free felt matroyshka pattern

Applique the flower to the apron. Then applique the center of the flower and the yellow drop.

free felt matroyshka pattern

Lay the apron over the dress and applique the edges down.

free felt matroyshka pattern

Applique the hair to the top of the face.

free felt matroyshka pattern

Then applique the scarf over the face. Depending on how much extra seam allowance you cut around the face, it may hang out past the edges of the sides of the scarf. That’s ok.

free felt matroyshka pattern

Flip the piece over so you can see your stitching line – the circle of purple stitches here. Trim away the excess felt as close to the stitching as possible so that nothing sticks out past the edge of the scarf.

free felt matroyshka pattern

It should look like this when you’re done.

free felt matroyshka pattern

Finally, lay the back piece down on a flat surface and use that as a guide to line up the face and scarf over the bottom half of the doll. Applique the last layers together.

You can applique this finished front to anything else, or you can sew it to the matroyshka back piece using whipstitch all around. Leave a small opening and add a tiny bit of stuffing – just enough to puff it out a bit. Finish sewing it closed and attach a hanging loop to the top if you like.

Finished!

Free Felt Matroyshka Pattern from Shiny Happy World

You could make a set of these in lots of different colors and string them together into a garland. That would be so pretty!

If you like this, sign up for the newsletter! You’ll get exclusive free patterns, special discounts, and notification of new patterns and tutorials.

Happy stitching!

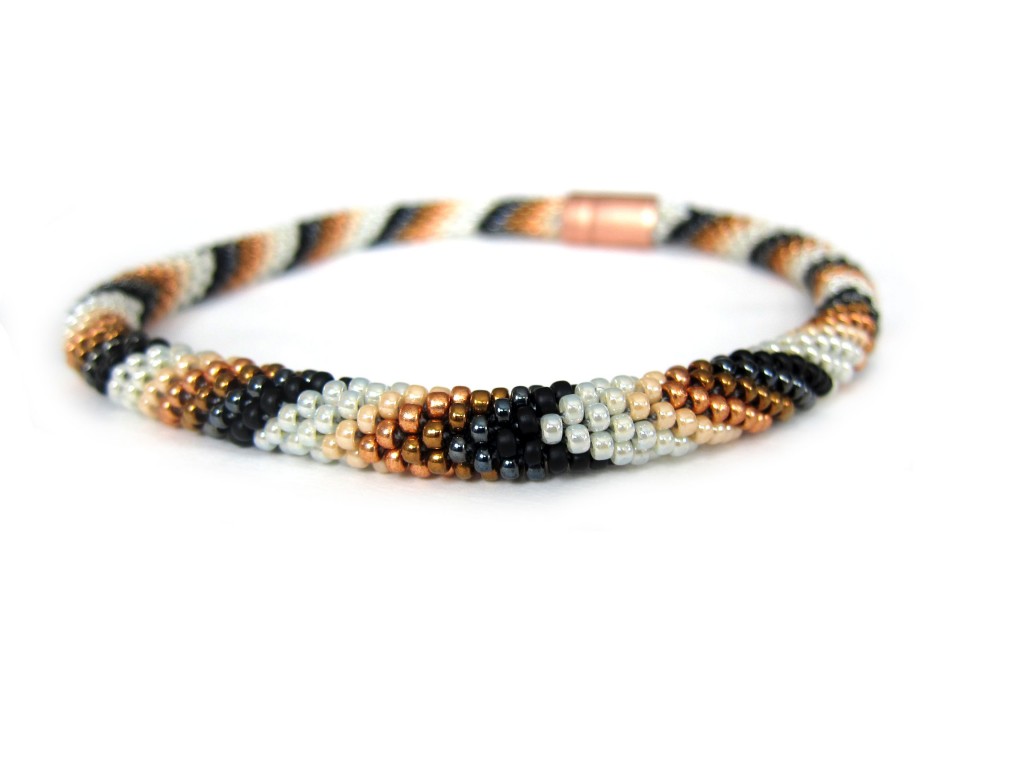
Finished Rainbow Bead Crochet Necklace

I’ve been working on this project for a while: I started it in December, but got derailed until I found this nifty bead spinner to help me get that long strand done… and here it is!

rainbow bead crochet necklace

You can see how long that black strand is around the back. That’s a lot of beads!

I just love it! It’s a project from Bead Crochet Jewelry (a book I highly recommend!

rainbow bead crochet

I used size 6 beads for the rainbow links, and size 8 beads (slightly smaller) for the black chain around the back. That difference accentuates the rainbow, I think!

It’s a real statement piece, and I’m planning on wearing it while teaching at Stitches South. Am I going to see you there?

Best,
Stacey

Controlled Chaos Scrap Quilt – Block #14

Controlled Chaos scrap quilt - block #14

I had to take a bit of a break from the Controlled Chaos quilt over the holidays and into this spring – but I’m ready to finish this baby!

Here’s block #14 in the Controlled Chaos Quilt!

What You’ll Need

  • 48  two-inch squares in color A (shown in aqua)
  • 52 two-inch squares in color B (shown in magenta)

Instructions

Use 1/4″ seam allowances for all sewing.

Press all the seams. I’m pressing mine open for this quilt. I think it will make things simpler in the end.

Arrange your squares according to the diagram below.

Controlled Chaos scrap quilt - block #14

For this block I sewed things up in rows. The top and bottom rows are identical, as are rows 2 and 9, rows 3 and 7, etc. Knowing that can help you sew them up in batches.

Then sew those rows into one fabulous block. 🙂

That’s 14 blocks done – just 6 more to go!

Controlled Chaos scrap quilt - block #14

I think I’m going to go with grey sashing between the blocks. I like the way it sets off each one as its own little composition. Plus – I’m heartily sick of matching up seams. 🙂

Click here for all the Controlled Chaos posts.

Happy piecing!

Best,
Wendi
That's me!

Free Bunny Softie Pattern

Itty Bitty Sleepy Bunny - a free beanie bunny softie pattern from Shiny Happy World

It’s a free bunny softie pattern! With a soft beanie body and small size, this Itty Bitty Bunny is just perfect for Easter baskets! And it’s super easy to make!

It can’t wait to hop into the pocket of someone special. 🙂

Here’s how to make it!

Materials

  • scrap bunny­-colored fabric
  • scrap of pink satin for the bunny ears
  • less than a fat quarter of pajama fabric
  • embroidery thread for the face (I DMC #3371 and #601)
  • plastic pellets (I like Poly­Pellets Weighted Stuffing Beads)
  • polyfill stuffing (I like Soft Touch Poly­fil Supreme Fiberfill)

Step 1

Download the pattern templates.

Cut out all materials as directed on the pattern pieces. You should have. . .

  • 1 body front piece
  • 2 body back pieces
  • 2 head pieces
  • 2 ears cut from bunny fabric
  • 2 ears cut from ear lining fabric

Step 2

Trace the face onto one head piece.

Embroider the eyes and mouth using backstitch and two strands of DMC #3371.

Satin stitch the nose with two strands of DMC #601.

Step 3

Place one ear lining and one ear piece right sides together and sew around the top (curved) edge.

Turn the ear right side out and press. Fold the bottom edges in to the center of the ear and stitch them in place.

Repeat for the second ear

Step 4

Sew the two body back pieces together along the center back line, making sure to leave a few inches open for stuffing.

Don’t forget to backstitch at the beginning and end of your stuffing opening.

Step 5

Open up the center back pieces and press the seam nice and flat, including the edges of the stuffing opening. That will give you a nice clean edge to sew when you’re closing up that opening by hand.

The stick shows where the stuffing opening is.

Step 6

Fold the bottom of the head and the top of the body in half to find the centers. Line those centers up so the head is exactly centered on the body.

Sew the face to the body front and the other head piece to the body back.

Step 7

Fold the heads up and press.

The seam allowance should be pressed toward the head so the body remains flat.

Step 8

Lay the body front face up on a flat surface.

Lay the ears face down over the face as shown in the photo. Don’t worry about making them perfectly even ­ crooked is cute. :-­)

Pin in place.

Step 9

Place the body back face down over the front, sandwiching the ears between the layers. Pin or clip the layers together carefully.

I match the neck seams first, then the center bottoms, then the dips at the sides and then the tips of the arms and legs and the head.

Step 10

Sew all the way around the body using 1/4 inch seam allowance. Make sure you’re catching the ears.

Clip into the seam allowance at all the concave curves and points as shown in the photo.

Step 11

Turn the body right side out.

Awwww! Isn’t that a cutie? Take a moment to admire your work so far. You’re almost done!

Step 12

Stuff the head pretty firmly with fiberfill ­ but not past the neck.

Pour 1/2 cup of plastic pellets into the body and sew up the opening in the back using ladder stitch.

Finished!

All done! Give it an itty bitty hug and then slip it into a special someone’s pocket. :­)

It’s a pocket-sized softie for your kids – and a snuggly bedtime softie for your kids’ dolls. Take a look at the Itty Bitty Bunny with one of the Dress Up Bunch dolls.

Emily with her Itty Bitty Bunny - patterns from Shiny Happy World.

Because dolls need softies to play with, of course. :­-)

Have a great weekend, everyone!

Best,
Wendi
That's me!

The Dress Up Bunch is a collection of cute and cuddly rag dolls. Get patterns for the dolls, plus all their fun outfits and accessories!

Made with Love – Donating Your Handmade Quilts and Softies

Donating Handmade Toys and QuiltsEvery once in a while I get an email from someone saying they love to make softies, but don’t have any children in their lives right now the right age to get them. They want some suggestions for where they can donate their creations.

There are so many wonderful places!

  • children’s hospitals
  • firefighters and police departments like to keep some on hand to give to traumatized children
  • homeless and family violence shelters
  • orphanages – both in the US and overseas

This is just a the tip of the iceberg! I put out a call in a recent newsletter asking readers where they give, and I got a bunch of great responses!

So let’s start with a few general guidelines and things to think about, and then move into the specific suggestions offered by readers.

The number one bit of advice I have is to ask first! Some organizations might have restrictions that you could never anticipate. Depending on the ward, some hospitals can only take toys that are made of hypoallergenic materials – they can give you a list of what is and isn’t allowed. One suggestion that surprised me (but made perfect sense) was to keep arms and legs minimal so there’s less to get hooked on tubes and wires.

My local shelter asked for toys to be small – they pointed out that each kid has a bed and a small shelf and that’s it – and when they leave they leave with a small bag. They can’t have a stuffed animal that takes up half the bag. They also asked for some teen-appropriate softies, saying the teens are often happy to have a softie to hug, but don’t want something that looks too babyish – a request that totally broke my heart. So contact the organization and ask first.

And remember – your favorite organization might prefer cash! I’ve lost count of the number of cat and dog quilts that have been made and auctioned off at shelter fundraisers! Every one of them makes me so happy!

Sarah of Dolls and Daydreams has some really great info about donating dolls abroad here.

And now – here are some responses from readers. . .

Lots and lots of people mentioned the Knit-a-Square organization. They collect knitted and crocheted squares to be joined into afghans, and also handmade stuffed animals and dolls – all going to AIDS orphans in Africa. Definitely take a look at their website – they have the infrastructure to distribute a LOT of love. 🙂

Julia writes. . .

I am about to send two quilts to Quilts For Kids, an organization that donates quilts for kids in hospitals. I have tons of baby-ish fabrics in my closet and feel great that they’re all going to a good cause.
After I found out about QFK heard a lovely story about a family that had premature twin babies in a NICU in New York–the NICU also had quilts and both parents commented on how comforting this was.

Beatrice writes. . .

Currently I am in the process of making lots of “Warrens” which will be donated to orphanages and cancer hospitals in Egypt. I have been living in this country for 18 years and donated lots of items and cash to help the poorest, which sadly are numerous. This time though, I feel really happy, because with every lovely bear finished I try to imagine a little girl or boy who will love what I have created.

Liz writes. . .

A local organization that I donate time, money, and material things to is Hope’s Door, in Dallas.  It’s a shelter for battered women and their children.  They do a wonderful job and are a great bunch of dedicated, insanely organized people.  Throughout the year, Hope’s Door does everything from toy drives to fun runs to auctions. If you’re going to post a list, I’d love for you to mention them, and I know they would appreciate it, too!  They always have needs because, sadly, they always have clients.

Cindy writes. . .

There is a woman who works with my husband who belongs to a small church that gives away bags of food once a month. For Christmas I donate lots of stuffed animals and dolls. And also at Easter I donate  Easter things – bunnies and chicks, etc. I’m so grateful I have the time and money to do this.

Candy writes. . .
Here’s a suggestion of where to donate softies; local hospitals and local woman’s shelters. I have been making and donating for several years now to both. The shelters love the animals or dolls because lots of times the families are rushed away from their homes because of fear and abuse and don’t have time to grab things of love and importance so having something to cling to (softie) is sometimes a life saver. This goes for kids as well as the women. Hospitals love any type of donation, whether it be softies, knitted things for babies, sewn things for babies and blankies. I know there are lots of other places to donate but these are my favorite.

Laura writes. . .

Wildlife rescue groups sometimes request crochet artificial nests for orphaned birds, bunnies, possums etc. Your readers can see if they can find one locally that needs some.

I have seen cat and dog rescues that take handmade fleece blankets to shelters so the animals don’t have to sleep in those harsh metal cages without any protection and warmth they can receive from a blanket. Just make sure to contact rescue first to obtain size wanted.
An excellent charity is your local domestic violence shelter. These families have fled their homes with nothing. They can use new blankets and quilts ( I have donated many fleece blankets for infants and toddlers), new handmade softies for the kids, hats gloves and scarves in the winter. This is an extremely rewarding charity to donate!

Ann writes. . .

I donate softies and dolls at my local hospital pediatrics ward and in the Emergency Room waiting area where children often are waiting with adults. I also go to the local pediatric office, pediatric dentist office, the sheriff’s department and the fire department.

Joan writes. . .

We are a small group of ladies that gather once a month to sew to donate. Some of local items we have donated are fleece hats given to our pre-school.  We used a pattern from Nancy’s Notions.  They loved them. Kid capes were given to our local day care centers. We borrowed a doll from the pre-school and made doll clothes, diapers, blankets, a mattress for a crib, etc. for their room. This month we are making pillows for cancer patients.  We are making a port pillow, heart shaped pillows, rectangle pillows.  These are delivered to local hospitals that give cancer treatments. One month we did walker bags for a local nursing home.  We did lap quilts for shut-ins. We have made burp cloths and receiving blankets and bibs for Northeast Nebraska Community Action Partnership.
We like to find local spots we can donate for we have found postage is soo expensive.

Finally – a couple of specific patterns.

I designed Warren the Charity Bear especially for donations. He can be made out of any kind of fabric, with any kind of stuffing, and has lots of possible variations so you won’t get bored if you decide to make a lot of them – like Kathy and many others have done. 🙂

Kathy made the Warrens in this photo and Caroline made the ones in the top photo – both for Knit-a-Square.

Lots of colorful and fun Warren Bears - made with a free pattern from Shiny Happy World

I’ve also heard that Warren makes an excellent post-op cough pillow for kids. People who have had chest or abdominal surgery are taught to hug a pillow when they cough, to help support the incision and ease pain. Warren is just the right size and shape for this. 🙂 He also has very small arms and legs – small enough that lines and cords in a hospital bed won’t get caught on them.

You can see how to make Warren here.

I also have a tutorial here showing how I made an easy scrap quilt for charity.

If you have any other suggestions – either for places to donate or favorite patterns to use – please leave a note in the comments section!

Happy sewing!

Have you tried these ways of making yarn?

This post contains affiliate links. That means I make a little commission if you buy something after clicking through. All affiliate links are marked with an *.

Of course you can go to the store and purchase a skein of yarn.

But you can also make the yarn yourself!

Some of these are fabulous options if you’re on a budget, or maybe just looking for a way to get creative!

Spin Yarn

Spinning is using either a spindle or a spinning wheel to create yarn from fiber. You can make it as complicated as you want… you can sheer the sheep, wash and card (organize) the fiber yourself (free if you own a sheep or are friendly with a farmer!) or purchase some roving online.


spinning yarn on bobin yellow red


Tips

  • If you’re giving spinning with a spindle a try, I highly recommend one with a notch. You can find one for less than $20 on Etsy.
  • If you’d like to take a class, check out Ply to Knit: Spin the Yarn you really want* on Craftsy
  • Before investing in a wheel, shop around. Try borrowing one from a local spinning guild or renting one from a yarn shop so you can see if it really suits you.
  • Shopping for fiber is as much fun as shopping for yarn! Search for ‘hand dyed roving’ on Etsy to get started!

Make t-shirt Yarn


T-shirt yarn is yarn made from t-shirts!

t-shirts for tshirt yarn


I made some t-shirt yarn a little while ago and crocheted a bath mat. So much fun!

I absolutely love this tutorial on how to make it.

Make a Magic Ball!

Do you have lots of scraps laying around? Join them together to make a magic ball! Here is a tutorial.

rainbow spinning


Tips:

  • Select yarns that are the same weight to join together
  • Yarns with plies work best
  • Wind the ball as you go to keep it tidy!

Once you’ve finished, you have a fun rainbow-y yarn that you can use to knit or crochet anything!

Unravel a Sweater

Some beautiful yarn in the world has been knit up into really ugly sweaters.

If you find one of these gems in the thrift store, you can unravel the yarn and put it to good use! I once retrieved skeins of cashmere yarn from one lucky find!

And more…

This Mollie Makes post has links to even more techniques for making yarn that I haven’t tried yet. Newspaper yarn? Whoa!

How many of these have you tried?

Are any of these ways of making yarn new to you?

Or have you done them before? Let me know your experiences!

Best,
Stacey

Free Bunny Applique Pattern with Fun Mix & Match Parts

three stacked bunny faces made with the free Mix & Match Bunny Blocks applique pattern


I’ve been thinking about designing a bunny applique block for a couple of years now, but Easter always seems to come and go before I have a chance to do it.

But not this year!

And I didn’t just design a bunny block – I designed a free bunny applique pattern with mix & match parts so you can play with it to make lots and lots and lots of unique bunnies. 🙂

Playing is good!

The pattern has three bunny head shapes, three bunny ear shapes, and three bunny faces. You can mix and match those for (I think) 27 possible bunnies. Throw in different color possibilities and you could make a king-sized quilt with no repeated blocks!

Download the pattern here.

If you’ve made any of my quilts, the construction will look familiar. The patterns have already been reversed and exploded so they can be printed right on my beloved printable fusible adhesive. No tracing! La la la la la.

I strongly recommend prewashing any fabric you use with fusible adhesive. The sizing on the unwashed fabric can resist the adhesive. And don’t use fabric softener in your wash – it can do the same thing. (Dryer sheets are fine.)

You can trace onto your favorite fusible if you want to, but I’m lazy and like to skip right to the fun part.

If you prefer the freezer paper applique technique you can print the pieces onto freezer paper, but the instructions I’m giving here are for applique with fusible adhesive. For a complete overview of that technique (my favorite) click here. Find general instructions for freezer paper applique here, and needle turn applique here.

I’m completely in love with the Quilt As You Go method, so I did all the outline stitching and quilting through the top fabric and the batting. I usually do the quilting before I do the applique so I don’t have to work around the pieces. Easy peasy.

Cut each background block 10 1/2″ square.

Step 1

Roughly cut out the pattern pieces and fuse them to the back of your fabric.

Mix & Match free bunny applique pattern from Shiny Happy World

Step 2

Cut out the pieces neatly. Cut right on the solid lines. Leave a little extra seam allowance where there’s a dotted line – that bit of the piece will tuck behind another bit for a clean finish.

Mix & Match free bunny applique pattern from Shiny Happy World

Step 3

Choose a face and trace it onto the face piece.

Mix & Match free bunny applique pattern from Shiny Happy World

If you tape the face in a window and then hold the face fabric up against it, the image will shine right through for easy tracing.

I usually trace just inside the eyes and nose (so I don’t have to be perfect with how I position those applique pieces) and right on the mouth because I’m not using an erasable pen. Don’t use a Frixion pen to mark the face! It will disappear when you fuse the pieces together and you will be sad. 🙁

After I’m done tracing the face, I fuse the eyes and nose to black fabric for their applique pieces.

Step 4

Play around with the placement of the ears.

Mix & Match free bunny applique pattern from Shiny Happy World

Do you want them standing straight up? Spread wide? Wonky and uneven? There is no right answer – they’re all cute. Do what you like!

Step 5

Layer all the pieces and fuse in place following the manufacturer’s instructions.

Mix & Match free bunny applique pattern from Shiny Happy World

Don’t forget to tuck the base of the ears and inner ears behind the head before you fuse.

Step 6

Stitch around all your pieces.

Mix & Match free bunny applique pattern from Shiny Happy World

I machine stitch with regular all-purpose black thread with basic straight stitching everywhere. I love the cartoony look it gives! I go over the mouth twice to give it extra weight.

For help with those tight curves, watch this video.

If you don’t want to applique the eyes and nose, you’ll find several other options here.

Done! With that block, at least. 🙂

There are instructions for finishing a Quilt As You Go quilt here.

See how to layer and baste any quilt here.

Learn how to bind a quilt here.

Here are the details on the three bunnies I made. . .

Mix & Match free bunny applique pattern from Shiny Happy World

This bunny uses Head #1, Face #3 and the fat ears.

Mix & Match free bunny applique pattern from Shiny Happy World

This bunny uses head #2, face #2, and the skinny ears.

Mix & Match free bunny applique pattern from Shiny Happy World

This bunny uses head #3, face #1 and the medium ears.

Mix & Match free bunny applique pattern from Shiny Happy WorldI made my three blocks into a pretty springtime wall-hanging.

There are instructions for adding a hanging sleeve here.

Combine multiple blocks in any configuration to make a baby quilt, a wall hanging, or a bed quilt.

Like almost all of my applique quilt patterns this finishes to a 10″ block. That means you can easily pop a bunny into any of my other quilt designs. A cute bunny would be a great addition to the Wild Flowers quilt or the Noisy Farm quilt. 🙂

Remember – you can adjust the size of any digital pattern to make it work for all kinds of projects!

Add a single bunny to a T-shirt or a baby onesie.

Add a single applique to this free receiving blanket pattern.

Add a different bunny to each side of this free tablet cover pattern.

Applique a bunny to any tote bag pattern – like this free mini tote bag.

Make a pillow using this free tutorial.

Use the pattern pieces with pretty paper to make collage greeting cards, like these I make for my daughter.

You can even shrink them down extra small and use them for embroidery patterns!

Have fun playing with these bunnies!

If you like them – sign up for the Shiny Happy News so you never miss a free pattern, a new tutorial, or the little bits of happiness I like to share!

Happy sewing!

Best,
Wendi
That's me!

How to string seed beads quickly and easily!

It’s a new Coffee with Stacey!

I got a really fun new toy: the Darice Bead Spinner*, which promises to speed up the stringing of seed beads.

review of the darice bead spinner by FreshStitches

I string a lot of beads for bead crocheting, so I just had to give it a try!

review of the darice bead spinner by FreshStitches

Watch the video to see me using it in action, as well as a little update about my current bead crochet project!

Other Links you might Love:

Best,
Stacey

Show & Tell Time!

Last week’s Show & Tell post was all about quilts. This week I’m sharing the amazing stuffed animals you all have been making!

A Warren Mobile!

Let’s start with this incredible mobile Tess made!

She posted complete instructions on her blog so you can make one too! Look at the details she added to the bears. . .

Awesome mobile made from the free Warren pattern!

The beard! The monocle! The bowtie! I love them all!

Pattern: Warren the Charity Bear (free)

Sweet Softies and Adorable Kids

I absolutely love this photo that Carrie sent of her girls with the softies she’s made for them.

Adorable softies and adorable kids - both made by Carrie

She writes. . .

I’m just realizing on this trip how much my girls really do love their softies!  That’s Ellie all snuggled up with a Fat Cat. Kate’s favorite way to snuggle with Bertie is to use its belly as a pillow and the big feet to warm her ears!

And look at this!

Adorable softies and adorable kids - both made by Carrie

Photos like this make me so happy!

Patterns: Franklin the Fat Cat and Bertie Bunny. She made the cute kids with no pattern at all!

Beautiful Blue Benson Bunny

Kim made this beautiful Benson Bunny!

Beautiful Blue Benson Bunny made from a baby blanket

She’s in the UK and couldn’t find the cuddle fleece that I used. Guess what she used instead?

I actually made my bunny out of a very soft and ‘feel-y’ baby blanket I bought in a discount store (£4 – maybe $6? – for a blanket 1m x 0.75m) – it worked well, but it was very fluffy to work with! The Soft and Stable was easy to work with and actually made the sewing a bit easier when it was that side down! Everything else I had, so he was an economical project for me. 🙂

He looks so huggable!

Pattern: Benson Bunny

Lots of Warren Bears – All Different!

Kathy has been busy making lots and lots of Warren bears to send to Aids orphans in South Africa through the organization Knit-a-Square. Just look at them!

Lots of colorful and fun Warren Bears - made with a free pattern from Shiny Happy WorldI love how bright and colorful they are!

Kathy writes. . .

You can probably tell how much I love making them, and am building up supply choices so each bear is different. Then each child will feel individual and special, well I hope so anyway. 🙂

I love the addition of the stars and butterflies!

Pattern: Warren the Charity Bear (free)

More Charity Bears

Caroline also donates her bears through Knit-a-Square. Look at the pretty ones she made!

Charity Bears for Knit-a-Square, made by Caroline

I love those soft pink ones! And the brown bear has terrific eyes!

Pattern: Warren the Charity Bear (free)

Fabulous Leonard

Leonard is one of my favorite patterns, and this version is spectacular!

Fabulous Leonard made by Caitlin

I love, love, LOVE the color choices! So perfect and monstrous! And that furry back. 🙂

Pattern: Knuckleheads

A Sweet Warren

I love this bear that Laney made!

Sweet Warren Bear made by Laney

Look at that herringbone tummy patch! It matches one of the squares in the quilt!

Pattern: Warren the Charity Bear (free)

A Squishy Bertie Bunny

Look at the bunny that Patricia made!

A super squishy Bertie Bunny!

She writes. . .

I thought you might like to see a picture of Buster in white velour.  I had forgotten how tricky velour can be as it insists on curling. Happily, our fabric store did have the doll needles.  I made him for my great niece’s first birthday, along with a pile of favourite books my grandsons no longer read.

That velour can be kind of a bear to work with (the curling makes me crazy) but it does make spectacularly squishy softies. 🙂

Pattern: Bertie Bunny

An Epic Pile of Charity Bears

This just takes my breath away!

A massive pile of Charity Bears - all waiting to be donated!

Beatrice made all of these bears to donate to orphanages and cancer hospitals in Egypt, where she lives.

How many?

The photo shows 54 bears, but she’s actually made 62. 62 bears! And they’re all baby safe with sewn-on eyes.

Wow!

Pattern: Warren the Charity Bear (free)

Milton Monkey

Karen made this dapper monkey.

A dapper Milton Monkey made by Karen.

She writes. . .

My dog Zoey want this to be a squeaky toy sooo badly!

My dog Augie always wants to check out the softies I make – but they’re never for him. He can chew through one in minutes!

Pattern: Milton Monkey

A Sweet Piggy

Terri made this adorable round piggie!

Terri's adorable round piggy, made with a pattern from the book Creature Camp

Isn’t she a cutie! Her name is Petunia. 🙂

Pattern: Percy the Piggy from the book Creature Camp

A Pair of Silly Monkeys

Brett made two monkeys!

a pair of silly monkeys made by Brett

She writes. . .

Here’s my Milton. He turned out so cute! My daughter wanted him to have a friend, so she picked out this pretty lady. Love the bow!!

I love the pink tummy! And using the bowtie as a hair bow is a great idea!

Pattern: Milton Monkey

Best Friends

Susan made this adorable Elliott and his best friend, Maurice.

Adorable Elliott and his best friend, Maurice - made by Susan

Aren’t they cute together?

Patterns: Elliott Elephant and Maurice the Mouse

And a Milton

Susan made this Milton too!

a dapper Milton Monkey made by Susan.

I love him!

Pattern: Milton Monkey

AND a Pig AND a Puppy!

Susan made these cuties too!

Adorable Nellie and Buster - made by Susan

Wow – she’s been busy! She writes. . .

I wanted to show you the two softies that I made for my niece and nephew in San Diego. We Facetimed with them on Christmas, and my sister-in-law said my niece loved Nellie – I also included a spiderweb and Aranea as well.

Love!

Pattern: Nellie the Pig and Buster the Dog

A Wee Mouse

Marian made this little black and white mouse as a holiday gift.

A tiny mouse with Santa

She posted about it here. You can find more info there too about that Santa. 🙂

Pattern: Mischief of Mice

Silly Friends

Susan sent in this cute photo of Nellie with her best friend Aranea sitting on her nose. 🙂

Nellie and Aranea goofing around - made by Susan

Patterns: Nellie the Pig and Aranea the Spider

A Silly Snake

My little Snake Charmers pattern is often the first thing kids grab when I teach classes. I love what Emma did with it!

Emma enlarged the little Snake Charmers pattern to make a huge boa constrictor!

She enlarged it (a LOT!) and made an awesome boa constrictor!

Pattern: Snake Charmers (free)

A Spunky Puppy and Kitty

Normajean shared these incredibly cute photos of her new puppy chasing her kitty up in a tree.

Absolutely adorable cat and dog softies made by Normajean

She writes. . .

I bought your Buster pattern last week.  You said he’s a drooly dog, but you didn’t warn us that he’s so scrappy and spunky! The phat cat is still up in the tree!  That’s one spunky puppy.  I didn’t have any pellets and live over an hour away from any fabric/craft store, so I put a ball of fiberfill only in the ends of his ears.  I used a lighter shade of yellow for the inside of his ears and front paws.  Gotta go with what you have on hand!

Love! Love! Love!

Patterns: Buster the Puppy and Franklin the Fat Cat

Can you believe I still have photos to share? Next week I’ll be sharing some of the places you all donate your creations, then I’ll be back with more Show & Tell. I think the next one may be all Dress Up Bunch dolls and clothes!

Happy sewing!

Best,
Wendi
That's me!