 Every once in a while I get an email from someone saying they love to make softies, but don’t have any children in their lives right now the right age to get them. They want some suggestions for where they can donate their creations.
There are so many wonderful places!
- children’s hospitals
- firefighters and police departments like to keep some on hand to give to traumatized children
- homeless and family violence shelters
- orphanages – both in the US and overseas
This is just a the tip of the iceberg! I put out a call in a recent newsletter asking readers where they give, and I got a bunch of great responses!
So let’s start with a few general guidelines and things to think about, and then move into the specific suggestions offered by readers.
The number one bit of advice I have is to ask first! Some organizations might have restrictions that you could never anticipate. Depending on the ward, some hospitals can only take toys that are made of hypoallergenic materials – they can give you a list of what is and isn’t allowed. One suggestion that surprised me (but made perfect sense) was to keep arms and legs minimal so there’s less to get hooked on tubes and wires.
My local shelter asked for toys to be small – they pointed out that each kid has a bed and a small shelf and that’s it – and when they leave they leave with a small bag. They can’t have a stuffed animal that takes up half the bag. They also asked for some teen-appropriate softies, saying the teens are often happy to have a softie to hug, but don’t want something that looks too babyish – a request that totally broke my heart. So contact the organization and ask first.
And remember – your favorite organization might prefer cash! I’ve lost count of the number of cat and dog quilts that have been made and auctioned off at shelter fundraisers! Every one of them makes me so happy!
Sarah of Dolls and Daydreams has some really great info about donating dolls abroad here.
And now – here are some responses from readers. . .
Lots and lots of people mentioned the Knit-a-Square organization. They collect knitted and crocheted squares to be joined into afghans, and also handmade stuffed animals and dolls – all going to AIDS orphans in Africa. Definitely take a look at their website – they have the infrastructure to distribute a LOT of love. 🙂
Julia writes. . .
I am about to send two quilts to Quilts For Kids, an organization that donates quilts for kids in hospitals. I have tons of baby-ish fabrics in my closet and feel great that they’re all going to a good cause.After I found out about QFK heard a lovely story about a family that had premature twin babies in a NICU in New York–the NICU also had quilts and both parents commented on how comforting this was.
Beatrice writes. . .
Currently I am in the process of making lots of “Warrens” which will be donated to orphanages and cancer hospitals in Egypt. I have been living in this country for 18 years and donated lots of items and cash to help the poorest, which sadly are numerous. This time though, I feel really happy, because with every lovely bear finished I try to imagine a little girl or boy who will love what I have created.
Liz writes. . .
A local organization that I donate time, money, and material things to is Hope’s Door, in Dallas. It’s a shelter for battered women and their children. They do a wonderful job and are a great bunch of dedicated, insanely organized people. Throughout the year, Hope’s Door does everything from toy drives to fun runs to auctions. If you’re going to post a list, I’d love for you to mention them, and I know they would appreciate it, too! They always have needs because, sadly, they always have clients.
Cindy writes. . .
There is a woman who works with my husband who belongs to a small church that gives away bags of food once a month. For Christmas I donate lots of stuffed animals and dolls. And also at Easter I donate Easter things – bunnies and chicks, etc. I’m so grateful I have the time and money to do this.
Here’s a suggestion of where to donate softies; local hospitals and local woman’s shelters. I have been making and donating for several years now to both. The shelters love the animals or dolls because lots of times the families are rushed away from their homes because of fear and abuse and don’t have time to grab things of love and importance so having something to cling to (softie) is sometimes a life saver. This goes for kids as well as the women. Hospitals love any type of donation, whether it be softies, knitted things for babies, sewn things for babies and blankies. I know there are lots of other places to donate but these are my favorite.
Laura writes. . .
Wildlife rescue groups sometimes request crochet artificial nests for orphaned birds, bunnies, possums etc. Your readers can see if they can find one locally that needs some.
I have seen cat and dog rescues that take handmade fleece blankets to shelters so the animals don’t have to sleep in those harsh metal cages without any protection and warmth they can receive from a blanket. Just make sure to contact rescue first to obtain size wanted.An excellent charity is your local domestic violence shelter. These families have fled their homes with nothing. They can use new blankets and quilts ( I have donated many fleece blankets for infants and toddlers), new handmade softies for the kids, hats gloves and scarves in the winter. This is an extremely rewarding charity to donate!
Ann writes. . .
I donate softies and dolls at my local hospital pediatrics ward and in the Emergency Room waiting area where children often are waiting with adults. I also go to the local pediatric office, pediatric dentist office, the sheriff’s department and the fire department.
Joan writes. . .
We are a small group of ladies that gather once a month to sew to donate. Some of local items we have donated are fleece hats given to our pre-school. We used a pattern from Nancy’s Notions. They loved them. Kid capes were given to our local day care centers. We borrowed a doll from the pre-school and made doll clothes, diapers, blankets, a mattress for a crib, etc. for their room. This month we are making pillows for cancer patients. We are making a port pillow, heart shaped pillows, rectangle pillows. These are delivered to local hospitals that give cancer treatments. One month we did walker bags for a local nursing home. We did lap quilts for shut-ins. We have made burp cloths and receiving blankets and bibs for Northeast Nebraska Community Action Partnership.We like to find local spots we can donate for we have found postage is soo expensive.
Finally – a couple of specific patterns.
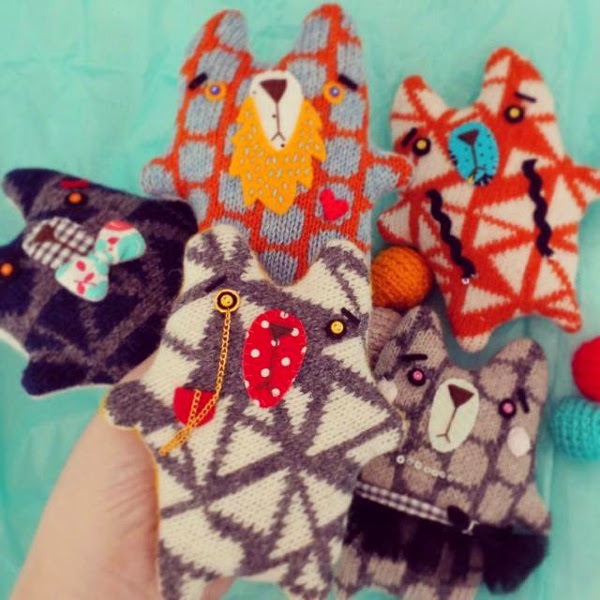
I designed Warren the Charity Bear especially for donations. He can be made out of any kind of fabric, with any kind of stuffing, and has lots of possible variations so you won’t get bored if you decide to make a lot of them – like Kathy and many others have done. 🙂
Kathy made the Warrens in this photo and Caroline made the ones in the top photo – both for Knit-a-Square.
I’ve also heard that Warren makes an excellent post-op cough pillow for kids. People who have had chest or abdominal surgery are taught to hug a pillow when they cough, to help support the incision and ease pain. Warren is just the right size and shape for this. 🙂 He also has very small arms and legs – small enough that lines and cords in a hospital bed won’t get caught on them.
You can see how to make Warren here.
I also have a tutorial here showing how I made an easy scrap quilt for charity.
If you have any other suggestions – either for places to donate or favorite patterns to use – please leave a note in the comments section!
Happy sewing!


