One – I wanted it to be easy and fun. Of course. That’s a main consideration in all my quilt designs. 🙂
Two – I wanted it to work especially well with those awesome fabric collections with great illustration that you just don’t want to cut up.
You know what I’m talking about.
How could I cut up this image?
Or this?
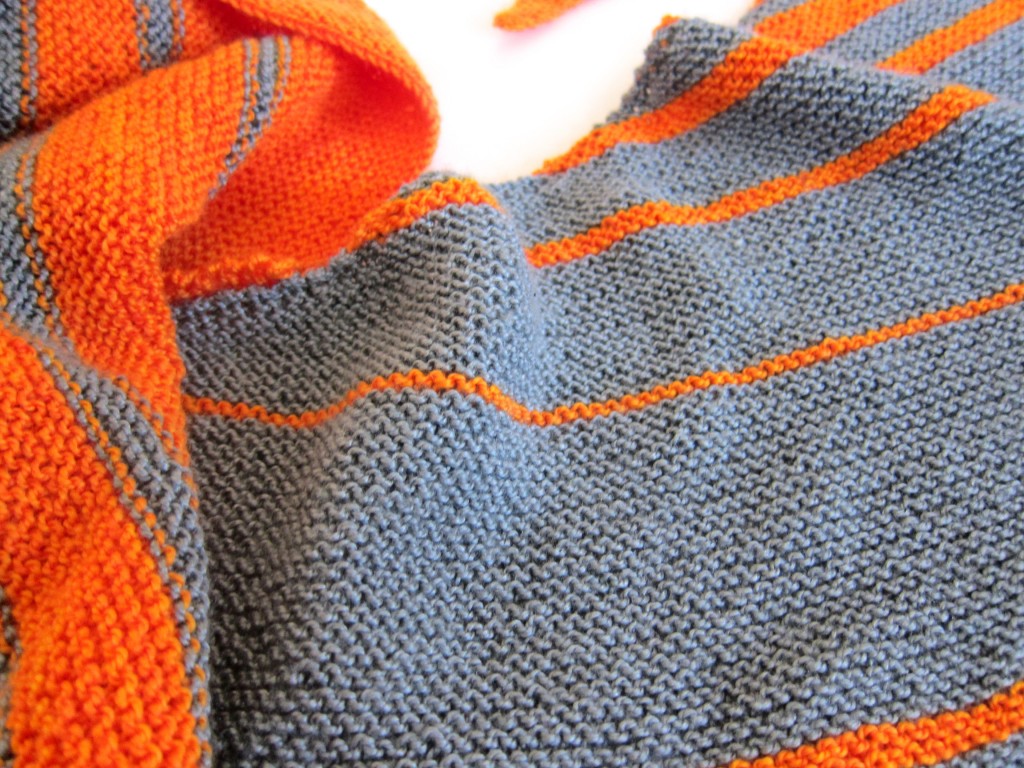
Use larger scale prints for the wide stripes, smaller scale on the narrow stripes. It’s a great way to use a whole fabulous fabric collection – which is especially nice for folks who stress out about choosing fabric.
I designed it especially for great prints like these – but you’re not limited to that! Try it in solids in a nice ombre layout. Or create a rainbow from your favorite tone on tone prints.
Stripes are always in season – always in style. And they’re oh so easy to sew. 🙂
Thick & Thin is a free quilt pattern.
That’s right – FREE! And that doesn’t mean it’s some skimpy abbreviated form of one of my regular patterns. You’ll get everything one of my regular quilt patterns normally includes.
Complete instructions – including yardage requirements, cutting instructions, and assembly diagrams – for six different sizes.
Baby (36″ x 48″)
Crib (50″ x 52″)
Nap (65″ x 76″)
Twin (65″ x 88″)
Queen (86″ x 92″)
King (104″ x 92″)
Detailed instructions – you’ll never feel lost or wonder if you’re doing things wrong.
Instructions (and diagrams) for pieced backs for all the quilt sizes.
Links to videos teaching you all the skills you’ll need to complete the project – including basting, quilting and binding.
Detailed quilting instructions – none of this “quilt as desired” single line of instruction at the end. 🙂
This is a very easy quilt – easy to cut, easy to sew, and easy to machine quilt.
Want the pattern? Here’s the link to download it – free!
If you like this pattern, sign up for the Shiny Happy News! Subscribers get a weekly newsletter with crafty tips and tricks, free patterns, special discounts and more.
Mollie from Wild Olive knows how excited I am about her new book, Stitch Love: Sweet Creatures Big and Small. I’ve got it in my hot little hands right now and there will be a full review coming in a couple of weeks after I have a chance to make a project from it. In a nutshell – it’s exactly as fabulous as I thought it would be!
In the meantime, I jumped at the chance to be a part of this Valentine’s Day blog hop in celebration of the new book. Mollie is giving away a few special patterns that are like the patterns you’ll find in the book – but completely new and getting ready for Valentine’s Day. And a few bloggers got to play with them first!
I chose this little otter/ferret. 🙂
Mollie thinks of him as a ferret – I think of him as an otter. My way I get to make a terrible otter pun. 🙂
I immediately saw that envelope as a 3D pocket, with the whole thing appliqued in felt – so that’s what I did!
Tuck a bit of the ears and tail behind the body, and then whipstitch all around each piece. A tiny dab of fabric glue on the back of each piece holds them in place while you stitch. No irritating pins to grab your thread!
Now add the envelope. I traced it as one piece so I could fold it into a little pocket. Flat it looked like this. . .
And then I folded it and stuck it on the otter like this. . .
Stitch all the way around the outside edge of the envelope.
Next I added his paws so it looks like he’s holding the envelope instead of having it float in front of him. 🙂
Just cut them out, stick them in place, and stitch them down. They’re tiny. 🙂
I love knitting garter stitch. ‘Garter stitch’ is what it’s called when you knit every row, turning your work after each row.
How do you count rows in garter stitch?
When I’m knitting in garter stitch, the pattern instructions usually say ‘knit 20 rows’ (or some other number), and I don’t want to use a row counter on each row. So, today, I’ll show you how to count the rows by looking at your work.
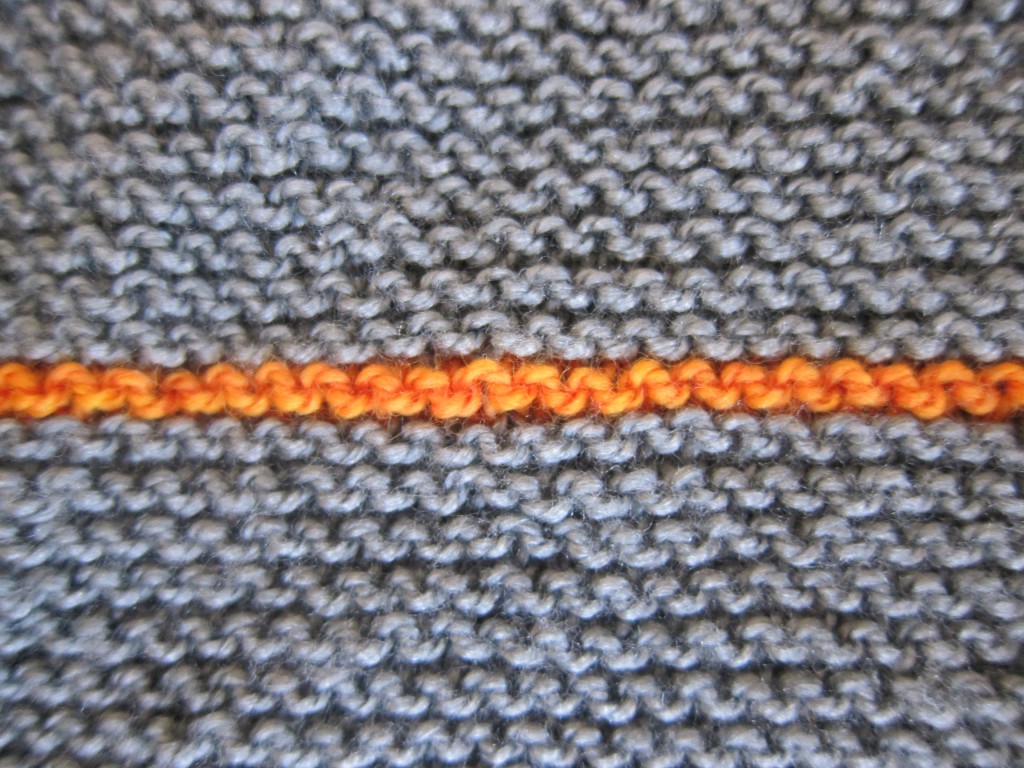
The important thing to know is that in garter stitch, 2 rows make one ridge. Check out this close up:
Do you see the orange? That’s 2 rows of garter stitch, or one ridge.
You might find it easier to count the ridges, because they stick out pretty well, and then multiply that number by 2 to get the number of rows.
Keep counting!
This technique allows you to just keep knitting and count how many rows you’ve done at the end. No row counter, needed!
If you want to learn to count in other stitches, check out this great post by Lion Brand.
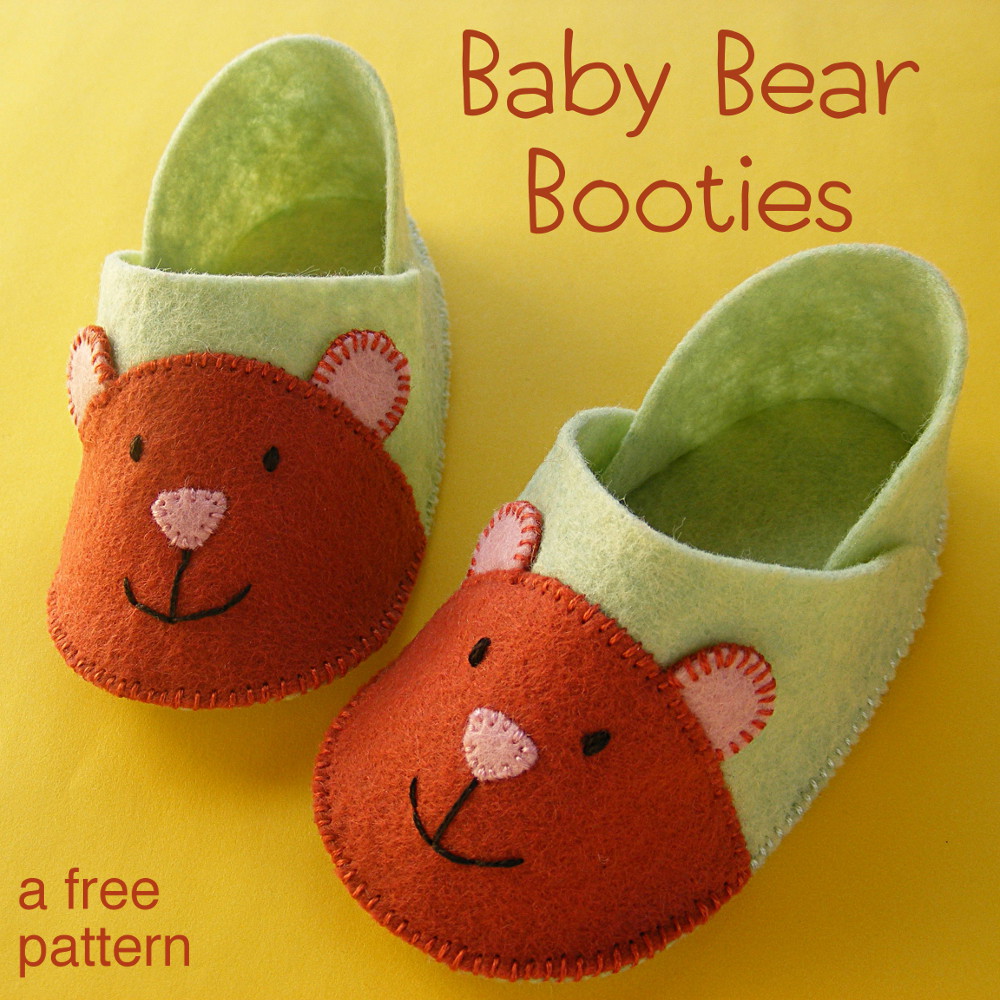
I’ve been meaning to make some little felt baby booties for a while now. A friend of mine just had a baby shower so the time was finally right for you all to get the free felt booties pattern I’ve had in my head for so long. 🙂
These were really easy to stitch up – and it was all handsewing so it was perfect to work on while I watched TV. (Foyle’s War and The Good Wife are our current obsessions.)
I used copper felt for the bear – and I think that color would look great with just about any color for the shoe – love bug blue, blue bayou, ragtime blue, fuchsia, shocking pink, lavender, banana cream, Georgia peach. They’d all be adorable!
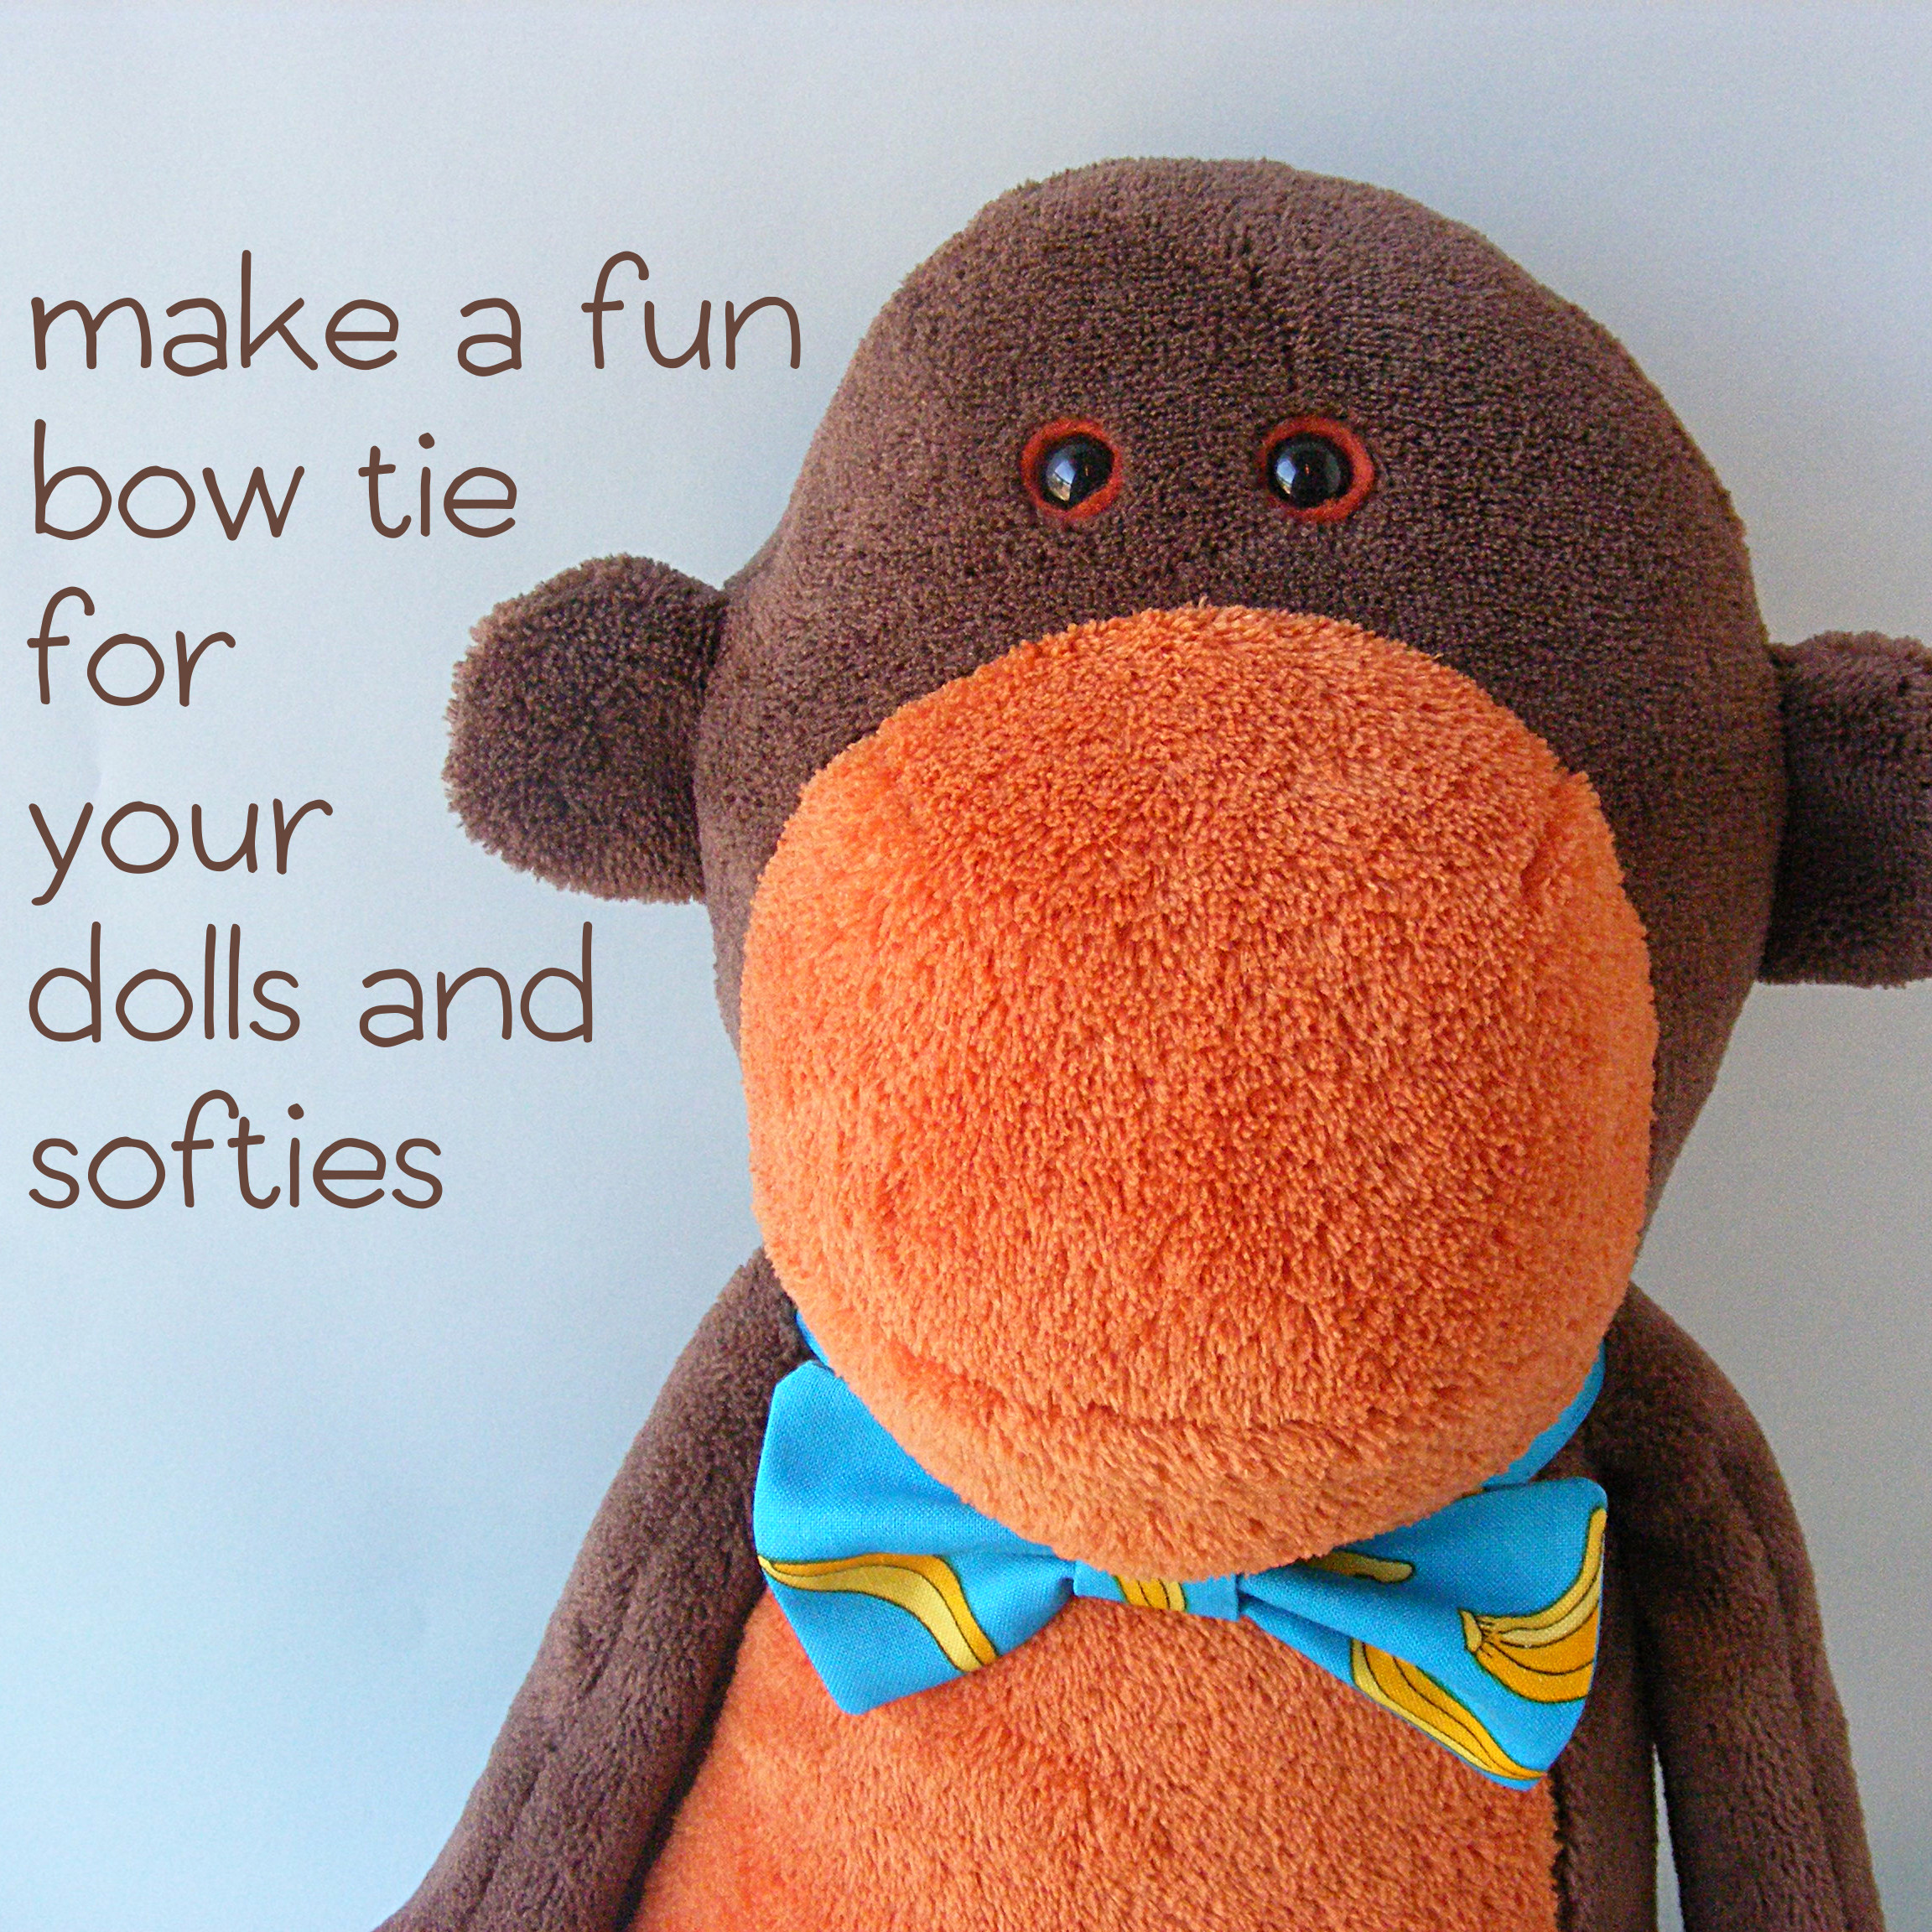
It’s an easy and fun accessory to add to any softie or doll!
This one fits most mid-sized softies – you can adjust the length of the strap pretty easily to fit whatever toy you’re trying to dress up a bit.
You can also leave the strap off and add a pin to the back to make a hair bow for a girl doll or softie.
Here’s the bow tie tutorial. . .
Cut out the pattern pieces as follows:
for the neck cut 1 piece 2″ x 14″
for the bow cut 2 pieces 4 1/2″ x 2 1/2″
for the knot cut 1 piece 2″ x 2 1/2″
Step 1
We’ll start with the bow part.
Place the two bow pieces right sides together and sew almost all the way around the edge using 1/4″ seam allowance. Leave 1-2 inches open in the center of one of the long sides so you can turn it right side out. Clip the corners.
Turn the bow right side out and press it flat.
You can hand sew the opening closed, but it will be hidden when you add the knot so you don’t need to. I didn’t.
Step 2
Now let’s prep the knot.
Fold the knot piece in half the long way and sew, using 1/4″ seam allowance.
Turn the piece right side out. Turn the tube so that the seam runs up the back and press it flat.
Step 3
Now for the neck band.
Fold the neck band in half the long way, pressing a seam down the middle.
Now fold the edges of the band in to that center fold and press. It should look like this.
Fold in the raw edges at the ends and press it flat, refolding and pressing that center seam.
Sew the folded edges together, as close as you can get to the edge. Sew a 1″ piece of hook and loop tape to each end of the band. Remember – one piece of the tape goes on the outside of the band and the other goes on the inside. I always try it out around a pretend neck to make sure I have it right before I sew the pieces in place.
Step 4
Let’s put it all together!
Pinch the center of the bow together. Wrap the knot around the pinched bow and the neck band. Fold the raw edge of the knot under and sew it in place.
This doesn’t have to be super neat – it will be on the back of the bow. While I’m at it (especially if this is for a child), I also tack a couple of stitches into the bow and the neck band to keep things from sliding.
Done!
You can easily make a whole bunch of bow ties in a range of colors and sizes to dress up all your toys and softies! Make some up in fun holiday prints to dress up for the different holidays!
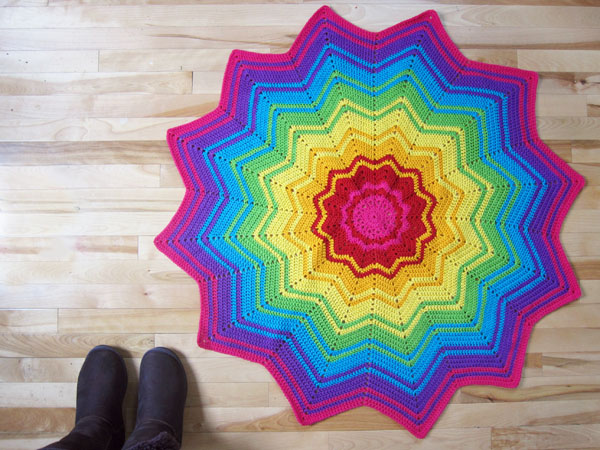
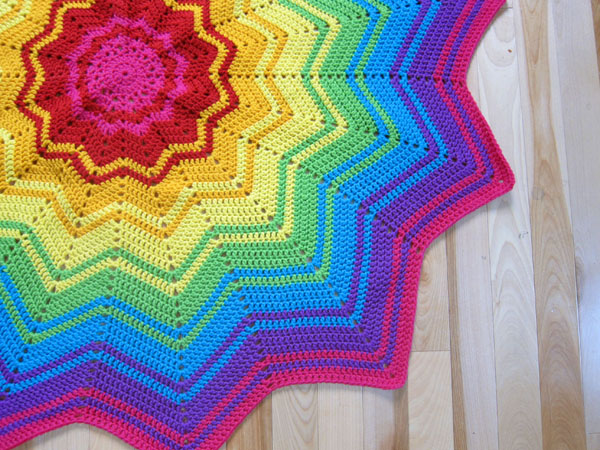
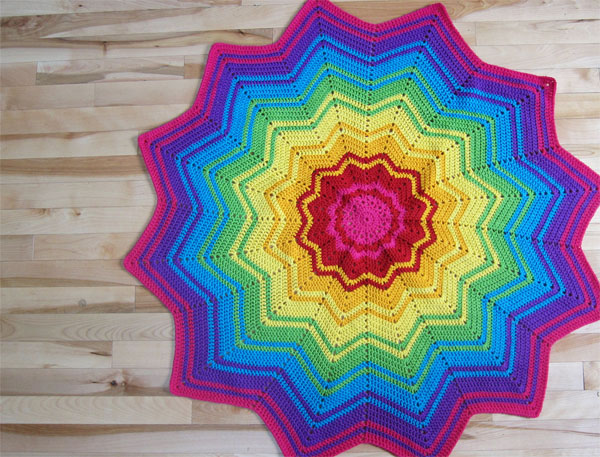
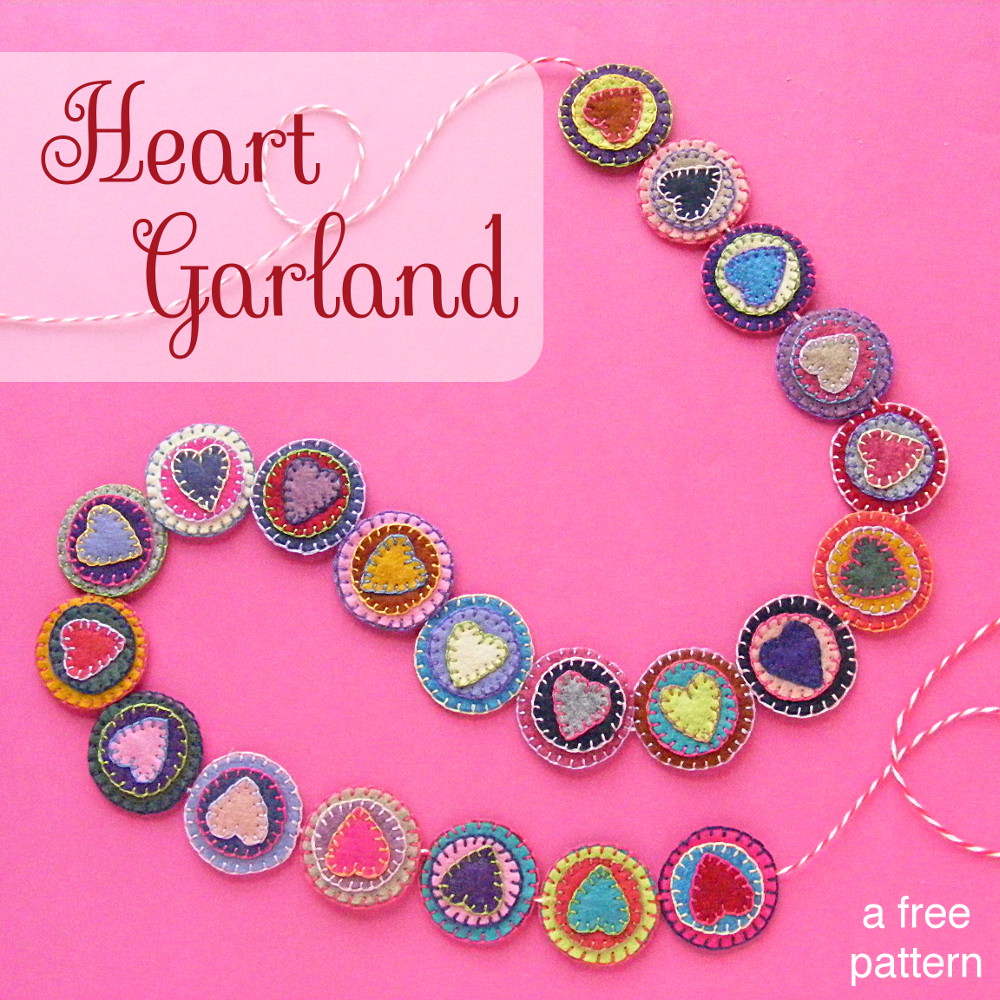
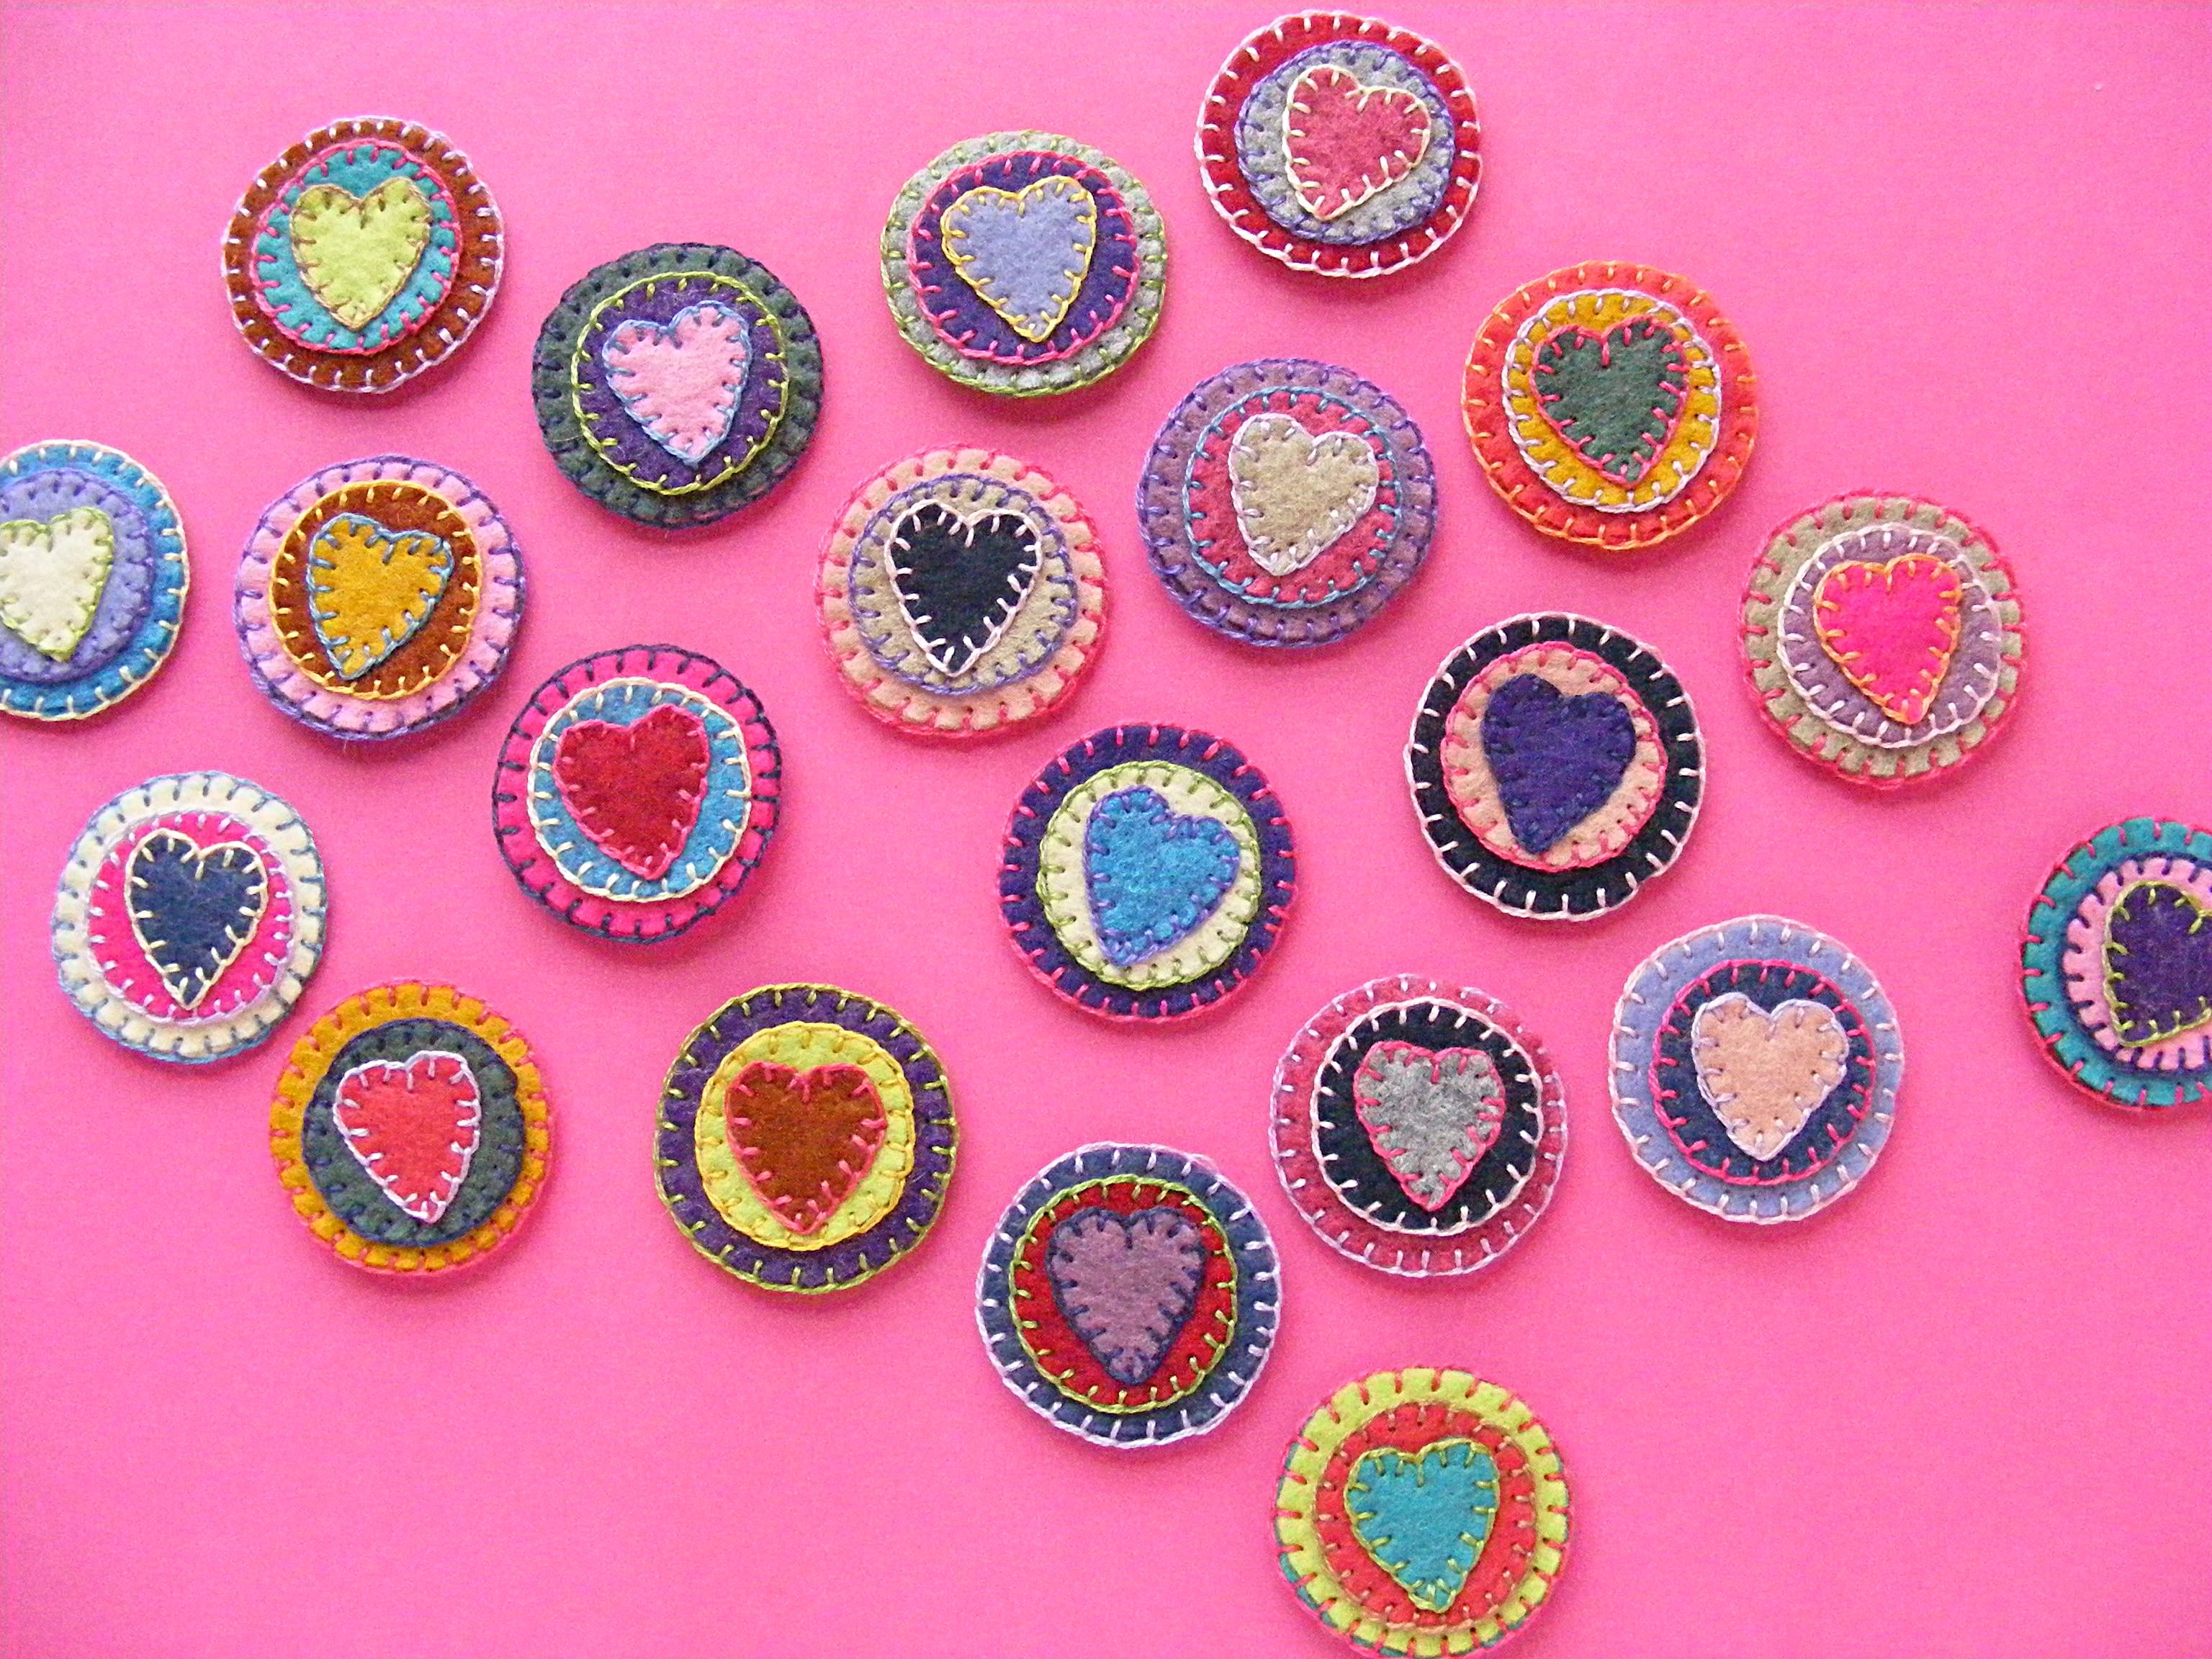
Crafting for Valentine’s Day is so much fun – especially since you don’t have to put the decorations away after the holiday’s over. Hearts never go out of season!
This pretty heart garland is easy to make (Just one stitch! And there’s a link to a video showing you how to do it!) and it’s a great way to use up tiny felt scraps and stray bits of thread. 🙂
Want the pattern? Here we go!
All stitching is done with two strands of embroidery floss.
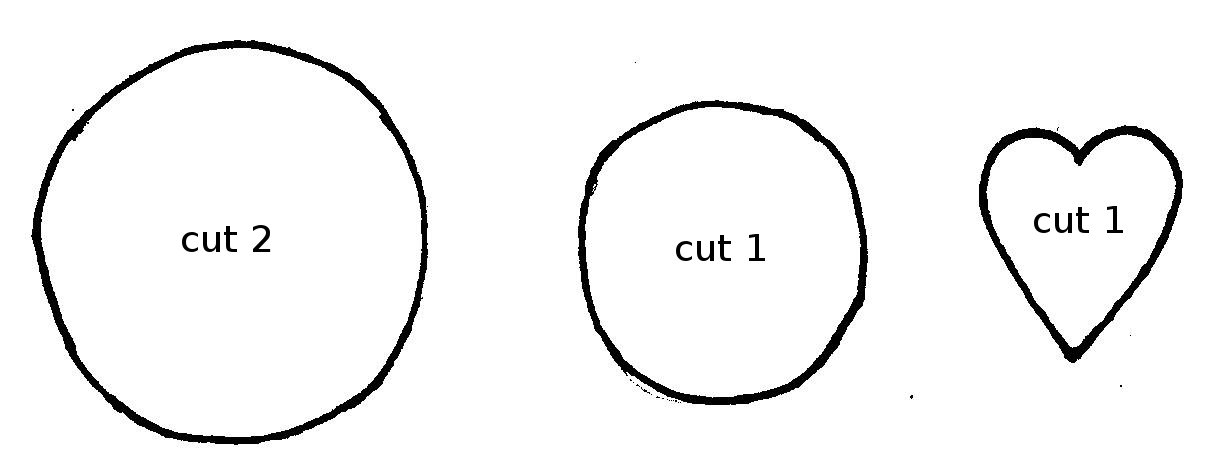
Print them out at 100% size (or whatever size you like). I really like using freezer paper for small pieces like this. Just iron it down to the felt, cut out the shape, peel off the paper and reuse it for the next one.
For each disc, cut out two large circles, one small circle, and one heart. I used lovely wool felt scraps for all of mine. (If you want your discs to have hearts on both sides, just cut out two of everything.)
For each foot of garland you’ll need 9 finished discs.
Step 2
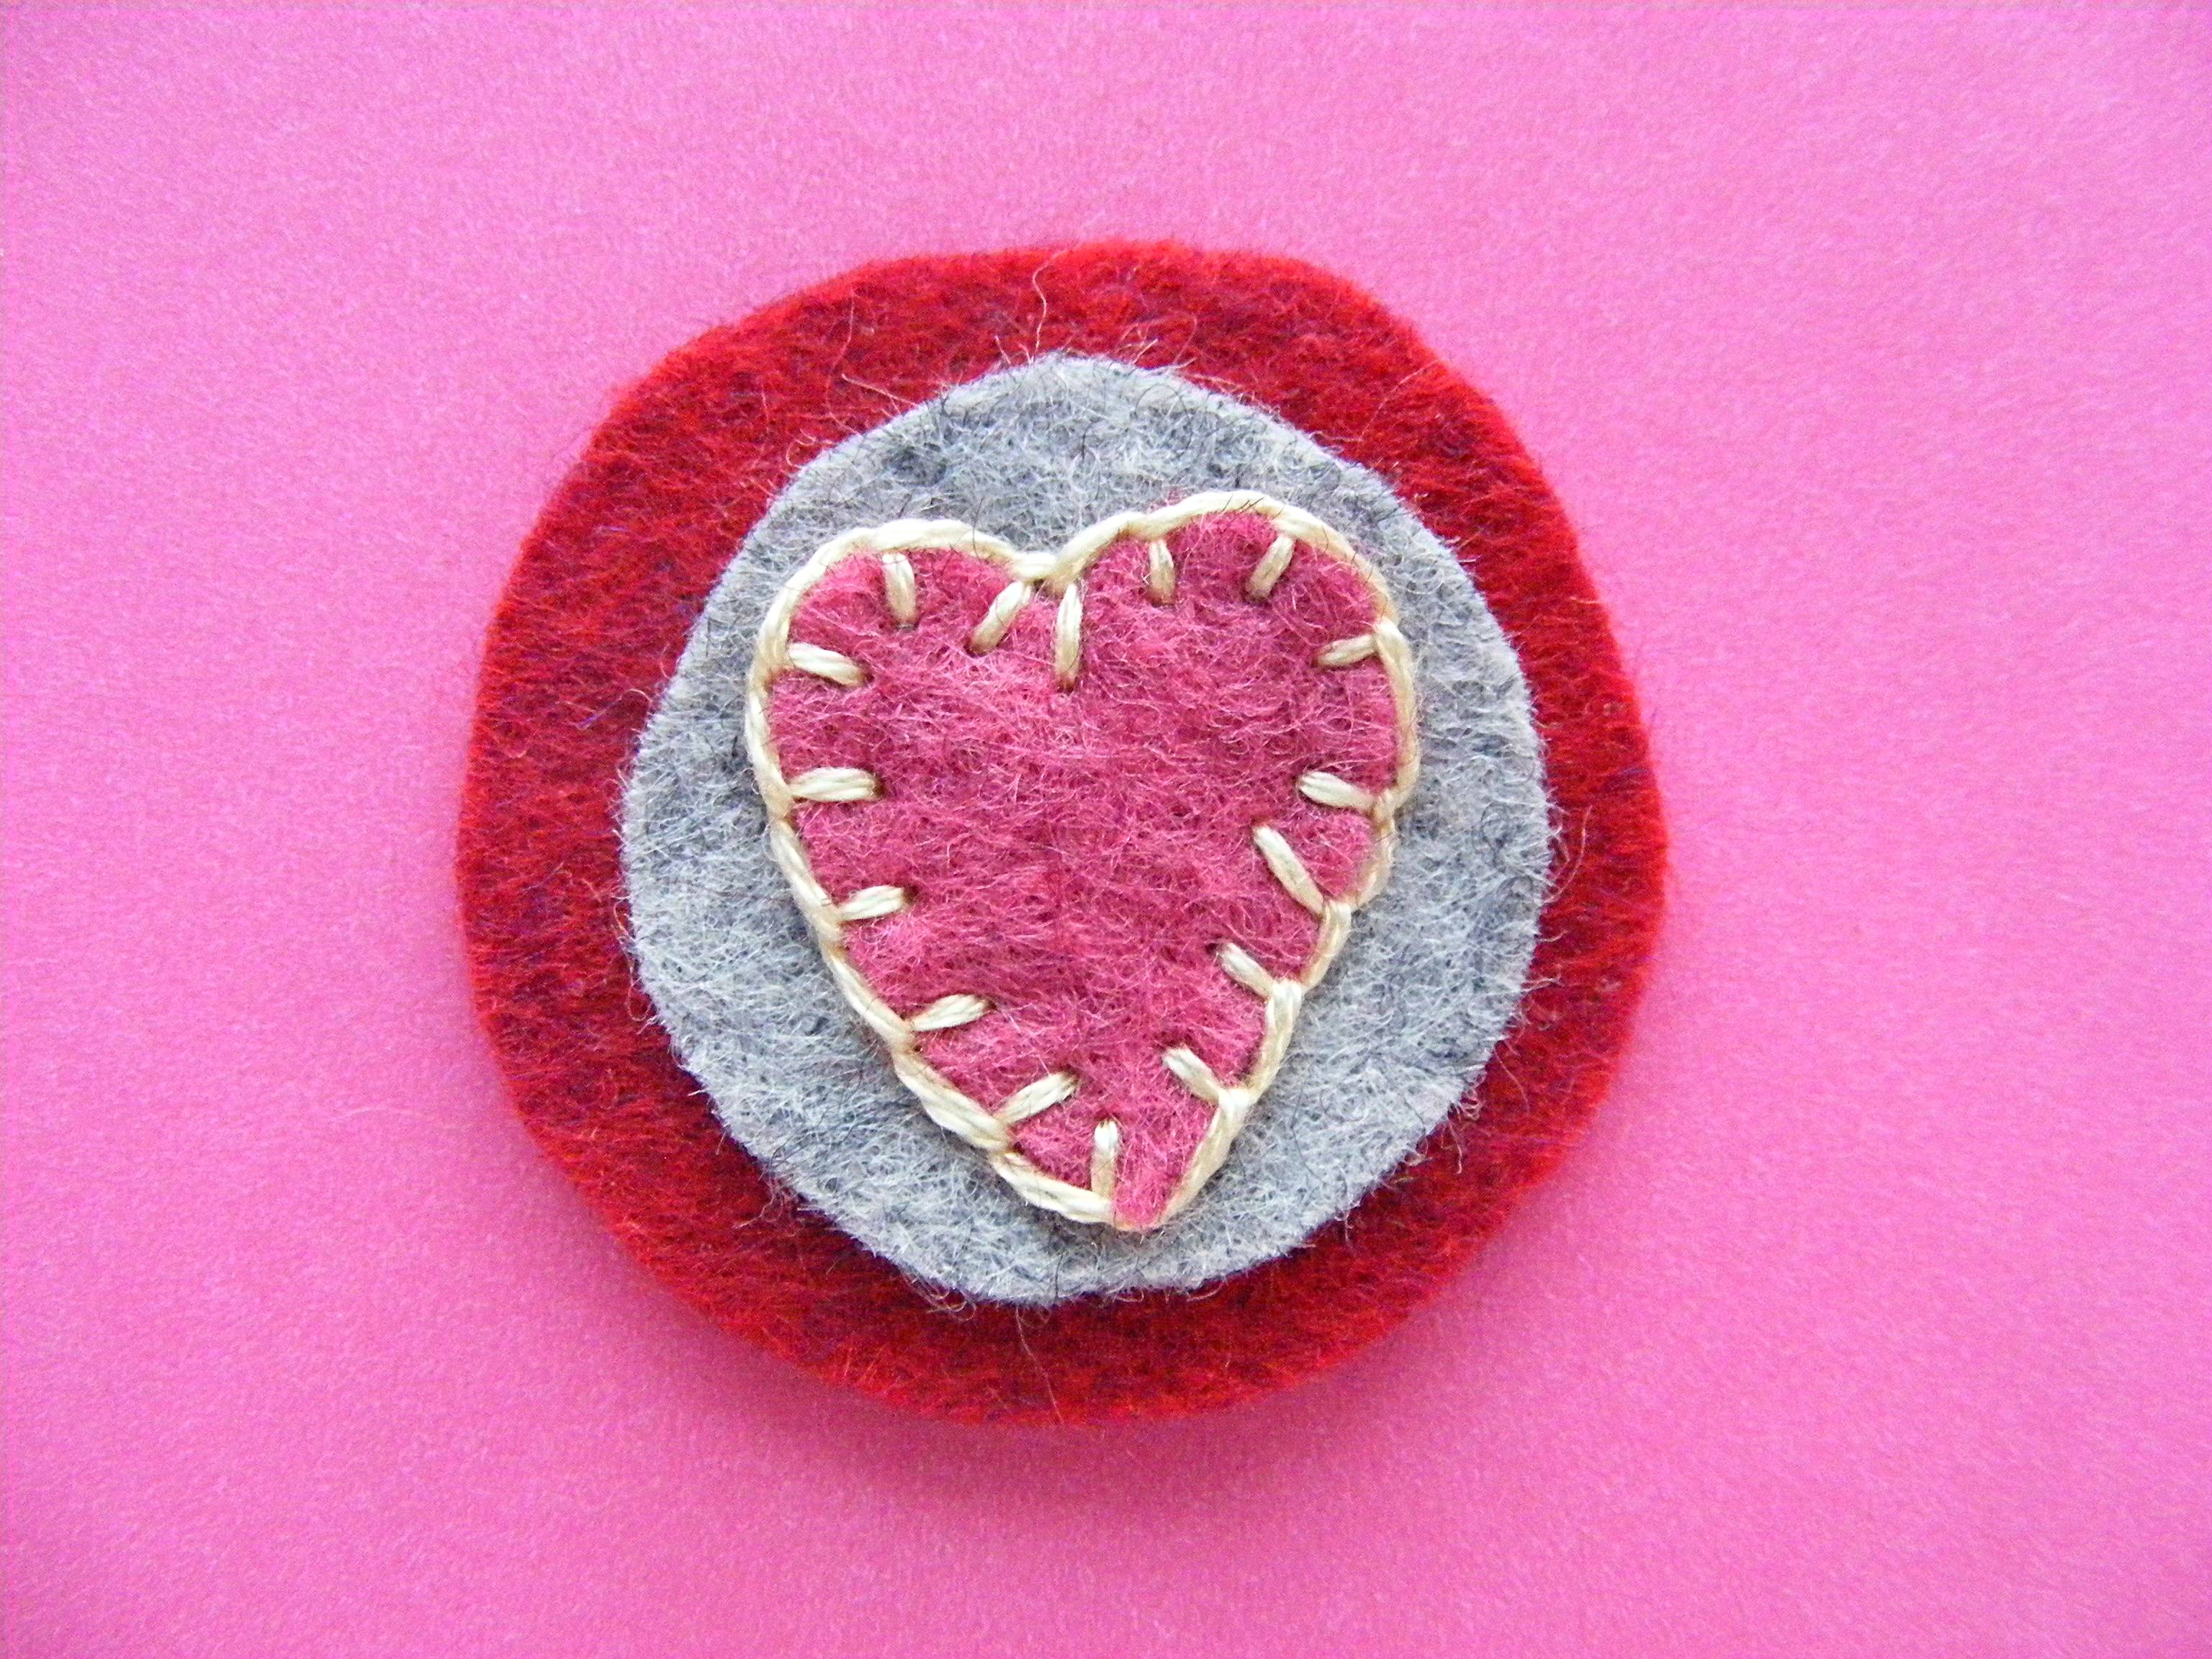
Stack one large circle, one small circle, and one heart.
Blanket stitch around the heart, stitching through all three layers of felt.
Step 3
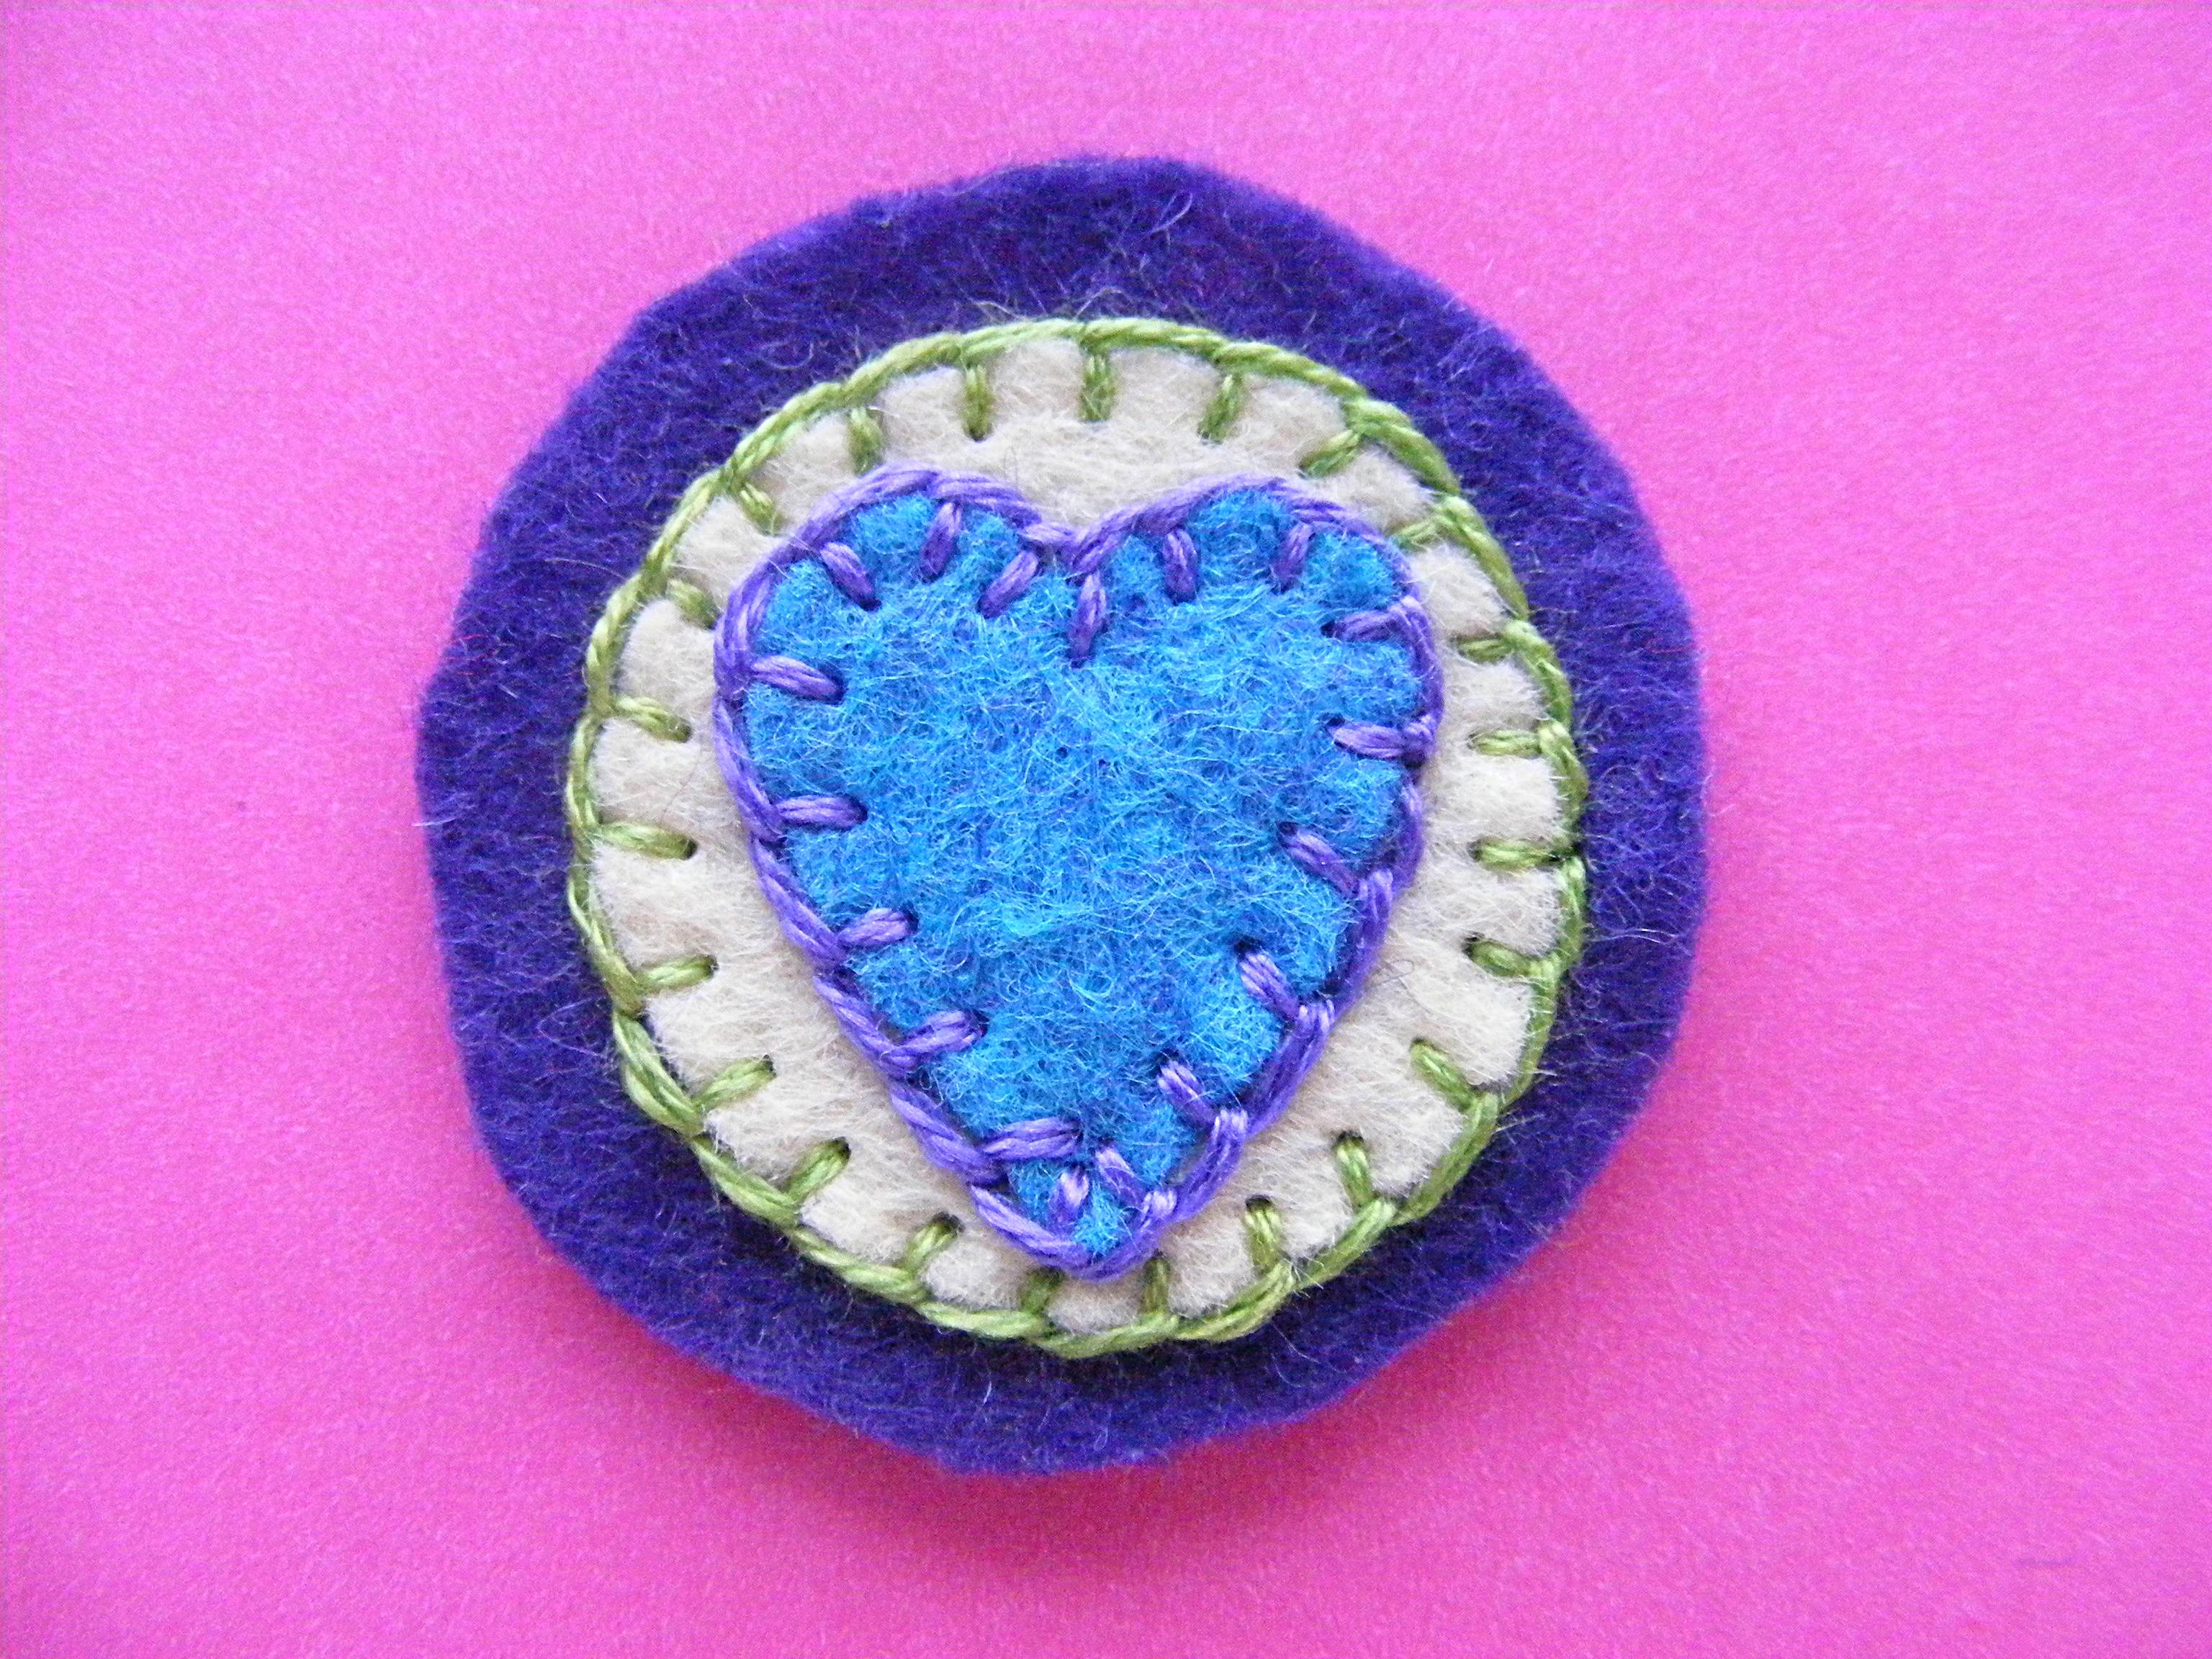
Blanket stitch around the smaller circle.
You’ll be stitching through two layers of felt.
Step 4
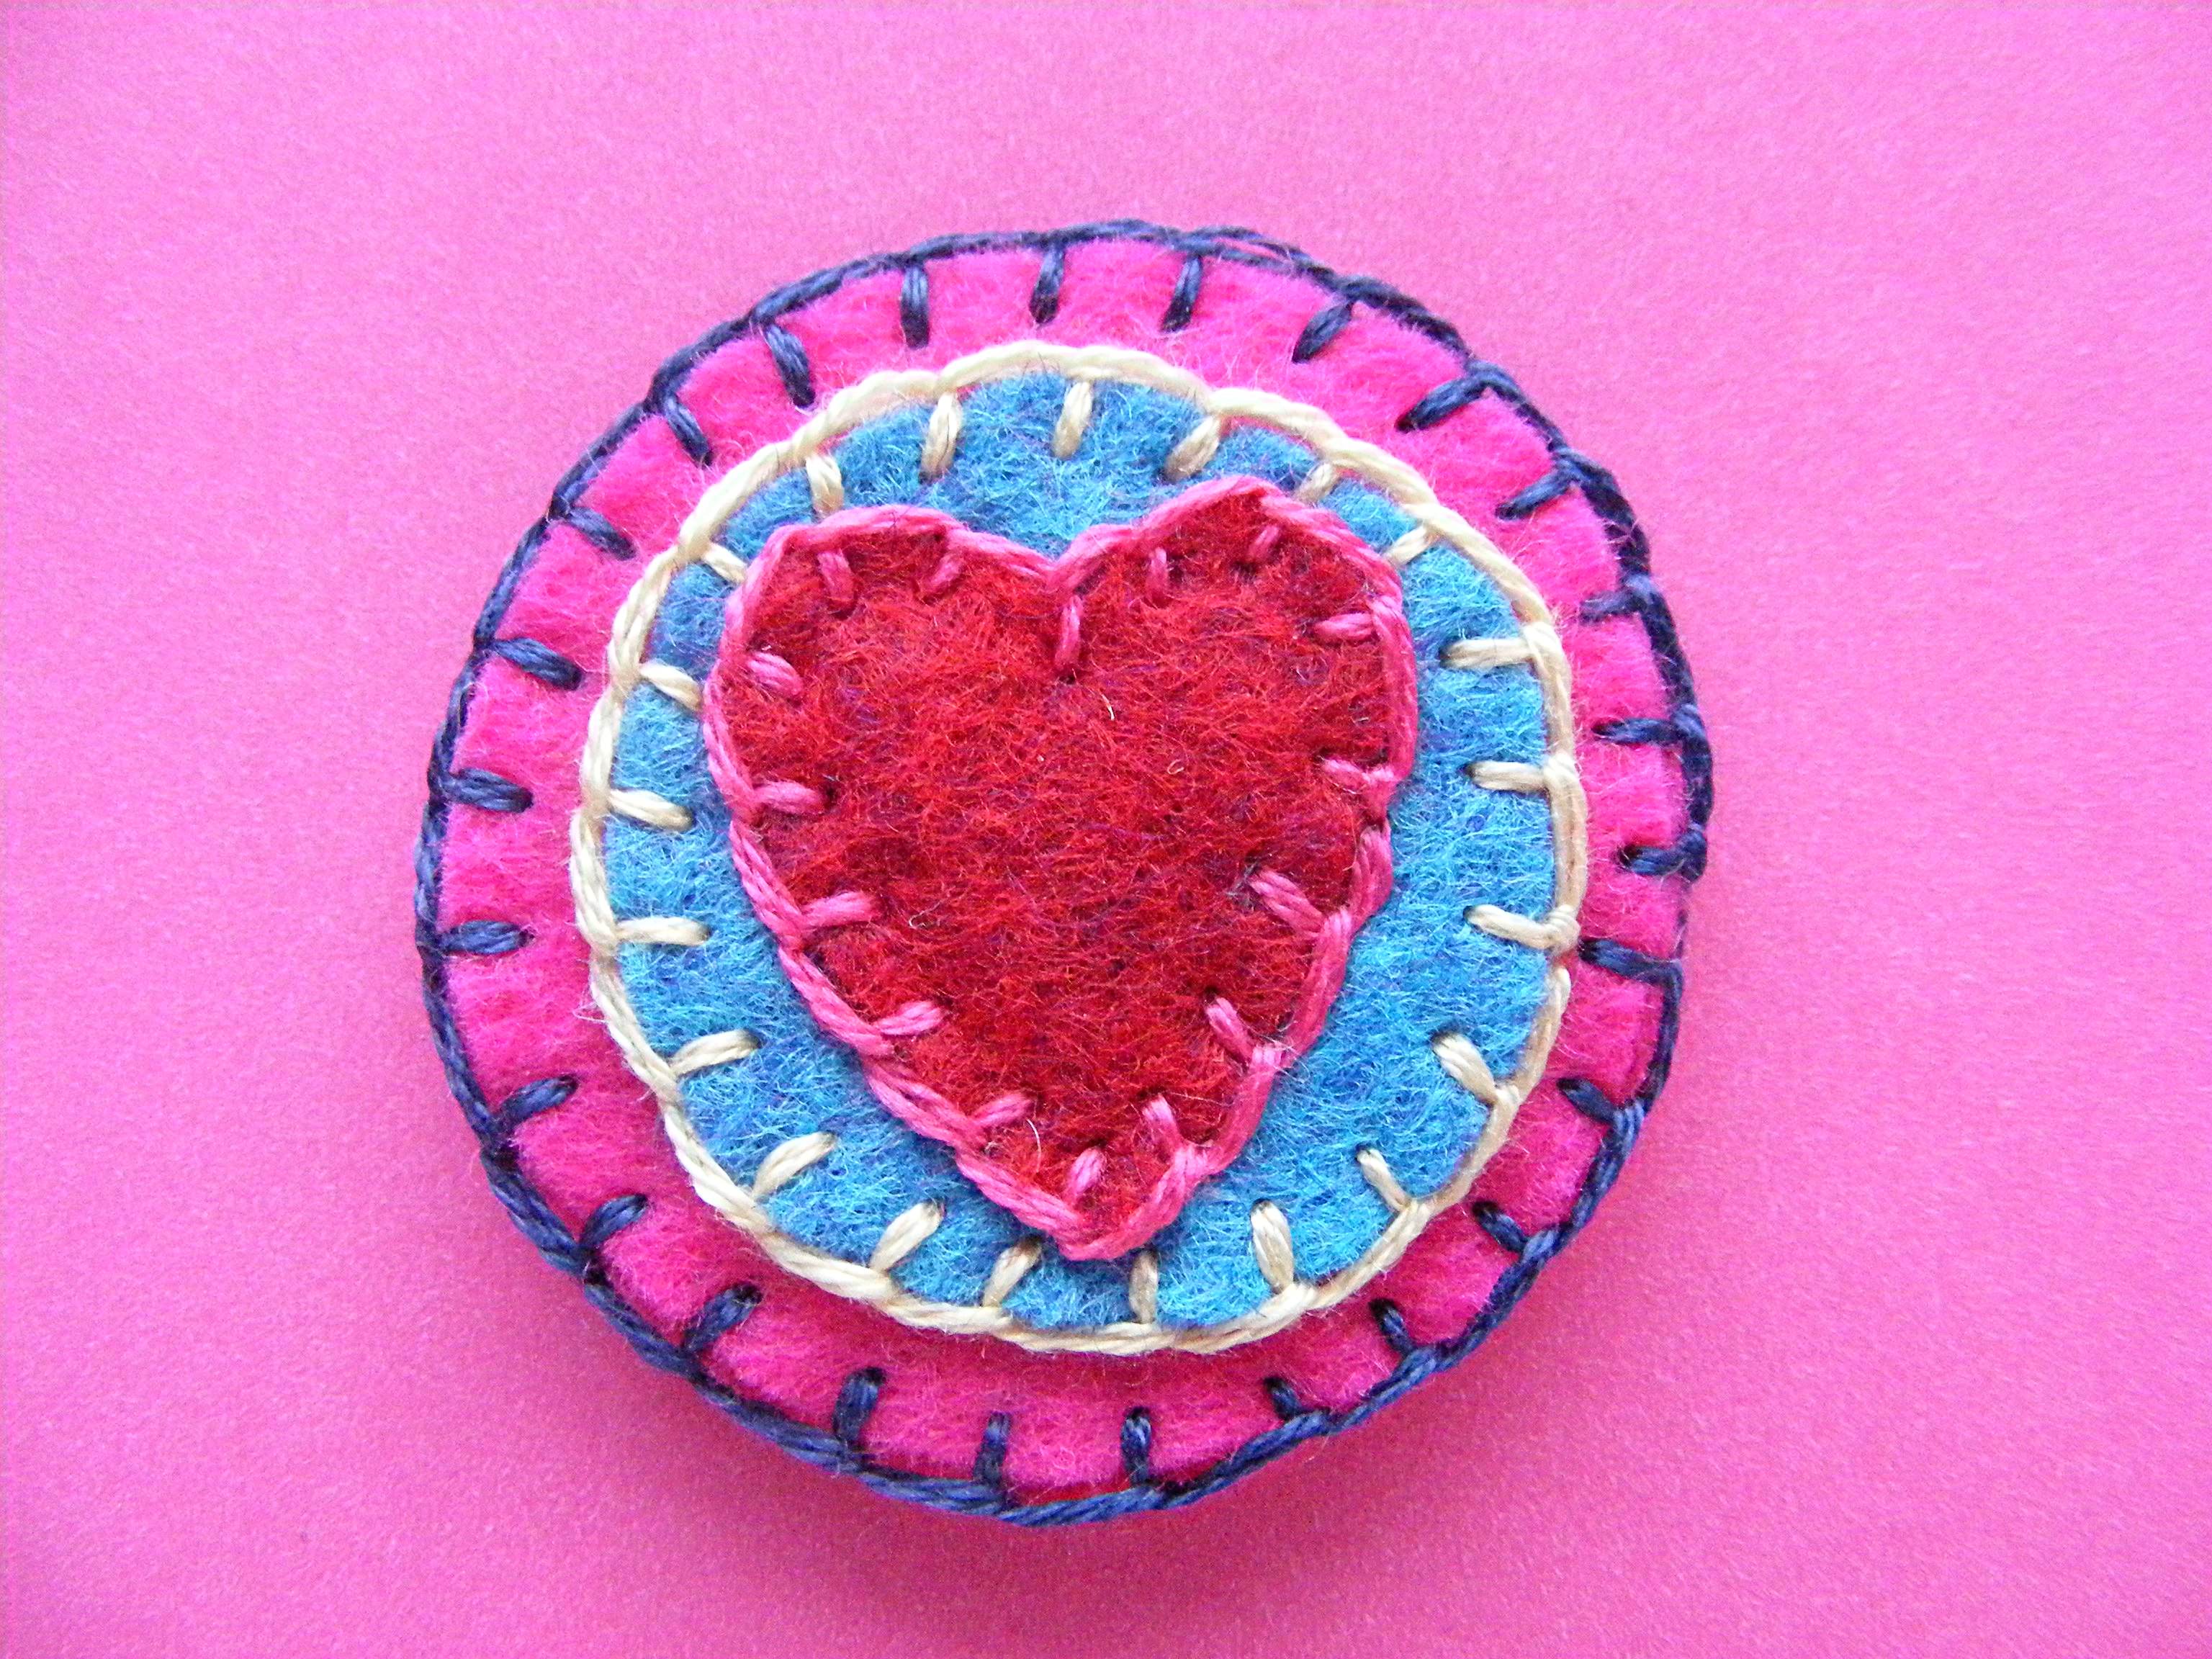
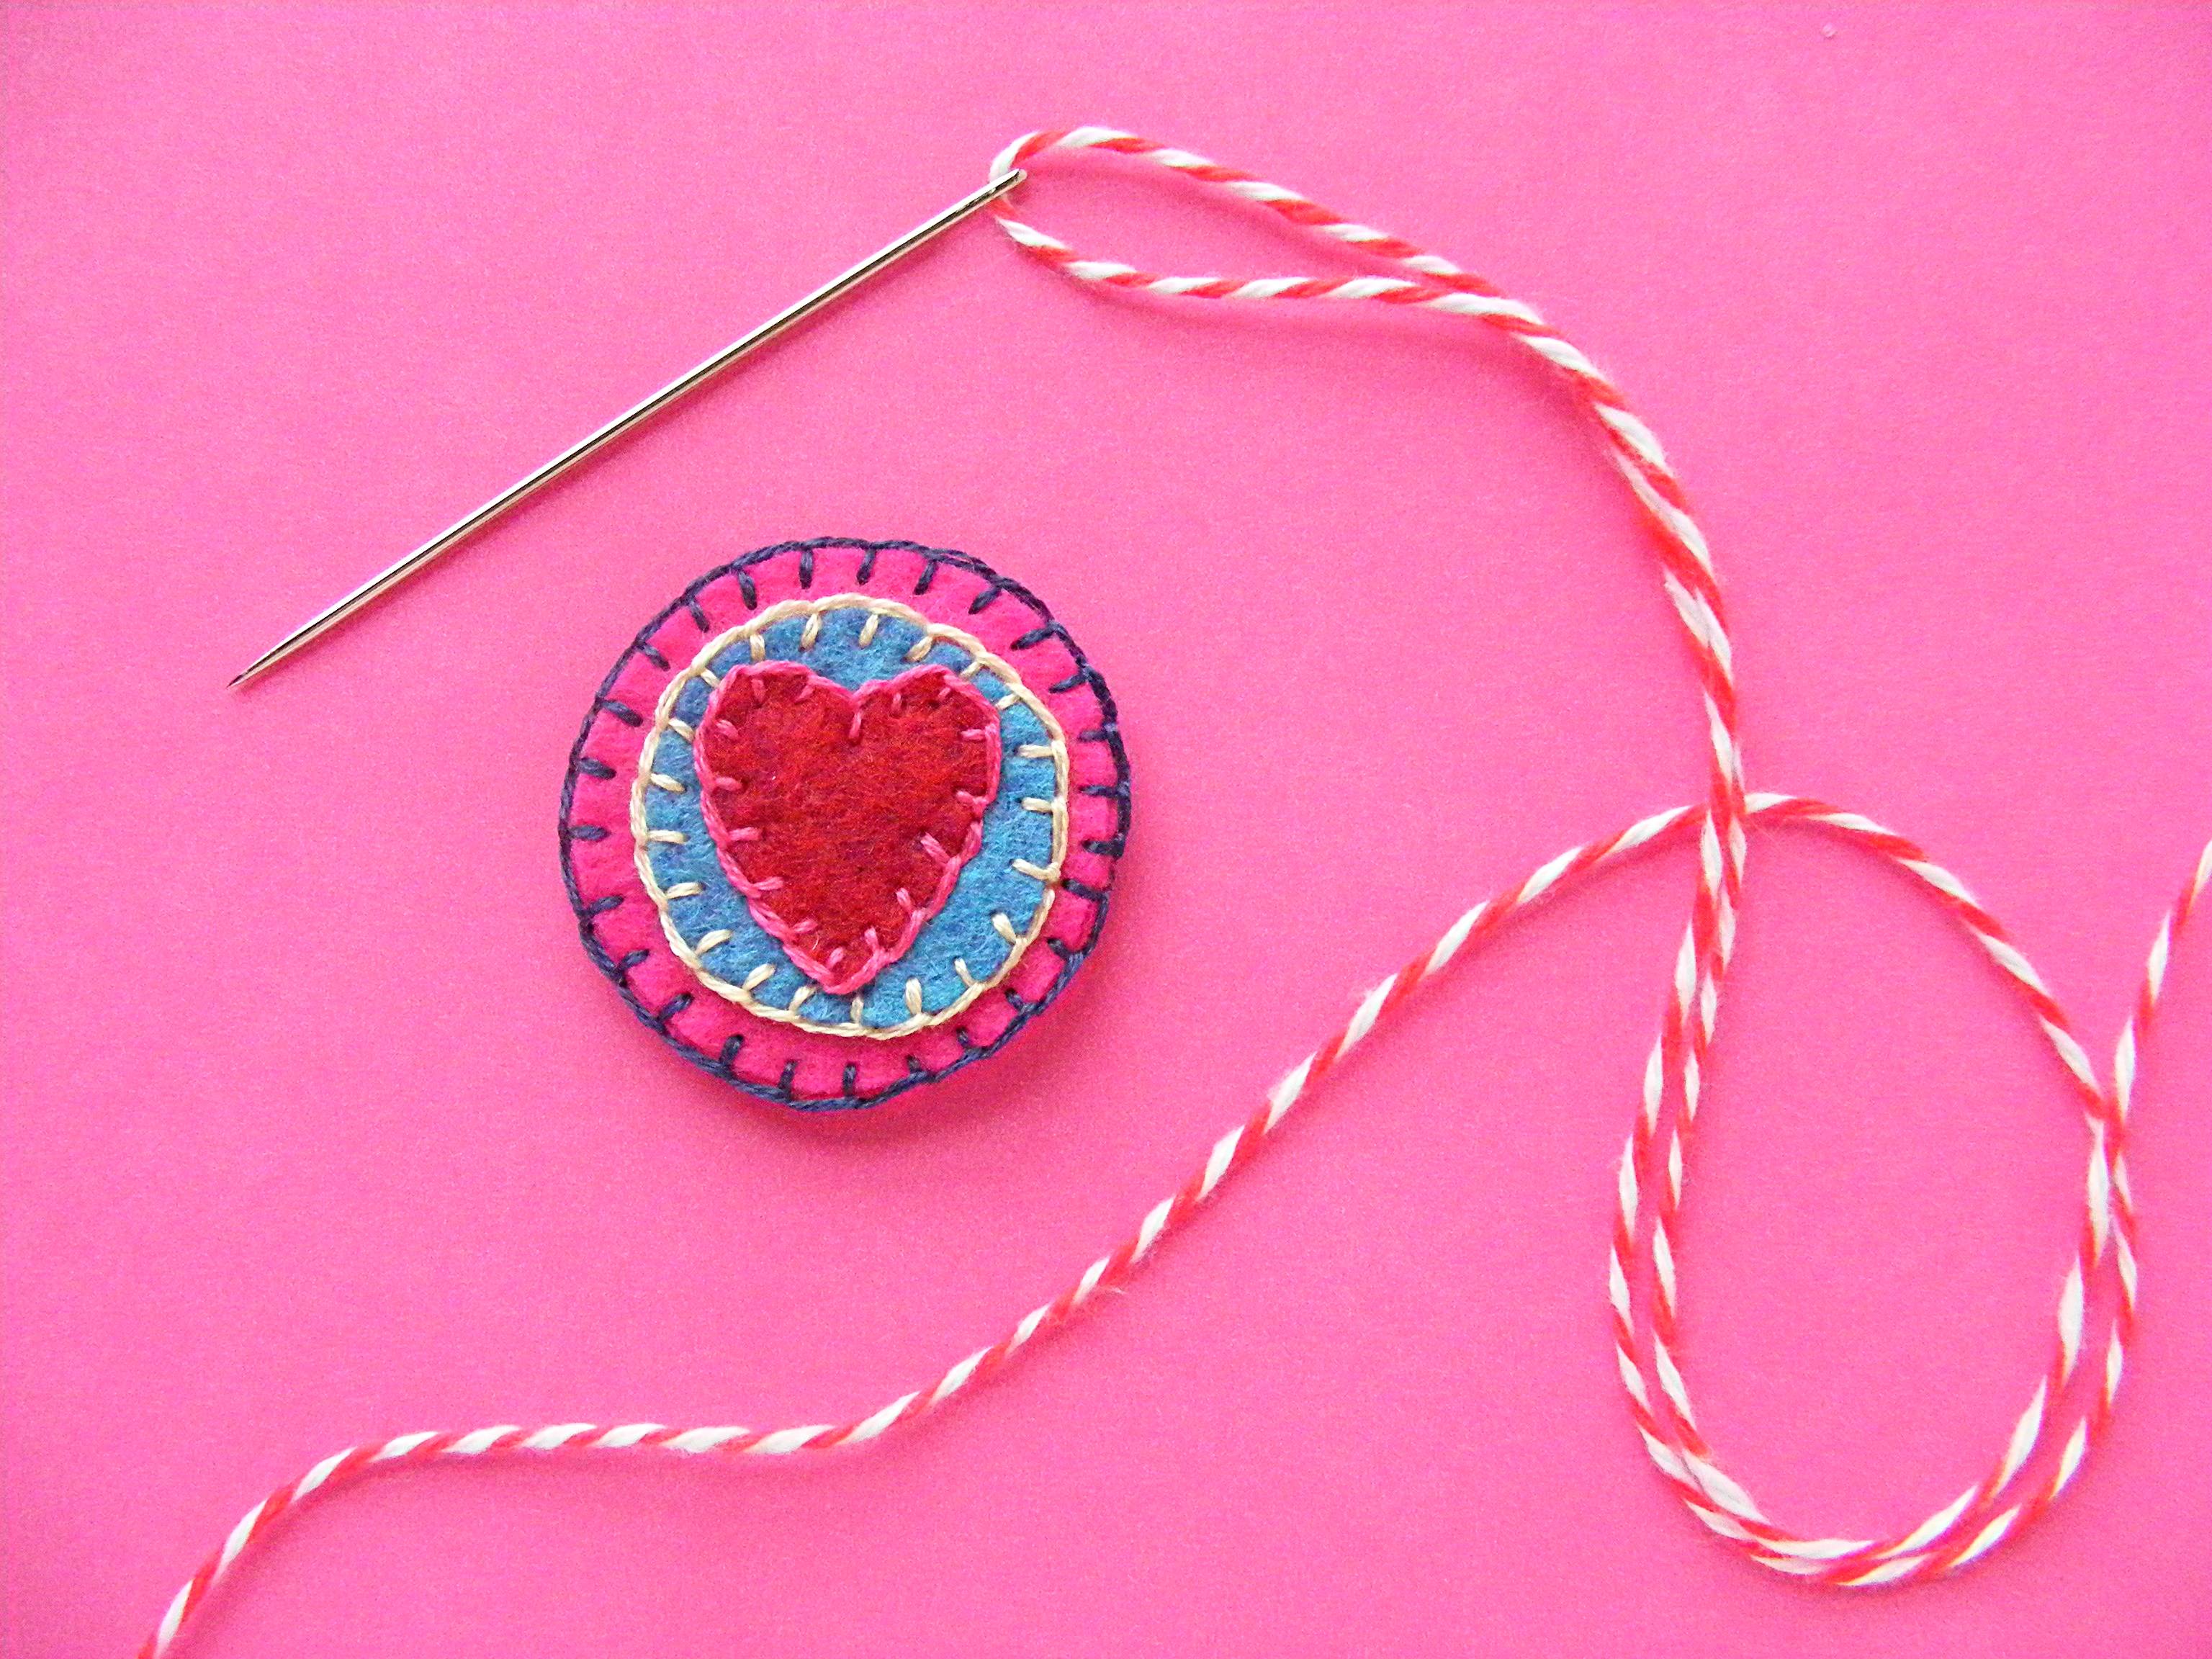
Layer the second large circle on the back of the disc and blanket stitch around the edge of the two layers.
Now you won’t see the back of any of your embroidery. Neat and tidy!
Step 5
Make as many discs as you want.
Each foot of garland needs 9 finished discs.
Step 7
Find a needle that’s longer than your disc is wide. Cut a length of stringing cord - I used one yard of pretty baker’s twine.
Thread the needle with the cord.
Step 8
Thread the needle between the two layers of felt, stringing the disc onto the cord.
Step 9
Continue adding discs until your garland is finished.
Admire your work! Isn’t it pretty?
Now hang it somewhere where it will make you smile every time you see it. :)
Stitch up some love!
Have a great day, everyone!
If you like this pattern, sign up for the Shiny Happy News! Subscribers get a weekly newsletter full of sewing tips and tricks, free patterns, special discounts and more.
I’m happy to share! Especially because this time I feel like I finally got it right. 🙂
Sure, I’ve “decluttered” before – but only with moderate success. This time I swore things would be different – and they were!
The number one change in my approach was a change in my attitude. Instead of asking “What can I get rid of?” I asked “What do I want to keep?”
On the surface that seems like it’s really the same question – but the subtle difference was key for me. First, let’s look at a before photo. It’s not taken from the same angle (it’s actually from the other side of the room) but it’ll give you a pretty clear picture of what things looked like.
And this was a good day! Every horizontal surface is full of stuff. There are plastic tubs stacked under my sewing table and in front of my storage shelves. There are permanent piles of stuff stacked on the corners (out of the way, right?) of my work tables. There is stuff everywhere – and I wasn’t using even close to half of it.
No more!
Here’s what I did. . .
Start with one thing. The experts say to do one room at a time – but even that was too much for me. I tackled one piece of furniture at a time.
Remove everything from that piece of furniture. Stack it on the floor, pile it on a table – whatever you have to do to get down to an empty piece of furniture. As you unload, you’ll spot some things you know you need to get rid of. Bag them up if they’re trash, box them for donating – go ahead and get rid of them now. But know that this is the easy stuff – things like the jar of bobbins that went to a sewing machine I got rid of over ten years ago, or the water damaged tablet of nice drawing paper. This is where I’ve stopped before – the things with an easy reason to get rid of them. This time I went deeper.
Clean it. Clean it really well. Dust it, polish it, vacuum out all the weird nooks and crannies full of Cuddle Fleece fuzz. Make it look (and feel) like a new piece of furniture.
Now – start “shopping” in that pile of stuff. Pull out the things that you actually WANT. The knick-knacks that make you really happy when you pick them up. The supplies that you love to use. I used the word shopping very deliberately. If you were strolling through Joann’s and you saw this stuff – how much of it would you actually put in your cart and buy today? Probably not much.
The best example of this was when I went through my yarn bin. I don’t use much yarn. I’ll crochet something every once in a while, and sometimes I need yarn for hair or a tail – but that doesn’t add up to much. You wouldn’t know that from looking at the huge (overflowing – the lid wouldn’t fit on it) bin of yarn I had. I called Jo in (because she crochets sometimes) and we dumped it out on the floor. We very quickly picked the 5-6 skeins of yarn we actually liked – and got rid of everything else. Yarn in ugly colors, scratchy yarn, fluffy yarn that I loathe crocheting with – it all went away. And I breathed a huge sigh of relief!
Don’t ignore the emotional difficulty. Decluttering like this can be hard because it often means letting go of dreams. I had kept a bunch of small skeins of eyelash yarn (given to me by someone who was decluttering – ha!) because I thought I might someday use them in amigurumi. They’d be cute manes or tails, or be great for little hedgehogs or porcupines. The problem with that is that I don’t crochet amigurumi. I could learn – and I’d like to – but the realistic side of me knows that I probably won’t. Or – to be more precise – I will definitely NOT take the time to learn every single craft I’ve hoarded supplies for for the last two decades. I already sew, quilt, and embroider – I’m very unlikely to also learn amigurumi, knitting, jewelry-making, garment sewing, printmaking, watercolor painting, acrylic painting, and all of the other kajillion crafts I was storing supplies for, just in case I decided to try them out. And if I really do decide to crochet a cute little hedgehog, I will go out and buy the single skein of grey eyelash yarn I will need. None of the 20 skeins I had were grey anyway. 😛
Put the things you really want back where they go. Make sure they’re stored in a way you can easily access them – both to get them out when you want them, and to put them away again when you’re done. No storing things stacked on top of other things!
Move on the the next room/piece of furniture.
I did this over and over again, touching every single thing in my studio. And I mean every single thing. I went though my pencil cups and got rid of the hard pencils, the pencils with hard erasers, the pencils that were too short to get out of the cup without digging. I touched every single thing in the room and asked myself if I really wanted it. Not if I could think of a reason to keep it – you can always think of a reason to keep something. The question is – Do you really want it?
Two more decluttering tips for you. . .
Be fast. You know in your gut if you really want something. As soon as you touch it – pay attention to your gut. Do not start listening to your head. Your head will start telling you, “Well – you could use it for this or that or some other thing.” That’s what you told yourself when you picked it up at a rummage sale 10 years ago and you haven’t used it yet. You’re probably not going to. Get rid of it! If you find yourself dithering, you don’t really want it – but for some reason you feel bad about getting rid of it. Which brings me to. . .
Be ruthless. Some of your best decisions will be the hardest. Letting go of some things means letting go of dreams or might-have-beens. Sometimes there’s a lot of guilt attached – money spent on supplies for a craft you ended up not enjoying, time and money spent on a partially-finished project that’s been sitting on the corner of your sewing table for years. Sometimes people you love give you things you don’t like very much, but you feel like you need to keep them. It’s all hard – but I feel so good about every tough decision I made! Especially getting rid of the things that had guilt attached to them – talk about burdens lifted!
And now – I work in a lovely, inviting space that I’m not embarrassed to show you. My supplies are easy to reach and easy to put away. I don’t have to clear off a corner of my table to work on a project.
I have never experienced this before. Never!
But I love it – and I find that it’s spreading. I recently started on my kitchen – one cabinet at a time – and the results are fantastic. I can’t wait to finish that room and move on to my closet! I’ll have to move more slowly – decluttering my studio was basically a full-time job for a week – which means the results aren’t quite as dramatic, but they’re soooo satisfying. 🙂
So there you have it – my tips for how to declutter a craft room. Have fun!
Here are handy links to all the posts about quilting tools and supplies.
You already know I’m a huge fan of dyeing with Kool Aid… but the colors can be a little limiting. So I had to try my hand with the Icing Dyes!
Advantages of Icing Dye
Icing dye, as the name suggests, is actually meant for dyeing. Granted, it’s usually food and not yarn… but it means that there are a wide range of colors that are really quite nice.
The dyes also have the property that you can mix them together with fairly predictable results, which isn’t necessarily true of Kool Aid.
The main disadvantage is that you’ll need to add vinegar to your dye bath to get the color to set. That’s not too big of a downside!
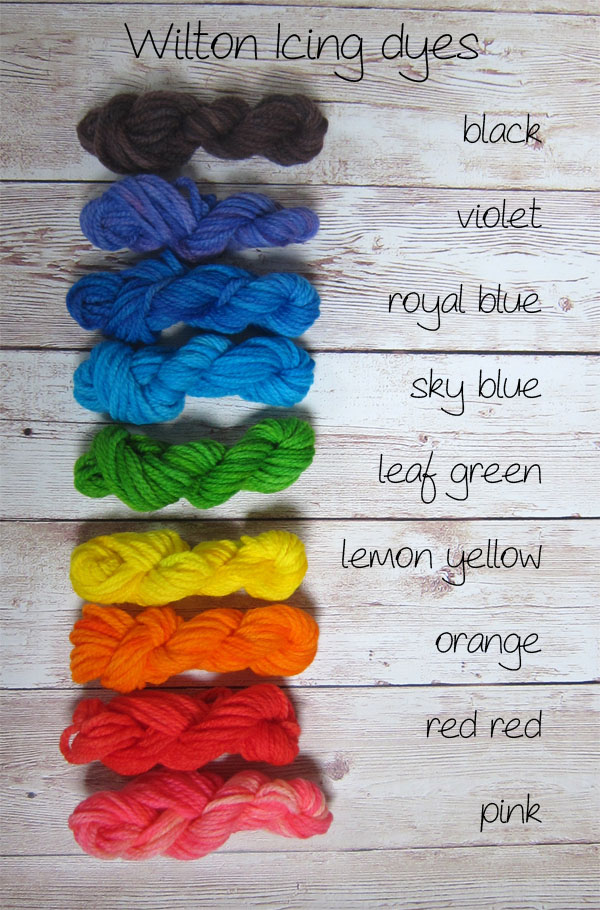
Wilton Icing Dye Color Card
For each color, my recipe was:
8 yards of white worsted weight yarn
1/8 tsp of Wilton Icing Dye
2 T vinegar
1/4 cup boiling water
And here’s how the colors look!
I’m so excited about the possibilities! These are the colors straight out of the jar… you can mix the colors to get even closer to what you want.
Notes on Dyeing
These colors were all produced with the same strength of dye. Experiment with adding less dye for more subtle colors.
Purple is notoriously difficult. It’s hard to tell from the photo, but the blue & red tones separated out quite a bit. I love the look, but you’ll want to always test swatches if you want a certain look.
A true black is very hard to achieve. I’ll play around with adding a higher intensity of dye.
Always do a test swatch! These 8 yard skeins were just perfect, you can wind them yourself for playing!
Have fun!
Here are handy links to all the posts about yarn. . .
I have three pincushions I use all the time. I keep one at my sewing machine, one at my ironing board, and one at my work table. The ones at my ironing board and work table tends to empty as I work, and the one by the sewing machine tends to fill up, so I just switch full ones for empty ones as needed. And by having several pincushions at all the places I pin and unpin, I’m never looking for pins or letting them pile up on the table.
The needle cushions are another of my favorite things. I keep one with commonly used needles at my work table, one with weird needles at my sewing table, and another one with commonly used needles downstairs by the sofa where I do a lot of hand work.
I used to have a bad habit of sticking needles into the arm of the sofa (and leaving them there), sticking needles into my clothing (and leaving them there) and occasionally mistaking my thigh for the arm of the sofa and sticking them there. No more!
And that’s it! My favorite solutions for common craft supply storage issues. I hope you enjoyed the tour through my studio this week! I’m back from vacation on Monday and I can’t wait to get to work in my awesomely tidy space!


 Or this?