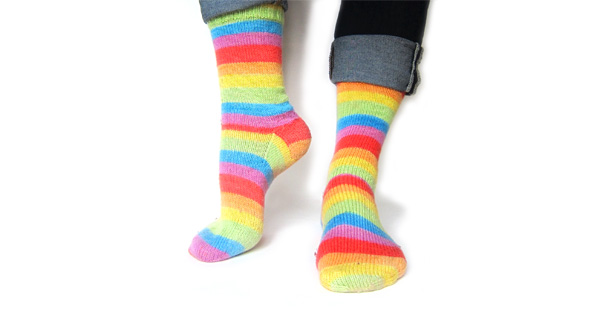
If you watched my most recent Coffee with Stacey, you’ll know that I absolutely love knitting socks from self-striping yarn.
My go-to sock yarn, Knit Picks Felici (shown above), has been discontinued. Self-striping yarn is hard to find… it’s difficult to dye and some beautiful ones are stunning but not suitable for socks.
So I thought it would be fun to post a list of delicious self-striping sock yarn!
I love this cute felt gingerbread man ornament – with his dapper pinstriped pants and his fancy snowflake buttons. 🙂
The pattern includes suggested felt colors to make chocolate and sugar cookie versions. Wouldn’t it be cute to make a bunch with different colored outfits and string them together into a garland?
This is the fifth ornament in the Christmas Club collection. Here are all five so far. . .
The club is closed now, but you can still get all the patterns!
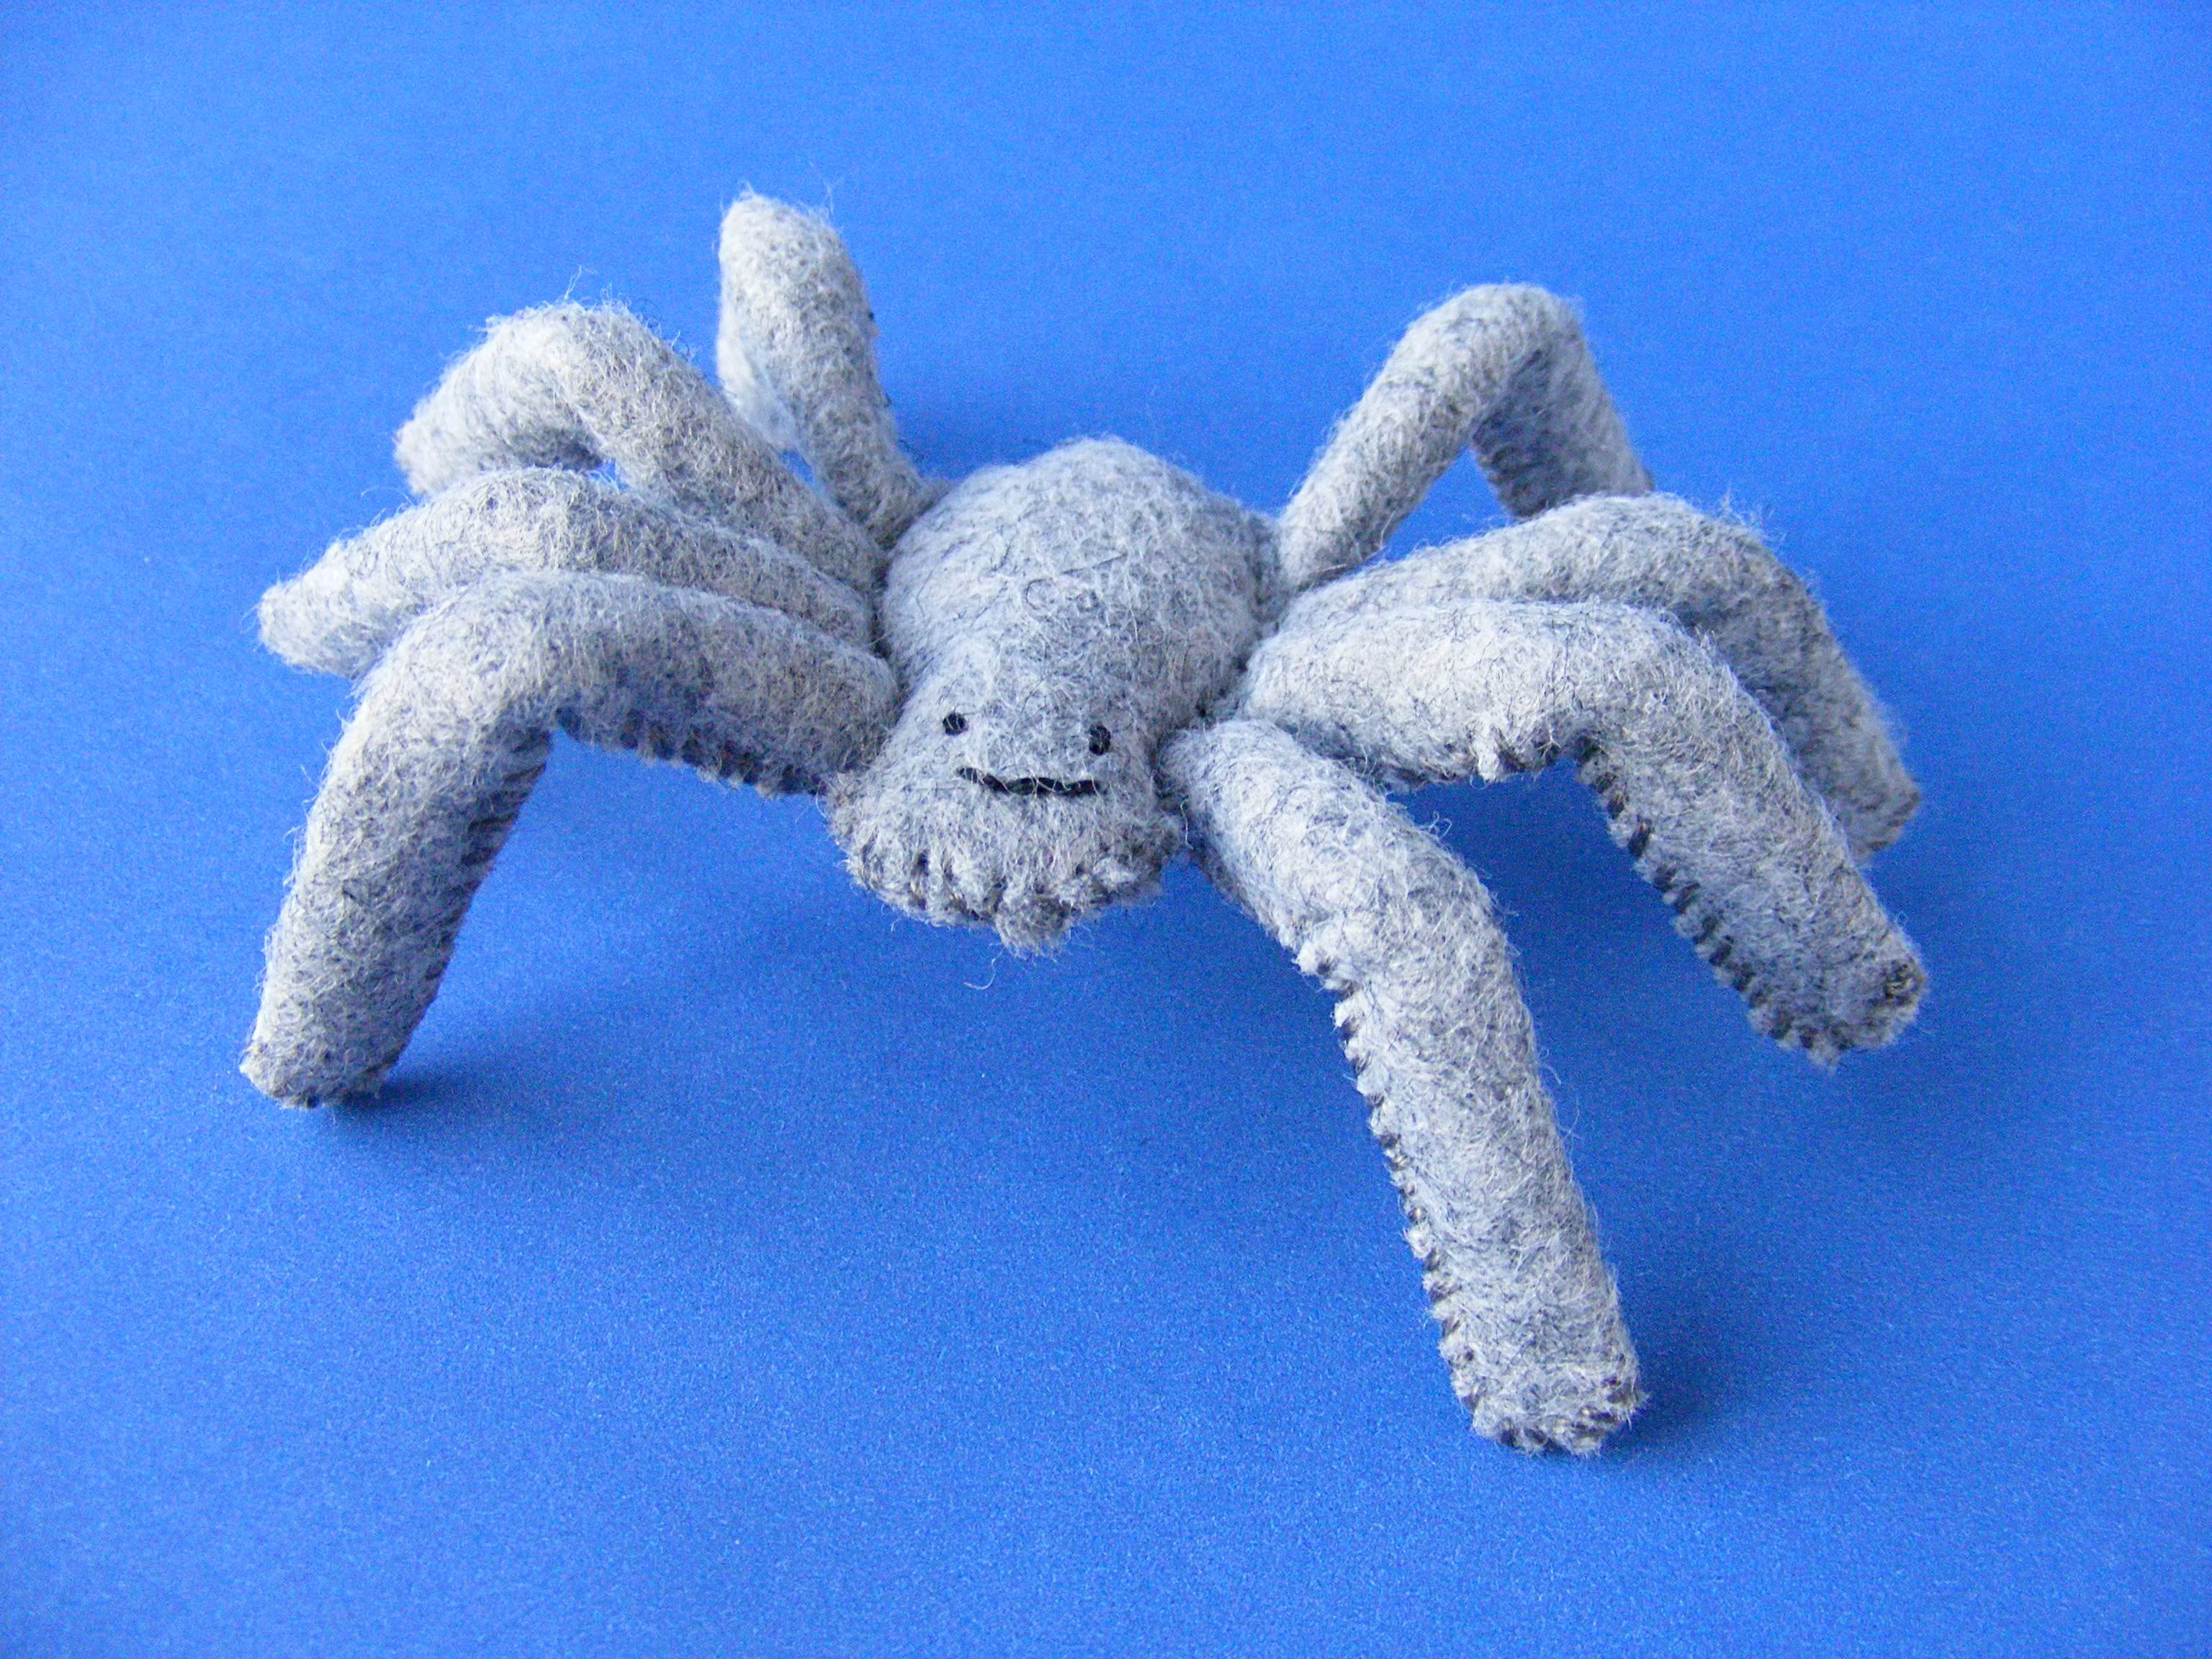
I originally designed this spider as a best friend for Nellie the Pig. She was made of light grey felt with a friendly smiling face – not scary at all. This is the perfect little spider to send up the water spout when you’re singing The Itsy Bitsy Spider with a group of preschoolers. 🙂 You can see that spider here.
I named her Aranea after one of Charlotte’s daughters who decided to stay behind with Wilbur.
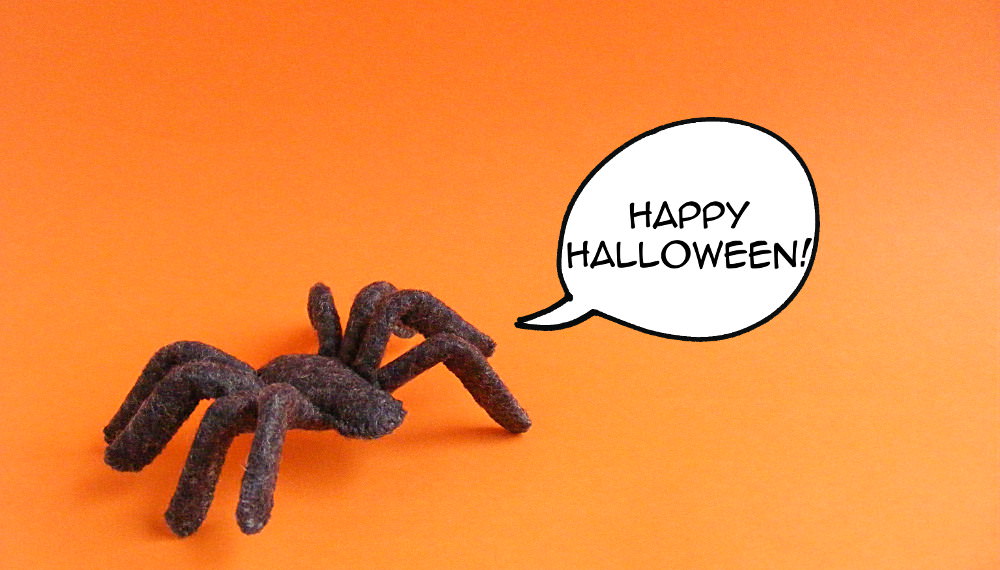
However – I decided that a spider pattern just wouldn’t be right without a slightly spookier version. I wanted to show you another version that would be perfect for Halloween decorations – something you could scatter around a table. 🙂 This version skips the embroidered face and uses Licorice felt for a slightly-hairy-looking, almost-black spider.
This is definitely NOT the spider to use with your preschool class. It’s surprisingly realistic looking! Jo suggested adding a hair clip to the bottom of the body for a spooky barrette.
And now the pattern is available in the shop! It’s a PDF pattern, so it will be delivered instantly by email.
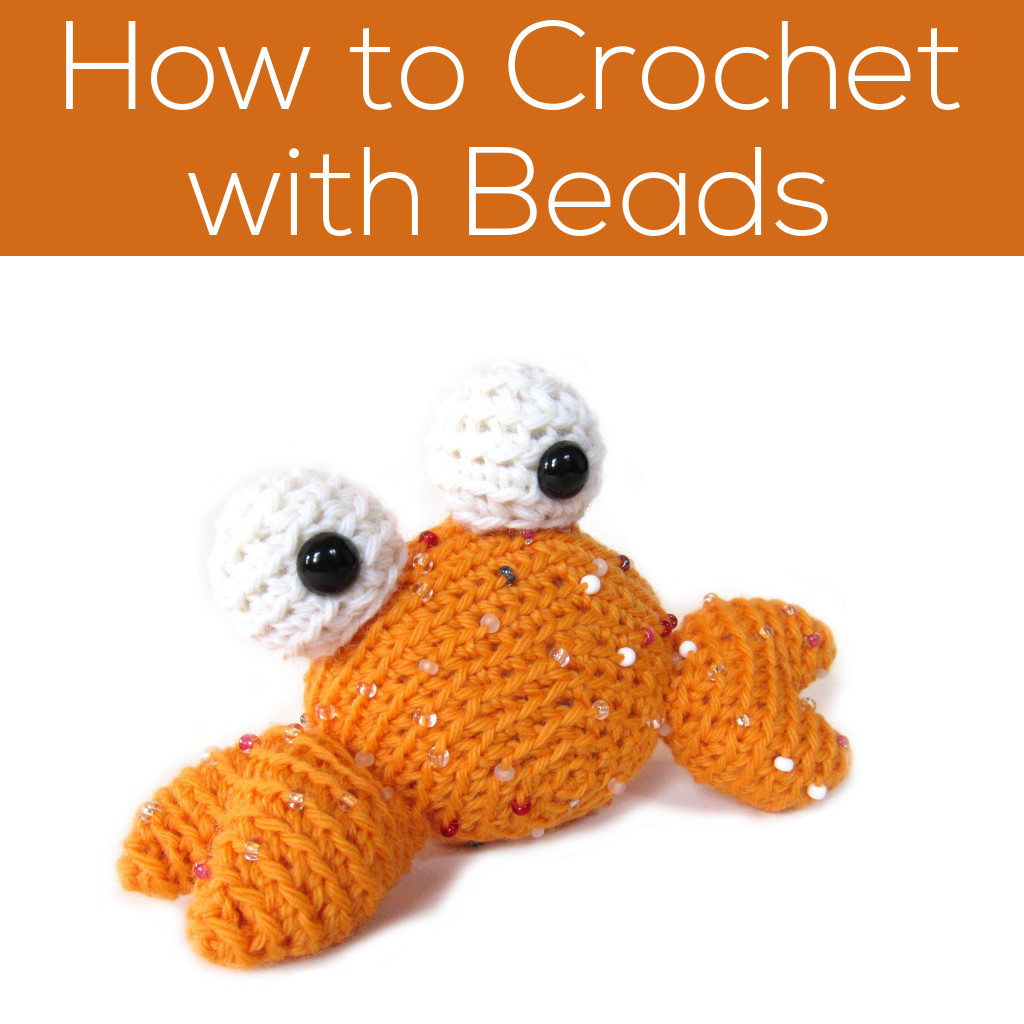
Crocheting with beads can be tricky. Many techniques call for adding the bead to the stitch as you go, which isn’t great for traveling, and the bead doesn’t sit nicely.
Want to see the beading technique I developed?
In this technique, the beads sit nicely on the front loop of the piece, so we’ll be crocheting through the back loop only. Here’s how to do it:
Step 1: String your beads
I’m using size 6 beads on worsted weight yarn. You’ll want to use the size beads that work for your yarn.
You’ll want to thread all of your beads onto your yarn. To do this, you might find a bead threader to be helpful! Stick the tail of your yarn through the big loop of the bead-threader:
Make sure about an inch or two is through the threader. Now, thread beads on the tip of the threader!
The bead may take a little bit of tugging to pass over the doubled-piece of yarn, but then it’ll slide easily down the yarn.
Thread all of your beads, and then you’re ready to start!
Step 1: Crochet with beads!
To place a bead, single crochet… and on the stitch before you want to place a bead, pull the bead through the stitch as you do the final ‘pull-through’ of the stitch:
This is the trickiest part. You may have to use your fingers to fidget the bead through, especially if you crochet tightly.
Now, make sure the bead lies on the front half of the stitch (in front of your hook):
Finish the next crochet stitch, and your bead will lay right on that front loop! So much fun!
There’s no magic color-changing trick… I just took this photo on a different stitch!
Let’s see it in action!
I know it can be hard to learn from photos sometimes… so I made you a video!
Look how cute!
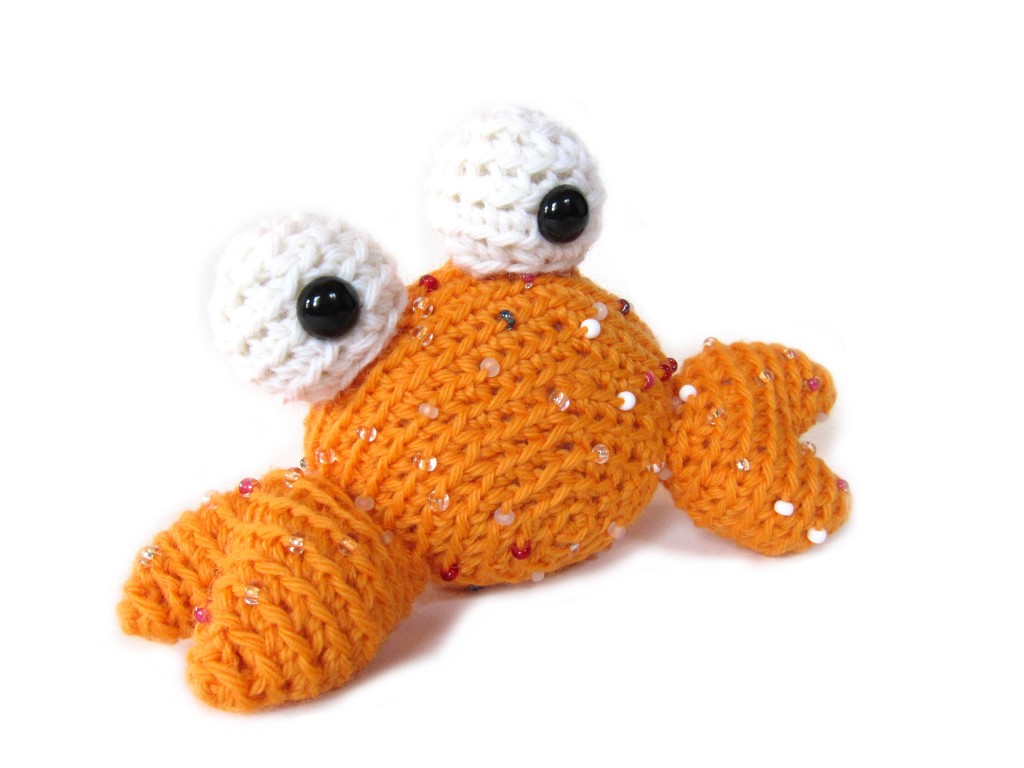
This is Tipper the Tiny Crab. To make him, just string the beads onto the yarn, and crochet the beads using the technique described above! You’ll follow the instructions for Tipper as they are written in the pattern, but you’ll place beads randomly, about every 5-8 stitches.
Here are handy links to all the posts about faces and details. . .
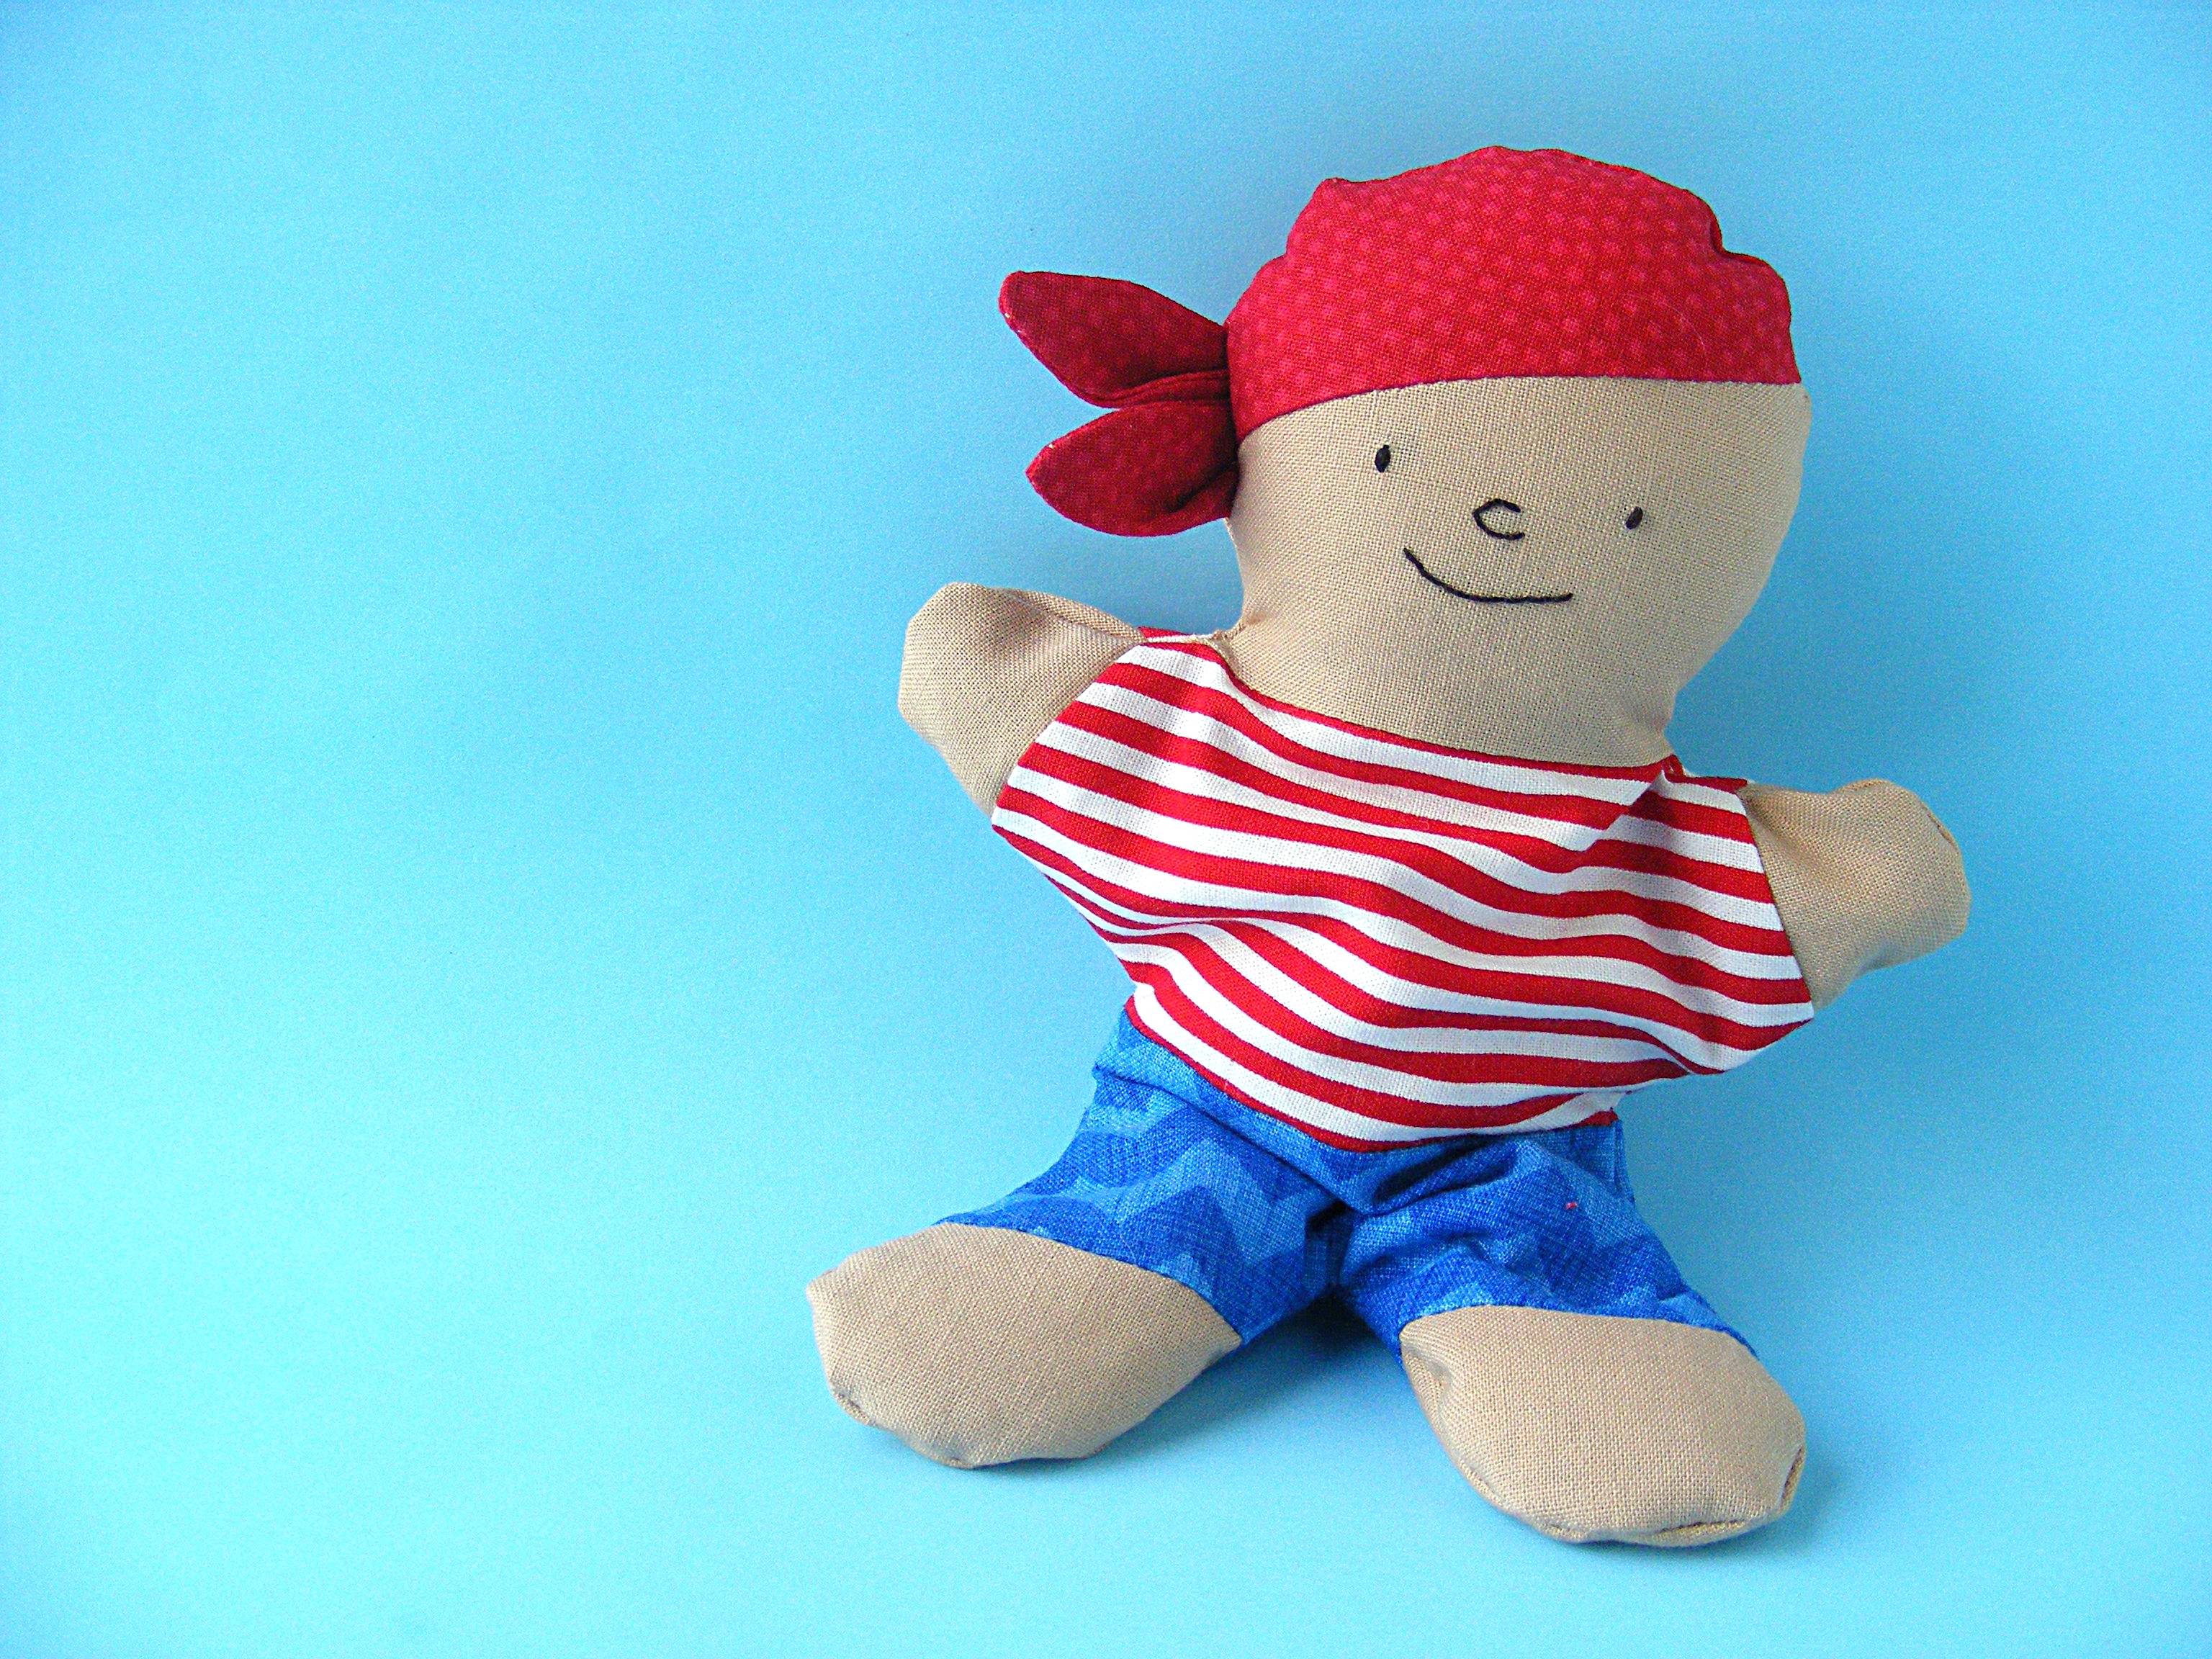
Materials (find links to my favorite tools and supplies here)
scrap of skin-colored fabric
scrap of red fabric for the bandana
scrap of striped fabric for the shirt
scrap of blue fabric for the shorts
embroidery thread for the face (I used Sulky 12wt. cotton thread in dark brown)
plastic pellets (I like PolyPellets Weighted Stuffing Beads)
polyfill stuffing (I like Soft Touch Polyfil Supreme Fiberfill)
Use 1/4 inch seam allowance for all sewing.
Step 1
Cut out all materials as directed on the pattern pieces. You should have. . .
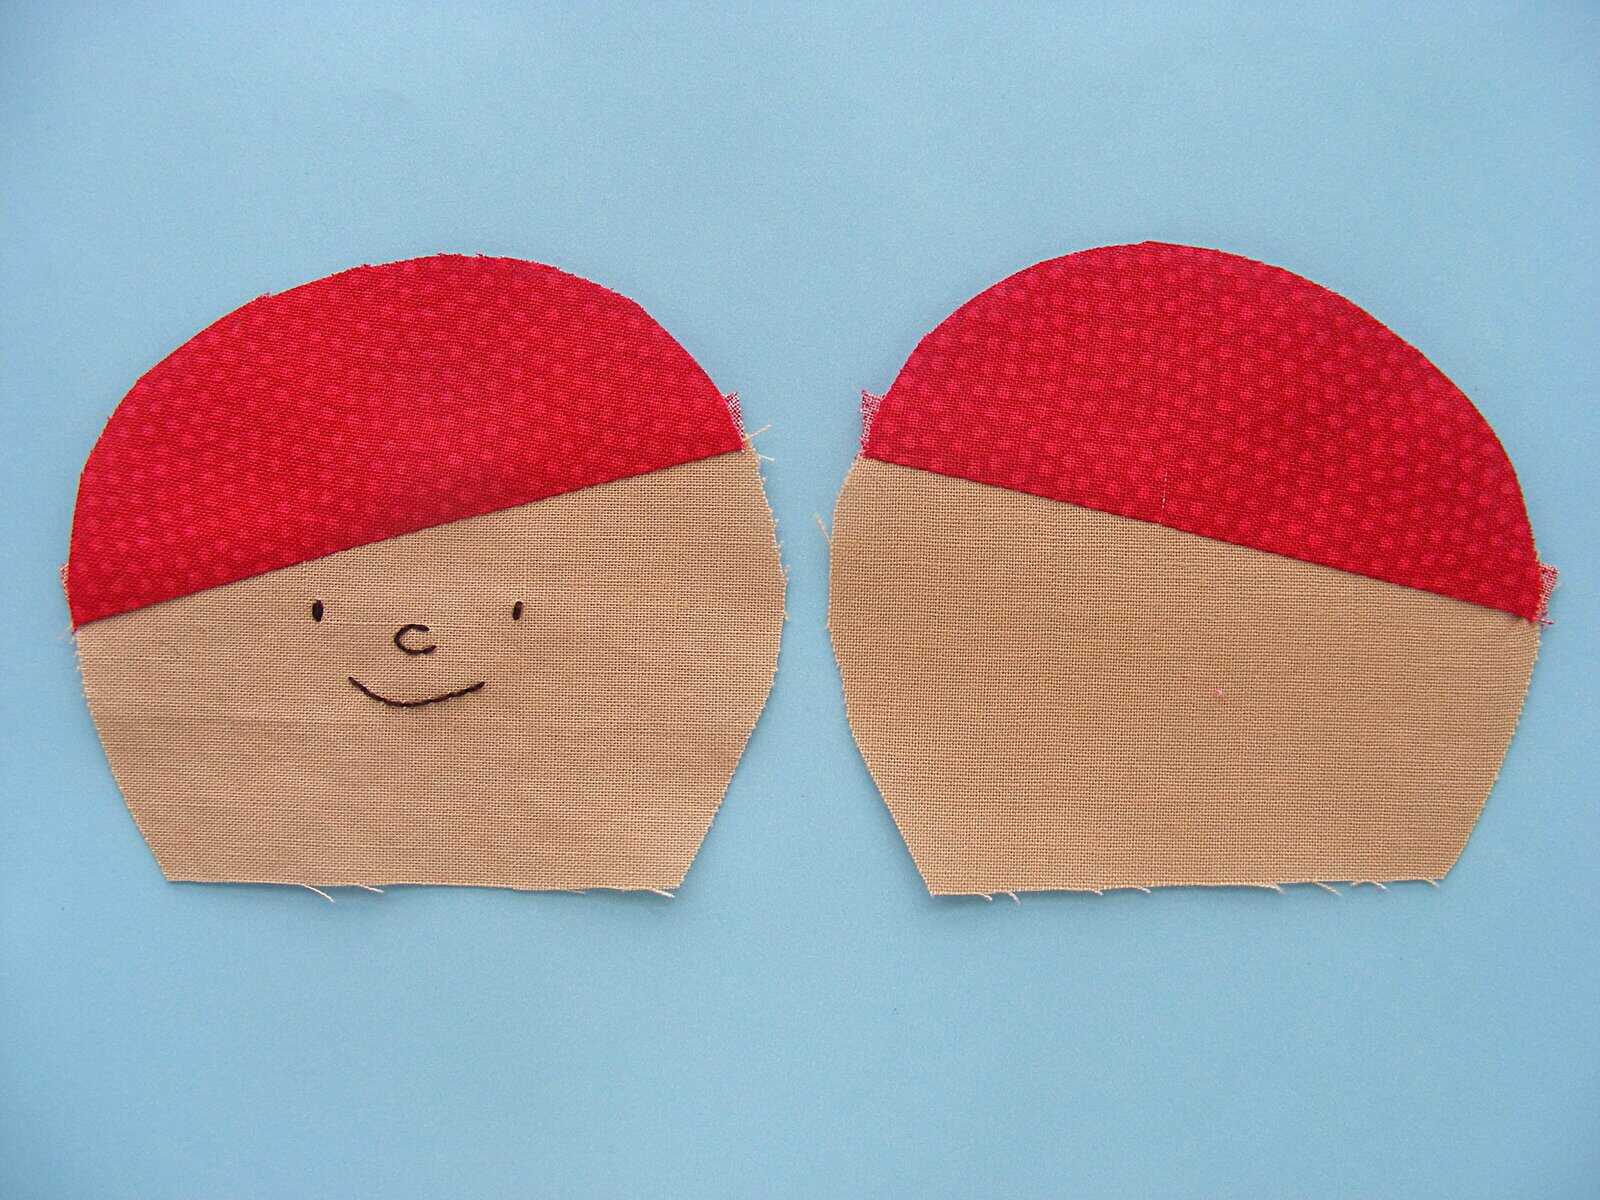
2 head pieces (1 reversed)
2 bandana pieces (1 reversed)
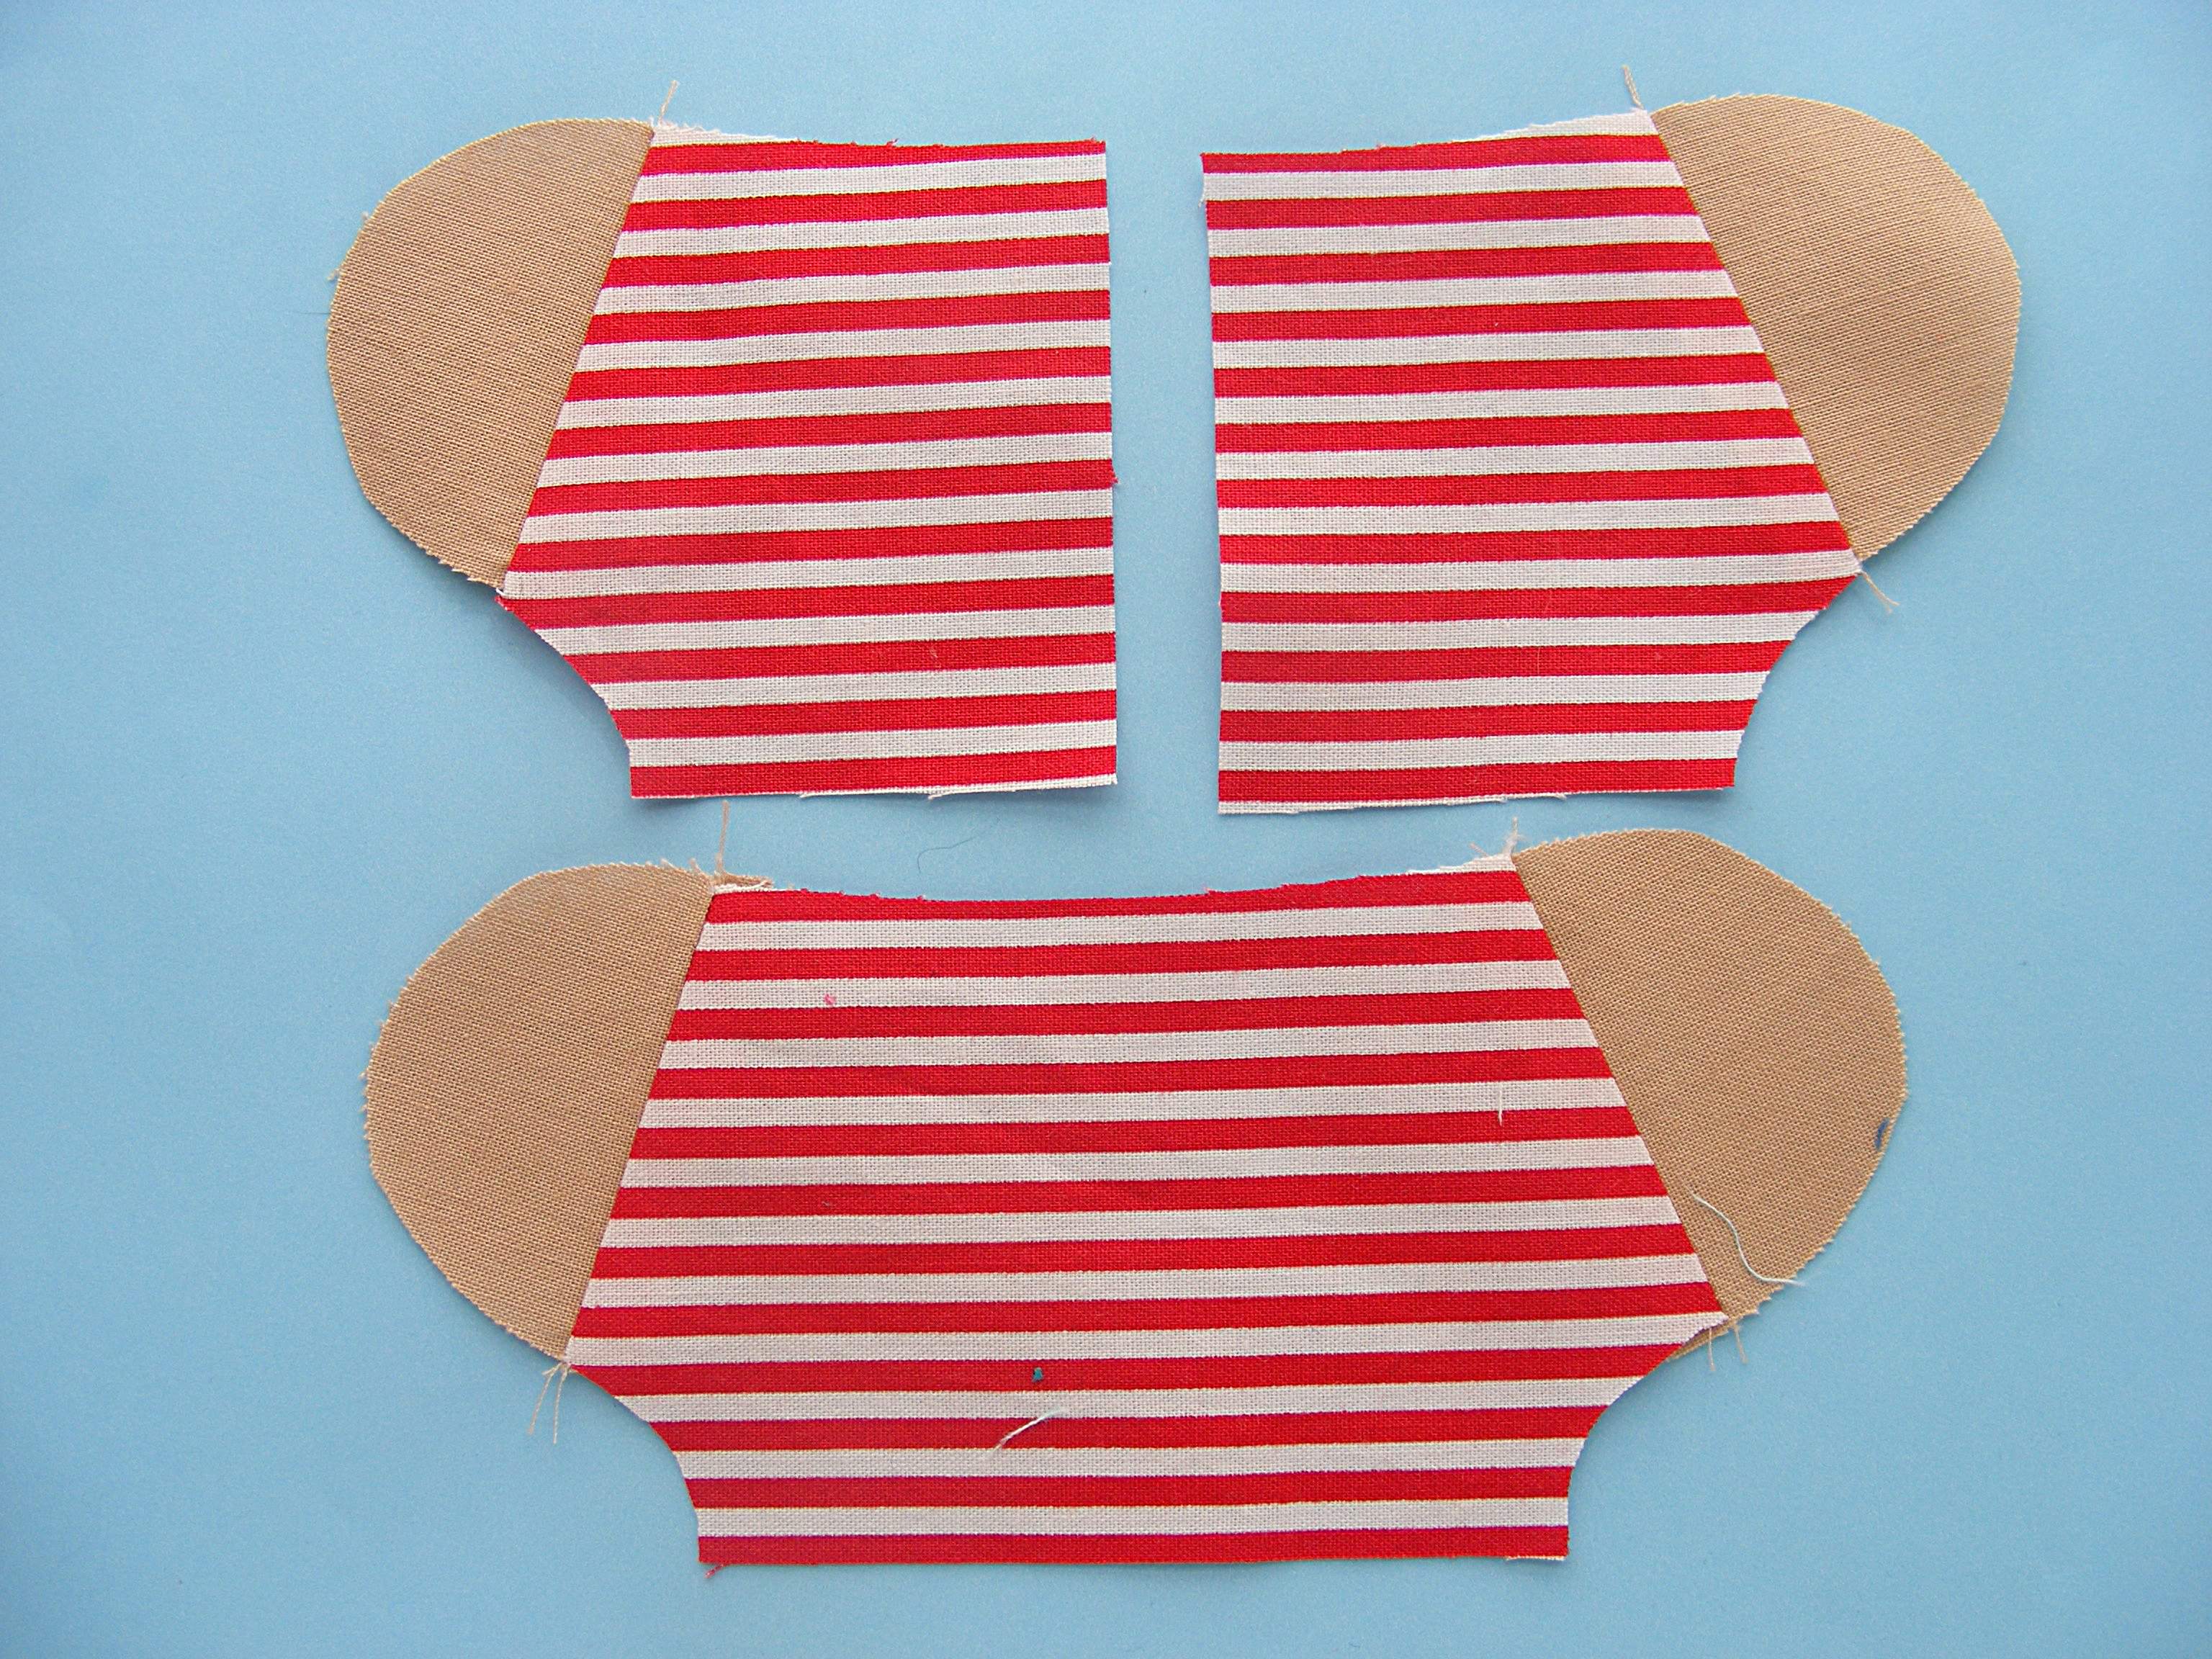
1 shirt front piece
2 shirt back pieces (1 reversed)
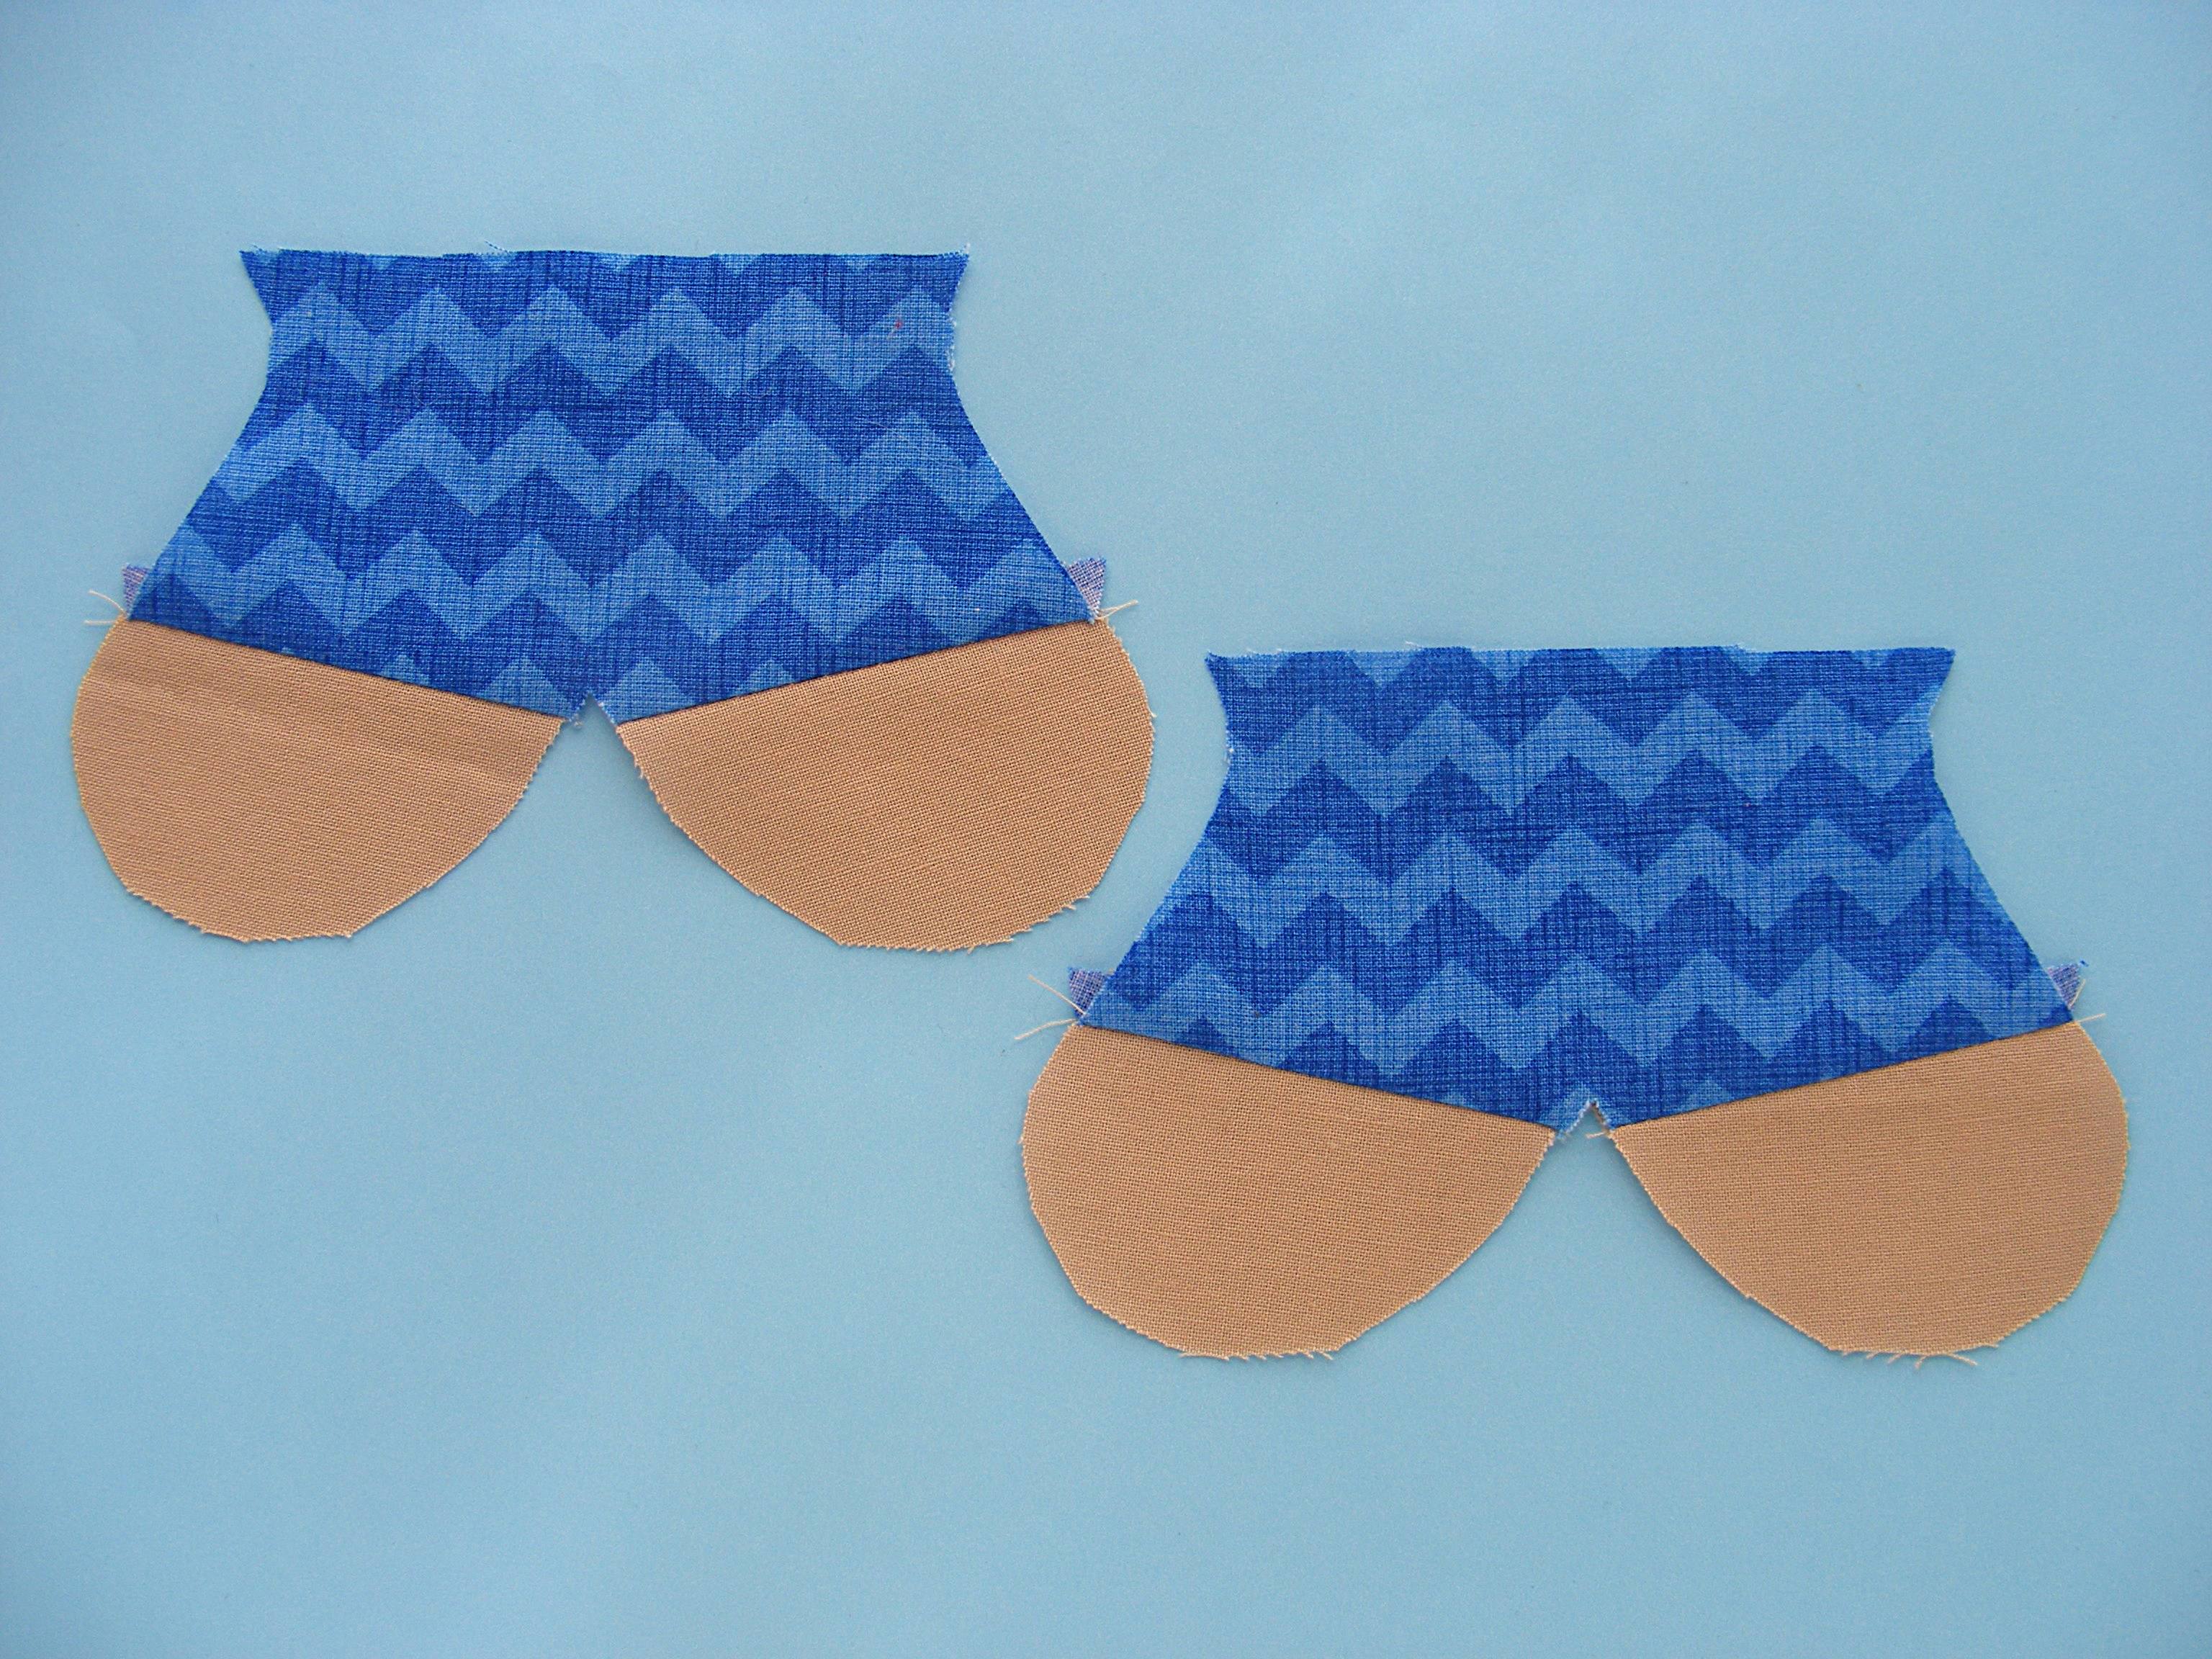
2 pants pieces
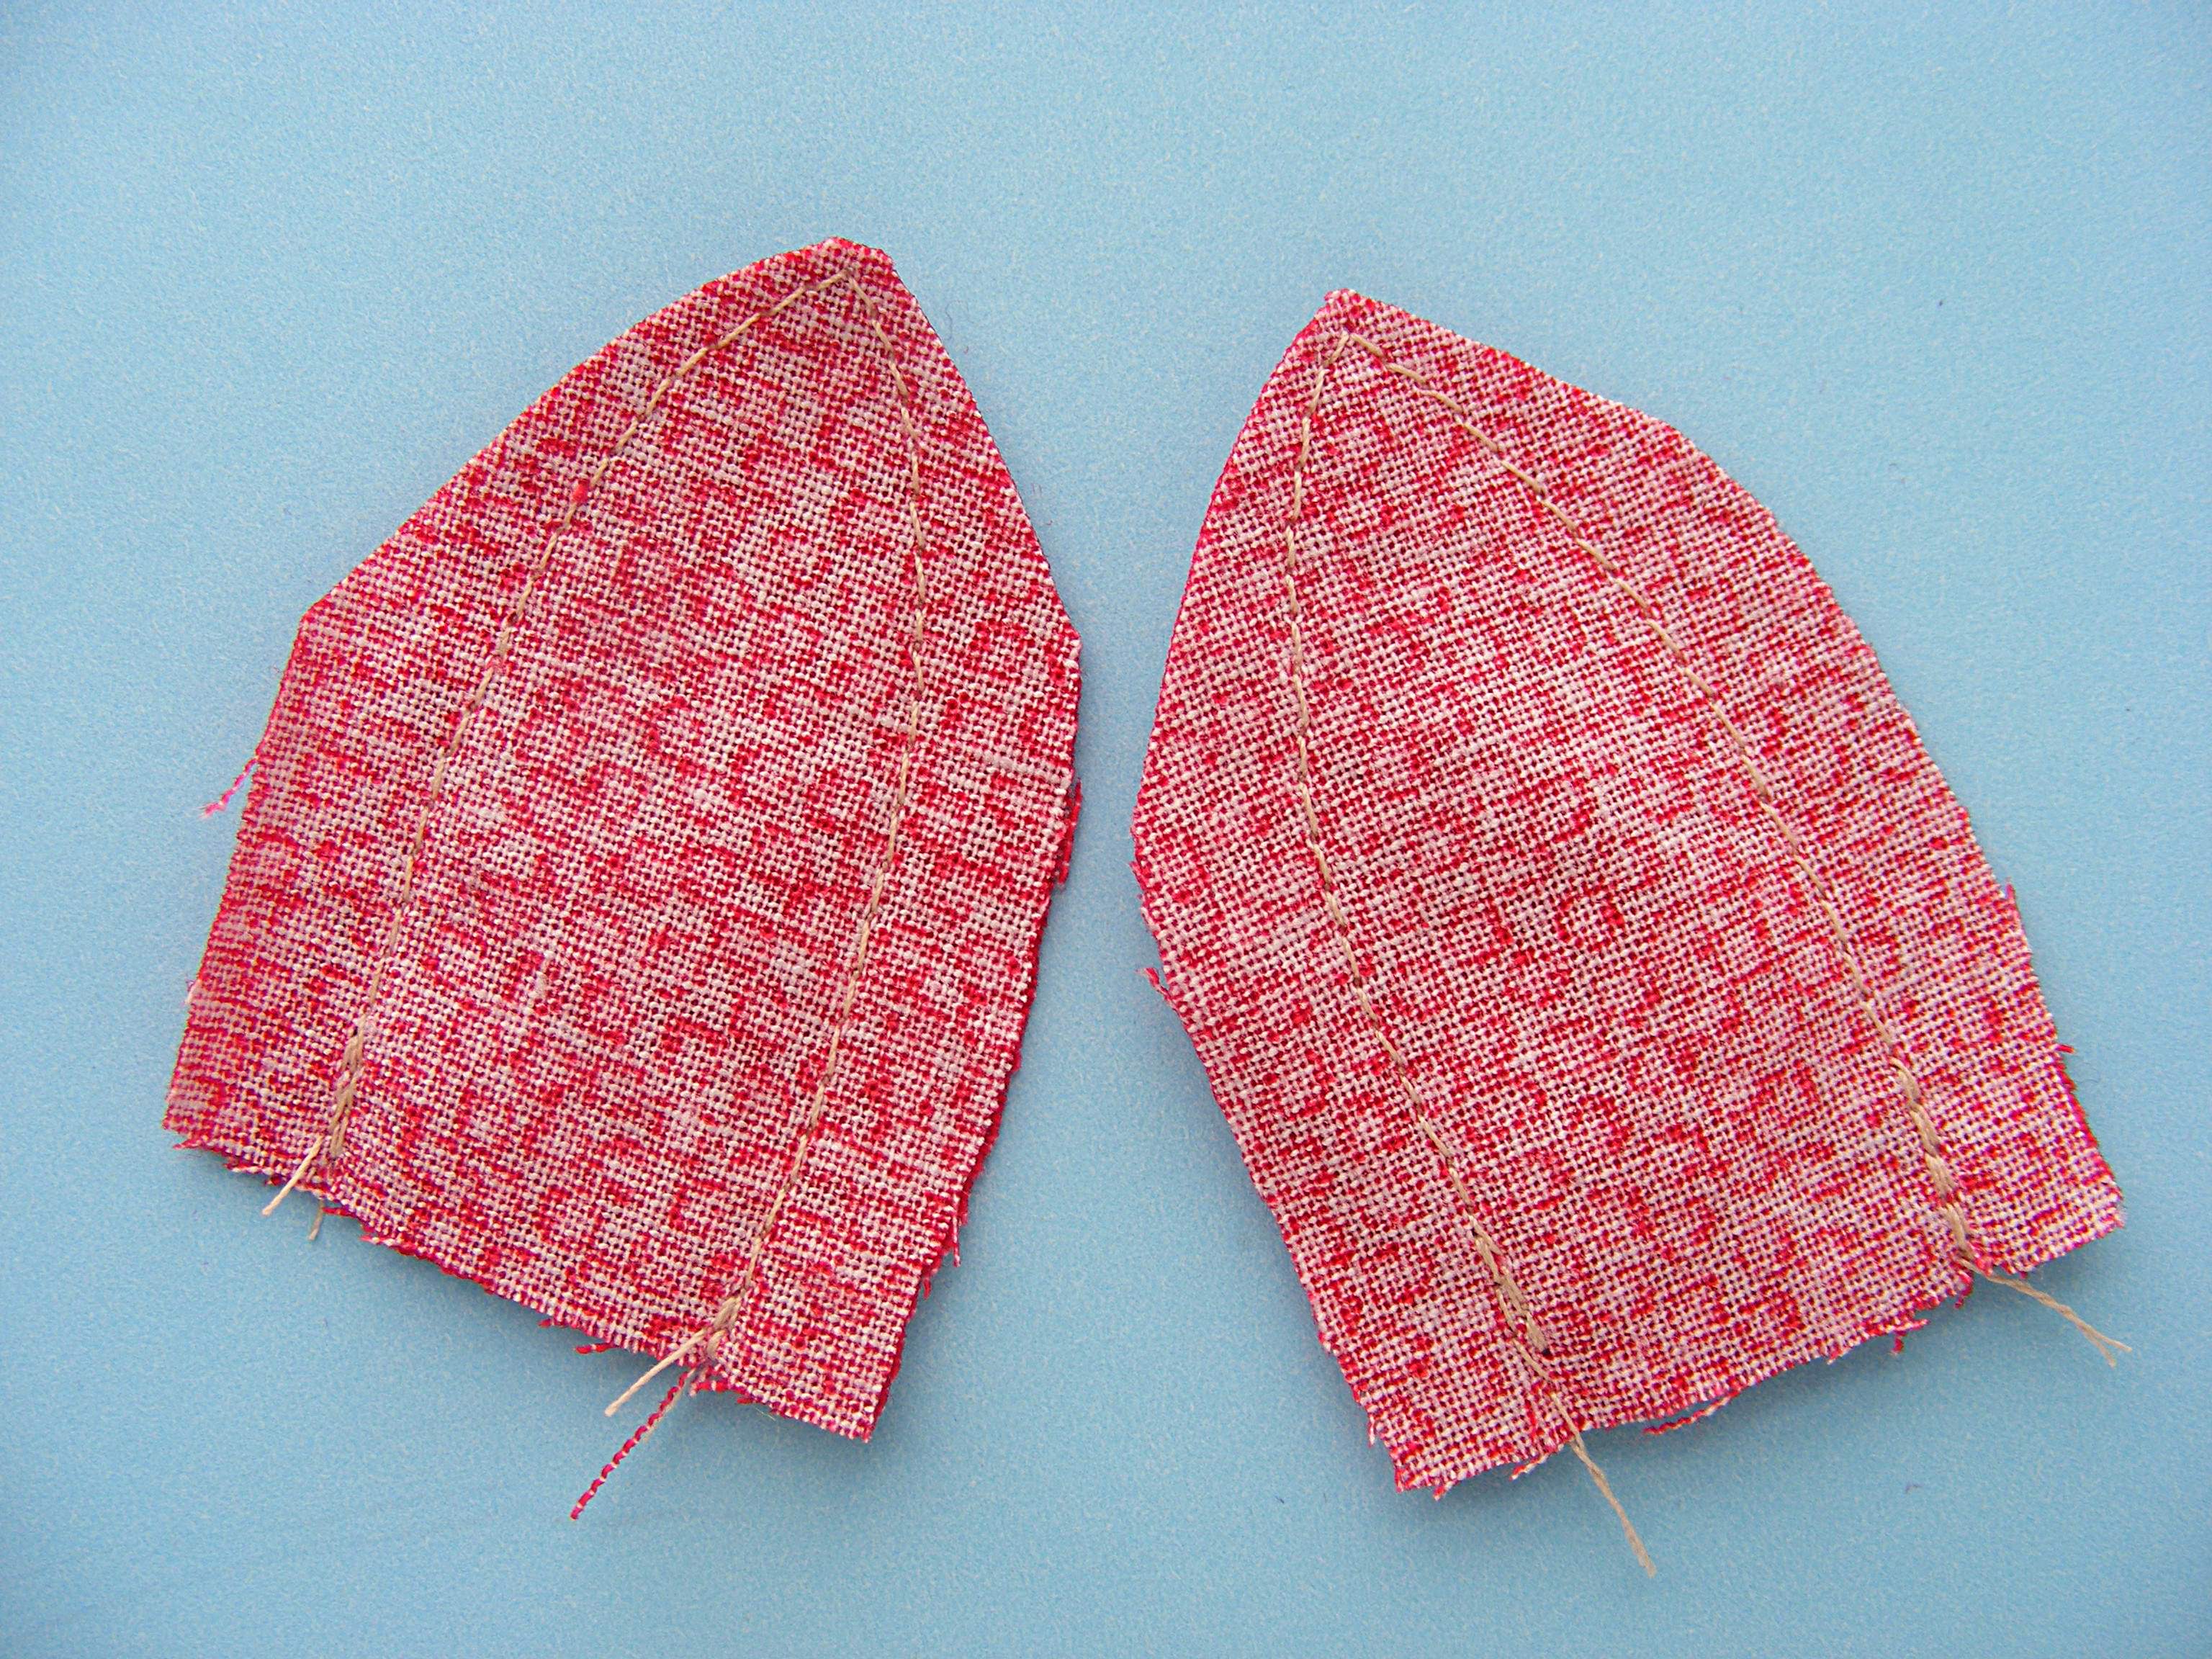
4 foot pieces (2 reversed)
4 hand pieces (2 reversed)
4 bandana knot pieces
Step 2
Trace the face onto one head piece.
Embroider the nose and mouth using backstitch and a single strand of Sulky 12 wt. embroidery thread (the equivalent of two strands of regular embroidery thread).
Fold the ends in half, stack the two pieces mostly on top of each other and sew them together 1/4 inch from the raw edge.
It doesn’t have to be pretty - it just has to keep them folded and together. :-)
Set the bandana knots aside.
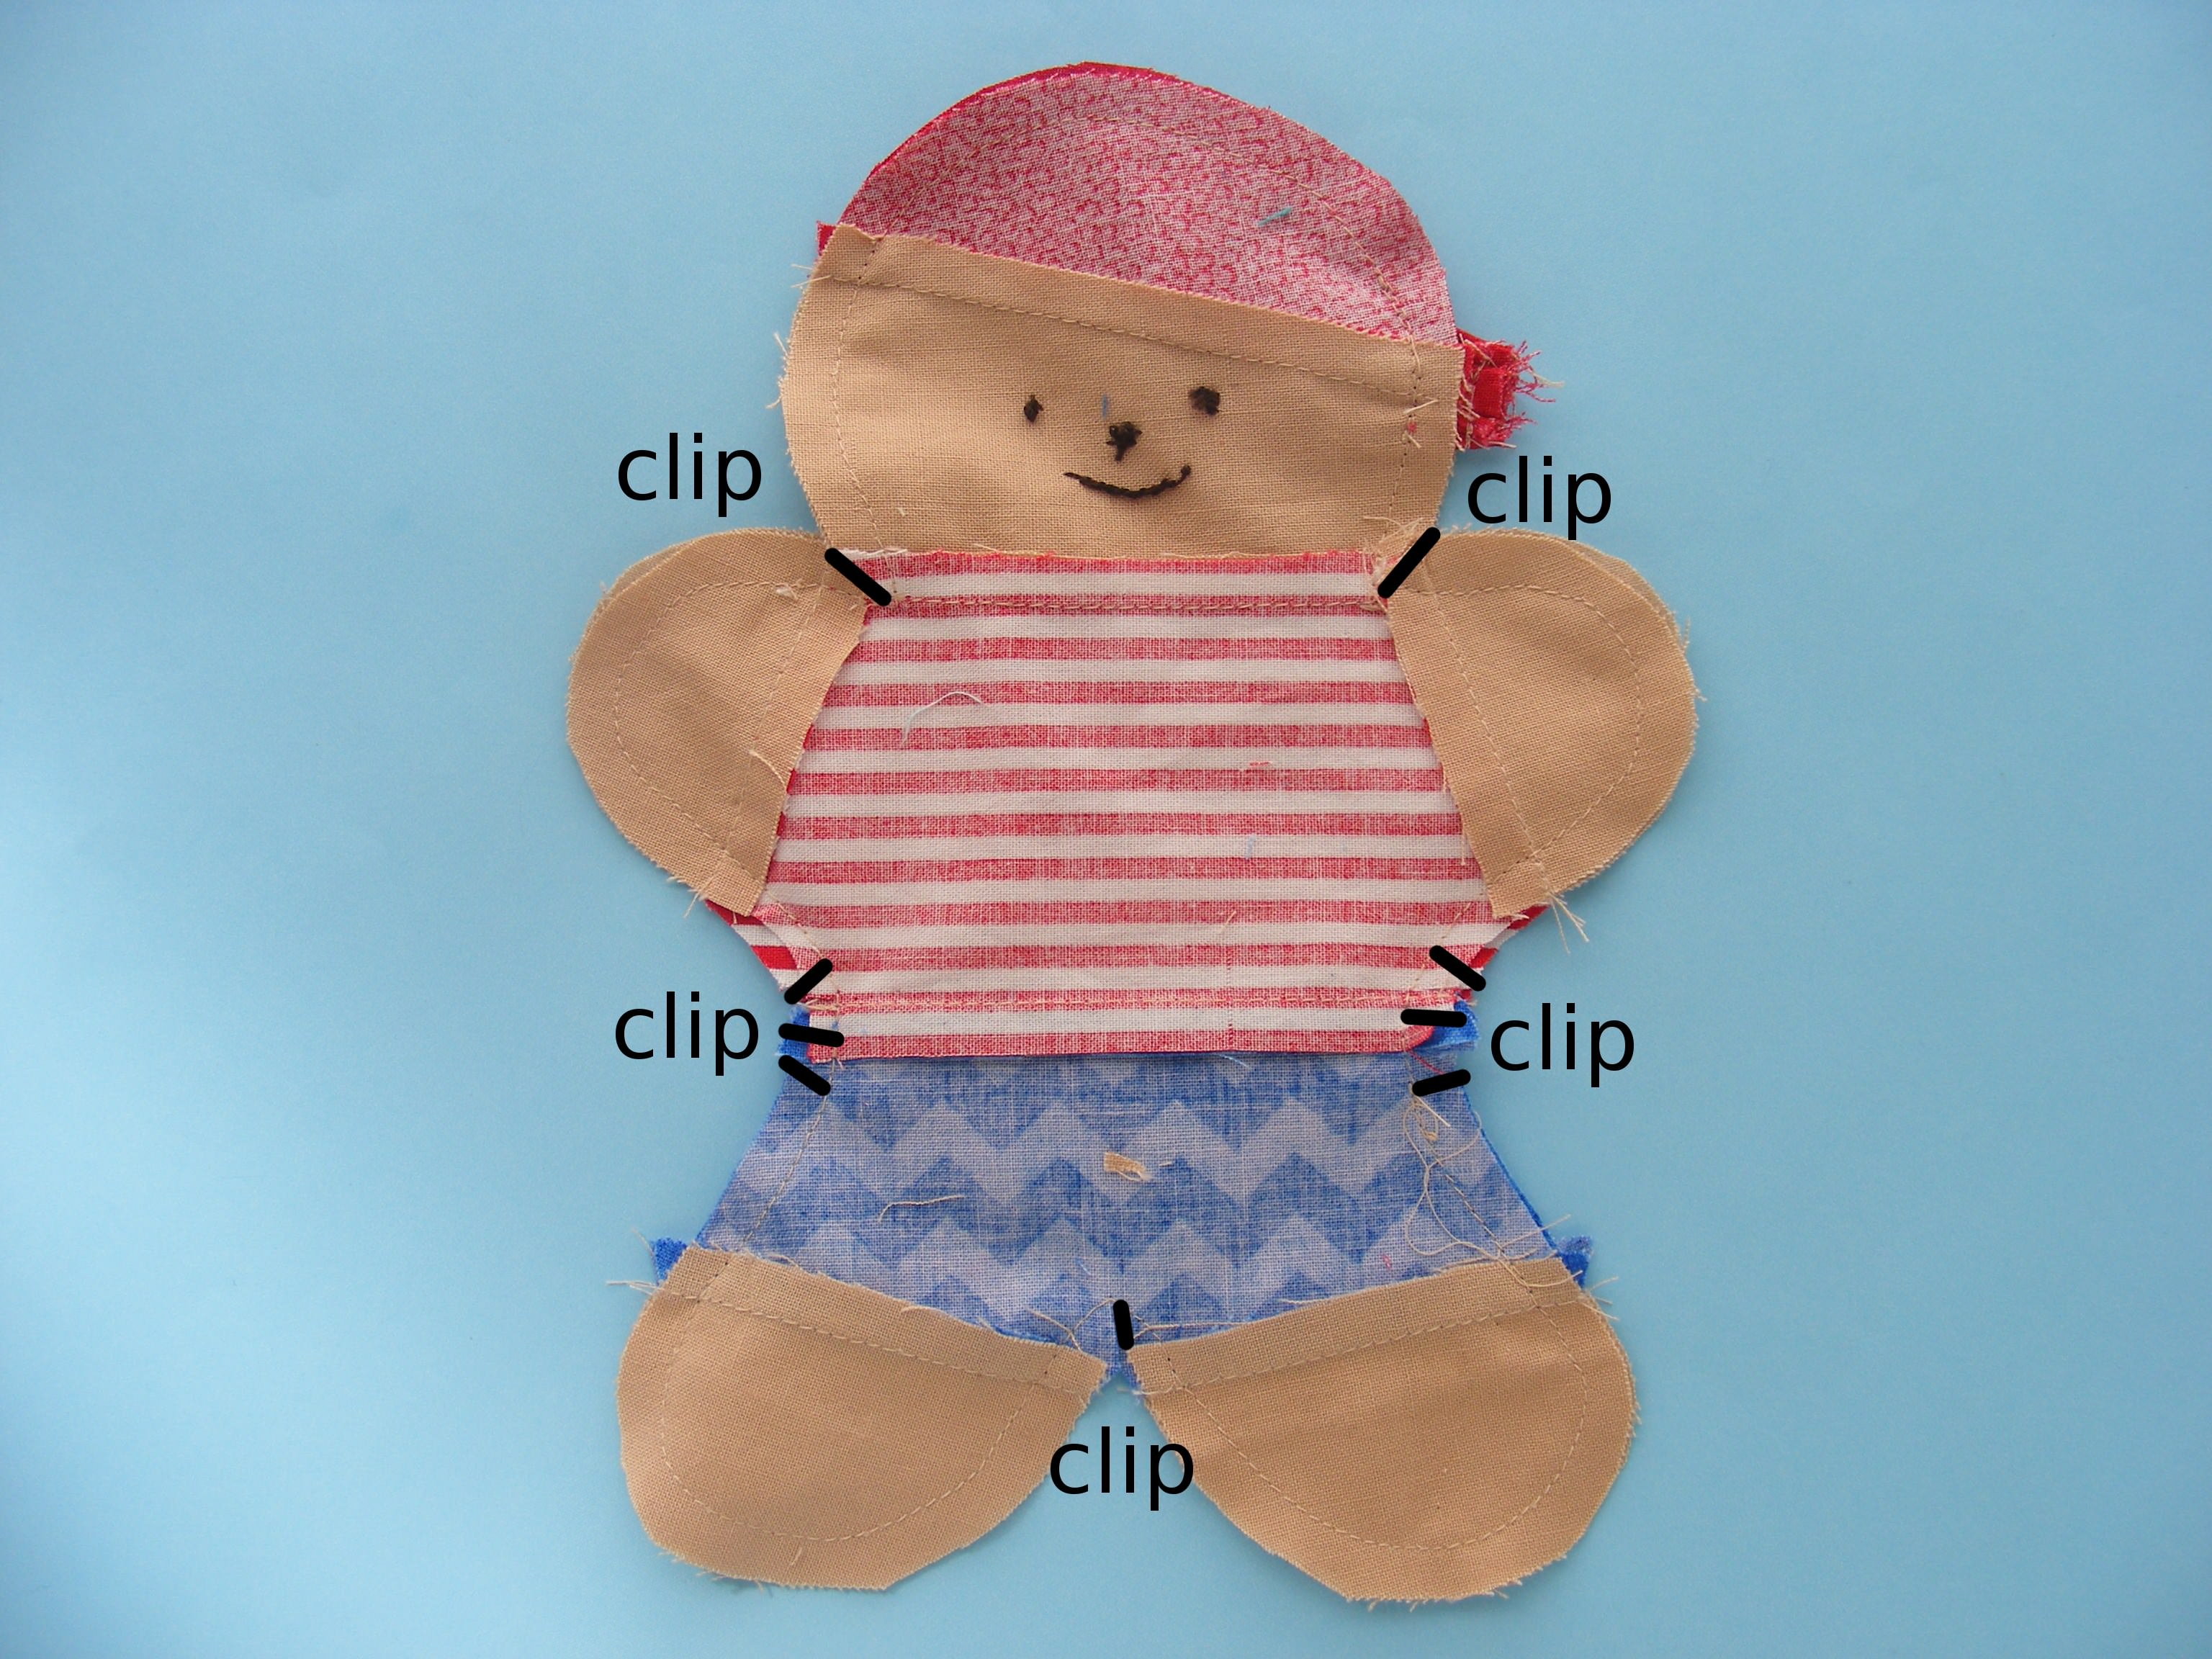
Step 6
Sew the hands to the shirt pieces.
Press the seam allowance open.
Step 7
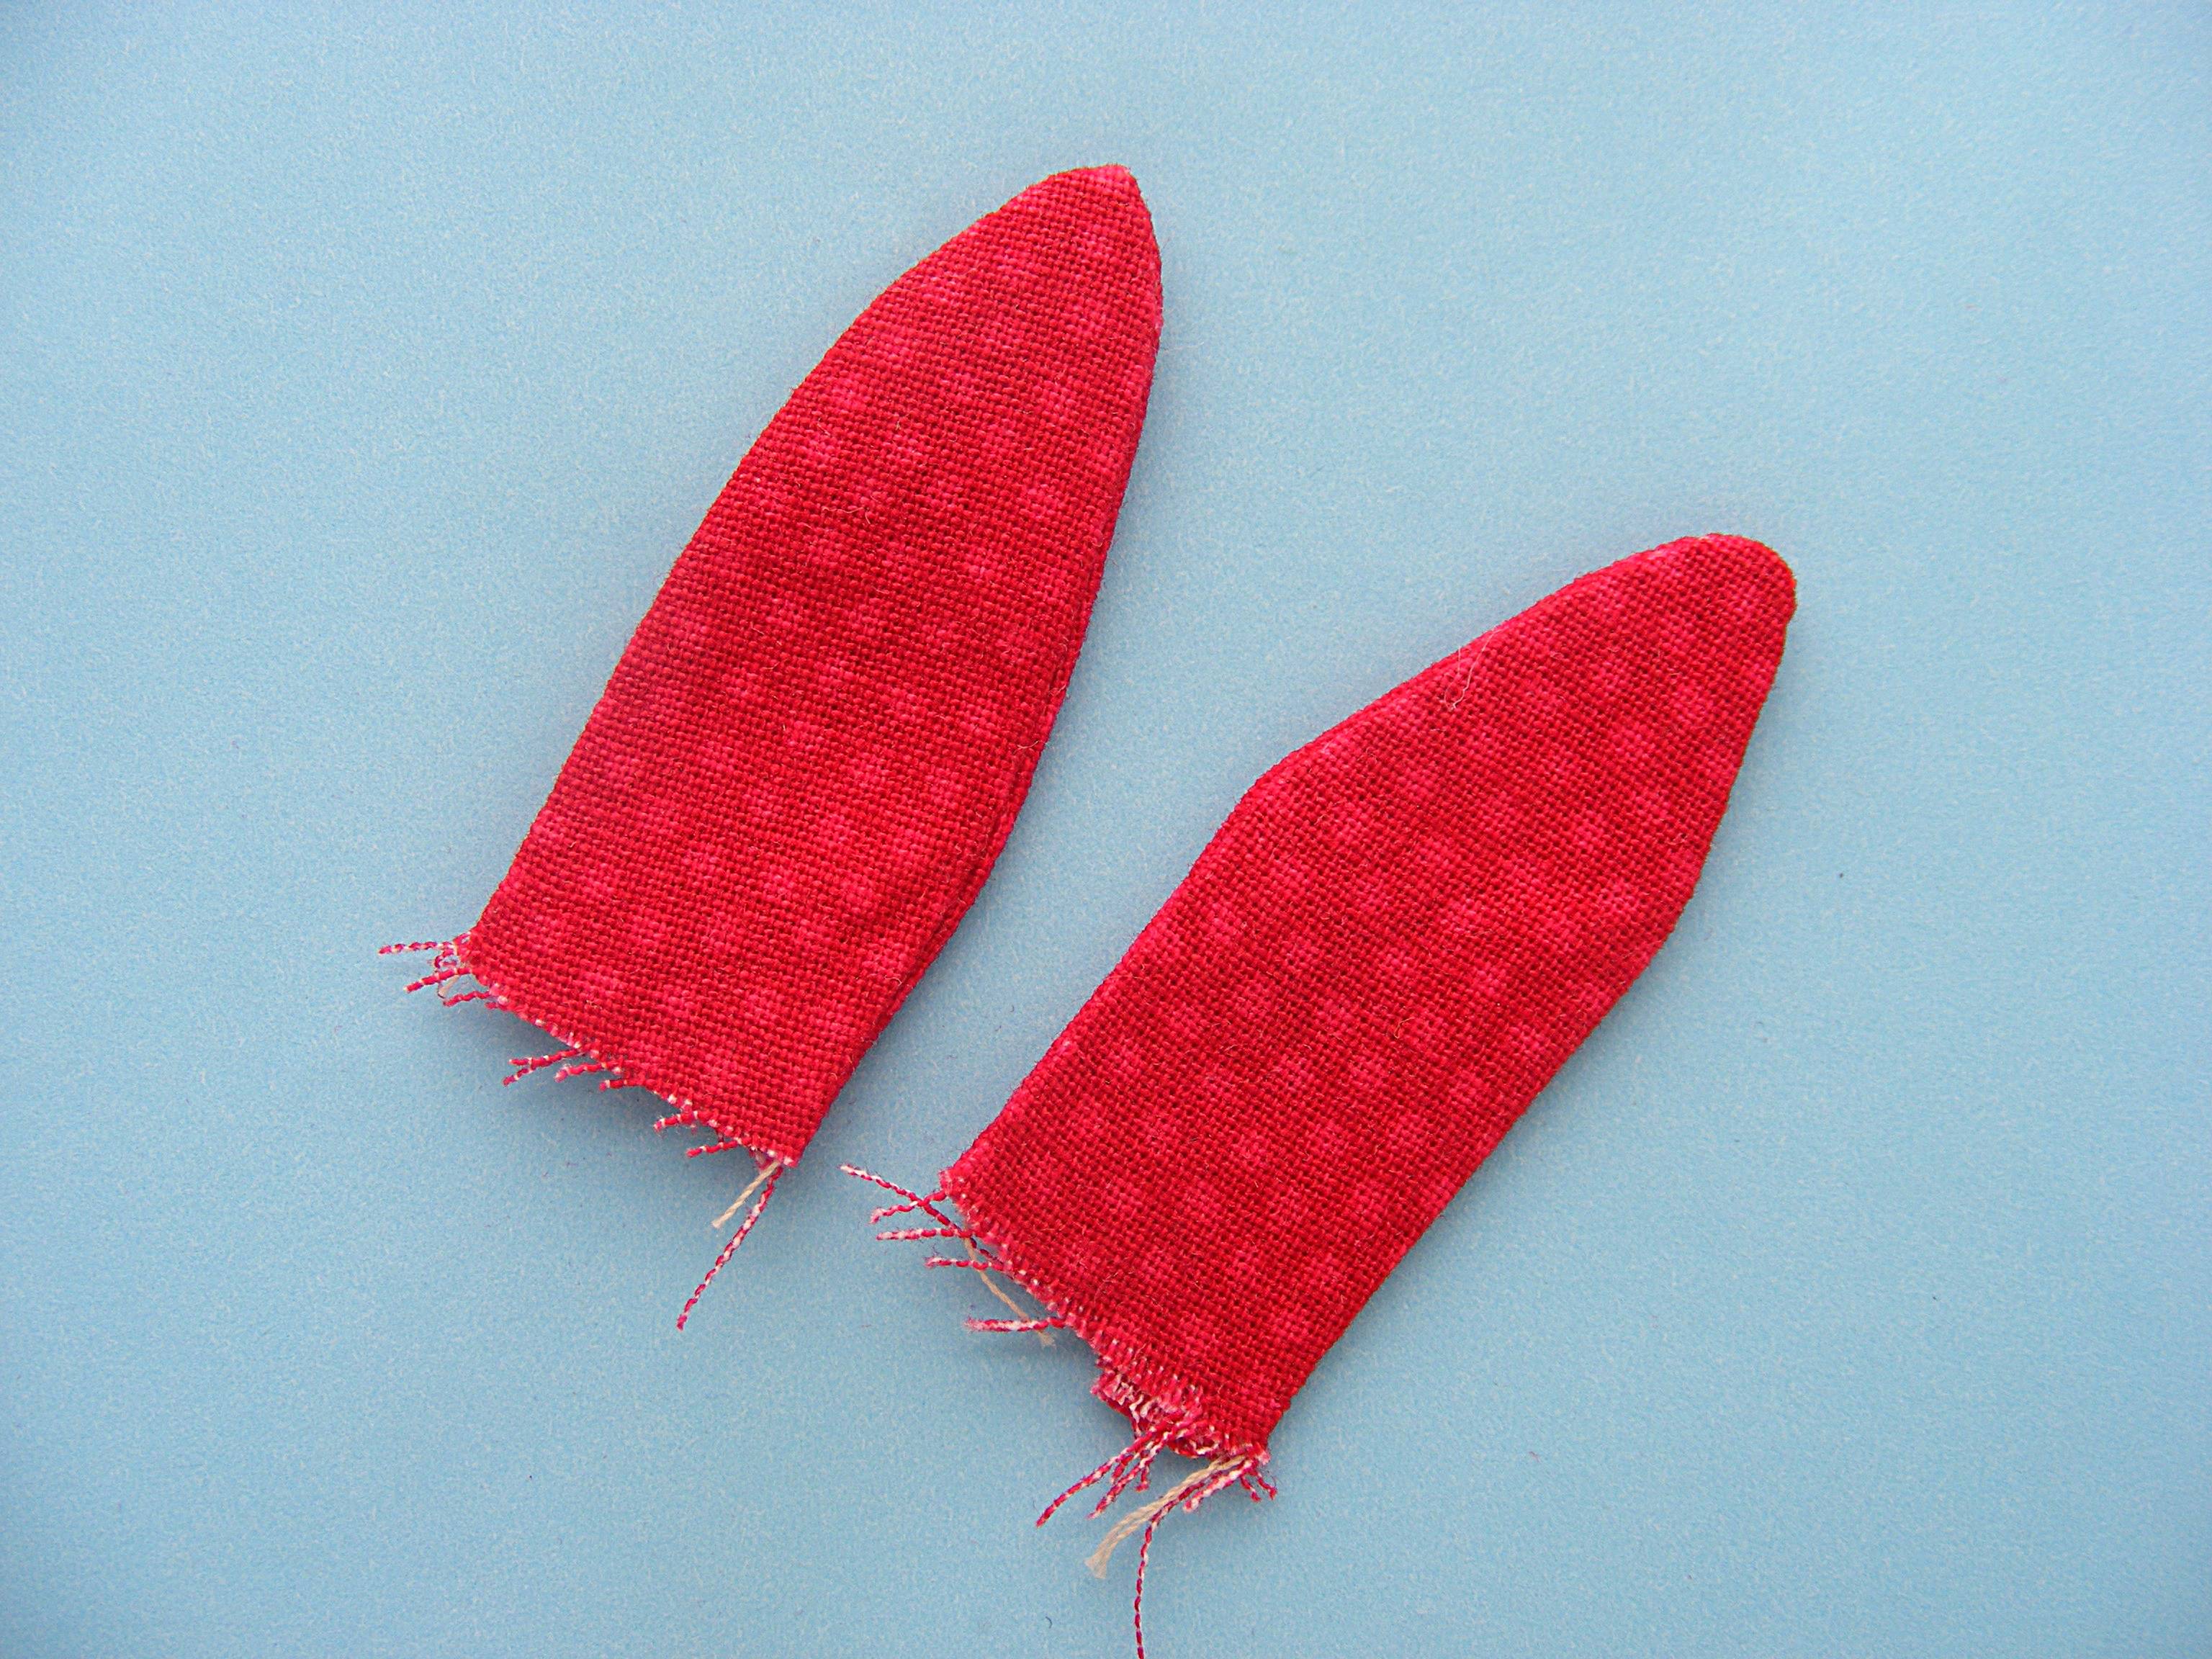
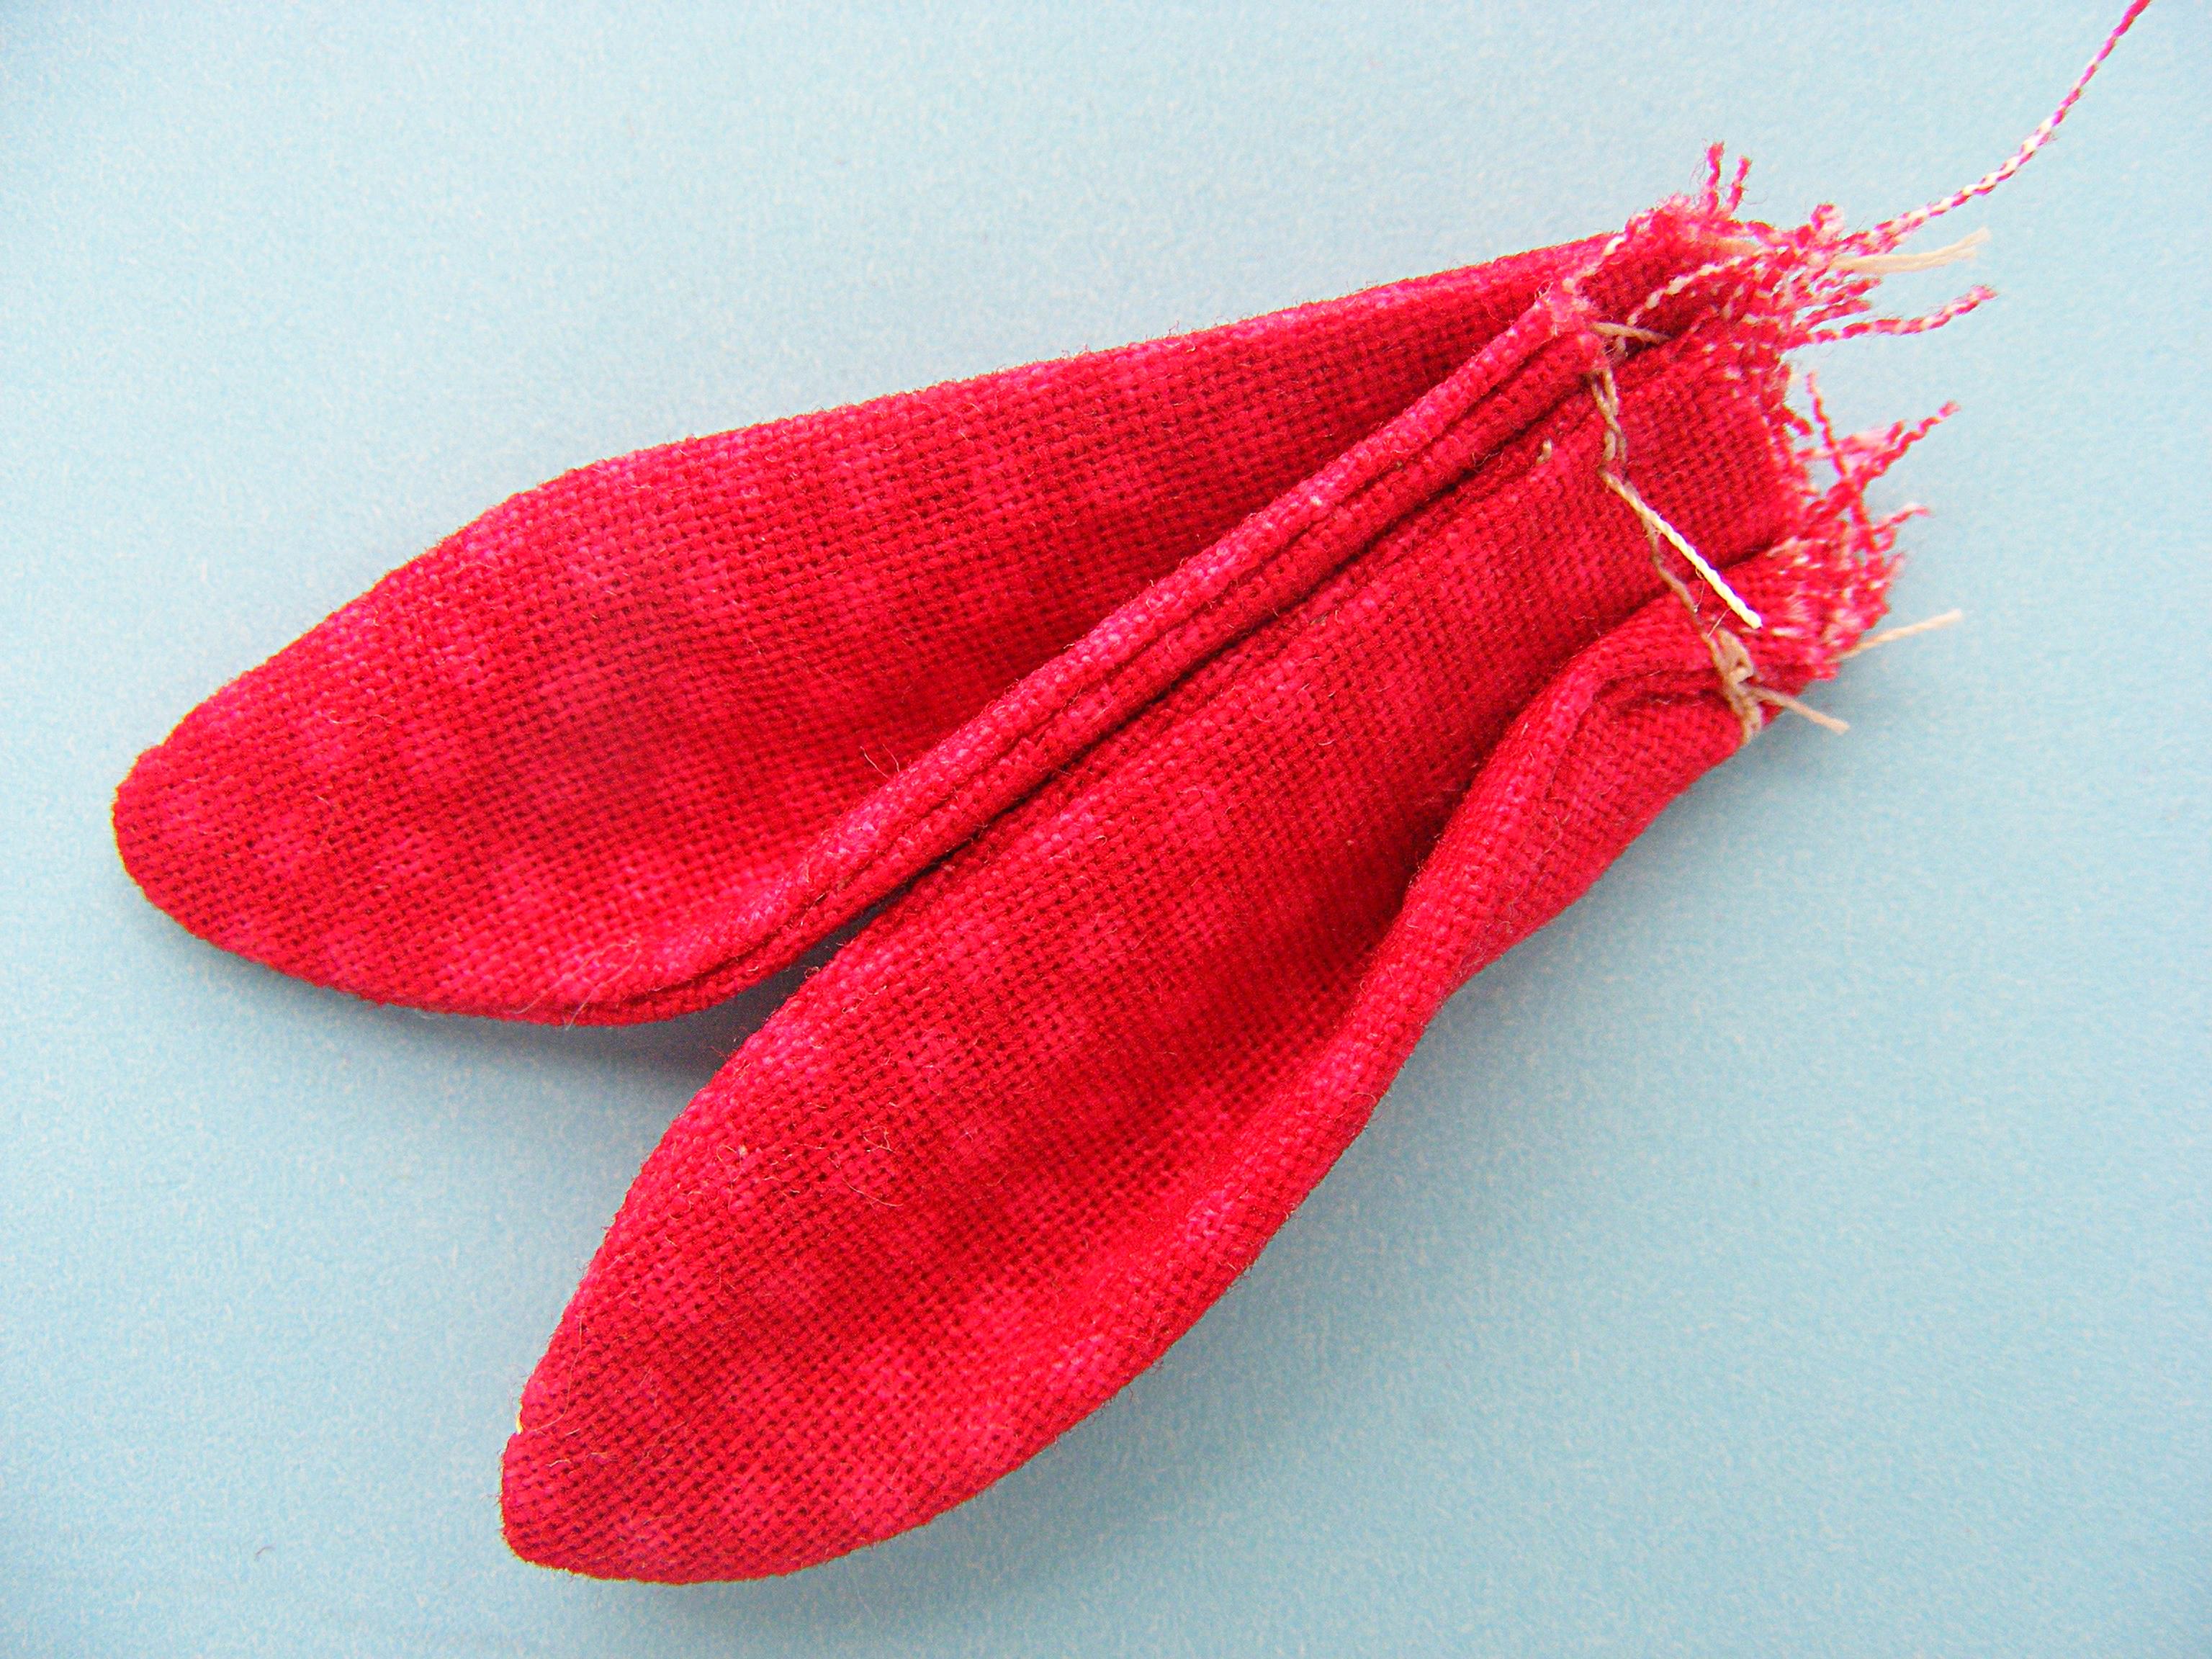
Sew the feet to the pants.
Press the seam allowance open.
Step 8
Sew the bandana pieces to the top of the head pieces.
Press the seam allowance open.
Step 9
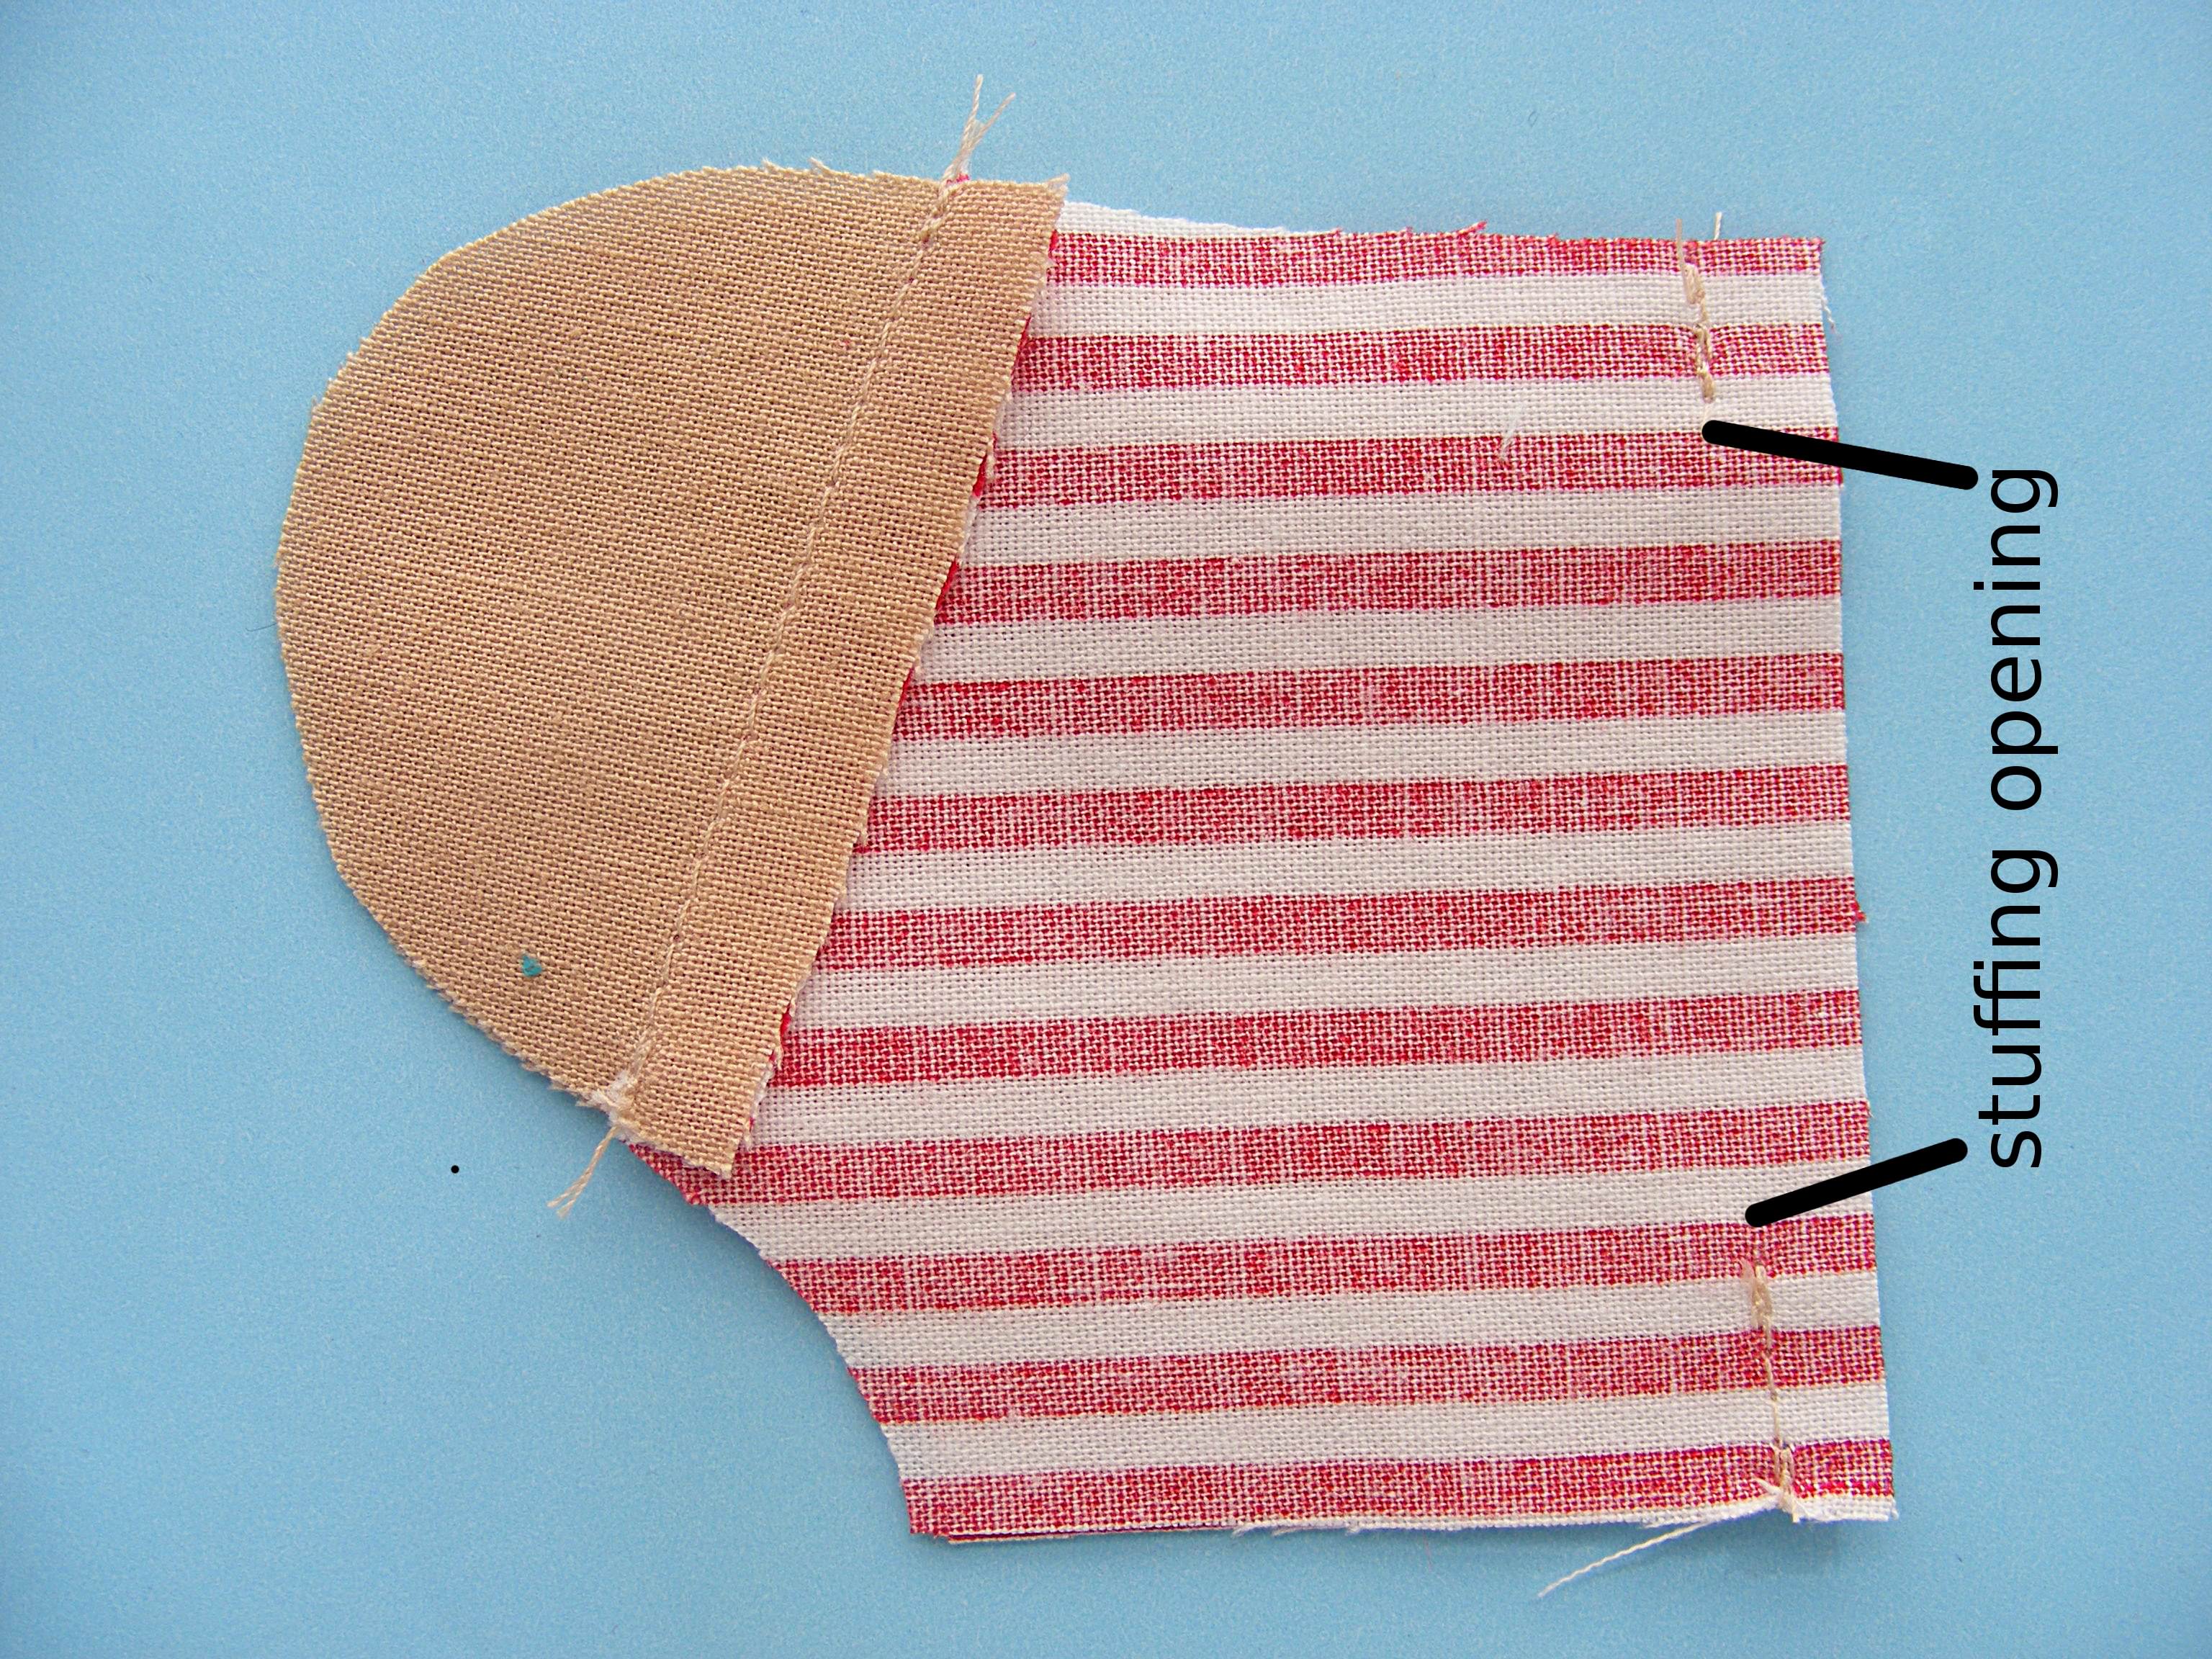
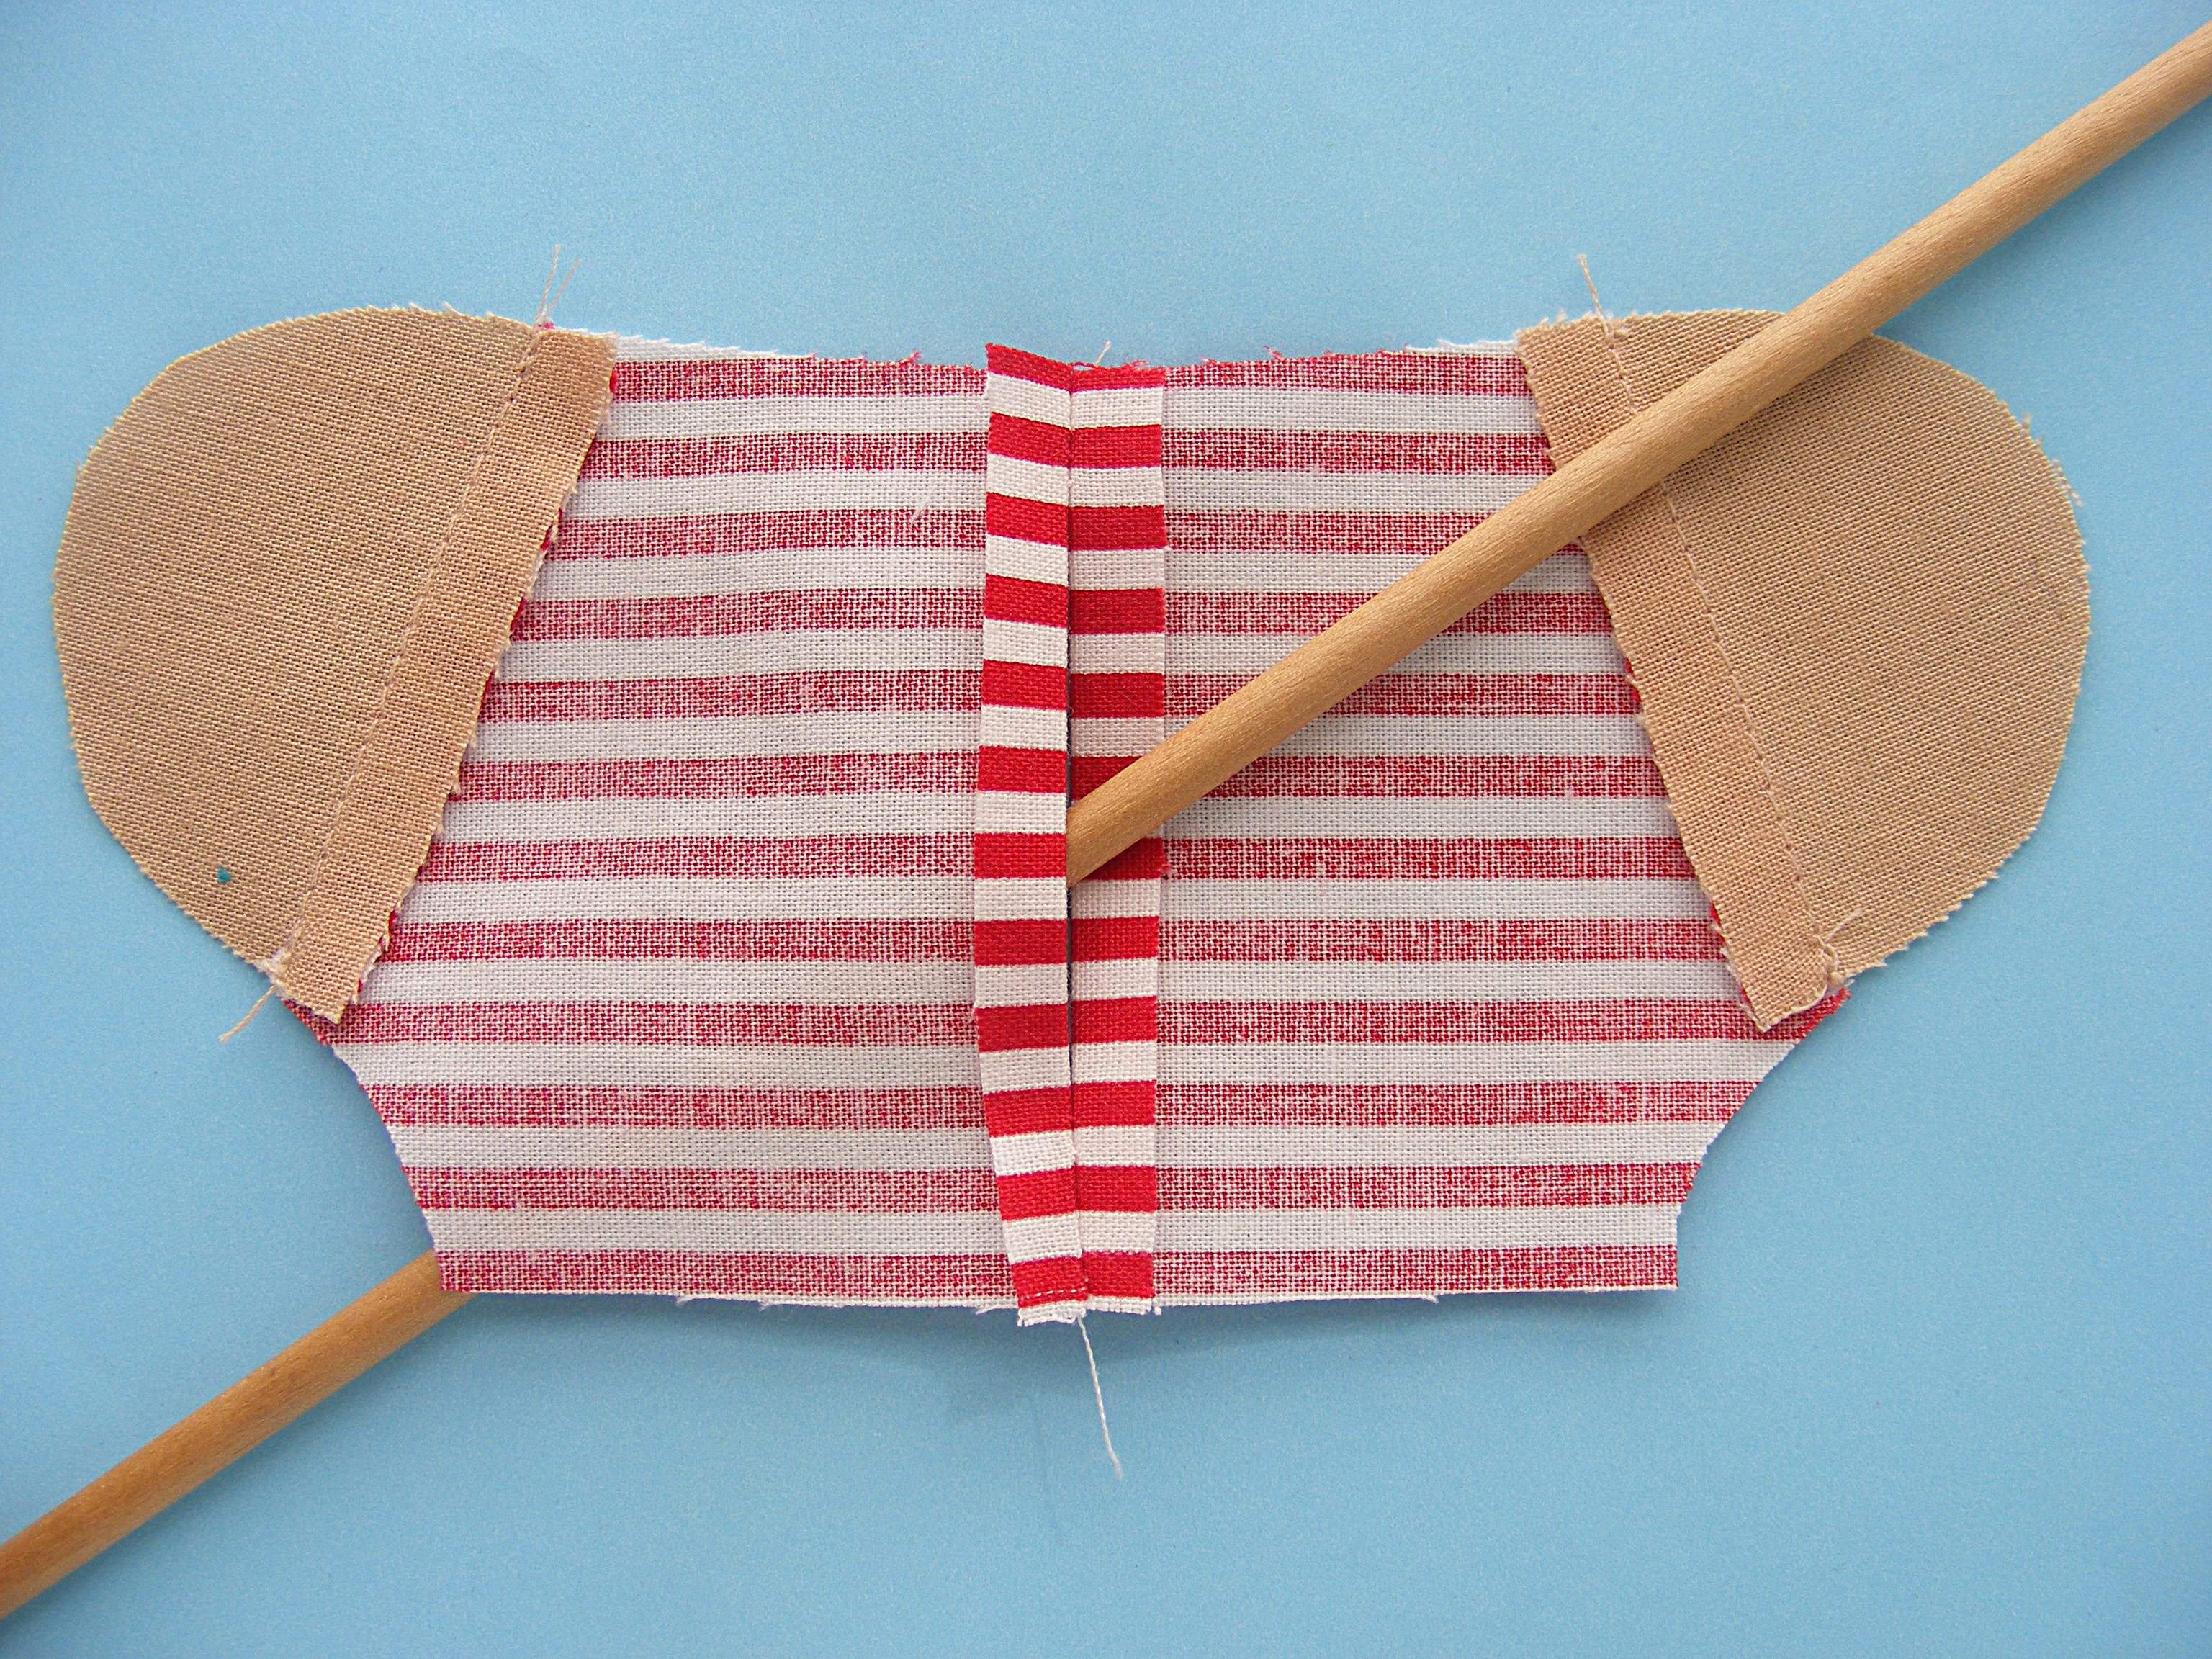
Sew the two shirt back pieces together along the center back line, making sure to leave a few inches open for stuffing.
Don’t forget to backstitch at the beginning and end of your stuffing opening.
Step 10
Open up the center back pieces and press the seam nice and flat, including the edges of the stuffing opening. That will give you a nice clean edge to sew when you’re closing up that opening by hand.
The stick shows where the stuffing opening is.
Step 11
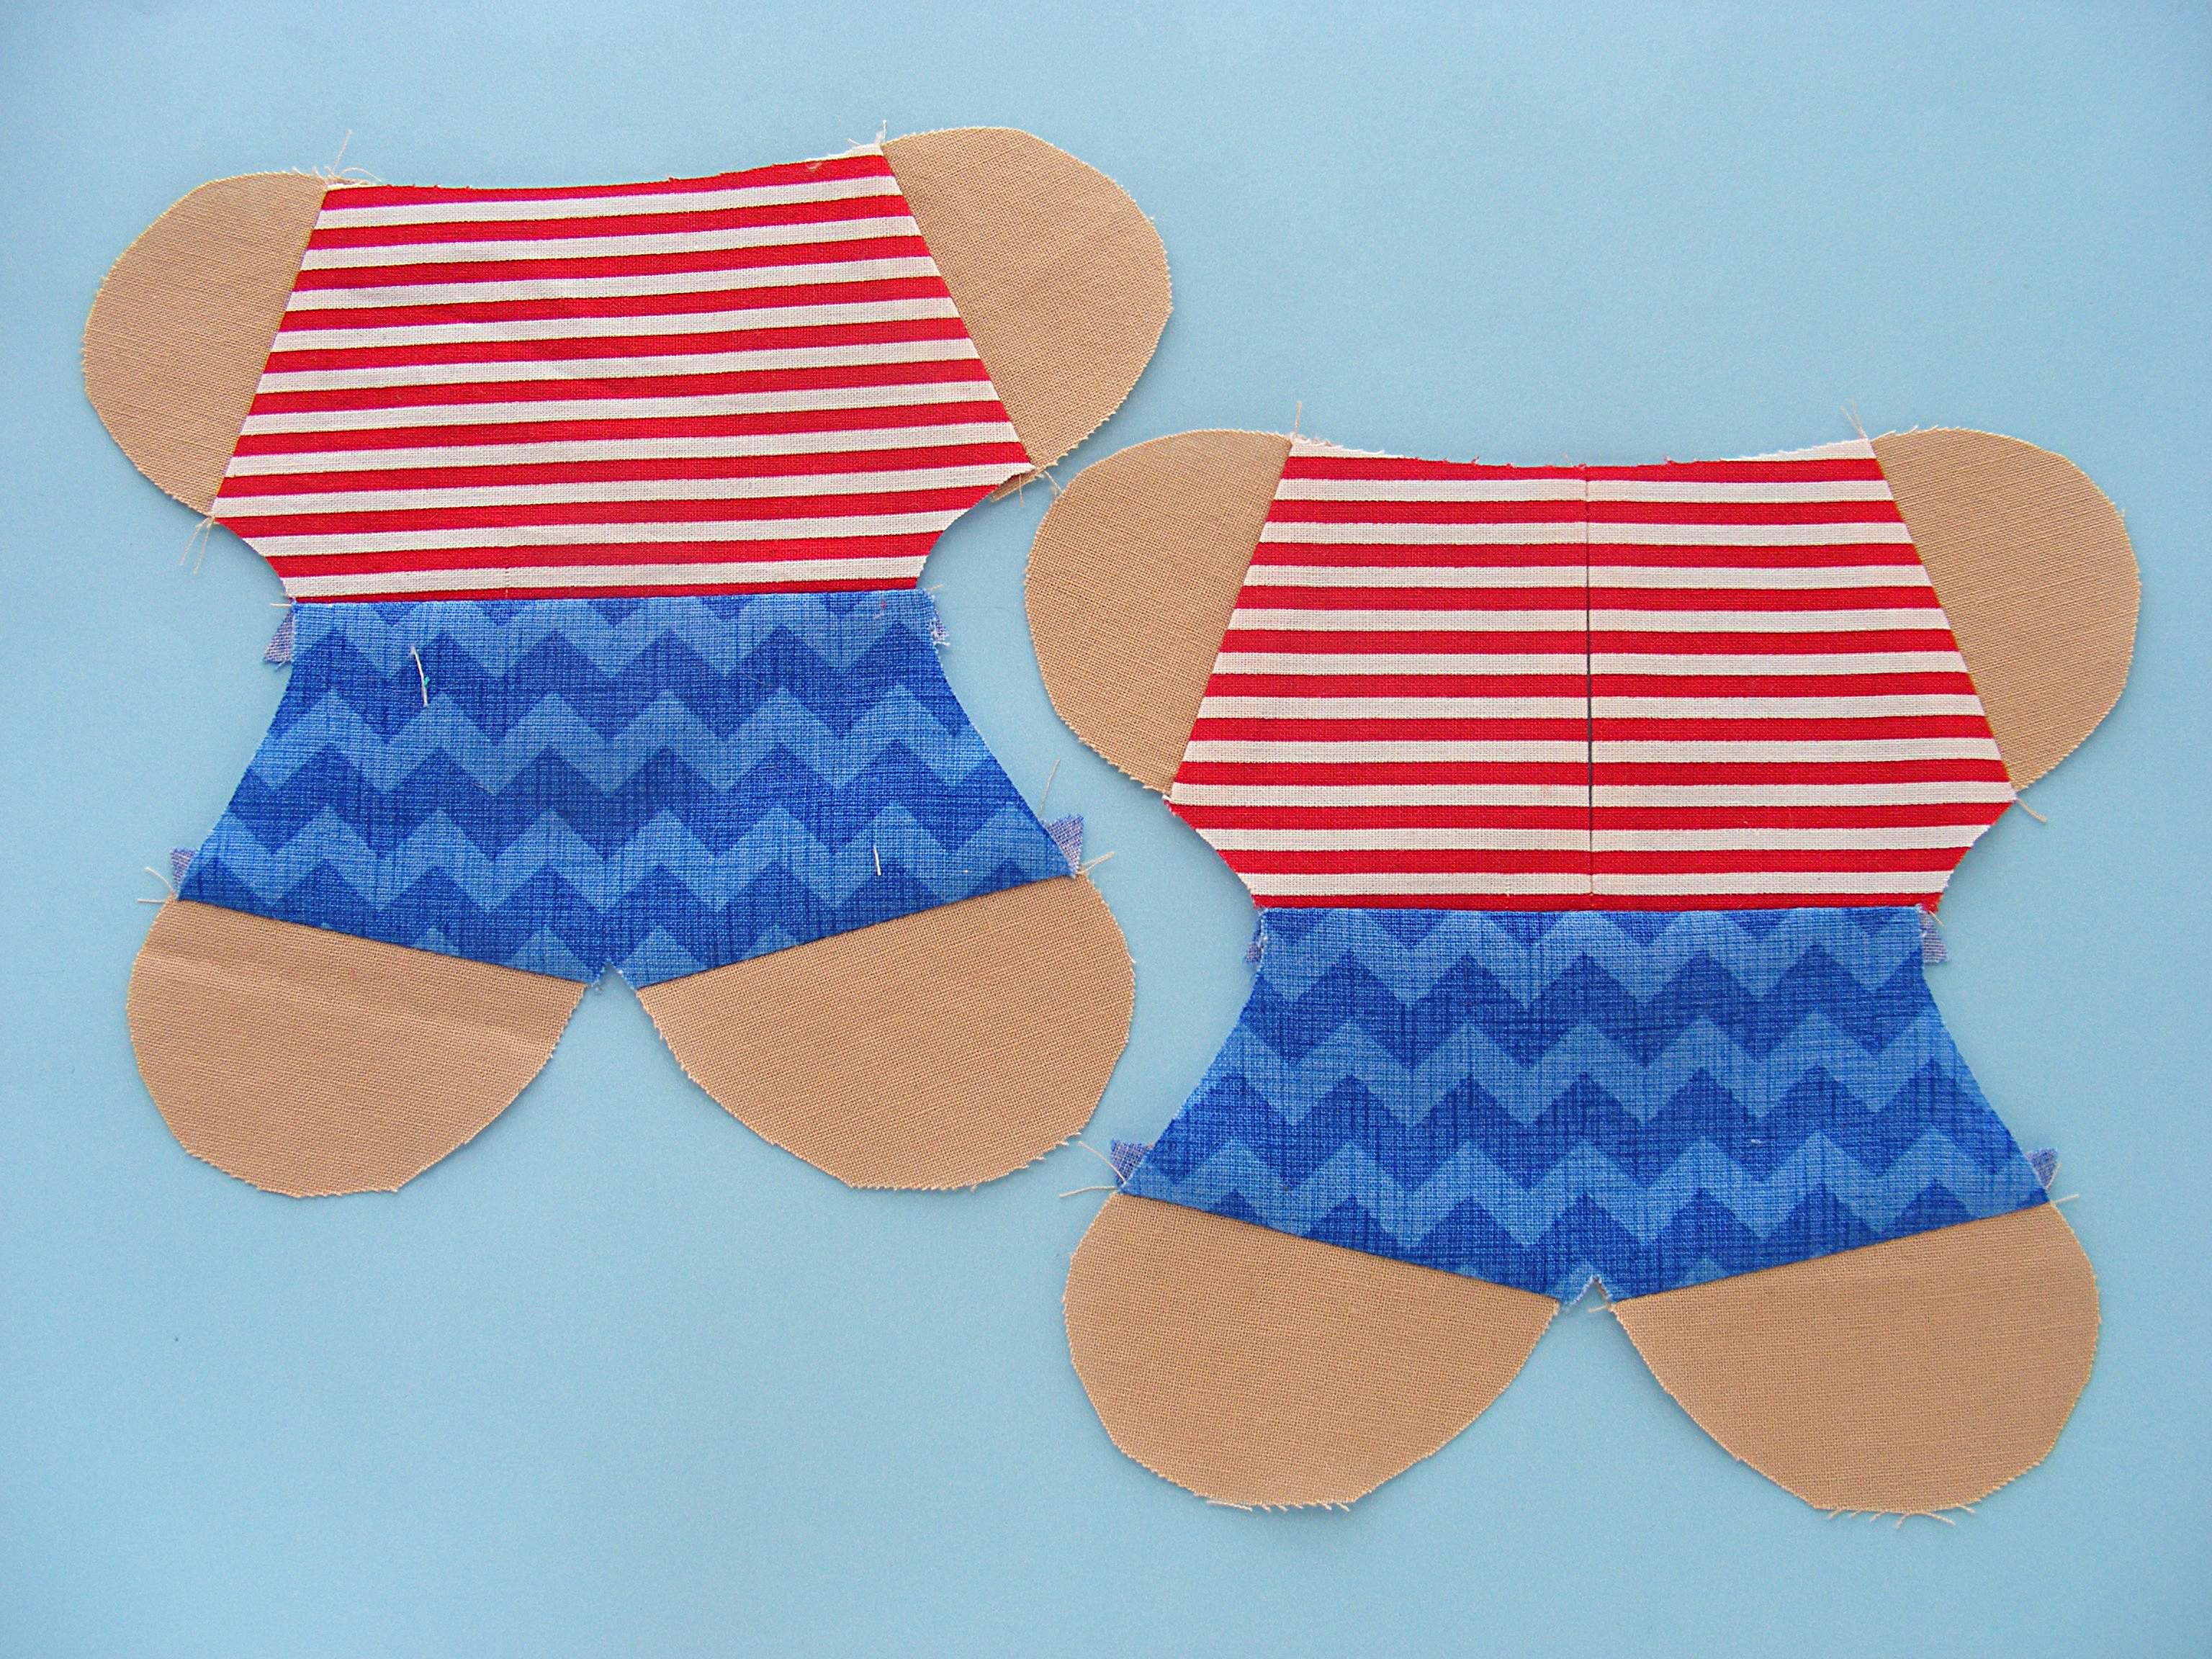
Sew the shirt pieces to the pants.
Press the seam allowance open.
Step 12
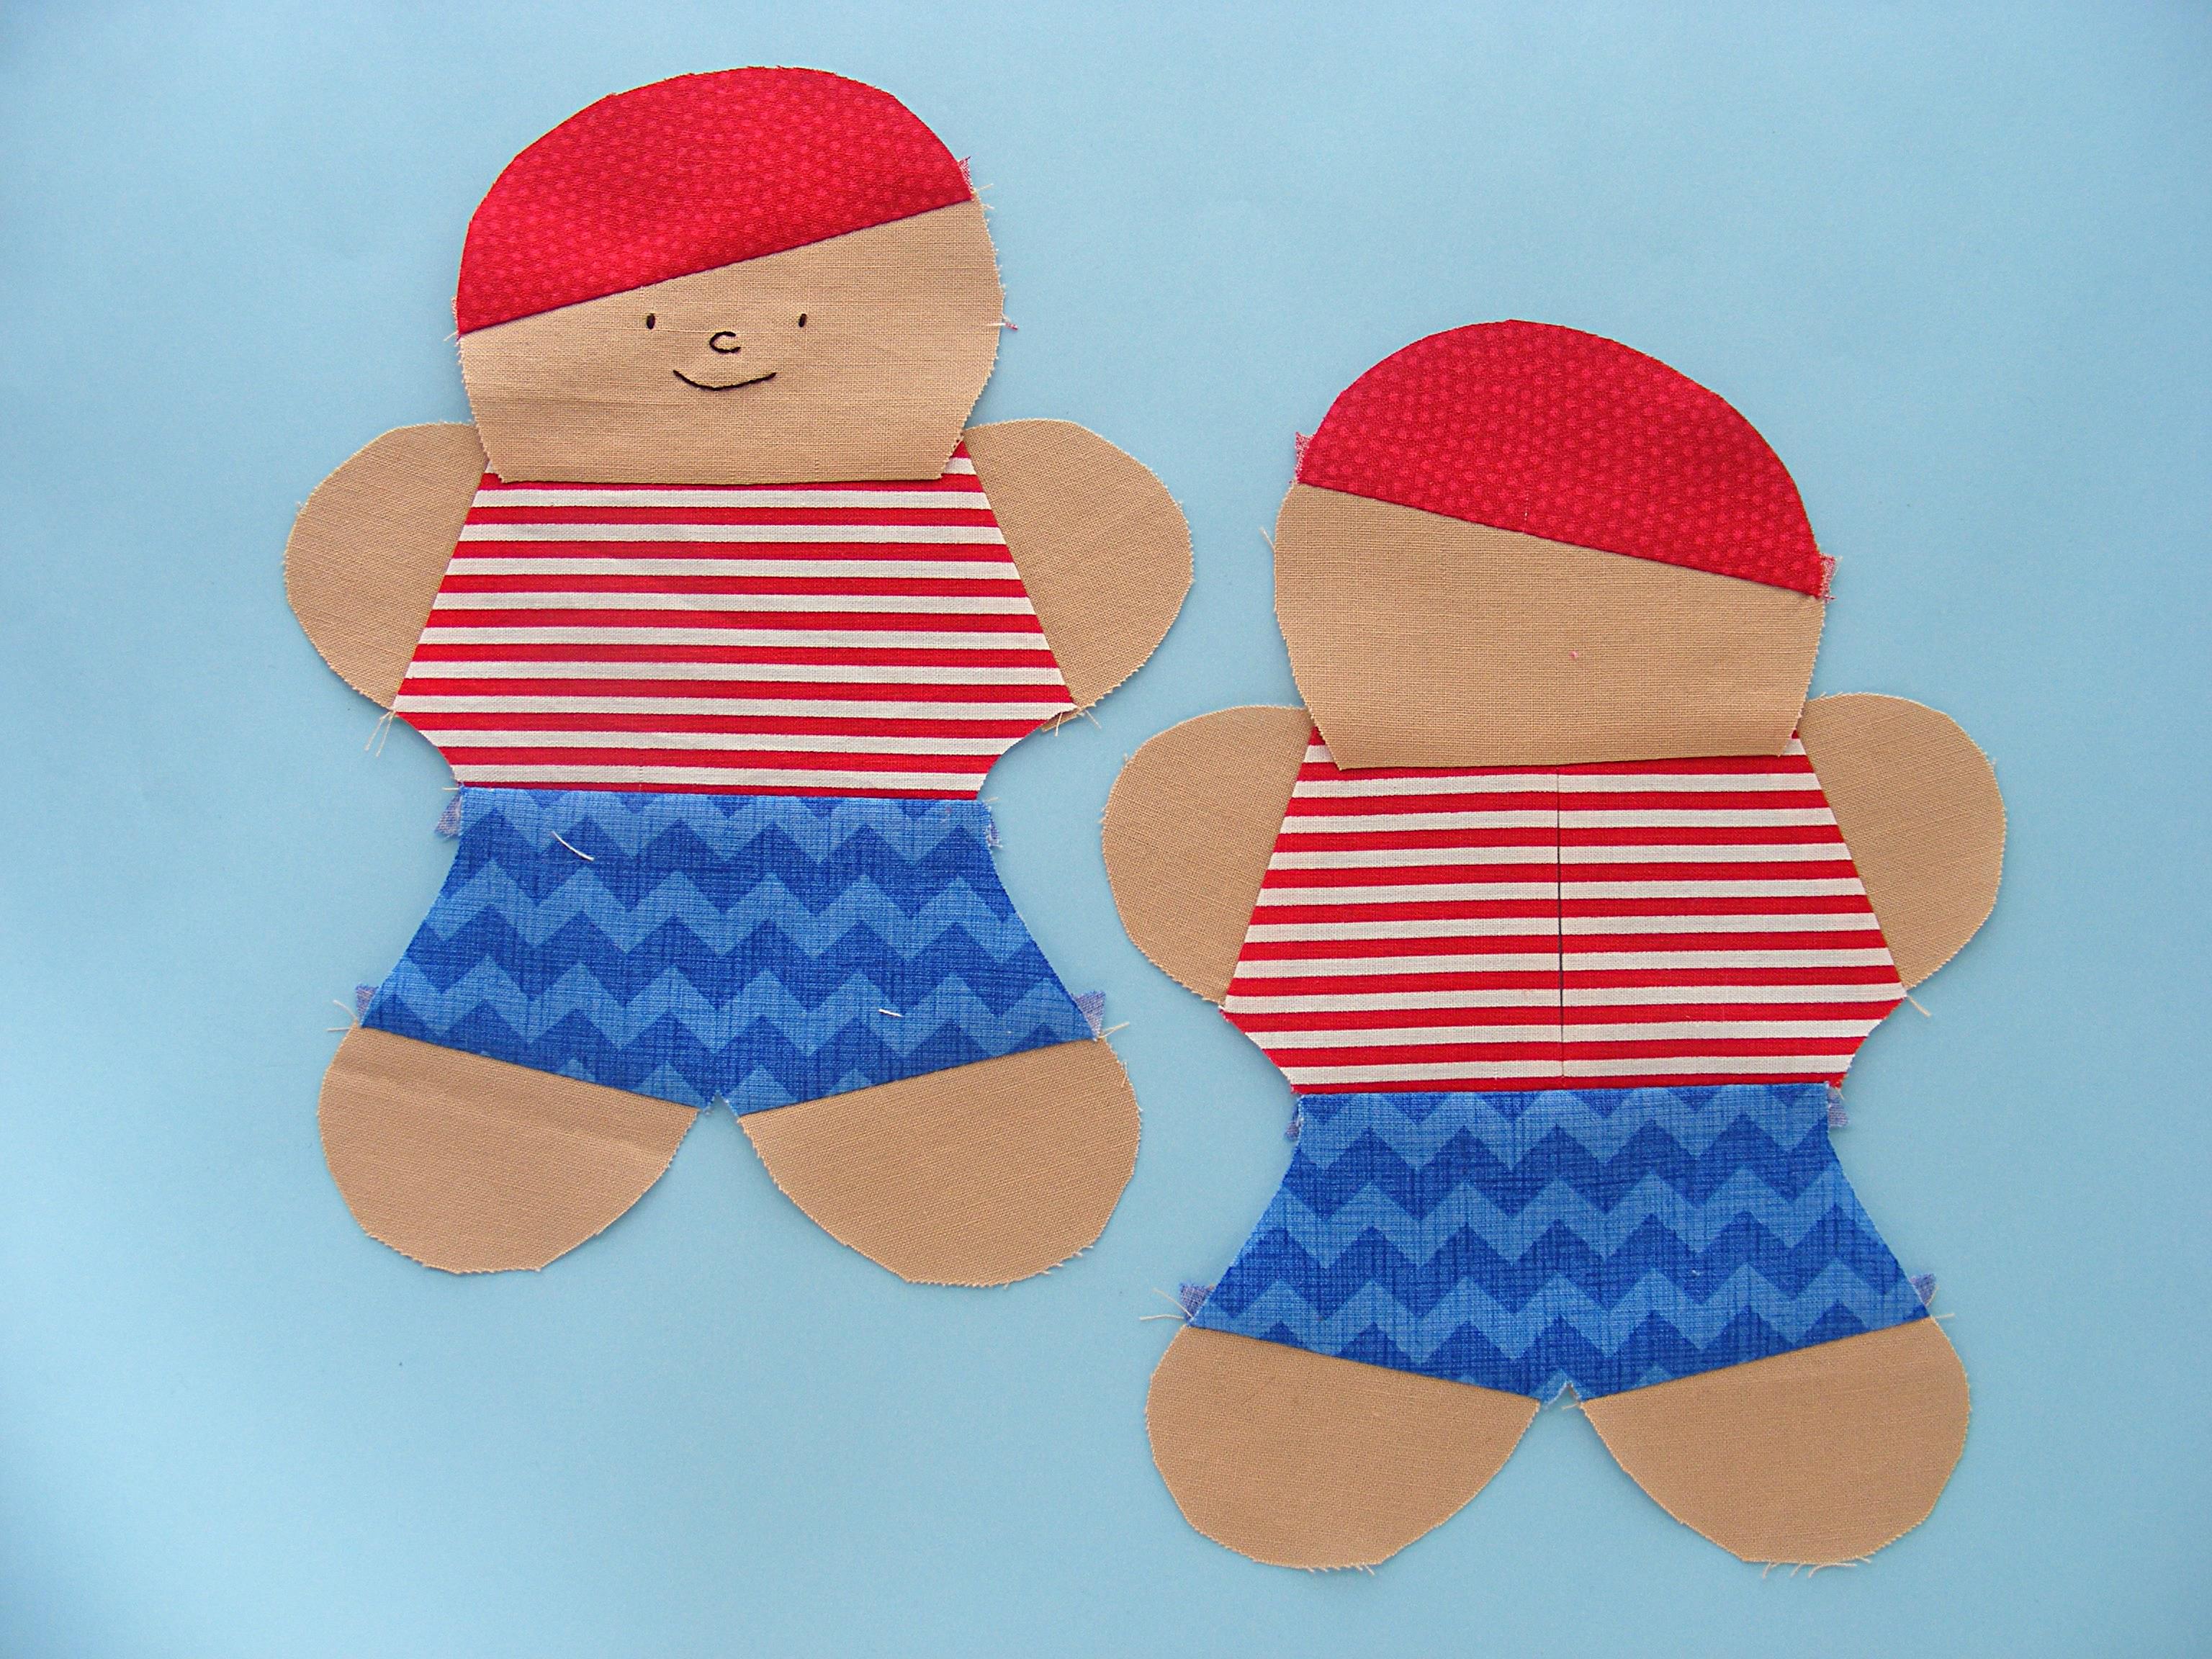
Fold the bottom of the head and the top of the body in half to find the centers. Line those centers up so the head is exactly centered on the body.
Sew the face to the body front and the other head piece to the body back.
Flip the heads up and press. The seam allowance should be pressed toward the head so the body remains flat.
Step 13
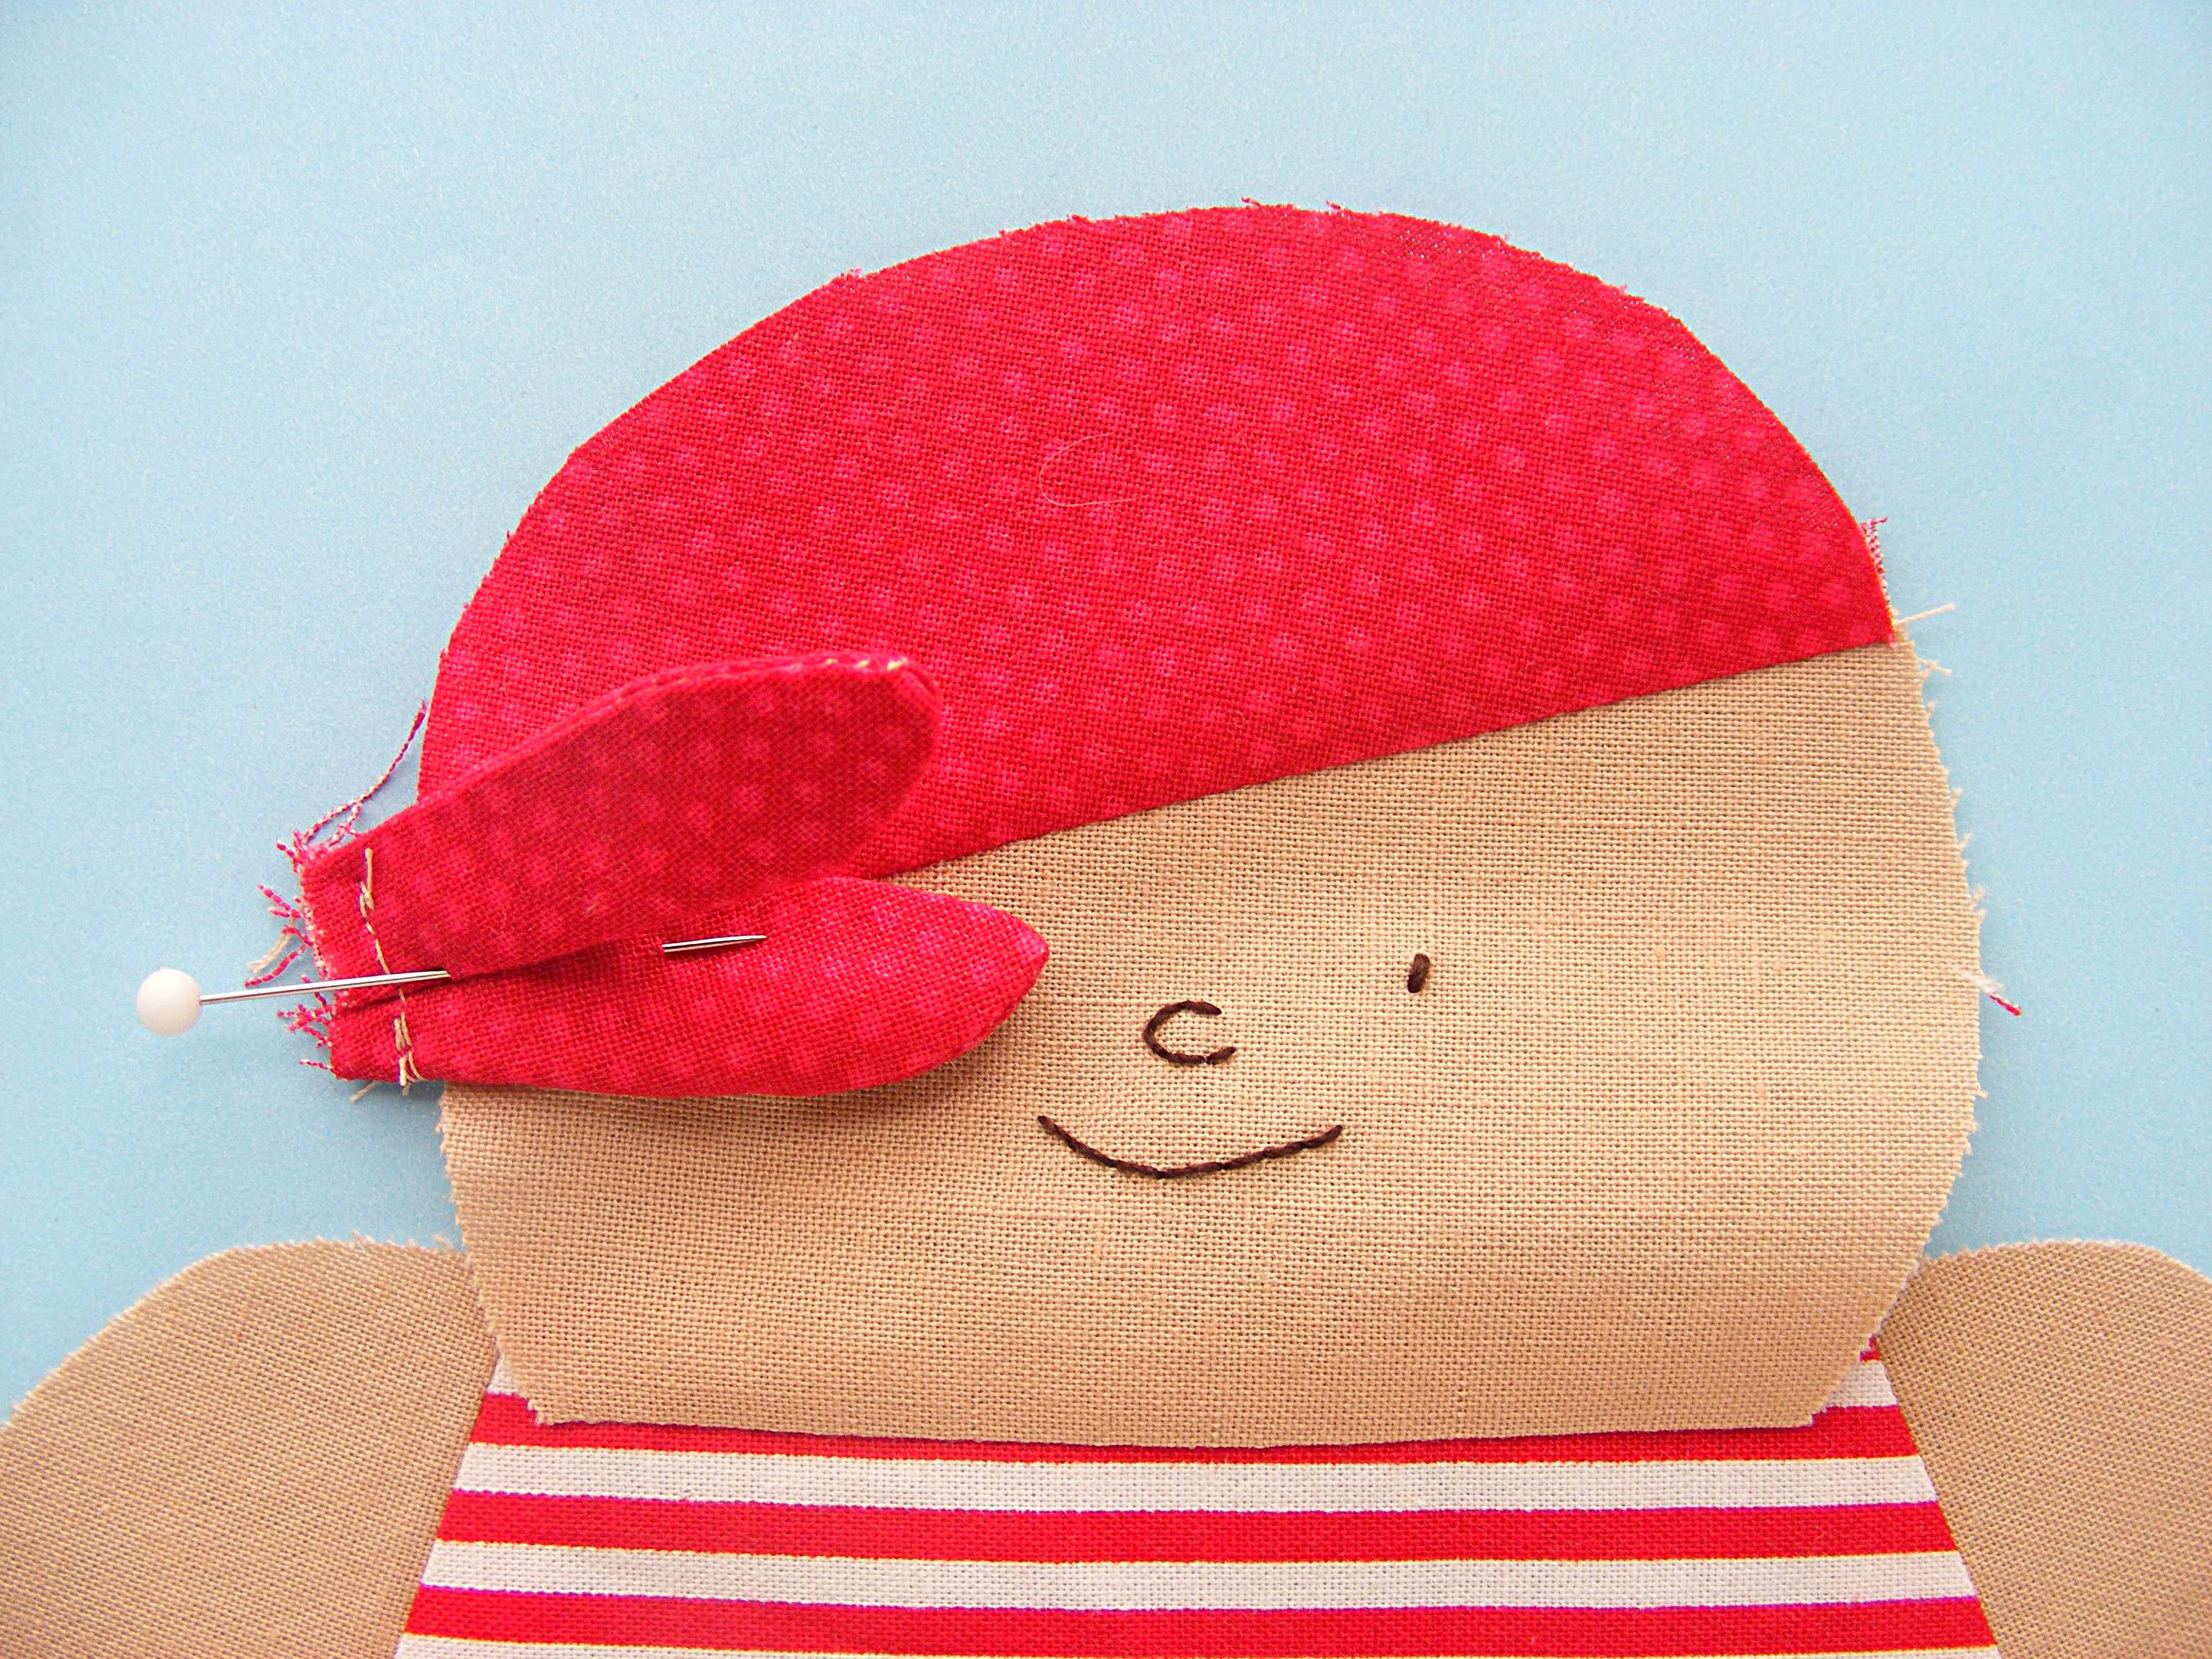
Lay the body front face up on a flat surface.
Lay the bandana knot over the face as shown in the photo. It should be right at the seam where the bandana meets the head, with the folds face down and with the raw edge hanging off the edge of the head by about 1/4 inch.
Pin or clip in place.
Step 14
Place the body back face down over the front, sandwiching the bandana knot between the layers.
Pin or clip the layers together carefully, matching all the seams first (the white pins) and then pinning as needed around them (the red and yellow pins).
Step 15
Sew all the way around the body using 1/4 inch seam allowance. Make sure you’re catching the bandana knot in your stitching.
Like this? Sign up for the Shiny Happy News! You’ll get more free patterns, plus sewing tips and tricks, new tutorials, fun videos, yummy recipes, special discounts and more!
Press all the seams. I’m pressing mine open for this quilt. I think it will make things simpler in the end.
Arrange your squares according to the diagram below.
For this block I sewed things up a little differently in order to keep the edges of my chunks of color perfectly straight, even if my seams weren’t lined up perfectly.
We’re going to sew the whole thing into three fat rwos, but we’re going to sew some parts of those rows into chunks first.
1. Sew up the two orange 3×3 squares and 1 orange 4×4 square.
2. Sew up two aqua 3×7 rectangles and two aqua 3×4 rectangles.
Arrange those chunks as you see below.
Now sew all those chunks into rows.
Finally – sew all those rows into one fabulous block. 🙂
I’d like to have a few words with whoever invented the Tooth Fairy.
Seriously.
Let’s start a tradition where a child places a teeny, tiny tooth under their pillow and parents have to retrieve it in the middle of the night without waking the child.
This is madness.
The night after Jo lost her first tooth she caught me frantically scrabbling around under her pillow in the dark, looking for a tooth the size of an apple seed.
She (naturally) asked me what the heck I was doing.
“Ummmmm. . . nothing. Just checking to see if the tooth fairy came yet. I. . . ummmmm. . . couldn’t wait until morning.”
Which she bought, but only because it was her first tooth and she was six years old.
After that somebody gave her a tiny little tooth fairy box that hung from her bedpost. It was just the right size for holding a tooth, but the money still had to go under the pillow.
I kept thinking about making a tooth fairy pillow that would hold tooth and money, but I couldn’t figure out exactly what I wanted to do. By now she’s lost all of her baby teeth, but as soon as I saw this cute new fabric I knew right away that it would make a perfect tooth fairy pillow.
Luckily, you all give me an excuse a reason to keep designing things that Jo outgrew years ago. 🙂
The pocket is big enough for grown-up fingers to reach in and find a tiny tooth. It’ll hold paper money or fun coins (Jo got a dollar coin for every tooth). And being snug up against a plump pillow means teeth and coins won’t just fall out.
The pillow is also big enough that it won’t get lost in the mountain of stuffed animals that help our kids hide those lost teeth. 🙂
If you have an especially light sleeper, you can add that ribbon loop so you can hang the pillow from a bedpost or door handle. It’s easy and the pattern has instructions.
The best part of the project is that you can position the tiny pocket anywhere on the pillow you like. Make sure not to cover up your favorite bit! I especially like this little block showing how many teeth dogs and cats have.(Sorry – this fabric is discontinued now.)
Jo would have latched right on to fun facts like this! She also would have liked the grossness of the picture of tooth decay. 🙂
Press all the seams. I’m pressing mine open for this quilt. I think it will make things simpler in the end.
Arrange your squares according to the diagram below.
For this block I sewed things up a little differently – mainly to keep the edges of my yellow squares perfectly straight, even if my seams weren’t lined up perfectly.
We’re going to sew the whole things into columns, but we’re going to sew some parts of those columns into chunks first.
1. Sew up the four all-green columns.
2. Sew the middle two all-green columns together.
3. Sew all the yellow squares into their 3×3 blocks.
4. Sew eight 1×3 green rectangles.
5. Sew four of the 1×3 green rectangles into two 2×3 green rectangles.
Arrange everything as you see below.
Now sew all those chunks into columns.
Finally – sew all those columns into one fabulous block. 🙂
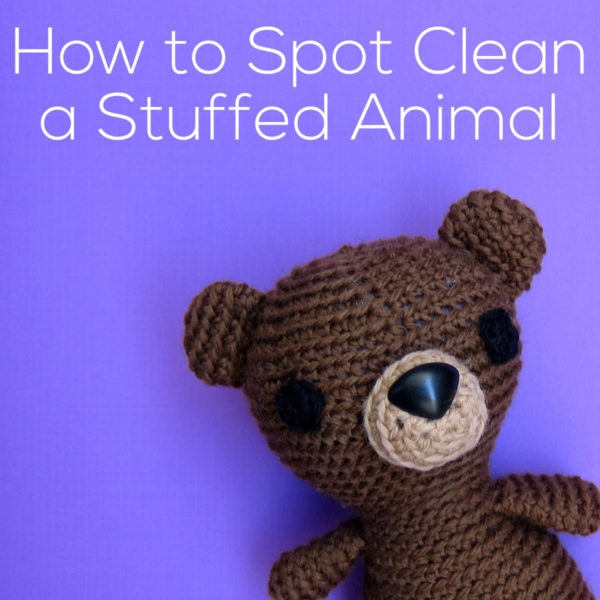
If you crocheted a stuffed animal using a hand wash-only yarn, then you can’t just throw the little guy into the washing machine. You’ll need to spot clean. Here’s how to do it!
How to Spot Clean
Spot cleaning basically means cleaning a particular area of an item without submerging the entire item. It’s a phrase frequently used in the garment industry, but applies to your stuffed animals, too!
Wet a washcloth in water or in water + a wool safe wash (like Eucalan no rinse wash)
Dab at the spot that has become soiled, moistening the stuffed animal’s fabric. Do not scrub! Agitation causes felting.
Allow to air dry.
That’s all!
FAQ
How do I tell if an animal needs to be spot cleaned? The yarn is your guide! Wash the animal like you would wash a garment made with that particular yarn, paying careful attention to the instructions. Keep in mind, though, that it’s incredibly important that the animal (and its stuffing) completely dries. If your yarn can’t stand the dryer, then you won’t be able to dry the animal… meaning you shouldn’t get the stuffing wet! Spot clean, only.
What if it’s still dirty? If you follow the above steps and it’s still dirty, then wash again. You can feel free to dip the tip of a limb in water, avoiding soaking the stuffing, to get a bit more water and detergent into the stain.
My stuffed animal is a complete mess. (like, it fell in a puddle). What can I do? If you think the animal might be headed toward the trash can, you can always try machine washing it. The good news is that the stuffing often prevents some amount of felting, so you could be safe. It’s a last ditch effort, though!
1 fat quarter of fabric for the outside of the pouch
1 fat quarter of fabric for the inside of the pouch
scraps of fabric for the hair/spikes
two 7/8 inch buttons for the eyes (I stacked smaller black buttons on top of these buttons)
two 3/16″ buttons for the nostrils (optional)
9 inch zipper
The hardest part of this project is getting the fabric facing the right direction, so pay special attention to those parts of the instructions.
Step 1
Cut out all materials.
For the top of the face cut one wide rectangle 3″ tall and 10″ wide. Cut the same size from the lining fabric.
For the bottom of the face cut one narrow rectangle 2″ tall and 10″ wide. Cut the same size from the lining fabric.
Wait to cut the pieces for the back of the pouch. The size will vary depending on the width of your zipper, how close to the teeth your zipper foot lets you get, etc.
For the pointy spikes cut five 3″ squares.
Step 2
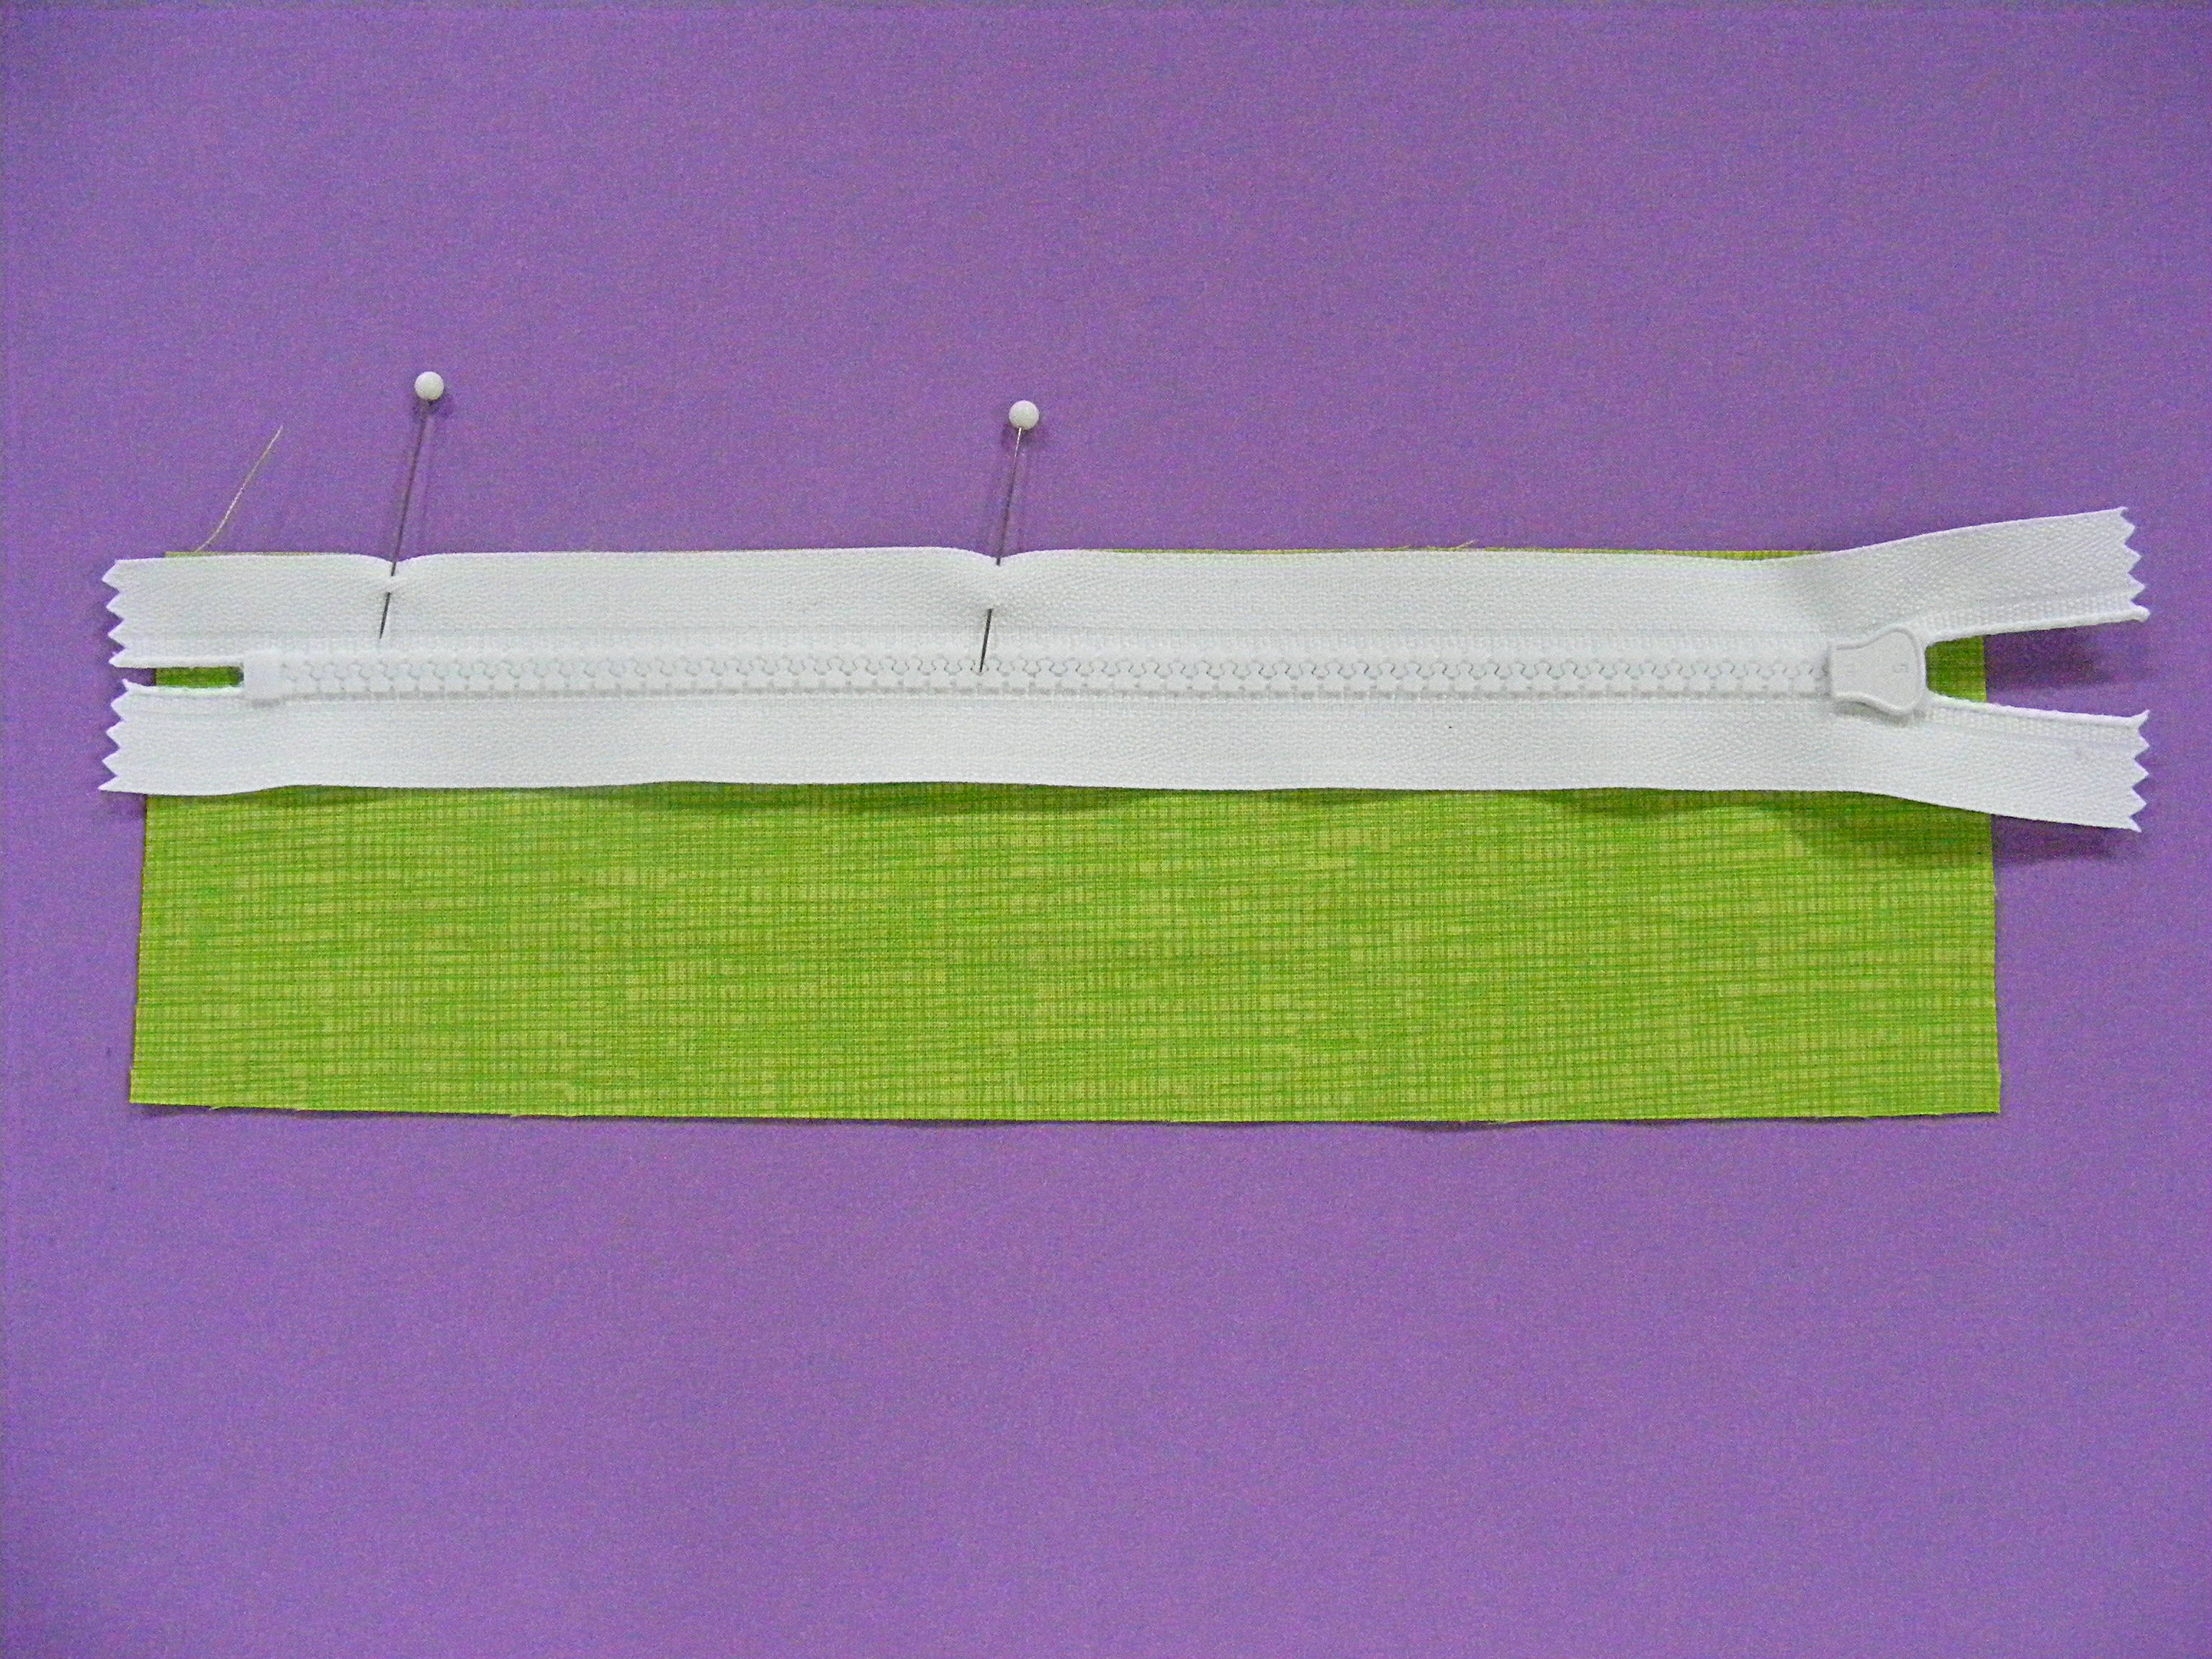
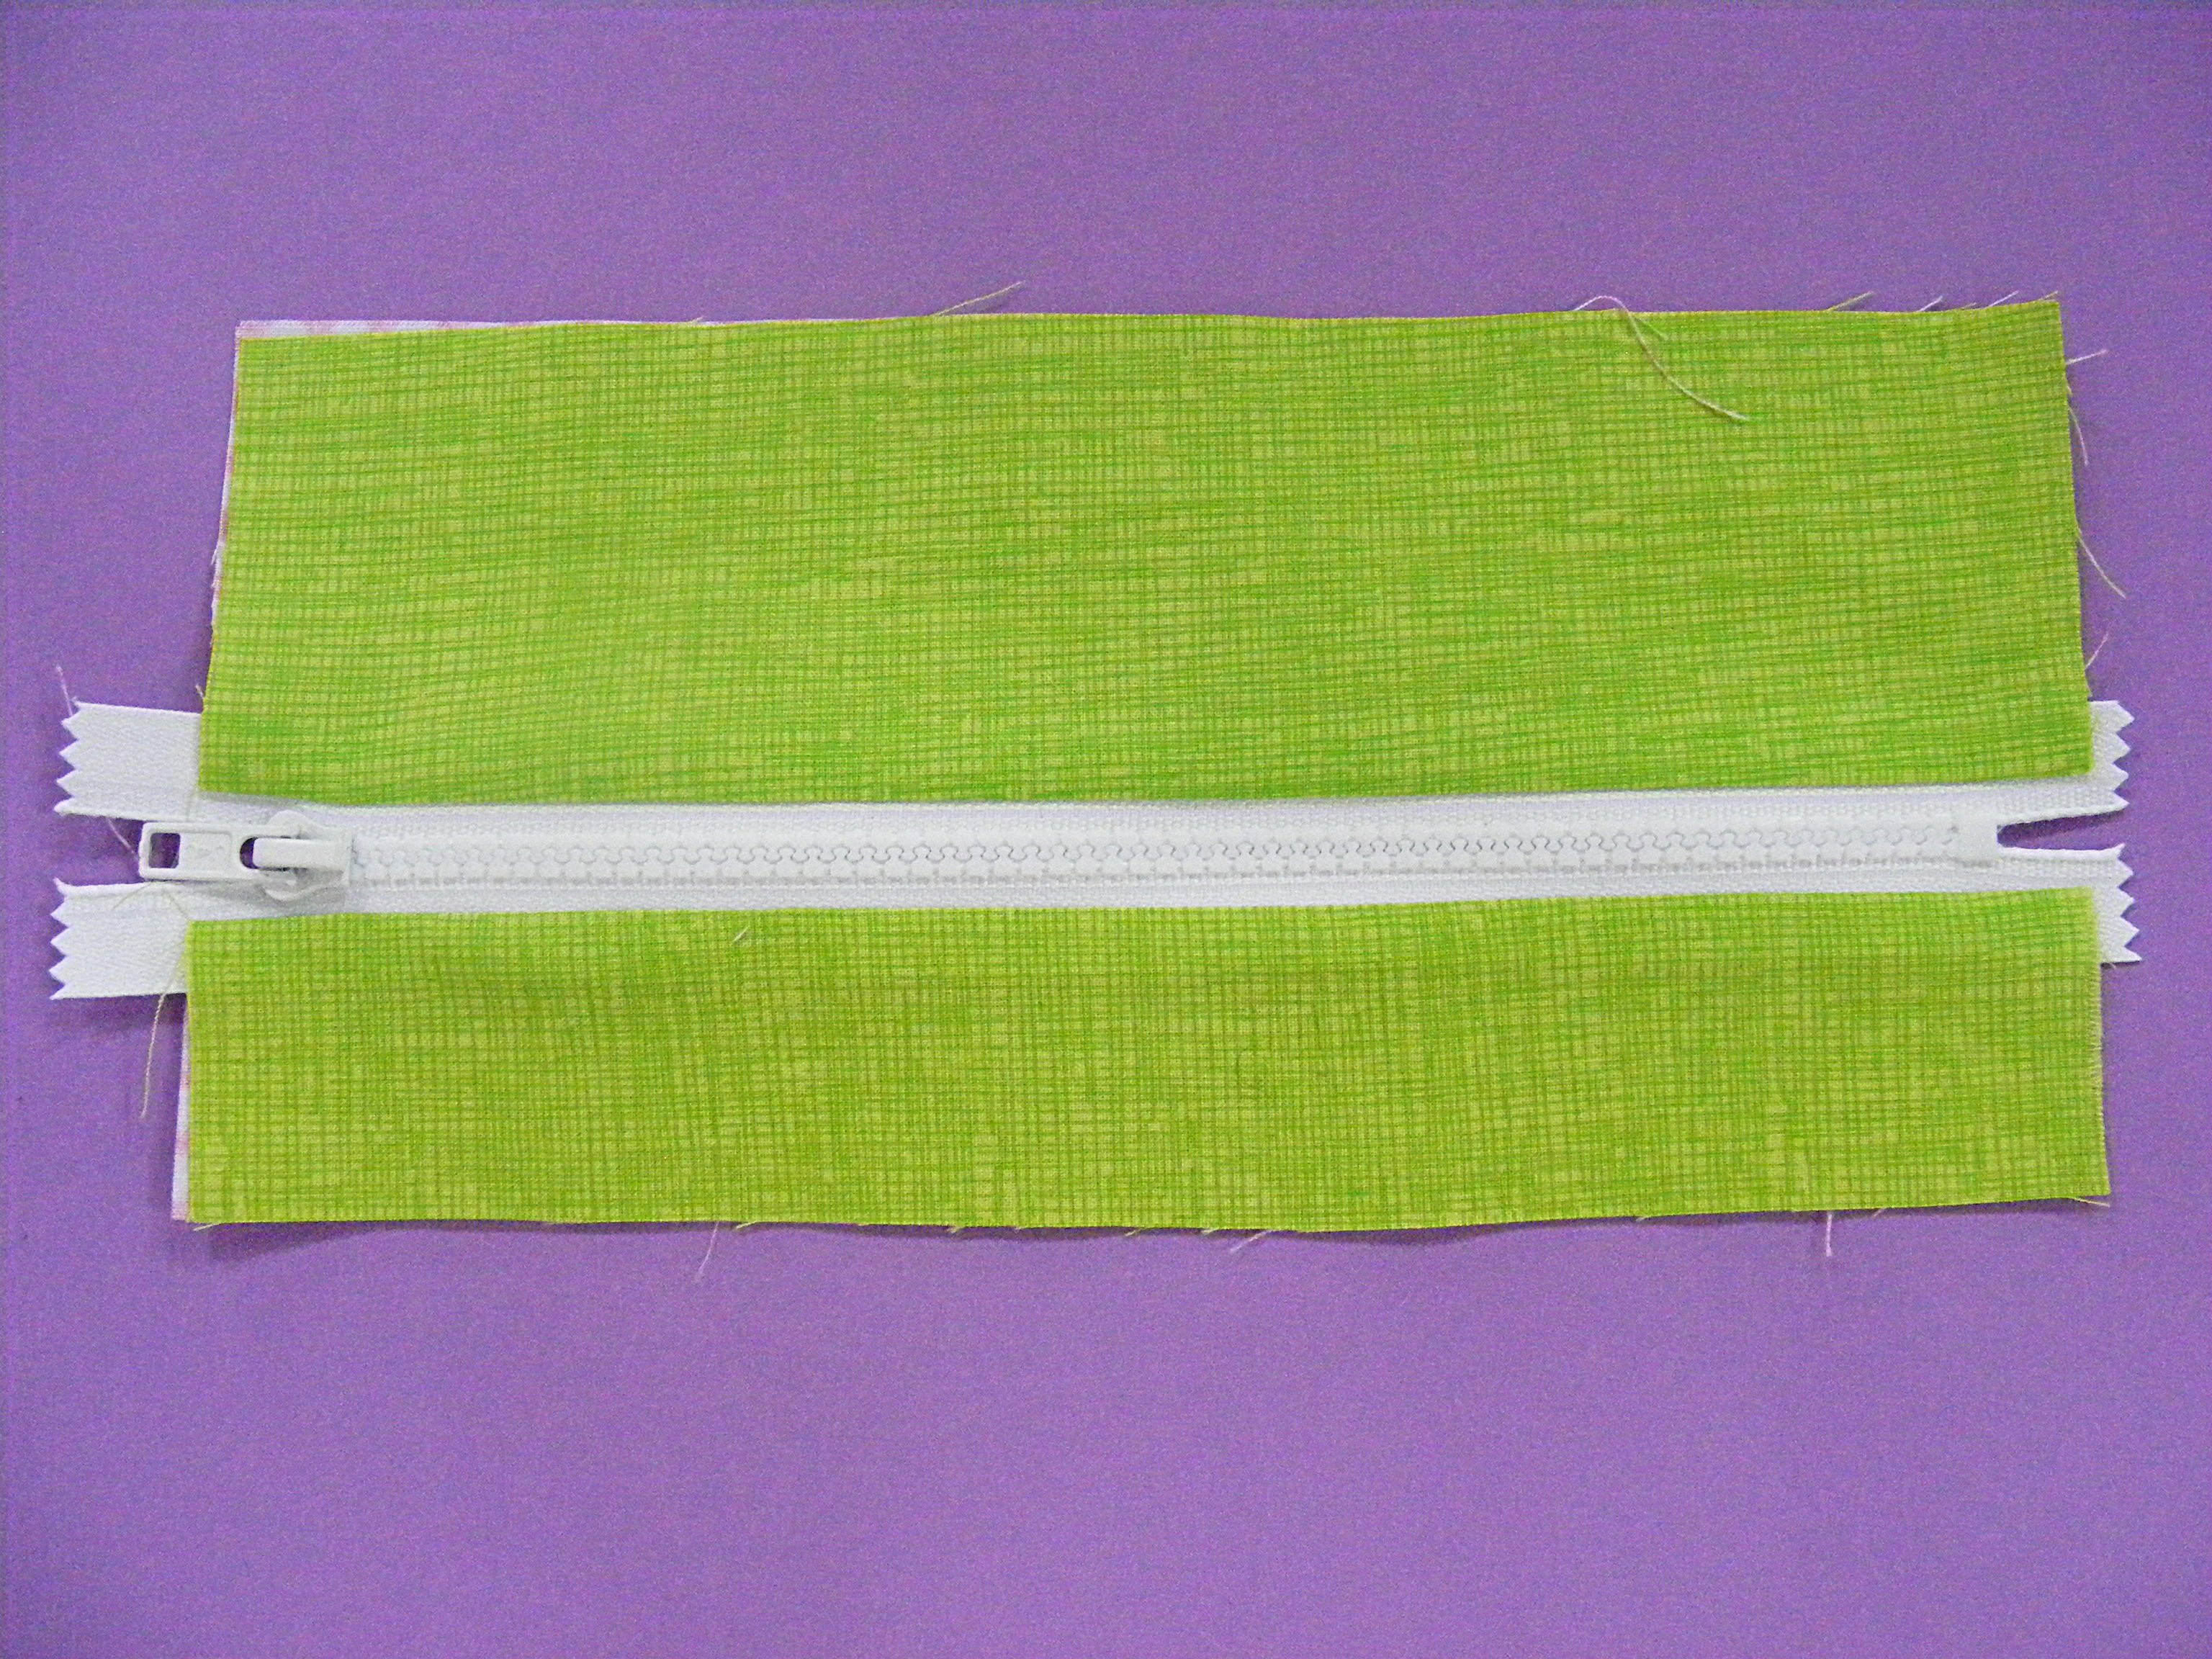
Lay the wider rectangle in the outside fabric face up on a flat surface.
Lay the zipper face down over the fabric. Make sure the teeth of the zipper (not the zipper tape) are centered over the rectangle. Line the edge of the zipper tape up with the edge of the fabric and pin in place.
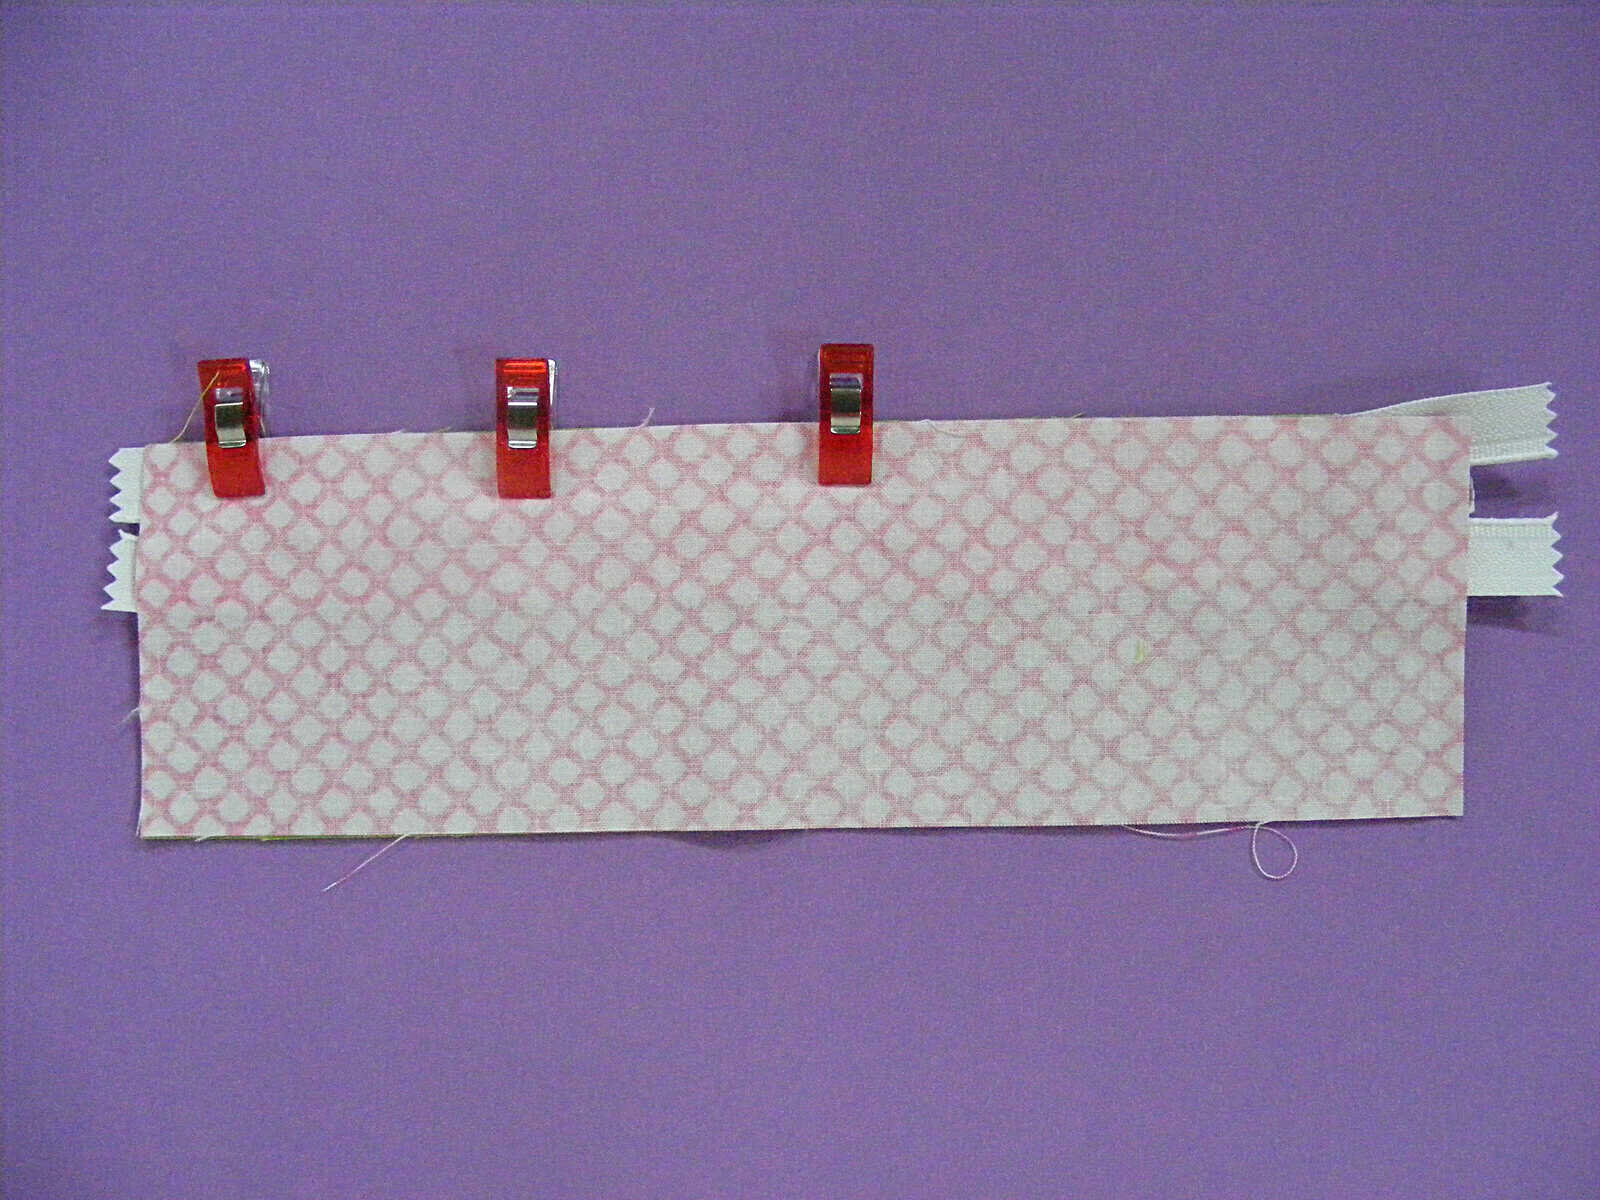
Lay the wider rectangle in the lining fabric face down over the rectangle from Step 2, with the zipper sandwiched between the two layers of fabric.
Pin or clip the layers in place.
Step 4
Sew the three layers together (outer rectangle, lining rectangle and zipper) getting as close to the teeth of the zipper as possible. You’ll want to stop partway along the seam to move the zipper pull out of your way. Watch this video for tips.
If you have a zipper foot, that will let you get very close to the teeth. If you don’t have a zipper foot, just get as close as you can. You’ll have a little more zipper tape showing in the finished pouch and it will be fine.
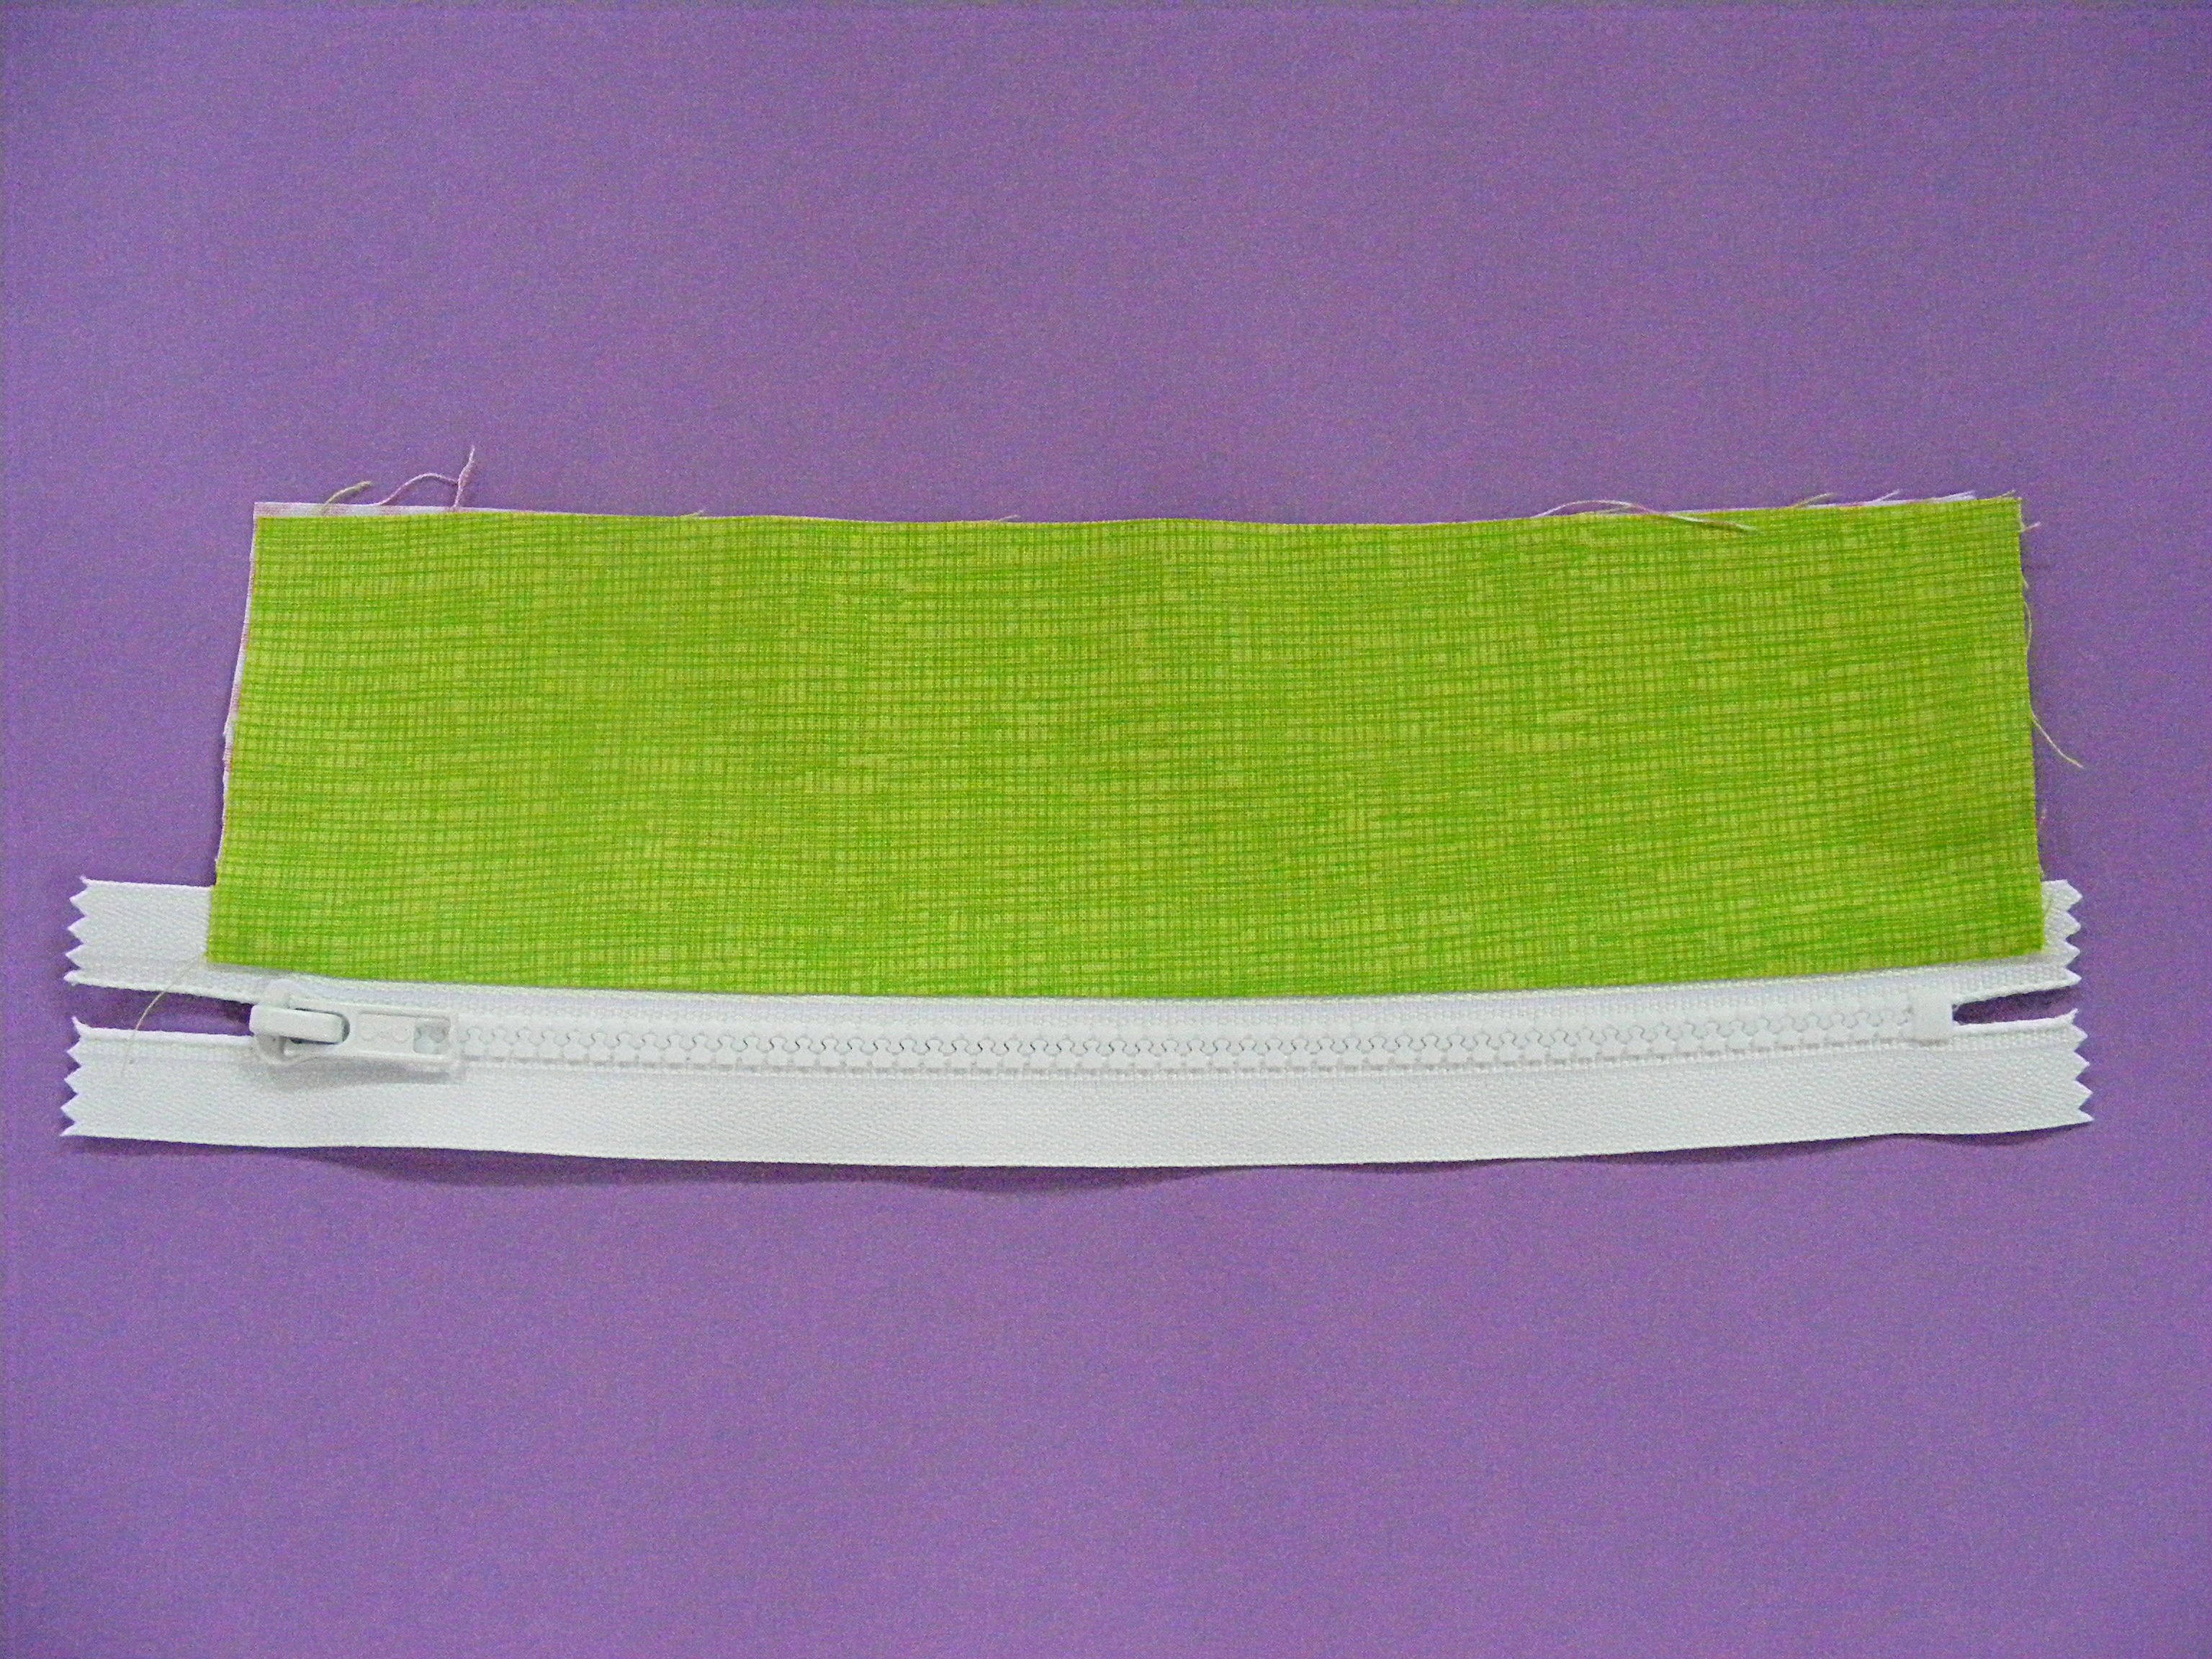
Step 5
Flip the fabric rectangles right side out and press.
On the right side of the zipper (where the pull is) you should have the right side of the outer fabric showing. If you flip the whole thing over you should have the right side of the lining fabric showing.
Step 6
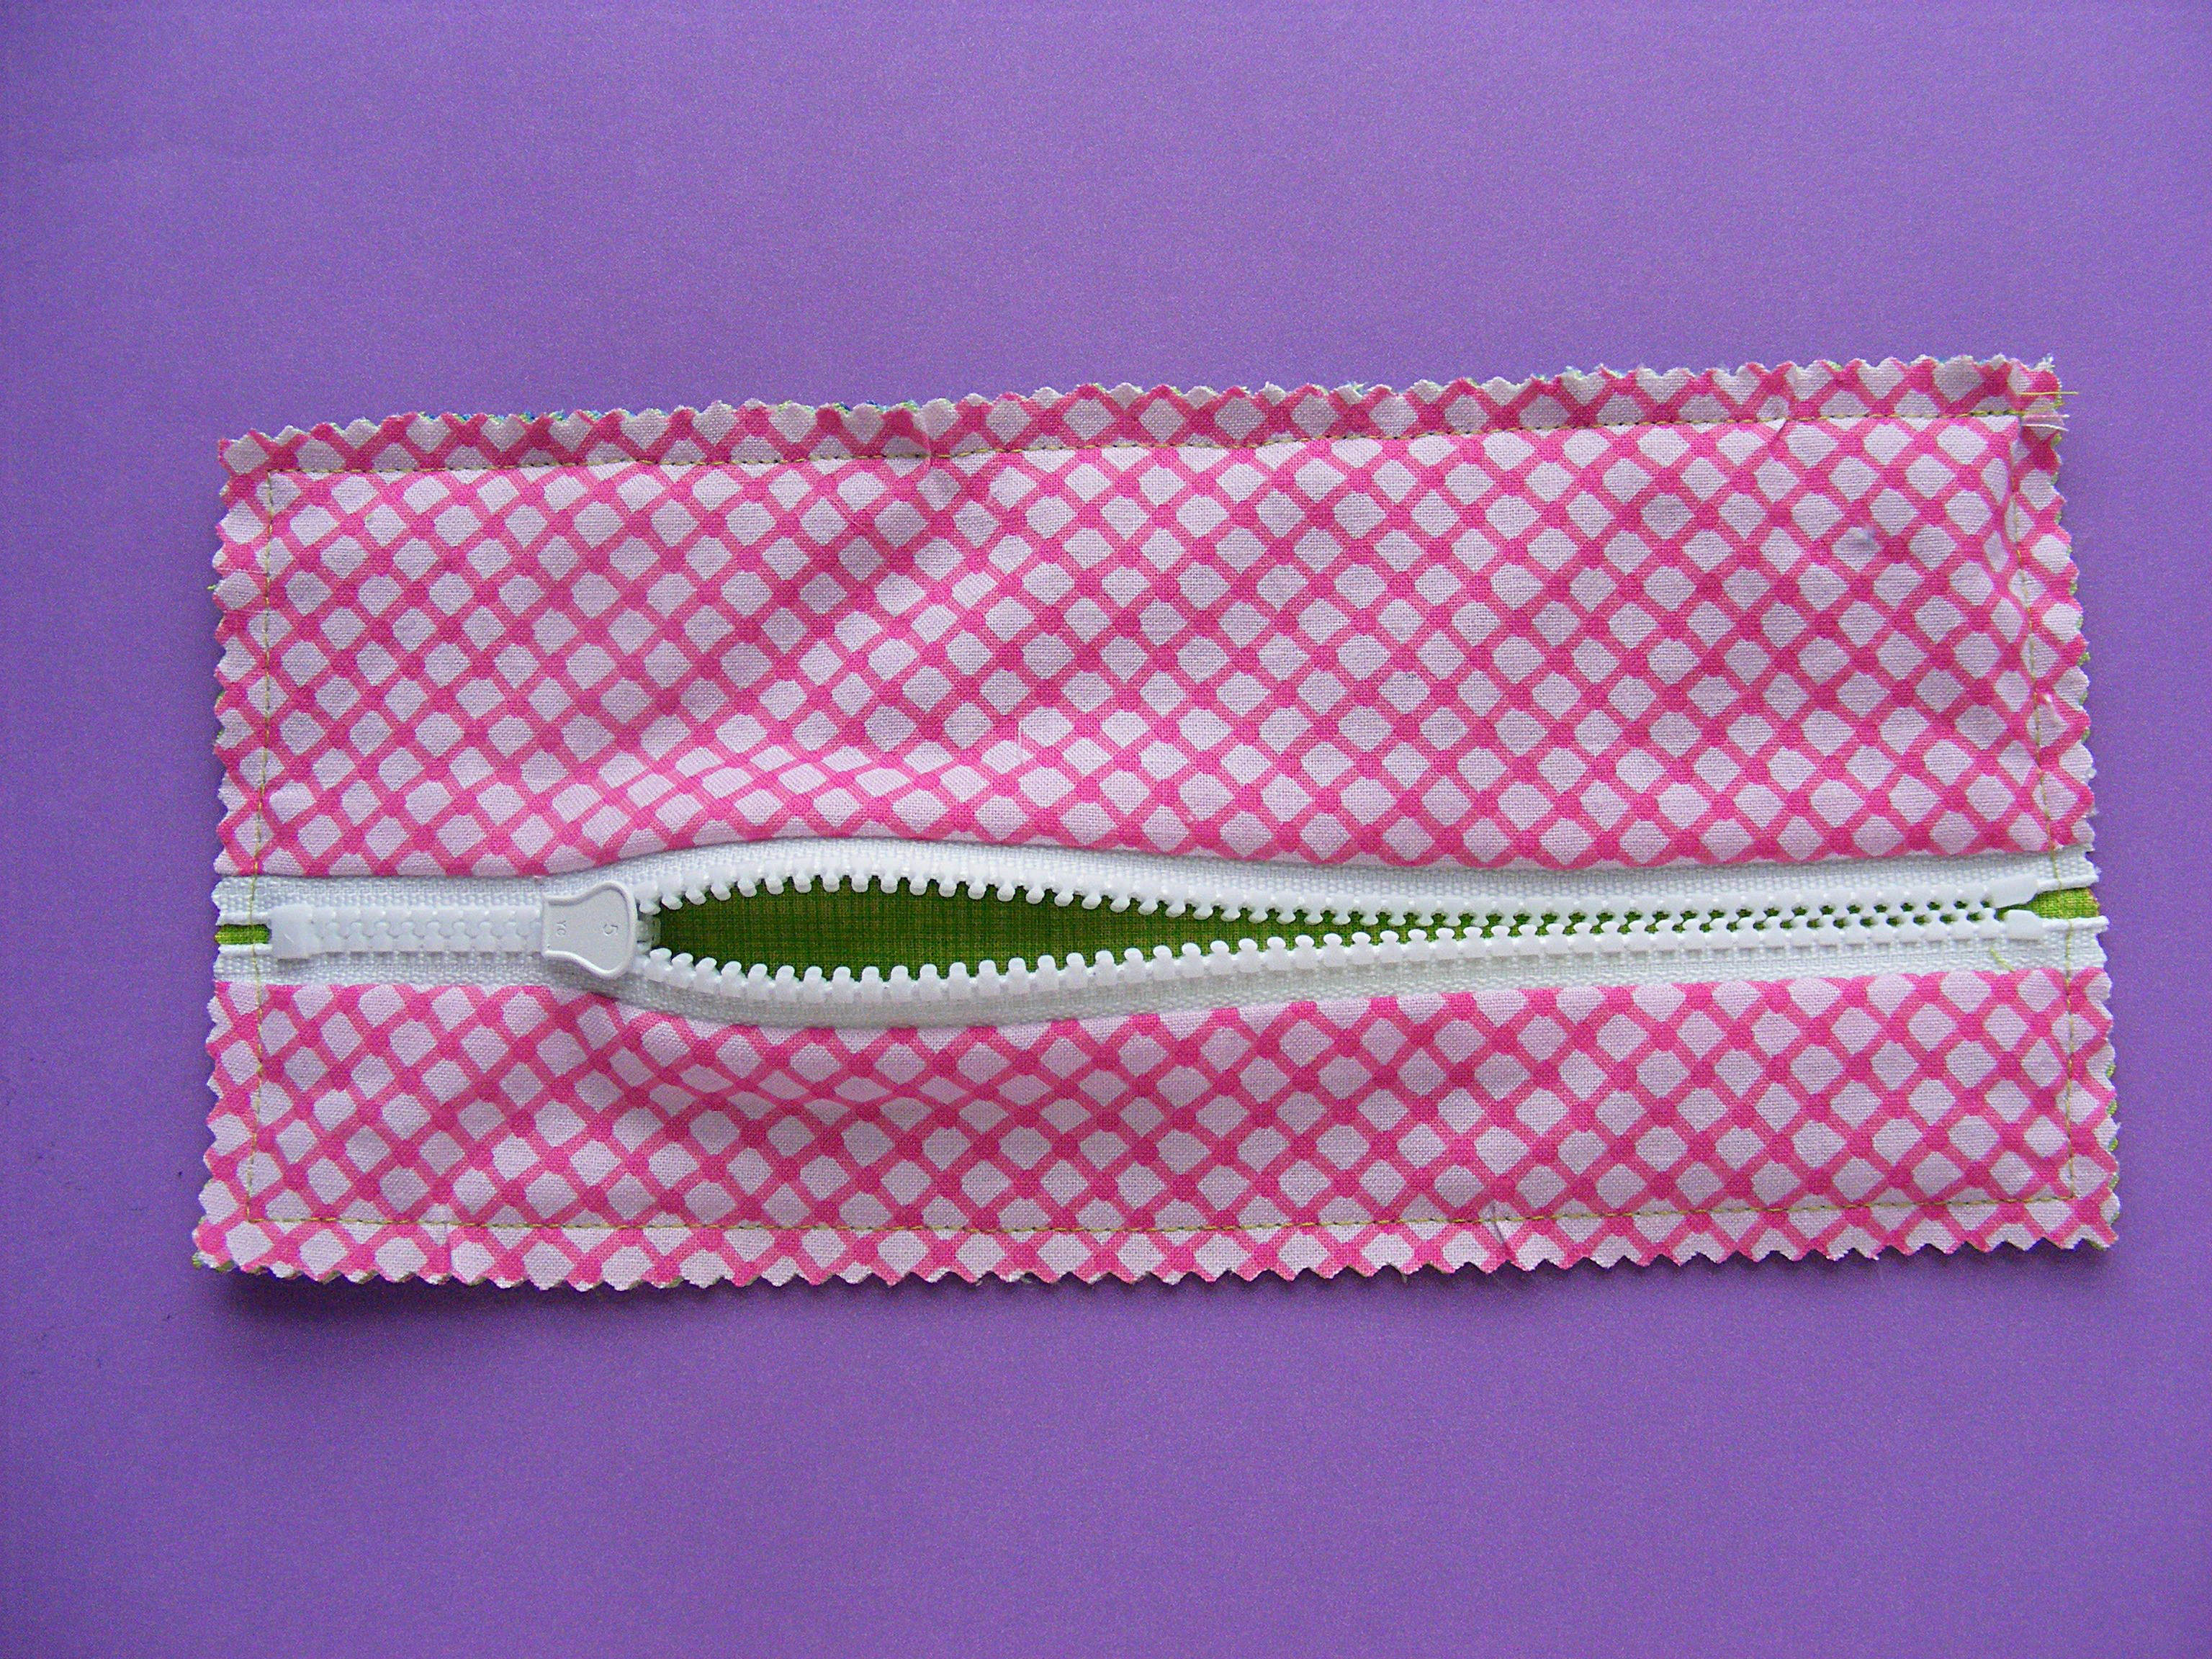
Repeat Steps 2-5 with the narrower fabric rectangles and the other side of the zipper for the bottom of the face.
Remember - the right side of the outer fabric should be facing the right side of the zipper and the right side of the lining fabric when you sew.
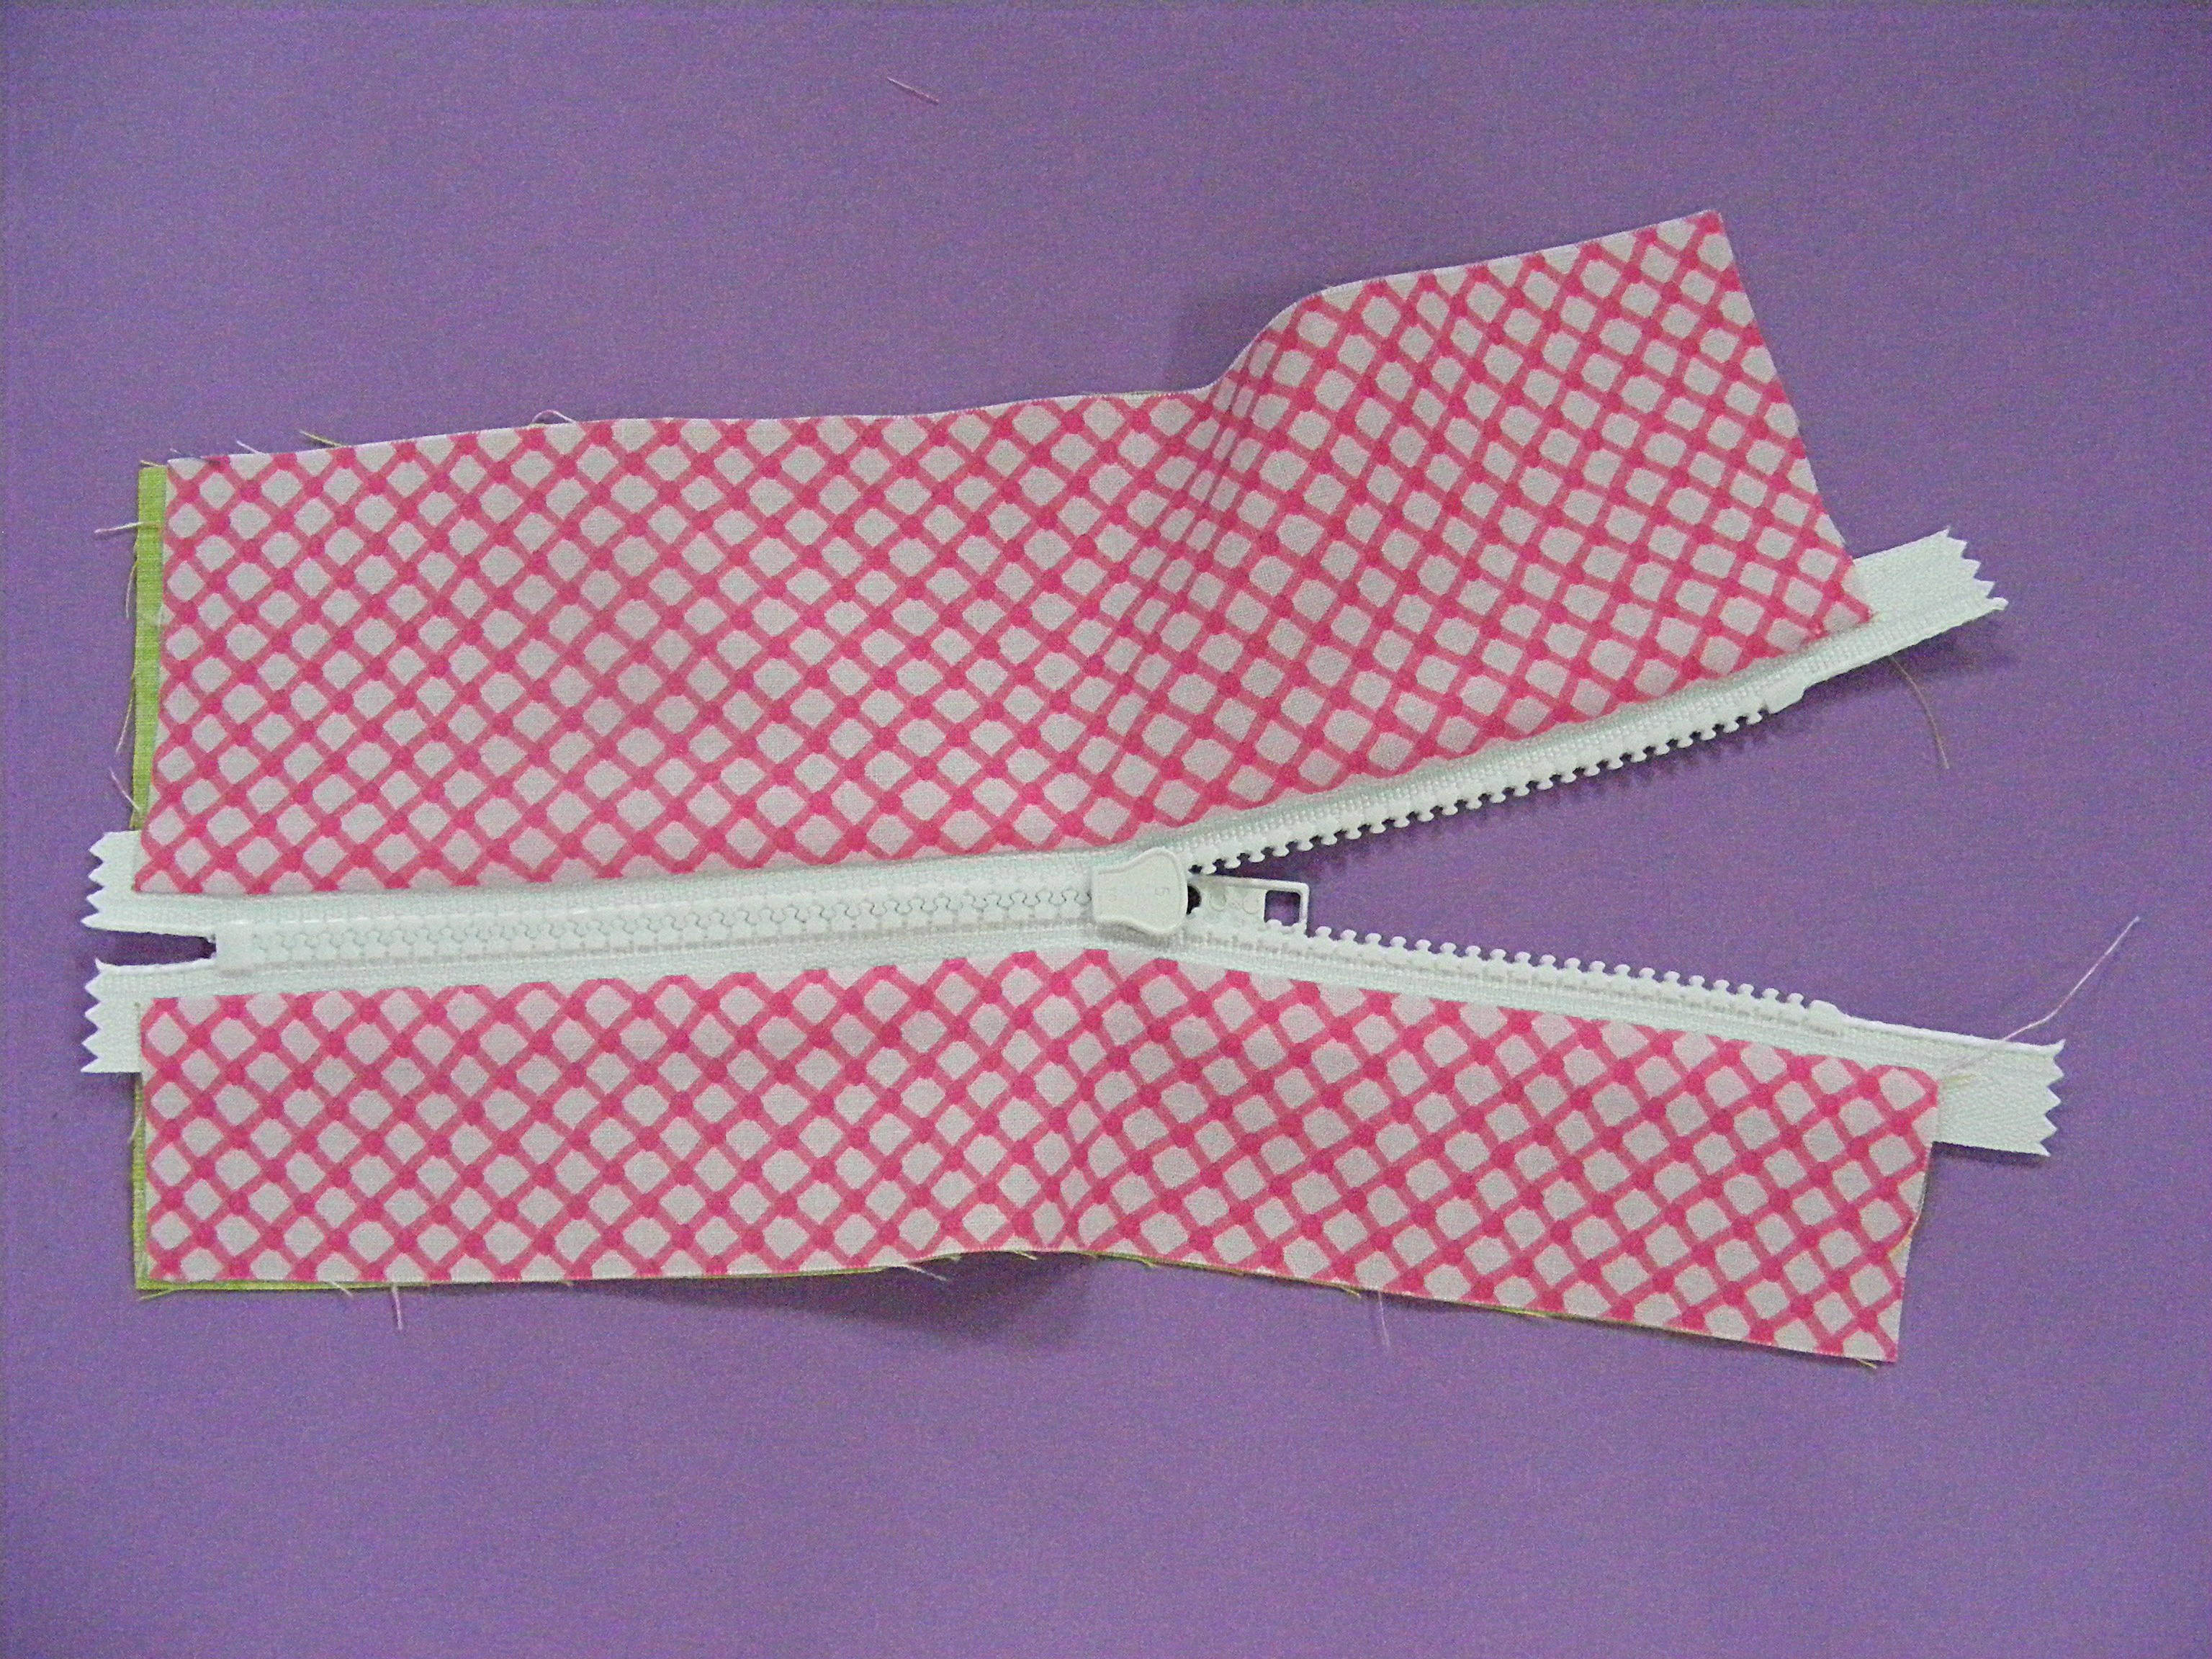
You’re done with the front of the pouch!
Here’s the view of the same piece from the inside. You should be seeing the right side of the lining fabric.
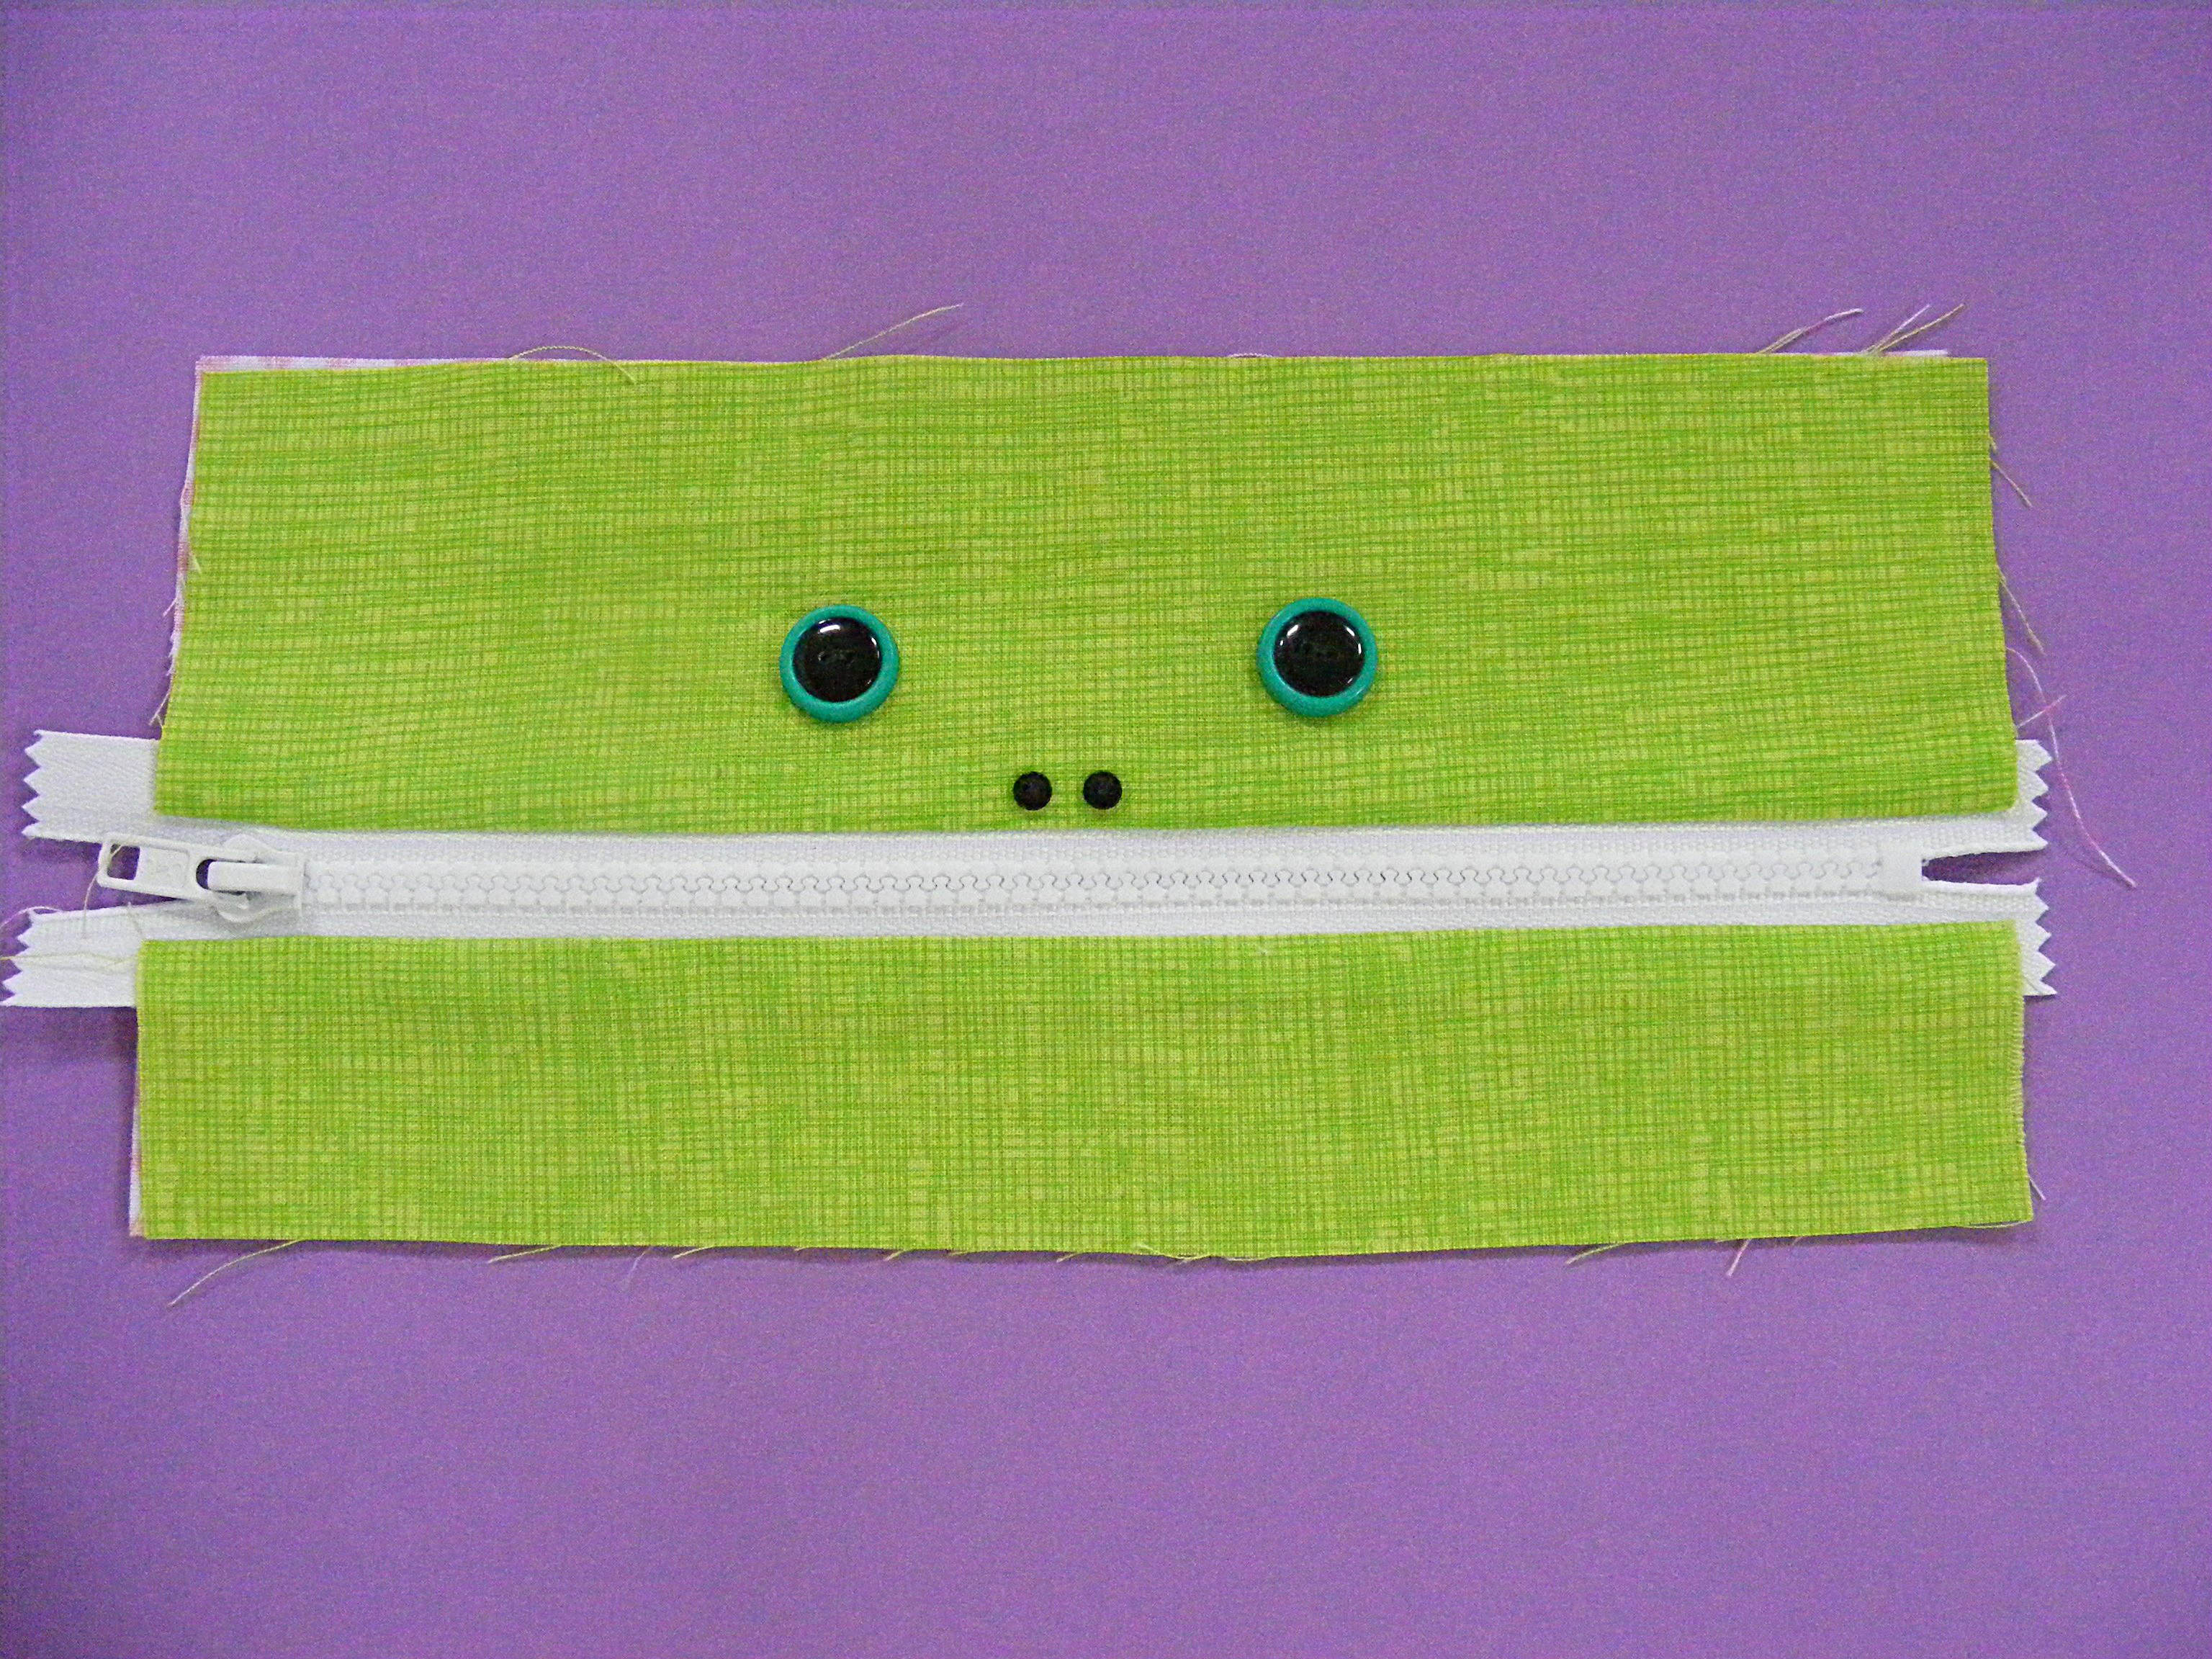
Step 7
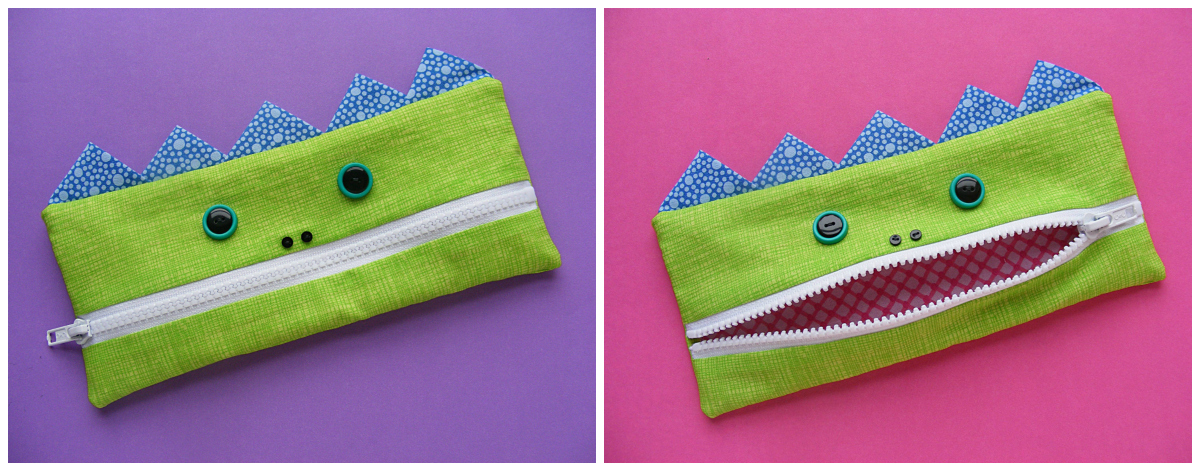
Sew on some fun features! I stacked black buttons on top of larger blue buttons for the eyes, and sewed on tiny black buttons for the nostrils.
Play around and have fun with these! Add one giant button to make a cyclops. Embroider on some eyebrows. Skip the nostrils. Make it your own!
You’ll be sewing all around the outside of the pouch using 1/2″ seam allowance - so make sure to take that into account when you position your eyes and other features.
Flip the lining piece out of the way so you’re only sewing through the outer fabric.
Step 8
Measure the finished piece. It should be 10 inches wide, but the height will vary depending on the chunkiness of the zipper you’re using, and how close to the teeth you were able to stitch. Mine was 10″ wide and 4 7/8″ tall.
Use the measurements of your finished face to cut two back pouch pieces to match it. Cut one from the outer fabric and one from the lining fabric.
Step 9
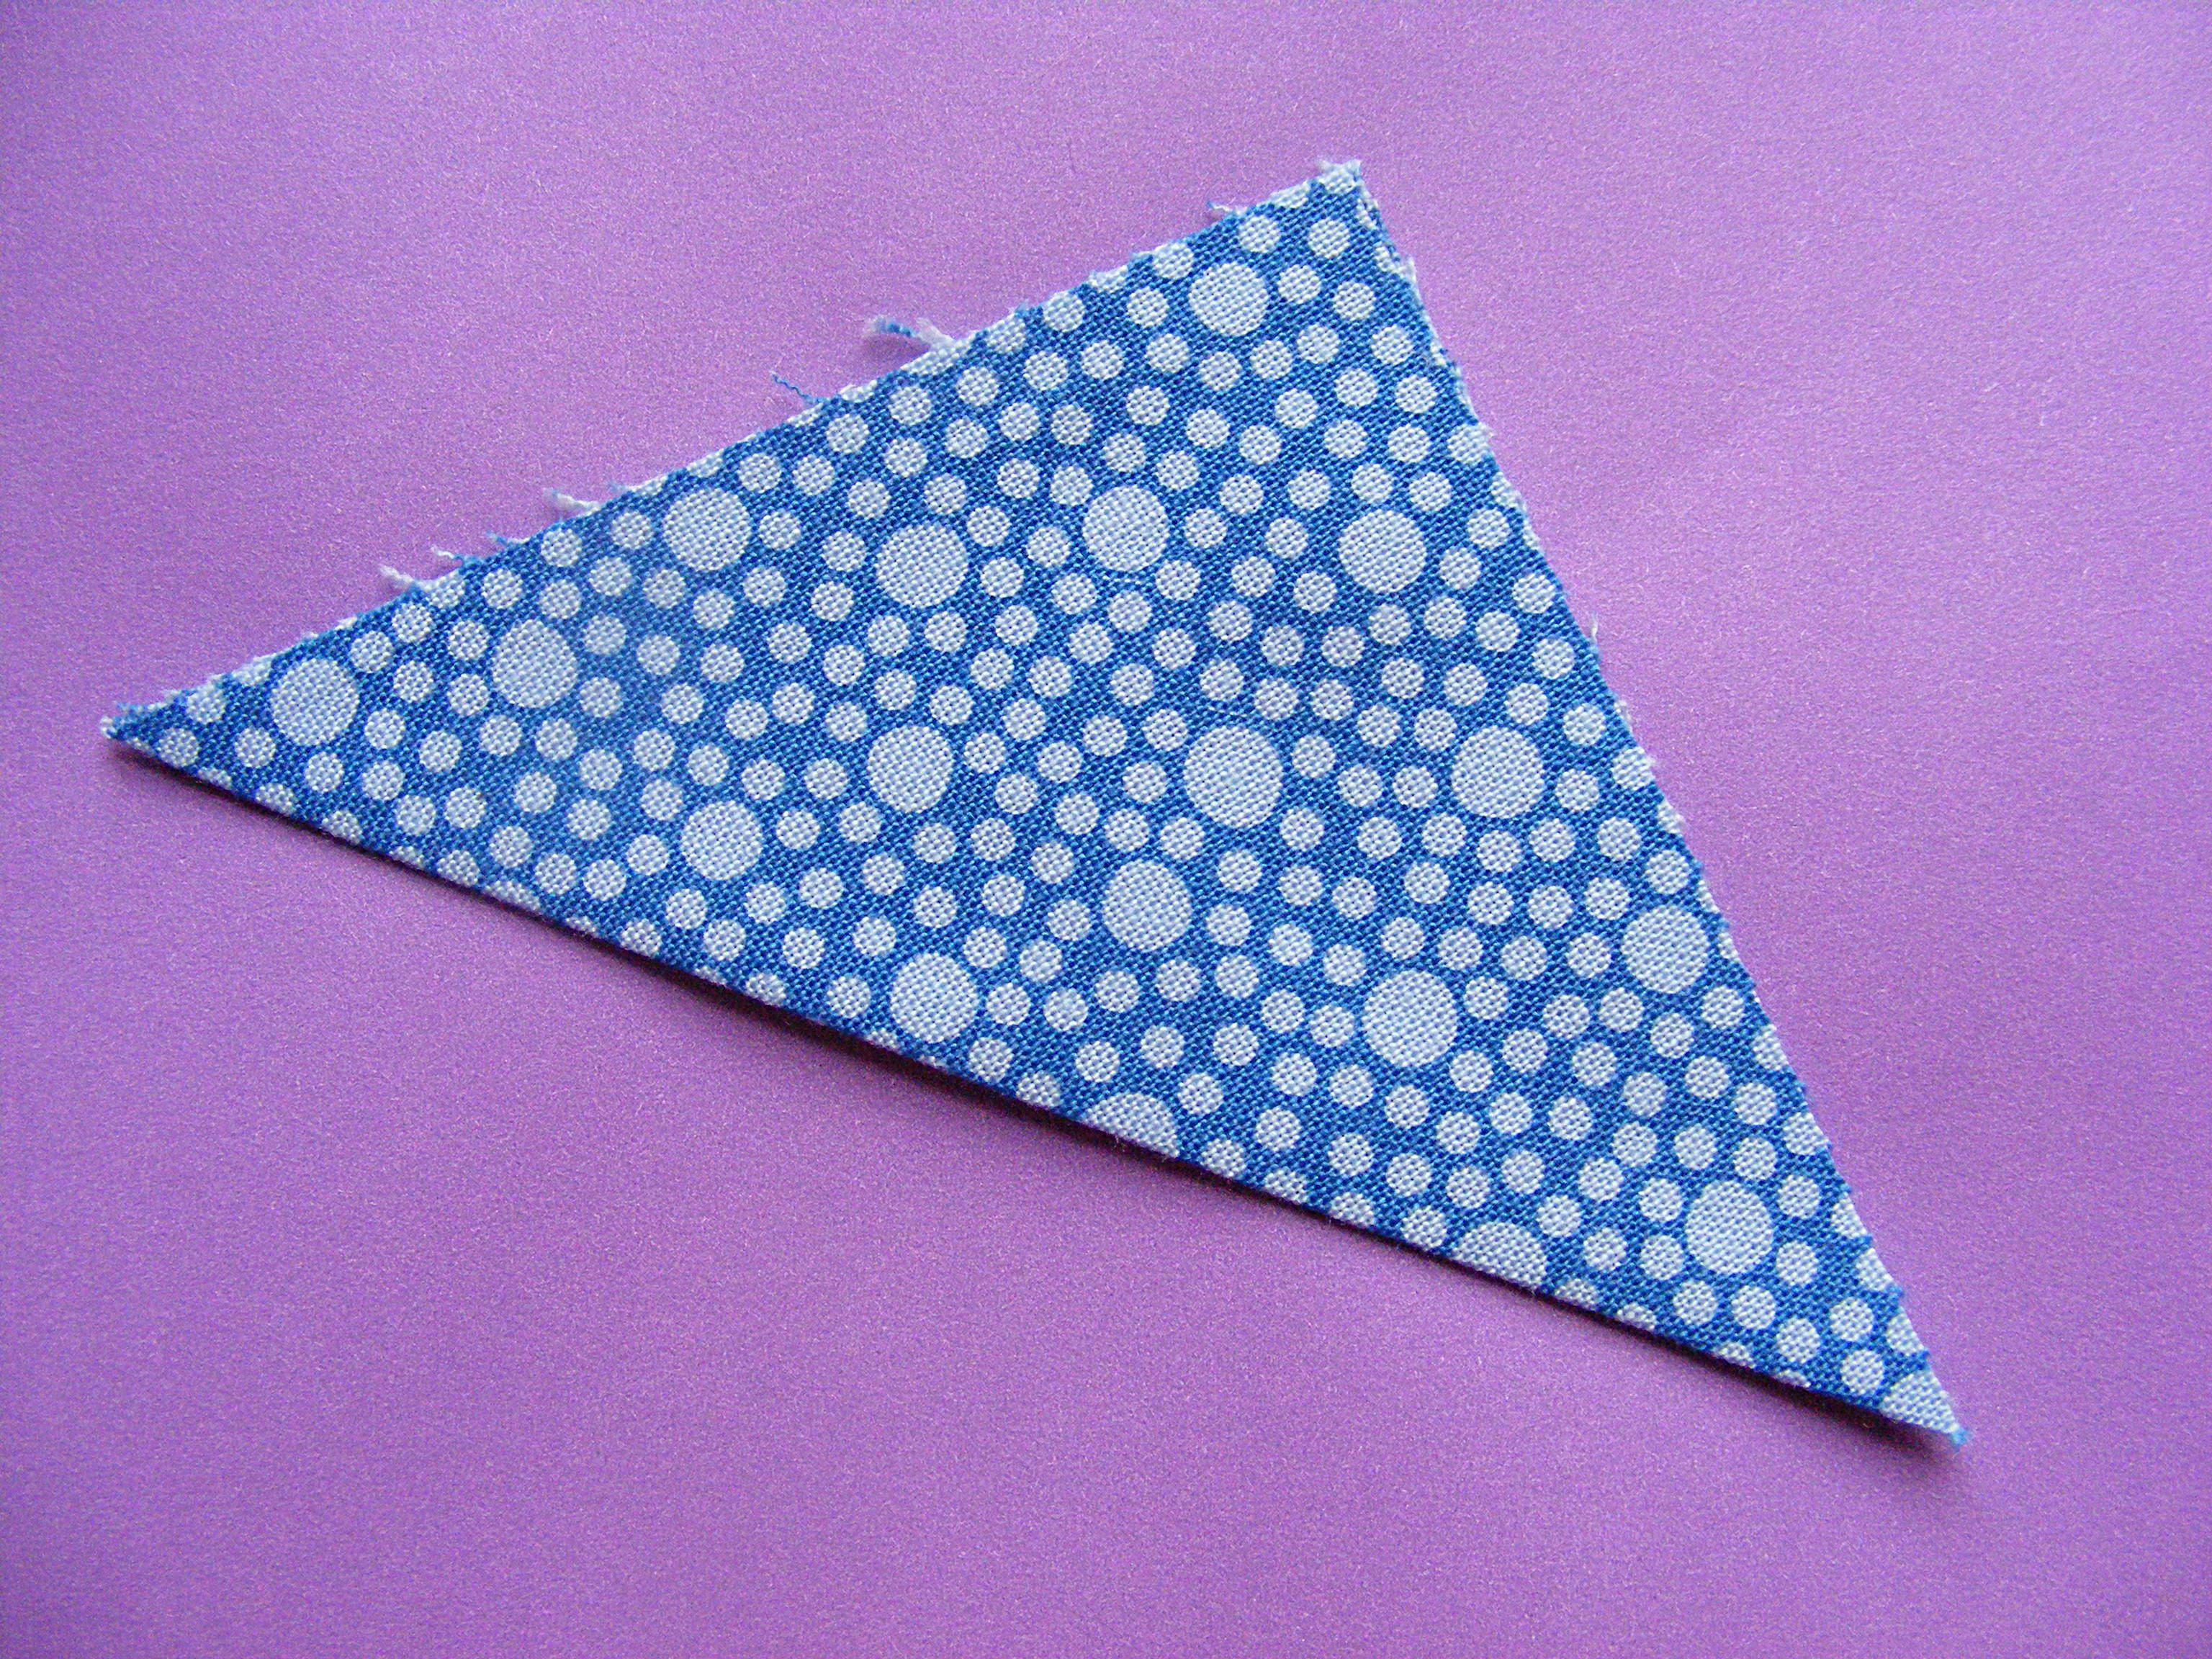
For the hair/spikes we’ll be making some prairie points. It’s really easy - just folding!
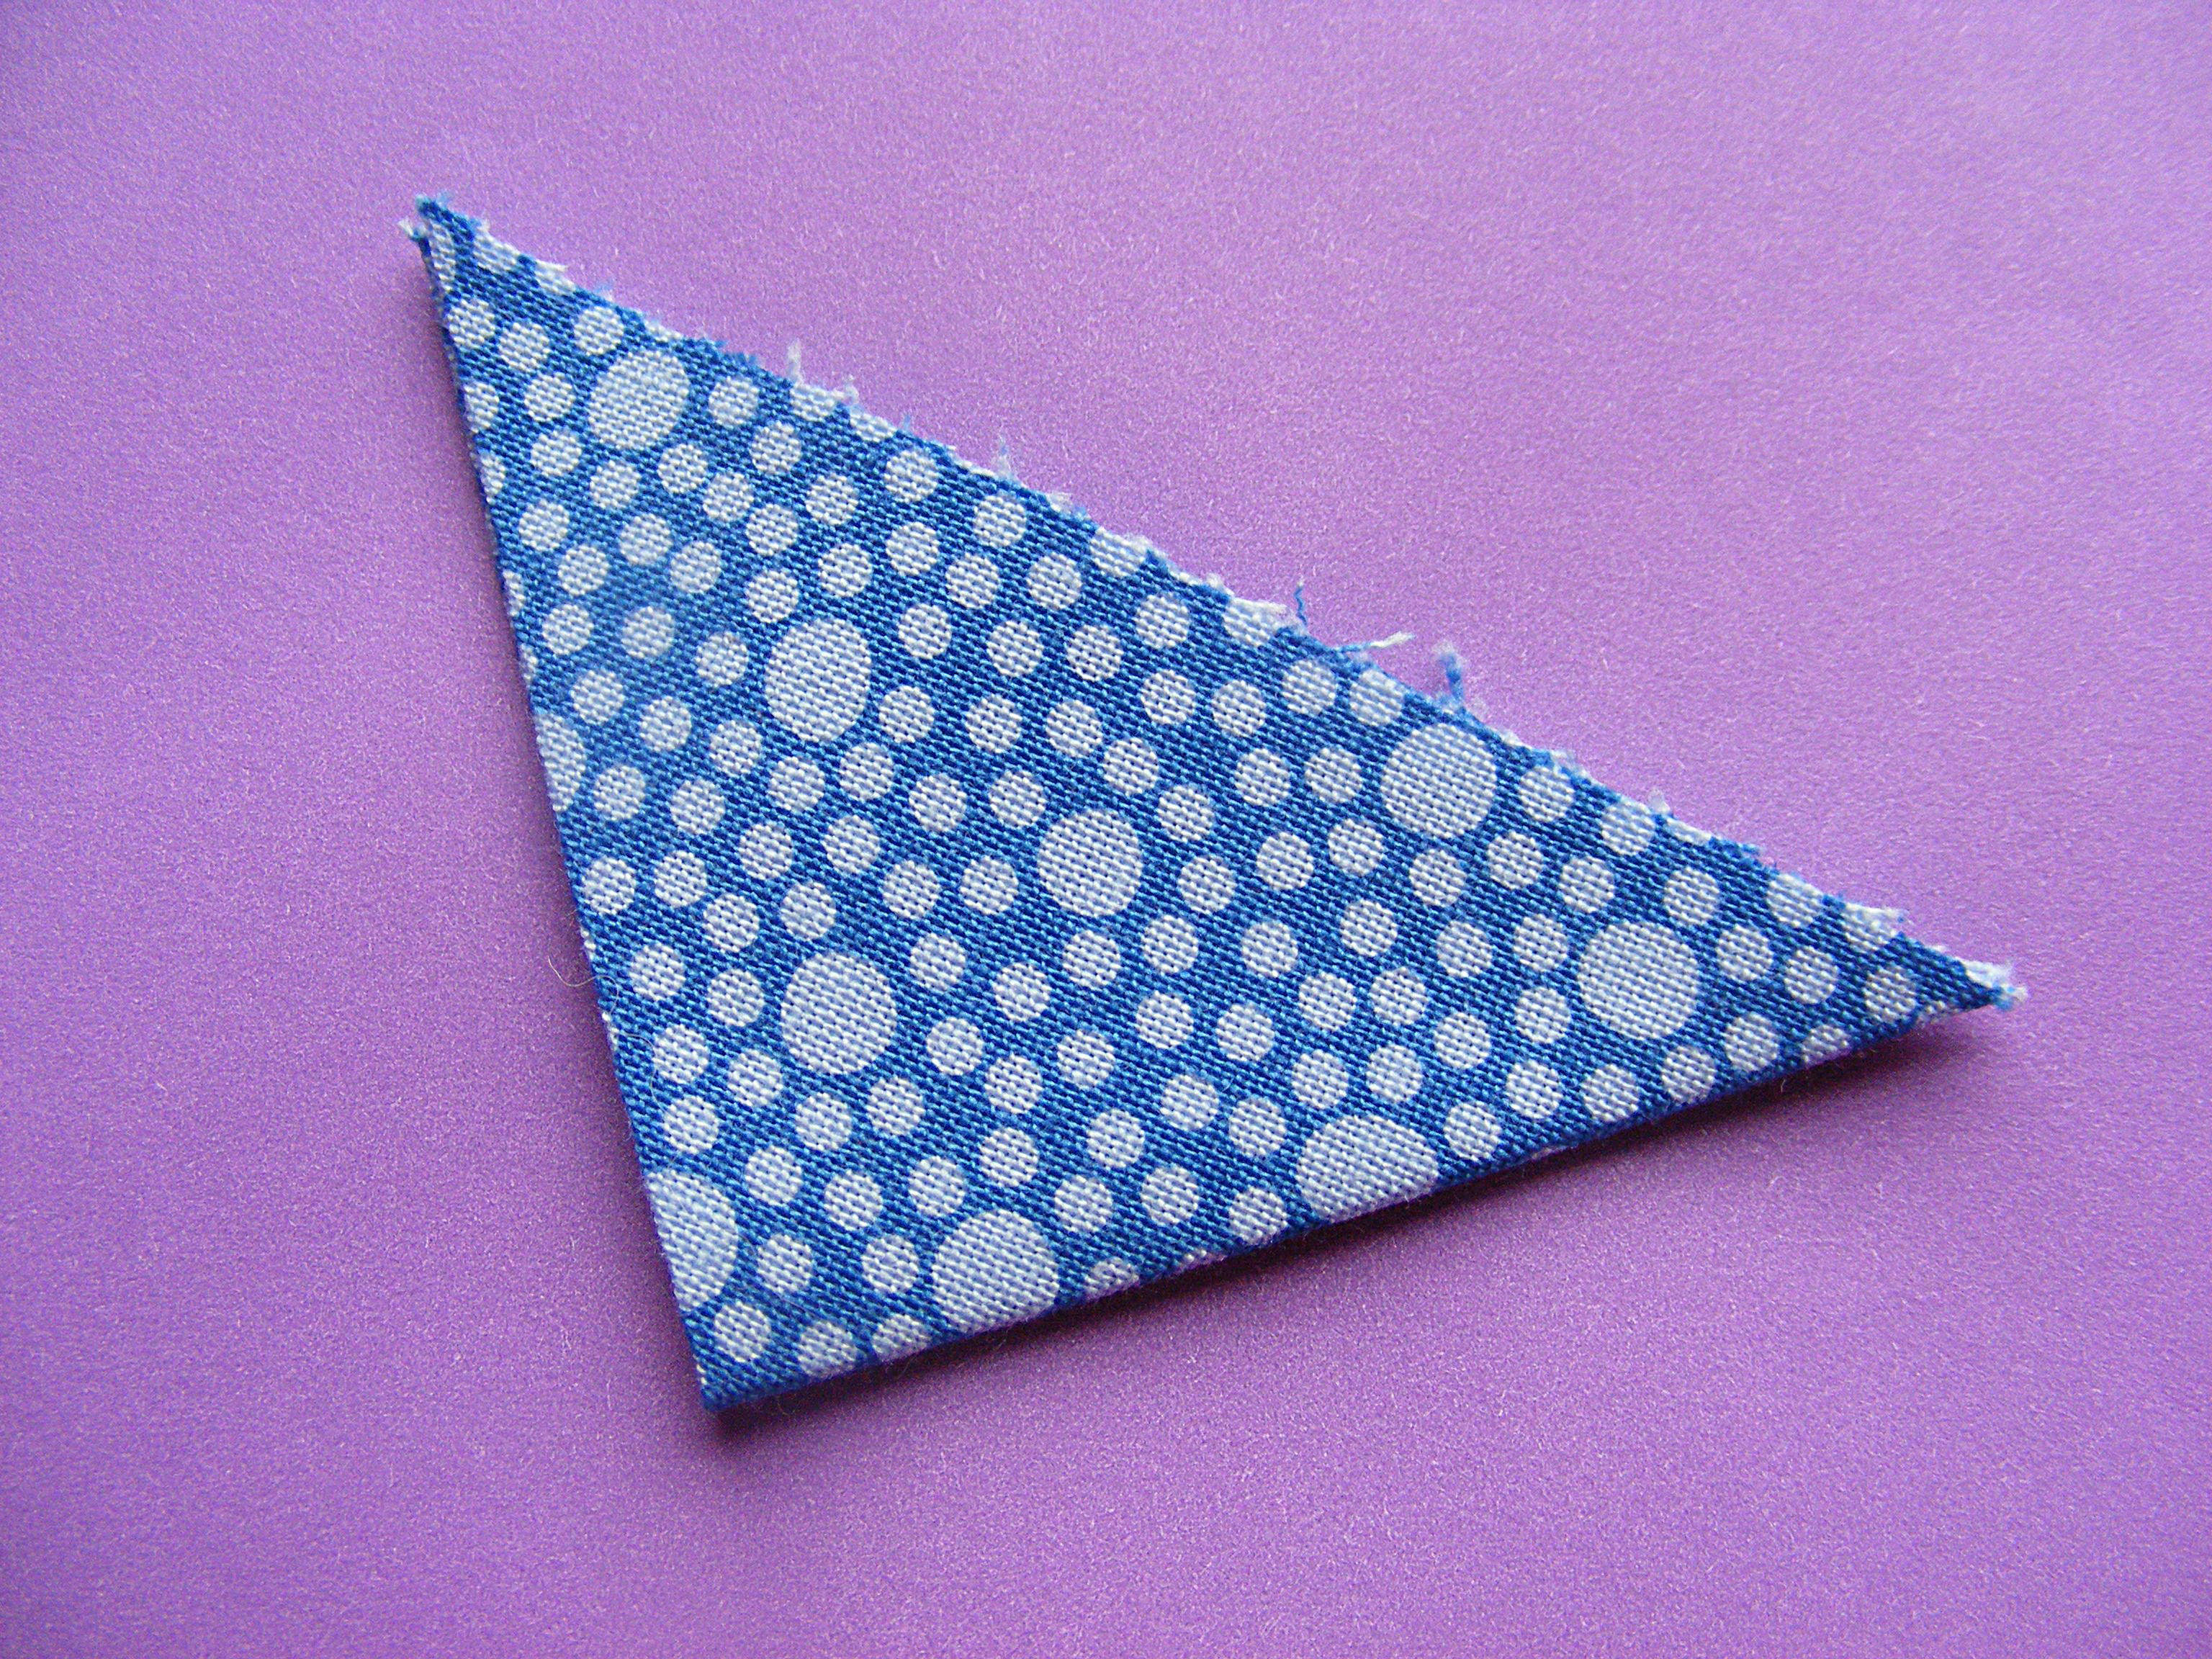
Fold one of your squares in half along the diagonal.
Press.
Now fold it in half again, so that all the raw edges are lined up along the longest edge of the triangle.
Press.
Done! Repeat for the other four squares.
Step 10
Ready to put it all together?
Pin the prairie points along the top edge of the face. I start by folding the face in half to find the center. Pin the center point in place first, then pin the two at the edges, then center the last two between them.
All the raw edges of the prairie points should be lined up with the raw edges of the outer and lining fabrics.
Step 11
Unzip the zipper mouth at least part way. This is very important! If you forget, you won’t be able to turn your pouch right side out after the next step!
Lay the outer fabric rectangle (the one you cut in Step 8) face down over the face, with the prairie points sandwiched between the two layers.
Lay the lining rectangle face up over the outer fabric. Pin all the layers together all the way around the edges.
Step 12
Sew all the way around the edge using 1/2″ seam allowance. That should have you sewing right up against the bumpy ends of the zipper.
Trim away your excess seam allowance with pinking shears. That will keep the fabric from fraying too badly - plus it looks cute. :)
Leave about 1/4″ seam allowance.
Step 13
Turn the pouch right side out and poke out the corners with a chopstick. You’re done! See how cute the contrasting lining inside the mouth looks?
Do you like this? Get the weekly Shiny Happy News and never miss a free pattern! Sign up here.