Crochet Mike the Monster from Monsters University!


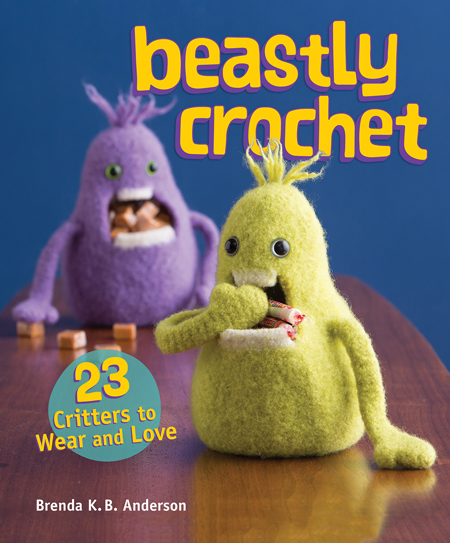
I love monsters. And I love crocheting monsters. So, when I found out that Disney was looking for bloggers to write tutorials for crafts based on Monsters University, I nearly fell out of my chair.

Monsters-University banner

My love for monsters must have poured through the computer screen… because here I am, sharing my super-awesome crochet tutorial with you!

This tutorial is celebrating the release of Monsters University (in a Blu-ray combo pack) tomorrow! Hooray!

How do you pick just one monster?

I’ll confess. It was really hard to pick a monster from Monsters University to turn into crochet-form. The movie is just so darn chock-full of adorable and creative monsters!

Characters from Monsters University

I was tempted by Squishy (the multi-eyed cutie with a knit sweater!) and Terry & Terry (the double-headed duo)… what great shapes!

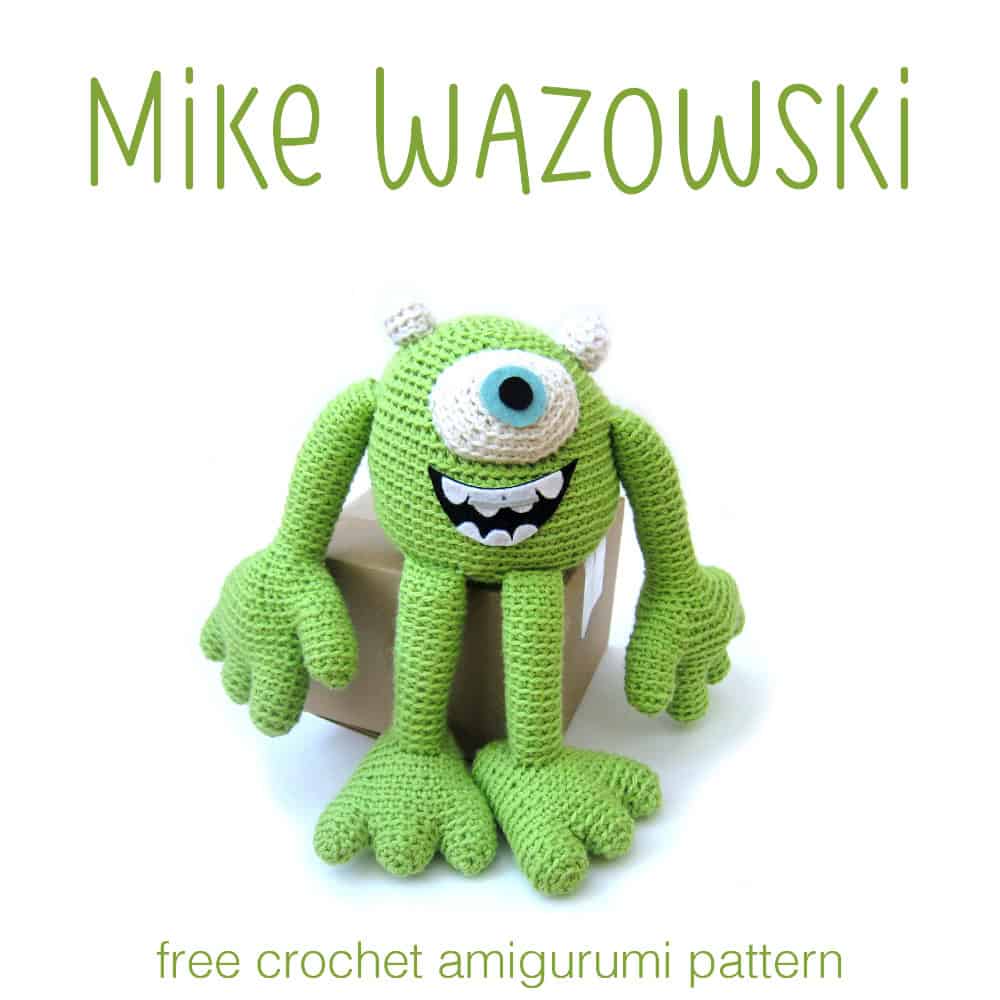
But in the end… I had to go with familiar and loveable Mike.

movies-monsters-university-character-art-4

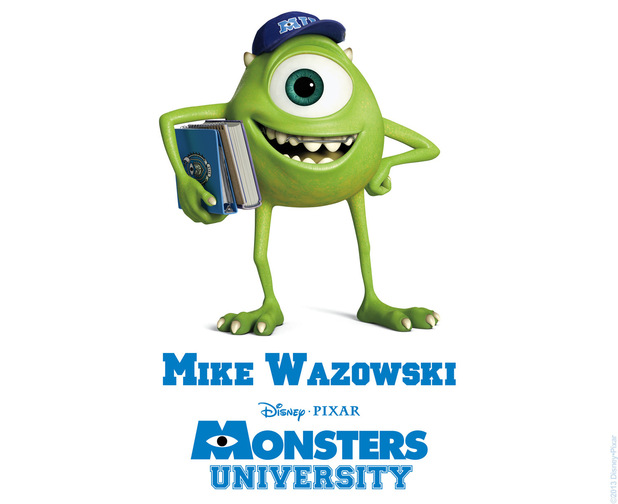
You can crochet your own Mike!


To crochet Mike, you’ll need:

  • 2 colors of worsted weight yarn: green (250 yards) and white (15 yards)
  • Size H (5.0mm) crochet hook
  • Tapestry Needle
  • Polyester stuffing
  • Small amounts of felt: black, white, grey and blue
  • Craft glue (one that works for fabrics)

Once you have your supplies gathered, download now.

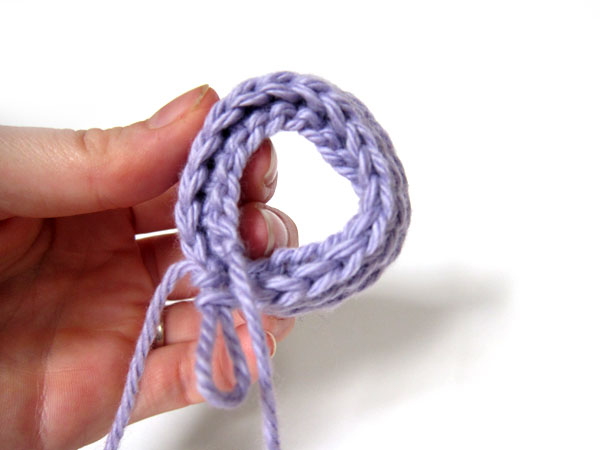
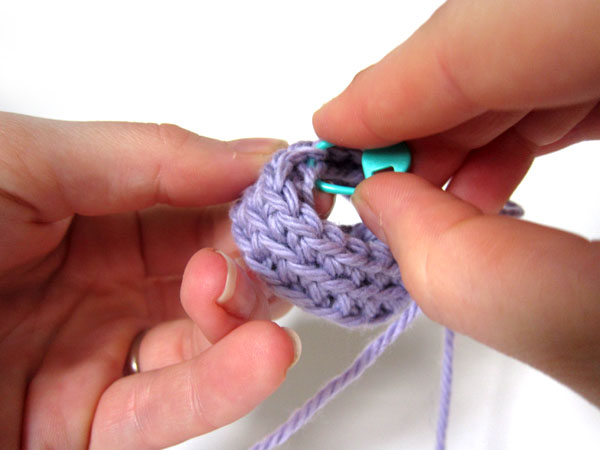
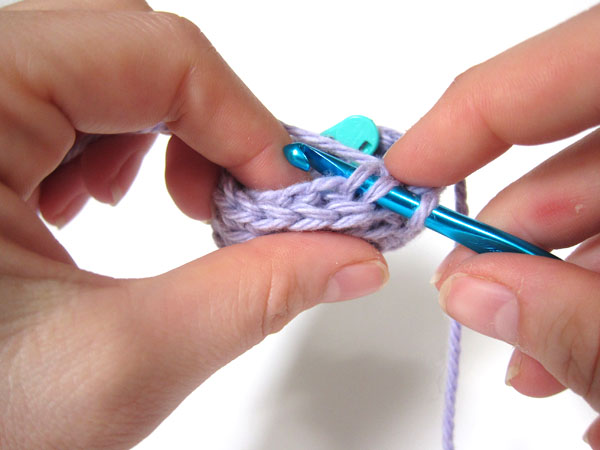
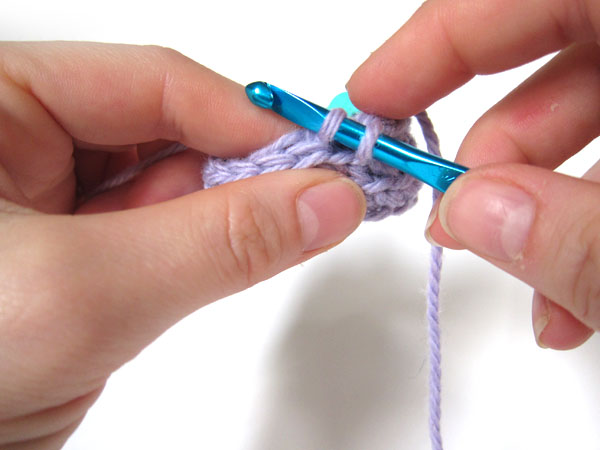
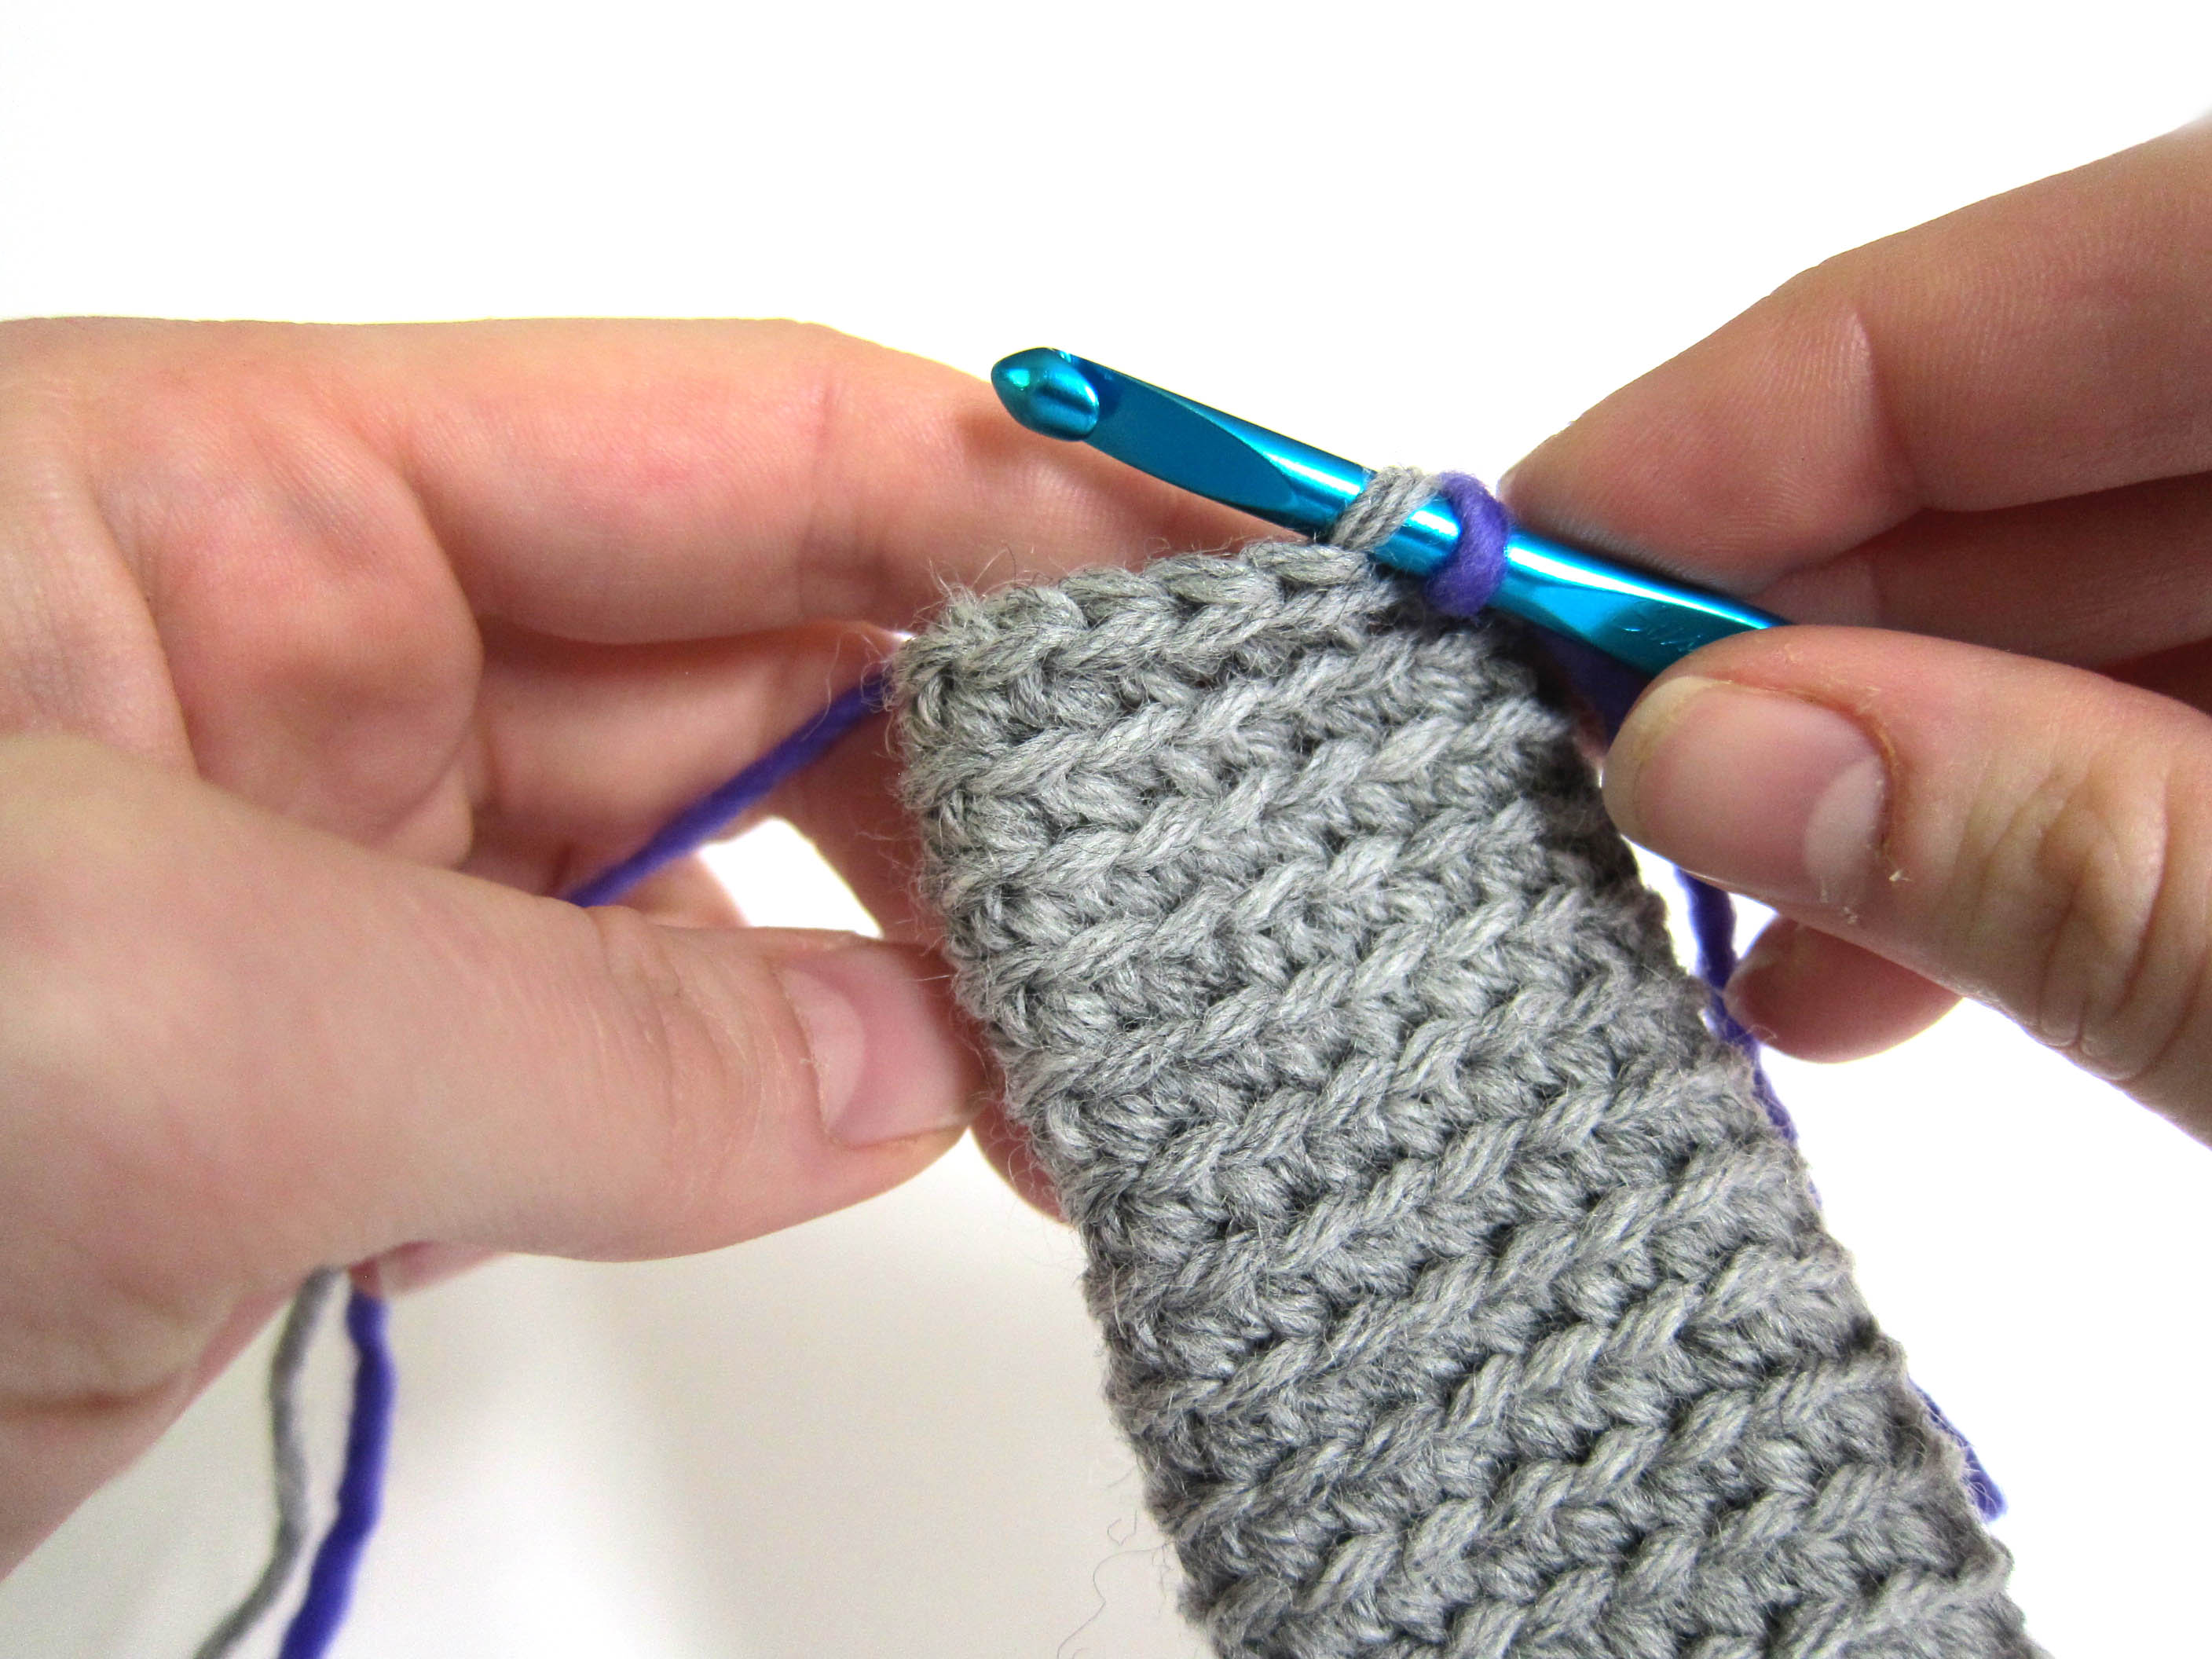
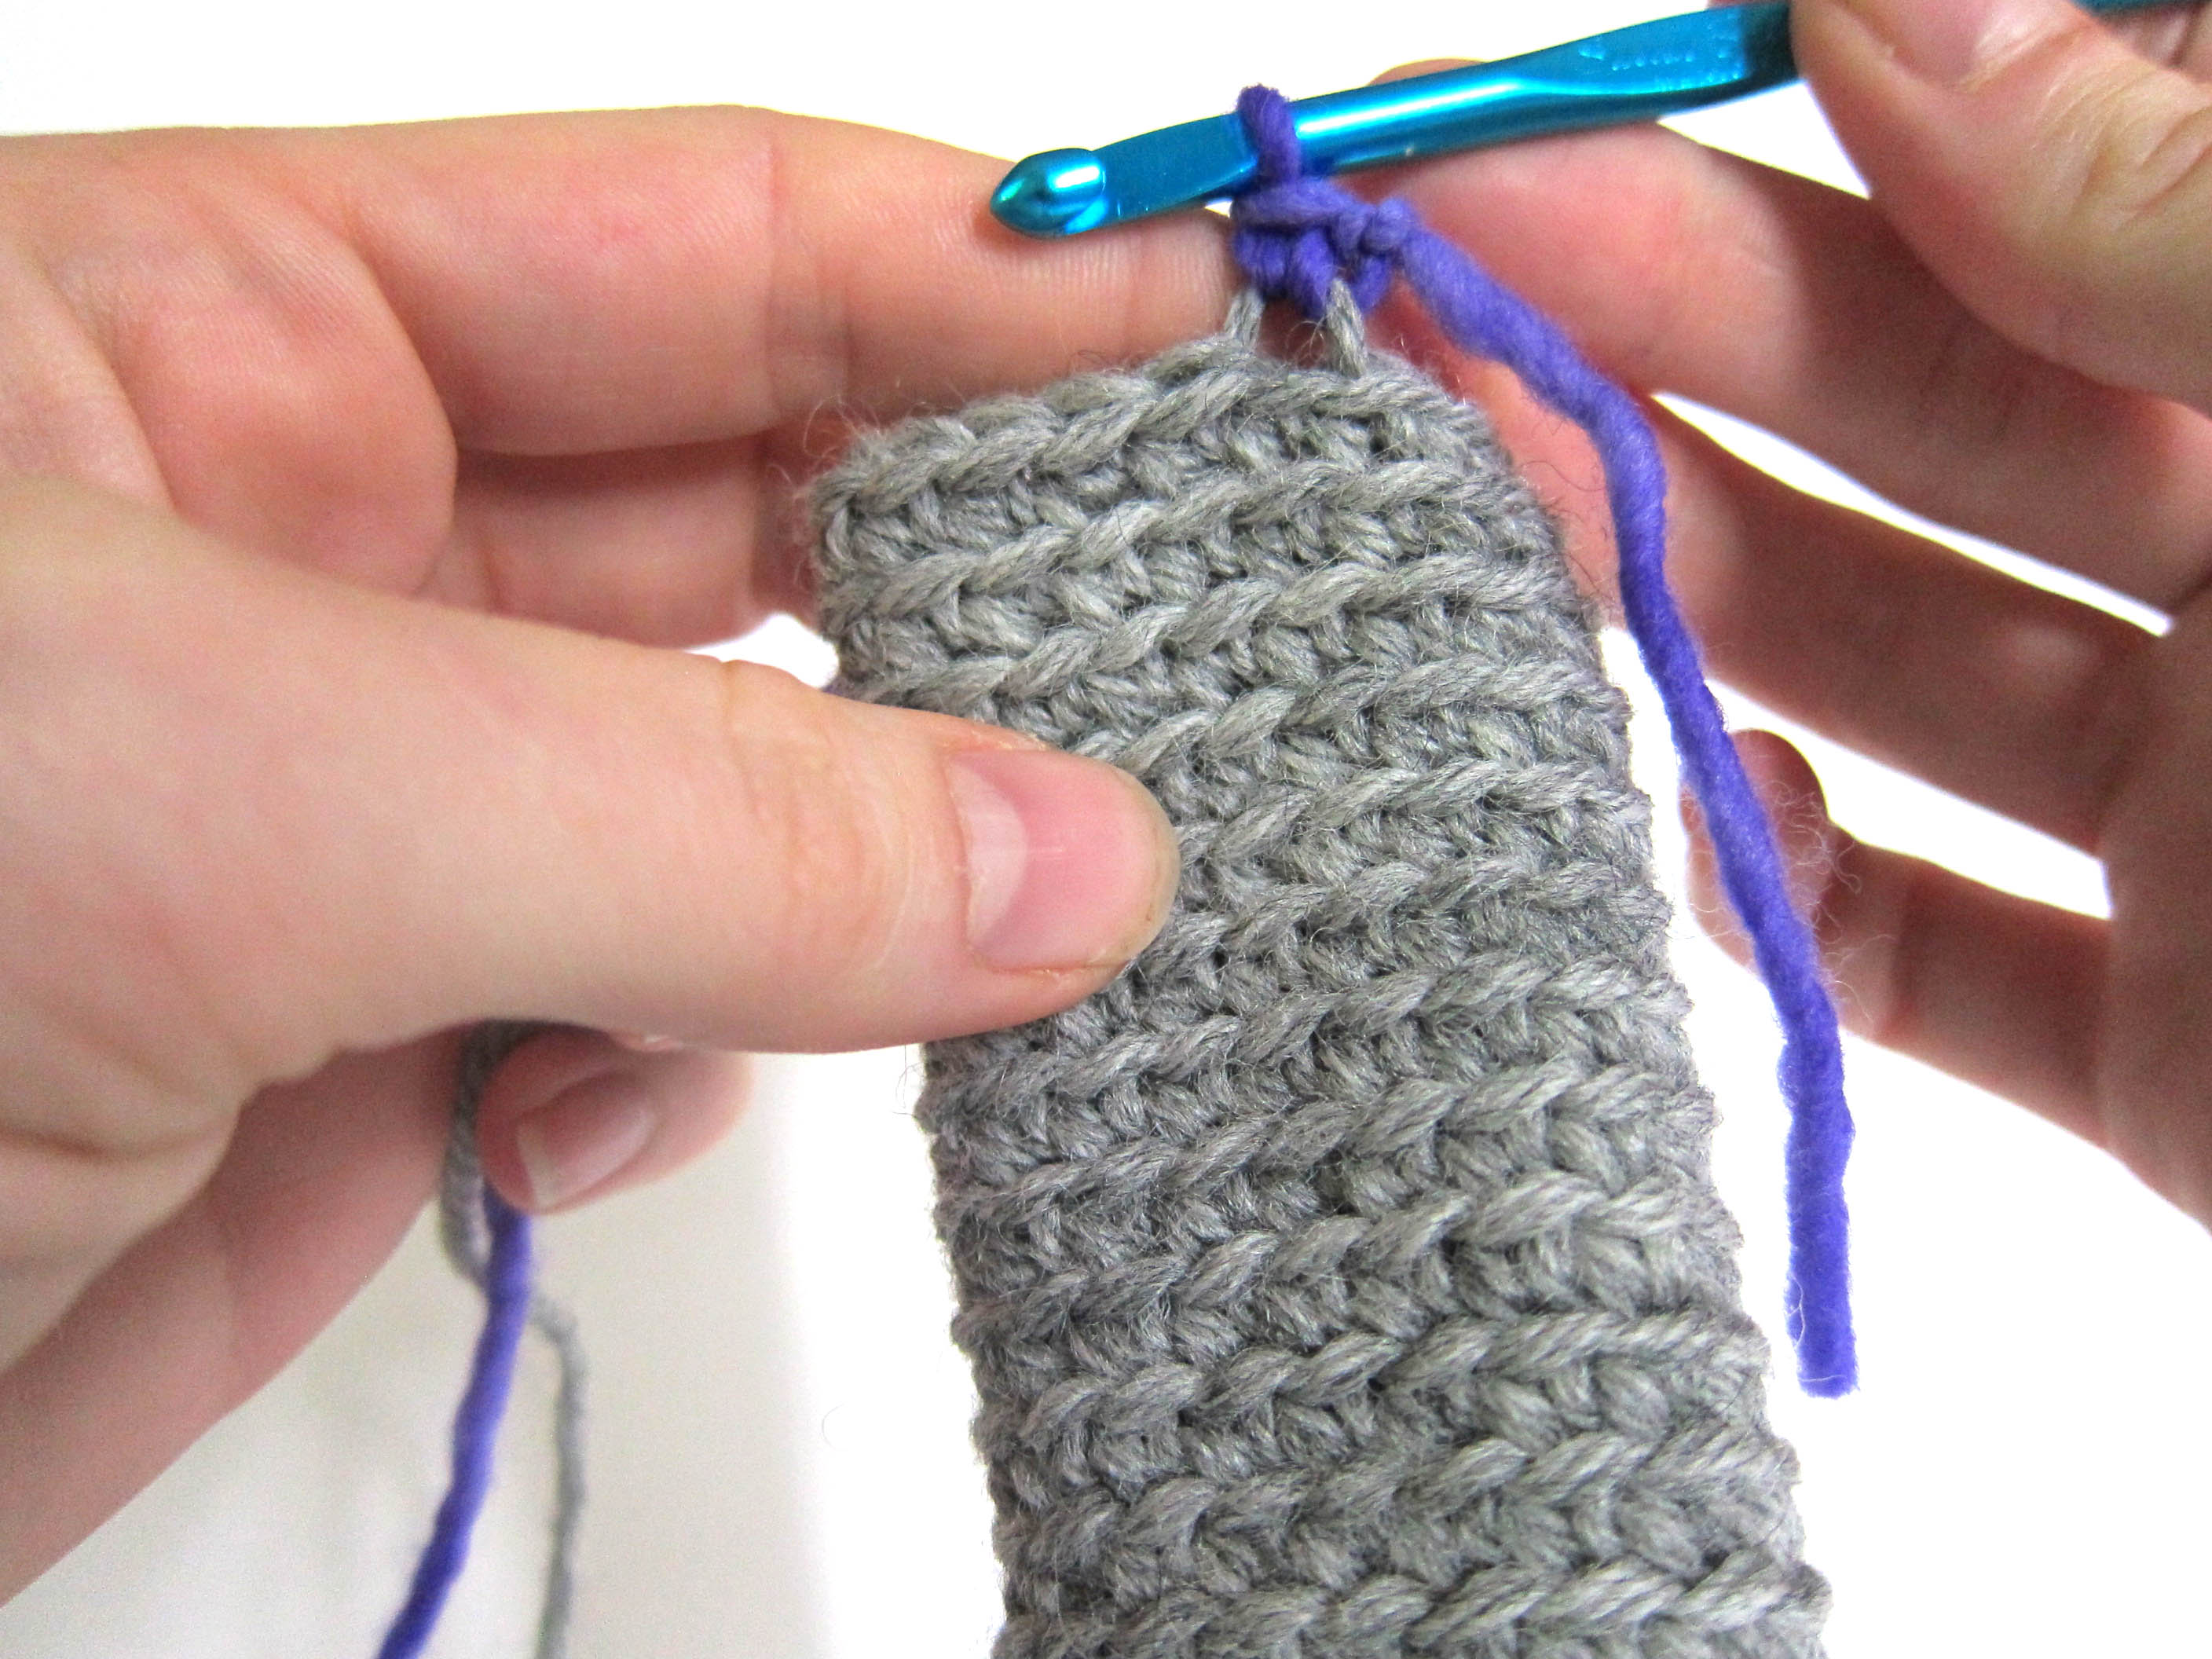
The pattern download will take you step-by-step through the stitches you’ll need to bring Mike to life… too many for just one blog post!

Crocheted fingers

One of the things I love about Monsters University is how lifelike the animation is… and I didn’t want to lose any of that detail in the crochet version. That’s why I made sure to give Mike separate fingers and toes!

It’s a little extra crocheting… but I hope you love the results!

Add the details…

Once you’ve finished crocheting the pieces, you’ll need to decide which expression you’re going to give to Mike… during the course of the movie, you’ll notice that he sports quite a few!

mike-and-sulley-monster-university-wallpaper-wide

I decided to give Mike the wide grin (with retainer!) that’s featured on the cover of the DVD:

felt mouth

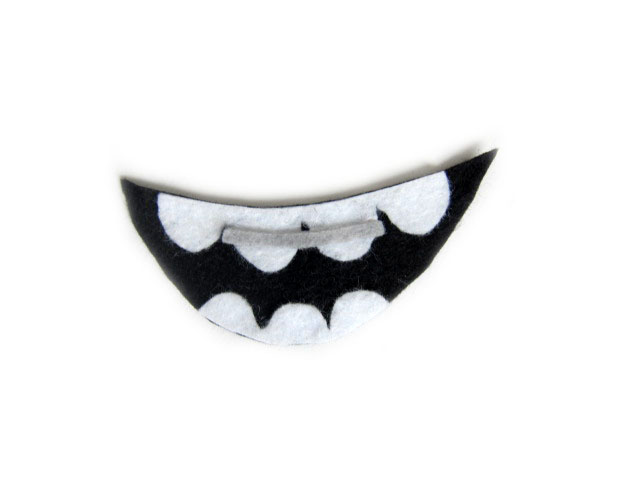
To make Mike’s mouth, use your pieces of felt and cut out the shapes you’ll need. First, cut a smile (or frown) from the black felt. Next, cut bumps (for teeth) from the white.

Here’s a trick: you don’t need to cut the teeth to fit the mouth perfectly. Just cut the top ridges for the teeth, then glue in place on the black mouth. Notice how, in my photo below, the white is hanging off the side of the black:

shaping a felt mouth

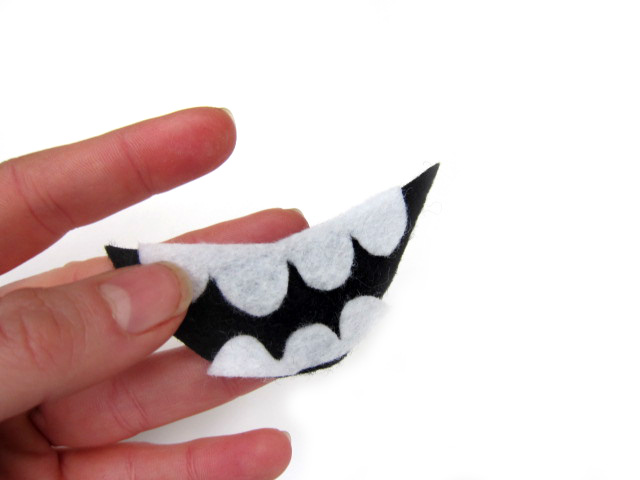
Once the glue dries, trim the excess white, and you’ll have a perfect mouth! A simple line of grey makes the retainer.

Since you’ve used yarn to make Mike, a craft glue will hold the smile in place:
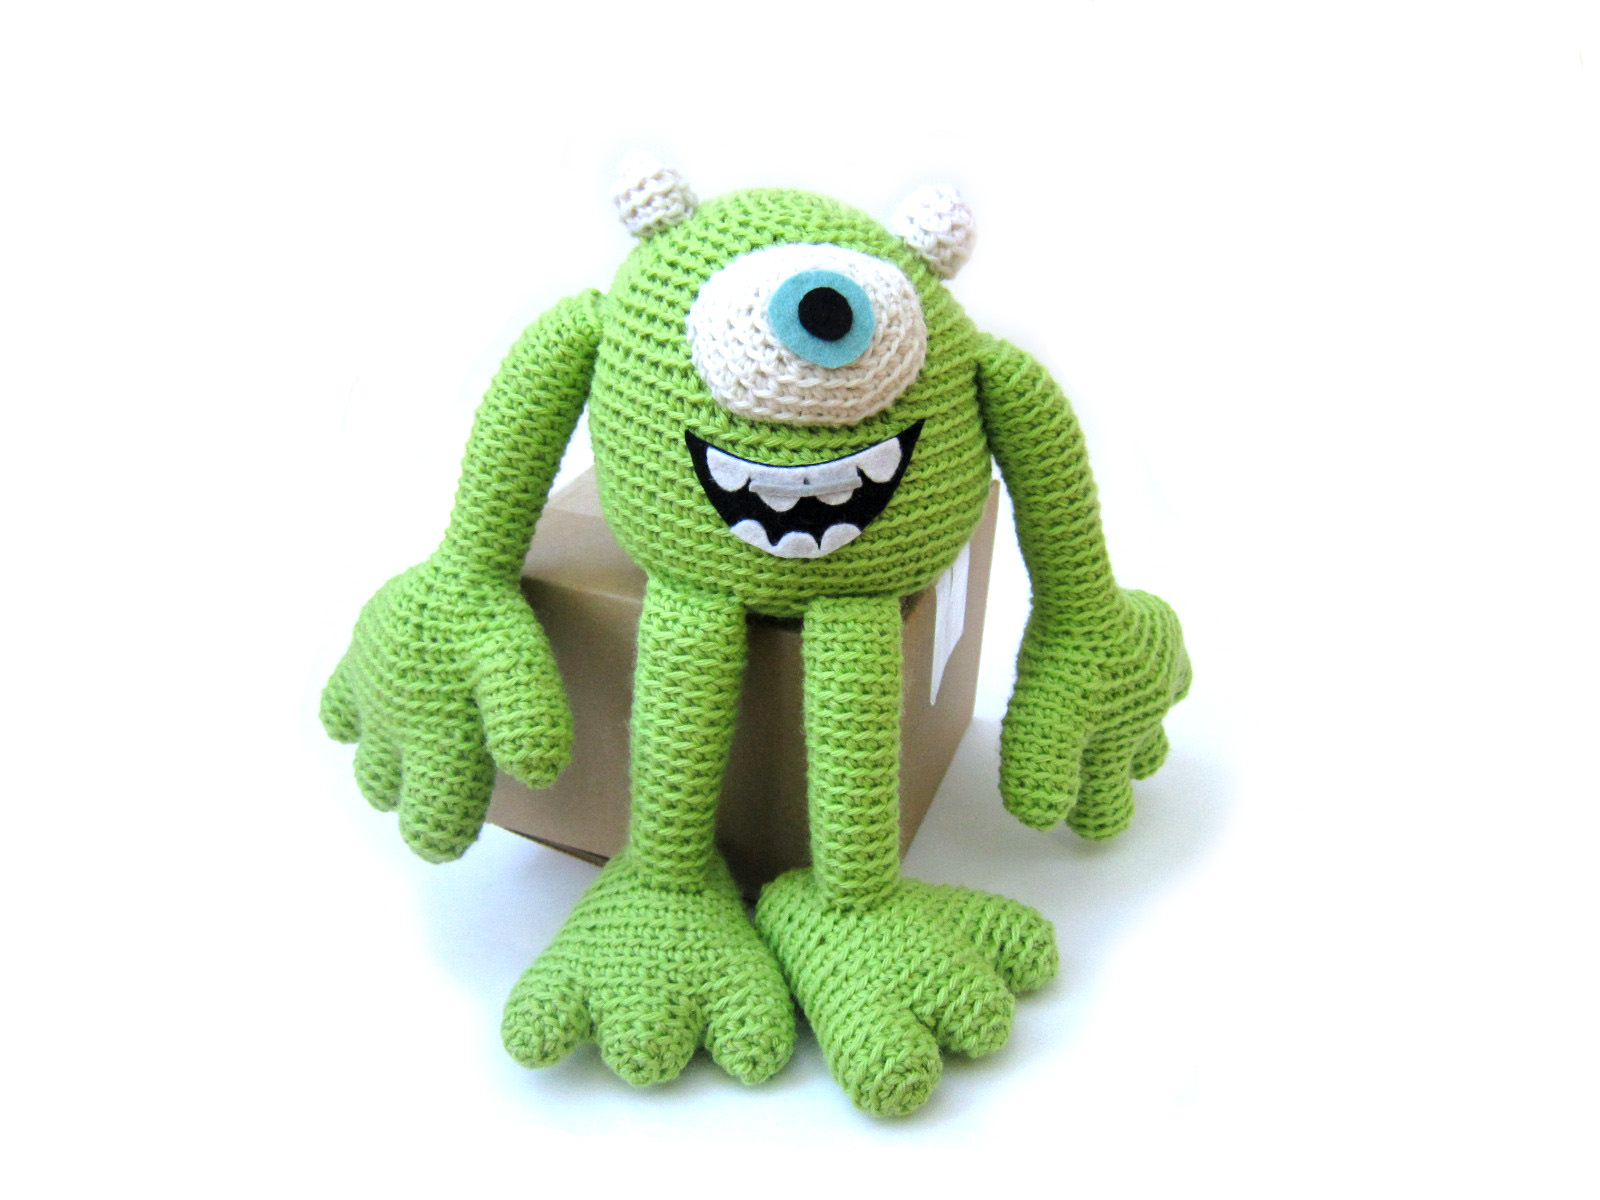
mike1

Isn’t he so cute?

More accessory ideas

I’m a real sucker for the University-wear sported in the movie!

mike-wazowski-monsters-university-18119-1920x1080

How cute would your crocheted Mike look with a knitted blue and white scarf? Or an MU pennant made from felt? Use your imagination!

You can also get super-creative and make multiple expressions… and attach them to Mike with use hook and loop tape! He’ll be a toy with many emotions!

Are you going to get crocheting?

I had so much fun watching Monsters University and crocheting a Mike… I see more monsters in my future.

I hope you absolutely love this free pattern download as much as I do!

Helpful Links

Be sure to share the cutie monster you crochet!

Disclosure: This is a compensated post from Disney and Blueprint Social. I received a copy of Monsters University. All opinions are my own. I received permission to create a pattern using the likeness of Mike.

Happy stitching!

Best,
Stacey

This is how I crochet!

Last week, I got a surge of requests from my Ravelry group to post a video of me crocheting.

Who am I to say no?

So… here it is! (Click on the box in the lower right hand corner of the video to view in full-screen)

Click here to view the video on YouTube.

When do you need to change your technique?

Most of the time, I’ll say: you should crochet however you feel like it. Don’t worry about how I crochet. However, there are a few signs that you should change your crochet technique. If you:

  • experience pain after only a short period of crocheting
  • have difficulty getting even stitches
  • struggle to tension your yarn properly
  • find crocheting difficult or annoying

… then the problem might be your technique! Go ahead and watch how I crochet (and watch some other folks, too!) and see if there are some changes that you can make to your style.

Crocheting should make you happy, not ouchy!

Book Review: Beastly Crochet

As soon as I saw the cover of Brenda Anderson’s new book, Beastly Crochet, I knew there would be some cuties inside:

Beastly Crochet

But… I had no idea there would be so much other awesome stuff! Let’s peek inside, shall we?

The Beasties

You know me, I can’t resist a cute stuffed animal. (Are monsters really animals?!? Hmm… I digress.)

The thing I really love about the creatures in this book is that they feature a variety of crochet techniques. Check out ‘A Zombie named Skip’, a marionette who sports an open mouth with beads as teeth!

Crochet Zombie Pattern

The other critters (including a Frankenstein & his bride and an adorable yeti-type monster among others) feature colorwork, textured stitches, appliques and even felting (the cuties on the cover!). While there are a few patterns suitable for beginners, this book is targeted at crocheters who are looking for innovative patterns and want to add a new skill or technique to their repertoire.

The Wearables

The ‘Beastly’ part of the book is broadly construed to include: zombies, monsters, skulls, robots and myths. I was really surprised by some of the fabulous wearables in the book:

skull zipper cowl

This fun skull cowl is just one of many clothing patterns in the book. There are Sasquatch slippers, a couple great sweaters for kids as well as bibs and bags.

Seriously, how did Brenda fit all of this stuff in one book?

And more!

gnome coin purse

Look at that coin purse! Isn’t it ridiculously cute?

And this Tiki pillow:

Tiki Pillow

So clever and fun!

I particularly love the book’s section on ‘Principles of Cuteness’, where Brenda talks about eye shapes and spacing, so you’ll get the maximally cute monster!

The Verdict

With Halloween coming up, the timing of this book couldn’t be better! It contains 23 fabulous projects for anyone who loves monsters/robots/fantasy.

This book is aimed at the advanced beginner/intermediate crocheter. It doesn’t contain a lot of introductory material (so, expect to learn how to single crochet elsewhere!), but it’s packed with patterns that have great assembly/finishing information. A crocheter with a standard cache of skills won’t get lost, and will learn a bundle of new techniques and methods.

It’s a fab book! You can get it here.

disclaimer

How to Embroider with Yarn

How to Embroider with Yarn - tips for stitching amigurumi faces from FreshStitches and Shiny Happy World

Today, I’m going to show you how I embroider features on my stuffed animals. It’s a little different than regular embroidery… because you stuff the inside of an animal, there’s no need to worry about tying knots!

There’s a video at the end of this post too – for those who want to see every step in action. 🙂

My technique makes a slip-proof knot and creates a double-thickness of yarn, so your embroidery will stand out!

Step 1: thread the tapestry needle with a length of yarn (about a foot or two). Tie the two ends of the yarn together with a knot, as pictured in (a).

how to embroider with yarn

Step 2: pull the needle through to the the front of the work, leaving about an inch between the knot and the back of the work, and then poke the needle from front to back, and through the loop created (between the knot and back of work) by the two pieces of yarn, as shown in (b). Tug, and this anchors your work!

Step 3: to do a stitch, put the needle (from back to front) where you’d like the stitch to go (c), about 1/4 inch (5mm) from where your previous stitch (or knot) is anchored.

Step 4: to finish the stitch, push the needle from front to back, connecting the stitch to your previous work (d). Continue stitching (following steps 3 and 4) according to the desired pattern.

Step 5: to finish, cut your yarn-loop in half, and use the two ends of yarn to tie a knot!

Easy, huh?

Sloth

See the embroidery that makes this sloth’s mouth? Cute!

Now here’s the video.

Give it a try!

Here are handy links to all the posts about faces and details. . .

Return to the main table of contents for Let’s Learn to Crochet Amigurumi.

Move on to the lessons about eyes.

Happy stitching!

Online Tools to Help with Your Colorwork

You probably already know that you can add stripes to almost any knit/crochet pattern… and it’s a great way to use up leftover yarn! Another fabulous way to use up leftover yarn is to make an afghan using medallions (like a granny square) will all of your extras.

But if you’re like me, the hardest part about colorwork isn’t the actual knitting/crocheting… it’s putting the colors together in an aesthetically pleasing way!

Today I’ll share two amazing online tools that will help you plan your colorwork. Thanks so much to the folks in my Ravelry Group for pointing me to these great sites!

First, pick your colors

For a successful colorwork project, you’ll want to group colors that go well together.

Color Theory

We all have our favorite colors, so chances are that a lot of your stash already coordinates! If you want a little more help, read this post on color theory.

Random Stripe Generator

Okay, let’s say you want to throw stripes into your project. Getting random-looking stripes can be tricky (since us humans are pattern-seekers and tend to go into a pattern even if we don’t want to). That’s why I love the Random Stripe Generator over at Biscuits and Jam!

The website allows you to input the colors you’re using and maximum stripe thickness. Then… presto!

Random stripe generator

Here are the stripes it generated for me! Isn’t that neat?

The page also provides a text pattern in addition to the image.

Granny Square Generator

Selecting colors for granny squares poses a similar problem: you don’t want like colors touching, but you still want a look of randomness to it.

Fortunately, Granny-Square-Colors.com has you covered!

Input the colors of yarn you have available and you get back a chart:

granny square generator

Follow the image for each square, and assemble as shown. Nifty!

The number of colors per square is a parameter in the generator, meaning that you can use this same generator for any number of medallion patterns, not just granny squares!

Aren’t these fun?

Give them a try and tell me what you think!

What a difference stuffing makes!

I’ve crocheted two monsters using the same pattern (Roy the Rainbow Monster) and similar yarn… but they look a little bit different. Do you know why?

stuffing a stuffed animal

It’s the stuffing!

Notice that the monster on the left has a fuller body, and less stuffed arms. This results in almost no space between the legs, a round head and arms that lay flat.

The monster on the right has a less stuffed body, and plump arms. In contrast to the other monster, this guy has a gap between his legs, a flatter head and arms that stick out from the body.

There’s no right way! The only thing that matters is how you want your animal to look!

So, don’t think of stuffing as that last pesky thing to do before finishing your animal… think of it as the final step that gives your animal its shape! And shape your animal with stuffing!

Here are handy links to all the posts about stuffing amigurumi. . .

Return to the main table of contents for Let’s Learn to Crochet Amigurumi.

Move on to the lessons for closing up the opening.

Happy stitching!

How to Crochet a Donut Shape

Learning to crochet a donut shape is really handy! Unstuffed, I especially like using it for fish mouths.

You can see it here in this seahorse crochet pattern.

Ivo the Seahorse - easy crochet amigurumi pattern

And here on the lips of this fish pattern.

Willie the Fish - easy crochet softie pattern

If you add stuffing, you can make a swim ring for your stuffed animals, like Walter here.

Walter the Water Buffalo - easy crochet pattern

You can also – of course, make a donut!

It can be a little tricky the first time you try to crochet a donut shape from written instructions alone, so today I’ll show you a photo tutorial!

folded edge in crochet

The piece usually begins with a tube. . .

crocheted tube

To turn that tube into a donut shape, you’ll need to crochet two rounds together. First fold the piece so that the two (desired rounds) are touching:

crocheting two rounds together
folding crochet piece

In this (pretend) example, you’re folding the foundation chain to round 6, in preparation for “crochet through the round you just crocheted AND the foundation chain”.

You may want to pin the rounds together if that would help you:

using a locking stitch marker to secure fabric

Now it’s time to crochet! Insert your hook through the next stitch (on round 6) and the corresponding stitch on the foundation chain:

single crocheting two layers together

Wrap the yarn around your hook, and draw through the first two loops (treating these as one loop of a ‘normal’ single crochet):

single crochet two layers together

Wrap the yarn around your hook and draw through both remaining loops.

Crocheting two layers of crochet together

Continue crocheting the two rounds together, stitch by stitch, until you’ve completed the round. If you’re stuffing the shape, it’s easiest to stuff a bit at a time as you go.

crocheting two rounds together

Ta da!

folded edge in crochet

Isn’t that such a great shape?

Here are handy links to all the posts about crocheting more advanced shapes. . .

Return to the main table of contents for Let’s Learn to Crochet Amigurumi.

Move on to the posts about troubleshooting common problems.

Happy stitching!

Let’s talk about hair!

doll crochet a long

We’re in the final stretches of the doll-a-long… have you added hair to your doll yet?

I think the hair is one of the most exciting parts because there are so many options! For a general how-to for adding hair, check out this blog post.

Let’s chat hair options, shall we?

Curly Hair

The A Doll Like Me ebook contains instructions for making curly hair:

curly hair doll

Here are a few more tips for working with curly hair for your doll:

  • Keep in mind that if hair is curly, it will appear shorter than if it were straight (due to the curl). You might want to cut longer strands of hair to compensate.
  • The curls are obtained by blocking the yarn into place. Yarns that don’t block well (like acrylic) may not end up as curly as wool yarn.
  • Since the curls are blocked, they will ‘come out’ if you wash/wet your doll’s hair. If you’re planning on machine-washing your doll, go with straight hair.

crochet doll pattern curly hair

Straight Hair

Straight hair can be any length or style! Here are some fun suggestions/tips:

  • If you’d like to add bangs, simply cut some shorter strands and attach at the front of the head.
  • For highlights, cut yarn in a few coordinating colors of yarn.
  • For a bob hairstyle, attach the yarn, and then trim along the bottom so all of the hairs end at the same length.
  • Try putting hair in braids or pigtails!

Which style are you choosing?

The doll-a-long runs until Thursday… still plenty of time to finish yours! Tell me, which hairstyle does your doll have?

Tips for attaching a dress to your doll

Tips for Attaching a Dress to Your Crochet Doll - from FreshStitches and Shiny Happy World

How’s your doll coming along?

doll crochet a long

I’ve been seeing some fabulous works-in-progress and finished dolls in the Ravelry Doll-a-long thread… have I seen yours?

Today, I’m going to share some tips for crocheting on the dress/skirt/tutu for your doll!

Tip 1: Start without a head

The dress can be added after your doll has been stuffed and assembled, and many people prefer doing this because they can ‘envision’ what clothing will look best.

However, it’s actually easiest to crochet clothing on before the doll has been stuffed.

Legs of a doll, body

In doing it this way, you can crochet on the dress (and easily maneuver the body) without the bulk of stuffing or the head getting in the way.

Tip 2: Join the new yarn with a sc, in the back

Okay, so this ‘tip’ is written in the pattern, but I thought it was worth repeating!

It may look like the doll’s body doesn’t have a front/back… but take a look at the feet! The toes point forward to the front!

Attach your new yarn with a sc, at the center back of the body. This way, any jog in the rounds will be hidden at the back.

Tip 3: Hold your doll upside down

When attaching the dress, you want the right side of the dress fabric to face outwards.

This means holding the doll ‘upside down’ (head towards you, feet away) when you attach your new yarn.

attaching a dress to a doll

Notice how the right side of the dress is now facing outwards? That’s important! It will continue to do so as you crochet:

outline2

Tip 4: Weave in that end!

When you finish the dress/skirt, you’ll have an end that needs to be woven in. Whip out your tapestry needle, and zig-zag it through the wrong side of the fabric!

How’s your dress coming?

Well… if you’re doing one of the girls, that is! I know a number of you are crocheting Ethan, so you don’t need a skirt… but the same tips apply to attaching the sleeves!

Here’s how my Avery looks:

She’s almost done! Now to make choices about her eye color…

Want to make your own doll? Get the pattern here.

Here are handy links to all the posts about attaching parts. . .

Return to the main table of contents for Let’s Learn to Crochet Amigurumi.

Move on to the lessons about faces and details.

Happy stitching!

How to ‘attach with a single crochet’

How to Attach a New Piece of Yarn with Single Crochet - a tutorial from FreshStitches and Shiny Happy World

Occasionally, in a pattern, you’ll read the instruction ‘attach with a sc’. What does this mean? I’ll tell you!

Attach with a single crochet

This technique is used to attach a new yarn to an existing crocheted work. It’s used in the doll patterns to attach a piece of clothing like a dress or a sleeve. You might also use it to attach a foot to a slug, prickles to a hedgehog, a mane to a lion, and more.

Here’s how to do it. Begin with a slipknot on your hook:

how to attach a yarn with a sc

Now, just pretend this loop is any ol’ loop! Insert your hook into the indicated stitch on your crocheted fabric:

How to attach with a sc

And then crochet as instructed!

attach with a sc

Hooray!

Here are handy links to all the posts about attaching parts. . .

Return to the main table of contents for Let’s Learn to Crochet Amigurumi.

Move on to the lessons about faces and details.

Happy stitching!