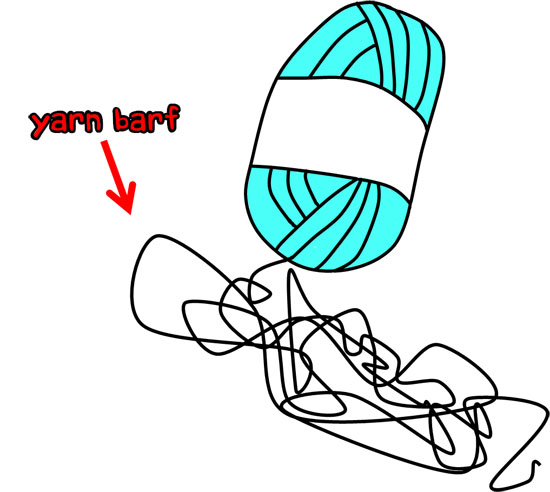
The more you knit/crochet, the more you wind up with little leftover bits of yarn. It would be a pity to throw them away, but what do you do with them?
Joining in the CAL is easy! You’ll need to pick your pattern, gather your scraps and follow this tag to get all of the helpful crochet/amigurumi tips that will guide you along the way!
Are you in?
It’s going to be a blast… and I really hope you join us! Go ahead and leave me a comment… and tell me about your scrap-a-long plans! Which pattern will you do?
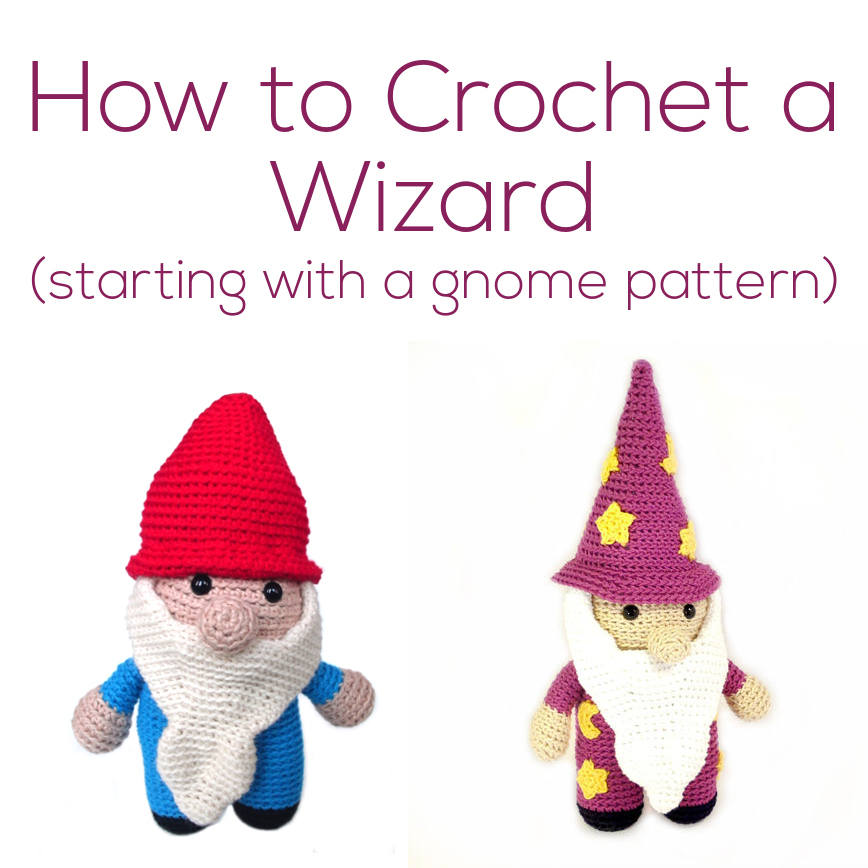
Chloe has become quite a celebrity because of her beautiful crocheting! She never ceases to post amazing project photos and animals in creative poses!
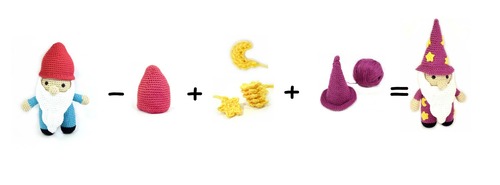
Today, Chloe is sharing with us how to transform a Forrest the gnome into a wizard! How cool is that?
And, you’ll definitely want to check out Chloe’s Ravelry page and blog to check out all of her great creations!
Hereby is the ingredient list and instructions for the Transgnome Potion aka How-to-turn-your-gnome-into-a-wizard Serum! So, grab your quills and note the materials you’ll be needing:
Yarn in magical colour, i.e. any colour you like, for the hat, arms, body & legs
Now, take you wands..oops..hooks and off we go!
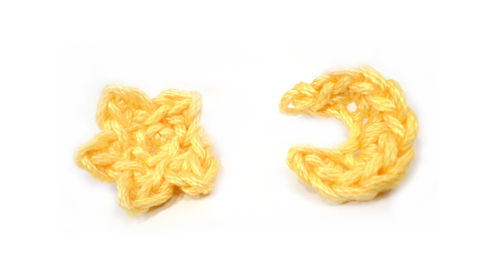
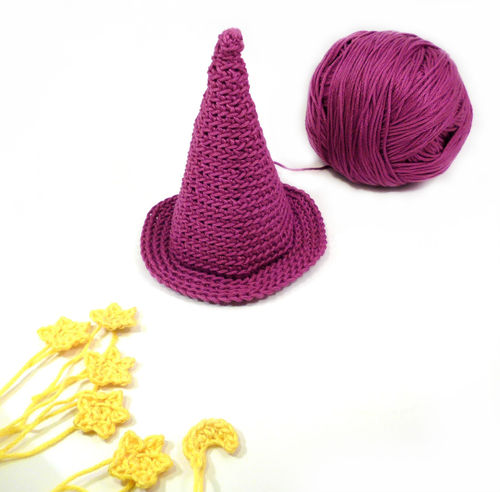
Step 1. Crochet tiny stars and crescent moons. I made 12 stars and 2 moons with a 2.75mm hook and yellow yarn. You might want to crochet more or fewer according to your item’s final size.
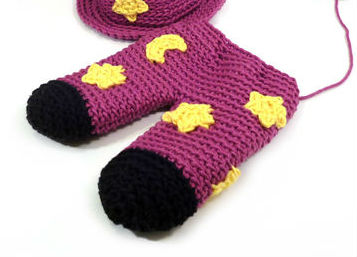
Step 2. Crochet all FreshStitches gnome parts, except for the hat. Attach tiny stars and moon onto the legs and body (mine took 7 stars and a moon). Assemble all crocheted parts together.
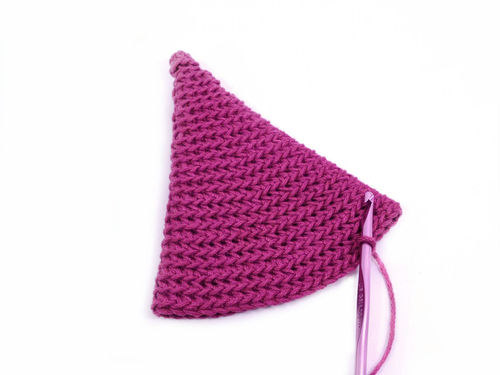
Step 3. Crochet the hat, according to the following instructions.
Wizard hat
Crochet hook: 4.00mm Yarn: Mouzakis Butterfly Super 10, 100% cotton, in purple
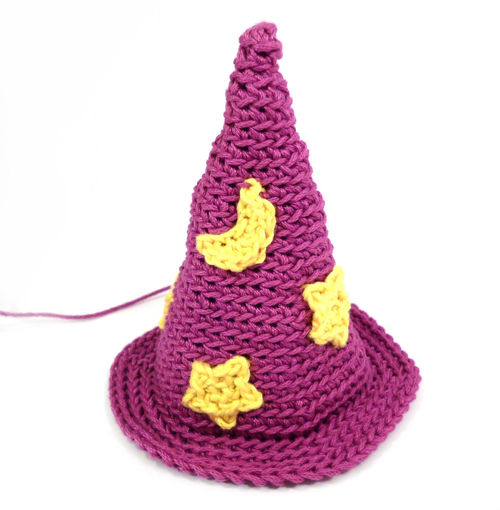
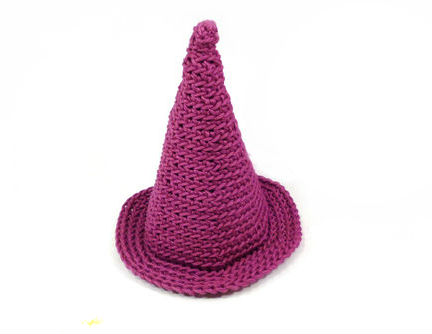
You’ll need approximately as much yarn as it’s calculated for the gnome’s hat. Crochet through back loops, except for round 24. The final hat is conical and 11 cm in height.
Ch 2
Rnd 1. sc 6 in 2nd chain from hook (6 st)
Rnd 2-3. sc each st (6 st)
Rnd 4. sc twice in each st (12 st)
Rnd 5-6. sc each st (12 st)
Rnd 7. [sc twice, sc next st] * 6 times (18 st)
Rnd 8-9. sc each st (18 st)
Rnd 10. [sc twice, sc next 2 st] * 6 times (24 st)
Rnd 11-12. sc each st (24 st)
Rnd 13. [sc twice, sc next 3 st] * 6 times (30 st)
Rnd 14-15. sc each st (30 st)
Rnd 16. [sc twice, sc next 4 st] * 6 times (36 st)
Rnd 17-18. sc each st (36 st)
Rnd 19. [sc twice, sc next 5 st] * 6 times (42 st)
Rnd 20-21. sc each st (42 st)
Rnd 22. [sc twice, sc next 6 st] * 6 times (48 st)
Rnd 23. sc each st (48 st)
To make the brim, crochet the next round through the front loops
*Front loops* Rnd 24. sc each st (48 st)
Rnd 25. [sc twice, sc next 7 st] * 6 times (54 st)
Rnd 26. [sc twice, sc next 8 st] * 6 times (60 st)
Rnd 27. [sc twice, sc next 9 st] * 6 times (66 st)
Rnd 28. sc each st (66 st)
Fasten off with tail.
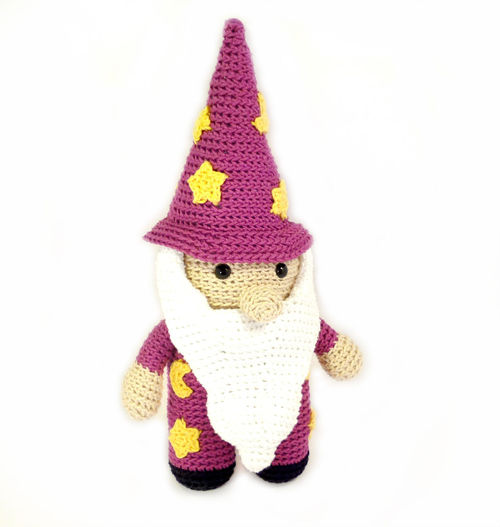
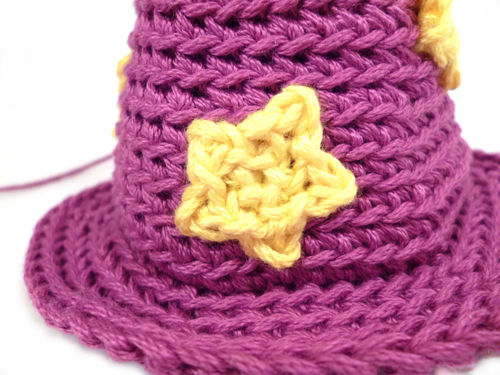
Now, you’ll use some stars and moons to decorate the hat!
I used 5 stars and one tiny moon!
Step 4. Stuff slightly and attach the hat on the wizard’s head through round 24 of the hat.
And you’re done! Not that difficult, right?
Suggestions
It’s more wizard-y using the same colour for the cloak and hat! I chose purple, which is a rather conventional choice for a wizard! Pick up your favourite colour, since magic comes in every possible colour!
Likewise, the stars and moons are expected to be yellow or white, but expectations are exceeded in the magical world!
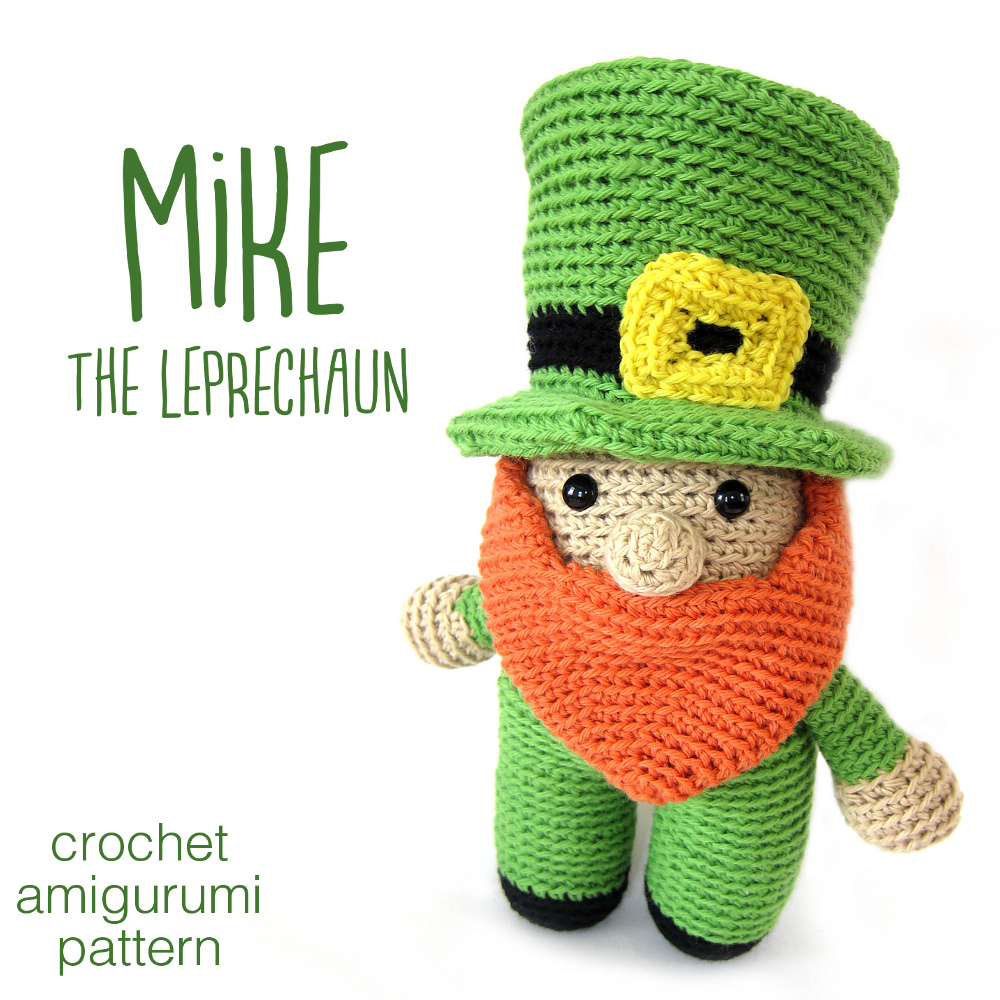
I wanted the hat overall to look a little frail and worn-off (my wizard is doesn’t care for brand new clothes!). If, however, you want a more sturdy-looking hat, you can (a) make the brim double thick and (b) use a conical carton inside. Both these techniques are shown in the Freshstitches Leprechaun pattern that was released recently (see Hat).
Since I’m away at the Pittsburgh Knit and Crochet Festival, I won’t be cooking the traditional corned beef & cabbage… so if you are, could you eat some extra for me?
Today’s guest post is written by Nichole of Niccup Crochet.
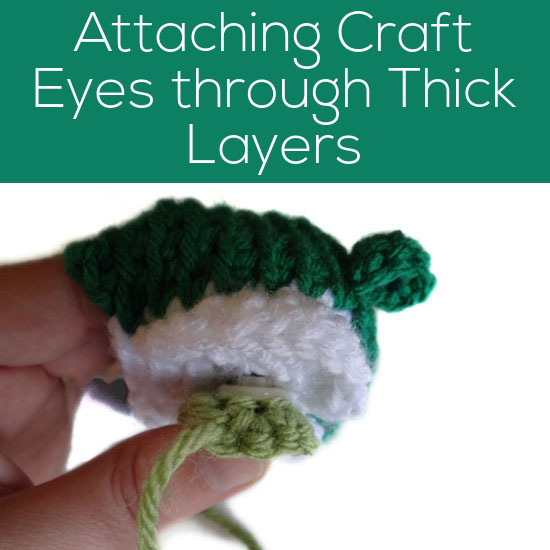
I’m really excited about this post, because Nichole has come up with a solution (little did I know until she mentioned it!) that has been plaguing many crocheters. When attaching craft eyes (or ‘safety eyes’) to an amigurumi, it can be really tough to get the post through multiple layers.
Nichole is sharing her clever solution with us, today!
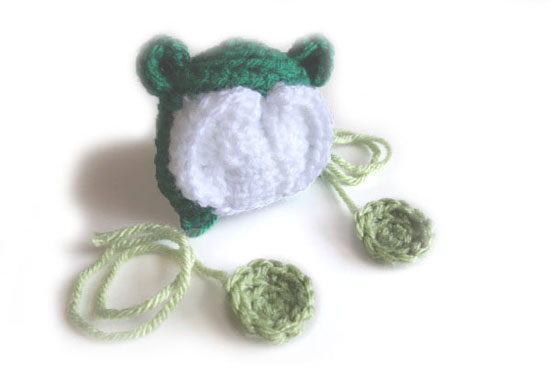
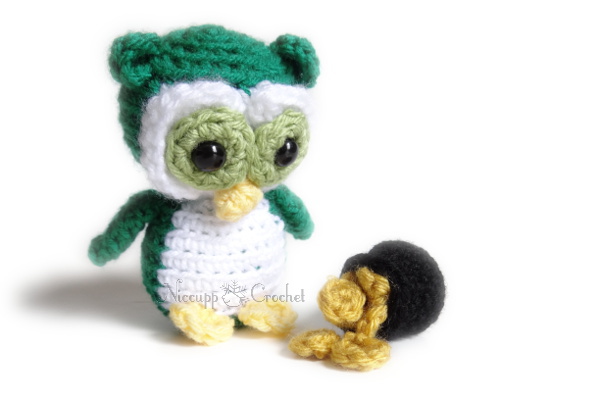
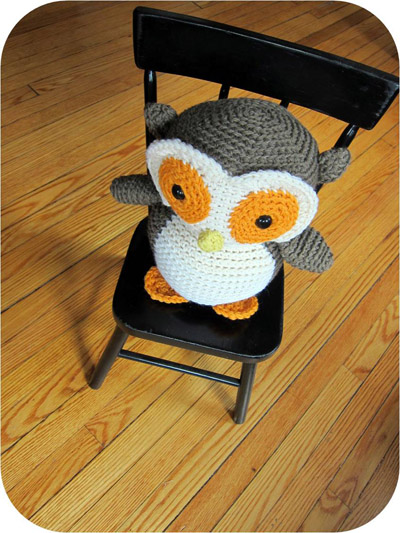
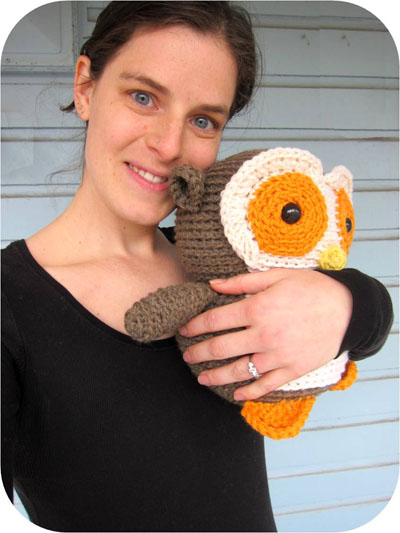
She’s demonstrating the technique on Nel the Tiny Owl, who she’s crocheted in a St. Patrick’s Day colorway. You can find instructions for the adorable pot of gold on Nichole’s blog!
Crocheting Nel, the Tiny Owl, was a smooth-sailing until it came time to attach his eyes. Eeek! I could not get the safety eye attached securely (enough). The washer locked over the outer-most ridge of the safety eye and no amount of force could get it to lock any further.
The anatomy of the problem
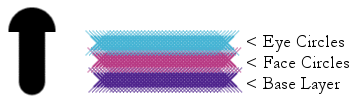
The post of the safety eye is only so long. It has locking points on the post and the washer slides over the ridges to secure the safety eye in place. The problem with Nel is that the safety eye has to be forced through three layers of fabric. Most of the post is surrounded by the fabric layers and very little is left sticking out the bottom where the washer needs to be secure.
Work Smarter, Not Harder
I attempted to secure his second eye with needle-nose pliers. That was a bad idea! The pliers slipped and I damaged poor Nel’s eye. No amount of force was going to work…the fabric was just too thick.
I took a step back and looked at all of the pieces involved. There just had to be another way.
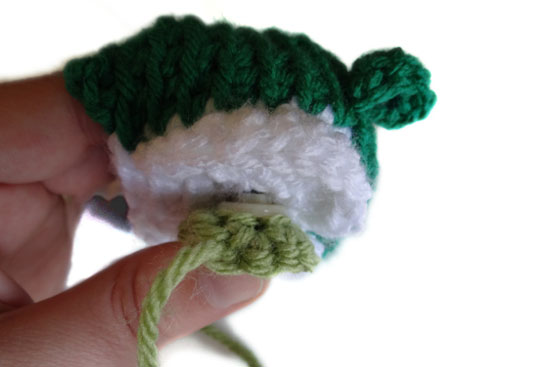
Then, it dawned on me: the safety eye can be attached to the eye circle before sewing the eye circle onto Nel’s head. Sometimes the best solution is the simplest one.
Attach the safety eyes through the middle of the eye circle.
Then, you will sew the eye circles onto Nel’s head. As you are doing this, make sure you force the post down through the other layers of fabric. This will keep the eye from bulging out.
I hope this helps you as you crochet your next Nel, Nelson or a few other FreshStitches patterns.
Here are handy links to all the posts about amigurumi eyes. . .
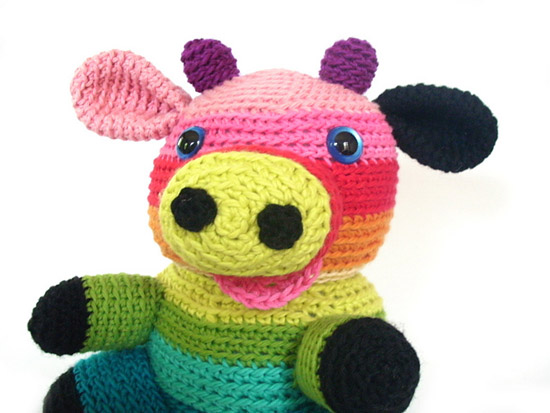
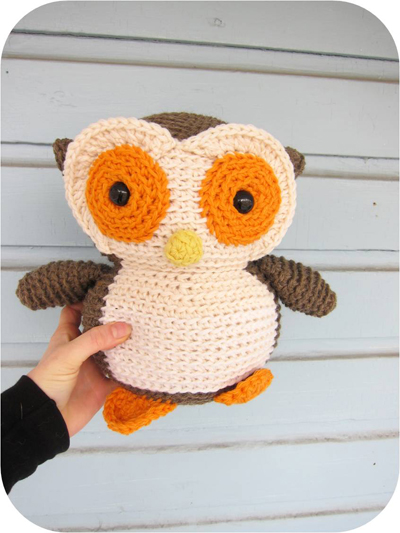
I’m really into doing these ‘big’ guys… they don’t require any more crocheting than a normal one (since you’re just using a thicker yarn), but they turn out super-cuddly!
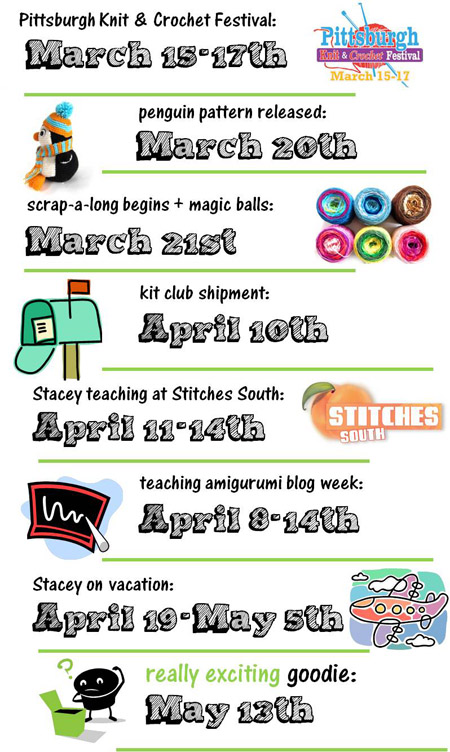
Upcoming Events
I’m so excited about the oodles of stuff that’s coming up at FreshStitches! Have a peek!
I hope you have an awesome and craft-filled weekend!
Tomorrow, I’m going to share all of the exciting crafty stuff I did at a workshop I went to last weekend!
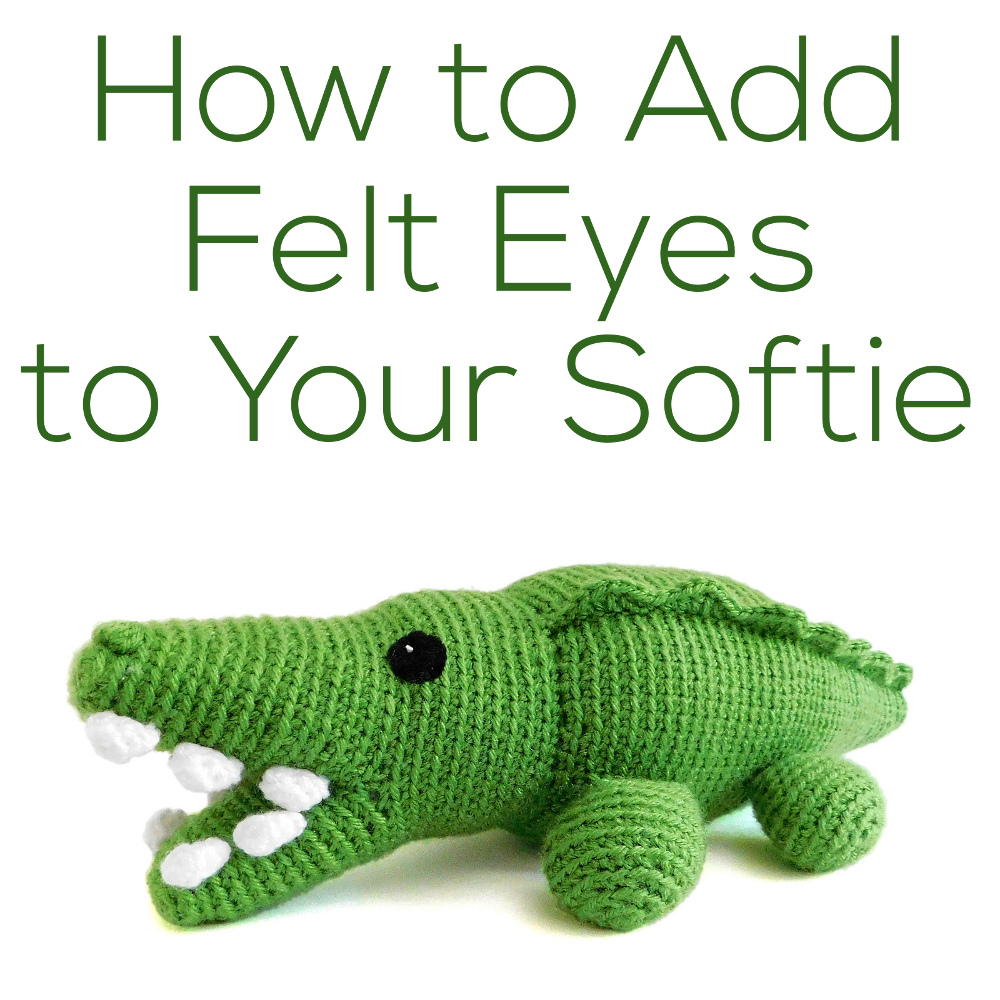
Today’s guest post is written by Alyssa, who has a gift for making fabulous felt eyes.
Today, she’s going to let us in on her secret… so we can make fabulous felt eyes, too!
(Alyssa wrote this specifically about amigurumi – but the technique works for any softies.)
Why use felt?
I like to use felt eyes as an alternative to other eye-making methods. Felt is safer to use than plastic eyes for toys that will be given to small children, but much more expressive than eyes that are made using yarn.
While Stacey has created a baby-safe crocheted eye that looks great, I could never quite get them to look right, and so I use this method instead. Attaching the felt is more time-intensive than any of these methods, but I think that it is worth it in the end.
White Size 3 cotton crochet thread (or another thin white yarn)
2 different sized sewing needles (one for the floss and one for the crochet thread)
I find it easiest to attach the felt once the animal has otherwise been completed. That way, all of the features are positioned and the felt will not stretch out of shape when the piece is stuffed.
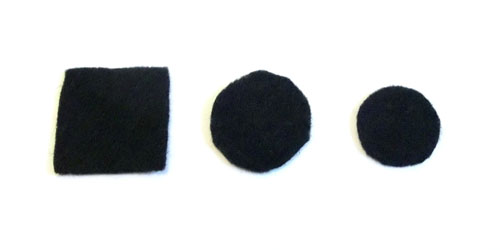
Step 2: Cut the Felt
I usually cut the felt into squares slightly larger than what I want to eye to be, then into rough circle shape, and then carefully trim the edges of these circles until they are completely smooth. The trick to good-looking eyes to take your time to get nice rounded edges. Using small, sharp scissors really makes a difference.
Cutting the felt, start to finish:
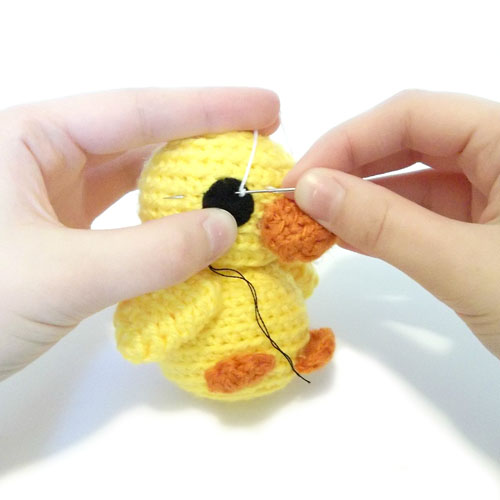
Step 3: Sew on the Eyes
Before you start sewing, you will want to position the eyes on the toy—play around with them until you are satisfied with the way they look and then pin them into place. I find it helpful to use a pin with a white head as it mimics the position and look of the eye highlight.
Use the smaller needle and a single strand of embroidery floss or sewing thread to attach the eyes. The felt will be sewn on using an applique stitch, which are small whipstitches made around the circumference of the eye. (Wendi has a video here showing how to whipstitch applique felt – it’s the same method.)
In the photo, the blue lines mark where I placed my stitches for Mal. The size of the animal and the eye will determine how many stitches you will need to securely attach it. For a small toy like Mal, I only use 6 stitches.
For a medium-sized toy (Most of the FreshStitches amigurumi), I would use 8. And for a large toy or one with large eyes (I like to give Nelson the Owl huge eyes), I might use upwards of 12.
Step 4: Create the Highlight
Play around with the position of the white pins to figure out where you want the highlight to be. The highlights themselves are simply French knots, with the yarn wrapped once around needle.
Pull the ends of the white thread to snug up the knot. If you don’t like the way it looks, simply pull the knot out and try again with a new thread.
Step 5: Finish your Amigurumi
Once your eyes have been sewn on and the highlights look satisfactory, tie the ends together to secure them and use a needle to pull them through the stuffing to hide the ends. Snip off any remaining ends and congratulate yourself for finishing your new amigurumi!
Good news to share!
Want to squee along with me about some great news?!?
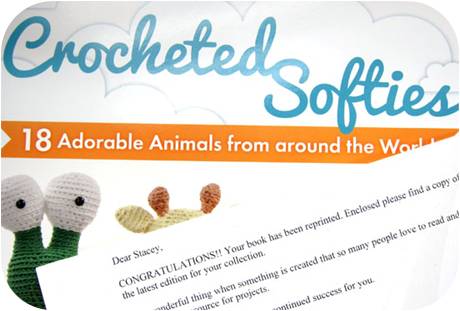
Crocheted Softies, my second book, has been reprinted! That means that so many have sold… that the publisher ran out and needed to print more! Hooray!
Today’s guest tutorial is written by Jennifer Crowley, the designer/teacher/blogger at www.tinkingturtle.com.
Jennifer teaches both knitting & crocheting, and you can check out her designs on Ravelry. Recent and upcoming publications include Sockupied, Knitpicks and Classic Elite Yarns.
Today, she’s sharing with us a technique for working two colors in crochet… one I had never heard of! How exciting is that?!?
Helix striping has been on my mind a lot lately. I just finished creating a pattern for Sockupied that uses knit barberpole striping, and since I was on a role, when Stacey put out a call for guest writers – I was in!
Helix, or barberpole striping, is a technique that takes advantage of the fact that crochet (or knitting!) is not actually done in the round, but in a spiral. Crocheters are very aware of this – when we want to work in the round oftentimes we join each round – but other times, like in many of Stacey’s patterns, we work in a swirl. Each row stacks up over the next, never coming to an ending point. When crocheting with one color this phenomenon is not always obvious, but when we want to create stripes, or change colors, we often get a jog, or a step. Helix, or barberpole striping, is one solution to the problem.
I first read about helix striping in Knitter’s Handbook by Montse Stanley. Now, I know she’s talking about knitting, but the principle is the same. As she explains it, “A truly ingenious way of avoiding steps [striping jogs] at the start of rounds… Divide the work into as many, roughly equal, groups of stitches as colors you want to use. Either put each group on its own double-pointed needle, or use needle markers if working with a circular needle. Work the 1st group in the 1st color, 2nd group in the second color, etc. Work next round similarly, but using the colors as they come – 1st group with last color from previous round, 2nd group with 1st color, etc. Repeat.” The same is true for crochet.
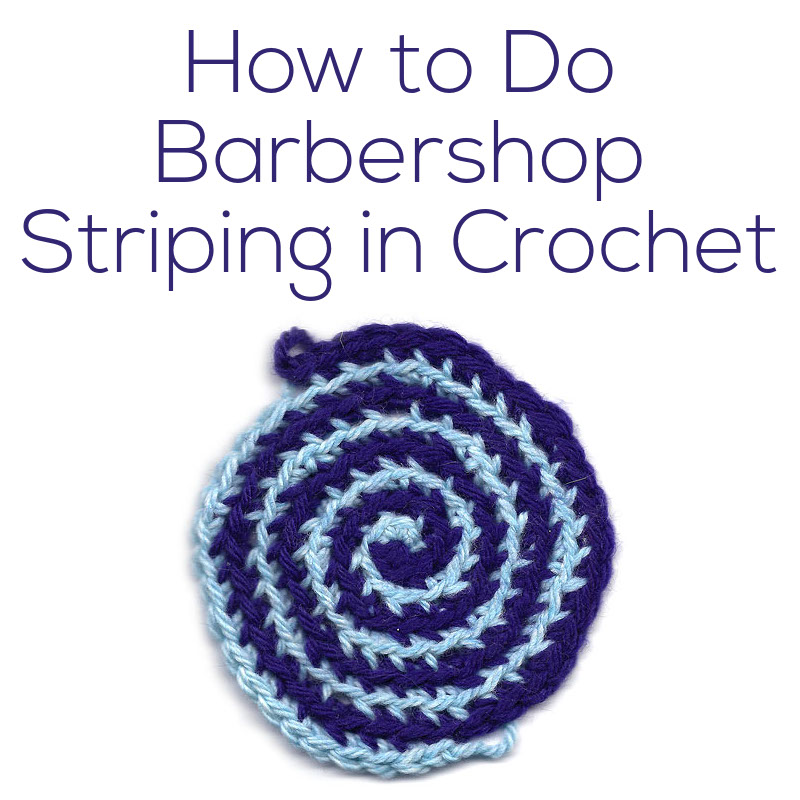
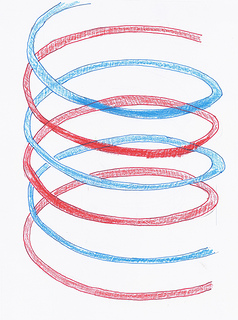
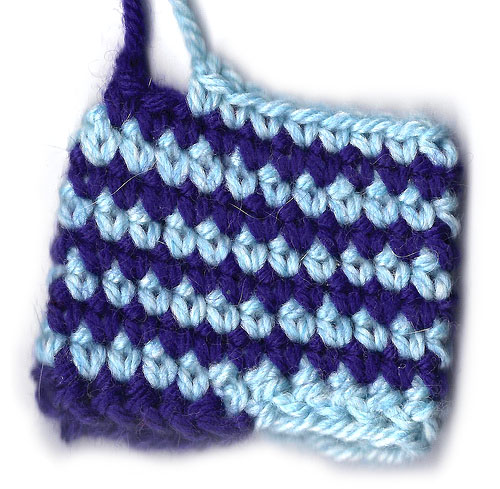
When working helix stripes, the fabric looks something like this:
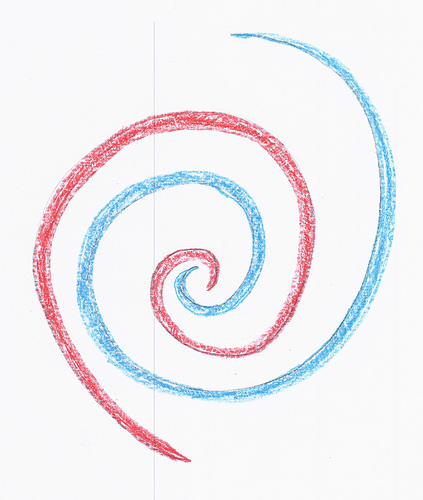
The blue stacks upon the red, and the red stacks upon the blue. Each color swirls around the next. If viewed from above, as if working a hat (or blanket), the colors look like this:
So how does this work in practice? Well, Montse Stanley hints at how to work helix stripes. Instead of working in one color, then dropping it and working on the other color (like in traditional stripes that have a jog), both colors are “live,” and while not necessarily worked at the same time, are never retired from crocheting. This is actually easier for crochet than it is for knitting, because in crochet, you have far fewer “live” stitches.
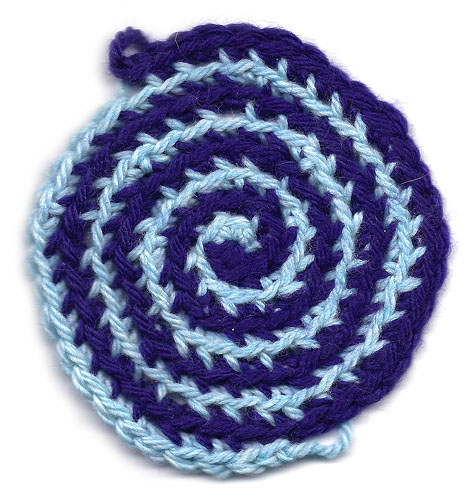
Take a look at the swatch I worked here:
When I began, I started with Stacey’s super-easy magic ring and in the light blue I: ch1, sc3, then I joined the navy, and ch1, sc 3. I then continued to crochet over the light blue with the navy, putting 2 sc into each st. When the navy met up with the blue, I dropped the navy yarn (put a locking stitch marker through the loop), and proceeded to then put 2 sc into the next 3 sts (12 sts). I then continued to crochet over the navy, until I ran out of navy sts to work. I then picked up the navy yarn, put the stitch marker into the blue loop, and did the same thing for the navy as I did for the blue.
The result? A swirl. If you trace the blue yarn (or the navy, just pick one), the stripe swirls out in a spiral, like a seashell.
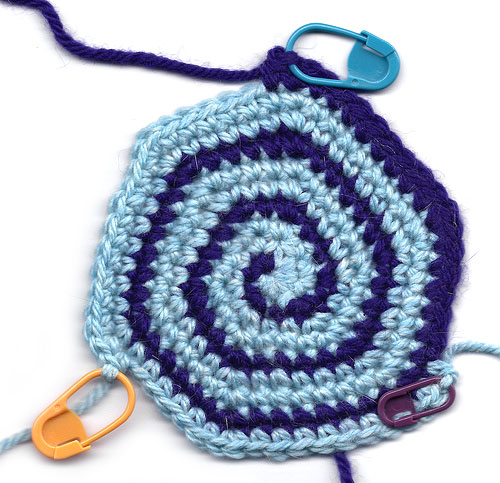
If you can’t see the spiral, take a look at my next swatch. This time I had two strands of the blue, and just one of the navy. In addition to making the swirl more drastic, it also has the result of making the blue stripes thicker.
Here I now have 3 yarns that are live. The order is now navy, followed by light blue, followed by light blue again. Here, instead of having the colors all end at the same place, I crochet the navy over to the blue stitches, and when I get to the blue, I drop the navy and knit the blue stitches over the second blue. When I get to the second blue yarn, I drop the first blue and work over the navy stitches, until I reach the navy. I then pick up the navy and start the whole cycle again.
Some things to be aware of when working with the yarns ending at multiple places in your crochet: the points where you switch colors can become stretched out and loose. Take care to make sure that you snug up any stitches that have become too loose, without yanking on them. The locking stitch markers that hold the other live stitches help. Also, be sure to put in a stitch marker to mark the beginning of the round. Because you are working with multiple colors, each round with a color is 1 round, but colors are going to switch in the middle of rounds. By the time all the colors make one full circuit, you’ve worked several rounds – however many colors you have. In the above picture’s case, this is three.
Barberpole stripes don’t only have to be worked in circles, although this is the most intuitive shape. Here, I worked a square, stacking my increases up in the corners similar to when you work any type of granny square.
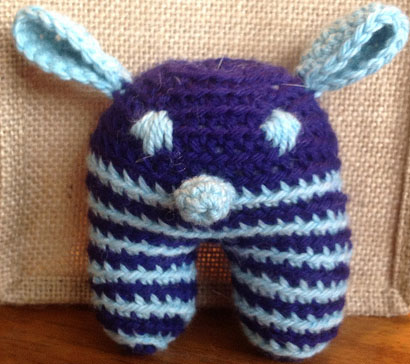
While helix striping creates some distinctive effects when viewed from above, one of the great advantages it has is when it’s viewed from the side. From the side, the distinctive swirl is not as noticeable, and the stripes, without steps or jogs, shine. I’ve got plans to make a Roosevelt the Monster using helix stripes. His legs would come out looking something like this:
And the finished version might come out something like this:
Which one of Stacey’s patterns do you think would look good with helix stripes?
Here are handy links to all the posts about changing yarn color in crochet. . .
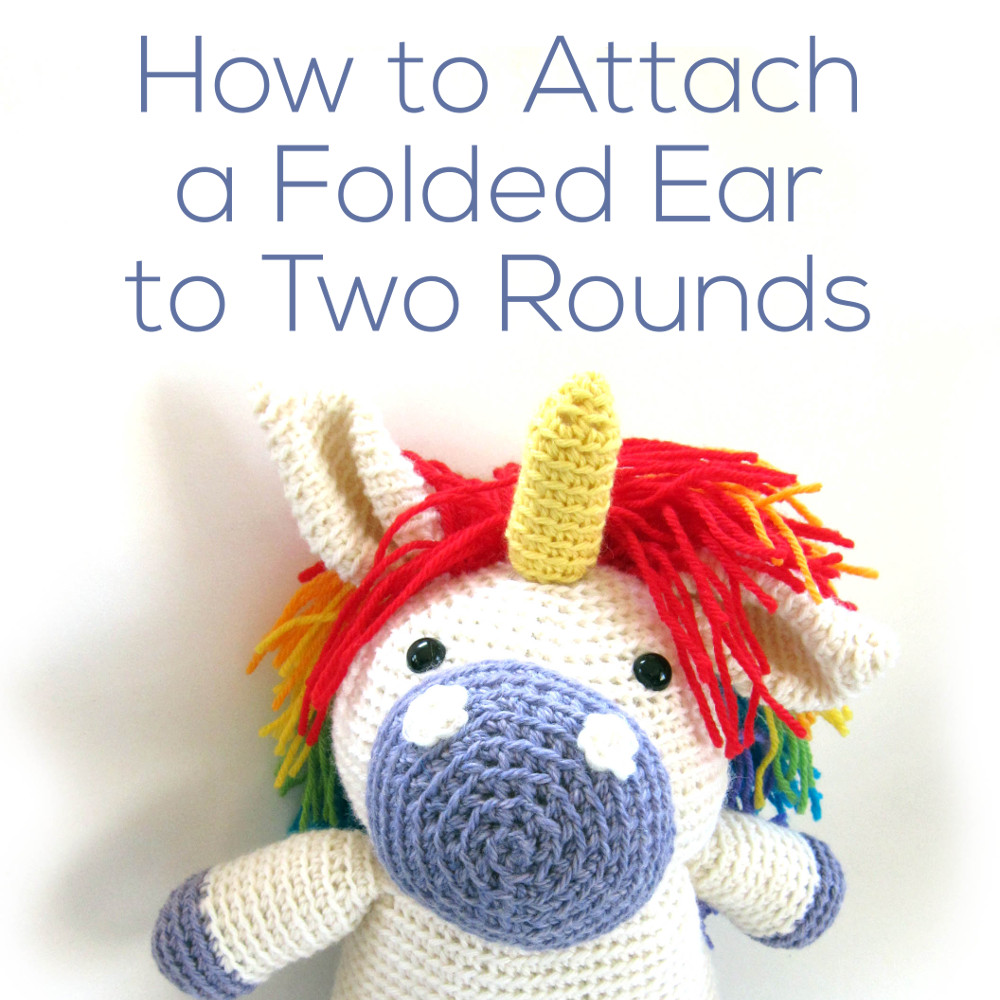
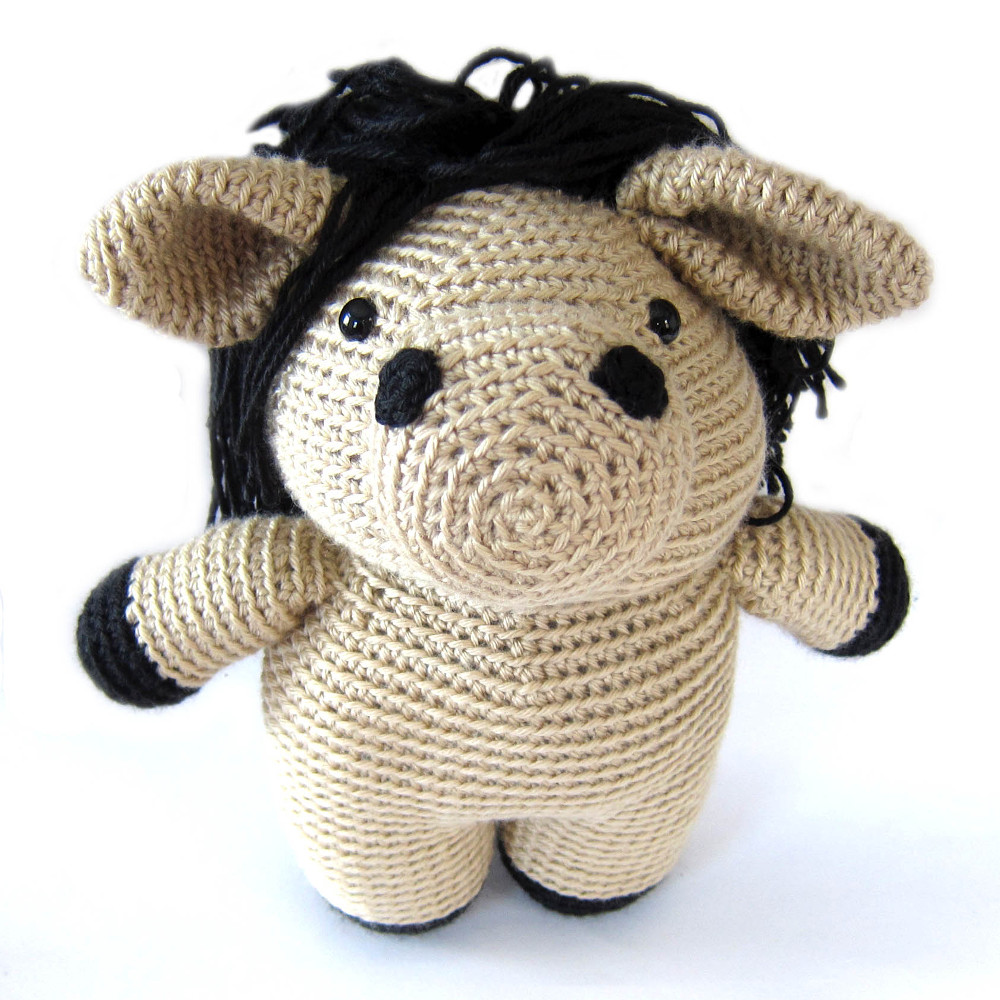
Today, I’m going to talk to you about an instruction that pops up in Flavia the Unicorn:
Flatten ear and then fold ear in half, and attach to the head (at rounds 6-7) so that the opening of the fold faces forward.
The potentially tricky bit in this instruction is that you’re attaching the folded ear to two rounds. Let’s chat about it!
One round vs. two rounds
Why does Flavia’s pattern tell you to attach the ear to two rounds, whereas other patterns instruct you to attach a folded ear to one round? (Have a peek at this tutorial for the step-by-step on one-round attaching.)
This is the ear from the Choose Your Own Adventure Dragon pattern, one where you attach to one round. See how the ear is floppy? There’s nothing wrong with that… it makes the dragon cute!
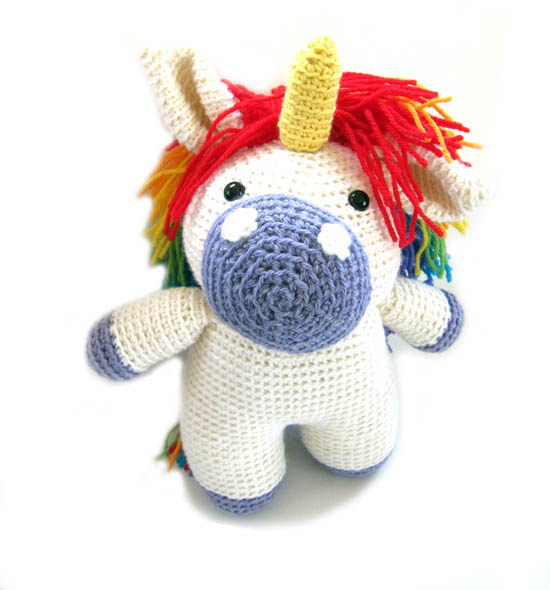
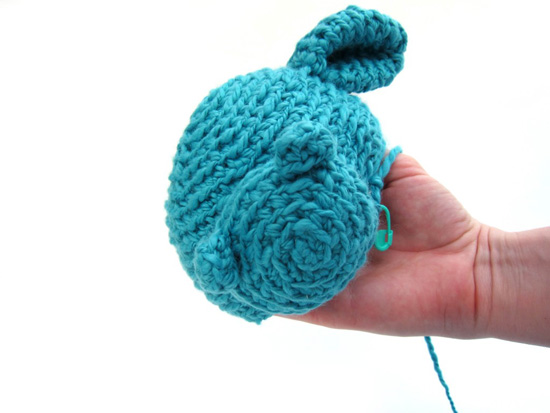
But, notice how Flavia’s ear sticks out? That extra structure is the result of attaching the ear more firmly at the base: to two rounds.
How to attach a folded ear to two rounds
All right. How do you get this perky ear? I’ll show you how it’s done.
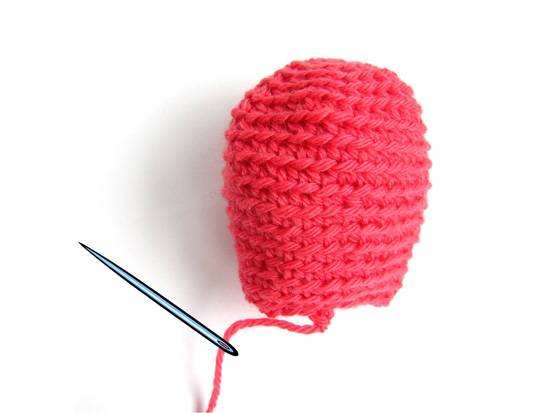
First, flatten the ear and whipstitch it closed (check out this post if you’re rusty on that step).
Count how many stitches you have. If your final round had 24 stitches, your flattened piece will be 12 stitches wide. With your long tail, whipstitch half of the ear stitches to one round:
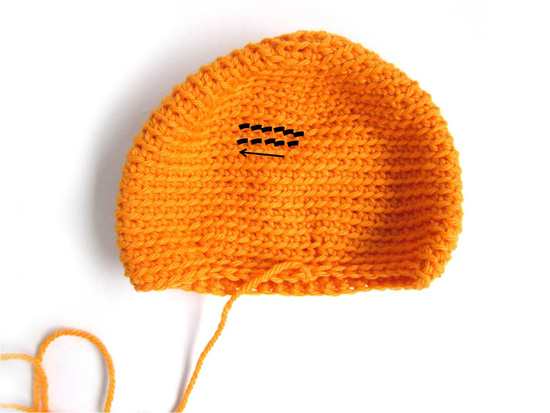
Now, you want to whipstitch the other half of the ear stitches to the second round. This means that you’re stitching in the opposite direction (follow the arrow!). . .
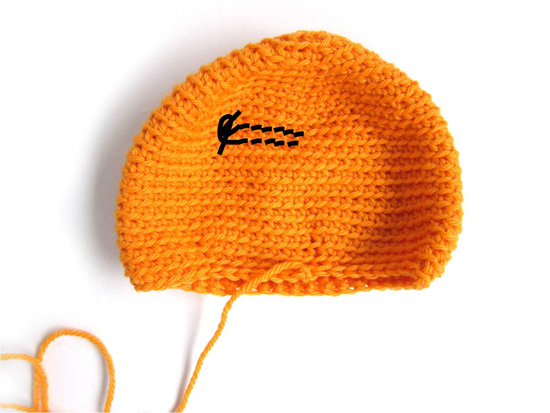
Yay! The ear is fully attached! To make the front of the ear look nice and tidy, I run my tapestry needle through the starting stitch, then tie a knot on the wrong side. This draws the fronts together.
Ta da!
You can use this trick on any folded ear… and it’ll stand up just a bit more!
Here are handy links to all the posts about attaching parts. . .
A lot of patterns going around at the moment feature stripes: two or three colors that go together perfectly.
You could follow the colors suggested in the pattern sample, but you want to try something a little different. But how in the world do you pick a colors that go together? Color theory. That’s how!
Picture the yarns on a color wheel
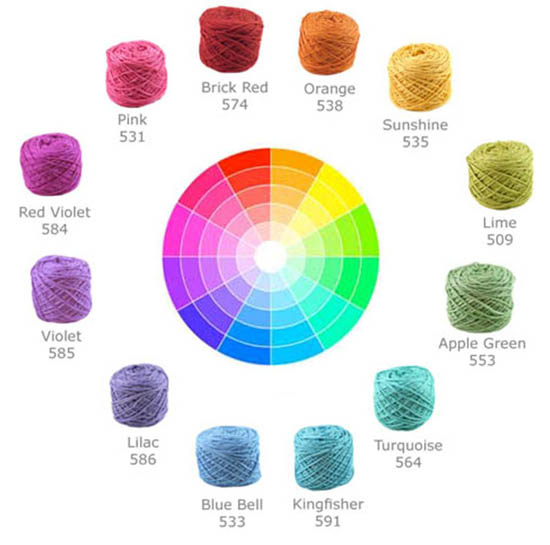
Most yarn lines contain a wide range of colors. Here’s a look at the color palette for Cotton Candy from Be Sweet:
Whoa! Overwhelming, right?
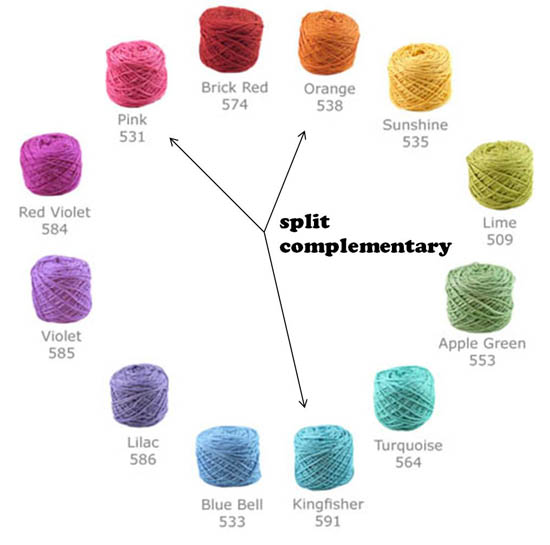
But don’t fret. To get started with selecting a pair of colors, imagine them organized around a color wheel:
It’s not all of the yarns, of course! I just picked a representative for each color wedge!
Most yarn companies design their colors of yarn with compatibility in mind. This is good news! It means that most yarns from a single line are of similar tone and will work together nicely… it’s just up to you to pick your fave color combo!
Color Theory 101
Fortunately, there’s a name for the art of picking colors that go together: color theory. Oodles of brilliant artists and designers agree on some fundamental color groupings. Phew! That means we can use what they’ve figured out to help us pick our color pairings!
There are three color schemes that, if followed, will create knock-your-socks-off color combos: analogous, complementary and split complementary. For help picking an awesome pair (or trio) of colors, stick with one of these schemes, and you can’t go wrong!
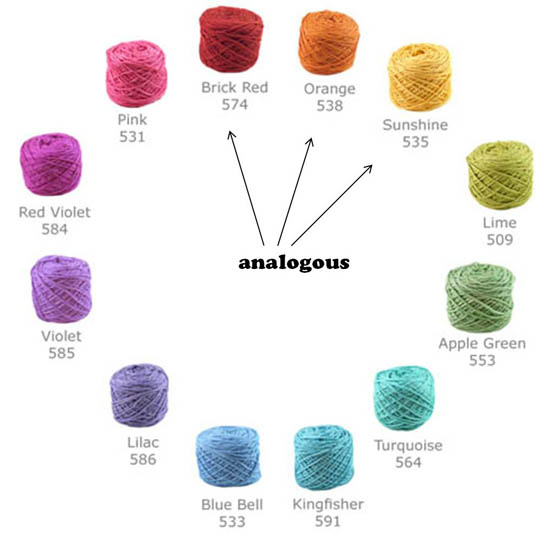
Analogous
Analogous colors are the ones that are next to each other on the color wheel.
This scheme can work with any number of colors – pick two that are next to each other, or three or four!
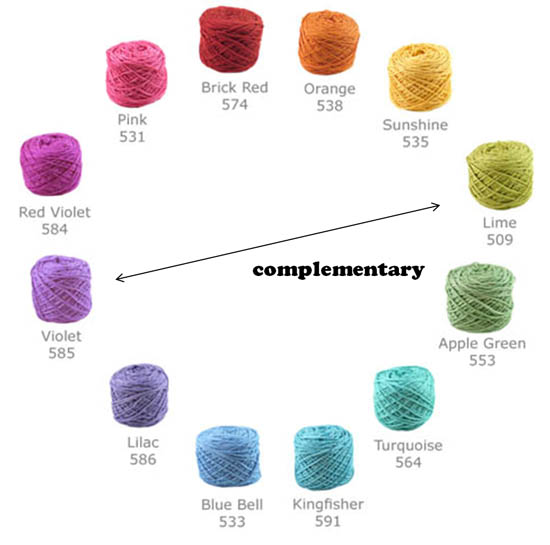
Complementary
For a color pair with a real ‘punch’, go with complementary colors – colors that are opposite each other on the color wheel.
I love using complementary colors. The difference in colors really highlights the striping/pattern in your knitting/crochet.
Split Complementary
A complementary color scheme gives you two colors… so if you want three, you’ll want to use the Split Complementary scheme. Here’s how this one works: start with one color. Zip across the color wheel to its complementary color, and select the two colors on each side of it.
Are you ready to hop into color?
See? It’s not so bad. The color wheel is your friend!
By using one of these color schemes, you’ll be able to put together a beautiful color combo! (I know I’ve started eyeing the blue + pink + orange one!)
Thanks so much to Be Sweet for permitting use of the photo of their lovely yarn to use as examples!
I teach people to crochet. More specifically, I’m very keen on teaching folks how to crochet adorable stuffed animals. I also teach crocheters how to create their own stuffed animal designs.
This last aspect of my chosen career has raised some eyebrows. I’ve been asked, “Aren’t you diluting your brand by teaching others to crochet like you?” and “Aren’t you creating your own competition?”. Wow. Big questions.
Today, I’m going to chat about my answers to questions, and share with you the reason I teach design: because folks from my classes are becoming designers and releasing their own patterns… and that makes me ecstatic! Isn’t that why teachers teach? To see students put to practice what they learned? I think it is!
FAQ: Fears about teaching design
I understand where these fears come from. It’s tough to make a living selling $5 patterns, and so there’s a natural defensiveness that can arise.
But I don’t think of my job as competitive. My job is to publish high-quality crochet patterns featuring designs in my own, unique style. And people who like my style might buy my patterns.
It’s hard for me to get my tail feathers in a ruffle when a new designer comes along. Miss New Designer has her own style! Some people will like it, and that’s okay. People will still like my patterns.
I’ll answer a couple of frequently asked questions.
Q: Don’t you think that teaching other people to design in your style will dilute your brand?
No, I don’t.
First, I teach certain techniques (like crocheting through the back loop and crocheting spiral rounds) because I think these create a better crochet fabric & overall design. In my opinion, these are techniques for your crochet toolbox, not ‘secrets’ of my style. I wasn’t the first person to ever use the back loop in crocheting, and I won’t be the last!
Second, ‘my style’ is something that’s difficult to teach or copy. My style is the ideas that pop into my head. My style is my judgement call about whether a nose looks better attached to round 8 or 10. I’m not trying to teach ‘my style’ because I’m not sure that I could! What I teach is methods for allowing crocheters to express their own style in the form of a unique design and, if they want, a crochet pattern.
Third, my brand is more than just my designs. My brand is a reputation for incredibly clear and photo-rich crochet patterns. It’s my commitment to replying to questions via email in a quick and helpful manner. It’s my blog, full of tutorials and videos. None of those things are diluted by teaching others to design.
Aren’t you afraid you’ll sell fewer patterns if there are more designers?
Not really. Keep in mind: there are always going to be more designers! You can’t stop that.
A revised question might be: can there be too many crochet stuffed animal designers? And I don’t think so. There’s a very interesting phenomenon that happens: the more people do something, the bigger the niche grows.
I’ll give you an example. Let’s pretend you were a computer manufacturer in 1980. You were probably one of the only two manufacturers in existence. But, there were only a few thousand people using computers. What happened over time? The more manufactures built computers, the more customers bought computers. Which meant that owning a computer was more useful: more friends had them and more software was being made. The entire niche grew. Now there are dozens of manufactures, but there are billions of users. The number of customers per manufacturer has increased, despite increased competition.
And that’s how crocheting is. It’s a myth that there are x number of crocheters out there that us designers are fighting for. As more people crochet, it’s more likely someone will think, “hmm… my friend makes those cute animals, maybe I’ll give it a try!” We’re constantly adding to the pool of crocheters.
Is someone going to steal your designs?
Here’s another truth: if someone is steal your design, they’re going to do it. In fact, oodles of crocheters already have the skills to copy a design, even without the benefit of my fabulous teaching skills.
I’m not making the problem any worse by teaching crocheters to design. I’m training crocheters to come up with their own designs! To put in yarn ideas that come from their own heads! If anything, I think I’m solving the problem of knock-off-ing.
Anyway, every student I’ve had (in real life or online) has been a real joy. Once we’ve spent hours together, it feels like we’re friends. If anything, it’s my students who are the most protective in online forums about my rights as a designer. Because we’ve built a relationship of trust. They’re not in it to steal my designs or hurt me!
Meet who makes me happy!
Okay, now onto the fun stuff!
I want to introduce you to two ladies who make me deliriously happy. They’re students of mine who are budding designers!
Hollie!
Hollie is a sweetie, who also happens to be one of the moderators in the FreshStitches Ravelry group. She’s the one who puts together the amazing swaps that happen in the group, and also the one who surprised me with the FreshStitches Cowl that I chatted about as being one of my fave pieces.
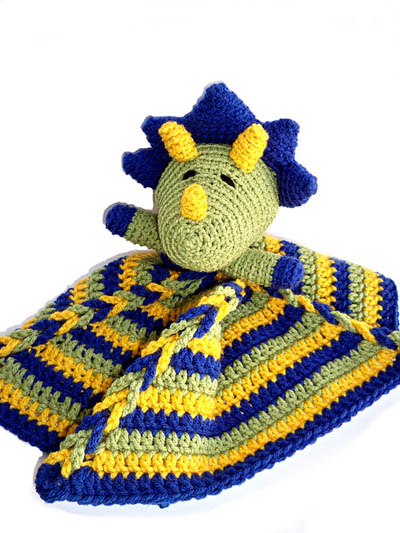
Introductions aside, Hollie just published her first pattern this week!
It’s a Triceratops Lovey… and isn’t it amazing? The triceratops is just stinkin’ adorable, and the detail on the lovey is fantastic. I couldn’t be more thrilled!
If you follow this blog, you know Alyssa! She’s the author of the much-loved What does Amigurumi Mean? blog post and also winner of the Slug-a-long. Alyssa is a smartie with a fabulous photographic and styling eye.
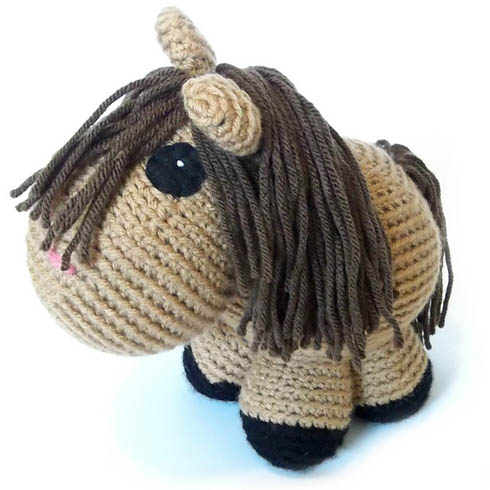
Alyssa also just completed her first design:
An adorable horse! It’s still in the pattern-development stage, but rumor has it that it’ll be released as a pattern next month. So exciting!