Crochet sleepy eyes for your amigurumi!

A little while ago, I was invited to crochet-a-long with the facebook group, Learn Amigurumi Crochet with Us! We crocheted Howie the Penguin and had a blast!

Howie the Penguin, FREE crochet pattern & guide to amigurumi

(If you haven’t checked out the free Howie pattern, what are you waiting for?)

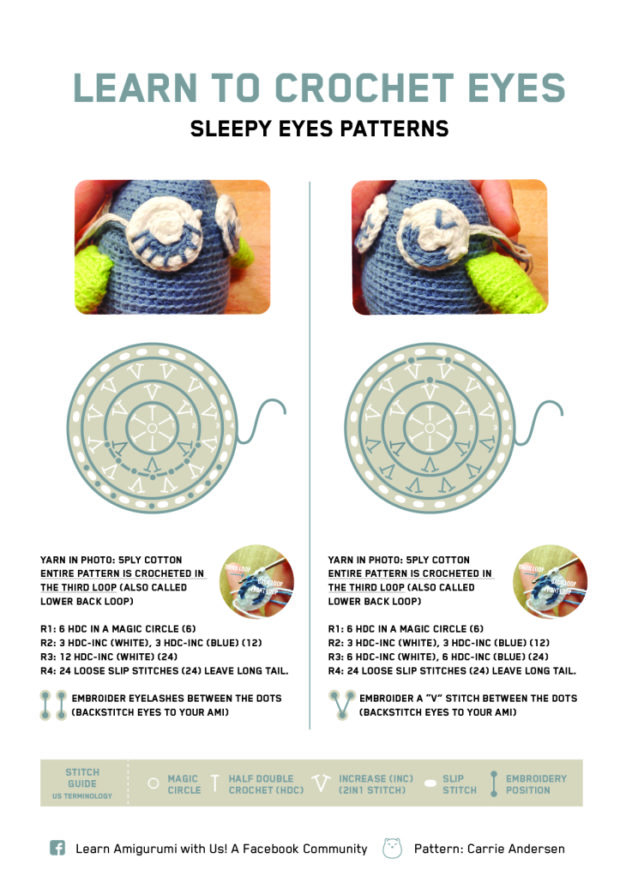
Carrie (one of the group leaders) designed sleepy eyes for crocheters who didn’t want to use plastic craft eyes… and she’s sharing her pattern with us!

free sleepy eyes pattern

Aren’t they adorable?!?

Maybe you’d like to add sleepy eyes to your next amigurumi!

Best,
Stacey

Variegated Yarns: swatches in knitting, crocheting and weaving

It’s always so mysterious how a pretty little skein will work up, isn’t it? Especially with variegated yarn!

I dyed up a little (well, BIG) skein and made swatches in knitting, crocheting and weaving! And they’re SO different!

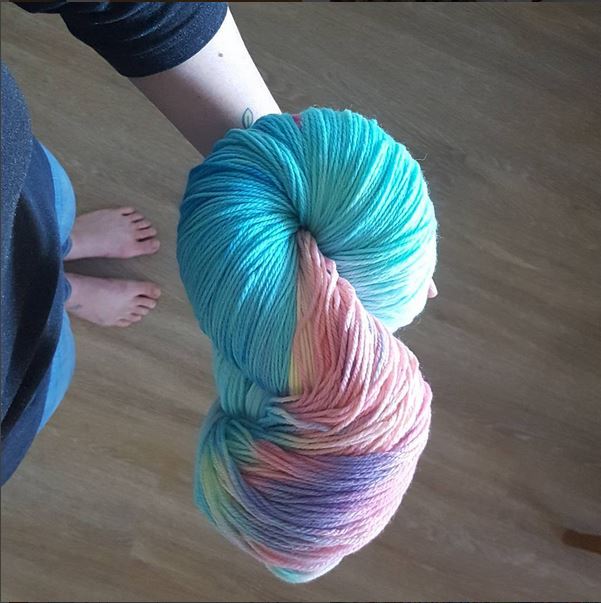
Here’s the skein I dyed (if you want to try it, check my tutorial on how to dye yarn with Wilton Icing Dye):

variegated skein dyed with Wilton icing dye

Knitted Swatch

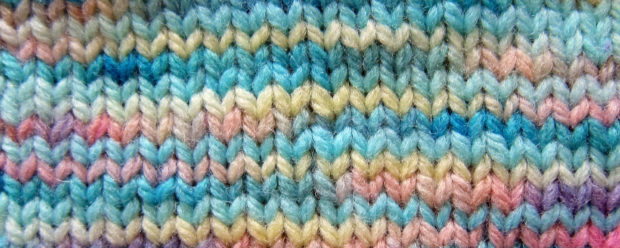
Here’s my knitted swatch!

Variegated yarn in knitting

The factor that’s relevant in how variegated yarn will work up is how long each color repeat is and how much yarn each stitch uses. Although skeins vary, most are about 3-4 feet in circumference, and a variegated yarn will break this length up into a few colors. So, most color repeats are a few to several inches.

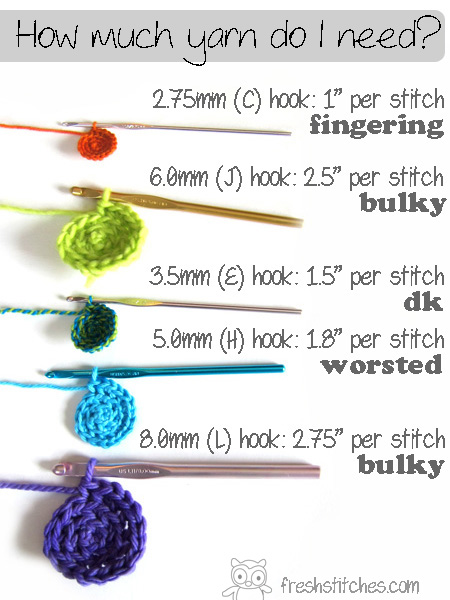
Here’s how to calculate how much yarn each stitch uses.

You can see here that each color lasts several stitches before switching to a new color.

Crocheting

Crochet stitches, in general, use more yarn than knitting stitches, so a color repeat will last over a fewer number of stitches.

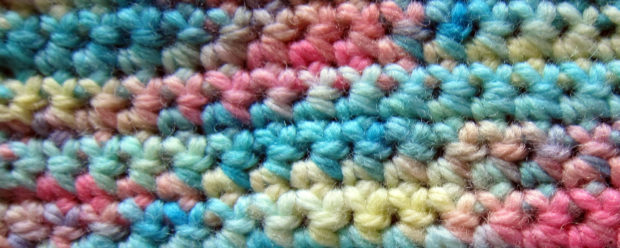
Here’s my crochet swatch

Crochet swatch with variegated yarn

This swatch is done in single crochet, and most of the colors last for a few stitches before changing (as compared to several with knitting). This results in a ‘splotchier’ looking fabric.

You might be interested in reading about the latest craze of Planned Pooling.

Weaving

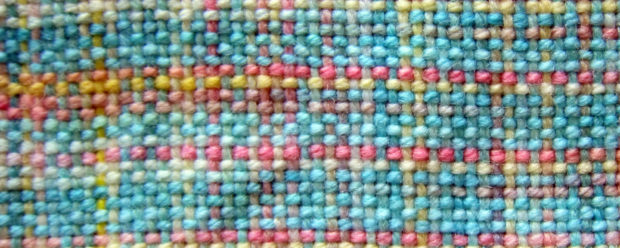
Totally different from knitting and crochet, because there isn’t a ‘stitch’, the color repeat goes for as long as it actually goes on the yarn. In most cases, a color lasted for an entire row on my scarf.

Also, weaving uses two directions of yarn, the warp and the weft.This results in a really lovely plaid-like fabric. Here’s my swatch:

weaving swatch with variegated yarn

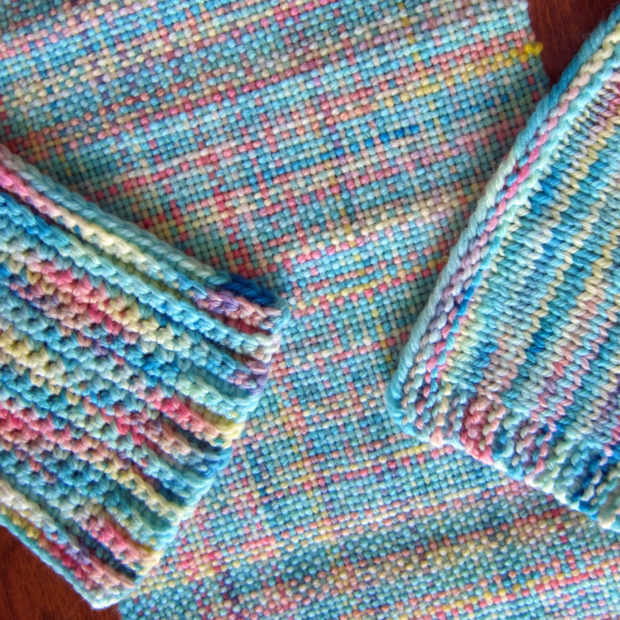
All together now!

They’re all so different, right?

swatches: weaving crochet knitting

It just goes to show that when you find that dream variegated skein, you still have choices to make! You’ll want to select a project (and craft) that will result in the colors working up the way you want!

Best,
Stacey

How to crochet the 2nd round in amigurumi

Today, I’m going to talk about how to crochet the second round of your amigurumi!

You see, I spend a lot of time talking about how to start off with the first round. Whether it’s using the magic ring method or the sloppy slip knot… the first round gets all the attention!

And then, Jen told me she was having trouble on the second round. Of course! We never talk about the second round, even though it’s just as tricky! So, here we go!

(Want to see a video version of this tutorial? You’ll find it here.)

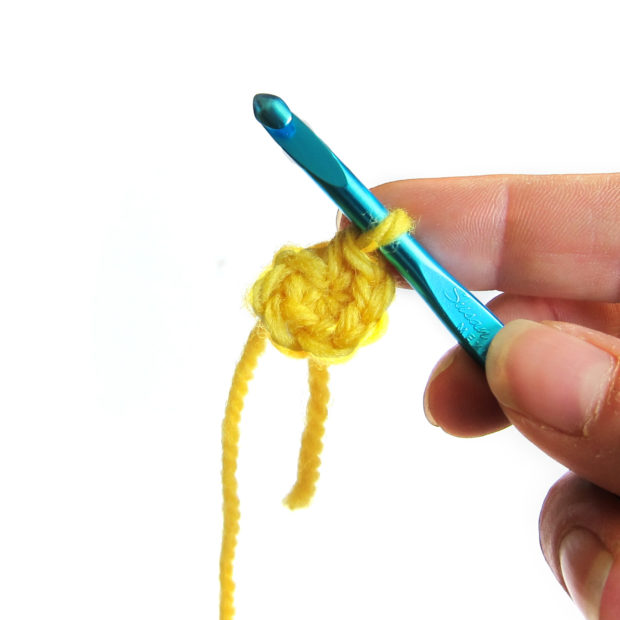
For today’s tip, I’m using the pattern shown here, but almost all amigurumi patterns are the same! It starts with 6 stitches for the first round. So, let’s say we’ve completed our first 6 stitches:

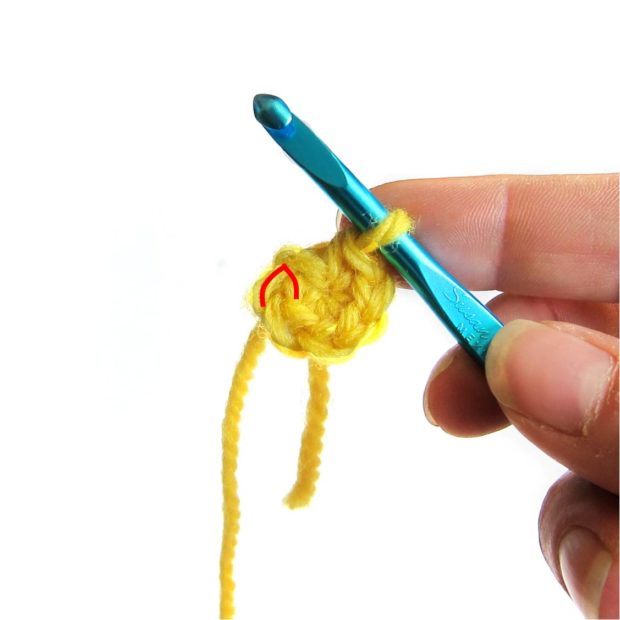
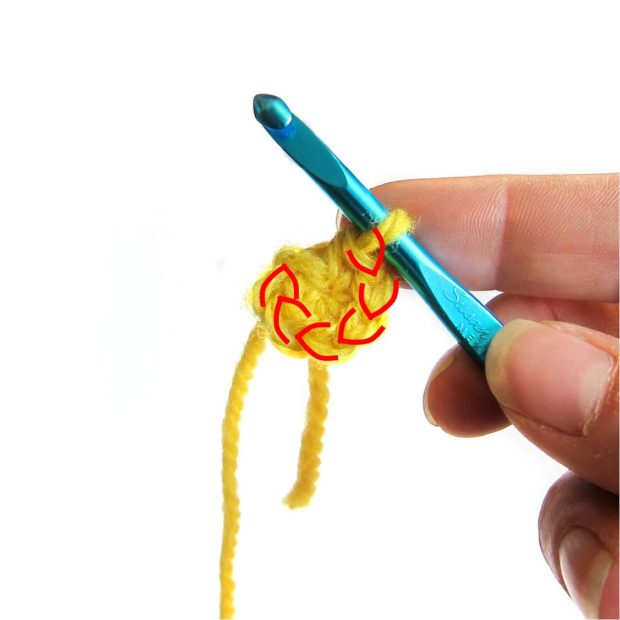
how to crochet the 2nd round in amigurumiDon’t turn your work! You’re going to crochet the second round going around just the way you’ve been going. The hardest part about crocheting the second round is finding the next stitch you should use. I’ve highlighted the next stitch in red:

how to crochet the 2nd round in amigurumi

How did I know it was the next stitch? It has to be! I want to have 6 stitches in my first round, so I count my 6 stitches (backwards, starting from the hook):

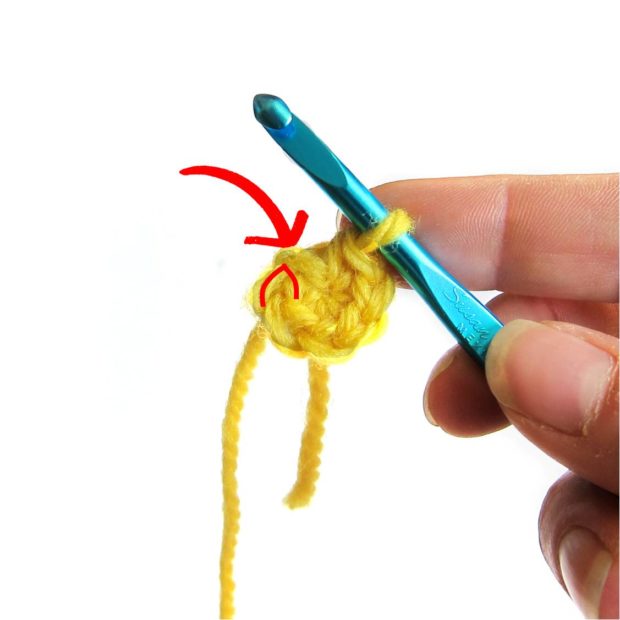
how to count your stitches in crochetSo, now I know what my next stitch is! What is that little weird extra bit that might trick you into being a stitch? The arrow is pointing to that weird piece in this picture:

ignoring a turning chain in crochet
That’s just a confusing chain left over from the original chain 2. Don’t crochet into it… skip over it and pretend it isn’t there!

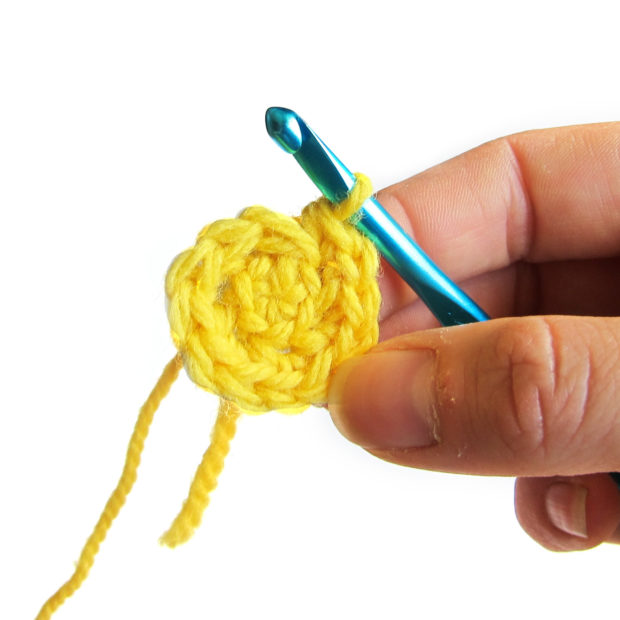
Now you know which are your 6 stitches, crochet twice in each one. Now you’ve finished your second round! The rest will be a piece of cake!

crocheting amigurumi

You might also want to read my post on using stitch markers… it’ll help you keep track of your stitches!

Best,
Stacey

Save

Save

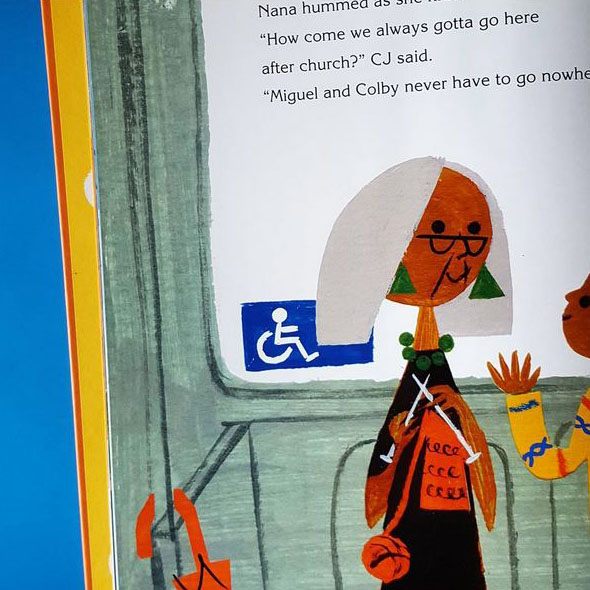
Children’s Books with Knitting (and Yarn!)

It’s gift-giving time! And I LOVE giving books as presents!

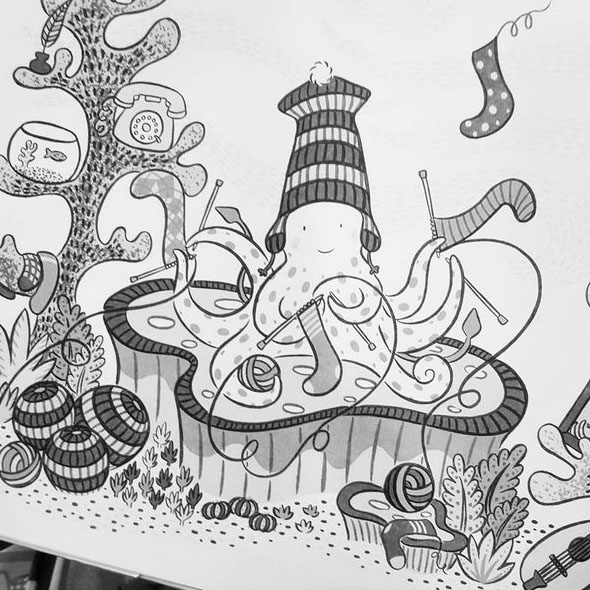
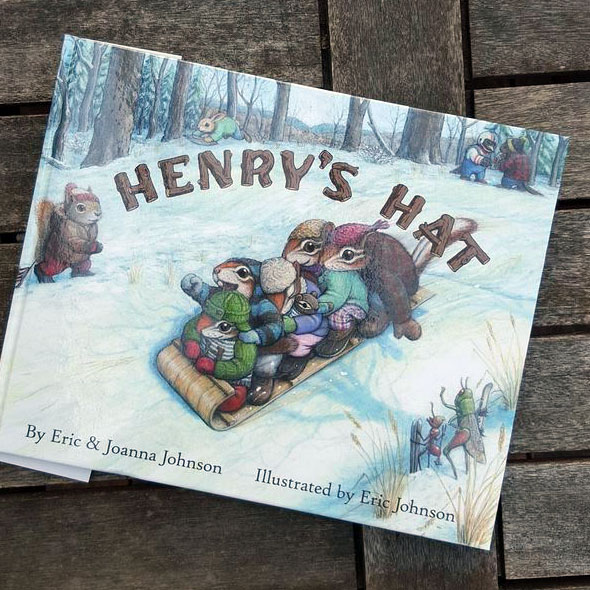
So I’ve compiled a list of Children’s books that contain knitting (or spinning or weaving or yarn… but it’s mostly knitting)! Not all of these books is about knitting, but yarn gets either a mention or an illustrated appearance!

Maddie of FreshStitches reading a book, recommendations for books about knitting for children

Some of these we already own… but I’ll tell you, I added quite a few to Maddie’s Wish List! Thanks so much to everyone who chimed in on Twitter and Facebook to contribute their faves!

This post contains affiliate links to amazon.

book recommendations with knitting for young children

Books for Small Children (to 3 years)

Knitting book recommendations for children

Books for Bigger Children (4 – 8 years)

Knitting book recommendations for young children

More Lists!

I’m not the first one to put together a list of books of children’s books featuring knitting! Check out these other lists!

Any I’ve left out? What’s your fave?


Save

Save

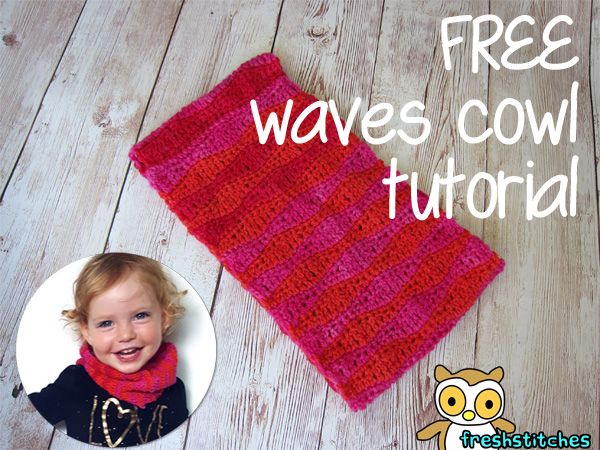
Free Waves Stitch Pattern + Cowl Tutorial!

One of my favorite stitches is the wave stitch. So, when Maddie asked for a scarf for fall, I knew right where to turn!

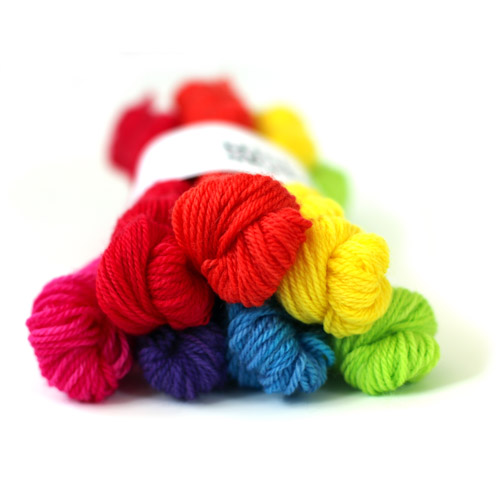
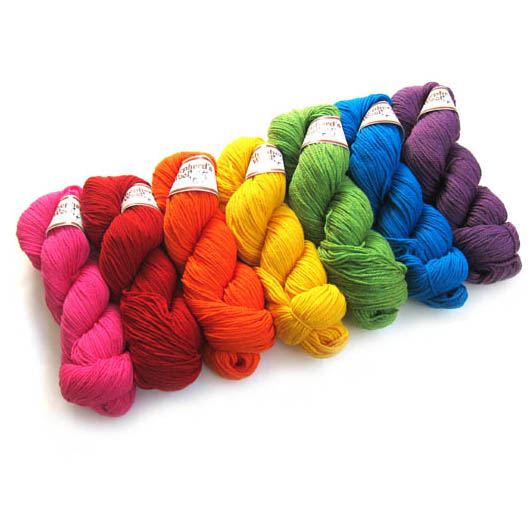
First, I pulled out a SpaceCadet Rainbow Mini-Skein Bundle and let Maddie choose the colors she wanted.

Rainbow Mini skeins for FreshStitches from SpaceCadet

(Since each mini-skein is 70 yards, I needed less than 3 to make a baby cowl… but one set would more than make an adult one!) Maddie is really into red, so she selected the red, pink and orange.

Then, I grabbed a hook and started crocheting! With this fingering weight yarn, I used a C hook.
free crochet cowl tutorial
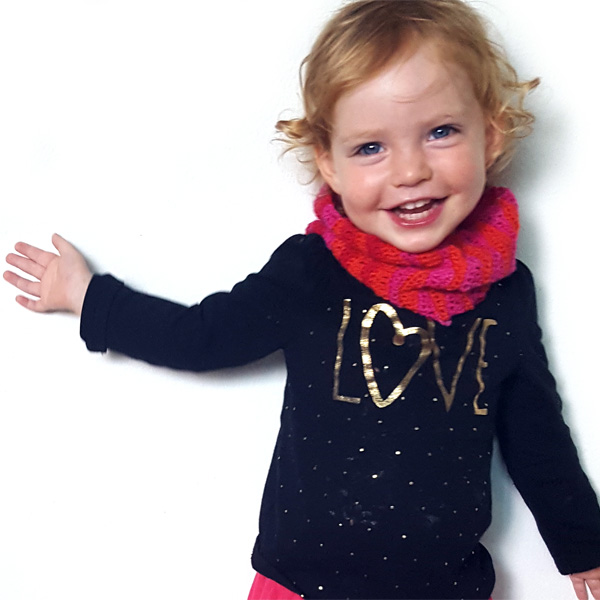
The result is lovely and drapey… and Maddie loves it!

Let me give you the pattern!

The Waves Pattern

In this pattern. . .

  • sl= slip stitch
  • sc= single crochet
  • dc= double crochet
  • hdc= half double crochet
  • tr= treble crochet
    Free Crochet cowl tutorial
    With A, ch 30.
    Row 1: Sc in 2nd ch from hook and each ch across. (29)
    Row 2: With A, ch 1, turn, sc in next sc, * sc in next sc, hdc in next 2 sts, dc in next 2 sts, tr in next 3 sts, dc in next 2 sts, hdc in next 2 sts, sc in next 2 sts. Repeat from * once. (29)
    Row 3: Ch 1, turn. Sc in each st. (29)
    Row 4: With B, Ch 4 (counts as tr), turn. * Tr in next st, dc in next 2 sts, hdc in next 2 sts, sc in next 3 sts, hdc in next 2 sts, dc in next 2 sts, tr in next 2 sts. Repeat from * once.
    Row 5: Ch 1, turn. Sc in each st. (29)
    Repeat rows 2-5 until piece measures desired length (circumference of the cowl) and fasten off and sew ends together!

Free Waves cowl pattern

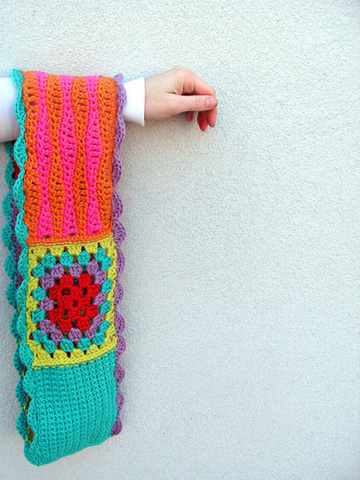
I used this pattern to make a cowl, but you can also use this pattern (repeating rows 2-5 until piece measures 5.5″ long) and add with other blocks to make a sampler cowl!
freshstitches sampler cowl

Visit this blog post for a granny square pattern!

What are you going to make?

So… you have the pattern for the waves stitch. . . what are you waiting for to get started? I can’t wait to see what you make!

How to use Ravelry’s Stash Feature

This post was originally published 5/21/2012… but 4 years later, this is still some of my best advice! Follow these steps to get your stash organized!
amazing tutorial for using stash on Ravelry... go read these tips!
You’ll also be interested in reading:

If you’re a Ravelry-user, you’ve probably seen the ‘Stash’ button (underneath ‘my notebook’)… but do you use it?

You should! In this post, I’ll tell you why I love storing my Stash on Ravelry, and I’ll walk you through the basics of how to use it. Just put in a bit of time up front, and you’ll have a super-organized stash that your yarny-friends will be envious of!

Reasons to Use Ravelry’s Stash

Why should you go through all of the work of uploading your yarns into the Ravelry database? Seems like a lot of trouble, huh?

Here are a few reasons why I think it’s worth your while:

  • No matter how large your stash is, storing it in Ravelry’s online database makes it easy to sort and search… no more digging through tubs in your basement to see if you have any pink laceweight yarn.
  • The stash is integrated into other features on Ravelry, meaning you can search through patterns based on what’s in your current stash.
  • When it’s time to do spring-cleaning, it’s easy to list your undesired yarn stock as ‘for sale/trade’.

The Basics of Putting your Stash on Ravlery

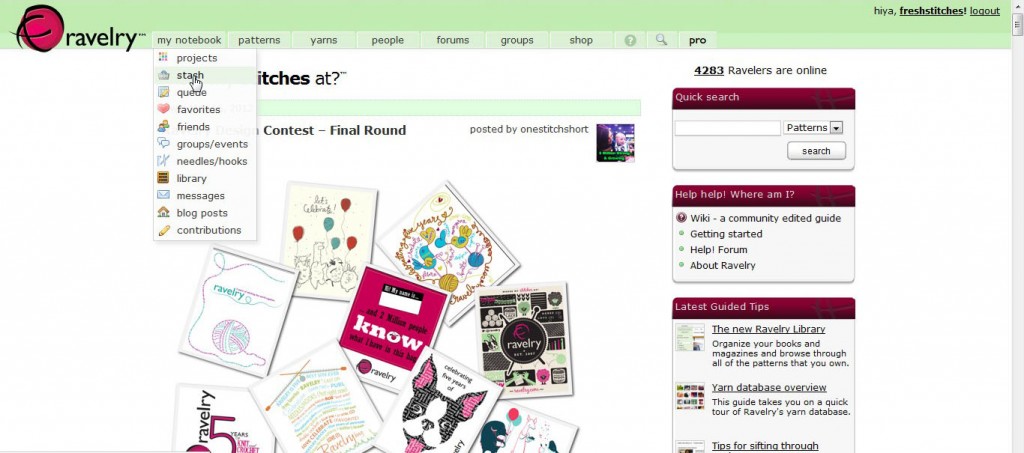
Let’s start at the start. Under ‘My Notebook’, click on ‘Stash’:
You’ll go straight to your Stash Page (yours will be empty if you haven’t added anything yet, but I’ve got yarns in mine!):
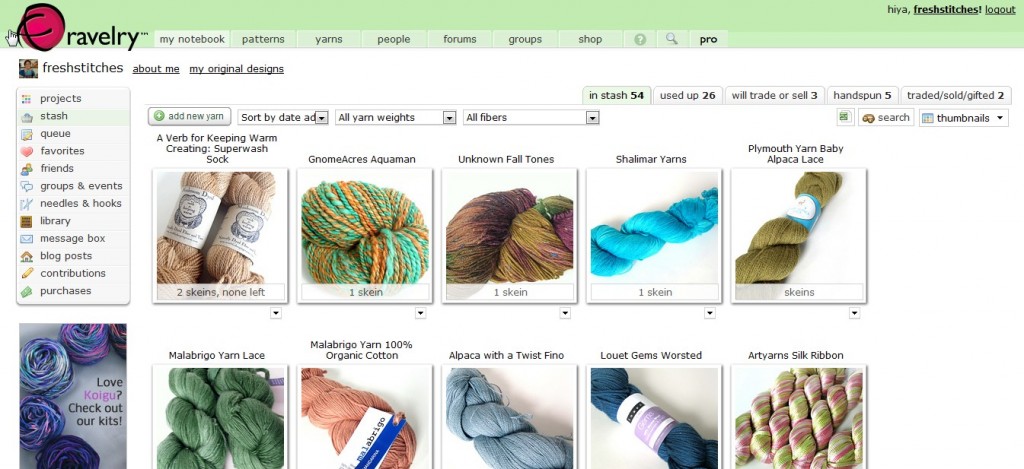
Have a yarn you want to add? Click the ‘Add New Yarn’ button and add whatever information you’d like. I like to put a picture in, but that’s not necessary. To get the best use of the stash feature, be sure to enter the name of the yarn, number of skeins you have and color.

How to Search through your Stash

Okay, so you’ve uploaded the yarns that you have… how do you search through them? Easy-peasy!

Let’s look at our main screen, again:

Look to the right of the ‘Add New Yarn’ button… that’s where you do your searching! You can search by ‘Date Acquired, ‘Yarn Weight’ (i.e. do you have any bulky-weight yarn?) or ‘Fiber’.

Let’s say I’m trying to find out if I have any yarns that contain cotton… I just select ‘Contains Cotton’ from the ‘Fiber’ drop-down menu:
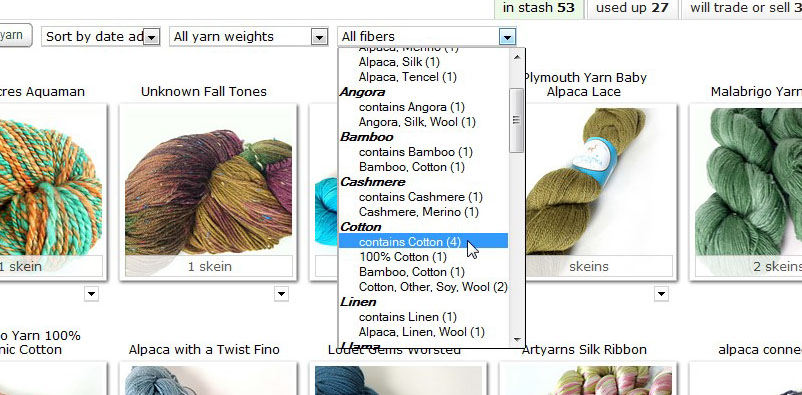
Looks like I have 4! When I click on that selection, those yarns come up on my screen and I can browse them for further info.

Searching Patterns with your Stash in mind

Now, we’ve all done the search for patterns… but did you know that you can restrict your search to patterns that you already have the yarn for?!? Talk about a time-saver!

To do this, you’ll need to click ‘Pattern Browser & Advanced Search’:
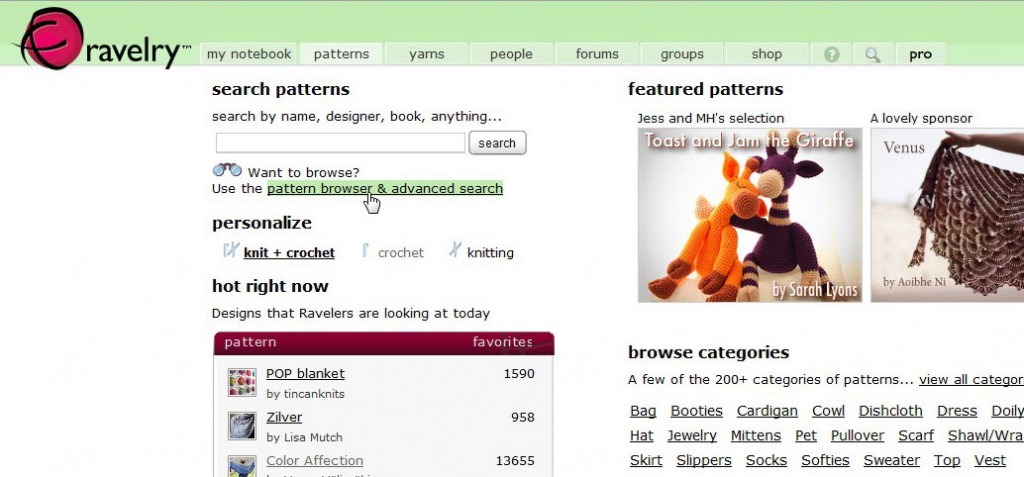
Here, you can enter lots of criteria… but what’s important to us is restricting your search to yarns you have in your stash.

Scroll down, looking on the left, until you see the ‘My Notebook’ header. Click ‘Yarns in my Stash’, and the search will bring up all of the patterns you can make!
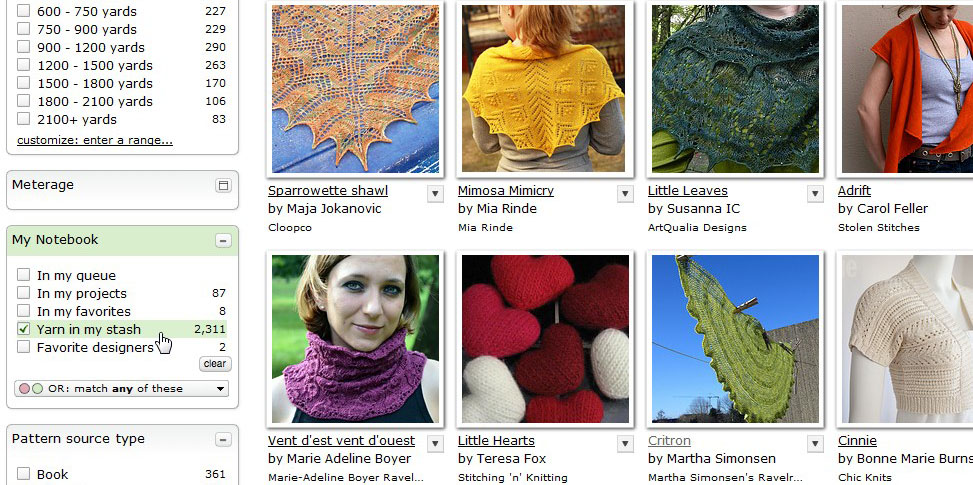
Isn’t that great?

Using your Stash in your Projects

Once you’re using the Stash feature, you’ll want to keep it up-to-date. So, when you start a new project, make use of the ‘use stash yarn’ option:
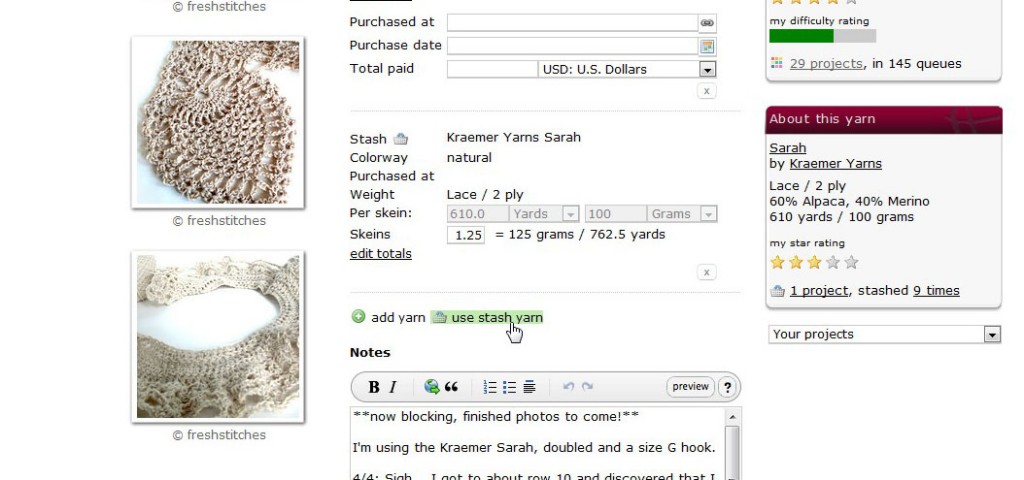
Doing this does 2 things:

  • It automatically updates the amount of yarn in your stash
  • It lists detailed information about your yarn (color, dye lot, purchase date) in your project

Listing your Yarn for Sale/Trade

Sometimes, you’re looking to clean out your yarn stash. No problem! It’s easy to list your yarn for sale to other Ravelry-users. Edit the information about your particular yarn, and select ‘Will Trade or Sell’:
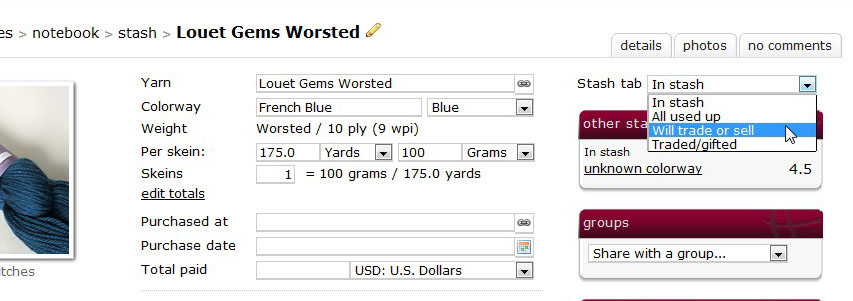
If you want added exposure, share your yarn with some groups where you think people may be interested.

Get Started!

Are you encouraged to list your stash online, yet?

Those of you who have giant stashes, here’s one more helpful bit of information:
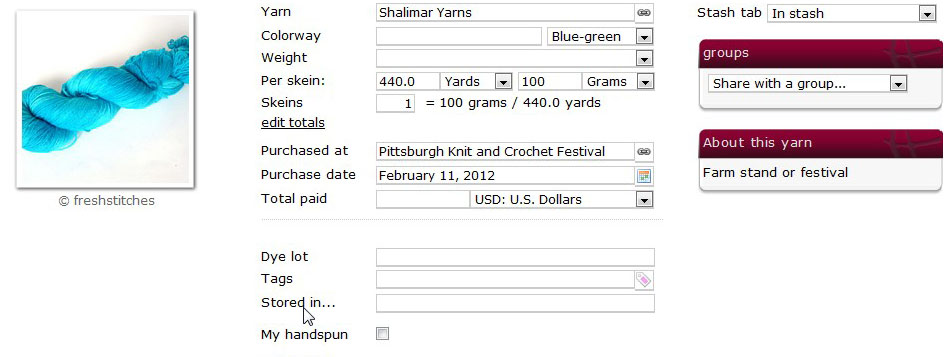
See that line next to my cursor? You can use the ‘Stored In’ line to add information about where a particular skein is stored (i.e. the blue storage tub under the guest bed) in real life!

Happy organizing!
Best Practices for Working with Digital Patterns

Best Practices for Working with Digital Patterns

I love digital patterns!

I love instant delivery. I love being able to print directly onto specialty papers like Sulky Sticky Fabri-solvy, freezer paper, and fusible adhesive. And I love being able to click through to additional resources and tutorials.

But they’re new territory for a lot of people!

I get a lot of questions about digital patterns and have heard some heartbreaking stories that could have been avoided if people had known just a few good practices when working with this kind of file.

So here are some simple suggestions for you.

When you download your digital pattern file, make sure to save it where you know you can find it.

Most computers have a factory-created folder called downloads and all downloaded files are automatically saved there. You can change your computer settings to save downloads to your desktop or another folder, or you can just open the downloads folder after you download your pattern, and then move it to where you want it to live permanently. I suggest a folder called Shiny Happy World Patterns. 🙂

Save a backup!

I can’t count the number of heartbreaking emails I’ve gotten from people whose computers crashed and they’re trying to replace all their digital patterns because they didn’t have a backup. 🙁

If you have a free Google account, you have a HUGE amount of free storage space on Google Drive. You can also save a backup to an external hard drive, another cloud service, or even a flash drive. I know a couple of people who store a backup of all their digital patterns on a flash drive – which makes it super easy to take to a copy shop for printing if you don’t have a printer.

Saving the email with the download link is NOT a safe way to back up your files.

  • A lot of shopping cart services have an expiration date on those links – some as short as a week.
  • Many shopping cart services have a limit to the number of times you can download a pattern – a few limit it to a single download!
  • Digital delivery services change and companies go out of business. Download links don’t remian functional forever. A pattern actually saved to your computer (and backed up) is yours forever.

Only print the pages you need

As a designer, one of the things I love about digital patterns is that I can include loads of additional information and photos – way more than I could possibly justify if I had to think about the printing costs associated with books and paper patterns. And I can include links to video tutorials going into more detail teaching every single skill used in the project.

The only pages you really need to print out are the pattern pages – the actual templates that you’ll be cutting out or tracing. And many times you don’t even need to print all of those. All of my applique patterns, for example, include a regular version of the image which you can use for needle-turn applique and as a placement guide for other techniques, plus a whole separate set of templates with all the pieces reversed and exploded and ready to print on fusible adhesive or freezer paper. You don’t need both sets! Choose your technique and then print only the pages you need.

Some people print all the instruction pages and keep them in a binder, but a lot of people skip that step too. You can set your computer, phone or tablet next to your sewing machine and work directly from the screen if you like.

Print at 100% size – no scaling

The exact look and wording of the printing dialog will vary depending on your computer and your printer, but it will look something like this.

Print digital patterns at 100% for the correct size.

I drew a big pink arrow pointing to the stuff you need to look for – language about size or scaling. Unless the instructions state otherwise, you want to print at 100%.

You can play with this setting to enlarge or reduce patterns that don’t have seam allowances (applique and embroidery patterns, for example) but not for things like stuffed animals and clothing. This blog post has tips for enlarging and reducing patterns with seam allowances.

My Pattern Won’t Print

Sometimes a PDF won’t print. It’s usually a problem with needing an update – either your browser, your version of Adobe Reader or your printer driver. It’s hard for me to help with that because the problem is usually specific to the software on your computer. I can tell you that there are no “protections” of any kind on my PDF patterns – if you can download the pattern you should be able to print it. One workaround that can help is to print it as an image. There are instructions here for how to do that, as well as some more troubleshooting tips for weird printer problems.

Updating your browser can fix a whole host of weird problems. It’s the “Have you tried changing your sewing machine needle?” fix of the tech world. Any time I run into tech difficulties on ANY site, my first stop is always to visit www.whatismybrowser.com. It will tell you if there’s an update available for your browser. Running that update has helped solve really weird problems more times than I can count.

Those tips address the most common questions and problems people run into with digital patterns. If you have any more tips or suggestions for people – please include them in the comments!

Having trouble downloading a pattern? Want to know how you can work with digital patterns if you don’t have a printer? You’ll find answers to lots of tech questions on the FAQ page.

Here’s a list of links all about choosing a quilt pattern – and even designing your own!

Return to the Let’s Make a Quilt main Table of Contents.

SHARE THIS

How to Knit or Crochet Using an *Exact* Amount of Yardage!

We’ve all done this, right? You have a ball (or partial ball) of yarn, and you want to know how much you can knit/crochet until you run out. How do you calculate this?

rainbow yarnI’ll show you!

How to calculate how many stitches you can get from your yarn

I’m detailing each of these steps, below!

  1. Calculate how many yards of yarn you have
  2. Calculate how many stitches you get per yard (using your gauge)
  3. Calculate how many stitches you can get from your yardage!

How to calculate how much yardage you have

If you have full skeins of yarn, this step is easy. Just read the label.

But, if you have partial skeins, you’ll need to do some calculating. The best way to do this calculation is by using weight. Read this blog post for step-by-step instructions!

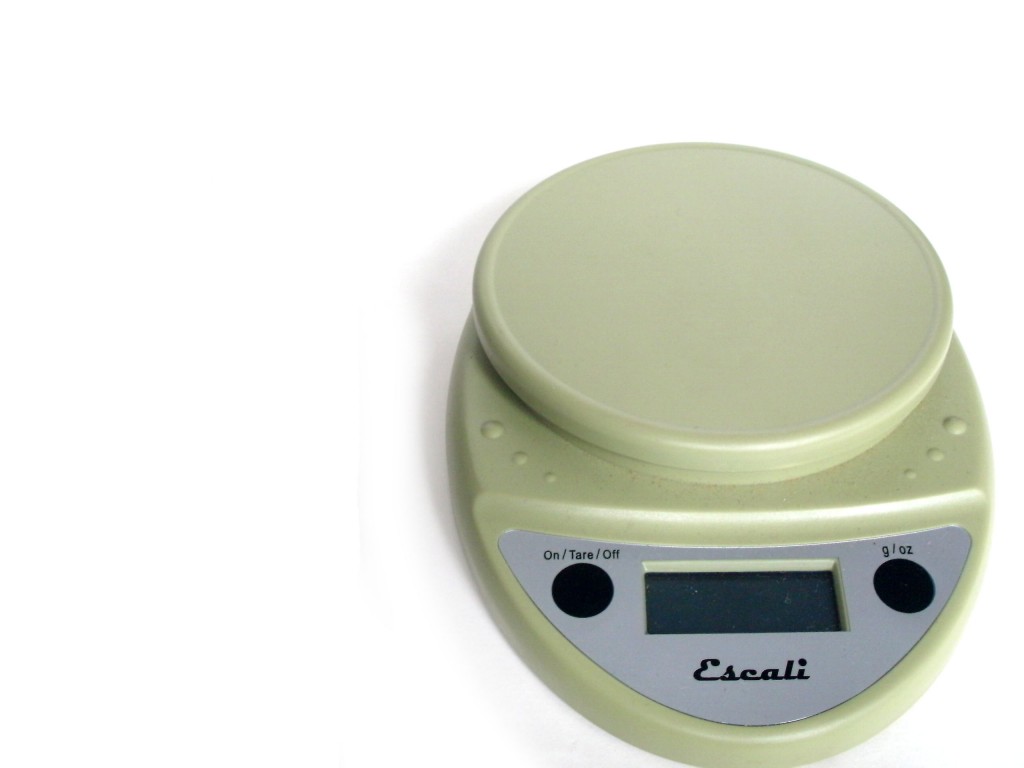
scale for measuring yarn

You’ll need a digital scale and a calculator!

How to calculate how many stitches you get per yard

You’ll need to do a little gauge swatch! This technique works for either knit or crochet. Read this great blog post on how to measure yarn.

how to measure yarn

This blog post has some typical measurements for crochet.

how much yarn do I need?

Calculate how many stitches you can get from your yardage!

Let’s put it all together now!

To begin, multiply your yardage by 36 to get the length in inches.

So, if I have 110 yards, that’s 3960 inches.

Divide this number by your inch/stitch measurement (that you got in step 2), which for single crochet with a worsted weight is 1.8″.

3960/1.8 is 2200 single crochets!

crochet freshstitches

That’s your number! A good pattern will contain stitch counts at the end of each row, so you can add them up and determine how many extra rows you can sneak into a cowl, or whether you’ll need so skip some rows of sleeve length to get your sweater to work!

Best,
Stacey

Make Your Amigurumi Faces Kawaii!

This post contains affiliate links. That means I make a little commission if you buy something after clicking through. All affiliate links are marked with an *.

Kawaii means ‘cute’ in Japanese, and when it comes to amigurumi… there’s a lot in the face!

Make it kawaii

(You might be interested in reading about what amigurumi means!)

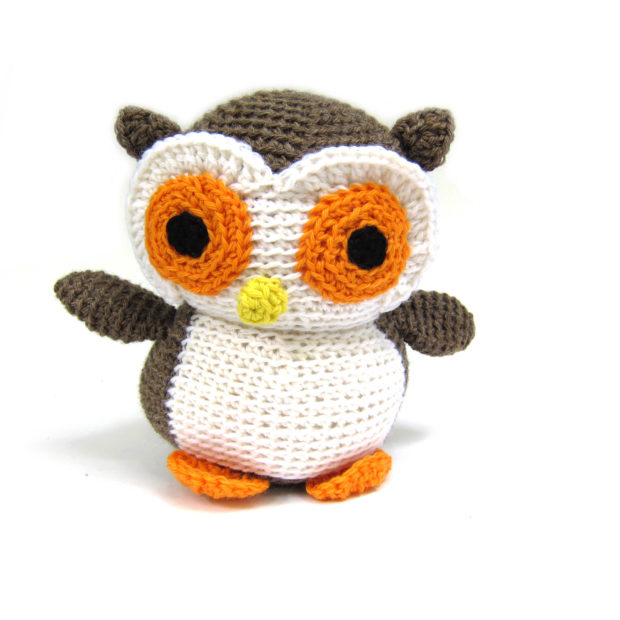
I make most of my amigurumi as bigger plush toys, that are cute… but not super cutesy. Real human people have their eyes at the halfway point of their face, and this is where I put a lot of my animal’s eyes:

amigurumi crochet owl kit by FreshStitches

Cute, right?

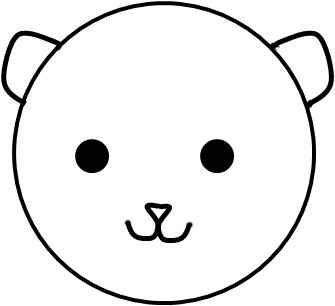
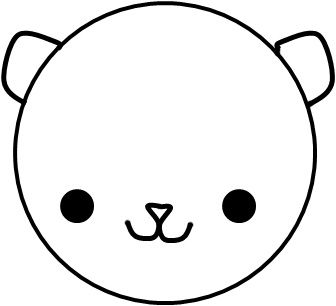
I’ve drawn up a little graphic of what it looks like to put eyes at the halfway point on a sample bear:

animal face

But what if you want to make your amigurumi even CUTER? Even more kawaii?

Try putting the eyes even lower on the face, and spaced further apart! Check out this cutie!

kawaii bear drawing

Even cuter! Squee!

Play around with eye placement on your next stuffed animal!

If you’re interested in cute Japanese characters, I highly recommend reading Manga for the Beginner Kawaii: How to Draw the Supercute Characters of Japanese Comics*! As I explain in my Craftsy course Amigurumi: Design Your Own Monster, you can crochet animals from drawings, so a drawing book is a great resource!

Best,
Stacey

My Favorite Online Crochet Classes

My favorite online crochet classes - I made this hat in one of them.

This post contains affiliate links. That means I make a little commission if you buy something after clicking through. All affiliate links are marked with an *.

I learned how to crochet when I was a kid – but I only learned the most basic stitches and for 40+ years I only ever made flat, rectangular things – afghans and scarves. Last summer I decided to explore some online crochet classes to learn how to make not-flat things. It was so much fun!

Here’s why online craft classes are always my first choice for learning a new skill. In a nutshell – I can watch any time I want, as many times as I need to, and I always have a front row seat and close-up view. 🙂

I started off with a hat-making class. I love handmade hats, but I’ve stopped buying them because they’re always too small for my head. I decided I would finally learn to make my own – to crochet round things!

My favorite online crochet class - Crocheting in the Round with Stacey Trock

I chose the class Crocheting in the Round: Mix & Match Hats* because it’s on the Craftsy* platform – which I love – and is taught by Stacey Trock. I’ve watched some of her videos on FreshStitches and I knew she was a good teacher. 🙂

This was a terrific class! Not only did Stacey teach me to make several different hats – she also teaches the why behind everything she does, so when she gets to the section about designing your own hat patterns, it totally makes sense! Now I can make any hat, any style I want – and it will always fit. And it’s actually super easy!

Jo (age 12 at the time) took the class with me and she loved it too. As you can see from these photos, she really got into the unit on colorwork. 🙂

Jo got so into colorwork that she made three hats in the Fresh Stitches Mix & Match Hat Class.

Jo is still making tons of hats. I think she’s made at least one for every kid at her school. She even figured out how to make the top pointy instead of flat and made a bunch of elf hats too. So cute! But she’s not just making hats. . .

From hats she moved on to this class – Design Your Own Monster*!

Awesome online crochet class from Stacey Trock on Craftsy

Monsters are great for this kind of class because you can never do anything really wrong. So maybe the body is a little weird and the arms are super long and the eyes bug out way more than you expected. It’s a monster! Nobody can say, “Monsters don’t really look like that!” 🙂

Stacey teaches basic formulas for different shapes – cones, spheres, etc. and how to attach arms and legs and how to add faces and excellent stuffing tips. I can’t show any finished cuties because Jo keeps giving them away before I can photograph them. Also – all of a sudden she can read crochet patterns and design her own! Her current obsession is making amigurumi turtles with spiral striped shells. 🙂

Jo and I aren’t done with online crochet classes – here are a few more on our wish lists.

Jo is definitely ready to learn some new stitches. She’s already figured out some weird crochet cable stitch and how to bobble stitch with YouTube videos, but now she says she wants a class that will take her through a bunch of new stitches in a systematic way. I’m getting her this Textured Crochet Stitches class* for this summer.

One of many online crochet classes on my wish list.

She also really likes to make Useful Things That Everyone At School Will Wear so I think she’ll really like this class on making mittens and fingerless gloves*.

One of many online crochet classes on my wish list.

And for me? I think a fancy little edge on the bottom of one of my hats will be just the thing, so I’ve got this Fantastic Finishes class* on my list.

One of many online crochet classes on my wish list.

The number and variety of classes is truly astounding! I’ll be reviewing some of my favorite cooking and embroidery classes next week. 🙂

Happy stitching!

Best,
Wendi
That's me!