What are the different kinds of sewing needles?

What are the different kinds of sewing needles?

Want to learn the basics of hand embroidery with an easy online workshop – totally free?

Sign up for Embroidery 101 here. You’ll learn how to get started, the tools and supplies you’ll need, the four most basic stitches, how to transfer your pattern and how to display your work.

If you already know the basics – sign up for Embroidery 201. It’s also free! You’ll learn how to stitch on specialty fabrics like felt and stretchy T-shirts. Plus you’ll learn lots and lots and LOTS more stitches – all my favorites!

Liz recently asked me. . .

I have a question for you – what sort of sewing needles do you use? I am experimenting with different sorts but haven’t yet found the  perfect one. It looks like you are using six strands in your eyes video – which needle are using for that? And what would you recommend for three strands?

I’m going to use this as an opportunity to talk about sewing needles in general. See that photo up there? I loaded it up in a large file size so you can click on it to see it closer – and that’s a sewing bobbin in there for size reference. The three needles there are the ones I use most often (which is why they’re the hand sewing needles I sell in my shop).

Types of Hand Sewing Needles

Let’s start from the top. . .

The top needle is a size 5 embroidery needle. That’s the size I most often use for regular embroidery because I like to stitch with 4 strands of thread and it’s perfect for that. It doesn’t hurt to use fewer, and if I concentrate really hard (and remove my glasses) I can get six strands through that eye.

I often use a size 8 embroidery needle when I’m sewing or embroidering on felt. The needle hole can actually be visible in felt, and I’m usually only stitching with 2 strands of thread – so it’s better to switch to a smaller needle for that.

I also use a size 8 embroidery needle for Big Stitch quilting.

The middle needle is a size 4 sharp. That’s a basic sewing needle. (Basic sewing needles are called sharps – just to confuse you. All the needles in the photo are sharp, but the middle one is actually called a sharp.) If you click on the photo to see it larger I hope you can see that the eye is much smaller than the embroidery needle. In a pinch you could maybe fit 3 strands of embroidery thread through there, but it would be tough. That said, I have used a sharp to embroider with 1-2 strands of thread and lightning didn’t strike me for using the wrong needle. 🙂

The bottom needle is a size 8 between or quilting needle. I have no idea why quilting needles are called betweens. I think it’s just one more thing to scare away the people who opted out of Home Ec. Anyway – this is a good small size for traditional hand quilting, but I often recommend for beginners to start with something larger and work their way down. That’s why the quilting needles I sell in my shop come in a pack of assorted sizes.

This needle is also sharp, with a small eye like a sharp, but it’s shorter and thinner. I’ve been known to sew with a between, but I never quilt with a sharp.

And now one more thing to confuse you – as needle size numbers get bigger, the needles get smaller and vice versa. So a size 5 embroidery needle is smaller than a size 3. It’s like wire gauges.

So there you go – an intro to the basic types of sewing needles I use most often – along with many (many!) asides reminding you that you can use whatever kind of needle you like best. The needle police will not come and lock you up. 🙂

Got any other sewing or embroidery questions? Send them to me here.

Happy stitching!

Best,
Wendi
Applique Wendi (with fabulous hat)


Felt Embroidery – All My Tips and Tricks

Tips and Tricks for Embroidering Felt

I’ve gotten a few questions lately about felt embroidery – and I’m going to answer them all here today.

Most of your patterns use smallish shapes. Do I transfer the pattern, hoop them and stitch, and then cut them out?

Well – I buy the good stuff (there’s no point embroidering it if it’s going to get all pilled and nasty-looking the first time someone touches it) and I don’t like to waste any of it. That means no excess for hooping. You don’t really need to hoop felt anyway – and it’s hard to get the crimp marks out when you do. It’s stiff enough to embroider easily without a hoop. Just be careful not to pull your stitches too tight.

My method is to transfer the pattern, cut it out, and then stitch.

How do you transfer your pattern to felt? You can’t trace through this stuff, and any pen or pencil tends to lift the fibers.

I use one of my favorite embroidery products–I call it The Magical Embroidery Stuff and you can read more about it here. I use it for all of my embroidery, but it really is pure magic for felt embroidery. In fact – it’s so magical that I wrote a whole post here, just about how amazing it is with wool felt.

Where do you find wool felt in such gorgeous colors?

I recommend Benzie Design. They have an amazing selection of colors – including lots of gorgeous felt bundles.

By the way – that picture up at the top is a close up of some of the blocks from the Felt Blocks Embroidery Pattern. Those were so much fun to stitch!

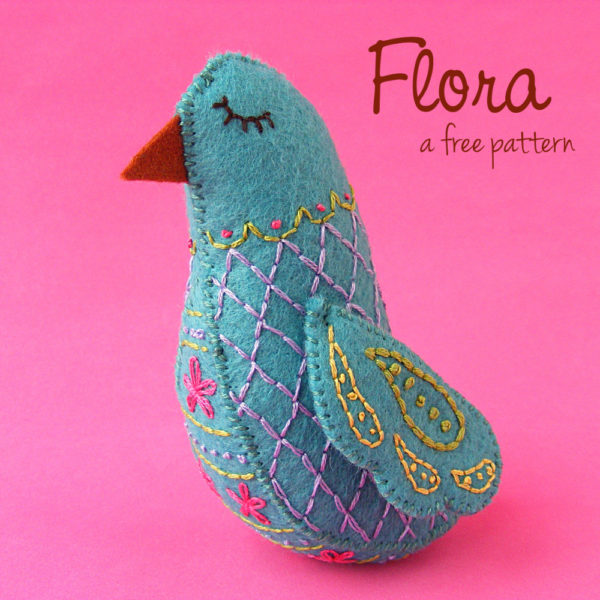
If you’re looking for a free pattern to try, I recommend Flora the felt bird.

Flora the Felt Bird - a free pattern from Shiny Happy World

She’s so pretty!

Here are links to all my posts about embroidery tools and supplies.

For Beginners

Specialty Fabrics

Threads

Stabilizers and Pattern Transfer Tools

Return to the Learn to Embroider main Table of Contents.

Move on to the posts about working with patterns.

Free Stocking Pattern + Free Ornament Pattern = Fun Handmade Goodness

Free stocking pattern and free ornaments patterns from Shiny Happy World - combine them for extra fun!

Handmade Christmas decorations are so much fun!

I’ve got a free Stockings pattern and a free Ornaments pattern.

They’re fun on their own, but look what you can do when you mix them together!

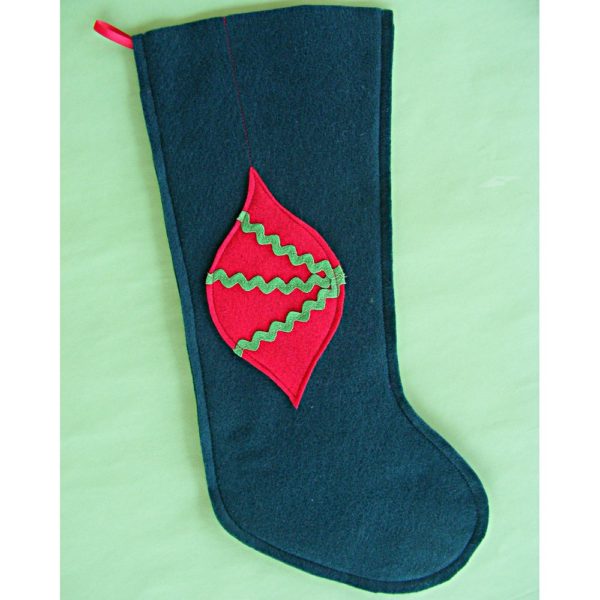
We’ll start simple. Sew some rickrack onto the ogee and sew the ogee to the stocking. If you want to get fancy you can run a line of stitching from the top point to make it look like it’s hanging. This stocking will take maybe 20 minutes to make and it’s very easy for a beginner.

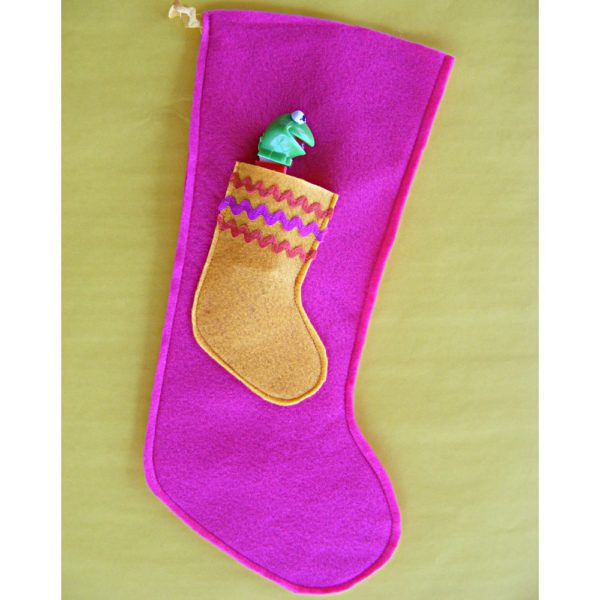
Here’s another super simple one – and one of my favorites. Stitch the little ornament-sized stocking to the regular sized stocking but leave the top unstitched. Now you have a stocking with a stocking-shaped pocket on it, perfect for holding a little Pez dispenser or a couple of lollipops or a small toy. Cute!

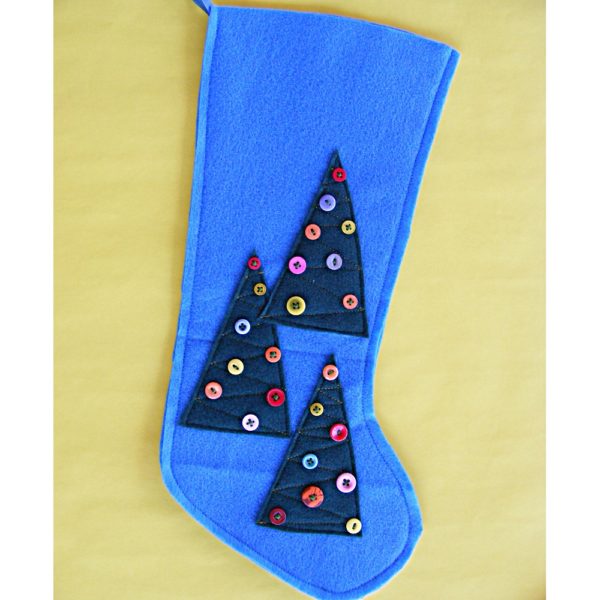
You don’t have to limit yourself to just one felt applique. For this stocking I cut out three tree triangles from the ornament patterns, stitched them to the stocking with a little swaggy zigzag action, then added random buttons. A forest of decorated trees!

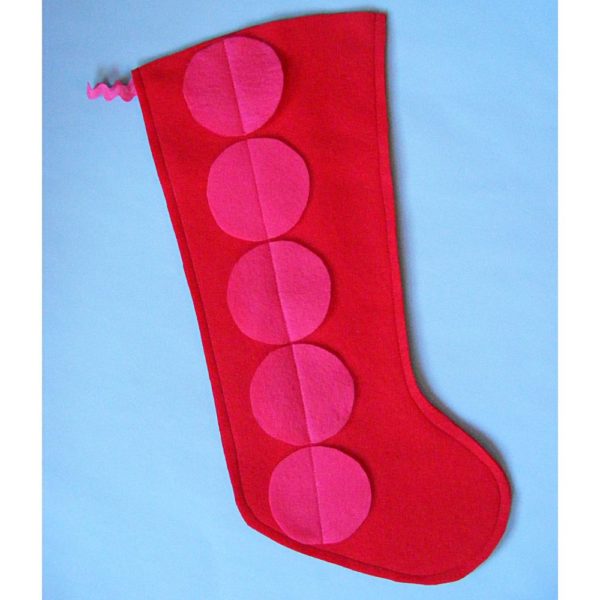
You can fit exactly five of the large ornament circles in a stack up the side of the stocking. Lay them in place, stitch one row of stitching up the middle, and you’re done.

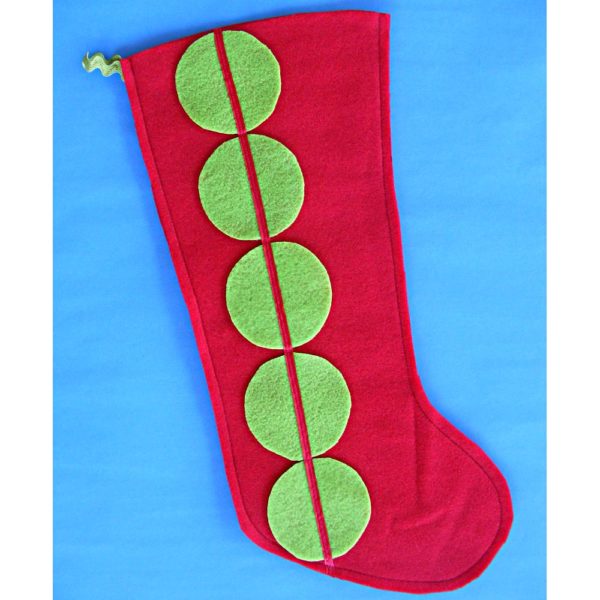
Here’s a variation with a more well-defined stripe. Instead of simply stitching up the middle of the dots, I laid a strip of satin ribbon down the center and then stitched over it. Easy peasy!

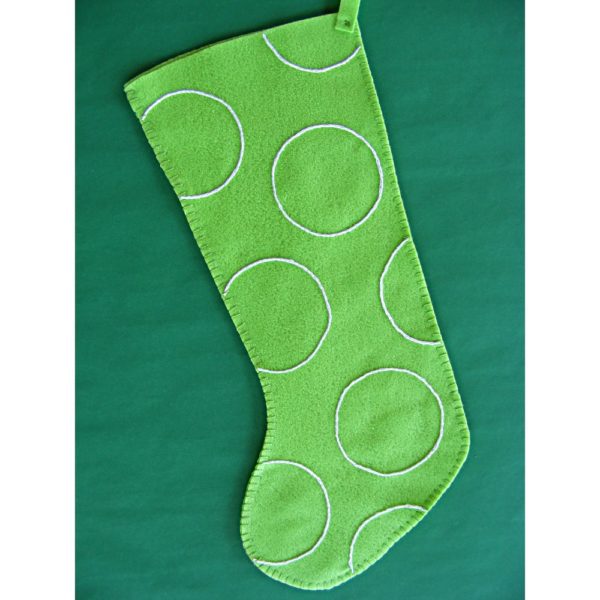
Forget about felt applique! For this one I didn’t sew down the big dots – I just used one as a pattern. I traced around it (randomly scattered over the stocking) and embroidered the circles with split stitch in white thread. Doesn’t it look minty fresh?

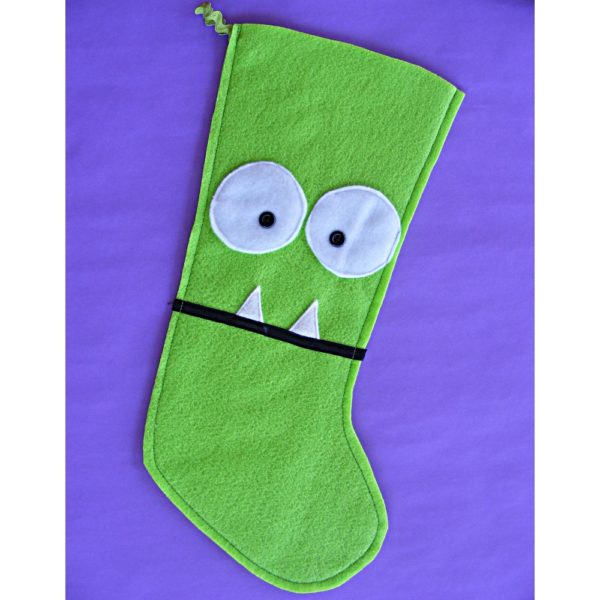
And then there’s this beauty! The big ornament circles make great eyeballs, no? The black strip for the mouth is a bit of satin ribbon, and the teeth are simply felt triangles tucked behind the ribbon before stitching.

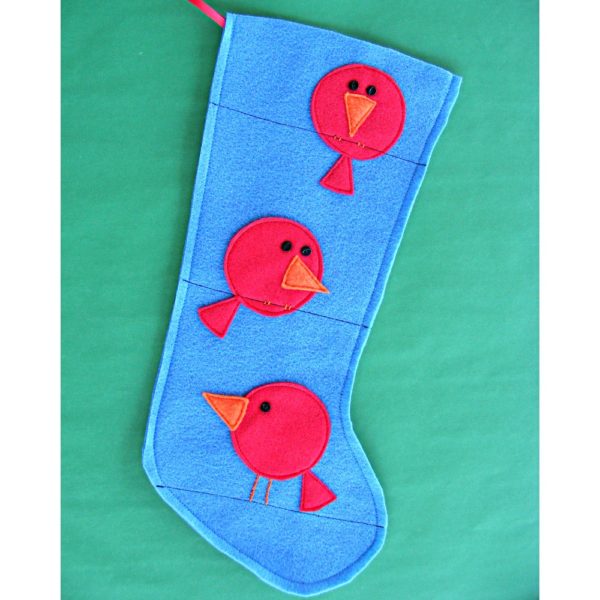
And now – my favorite. I used the big circles from the ornament pattern  – and Ed Emberley’s Picture Pie: A Cut and Paste Drawing Book. Those three birds are straight out of the book – and it’s filled with other cool pictures too, all made from circles.

I’d love to see what variations you all come up with! Get the free ornaments pattern here and the free stocking pattern here. And then please post your finished projects to the Shiny Happy People group so everyone can admire them. 🙂

Happy stitching!
Best,
Wendi
Applique Wendi (with fabulous hat)

Neato Ornaments – FREE Pattern!

Yesterday I gave you a pattern for a good, basic holiday stocking. Today it’s felt ornaments. (Psst! Visit this post to see how to combine my stocking pattern and this ornament pattern for extra fun!)

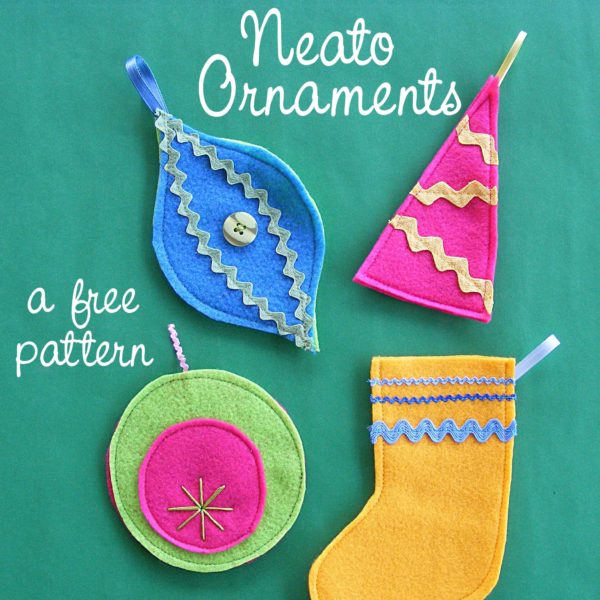
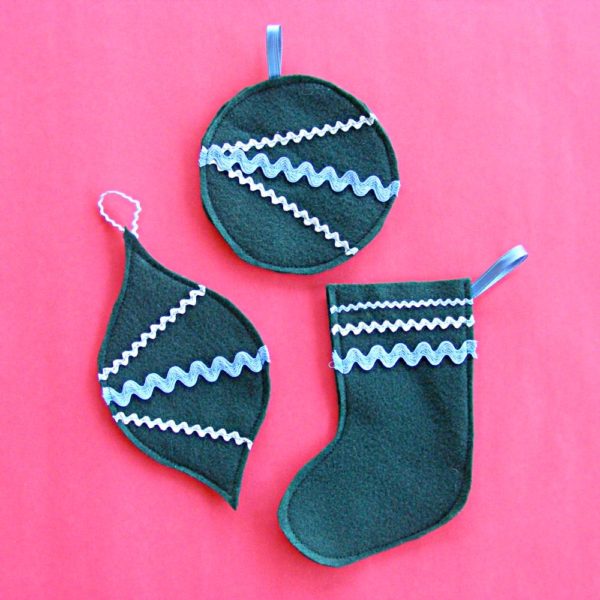
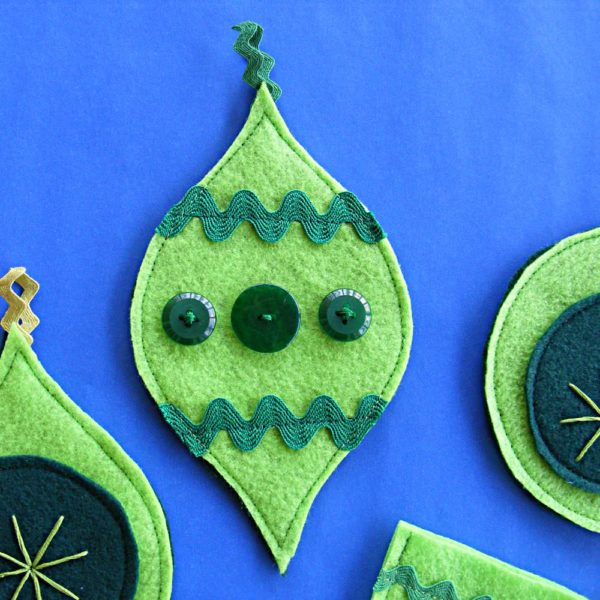
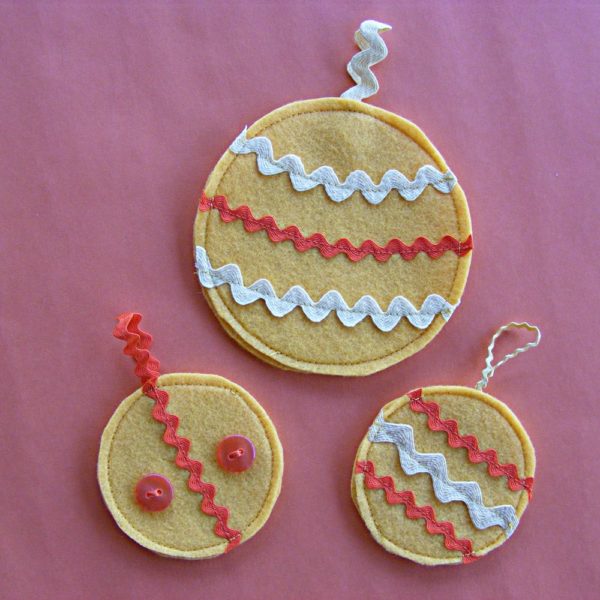
But now. . . ornaments. The pattern (click here to download) includes some really basic shapes – a tree, a stocking, an ogee, and two circles. The fun comes with what you do with these basics.

Add rickrack. (Boy – do I love rickrack or what?)

Add buttons!

Add fancy vintage trim!

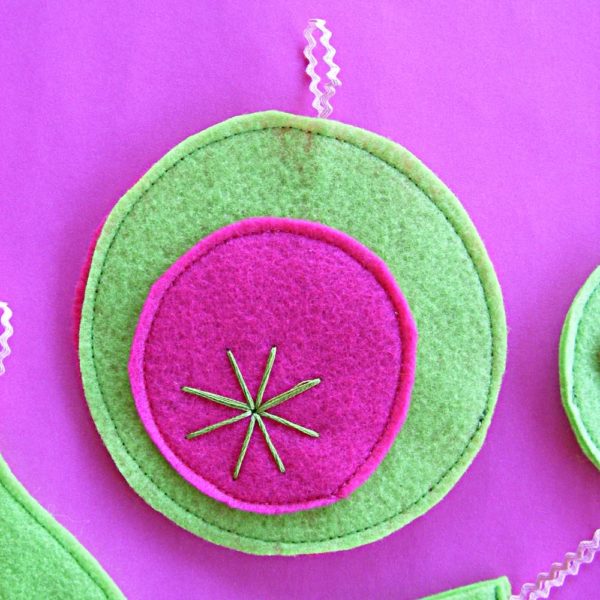
Layer them together with a bit of really simple embroidery!

Don’t feel like you’re tied to traditional colors. I love these yellow and orange ones! (Especially nice too for folks who celebrate solstice.)

Download the free pattern. Gather up your tiny scraps of trim, your odd beads and buttons, your little bits of yarn – and have fun! These shapes are really simple and fun for kids to play with too. Put on some Christmas carols, serve up some cookies, and let them sew the rickrack on with the machine (nice easy straight lines). They – and you – will have a blast. I promise.

Read this post for the best part – combining the stockings and these ornaments in really inventive ways. 🙂

Happy sewing!

Best,
Wendi
Applique Wendi (with fabulous hat)

Swell Stockings – FREE Pattern!

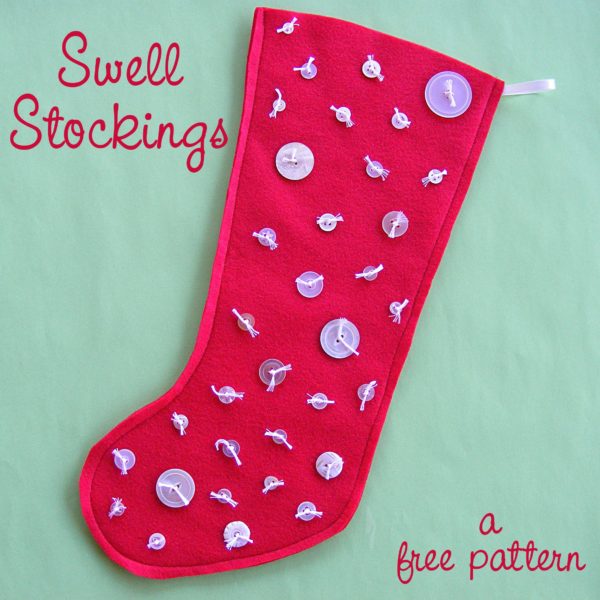
Planning to make any holiday stockings this year? Here’s an easy peasy pattern – and it’s free! Click here to download.

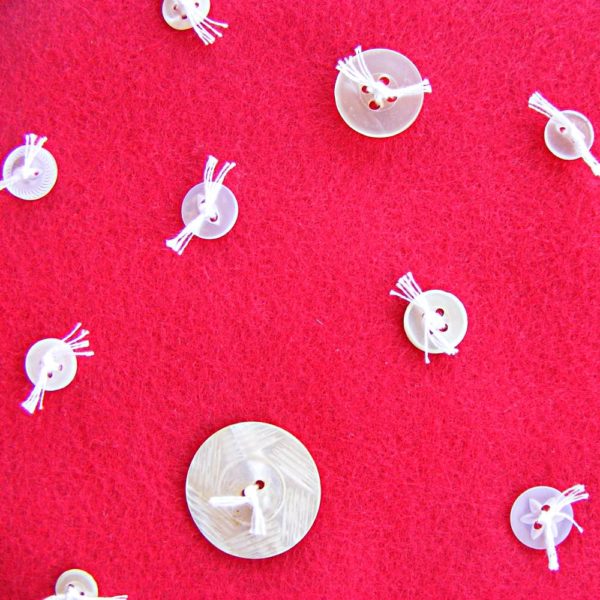
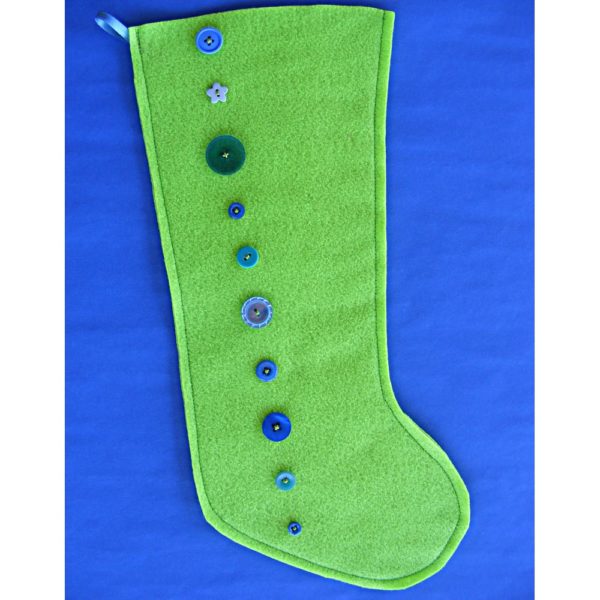
The pattern is for a basic stocking made from felt and takes less than an hour to make. But (of course) you’ll want to fancy it up a bit. 🙂 The one on the pattern cover just has a bunch of inexpensive pearly buttons stitched on it – with the thread tails visible.

See?

Or use just a handful of buttons in a vertical stripe.

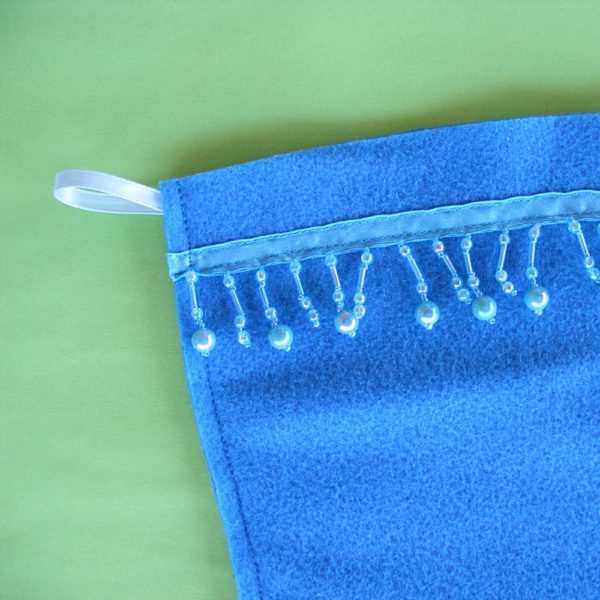
Beads are always nice – and beaded trim is super easy. You’ll still finish this one in under an hour.

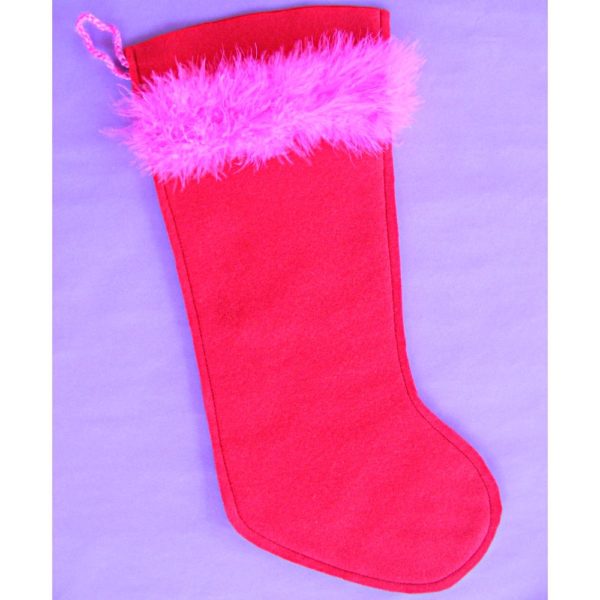
This one has a strip of feather boa across the top. Ooh la la!

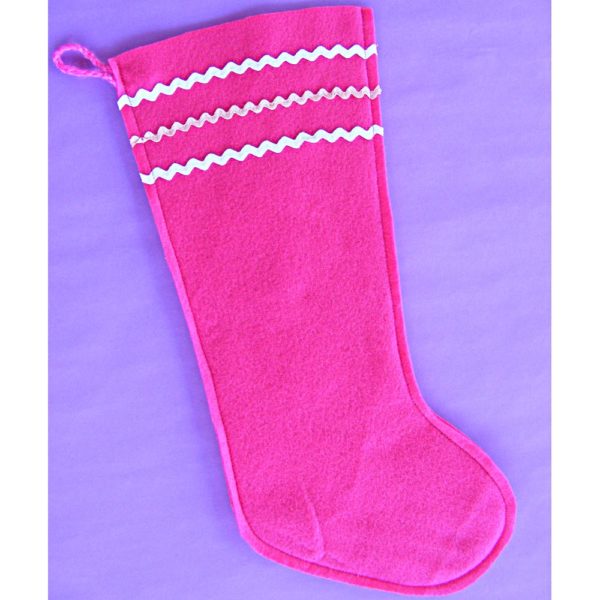
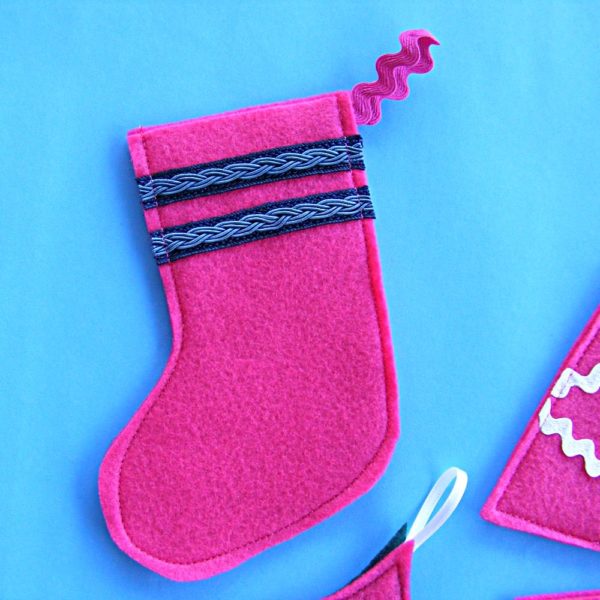
How about some rickrack? A couple of bands across the top are nice. . .

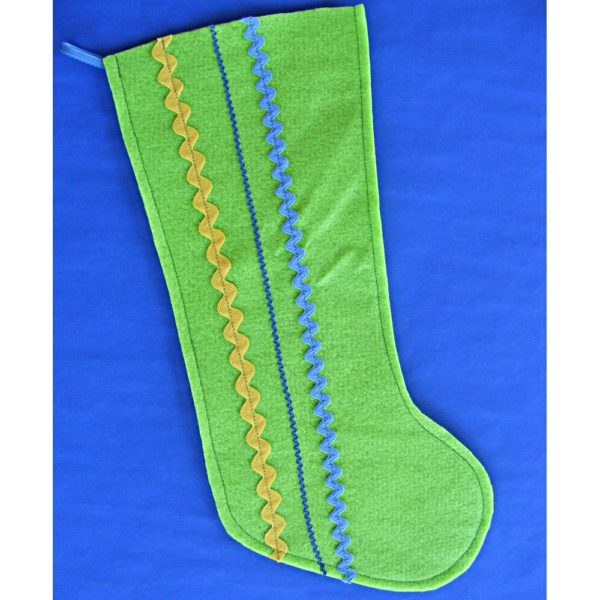
But vertical stripes are good too.

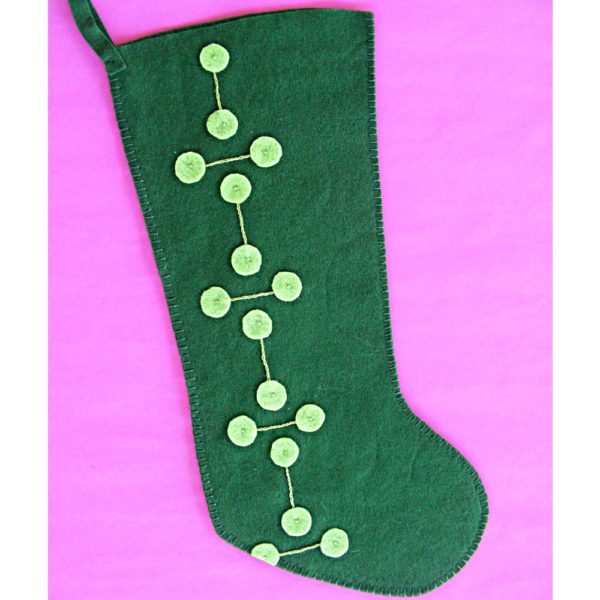
For this one I cut some dots out of felt (traced around a quarter for the size) and then laid them out and embroidered lines between them.

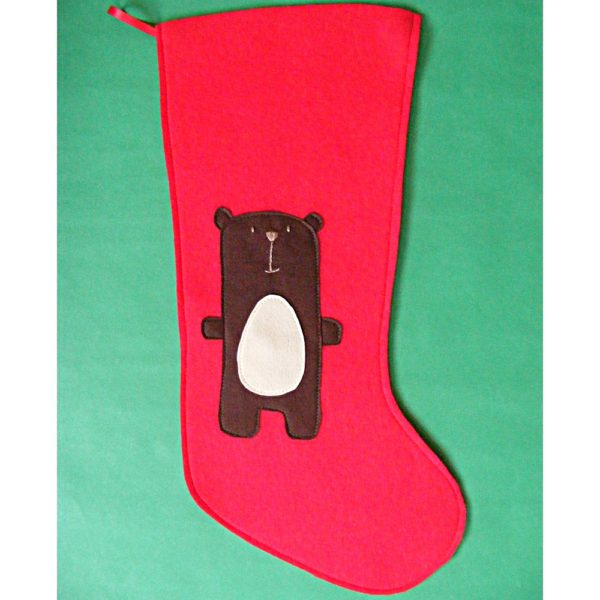
And here’s one with fancier applique (but still easy). You could do the same thing, using one of my appliqued animals quilt block patterns. How about embroidering on a stocking? One of the puppies or kitties would be really cute! So would one of the Rainbow Girls! Or one of the birds from the Bird Sampler! And did you know you can turn any embroidery pattern into an applique pattern?

The finished stocking is just a smidge over 17″ tall – a good basic size.

So there you have it – a bunch of swell stockings! Download the pattern and make one this year.

Get a free felt ornament pattern here.

See some fun ways to use the ornament and stockings together here.

Happy sewing!

Best,
Wendi
Applique Wendi (with fabulous hat)

Free Pattern – Make a Gizmo Cozy

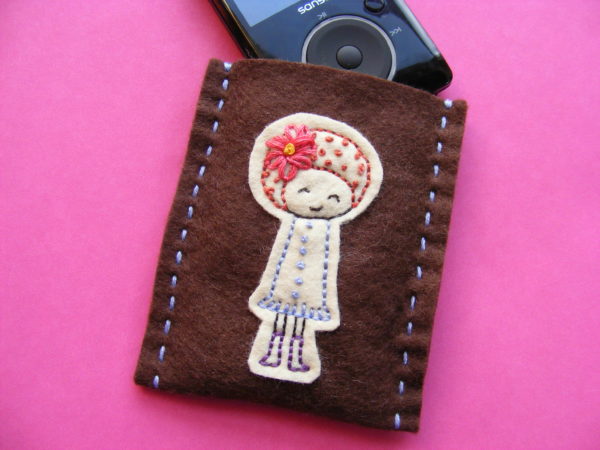
free felt pattern - gizmo cozy

Keep your electronic gizmos from getting scratched up – and also keep them warm and cozy (and cute!) with a super-easy felt cozy.

In this free pattern I teach you how to measure and fit any device – so you can make cozies for your MP3 players, your cell phone, your tablet, your e-reader – even a laptop!

You can sew by hand or by machine. You can embellish with embroidery, or applique, or beadwork, or anything else you know how to do.

It’s a totally open-ended project, perfect for playing and experimenting. Have fun with it!

What You’ll Need

Difficulty

The measuring and construction of the cozy is super easy – just simple running stitches. You can make the embellishment as fancy as you like.

Measure Your Device

First we need to do a little math. All these gizmos are different sizes so you’ll have to customize the pattern for each device.

Width

Measure the width of your gizmo. You’ll need to account for the thickness of it too – so measure up one edge, across the surface, and down the other edge. I use a flexible tape measure so I can do this all in one step, but you can use a regular ruler and add the three measurements together.

To the width measurement you’ll need to add some seam allowance. I like 1/4 inch on each side, so add a total of 1/2 inch to your width. Write it down.

______________________ = cutting width

Length

Now measure the length of your device. It won’t need to wrap around the top, so this time measure up the bottom edge (to get the thickness) and then across the surface to the top edge. This will be your length measurement.

You won’t be sewing the top or bottom edge, so no need to add seam allowance to this measurement. But we do need it to cover the front AND the back of your device. So multiply your length measurement by 2. Write it down.

_____________________ = cutting length

Cut and Decorate

Cut a single rectangle of felt that is the cutting width x the cutting length.

Now – decorate it if you want to!

Remember – the front of the cozy will be the top half of the rectangle you cut. You can, of course, decorate both the front and the back. But if you want an image centered on the front, fold your felt rectangle in half and center your image on the top half.

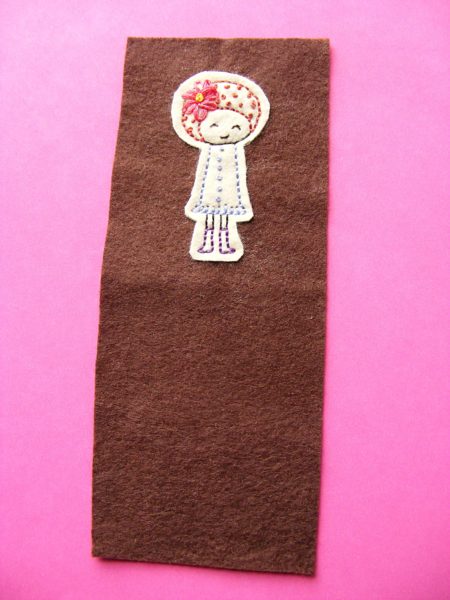
See where I put the image on my rectangle?

If you want to embroider on your cozy, here’s how I did mine. . .

Step 1

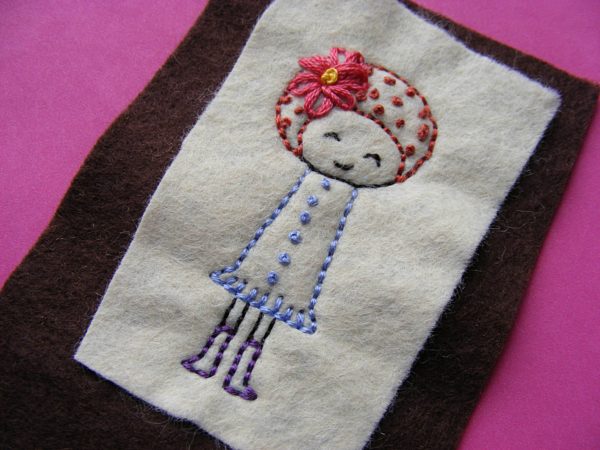
Choose an image to embroider. I used one of the Rainbow Girls, but anything will do. Find all my embroidery patterns  here.

Transfer the image onto a second piece of felt.

Step 2

I like my embroidery to sink in around the edges and make the felt more three-dimensional, so I started by embroidering just the inside of the design on the small felt piece. For this design I stitched the French knots in her hair and on her dress, her eyes and her mouth. Nothing else – yet.

Step 3

After I finished the “inside stitching” I centered the scrap of felt on the top half of the rectangle of felt I cut in Step 5 above.

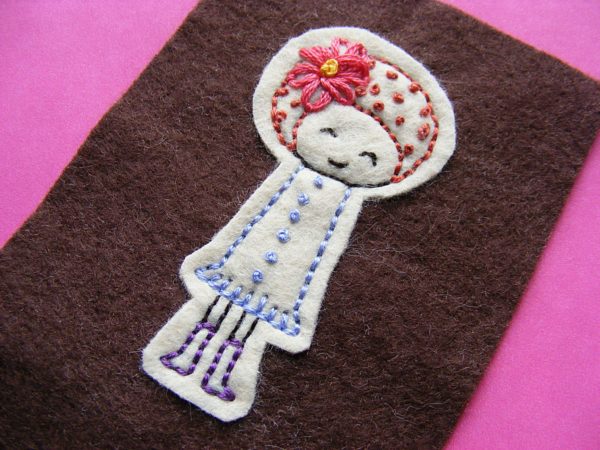
I attached the design to the cozy by embroidering the outline of the Rainbow Girl (the outline of her hair, her chin, the outline of her dress, and her legs and boots) through both layers of felt.

Going through both layers for the outline makes her hair, face and dress all look slightly puffy and rounded – and it also attaches the two layers together. If you want to do all the embroidery before you attach the design to the cozy – you can do that. Just use a glue stick to attach them together after you’re done stitching, or whipstitch all around the edge.

If you want to do all the stitching through both layers – that’s good too. It just gives you a subtly different look. Play around and experiment!

Step 4

Use a sharp pair of scissors to trim around the design, leaving a little extra around the edge.

One of these days I’ll get myself a pair of applique scissors (the bottom blade has a rounded tip so you can’t accidentally cut through the bottom fabric) so I can do this without having a nervous breakdown, but for now I just go very slowly and very carefully.

Sew It Up!

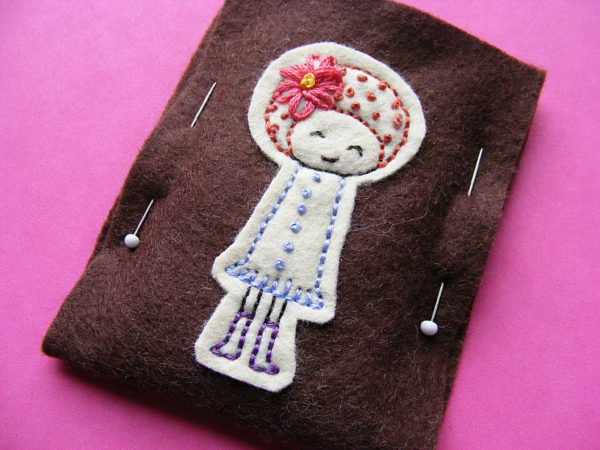
Fold the cozy in half, carefully lining up the edges. Pin it together on each side, 1/4 inch in from the edge.

Slide your gizmo in to make sure it fits. Fuss with the placement of the pins until you’re happy with the fit on your device. You want it snug – but not too tight. The device should still slide in and out easily.

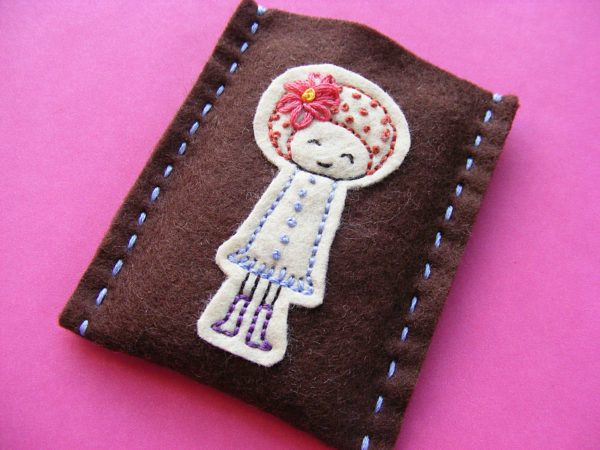
Stitch up one side. I wanted big, chunky, visible stitches so I used fat embroidery thread and a running stitch by hand. Blanket stitch would look nice too. You could also use a sewing machine instead – with matching or contrasting thread.

Check the fit one more time before you sew up the other side. Make any necessary adjustments – and sew.

Trim away some of the seam allowance if you want to – but don’t get too close to the stitching or your seam won’t hold.

Finished!

Happy stitching!
Best,
Wendi

Applique Wendi (with fabulous hat)