How to count stitches in your first round of amigurumi

Crochet a long Slug amigurumi freshstitches

We’re right in the middle of the slug-a-long, so you can guess what I’m crocheting… a slug!

Actually, I’m making two. I’m making a yellow one, like the slug pictured in the pattern and I’m also making a giant slug:

Crocheting a giant slug

Yarn: Vickie Howell Sheep(ish) in Magenta, 4 strands held together
Hook: size N
So much fun!

How to count the stitches in the first round

For those of you who are crocheting-a-long (or slugging-a-long?) with me, I’ve made a video to show you how to count the stitches in your first round.

In my opinion, counting the stitches in the first round is the trickiest, because there’s a weird little extra bit hanging around from your initial chain two. If you accidentally crochet into that weird bit, you’re count for the second round will be off, too!

So, have a peek at the video!

To view the video in full-screen, click play, then click on the rectangle in the bottom right-hand corner!

Of course, this tip will help you out with any amigurumi you’re crocheting… hope you’ll find it useful!

Are you working on a fun slug?

I can’t tell you how excited I am about my giant slug… it’s going to be so big!

That’s what I’ve been up to this week… how about you? I hope you have an awesome Wednesday, and get some great knitting/crocheting done this week!

If you want to check out more Work-In-Progress posts, please check out Tami’s Ami’s Blog, who’s been organizing a great WIP Wednesday blog theme! And, don’t forget to come back for FO (Finished Object) Friday!

How to add hair to your amigurumi

I’ll be frank. I was scared of adding hair to my amigurumi designs. It seemed complicated.

But not adding hair was limiting me… I mean, what’s a horse without a flowing mane? So, I decided to break out of my shell… and do you know what? Adding hair isn’t that hard.

Let me show you how.

How to attach hair to amigurumi, unicorn

The model in this post is my friendly unicorn. You can get the pattern here.

Step 1: Make your amigurumi

This process is done after all of the crocheting & stuffing & assembly has been completed.

Step 2: Cut your yarn into pieces

The pattern will specify the length of your hair pieces. If you’re making it up as you go along, just remember that each ‘hair’ will be folded in half. So, if you want your piece to have 3″ long hair, you’ll need to cut 6″ long pieces of yarn.

The easiest way to cut multiple pieces of yarn (and you’ll need a lot!) is to find a book/box that has a circumference the length of your pieces. Wrap your yarn around oodles of times, and then cut through them all at once. Presto!

Step 3: Add your first piece of hair

Fold your yarn in half, so that there’s a U-shaped bend on one side and two ‘tails’ on the other side.

Now, look at your amigurumi. If you crocheted through the back loop, there’s lots of ‘front loops’ left behind, which are perfect for attaching hair to. They’ll also guide you to keep your hair in nice rows.

Insert your hook into a front loop, and catch the bend in your hair piece:

tutorial how to attach hair to amigurumi

Pull the bend through the front loop, until about an inch is pulled through:

step2

If you accidentally pull the hair all the way through… don’t worry. Just start again!

Now, your aim is to pull the two ‘tails’ of the hair through the bend.

step3

I’m doing this by using my hook, but you might find it just as easy to use your fingers.

Pull the tails and… ta da!

step4

Step 4: Repeat until your cutie has lots of hair!

back_unicorn_blog

I’m not going to fib… it’s a little slow-going (especially to obtain a lush head of hair!), but it’s the perfect easy-thing to do while watching TV!

Lots of options!

For the unicorn, I made a rainbow-mane… but this technique looks just as adorable in a solid color:

horse_blog

Once the hair’s in place, you can feel free to style it, add a bow, or even trim the hair into a certain ‘do. I can picture this technique being used on amigurumi dolls, long-haired dogs, horses… you name it!

Ready to try your hand at adding hair? Get the Flavia the Unicorn pattern here.

Here are handy links to all the posts about faces and details. . .

Return to the main table of contents for Let’s Learn to Crochet Amigurumi.

Move on to the lessons about eyes.

Happy stitching!

5 ways to modify an amigurumi pattern

It’s really fun to modify an amigurumi pattern!

You can make the same pattern a hundred times and have a hundred different critters that all look different from each other.

Of course, you can follow the pattern exactly. There’s no shame in doing this! Use the recommended yarn, recommended hook size and follow the instructions to the letter. That way you’ll get exactly what you see on the pattern cover.

But try these fun ideas to modify an amigurumi pattern. . .

1. Change the color.

Pick any color you like! And remember – it doesn’t have to be realistic. It’s especially fun to pick seasonal colors to make a holiday version of a pattern you already have.

Take a look at this fun Valentine’s Day owl made with the Nelson the Owl pattern.

modify an amigurumi pattern by changing the color - pink and red owl for Valentine's Day - crocheted with the Nelson the Owl amigurumi pattern

Or how about this adorable red, white and blue version of Roosevelt the Monster?

modify an amigurumi pattern by changing the color - cute red, white and blue monster crocheted with the Roosevelt the Monster pattern

The easiest way to modify an amigurumi pattern is to change the color.

2. Make a giant amigurumi

To make a super-big amigurumi, pick a thick yarn and use a larger size hook. Then, follow the pattern!

I adore this giant slug that Stacey made!

modify an amigurumi pattern by changing the size - giant slug crocheted with the Hannah the Slug pattern

If you can’t find a thick yarn, hold two strands of yarn together. It’ll be double the thickness of the original!

Don’t know what size hook to use? Don’t fret. Check the yarn label for hook recommendations, or (if you don’t have a label) guess and try a swatch. As long as your fabric doesn’t have holes, it’s a fine hook!

Stacey has more tips for crocheting a giant amigurumi here.

3. Make a teeny-tiny amigurumi

Instead of going big… go small!

modify an amigurumi pattern by changing the size - small green crab ornament made with the Tipper the Tiny Crab pattern

Alyssa made Tipper the Tiny Crab extra tiny by using super thing yarn.

I like using a fingering weight yarn (i.e. sock yarn) and a size C hook… but I’ve seen others go even smaller! Try crochet thread and a steel crochet hook for a super-tiny guy!

Update: If you want more info about modifying an amigurumi pattern by changing the size, Planet June has a great post here. She actually created a conversion table showing what kind of increase or decrease to expect with which yarn sizes!

4. Add stripes or a gradient

It’s easy to add stripes to your amigurumi… just change yarn colors every few rounds. This is a fabulous way to use up all those little odds-and-ends of yarn!

Modify an amigurumi pattern by adding stripes - solid and striped bunnies crocheted with the Ringo Rabbit pattern

I used several different colors to make a striped Easter bunny version of the Ringo Rabbit pattern.

This post shows how to get a clean color change, and this one shows a way to change colors that minimizes the jog you get with that change.

Even easier… use a self-striping or gradient yarn, like the one I used for this Cooper Cat.

striped brown cat made with the Cooper Cat crochet pattern

5. Add some glitz

Maybe your amigurumi just wants a little pizazz!

modify an amigurumi pattern by adding beads - beaded orange crab made with the Tipper the Tiny Crab pattern

You can add some beads (there’s a tutorial here showing how to crochet with beads), or pick a yarn that already has beads or sequins added in. Fun!

Whatever method you choose to modify an amigurumi pattern – change is good! It’s like getting a whole new pattern!

Happy stitching!

Join the slug-a-long!

Crochet a long Slug amigurumi freshstitches

I know you’ve been gearing up for the next crochet-a-long! This one’s a… slug-a-long!

That’s right! This month, we’re crocheting Hannah the Slug. She’s a great pattern for those of you who have conquered your first amigurumi, and are looking for a fun project where you’ll learn something new, but isn’t too difficult.

Isn’t she cute?

amigurumi crochet slug

And of course… Hannah looks great in any color. And, since she only uses 35 yards of yarn, this is a great project for using up a little bit of leftover yarn from your stash!

Ready to join in? Grab the pattern and get started crocheting with us!


Join the CAL!

Joining in the CAL is easy! Get yourself a copy of the the pattern, grab your materials and read all the slug-a-long posts here to get all of the helpful crochet/amigurumi tips that will guide you along the way!

If you’d like, you can even stick this adorable badge on your blog (right click and save, then link the photo to this post!) to let folks know you’re joining in:

slug-a-long badge

Are you in?

It’s going to be a blast… and I really hope you join us! Go ahead and leave me a comment… and tell me about your slug-a-long plans!

How to hand wash socks

Most of my winter socks are ones that I’ve knit myself. Many of them require hand-washing. It’s not hard… I’ll show you how. But first, let’s tackle some basic sock care questions and I’ll give you a little advice.

Sock Care FAQs

Do I really have to hand wash my socks? Check the label of the yarn you used. If the yarn says ‘hand wash only’, then… well, you need to wash your socks by hand. If your socks are made with machine washable yarn, then it’s up to you (read below for one reason you may opt to hand wash socks that are fit for the machine).

What happens if I put socks in the machine that should be washed by hand? They will felt, meaning that they will shrink and not be nice, lovely socks anymore.

tutorial on hand washing socks

How do you remember which socks need hand washing? The truth is, every once in a while, you won’t remember. Big oopsie. That’s why I recommend treating all of your socks as needing hand washing (see below).

Do I need a sock blocker? A sock blocker is a device that will shape your socks as they’re drying to look nice and pretty. I own one from Knit Picks, and use it for socks that I’m going to photograph for the blog. I don’t ever block socks just so they look nice in my sock drawer. I say skip it, unless you’re doing a photo shoot.

Separate your socks!

I’m going to give you my personal advice. Put all of your hand-knit socks in a separate basket from your clothes when dirty. And pretend that all of your socks need to be hand washed.

hand knitted socks

Why? If you don’t, one of two things is bound to happen:

  • Someone in your family will spontaneously do some laundry… and not know that they should pick out the socks for hand washing. This turns a wonderfully thoughtful gesture into ruined socks.
  • You will think that a particular pair of socks was knitted with hand washable yarn… and throw it in the machine. This will also result in ruined socks.

So don’t risk it. Make a habit of making a separate pile for hand-knit socks, and wash them by hand when you’re down to only one clean pair left.

How to hand wash socks

Hand washing gets such a bad rap… and I’m not sure why! It’s not that hard.

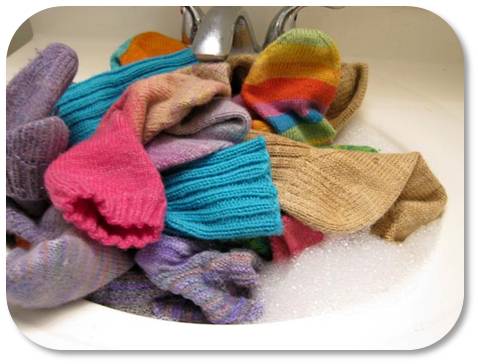
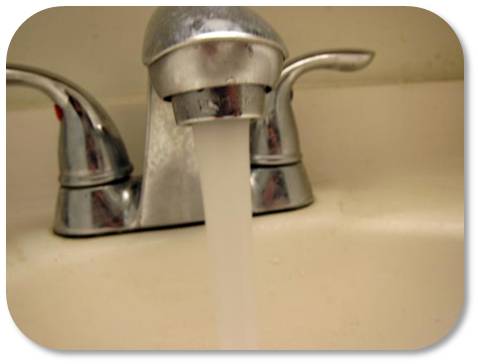
Gather your socks. Fill your sink with lukewarm water.

hand washing wool socks

Pour some Wool-wash (Eucalan is lovely and contains a natural moth-repellant) into the water as directed on the label.

Using Eucalan wool wash to wash socks

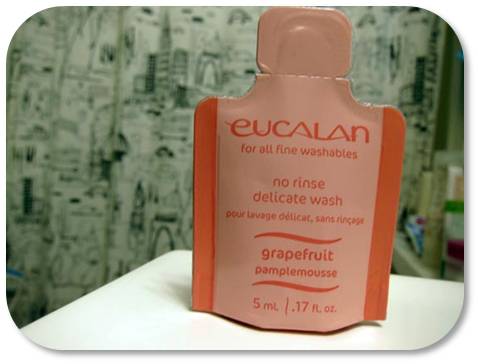
Be sure to look for a wash intended for hand washing, as these are intended to care for wool fibers and also do not need to be rinsed out. Contrary to its name, Woolite is a detergent and is terrible for wool. Spend the extra money for a real wool wash… you only use the tiniest bit for each wash and a bottle will last a long time.

Now, plop your socks into the sink, and press down so that they are fully submerged.

step by step tutorial on how to wash socks by hand

Leave for about 15 minutes.

That’s all! They’re clean! Squeeze each sock, getting out as much water as you can without wringing:

squeezing hand wash socks without wringing

Don’t get too disgusted by the icky-color of water that might come out… don’t forget, they’re socks!

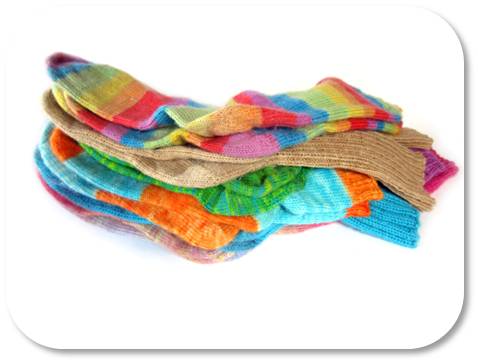
Lay flat on a towel to dry.

When they’re dry, re-stock your sock drawer!

tutorial on how to hand wash socks

That’s not so hard, right?

If hand washing sounds like a nightmare to you, then I highly recommend that you knit all of your socks with machine washable yarn. Otherwise, your socks will wind up sitting in your drawer like an obscure antique, and who wants that?!?

But, if the siren song of the oh-so-delicious hand wash only indie dyed yarn sings to you… go for it! Hand washing isn’t so bad!

House of Wool, Blackheath, NSW, Australia

House of Wool, Blackheath NSW Australia wool shop

I love traveling, and I love visiting yarn shops. It’s probably no surprise to you that I like to do both things at the same time!

I was delighted to hear about a new yarn shop, House of Wool, opening in rural New South Wales, Australia… which was directly on the road to my trip out to the country! Yippee!

House of Wool Yarn store Blue Mountains Australia

House of Wool is in Blackheath, a popular (and adorable) town in the Blue Mountains. It’s an area known for beautiful scenery… but it’s worth stopping in the towns to have a look at the shops, too!

house of wool yarn store in the blue mountains

The store just opened a few months ago, but it’s already obvious that it’s a fabulous place to be for yarn-lovers. It’s full of beautiful yarns (with a strong focus on local & eco-friendly yarns), has a full roster of classes available and sports a lovely interior.

Blackheath is about 2 hours outside of Sydney (you might also want to check out my guide to yarn stores in Sydney), and the scenery is worth the drive if you have time. It’s close to the famous ‘three sisters’ rock formation:

Three sisters blue mountains

Pretty, huh?

So, if you’re driving by (or scheming for a road-trip from Sydney), check out the House of Wool!

Are you looking for some fun yarn stores near you? Then check out my blog post on how to find yarn when you travel, and find some in your area!

Free downloadable tags for your amigurumi!

My free holiday gift tags were such a hit that I’ve made some more!

For your downloading and printing pleasure, I introduce to you… the amigurumi tag collection!
ree download gift tags for amigurumi crochet

Making some amigurumi? You’ll want to download these adorable tags!

I designed these tags specifically for your cutie stuffed animals… and even included a few tips for display!

Once you download and print the tags, you’ll want to fill out the tag with all the crucial info. Check out my example:

example tag for your amigurumi

The tag easily folds in half… and is ready to adorn your cutie!

Enjoy!

Pledge to Ten (minutes, that is…)

We all know that most New Year’s Resolutions fail. Do you know why? They’re too grand… too lofty. And they often seem impossible.

So here’s what we’re going to do: we’re going to set a practical crochet goal, and dedicate 10 minutes a day to reaching it. You have ten minutes a day, right?

And I’m going to give you a handy worksheet to use. Sounds do-able, huh?

Set realistic expectations, and remove roadblocks

If you’ve never knit before, then you’re probably not going to knit your first sweater this month. (Sorry if I’m the one who had to burst your bubble on that one).

But, there’s good news… the needle arts (knitting, crocheting, sewing) are all about putting in practice. I can pretty much guarantee you that if you practice in a consistent way (even if it’s not for huge blocks of time), you’ll get better.

help for reaching your crochet goals mantra

So, step one: pick a realistic goal that you think you can accomplish in a month.

Okay, onto step two (and I think this bit is really important!). You’re going to remove any possible roadblocks that you can think of that might come in between you and your goal. How many times have you sat down, ready to work on a project… only to discover that you don’t have the right hook?

The best way to guarantee success is to solve all of your roadblocks in advance. Before you begin working on your goal, gather all your materials and tools. This means downloading your pattern, getting your supplies, and even bookmarking resources that you might need. Then, when you need help… you won’t be slowed down. You’re prepared.

The Worksheet

easy crochet goals worksheet download

Now… here’s your helpful worksheet. Go ahead and download the pdf version.

Notice that there are 4 weeks, with 6 boxes each. Can you commit to spending 10 minutes a day, 6 days a week, to working towards your goal?

And if you find a little spare time… buy all means, keep going!

What’s important is that you consistently spend a little bit of time working towards your goal.

Let’s have a peek at an example:

goal setting for crochet, help

Look at how I came up with a list of concrete and helpful steps that will remove roadblocks and help me reach my goal. Nothing crazy… just little things that will help make the goal easier.

What’s your goal?

Notice this worksheet isn’t about setting your goals for all of 2013… it’s about picking one thing that you’d like to do within a month. Easy. No pressure.

If you’re feeling daring, you can print out 12 worksheets, one for each month. But, that’s optional! Start with the first month, and see how you go!

Crocheting should be fun, right?

Tell me about what you’re going to start with… I’m excited to hear your goals!

Options for single crocheting in a chain

“Sc in each ch” is an instruction you’ll often see in a written pattern.

But exactly how do you crochet into a chain? It’s a great question, because there are actually two different options for crocheting into your chain stitches. I’ll show you both options and compare the finished look!

Meet your chain

When you crochet your chain (also called a ‘foundation chain’), it should look like this:

chain

Yarn: Ella Rae Classic Wool, color #70

Hook: Knitter’s Pride Dreamz, size H (5.0mm)

It should look like a bunch of ‘V’s, laying on their side.

Does your chain not look like this? Let’s troubleshoot:

  • Look at the back… you might just be looking at the wrong side!
  • Is your chain forming a ringlet curl? That’s normal! Mine is just flat because I’m pulling on it. The ringlet will come out once you continue crocheting.
  • Is your chain zig-zag-y? This typically happens when you pause in between your chains, which allows the chain to twist slightly.

Okay… let’s do our first row!

Option 1: Crochet through the back loop only

Remember how we talked about those ‘V’s? The first option is to crochet only through the top half of the ‘V’ (also called the ‘back loop’):

back loop action

When you’ve completed single crocheting, your piece will look like this:

back loop finished

Option 2: Crochet through both loops

The second option is to insert your hook under the entire ‘V’ (also called crocheting through ‘both loops’):

both loops action

When you’ve completed single crocheting, your piece will look like this:

both loops finished

Comparing the two methods

Let’s look at the two options side by side:

comparison of ways to single crochet

As you can see, crocheting through both loops creates more of a ‘bump’, while crocheting through both loops is straighter along the bottom edge.

There’s no right way! And once you know the two options, you’ll be able to pick the one that best suits your project!

7 tips for planning travel knitting & crochet projects

The holidays are a typical time for traveling. And of course, you don’t want to set out without a project… but picking the right project for your travels can be tricky. In this blog post, I’ll give you some tips for picking the right project for you, and I’ll give you a peek at the travel knitting projects I’m planning!

airplane

Tips for picking the right project, and preparations

  • Think about your travel itinerary. Are you going to spend most of your time chatting with family or are you going to be alone on a plane? Thinking about your situation will help you decide whether you want a mindless project or one that can hold your interest.
  • Keep size in mind. Especially if you’re traveling by plane, luggage weight & space is important. Choose your travel knitting project accordingly. I tend to pack a shawl, since one skein of fingering weight yarn is fairly compact.
  • Keep notions to a minimum. If possible, you’d like a project that only requires one needle size, to keep your supplies to a minimum. If you require a large number of needles, consider a compact set, like an interchangeable set.
  • Do gauge swatches and investigate techniques in advance. This is an extension of the previous point: you want to keep your pack small. So, go ahead and do your gauge swatch so you know what needle you need. Also, look up any tricky stitches and print your pattern in advance, so you’re ready to roll!
  • Think about your seating situation. Have you ever lost a double point needle under an airplane seat? Or do you get carsick reading a pattern in the car? These things matter! Plan accordingly.
  • Investigate yarn shops in advance. Is there a yarn shop where you’re going? Jot down the address even if you’re not planning on a visit. You’ll never know when you’ll need more yarn!
  • Bring a back-up project. I can never decide on just one project. It’s easy to get bored or get stuck. Bring a backup just in case.

My travel projects

Tomorrow, I’m departing for Australia, which involves a 2 hour drive to the airport, a 6 hour domestic flight, a 5 hour layover and a 14 hour flight over the Pacific. Talk about needing a travel knitting project, huh?

My first project is Spectra by Stephen West. It’s been in my faves forever, and I’m really looking forward to it. I’ve selected my two skeins of yarn:

Blue Yarns

I’ve even done a swatch! The pattern calls for two fingering-weight yarns. The multi-color yarn I’ve chosen is listed as a worsted, but it looks quite thin to me. Fortunately, a swatch reveals that the two will play together nicely:

gauge

My second project is the There and Back Again Socks, a lovely pattern given to me by my friend Hollie. I’ve picked two close-in-color yarns:

purple yarn

Socks are a great portable project, and the color changes will keep the pattern exciting.

For these projects, I’ll bring along a size 6 24″ circular and a size 1 9″ circular. (I love 9″ circular needles so much that I wrote a whole post about them here.) Not too much needle baggage!

Plus, if I run low on projects, I can pick up a new skein of sock yarn and either knit another shawl or pair of socks!

What are your travel tips?

Do you have any tried-and-true travel planning tips to share? I’d love to hear them!