How to use Ravelry’s Stash Feature

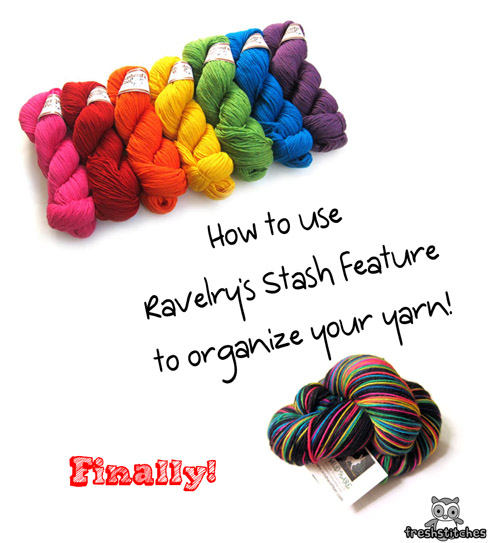
This post was originally published 5/21/2012… but 4 years later, this is still some of my best advice! Follow these steps to get your stash organized!
amazing tutorial for using stash on Ravelry... go read these tips!
You’ll also be interested in reading:

If you’re a Ravelry-user, you’ve probably seen the ‘Stash’ button (underneath ‘my notebook’)… but do you use it?

You should! In this post, I’ll tell you why I love storing my Stash on Ravelry, and I’ll walk you through the basics of how to use it. Just put in a bit of time up front, and you’ll have a super-organized stash that your yarny-friends will be envious of!

Reasons to Use Ravelry’s Stash

Why should you go through all of the work of uploading your yarns into the Ravelry database? Seems like a lot of trouble, huh?

Here are a few reasons why I think it’s worth your while:

  • No matter how large your stash is, storing it in Ravelry’s online database makes it easy to sort and search… no more digging through tubs in your basement to see if you have any pink laceweight yarn.
  • The stash is integrated into other features on Ravelry, meaning you can search through patterns based on what’s in your current stash.
  • When it’s time to do spring-cleaning, it’s easy to list your undesired yarn stock as ‘for sale/trade’.

The Basics of Putting your Stash on Ravlery

Let’s start at the start. Under ‘My Notebook’, click on ‘Stash’:

You’ll go straight to your Stash Page (yours will be empty if you haven’t added anything yet, but I’ve got yarns in mine!):

Have a yarn you want to add? Click the ‘Add New Yarn’ button and add whatever information you’d like. I like to put a picture in, but that’s not necessary. To get the best use of the stash feature, be sure to enter the name of the yarn, number of skeins you have and color.

How to Search through your Stash

Okay, so you’ve uploaded the yarns that you have… how do you search through them? Easy-peasy!

Let’s look at our main screen, again:

Look to the right of the ‘Add New Yarn’ button… that’s where you do your searching! You can search by ‘Date Acquired, ‘Yarn Weight’ (i.e. do you have any bulky-weight yarn?) or ‘Fiber’.

Let’s say I’m trying to find out if I have any yarns that contain cotton… I just select ‘Contains Cotton’ from the ‘Fiber’ drop-down menu:

Looks like I have 4! When I click on that selection, those yarns come up on my screen and I can browse them for further info.

Searching Patterns with your Stash in mind

Now, we’ve all done the search for patterns… but did you know that you can restrict your search to patterns that you already have the yarn for?!? Talk about a time-saver!

To do this, you’ll need to click ‘Pattern Browser & Advanced Search’:

Here, you can enter lots of criteria… but what’s important to us is restricting your search to yarns you have in your stash.

Scroll down, looking on the left, until you see the ‘My Notebook’ header. Click ‘Yarns in my Stash’, and the search will bring up all of the patterns you can make!

Isn’t that great?

Using your Stash in your Projects

Once you’re using the Stash feature, you’ll want to keep it up-to-date. So, when you start a new project, make use of the ‘use stash yarn’ option:

Doing this does 2 things:

  • It automatically updates the amount of yarn in your stash
  • It lists detailed information about your yarn (color, dye lot, purchase date) in your project

Listing your Yarn for Sale/Trade

Sometimes, you’re looking to clean out your yarn stash. No problem! It’s easy to list your yarn for sale to other Ravelry-users. Edit the information about your particular yarn, and select ‘Will Trade or Sell’:

If you want added exposure, share your yarn with some groups where you think people may be interested.

Get Started!

Are you encouraged to list your stash online, yet?

Those of you who have giant stashes, here’s one more helpful bit of information:

See that line next to my cursor? You can use the ‘Stored In’ line to add information about where a particular skein is stored (i.e. the blue storage tub under the guest bed) in real life!

Happy organizing!

How to use 9" circular needles for any pattern!

You know I love my 9″ circular needles. I think they’re the easiest way to knit socks and sleeves.

But, because they’re fairly new, there aren’t a lot of patterns written specifically for the 9 inch needle. I’m often asked how to translate your favorite sock pattern into one that can be used on a 9″ circular.

Here’s how to do it! And good news, it’s easy!

How to translate any pattern to using 9" circular needles

In this blog post, I’m going to show you a simple little example of a piece of knitting with 10 stitches. The green string is our yarn!
yarn on 9 inch circular needle

Step 1: Place your End of Round marker

If you’re familiar with knitting on circular needles, then you are probably already doing this step. The end of round marker is an interestingly-colored marker (different from all the rest!) that tells you when you’ve hit the end of your round.

end of round stitch marker on a 9" needle

Place stitch markers where the double points would be

Now, here’s the real trick. You want to place stitch markers on your work to note where would have been between the double point needles (shown in the image as orange).
how to use stitch markers on a 9" circular

Using our little example, let’s say the pattern told you to cast 3 sts onto one double point, 3 sts onto another and 4 sts onto a third needle. You would place markers to section off 3, 3 and then 4 sts.

This trick works whether you’re instructed to use 3 or 4 double point needles.

If the pattern called for 2 needles (such as when you knit socks on 2 circular needles), then you can do the same trick, just using fewer markers!

That’s it! Now you can knit, and easily follow the instructions as they refer to double point needles. If you want a bit more help, you might want to find stitch markers that contain numbers (to remind you which ‘needle’ would have been which.

knitting on double point needles with freshstitches

You can now use 9″ circular needles on socks and sleeves… now that you know how to ‘translate’ the pattern! Happy knitting!

How to Knit or Crochet Using an *Exact* Amount of Yardage!

We’ve all done this, right? You have a ball (or partial ball) of yarn, and you want to know how much you can knit/crochet until you run out. How do you calculate this?

rainbow yarnI’ll show you!

How to calculate how many stitches you can get from your yarn

I’m detailing each of these steps, below!

  1. Calculate how many yards of yarn you have
  2. Calculate how many stitches you get per yard (using your gauge)
  3. Calculate how many stitches you can get from your yardage!

How to calculate how much yardage you have

If you have full skeins of yarn, this step is easy. Just read the label.

But, if you have partial skeins, you’ll need to do some calculating. The best way to do this calculation is by using weight. Read this blog post for step-by-step instructions!

scale for measuring yarn

You’ll need a digital scale and a calculator!

How to calculate how many stitches you get per yard

You’ll need to do a little gauge swatch! This technique works for either knit or crochet. Read this great blog post on how to measure yarn.

how to measure yarn

This blog post has some typical measurements for crochet.

how much yarn do I need?

Calculate how many stitches you can get from your yardage!

Let’s put it all together now!

To begin, multiply your yardage by 36 to get the length in inches.

So, if I have 110 yards, that’s 3960 inches.

Divide this number by your inch/stitch measurement (that you got in step 2), which for single crochet with a worsted weight is 1.8″.

3960/1.8 is 2200 single crochets!

crochet freshstitches

That’s your number! A good pattern will contain stitch counts at the end of each row, so you can add them up and determine how many extra rows you can sneak into a cowl, or whether you’ll need so skip some rows of sleeve length to get your sweater to work!

Best,
Stacey

Make Your Amigurumi Faces Kawaii!

This post contains affiliate links. That means I make a little commission if you buy something after clicking through. All affiliate links are marked with an *.

Kawaii means ‘cute’ in Japanese, and when it comes to amigurumi… there’s a lot in the face!

Make it kawaii

(You might be interested in reading about what amigurumi means!)

I make most of my amigurumi as bigger plush toys, that are cute… but not super cutesy. Real human people have their eyes at the halfway point of their face, and this is where I put a lot of my animal’s eyes:

amigurumi crochet owl kit by FreshStitches

Cute, right?

I’ve drawn up a little graphic of what it looks like to put eyes at the halfway point on a sample bear:

animal face

But what if you want to make your amigurumi even CUTER? Even more kawaii?

Try putting the eyes even lower on the face, and spaced further apart! Check out this cutie!

kawaii bear drawing

Even cuter! Squee!

Play around with eye placement on your next stuffed animal!

If you’re interested in cute Japanese characters, I highly recommend reading Manga for the Beginner Kawaii: How to Draw the Supercute Characters of Japanese Comics*! As I explain in my Craftsy course Amigurumi: Design Your Own Monster, you can crochet animals from drawings, so a drawing book is a great resource!

Best,
Stacey

Video Tutorial: English Paper Piecing

How to Do English Paper Piecing - a video tutorial from Shiny Happy World and FreshStitches

I’m obsessed with English Paper Piecing (EPP). And because I want to you to share in the love of this awesome craft, I’ve put together two video tutorials so you can learn to do it too!

English Paper Piecing with freshstitches

english paper piecing hexies

Watch them and then start stitching! You’ll probably end up addicted to these little hexagon-shaped fabric pieces of candy… but that’s okay!

Video one: how to prepare your fabric and baste the hexagons

Video two: how to sew hexagons together and remove template

FreshStitches rainbow bundles fabric

I also love rainbows. So… I teamed up with Shiny Happy World to put together a kit that’s great for beginners or old hats!

Sorry – the kits are no longer available – but they used a lots of the fabrics from the Rainbow Brights fat quarter bundles.

FreshStitches rainbow bundles fabric

I also highly recommend the book All Points Patchwork: English Paper Piecing beyond the Hexagon for Quilts & Small Projects by Diane Gilleland. It’s amazing and inspiring! (That’s an affiliate link, which means I earn a tiny commission of you buy it.) You can read Wendi’s review of the book here.

Best,
Stacey

How to knit anything with STRIPES!

I am completely in love with rainbow yarn!

FreshStitches Rainbow Yarn Sampler pack

I love rainbows. I want to knit everything in rainbows.

But I’ve been asked… what pattern do you use? I’m not seeing a lot of patterns with stripes!

Well, let me tell you: you can knit almost any pattern in stripes! I’m going to share my tips with you, and show off a darling little sweater as an example!

FreshStitches rainbow stripes sweater

Tips for knitting almost any pattern in stripes!

This adorable little sweater is Gramps by Tin Can Knits, and the sample is in two colors, not stripes. But no worries!

rainbow sweater with heart buttons from FreshStitches

Here are some tips!

  • Calculate your yarn usage (total amount of yarn divided by the number of colors you have) to make sure you have enough yarn of each color. You can supplement with one ‘main’ color (as I’ve done for the collar)
  • Select a pattern that’s fairly simple, like stockinette. For example, a lace pattern would get lost in the stripes.
  • Change colors at the end of a row (and not the middle) for the cleanest stripes.
  • Keep in mind that changing colors on a purl row will create a bump of color, so aim for a changing on a knit row.
  • A ‘make 1 increase’ draws up yarn from the previous round, so avoid changing colors on this type of increase. For the sweater below, I started a new color on rows that were just plain knit.
  • Read the pattern in advance to plan out the number of rows each color should be to avoid the increases/purls/etc mentioned above.

Rainbow sweater from FreshStitches

Have fun! There’s no right or wrong way to do it!

I like to organize my stripes in color order (all rainbow-like), but it would be equally awesome for you to plan your colors randomly. Or have different stripe widths. There are no rules!

How to crochet in joined rounds

I usually crochet my rounds in spirals: which means that I go around and around continuously. It’s an easy technique.

The main downside, though, is that if you’re crocheting stripes, you get pesky little jogs in the color changes.

The solution is to crochet in joined rounds. That means, at the start of each round, you chain one, and then slip stitch into that chain at the end of the round.

Update – If you want to keep crocheting in a spiral but minimize that pesky jog in your stripes, there’s a video here showing a different technique.

It’s pretty easy to accidentally add stitches using joined rounds… which makes a chevron shape instead of a nice, flat join. Oops.

The trick to avoiding accidental increases is to know your stitches! Here’s a little graphic of the stitches involved:

crocheting joined rounds

So, when you’re crocheting, you don’t want to single crochet into the slip stitch of the previous round. It’s funny because it feels like you’re skipping a stitch. But that’s the trick.

Yay!

Here are handy links to all the posts about changing yarn color in crochet. . .

Return to the main table of contents for Let’s Learn to Crochet Amigurumi.

Move on to the lessons about crocheting stuffed animals in different sizes.

Happy stitching!

Free Bulky Hat Pattern + Bulky Rainbow Samplers!


bulky yarn sampler freshstitches

Stitch up a quick and easy rainbow hat using bulky yarn!

Free Download: Easy Bulky Hat Pattern

I wrote up a quickie pattern for you that shows off the wonderful texture and colors in this yarn!

Freshstitches bulky hat

It’s a free pattern, and you can download the pdf, here.

You can knit the entire hat with one 16″ circular… no need to switch to double points!

Easy Bulky Hat Freshstitches

The hat is sized to fit a woman’s medium (21″ head circumference), but is pretty stretchy, so you can probably fit it on a slightly larger one!

zig zag banner

Ready for some rainbow fun?

bulky yarn sampler freshstitches

Download your Easy Bulky Hat pattern. I can’t wait to see yours!

Tutorial: How to Attach Perfectly Positioned Buttons

Okay, so you’ve gone through all of that work to knit or crochet a sweater… and now it’s time to attach the buttons. How do you make sure you sew on the buttons in exactly the right spot? I’ll show you how!

All you need is one locking stitch marker.

First, close your sweater so that the button band overlaps exactly how you’d want it closed when finished, with the holey side of the button band on top.

Starting at the bottom (or top), poke your locking stitch marker through the first hole, and attach to the solid side of the button band.

attach buttons 0

This stitch marker marks where your button will go! Lock the marker.

Notice that the holey side of the button band will pull off… the locking stitch marker goes right through the hole!

attach buttons 1

Here’s what it looks like:

attach buttons 2

You want to sew your button directly on top of the locking stitch marker. Read this blog post about sewing on buttons for help.

attach buttons 3

When you’re finished sewing (or at least have finished the first few, securing stitches), remove the stitch marker. It should just slip out once you unlock it.

attach buttons 4

Now it’s time for the other buttons! Repeat this trick for each button.

Each time, button up the buttons you’ve already completed so you can ensure they line up properly.

attach buttons 5

No more wonky button problems!

Sample sweater is Gramps knit using the Rainbow Yarn Sampler Pack.

Have you heard about the Red Scarf Project?

This post originally appeared on November 20th, 2013. But it’s such a great cause, I’m reposting it with additional information!

What happens to a child in the foster care system when they turn 18? They’re ‘adults’, and are set out into the world alone, and without a network of family or social resources.

Sad, right?

If those kids are awesome enough to get themselves into college… who sends them care packages? Who do they call if they need an emergency $50 for a surprise textbook?

In most cases, they have no one to turn to.

Makes you sniffle, right?

That’s why I love Foster Care to Success, an organization that supports foster care children who have ‘aged out’ of the system. The organization collects money for emergency funds and runs other great drives to support this often-overlooked population.

I particularly love the Red Scarf Project. I read about it in Craft Activism.

Red Scarf project

The Red Scarf Project collects scarves from September 1st – December 15th every year, and then distributes them to a foster student on Valentine’s Day.

Isn’t that sweet? Can you imagine how special you’d feel if a handmade scarf with a sweet note showed up on your door? And what a boost that would give to your semester?

That’s why I’m knitting one!

Red Scarf Project

I didn’t feel like I had the time: the Kit Club packages, hosting Thanksgiving dinner, planning for the holidays… and then I told myself “Balarky! You can make the time! These college students don’t have families!”

And surprise… I’m finding the time!

Join in!

Can you spare the time?

Nothing fancy is required, just a simple red knitted or crocheted scarf. Check out the guidelines, here.

This link tells you where to mail the scarves, as well as the not-too-hard guidelines (basically is red, gender neutral and about 60″ long). Pattern suggestions, too!

Sweet extras, such as a hand-written note, are welcome!