Chevron Bead Crochet Necklace

Do you want to see what I just finished?

ombre chevron bead crochet necklace by FreshStitches

It’s a bead crochet necklace!

I’m super-excited about this one, because it features 2 firsts for me. It’s the first time I’ve followed a pattern in bead crochet, and it’s also the first time I’ve added a glue-on clasp:

glue on clasp

It’s magnetic!

magnetic beading clasp

Isn’t that so cool?

bead crochet necklace by FreshStitches

And… more beading!

Since I’ve been feeling really into beads recently, I decided to take a class at my local bead shop. Check out this necklace I made:

wire wrapped necklace

The main technique I learned was wire wrapping (to attach the dangling sea glass beads onto the chain), and it was really fun!

necklace by FreshStitches

Fair Isle

And… I finished knitting a fair isle hat!

Cleckheaton Hat by FreshStitches

It’s from a kit by Cleckheaton Superfine.

Don’t be THIS kind of gift-giver…

A chat about gift-giving

The holidays are super-busy and stressful. All that shopping! All that traveling!

And a lot of us crafters feel the added pressure of making handmade gifts for those that we love.

I know this is going to be a controversial post… but I’m going to encourage you to think twice before making handmade gifts for friends and family. Think about whether the person will actually want and appreciate the gift. Otherwise, you’re spending a lot of your time on a gift that just doesn’t work… trust me, I’ve been there!

A Story

My mom is over-the-moon excited that she’s going to have a granddaughter. Seriously. I think if she won a million dollar lottery, she’d be only 10% as excited as she is right now.

And she’s a keen shopper and bargain hunter. The trouble is that she’s purchased a number of items that are either just plain impractical for our tiny home. (for example, we don’t have space in our living room for a stand-alone bassinet… it’s already a room that doubles as my office and shipping room!)

I don’t want to sound ungrateful, but I’m going to tell you a truth about gift-giving: the best gift is one that the recipient actually wants or needs.

Picture1

Otherwise, your gift becomes a burden for the recipient to manage instead of the bundle of joy you intended it to be.

You see, we often give gifts that we want to give instead of giving gifts that others want to receive. Keep reading… and I’ll tell you why this insight has saved me oodles of time this holiday season!

Let’s get honest about handmade gifts

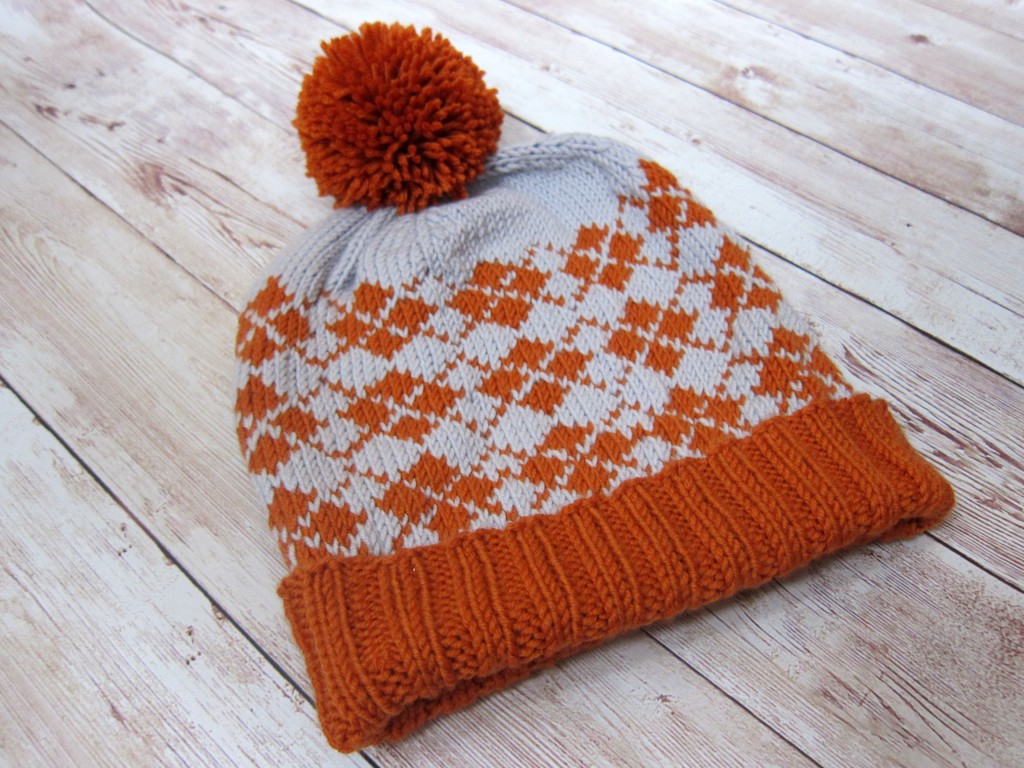
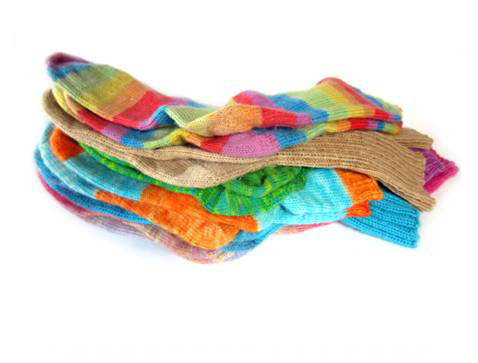
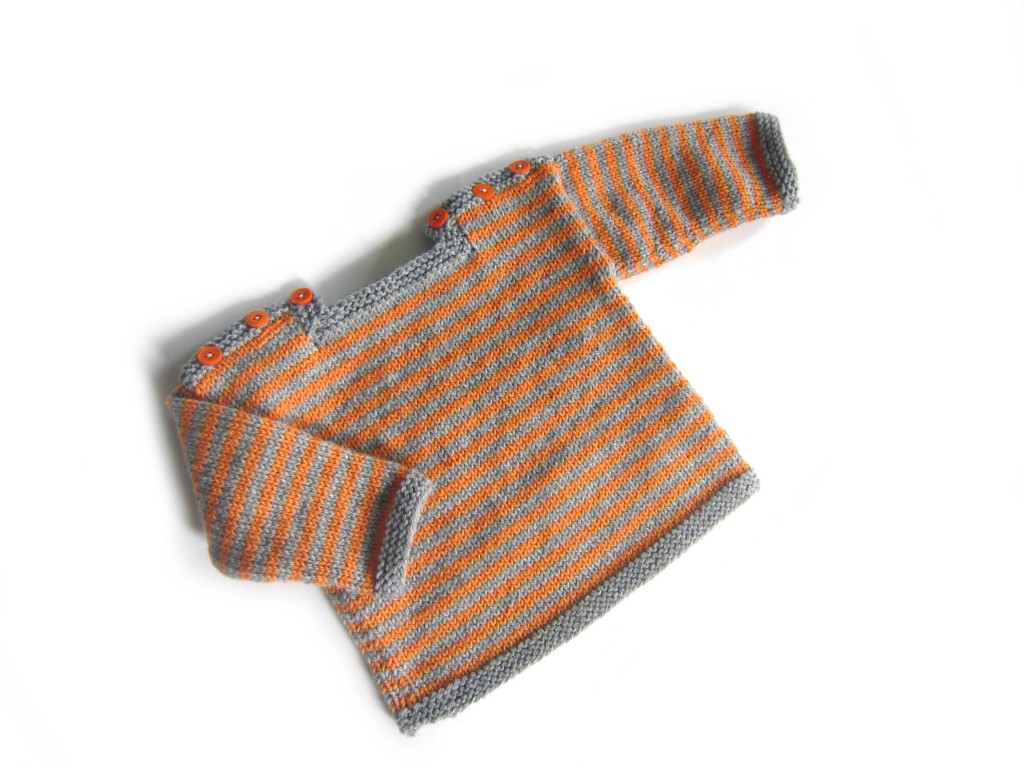
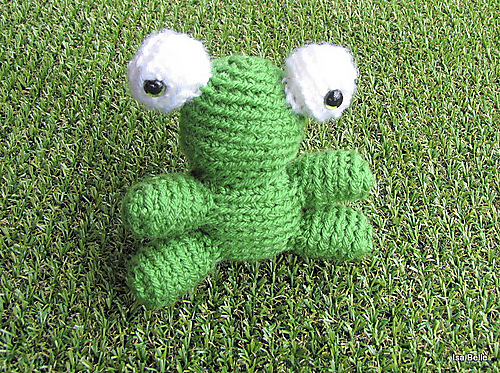
A few years ago, I used to make handmade gifts for everyone on my list. Knitted hats, sewn stuffed animals, you name it. I spent weeks making gifts for everyone on my list.

I often made presents that I secretly wanted for myself, but I poured all of my energy into making them for other people.


And then I learned that not everyone wants a handmade present.

I was so hurt! How dare they not appreciate the valuable gift I was lovingly making!

But then I realized… I was actually being selfish by foisting my desires onto them! I love making presents, and it was what I thought showed the most love. But in reality, I was ignoring what people actually wanted.

Now, I only make presents for a very few special people who appreciate and want a handmade gift.

What’s the lesson?

It’s good news: you don’t have to kill yourself this holiday season making gifts for everyone on your list! If someone didn’t appreciate your hand knit gift in the past, take the opportunity to reconsider. Maybe they really would rather get a gift certificate to a book store.

And take all that extra time you save and make something lovely for yourself! You deserve it!

SHARE THIS

WIP: Star Afghan begins!

Remember last week when I asked you to vote on my next afghan using these great rainbow colors?

Rainbow yarns

I was floored by all of the responses! And while the winner wasn’t clear-cut… the star pattern got oodles of votes!

The Pattern

After looking at lots of star patterns, I was really inspired by stablewoman’s version of the Lyn’s Round Ripple Afghan pattern.

I’ve gotten started:

crochet rainbow star afghan by FreshStitches

What do you think?

It’s a 12 point star, and even though the pattern isn’t terribly well-written, I’ve gotten the hang of it and I’m really enjoying it!

And some bead crochet…

I’ve also been into doing some bead crochet… here’s a little progress photo:

bead crochet

I’m hoping to show you some finished items, soon!

That’s what I’ve been up to this week… how about you? I hope you have an awesome Wednesday, and get some great knitting/crocheting done this week!

If you want to check out more Work-In-Progress posts, please check out Tami’s Ami’s Blog, who’s been organizing a great WIP Wednesday blog theme! And, don’t forget to come back for FO (Finished Object) Friday!

Knitting Phi: technique for carrying yarn across stripes

Do you want to see what I’m working on?

Phi Shawl

I’m knitting Phi, a fabulously fun garter stitch shawl.

Phi shawl

The shawl has stripes that can be quite thick, so you need to carry the unused yarn up the side of the thick stripes. I came up with a little technique for how to do this in a way that’s nearly invisible on the right side (a modification of the technique suggested by the designer), and I thought you might be interested!

Here’s the video!

That’s what I’ve been up to this week… how about you? I hope you have an awesome Wednesday, and get some great knitting/crocheting done this week!

If you want to check out more Work-In-Progress posts, please check out Tami’s Ami’s Blog, who’s been organizing a great WIP Wednesday blog theme! And, don’t forget to come back for FO (Finished Object) Friday!

How to attach a flattened piece in amigurumi

How to Attach a Flattened Piece to Amigurumi - a tutorial from Shiny Happy World and FreshStitches

Every once in a while, you’ll come across instructions that tell you to ‘flatten piece, and attach’. But, what does that mean? Today, I’ll show you step-by-step!

Let’s assume we’ve followed the crochet instructions, and we have a piece (that’s been worked in the round), and we’ve fastened off. The piece will look something like this one:

how to attach a flattened piece

Now, we need to carry out the instruction ‘flatten piece’. It’s easy! Simply squish the piece closed, leaving your long tail on one side.

how to attach a flattened piece in amigurumi

Thread the long tail of your piece onto a tapestry needle (mine is shorter than usual for photo purposes!).

How to attach a flattened piece to amigurumi

Now, we need to do the ‘attach piece’ part. To attach a flattened piece, the key is that you want to go through both layers of your flattened piece.

How to attach a flattened piece to amigurumi

Run your tapestry needle through both layers of your piece, then through one stitch on your background work (just like you usually attach):

How to attach a flattened piece to amigurumi

Now, just repeat this last step, until you’ve attached your entire piece! Yay!

Here are handy links to all the posts about attaching parts. . .

Return to the main table of contents for Let’s Learn to Crochet Amigurumi.

Move on to the lessons about faces and details.

Happy stitching!

Learn How to Knit a Sock

Rainbow striped socks knit by FreshStitches

I love knitting socks. And I get a lot of questions about which resources I’d recommend for learning.

So, in today’s blog post, I’m going to give you a list of my favorite sources!

Your First Pair of Socks

Do you feel comfortable increasing and decreasing? Have you used double point needles? Great! Then you’re ready to knit your first pair of socks!

My Easy Peasy Sock Pattern is designed for the first-timer. It’s a pattern that’s easy to follow and gives you a nice (although thick) sock.

socks

Socks knit by mmeglet on Ravelry
If it’s your first time, then there are a few things you should know. First, ssk is a decrease, not simply slipping two stitches and knitting the next. If you’re not familiar with the stitch, then watch this video. Second, turning the heel requires working short rows. They aren’t scary, but they’re weird. If you follow my instructions to the letter, your heel will come out perfectly. Don’t overthink it.

If learning from a written pattern isn’t for you, then I highly recommend Donna Drachunas’s Knit Sock Workshop on Craftsy. It’s a video course, so you’ll learn everything you need to know!

If you used handwash-only yarn to knit your socks, you’ll want to learn how to hand wash your socks!

Your Second Pair of Socks

I designed my sock pattern to be the easiest to do… but it’s not the best-fitting sock. For your second sock, you’ll probably want to use fingering weight yarn and choose a different pattern. I adore the Basic Sock Pattern by Churchmouse.

neon knitted socks

I’ve knit 7 pairs of socks from this pattern. It’s easy to understand and contains lots of variations.

I also adore The Simple Collection by Tin Can Knits. I haven’t knit them yet, but I have no doubt that Rye is a fabulous sock to knit as one of your first.

You also might be prepared to ditch your double point needles. My favorite way to knit socks is with a 9″ Circular Needle. Read this post to see why I love them!

Toe-up socks knitting

And more…

My second favorite technique is to use two circular needles. You can even knit two socks at a time! I highly recommend Antje Gillingham’s book for learning the technique.

two at a time on two circulars

Socks can become a lifelong addiction… they’re portable and fun to make. As you make more socks, you might get interested in more complicated patterns and designs. I have the book Sock Knitting Master Class: Innovative Techniques + Patterns From Top Designers, and it really gets your sock juices flowing. Check out this really interesting toe shaping I learned to do:

toe up socks

You might want to have a listen to my recent Coffee with Stacey episode about knitting socks– I chat all about yarns, caring for your socks and different techniques!

Ready to Cast on?

Are you already a sock knitter? Or want to start? I hope you love these resources!

pile of hand knit socks

Perpendicular Mattress Stitch (knitting)

Do you remember when I was knitting this sweater?


Well… I’ve finished! And today, I want to chat about a seaming technique that really helped me out!

striped baby sweater by FreshStitches grey & orange

Perpendicular Mattress Stitch

I loved knitting this sweater… the pieces are knit flat, which makes for very speedy knitting. At the end, you need to seam the pieces together.

Have a look at the sleeves. You’ll notice that you need to seam together stitches that are going vertically to stitches that are going horizontally. Tricky, right?

Perpendicular Mattress Stitch

Fortunately, I discovered that MochiMochiLand has a fabulous tutorial for just this technique! She uses it for toys, but it works great on sweaters, too. You’ll want to click over to this blog post and scroll down to ‘Vertical-to-Horizontal Mattress Stitch’.

Genius!

Do you prefer seaming or double points?

When knitting a baby sweater, there’s no getting around those tiny little sleeves! Your choices are to either knit the sleeves flat and seam them at the end, or knit tiny little rounds… usually on double point needles.

Which method to you prefer?

I’m generally a knit-in-the-round girl, but those sleeves are very tiny! (Right now, I’m knitting Flax on two circulars, and there aren’t a lot of stitches!)

I think for baby sweaters, I’m a seaming girl!

When should you teach a child to knit/crochet?

A little while ago, someone on Twitter asked me:

When should you teach a child to crochet?

My reply: whichever she’s most interested in, whenever she’s ready

Children begin to crawl at different ages. Kids start to speak at different ages. Is it any surprise that different children are ready to knit/crochet at different ages?

When is a child ready to knit/crochet?

There are a couple prerequisites to knitting or crocheting, so these are some good signs to look out for to see if your child is ready:

  • They hold and use a pencil (sloppy handwriting is okay!)
  • They can sit and work on an activity for at least 10-15 minutes
  • They can count to 10 (not a must, but helpful)
  • They show interest in the craft

Trying to teach a child before they are ready is not a good idea. It leads to frustration and can discourage the child from trying again later, so I highly recommend you look for these skills!

I began writing at four, and learned to chain when I was 5-6 years old. I just made chains for a really long time! That’s okay!

It’s most important that your child enjoys the activity, rather than hoping they accomplish a certain syllabus of skills. I liked crocheting (and according to my mom) was hopeless at knitting. Again, that’s okay. Encourage what the child is interested in.

What can you expect at what age?

One of the members of my Ravelry group taught her 6-year-old son to crochet. He made this frog all by himself!

frog crocheted by 6 year old

Isn’t that amazing? Before the age of 10, a child can typically learn to crochet with help from a parent who shows them the stitches and teaches them the steps of a pattern.

I’ve had children as young as 10 learn to crochet on their own in my Craftsy Course. By this age, kids are used to following instructions in class, and are able to take instruction from a teacher. So even if you can’t knit or crochet, your child might be able to learn!

child learning to crochet

Once a child is a teenager, they’re just about adults as far as learning knitting/crochet is concerned. ‘Kids’ of this age are usually fine taking an adult class at an LYS/shop (but double check with the store’s policy, first).

The younger the better!

As long as a child has the prerequisite skills (listed above), the younger the better! My husband, Tim, learned to knit when he was about 6 or 7, and it’s a skill he still has today!

With that background, I taught him to crochet as an adult in no time!

I think that exposing children to skills and experiences is a great thing to do… and they may never use it later on. (Tim has knit, like, one thing in his life) That’s okay! They may also latch on to it and the skill becomes a lifelong love, like it did for me!

You won’t know unless you give it a try! I recommend reading my post on tips for teaching a child to crochet!

Self-Striping Sock Yarn

If you watched my most recent Coffee with Stacey, you’ll know that I absolutely love knitting socks from self-striping yarn.

Rainbow striped socks knit by FreshStitches

My go-to sock yarn, Knit Picks Felici (shown above), has been discontinued. Self-striping yarn is hard to find… it’s difficult to dye and some beautiful ones are stunning but not suitable for socks.

So I thought it would be fun to post a list of delicious self-striping sock yarn!

Can you tell I’m shopping?


Have you tried any of these?

Or have a favorite to recommend? I want to hear it!

If you love beautiful rainbow-y socks, you’ll probably also want to follow Susan B. Anderson’s blog… she does lots of lovely knitting!

Tutorial: How to crochet with beads (video)

Crocheting with beads can be tricky. Many techniques call for adding the bead to the stitch as you go, which isn’t great for traveling, and the bead doesn’t sit nicely.

Want to see the beading technique I developed?

In this technique, the beads sit nicely on the front loop of the piece, so we’ll be crocheting through the back loop only. Here’s how to do it:

Step 1: String your beads

I’m using size 6 beads on worsted weight yarn. You’ll want to use the size beads that work for your yarn.

You’ll want to thread all of your beads onto your yarn. To do this, you might find a bead threader to be helpful! Stick the tail of your yarn through the big loop of the bead-threader:

Make sure about an inch or two is through the threader. Now, thread beads on the tip of the threader!

The bead may take a little bit of tugging to pass over the doubled-piece of yarn, but then it’ll slide easily down the yarn.

Thread all of your beads, and then you’re ready to start!

Step 1: Crochet with beads!

To place a bead, single crochet… and on the stitch before you want to place a bead, pull the bead through the stitch as you do the final ‘pull-through’ of the stitch:

This is the trickiest part. You may have to use your fingers to fidget the bead through, especially if you crochet tightly.

Now, make sure the bead lies on the front half of the stitch (in front of your hook):

Finish the next crochet stitch, and your bead will lay right on that front loop! So much fun!

There’s no magic color-changing trick… I just took this photo on a different stitch!

Let’s see it in action!

I know it can be hard to learn from photos sometimes… so I made you a video!

Look how cute!

beaded crab

This is Tipper the Tiny Crab. To make him, just string the beads onto the yarn, and crochet the beads using the technique described above! You’ll follow the instructions for Tipper as they are written in the pattern, but you’ll place beads randomly, about every 5-8 stitches.

Here are handy links to all the posts about faces and details. . .

Return to the main table of contents for Let’s Learn to Crochet Amigurumi.

Move on to the lessons about eyes.

Happy stitching!