How to Spot Clean a Stuffed Animal

If you crocheted a stuffed animal using a hand wash-only yarn, then you can’t just throw the little guy into the washing machine. You’ll need to spot clean. Here’s how to do it!

How to Spot Clean

Spot cleaning basically means cleaning a particular area of an item without submerging the entire item. It’s a phrase frequently used in the garment industry, but applies to your stuffed animals, too!

  1. Wet a washcloth in water or in water + a wool safe wash (like Eucalan no rinse wash)
  2. Dab at the spot that has become soiled, moistening the stuffed animal’s fabric. Do not scrub! Agitation causes felting.
  3. Allow to air dry.

That’s all!

FAQ

How do I tell if an animal needs to be spot cleaned? The yarn is your guide! Wash the animal like you would wash a garment made with that particular yarn, paying careful attention to the instructions. Keep in mind, though, that it’s incredibly important that the animal (and its stuffing) completely dries. If your yarn can’t stand the dryer, then you won’t be able to dry the animal… meaning you shouldn’t get the stuffing wet! Spot clean, only.

Cute crocheted owl

What if it’s still dirty? If you follow the above steps and it’s still dirty, then wash again. You can feel free to dip the tip of a limb in water, avoiding soaking the stuffing, to get a bit more water and detergent into the stain.

My stuffed animal is a complete mess. (like, it fell in a puddle). What can I do? If you think the animal might be headed toward the trash can, you can always try machine washing it. The good news is that the stuffing often prevents some amount of felting, so you could be safe. It’s a last ditch effort, though!

5 Tips for Selling Your Crochet Items

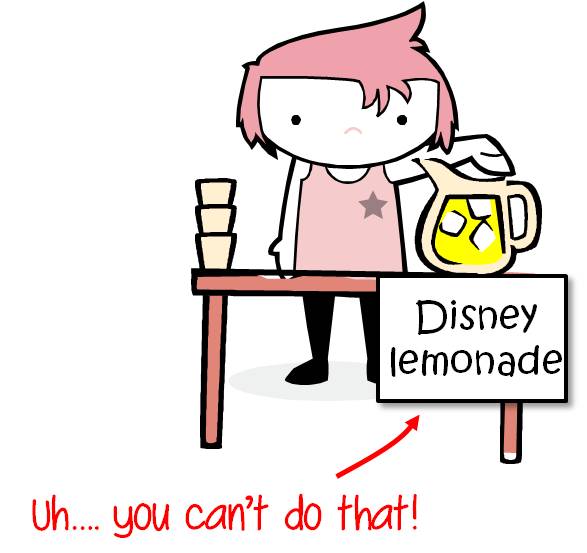
It makes me so happy that many crocheters use my designs as a way of making an income for themselves… by selling the finished items! (Yup, it’s allowed! Read here)

I’ve asked Michaela, the woman behind Crochet City KC on Etsy to share some of tips for selling crocheted items.

Hopefully, these tips will help you avoid some common problem spots and sell with success!

And a huge thanks to Michaela for taking the time to write this guest post!

1: Get Payment up front for Custom Orders

When I first started crocheting I was very lax in requiring payment for my creations. Since then, I have revised my policy to require payment up front on orders, as I had a few bad experiences of not receiving payment for my work.

Here’s an example: I took an order for a very large project that took me about 6 months and a large amount of yarn. And although I had quoted the person a price at the beginning of the project, because this person was a coworker, I didn’t feel comfortable asking for money up front. When the project was finished, the customer claimed I had quoted a lower price, and I felt like I needed to take it because there was nothing in writing and the work was already done.

Crochet Owl by Michaela

Looking back, I realize how silly I was for not standing up for myself and its definitely one of the experiences I look back on most and think to myself… wow I’ve come a long way! Trust me, you want to receive the money up front for your hard work!

2: Always Communicate!

I can’t express enough how important communicating with your customers is, if you think something isn’t turning out quite right, you aren’t sure about exactly what a customer wants or if you are behind on an order communicating from the beginning is so much easier then dodging them and then having an upset customer in the end.

For example, one time, I received an order for a blue octopus. But what blue? Royal blue? Light blue? Green blue? or who knows what kind! Instead of guessing, I took my phone to the store and sent photos of the various blue yarns available. I sent picture after picture until we found the right one, and I’m so glad I did. The little boy who received the octopus sleeps with it every night and it matches his bed room perfectly, which would have never happened if I hadn’t taken the time to clarify the customer’s desires.

3: Be Honest about Your Abilities/Time

Sometimes, a request may be out of your crochet comfort zone or just may take too much time for you to complete. Earlier this year a customer came to me asking if i could re-create a very complicated monster from a TV show and after looking at all the detail and weighing the time it would take, I decided to turn down the customer.

It may sound bad to turn down an order, but it’s actually much better than getting in over your head and being unable to deliver. It’s in everyone’s best interest to just be honest about what is in your comfort zone.

4: Keep Accurate Records

In my experience, customers often change their minds or “forget” certain aspects of your original discussion. If there’s no record of the original discussion, this can lead to disappointment!

I do a lot of orders through Etsy and Facebook (which automatically leave a written record), but there are often times I take orders in person. If I take an order in person I write out the details of what they what and have the person look over each detail and sign off on it – that way they are acknowledging it and I have proof later in case they decide they want something different.

crochet crinkle toy

Last year I had a customer ask why the item they ordered had blue eyes when they asked for green. I was able to send them a copy of their original message to me where it stated exactly what they asked for. Needless to say they were happy about their blue eyes after that!

5: Put Yourself out There!

I am a very shy person when it comes to meeting people and socializing, so this advice is a little weird coming from me. One of the biggest favors you can do for yourself if you are trying to sell crocheted item is to put yourself out there. No one will know about you unless you tell people!

Maybe your version of telling is maybe just carrying around your crocheting in public and having a business card on hand for when that person who asks “What are you making?” You can easily tell them and then point them in the direction of where they can see more of your work!

Just try one little act of putting the word out about what you do and chances are it will go a long way. I’m not the most active facebooker/etsy seller/tweeter in the world but I still manage to keep pretty busy with orders by just putting it a tiny bit of effort every so often!

Thanks, Michaela!

3 Ways to Join Yarn without Tying a Knot

How to Join Yarns with No Knot - Three Ways

Today, I’m going to show you my 3 favorite ways to join a new yarn without tying a knot. These techniques can be used:

  • When you’ve run out of yarn, and want to join a new ball of the same color
  • To change to a new color according to the pattern (although the color change won’t be as clean as with this color change technique)
  • To add new yarns when you’re making a scrappy project- great for leftovers!

Russian Join

The Russian Join allows you to connect all of your yarns before you begin crocheting. You’ll want to check out this tutorial for a full how-to.

how to russian join yarn

This technique is great if you have a lot of small pieces of yarn. You can join them in advance and then just keep crocheting! The result in joining up little pieces is a fabulous magic ball!

magic ball

‘Double Up’ Join

This is the technique I usually use when crocheting. You basically crochet a stitch or two with both your old and new yarns, then drop the old yarn and continue with just the new yarn. It’s very secure and quick. Visit this blog post for details!

join with no knot

The disadvantage is that those couple of stitches are a little thicker (due to the 2 yarns), but that doesn’t bother me much!

Spit Splice

This technique is the cleanest, but only works for wool yarns. And yes, you use spit! Read the full tutorial here.

This can be done either in advance or while you’re crocheting.

Which is your favorite?

Or do you prefer to tie a knot? It’s okay!

If you’re going to tie a knot, I recommend the following:

  • Tie the knot as you go, not in advance with the yarns
  • Start crocheting with your new yarn, then tie the knot after you’ve done a few stitches

I show how to do that in this tutorial.

Happy stitching!

Here are handy links to all the posts about yarn. . .

Return to the main table of contents for Let’s Learn to Crochet Amigurumi.

Move on to the lessons for the basic crochet stitches.

Happy stitching!

How to Care for your Craft Scissors

I have three pairs of scissors: a pair for cutting fabric, a pair for cutting tape and an all-purpose pair (that happen to be child-safe so I can use them for travel).

scissors

Having different pairs for different craft purposes allows you to keep them in tip-top-shape, and makes your crafting easier! Here are some tips I have for keeping your scissors healthy.

Mark your Scissors

Do you have a family member who might be tempted to use your fabric-only scissors for cutting construction paper? Add a label to them! And consider keeping your special scissors away with your fabric stash.

Clean Scissors with Rubbing Alcohol

I have a pair of scissors just for cutting packing tape. Because tape leaves a residue that makes scissors icky!

When mine get too icky, I use rubbing alcohol and a cotton ball to clean the blades. The sticky comes right off!

Get them Sharpened

Many craft stores have an occasional sharpening service. Just like nice knives, it pays to get your scissors sharpened!

Any tips to share?

How many scissors do you have? And what types are they?

Do you have any care tips you’d like to share?

Read about Wendi’s “Great Scissor Rotation” here.

The Future of Crochet: 3D Printing for Hooks

Right now, you have 2 choices when it comes to crochet hooks. You can go to a store and purchase a hook that’s been made in the millions by a manufacturer or you can purchase a hand-carved, custom crochet hook.

furls crochet hook

In the future, I think there will be a third option. Hang on to your crochet hooks.

What’s wrong with the current options?

When a manufacturer makes a crochet hook, they’re trying to make one that will appeal to a large number of people. Their goal is to sell them by the thousands/millions.

crochet hooks selection

While there are lots of different designs, there might not be a hook that’s perfect for you. Especially if you have small hands or a unique crocheting style.

The hand-carved hooks can be personalized (for example, to fit a smaller hand), but they are pricey. This makes purchasing one ‘just to try out’ out of reach for most consumers.

Crochet Hooks and 3D Printing

Have you heard of 3D printers? They’re basically printers that use a resin (instead of ink) to create a 3D item.

Less than a decade ago, these printers cost tens of thousands of dollars and were only used by researchers and companies. Now, though, there are a selection of 3D printers available in the $500 range, meaning they’re becoming practical for home use.

reasonably priced 3D printer

You probably have purchased a pdf pattern online for knitting, crocheting or sewing. These are usually patterns made by independent designers (like me!) that can be produced without the costs involved with printing & distributing a book.

This model allows independent designers to create patterns for niche markets. For example, a giant company might not be interested in spending thousands to produce a squid pattern, but as a pdf pattern (without much cost overhead), designing an adorable squid is practical! Yay, niches!

I predict the same thing will happen with crochet hook designs. You will be able to purchase 3D Printer Plans for a crochet hook, that you can print on your printer at home.

Sketch for a crochet hook for a 3D printer

The cost of these plans would be similar to purchasing a pdf pattern, and would allow the customer to purchase a crochet hook almost exactly to their liking. Independent hook designers will cater to different hand shapes and styles, exactly as they do now with stitching patterns.

Isn’t that such a cool future?

What do you think? Do you see print-at-home hooks in your future?

Video: Learn the Wiggle Stitch

How to Wiggle Stitch - video tutorial from FreshStitches and Shiny Happy World

One of my favorite patterns in Modern Baby Crochet is the Colorful Wiggle Pillow… and my publishers must agree, because they decided to put it on the cover!

Modern Baby Crochet by Stacey Trock

It’s a fabulous pillow, and a lot of fun to make! I’ve been getting a couple of requests for a video about how to do the wiggle stitch, and so I’ve made one. Now you can make a wiggle pillow, too!

Have fun with this!

Here are handy links to all the posts teaching more fancy crochet stitches. . .

Return to the main table of contents for Let’s Learn to Crochet Amigurumi.

Move on to the posts about working with crochet patterns.

Happy stitching!

How to single crochet 2 together (sc2tog)…neatly!

Tip Tuesday

A question I get asked very often is: when I sc2tog, that decrease looks all big and loose. How do I fix it?

Today, I’ll show you! If you’re looking for a tutorial on how to sc2tog, then click here for a video.

Aim for even stitches

A very common problem is either having the decrease look loose, or the stitch next to it. No worries! It’s fixable!

Today, I’ll show you how to get a really nice decrease, based on my teardrop technique. Basically, at every step of the stitch, you want to make sure that the loop on the hook looks like a tight teardrop.

Let’s look at the step-by-step photos of me doing a decrease:

single crochet decrease

Do you see how at every step the loop is snug against the hook? Not strangling the hook, but snug.

That’s the trick! A crochet stitch is formed from these loops, so if one of these loops gets big, then your stitch will be big and loose!

Best,
Stacey

Why does Disney ‘go after the little guys’?

Disney’s characters are copyrighted. You can’t use a drawing of Mickey Mouse and sell it on a mug, unless you have authorized consent to distribute the image.

Disney has a reputation for being ruthless about protecting its intellectual property (example stories of folks getting sued here and here).

cartoon lawyer

This leaves a lot of questions from crafters asking, Why does Disney go after the little guys?

In short: they have to

I’m not a lawyer (disclaimer!), but since I’m in the crafting industry, I have a fair understanding about copyright.

Let’s pretend that Disney finds out that Crissy Crafter has been using images of Mickey Mouse without permission.

Then, let’s pretend that Disney decides she’s ‘too small’ and doesn’t do anything about it.

needle

What happens?

In this case, Disney has put itself in a very sticky situation. By failing to press charges, it can be argued that they are ‘allowing’ this illegal usage to occur, and may have trouble defending future cases.

So, they have to pursue every case they find!

What’s a crafter to do?

Disney, as the creator of these characters, has the right to defend the images.

As a crafter, your best course of action is to just do what’s right. Don’t design and sell crochet patterns of Mickey Mouse. Don’t sell necklaces with drawings of Mickey Mouse. Violating someone else’s copyright can get you into trouble.

cant do that

It’s also unfair a crafter to benefit by using someone else’s brand. By selling ‘Mickey Mouse necklaces’, you’re giving the impression that you have an official connection with Disney, and you are piggybacking off their fame to generate sales for yourself.

Be creative! Come up with your own unique designs and characters! And stay out of trouble!

Comments, welcome!

As always, I welcome comments on this blog post.

However, from past experience, I know that blog posts about copyright are controversial and generate heated discussion.

My goal in writing this post was simply to explain to crafters one motivation behind Disney’s enforcement of its copyright.

As I am not a legal expert, I will not reply to any questions/comments about what is/isn’t copyright infringement. Thank you in advance for understanding.

Best,
Stacey

How and Why to Crochet through the Back Loop

How (and why) to Crochet through the Back Loop - from FreshStitches and Shiny Happy World

I’ve heard it all before. Crocheting makes your wrists hurt. It’s too hard to put your hook into the next stitch. Attaching pieces is a nightmare.

What if I told you that one little trick could totally change all that? And crocheting would become relaxing and easy on your wrists again?

I’ll tell you the one thing you can do! And then I’ll show you why it rocks so much!

Crochet through the Back Loop

When crocheting, there are two loops: the front and the back (highlighted with a black line in the below photo).

crochet through the back loop

The standard is to insert your hook under both loops when crocheting. But it’s not the easiest way!

Let me tell you all of the amazing reasons you might want to give the back loop a try!

Crocheting through the back loop is easy

See how the back loop is just hanging out at the top? It’s easy to see and easy to stick your hook into.

holding crochet hook like a pencil

The back loop is able to pull a bit of slack from the front loop, so you can pop your hook in even if you’re a tight crocheter or have a hook with a big head!

Use a Hook that’s Comfortable for Your Wrist!

I have bad wrists. Using a small hook and jamming it into tight stitches makes my wrists sore.

When you crochet through the back loop, you can use a slightly larger hook without getting holes in the fabric, because the front loop gives you some coverage.

Crocheted fingers

This is especially important with stuffed animals, where you are going to add stuffing and don’t want it to show through. Many patterns tell you to use a size E hook with worsted weight yarn… that’s crazy! Talk about a recipe for sore wrists!

Make it Easy to Count Rounds

Crocheting through the back loop leaves the front loop behind to make a nice horizontal row.

This row makes it super-easy to count how many rounds you’ve done!

Using a locking stitch marker for counting rounds

I’ve done three rounds since the stitch marker… isn’t that easy to count?

Read this blog post for more details on using locking stitch markers to keep track of your rounds.

Make Attaching Easy!

That lovely row of front loop stitches makes attaching easy, too!

Attaching is usually the worst part of crocheting… but not if you crochet through the back loop and follow these easy tips!

Want to give it a try?

It’ll make your crocheting life oodles easier!

Here are handy links to all the posts about working the first round of your crochet pattern. . .

Return to the main table of contents for Let’s Learn to Crochet Amigurumi.

Move on to the lessons for round two and beyond of your pattern.

Happy stitching!