Tips for Selecting Locker Hooking Materials

It’s Saturday! That means it’s time for me to share what I’m crafting… and some tips!

Today I’ll tell you about locker hooking, and give you some tips for picking your materials.

Locker Hooking

Right now, I’m working on locker hooking a bathroom rug.

You might be asking… what is locker hooking?

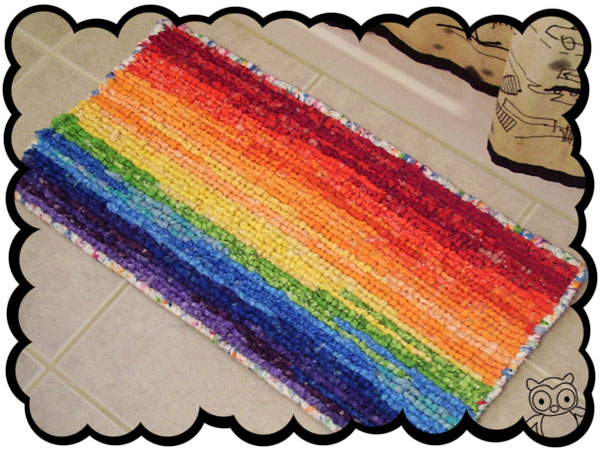
Locker hooking uses a crochet hook (or a special ‘locker hook‘, which is a crochet hook with an eye on the end), yarn, fabric strips and rug canvas to make fabric loops that are locked onto the backing with the yarn. It looks like this:

rainbow locker hooked mat

It’s fun! And it’s easy… especially for us crocheters who have the hang of using a hook!

Some tips for selecting your materials

To locker hook, you’ll need yards of fabric, 1″ thick. Check out my post on making yarn from fabric strips for details.

Here is the fabric I gathered:

blue and grey fabric

And here is my fabric ball… all those yarn strips cut and put together:

ball of fabric

Getting your fabric ready is almost as time-consuming as doing the actual locker hooking! But if you get into the right mindset, it’s a relaxing process. And it’s a fabulous way to use up cotton fabric!

Here are some of my tips for getting the right locker hooking materials:

  • Use 100% cotton. Not only does it tear into strips nicely (a big time-saver), but it also means your mat will dry quickly if it gets wet.
  • Focus more on the colors of the fabric than the design. When you cut the yarn into 1″ strips, you won’t see much of the design.
  • Aim for a varied palette. This way, if you run out of fabric, you can purchase more and it’ll fit right in!
  • Make sure your canvas is a few inches (in each direction) larger than you want your finished piece to be, since you will use some up in the border.
  • Go ahead and spring for a locker hook. They’re pretty inexpensive and will save you a lot of time!

I’ve started the actual locker hooking part… I’ll keep you posted as I go!

SHARE THIS

How to Make Yogurt

I never thought so many people would be interested in my yogurt-making! I make my own yogurt (once a week, if you’re curious), and every time I mention it, I get requests for a tutorial. So… here it is!

It’s not hard to do! And for folks like me (who like plain yogurt, or even flavored yogurt without lots of sugar), making your own can be easier than finding the one you like in the store. Making your own yogurt is also cheaper than buying it, although not by as large of a margin as other homemade items (like bread, for example).

The Equipment

To make yogurt, all you need to do is add a culture (ie. friendly bacteria) to warm milk and keep it at 120 degrees (f) for 6-8 hours.

There are various pieces of equipment available to help you achieve the required temperature. You can use:

  • a crock pot
  • your oven (if the temperature setting goes low enough)
  • a yogurt maker

I use a Euro Cuisine Yogurt Maker, and I love it. It keeps the temperature just right (as well as the humidity) and it doesn’t use much energy to run.

Euro Cuisine Yogurt maker

It’s important to note that a ‘yogurt maker’ doesn’t ‘make’ the yogurt (in the way that you dump ingredients into a bread machine and get a finished loaf of bread), it just keeps the mixture you’ll make at the right temperature for it to turn into yogurt.

Some people balk at having a yogurt-making appliance, but I don’t have a crock pot and my attempts at using the oven have been unsuccessful. So, it works for me. You’ll have to find what works for you!

The culture

You also need some happy bacteria to start your yogurt. The easiest thing to do is buy a small plain yogurt from the store, and divide it up into ice-cube trays and freeze:

freezing yogurt for making

You can also find culture in powder form, but I haven’t personally tried that approach.

How to make yogurt

Step 1: Heat your milk to almost boiling

Heat the volume of milk that you want to become finished yogurt (which probably depends on the size of your vessel).

warming milk to make yogurt

If the milk boils a little, it’s okay. But, try to turn the heat off before it becomes a rolling boil.

Step 2: Let the milk cool

Now, let the milk cool to 120 degrees. Some folks use a thermometer, but I just stick my finger in and see if it feels like a nice bath temperature. If you skip this step, the too-hot milk will kill your bacteria.

Step 3: Add your culture

Whether you’re using the ‘ice cube’ method, fresh yogurt or powder, add the culture in and stir with a whisk. Use about 1 tablespoon (or two ice cubes) if using yogurt as a starter.

how to make yogurt

Pour the mixture into your vessel. I, personally, found the little jars that came with my yogurt maker too difficult to clean, so I use a glass storage bowl that fits inside my yogurt maker.

Step 4: Keep warm for 6-8 hours

Using a yogurt maker, this is easy. Turn it on and wait!

yogurt machine in use

Step 5: Refrigerate and enjoy!

When your yogurt is done, it should look like yogurt. You know, solid-ish stuff with some liquid on top:

finished yogurt

Draining the liquid is how you make Greek yogurt, but I like mine just this way. Refrigerate, and then enjoy!

Best,
Stacey

6 Tips for Being Your Best Crafty Self!

I’m multi-craftual.

Yeah, that’s right. You can’t stick me in one little crafty box. I knit, crochet, sew and needle felt. I’ve dabbled in wheel-throwing (pottery), metal-working, quilting, spinning, locker hooking, embroidery, beading and tatting. And depending on your definition of ‘craft’, you should add baking, cheese making and gardening to the list.

bead crochet

I’m irresistibly drawn to making things. But do you know what? If you’re not careful, being involved in oodles of crafts can be a messy business. What do you do with all of those tools? How do you find the time to do them all?

Here are my 6 tips for managing your multi-craftual-ness… follow these, and you’ll be crafting with ease!

1. Accept that your work won’t be perfect

If you’re multi-craftual, then you’re only spending a small percentage of your crafting time on any particular skill. So, if you show up to a quilting group, don’t worry that your skills aren’t as advanced as some other people in the group! They’ve probably put more time into practicing!

knitting two at a time on two circs

Instead, be proud of yourself that you’re trying out something new. Chances are, because you have so much crafting experience under your belt, you’re doing great for the level of quilting experience you have. Enjoy the learning process!

2. Be careful about stashing

If you’re a knitter, then it’s fine to buy and stash beautiful skeins of yarn. But what happens if start stashing yarn and fabric and beads and…

yarns

A mess.

When you’re multi-craftual, it’s extra important to reign in your stashing. Focus on making purchases when you have a project specifically planned.

(If your supplies are already overflowing, check out this post with some really good tips on how to declutter a craft room.)

3. Allow your skills to transfer, even if it makes you ‘different’

I began my needlework life as a crocheter. This means that I tension my yarn with my left hand. So, when I began knitting, it was natural for me to knit ‘continental’ (holding the yarn in my left hand).

As a beginner, a number of people told me that I should learn to throw (also called knitting ‘American’ or ‘English’), because it was easier, and learn ‘continental’ later. I ignored that advice, and I’m happy I did!

Knitting with Karbonz needles from Knitter's Pride Review

You see, I was already comfortable holding my yarn a certain way… why not roll with that? When you’re multi-craftual, you need to let your experience from other crafts transfer, even if it means you’re learning ‘a little funny’. Follow your gut!

4. Divide your crafting time

Some crafts are better to do at certain times. Maybe crocheting a washcloth is easy to do in front of the TV, but your intricate beading is best done under the good lighting in your bedroom. And your sewing is easiest on weekends when you can commandeer the dining room table for your machine.

Think about when your crafts are most suitable to do. And if you work on crafts when they’re easiest, you’ll find that less frustration comes your way.

5. Know when a craft needs to leave your house

I told you I dabbled in metal working. Did I buy a soldering iron and drill press? No.

I took a class at my local arts center, where renting the equipment was part of my class fee.

Not all of the crafts you do need to be in your house. Look for opportunities (including renting sewing machine hours at a sewing shop) to do them outside of your living space. Not only will this provide a social opportunity, it saves space and a serious investment of money when you’re still just dabbling.

6. Find various groups

If you’re multi-craftual, it may be hard to find others who share all of your passions. But having others (either in real life or online) who support your crafts and inspire you is important to stay motivated and keep learning.

You may need to join a knitting circle and find a sewing forum online to meet your needs. Look for groups that meet infrequently, since joining multiple weekly groups would be a serious time-commitment!

What are your crafts?

Are you multi-craftual too? What crafts are you into? Any tips for managing them? Do share!

SHARE THIS

Crafts in Vietnam

I saw oodles of great crafting on my trip to Vietnam! I’m going to give you an overview of some of the most popular crafts, as well as some resources and tips (whether you’re looking to purchase finished crafts or materials to do your own crafting!)

In general, Vietnam is a very poor country where the average worker doesn’t earn very much per hour. This means that you will be able to purchase incredibly beautiful handmade works of art, for much less than you would in the US or Europe (which have higher labor rates).

Vietnam is also a place where counterfeits and cheap imitations (both of finished items and materials) are abundant. So, use your best discretion when shopping.

Lacquerwork

Lacquerwork (or Lacquer Work/ Lacquerware) is an art form where a high-gloss lacquer is applied to wood, typically with a decorative mother-of-pearl inlay.

mother of pearl lacquer work in Vietnam

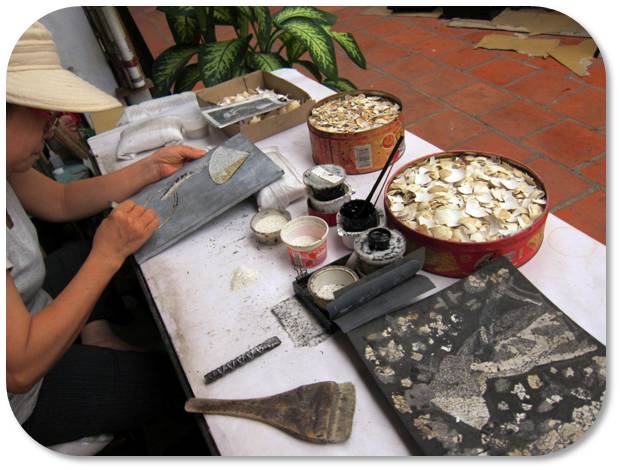
While the mother-of-pearl inlay is most popular, we visited a studio which created inlays with duck egg shells:
Lacquer work in vietnam egg shell

Bits of eggshell are applied, with tweezers, piece by piece to create the intricate design. After the design is completed, layers of lacquer are applied until a smooth finish is achieved.

lacquer work vietnam

To Visit

  • Tay Son Lacquerware: 198 Vo Thi Sau, Ho Chi Minh City, Ho Chi Minh. Studio and showroom.

Embroidery

Vietnam is home to stunning Silk Embroidery, where fine strands of silk are embroidered onto a canvas to create amazingly intricate designs:

Silk Embroidery vietnam

A piece can take months to complete, and since silk absorbs dye brilliantly, the final piece of work can be jaw-dropping.

Across the country, you’ll be able to find embroidery of varying levels of detail. There are many places selling embroidery pieces created with silk, but lacking the fineness of the top-notch silk embroidery studios.
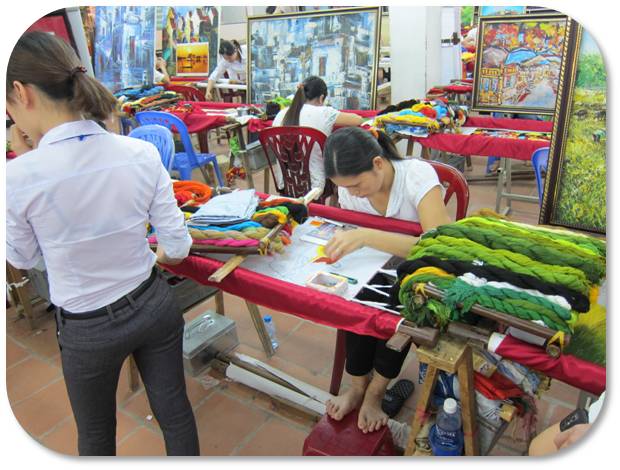
Embroidery in action vietnam

For a low-priced souvenir item, you will also be able to find simple embroidery pieces. These are typically created with a thicker thread, featuring a less-intricate design and made for function:
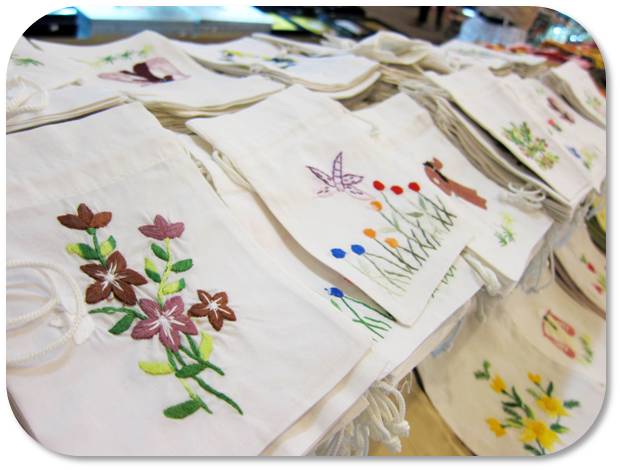
embroidery in vietnam

While I discovered one little cart selling white silk thread, I was not able to find a shop that sold the lovely silk (already dyed) for personal crafting.

To Visit

  • XQ Siagon Silk Hand Embroidery: 37 Donk Khoi Str, Dist. 1, HCMC Studio and showroom for fine silk embroidery.
  • Da Lat Su Quan: 110 Hang Gai, Hanoi Studio and showroom for fine silk embroidery.
  • Tran Gia Huy: 66 Ton Duc Tang, Dong Da, Hanoi. Showroom for fine silk embroidery.

Sewing

If you’d like a tailor-made garment sewn for you, then Vietnam is your place. Particularly in cities like Hoi An, you can find a tailor that will custom-make clothing to your specifications in under 24 hours.

Sewing in Vietnam

For the crafter, there are ample supplies of fabric and notions in local markets (particularly in Hanoi and Saigon):

Fabric in market in Vietnam

However, you should take care when purchasing your fabric. I’m suspicious that the ‘Versace Wool/Cashmere blend’ I saw for a few dollars a yard was the real deal. Many of the fabrics and notions are imported from China, and you’ll need to stay on your toes to ensure that what you’re purchasing is actually a good deal. After all, you’d like your fabric to hold up after a few washes, right?

buttons

Knitting and Crocheting

Although I happened upon a few women knitting/crocheting on the streets, Vietnam is a very hot country… so you can imagine that the demand for scarves is rather low.

Yarn in Vietnam

I found yarn for sale in markets in major cities, but almost everything was acrylic (they even stocked Caron Simply Soft!). Even the ‘Advanced Cashmere’, after closer inspection, was actually acrylic.

Dyeing and Weaving

The ethnic minorities in the Northern Highlands grow hemp, spin it, dye it with indigo and weave it into fabric. Here’s a photo of some indigo I saw growing:

Indigo plant Sapa Vietnam

The ‘Black Hmong’ minority is named for the indigo-dyed clothing that they make and wear:

black hmong clothing indigo vietnam

At first, I was curious if the local women really made their own clothing… but then I spotted oodles of women spinning hemp into thread:

black hmong woman hemp

And a loom in a local home:

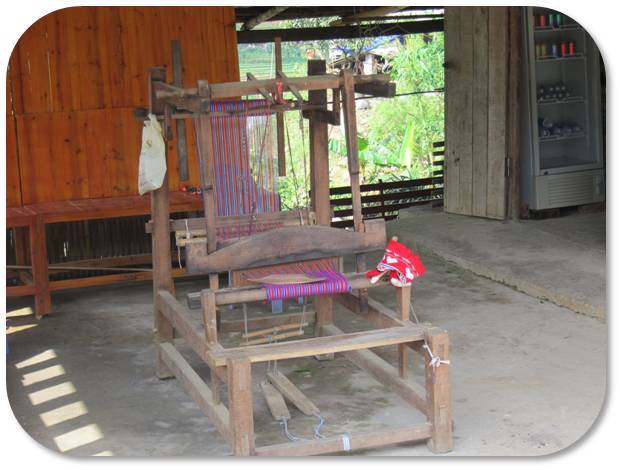
Loom in Vietnam

Isn’t it lovely to see such crafting at work?

You can purchase locally-made products from the minorities at markets in the hill-country around Sapa. As with much in Vietnam, use your best judgement when purchasing. I saw a vast amount of identical-looking pieces being sold for super-cheap that I predict were mass produced (elsewhere) for tourists). However, after a little shopping around, you can find some more genuine articles.

To Visit

  • Indigo Cat: 046 Fansipan Str, Sapa. Shop featuring locally-made crafts.
  • Indigo Store: 47 Hang Gai, Hanoi. Shop featuring ‘modern’ Indigo clothing.

Stonework

Ever seen those giant stone lions outside of an Asian temple? They have to be carved somewhere, right?

stone carving in vietnam
carving

We happened upon a place that carves huge carvings on the drive from Hanoi to Ha Long Bay. If you aren’t looking to purchase an 8-foot-tall Budda, you’ll still be able to find lots of pieces of stone carving in shops around Vietnam.

If you’re lucky, you may even find a shop with works-in-progress!

Stone carving in progress

Cross-Stitch

Hands down, the most popular craft (judging my what I observed most often) is cross-stitch.

cross stitch in vietnam

I saw no completed cross-stitch pieces for sale, so it seems like the craft that women do for fun and use for personal display in their home (and not for selling).

I spotted a few cross-stitch kits at markets, so if that’s your craft, keep your eyes peeled!

So many crafts!

I found Vietnam to be lovely and really inspiring from a craft perspective. It’s a great chance to purchase a beautiful work of art for a reasonable price.

In terms of raw-materials to use for your crafting, supplies abound, but you’ll need to keep a keen eye out to make sure you’re getting quality materials.

I hope you’ve enjoyed my crafty-view of Vietnam… and take a peek at a few of the websites (or add some stops to your itinerary if you’re visiting!)

Best,
Stacey

Simple wrist exercises for knitters and crocheters (video)

Simple Wrist Exercises for Knitters and Crocheters - a video from FreshStitches and Shiny Happy World

My wrist exercises for knitters and crocheters blog post has been super-popular… and some folks have asked me, “Can we see the exercises in action?”

Well, sure!

So, here’s a video of some little stretches and exercises you can do to keep your wrists happy!

Click ‘play’, then the rectangle in the lower right corner to see it big!

Here are handy links to all the crochet troubleshooting posts. . .

Return to the main table of contents for Let’s Learn to Crochet Amigurumi.

Happy stitching!

SHARE THIS

Meet the biggest owl in town!

Uh, oh. Maybe my title is too bold of a claim. Maybe there’s a bigger owl in town…

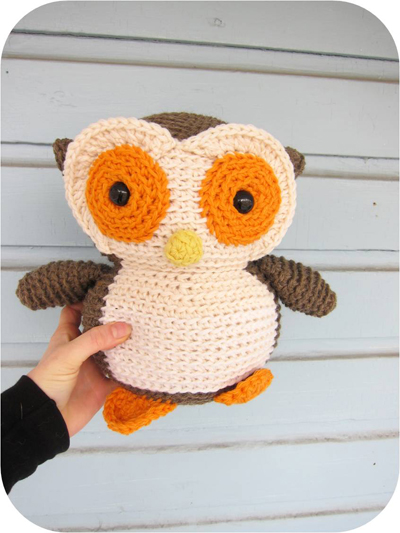
But this guy is definitely the biggest owl in my house. And probably on my block.

Check him out:

Super big crochet owl

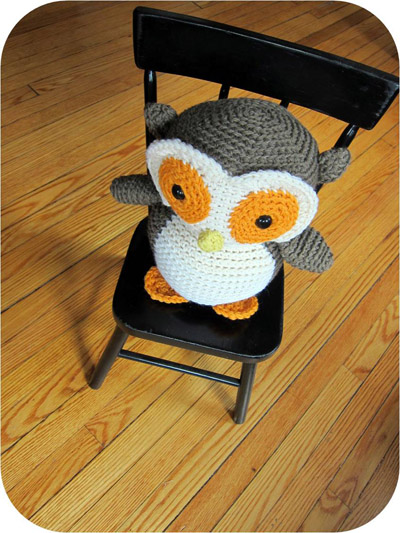
He’s 12″ tall and can hold his own in a super-cute kiddie chair:

Crocheted owl in chair

And he’s huggable!

Big owl crocheted cuddly

I used my Nelson the Owl pattern, but crocheted it with a double strand of worsted weight yarn and a size K hook. Feel free to check out big Nelson’s Ravelry Page.

He’ll be on debut at my table at the Pittsburgh Knit and Crochet Festival!

I’m really into doing these ‘big’ guys… they don’t require any more crocheting than a normal one (since you’re just using a thicker yarn), but they turn out super-cuddly!

Upcoming Events

I’m so excited about the oodles of stuff that’s coming up at FreshStitches! Have a peek!
FreshStitches upcoming events

I hope you have an awesome and craft-filled weekend!

Tomorrow, I’m going to share all of the exciting crafty stuff I did at a workshop I went to last weekend!

Tips for Starting a Craft Club

Tammy Powley Today’s guest post is written by Tammy Powley, crocheter and blogger at The Crafty Princess Diaries.

Tammy leads a craft club at her local school, and she’s been sweet enough to stop by today and share her tips! This post contains some great tips and also a list of charities that you can consider contacting if you’re interested in starting your own charity-driven craft group.

Have a read, and you might feel inspired to start a craft club of your own!


I am a member of a number of web-based craft groups, and we often get together (virtually) and use our crafting skills to help charitable organizations. While the Internet is a wonderful space to find fellow crafters and fiber lovers, I started to crave the “in person” experience.

However, the only group I could find locally meets at times when I’m working, as all are retirees. This dilemma eventually gave me the idea to start my own craft club. Though my club is affiliated with a school, a similar approach can be taken to create a club at other institutions or privately.

Find your Mission

I enjoy making donation items, and since I am a teacher, I decided to combine these two interests and start a craft club at my school. We are called Caring through Crafting and our mission is twofold: teach club members various crafting skills (crochet, knitting, paper-arts, jewelry making, etc.) and then use these skills to help local charities.

craft club

A few months after starting the club, I was lucky enough to find another faculty member who knits and crochets, and we both are now the club’s advisors. During the school year, the club meets twice a month, and we craft like crazy.

Each semester we select a service project. Some of our past and current projects include the following:

  • Making fleece blankets and collecting donated items for Save the Chimps.
  • Crocheting and knitting snuggles for two animal shelters: Domino’s House and Dogs and Cats Forever.
  • Making no-sew blankets, crocheting and knitting wash cloths, and collecting toiletry items for Miss Inc., a women’s and children’s shelter.
  • Making baby hats and afghans for Okeechobee Healthy Start.
  • Making various crafts (greeting cards, jewelry, amigurumi, journals) and selling them at a local craft show with the proceeds going to charity.

Straighten out the supply-line

When I first started the club, there was no funding available from the school because I started it in the middle of a semester and everything had already been budgeted. I bought our first batch of yarn and crochet hooks, but it did not take long for us to start receiving donations.

how to start a craft club

Here are some tips for getting funding and donated supplies:

  • Whenever it is appropriate, tell every person you know about your club, especially if you plan to also participate in charitable projects. Word of mouth has been my most successful way to receive donated supplies.
  • Many newspapers have small sections where they feature local activities. Contact them about your club.
  • Use social media (such as Twitter, Facebook, and Plurk) to help get the word out. Our club has a Facebook page that also helps us keep members up to date with club activities.
  • Keep an on-going list of supplies you need, and keep track of spending. This can be helpful when someone asks about what supplies you need.
  • Run fund raisers to earn money for your club. Our club makes greeting cards and sells them throughout the school year.

Expect the unexpected

Of course, there was a big learning curve for me when I started the club, and this is an on-going process.

assembling an afghan

Here are a few challenges to expect:

  • Not all donated supplies are going to be useful to you. Sometime you may have to decline simply because you have no use for them, or you may not have enough storage space.
  • As far as yarn goes, expect a lot of acrylic, which is actually fine for many charities (since it is easy to care for) and useful for beginners to use as they learn.
  • If your club decides to commit to a big project, make sure you are ready to commit yourself to doing all of the work. Lots of times members will have great ideas but are not able to follow through. If you feel you could not complete the project on your own, then you may have to nicely explain to members that it may not be a good fit for the club right now.
  • You won’t be able to please all the club members. Some will want to knit and crochet, and others will want to make jewelry. Make a schedule and agenda in advance so members know what activities they will participate in at each meeting.
  • These days, families are so busy that there is little time to sit down and teach children how to sew on a button or crochet a scarf. Do not expect to make large-scale projects if you have inexperienced crafters. Items like snuggles and dish cloths are perfect beginners’ projects. Be patient and encouraging when teaching newbie crafters.

The club has turned into a lot of work for both my co-advisor and me, more than either of us had imagined. The emotional rewards, however, are worth all of the effort.

We have seen club members go from learning the chain stitch to crocheting a small blanket for a cat or dog in just a few weeks. Not only do they learn a new skill and help others, but in turn, they help themselves. School is an enriching environment, but it can also be stressful. At our meetings, we have fun and learn and achieve. We talk, joke, and bond as we weave together bits of yarn. Members feel successful and proud of their efforts, and this translates into self-esteem and self-worth that they carry with them forever.

How to hand wash socks

Most of my winter socks are ones that I’ve knit myself. Many of them require hand-washing. It’s not hard… I’ll show you how. But first, let’s tackle some basic sock care questions and I’ll give you a little advice.

Sock Care FAQs

Do I really have to hand wash my socks? Check the label of the yarn you used. If the yarn says ‘hand wash only’, then… well, you need to wash your socks by hand. If your socks are made with machine washable yarn, then it’s up to you (read below for one reason you may opt to hand wash socks that are fit for the machine).

What happens if I put socks in the machine that should be washed by hand? They will felt, meaning that they will shrink and not be nice, lovely socks anymore.

tutorial on hand washing socks

How do you remember which socks need hand washing? The truth is, every once in a while, you won’t remember. Big oopsie. That’s why I recommend treating all of your socks as needing hand washing (see below).

Do I need a sock blocker? A sock blocker is a device that will shape your socks as they’re drying to look nice and pretty. I own one from Knit Picks, and use it for socks that I’m going to photograph for the blog. I don’t ever block socks just so they look nice in my sock drawer. I say skip it, unless you’re doing a photo shoot.

Separate your socks!

I’m going to give you my personal advice. Put all of your hand-knit socks in a separate basket from your clothes when dirty. And pretend that all of your socks need to be hand washed.

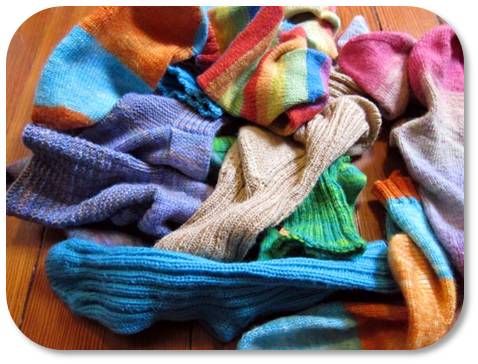
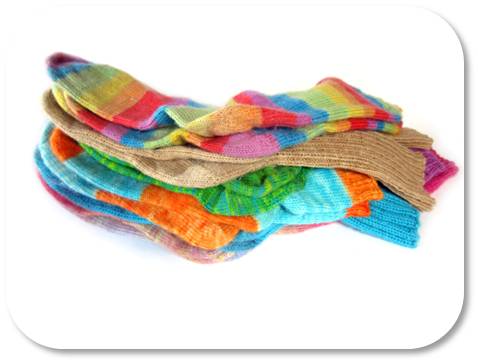
hand knitted socks

Why? If you don’t, one of two things is bound to happen:

  • Someone in your family will spontaneously do some laundry… and not know that they should pick out the socks for hand washing. This turns a wonderfully thoughtful gesture into ruined socks.
  • You will think that a particular pair of socks was knitted with hand washable yarn… and throw it in the machine. This will also result in ruined socks.

So don’t risk it. Make a habit of making a separate pile for hand-knit socks, and wash them by hand when you’re down to only one clean pair left.

How to hand wash socks

Hand washing gets such a bad rap… and I’m not sure why! It’s not that hard.

Gather your socks. Fill your sink with lukewarm water.

hand washing wool socks

Pour some Wool-wash (Eucalan is lovely and contains a natural moth-repellant) into the water as directed on the label.

Using Eucalan wool wash to wash socks

Be sure to look for a wash intended for hand washing, as these are intended to care for wool fibers and also do not need to be rinsed out. Contrary to its name, Woolite is a detergent and is terrible for wool. Spend the extra money for a real wool wash… you only use the tiniest bit for each wash and a bottle will last a long time.

Now, plop your socks into the sink, and press down so that they are fully submerged.

step by step tutorial on how to wash socks by hand

Leave for about 15 minutes.

That’s all! They’re clean! Squeeze each sock, getting out as much water as you can without wringing:

squeezing hand wash socks without wringing

Don’t get too disgusted by the icky-color of water that might come out… don’t forget, they’re socks!

Lay flat on a towel to dry.

When they’re dry, re-stock your sock drawer!

tutorial on how to hand wash socks

That’s not so hard, right?

If hand washing sounds like a nightmare to you, then I highly recommend that you knit all of your socks with machine washable yarn. Otherwise, your socks will wind up sitting in your drawer like an obscure antique, and who wants that?!?

But, if the siren song of the oh-so-delicious hand wash only indie dyed yarn sings to you… go for it! Hand washing isn’t so bad!

Pledge to Ten (minutes, that is…)

We all know that most New Year’s Resolutions fail. Do you know why? They’re too grand… too lofty. And they often seem impossible.

So here’s what we’re going to do: we’re going to set a practical crochet goal, and dedicate 10 minutes a day to reaching it. You have ten minutes a day, right?

And I’m going to give you a handy worksheet to use. Sounds do-able, huh?

Set realistic expectations, and remove roadblocks

If you’ve never knit before, then you’re probably not going to knit your first sweater this month. (Sorry if I’m the one who had to burst your bubble on that one).

But, there’s good news… the needle arts (knitting, crocheting, sewing) are all about putting in practice. I can pretty much guarantee you that if you practice in a consistent way (even if it’s not for huge blocks of time), you’ll get better.

help for reaching your crochet goals mantra

So, step one: pick a realistic goal that you think you can accomplish in a month.

Okay, onto step two (and I think this bit is really important!). You’re going to remove any possible roadblocks that you can think of that might come in between you and your goal. How many times have you sat down, ready to work on a project… only to discover that you don’t have the right hook?

The best way to guarantee success is to solve all of your roadblocks in advance. Before you begin working on your goal, gather all your materials and tools. This means downloading your pattern, getting your supplies, and even bookmarking resources that you might need. Then, when you need help… you won’t be slowed down. You’re prepared.

The Worksheet

easy crochet goals worksheet download

Now… here’s your helpful worksheet. Go ahead and download the pdf version.

Notice that there are 4 weeks, with 6 boxes each. Can you commit to spending 10 minutes a day, 6 days a week, to working towards your goal?

And if you find a little spare time… buy all means, keep going!

What’s important is that you consistently spend a little bit of time working towards your goal.

Let’s have a peek at an example:

goal setting for crochet, help

Look at how I came up with a list of concrete and helpful steps that will remove roadblocks and help me reach my goal. Nothing crazy… just little things that will help make the goal easier.

What’s your goal?

Notice this worksheet isn’t about setting your goals for all of 2013… it’s about picking one thing that you’d like to do within a month. Easy. No pressure.

If you’re feeling daring, you can print out 12 worksheets, one for each month. But, that’s optional! Start with the first month, and see how you go!

Crocheting should be fun, right?

Tell me about what you’re going to start with… I’m excited to hear your goals!

The Zen of Quitting

Quitter.

Ooooh… it’s such an ugly word, isn’t it? Who likes to be called a quitter? It makes you feel unworthy… like you’re just not good enough, right?

How often has the fear of being called a ‘quitter’ gotten you stuck in a rut? Is it the reason you won’t frog that knitting project that you know just isn’t going to work?

I’ve got some good news: sometimes, it’s okay to quit. I’ll tell you why…

Let me tell you a story…

I took ice-skating lessons from from 4 years old until 13 years old. Money was tight, and by the time I was 13, I was using both birthday and Christmas presents (from multiple family members) to pay for my lessons.

I was good, but I was also a realist. At the age when professional skaters begin national competition (with the assistance of private coaches), I was still learning to spin at the public rink. I didn’t have the resources to become a professional, and I was as good of a skater as I would ever need to be.

So, I stopped taking lessons.

My mom called me “a quitter”.

Ouch.

What society tells us about quitting

My mom wasn’t (at least I’d like to think) being mean. She was parroting the message that seems pervasive in our society. You’ve heard it all before:

  • “Quitters never win and winners never quit.” – Vince Lombardi
  • “Pain is temporary. Quitting lasts forever.” – Lance Armstrong
  • “Americans never quit.” – Douglas MacArthur

These are actually good quotes. When you’re an athlete in a competition (or a soldier in war), you have a mission, and sometimes you need a pep-talk. Keep at it! Don’t quit! Not a bad message, really.

What people forget is that these quotes were never intended as lessons about how to live life!

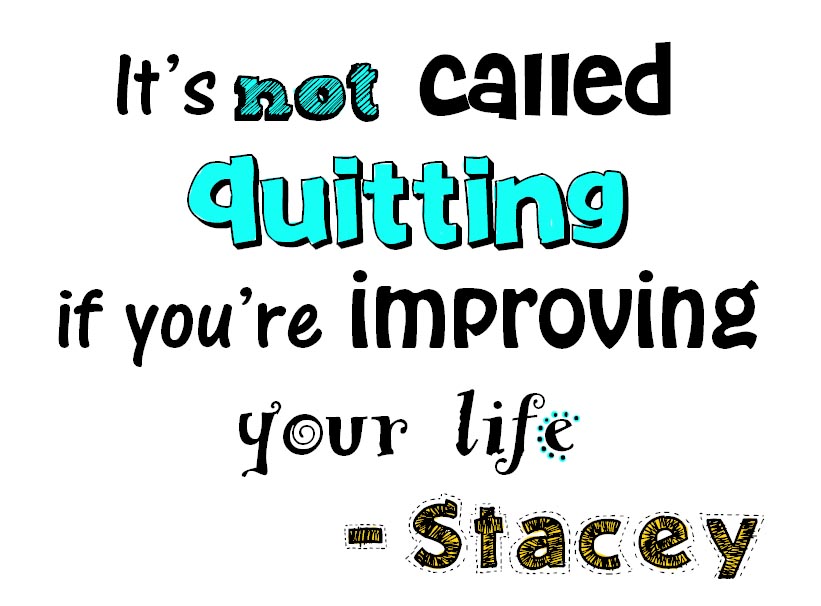
The zen of quitting

Now that I’m an adult, I know that my mom was wrong. I wasn’t a quitter.

There, I said it. If you make a move that improves your life… no one has the right to call you a ‘quitter’!

Should you persist in rescuing cat toys from your burning house? No way! Should you spend 100 more hours knitting a shawl that’s driving you batty… and you know you’re not even going to like when it’s done? HECK NO!

Why are we talking about quitting?

Uhhh… it’s because I quit working on something this week. At first, I felt bad about it. But now, I don’t! You see, I spent a fair amount of time and energy on it, and it wasn’t working. So I stopped.

You know that today is Craft School Saturday, right? The day of the week where I share about my latest crafting adventure?

So, I had it all lined up… I was going to cut glass:

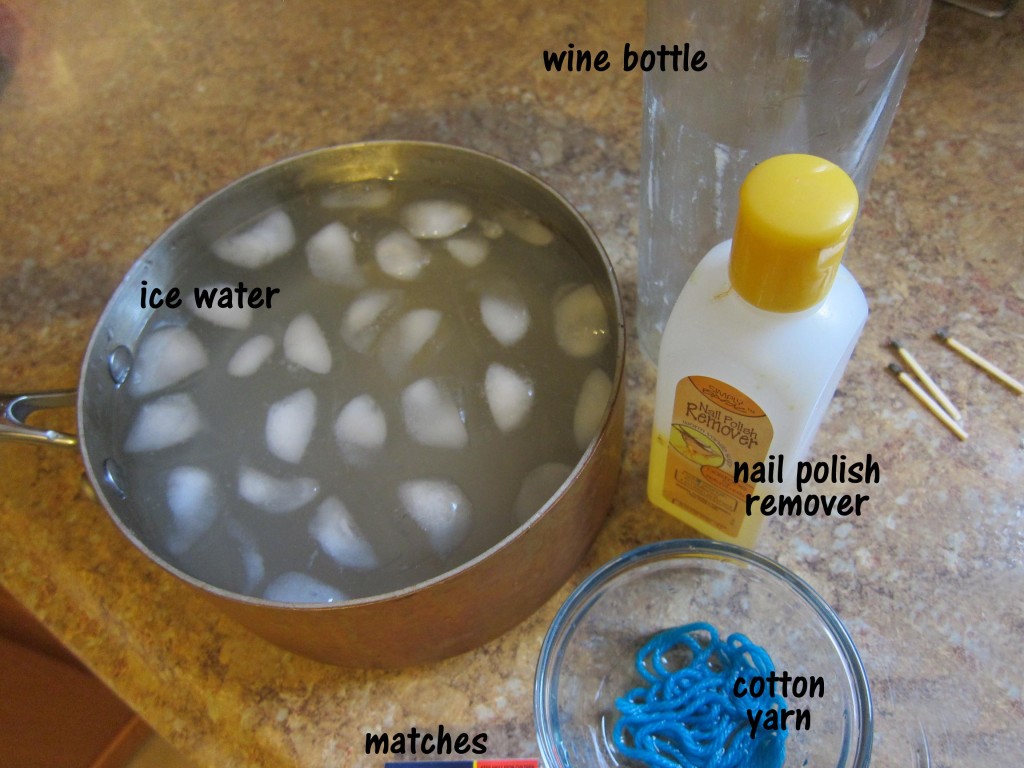
I found this fabulous tutorial on cutting glass using only basic household supplies: nail polish remover, ice water and a match. I was excited.

I gathered my supplies, and I tried for a really long time…

I tried over two separate days, and even tweeted the blog author (Jaderbomb, who’s actually a real sweetie and replied with lots of helpful comments) for assistance. I just couldn’t get it to work!

I was fretting. I didn’t have a back-up craft planned… and I kept thinking, “What are my readers going to think if I fail?”

And then it hit me. It’s okay to fail. It’s okay to quit something that isn’t working.

How do you know when it’s okay to quit?

On the topic of quitting, this is the trickiest question. Sometimes, you need to pull on your big-girl pants and persist even if you’re not happy (think: cleaning up a big mess from your dog or helping your child through their homework). Other times, persisting just means you’re wasting your time.

When you’re thinking of quitting, ask yourself these questions:

  • Will the result (if I persist) be valuable and worthwhile?
  • Will working on this process teach me valuable skills?
  • Can I find a part of this process that makes me happy?

If the answer is ‘yes’, these are signs it might be worth continuing.

What if you answer no? Here’s a few more questions:

  • When this is done, will I be reminded of the painful process?
  • Are there other things, equally worthwhile, that I could be doing instead?
  • Will I be much happier if I quit?

Answering ‘yes’ to these last three questions is a signal that you should give yourself permission to quit. Life’s too short, right?

As for my ice-skating, I liked doing it, but there weren’t many benefits from continuing my lessons. I could still visit the rink, but by quitting, I saved money and had time to work on different skills (like crocheting!).

And my glass cutting… it sounded really fun! But after a significant amount of time, I wasn’t getting anywhere. Was I really going to use these cut glasses? No. I was just doing it for fun. So, I decided to stop before I got frustrated.

Quitting isn’t bad… it can be healthy.

Is there anything you should quit?

Tell me… can you make your life better by quitting something that’s making you unhappy?

SHARE THIS