How to Kettle-Dye Yarn with Kool-Aid

Are you inspired to get dyeing with Kool-Aid? I hope so!
Today, I’m going to tell you about the basics of Kool-Aid Dyeing, and show you how to achieve a kettle-dyed look.

Kool-Aid Dyeing Basics

You’ll need:

  • yarn made from natural animal-fibers (undyed is best)
  • a few packets of Kool-Aid (see yesterday’s post about testing colors)
  • a glass bowl or dish
  • boiling water or water + a microwave

The Process

Dyeing with Kool-Aid is super-easy: just add your Kool-Aid packets to some boiling water and dunk your yarn in! Easy!

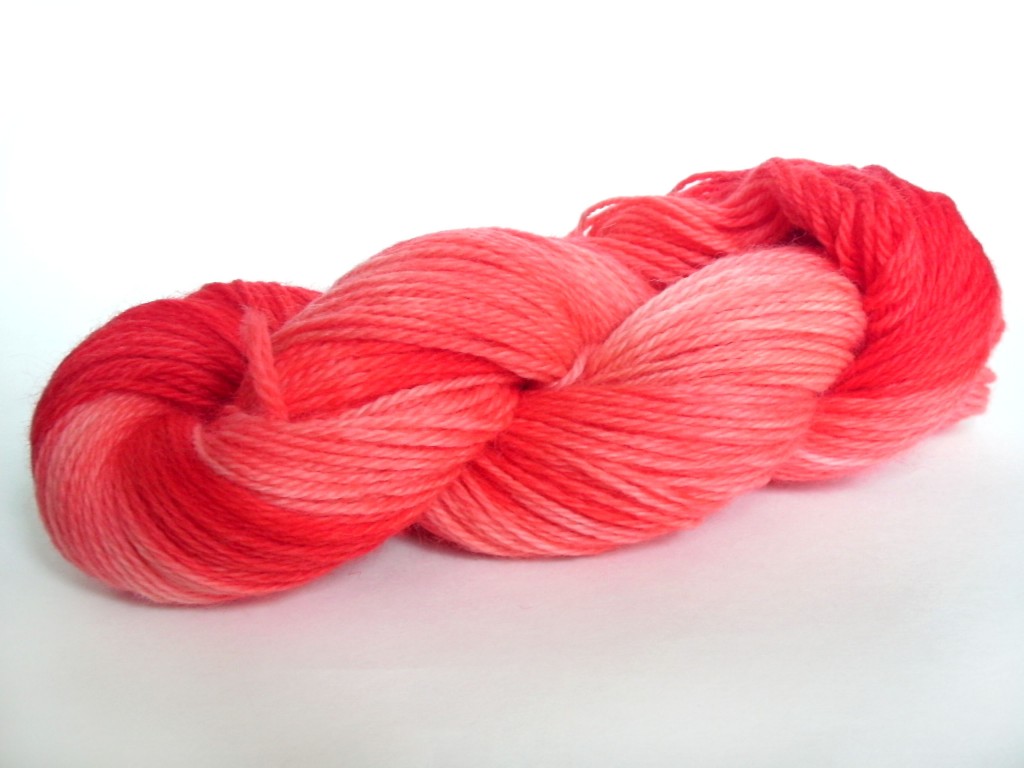
I’ll show you, step-by-step, how I use the basic technique to get a lovely kettle-dyed yarn. ‘Kettle-dyed’ is the name for a yarn that’s mostly one color, but has a range of tones gently changing throughout the yarn. It’s beautiful and easy, so give it a try!

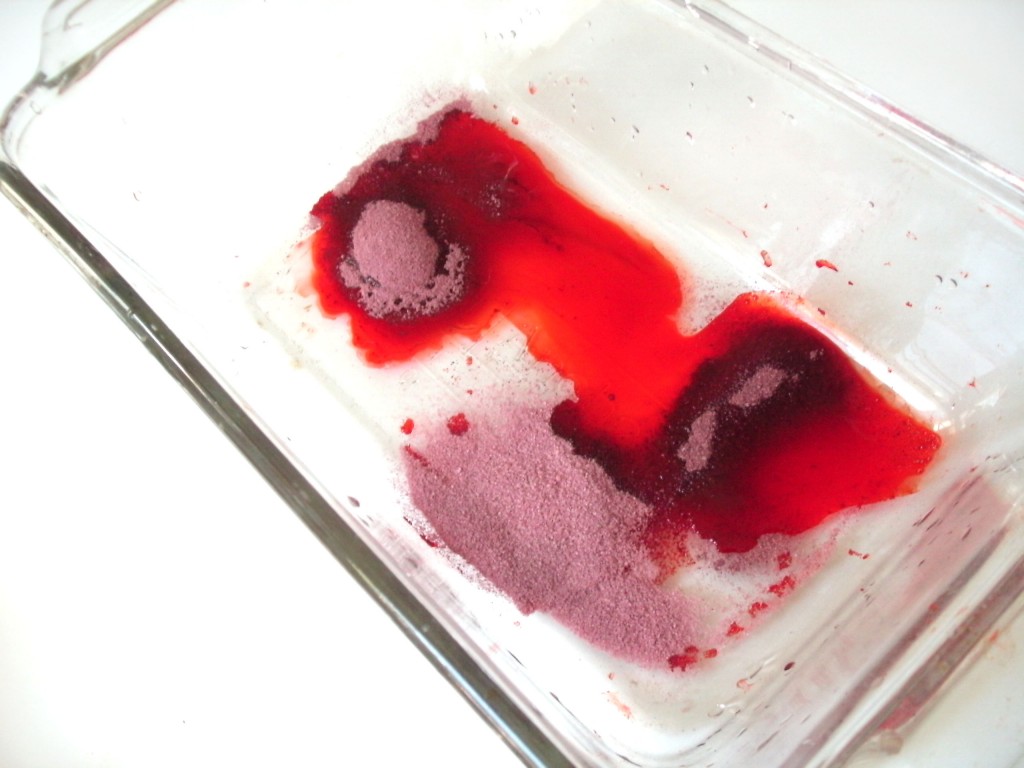
Step 1: Add packets to your bowl

I’m going to dye my yarn red, so I’ve added a couple of red packets to my glass bowl. You can either use packets that are the same color, or use a couple that are close in color:

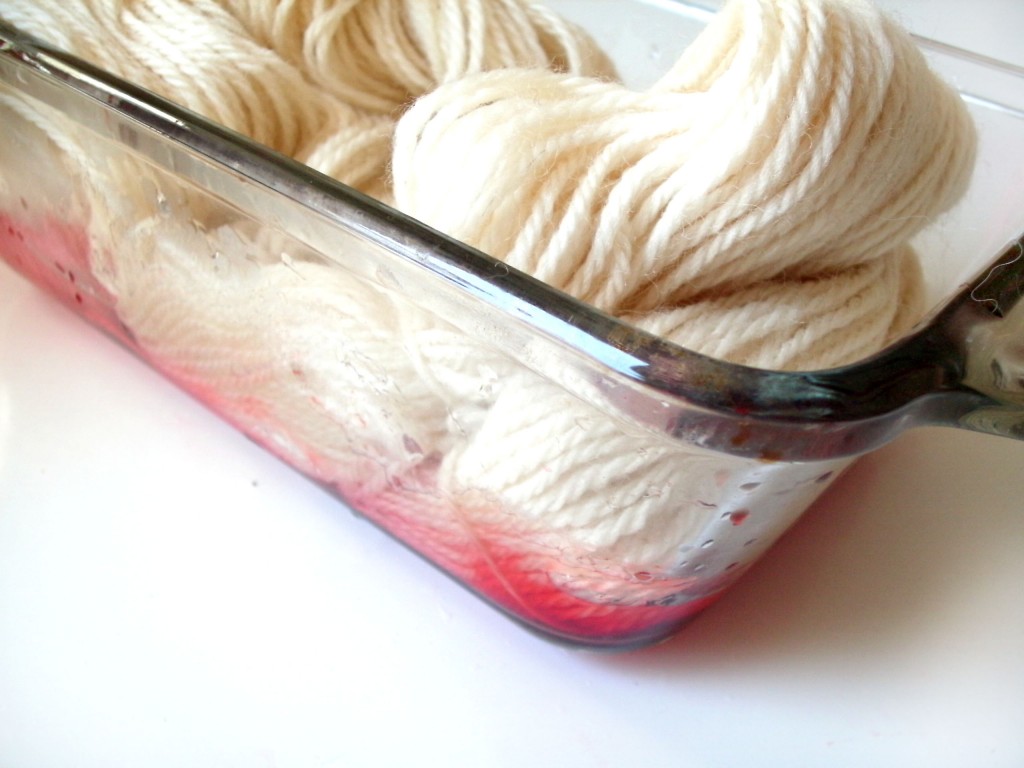
Step 2: Add water and yarn

Your yarn is going to suck up color like there’s no tomorrow… so don’t worry about messing up. I added a small amount of boiling water, and then plunked my yarn in:

The yarn that’s touching the Kool-Aid-dyed-water is going to start drinking up the color. Notice how I’ve left some of the yarn out? That’s because I want the yarn to absorb the color unevenly. That’s what gives you the kettle-dyed look!

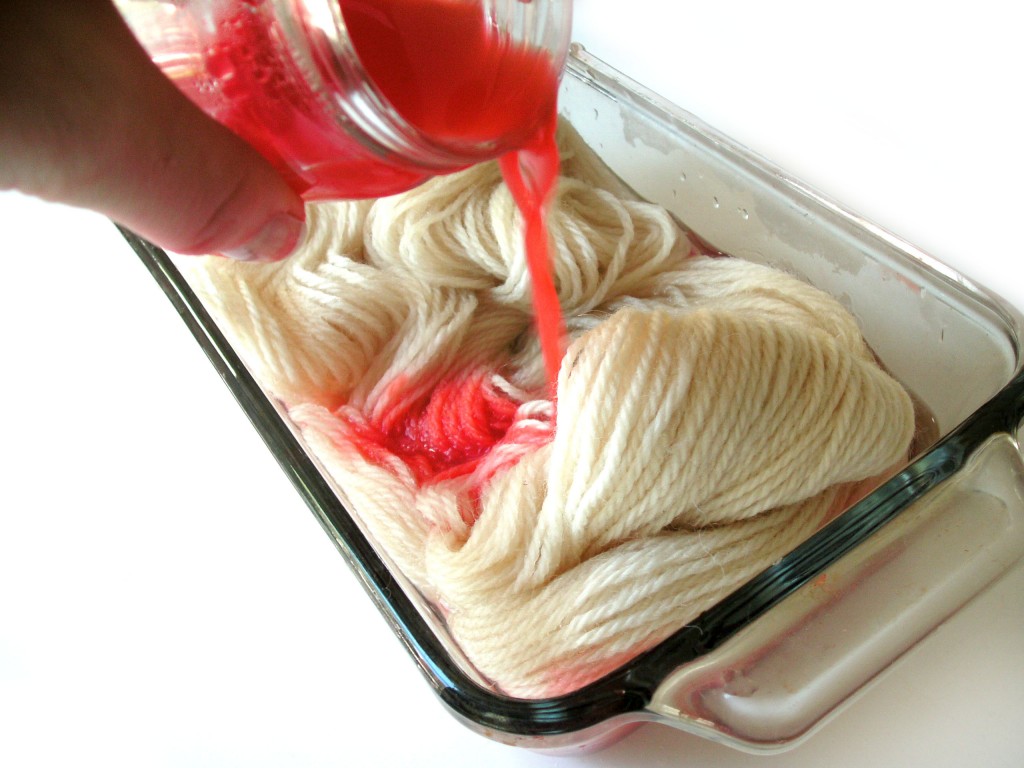
Step 3: Add more color/water until you’re happy!

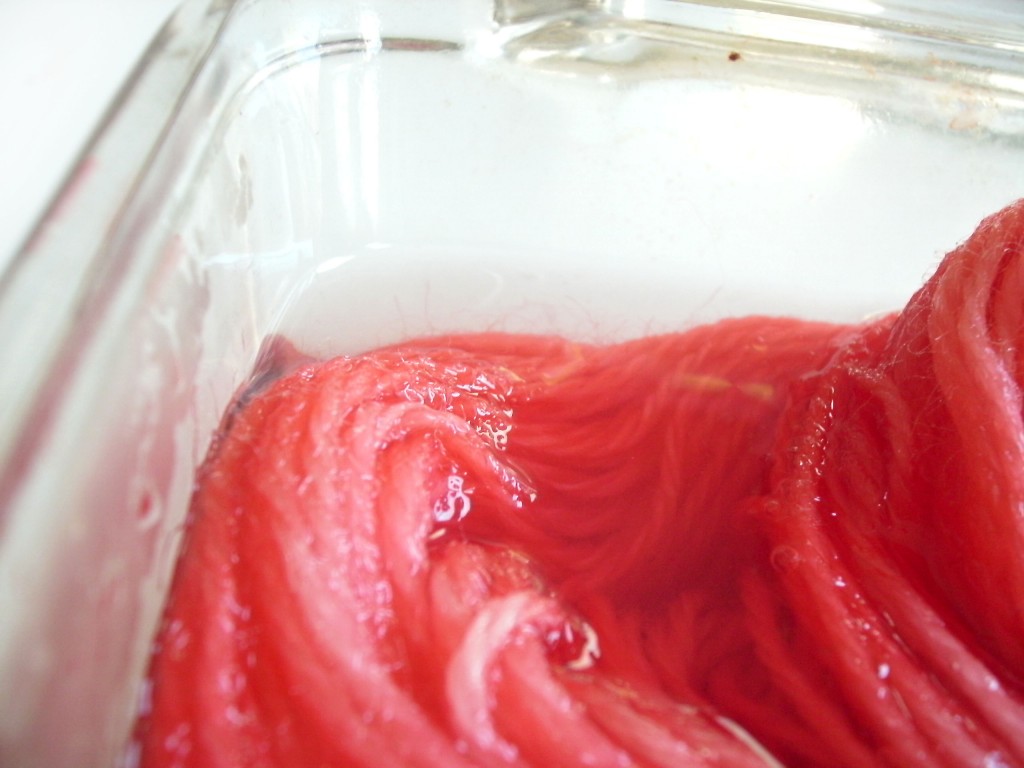
You can continue to add packets of color and water until the yarn is the color you’d like. Here, I decided to pour some (hot) Kool-Aid water on top of the yarn:

If you don’t want to use boiling water, you can also use regular water, and then microwave the water + yarn so that the color will set.

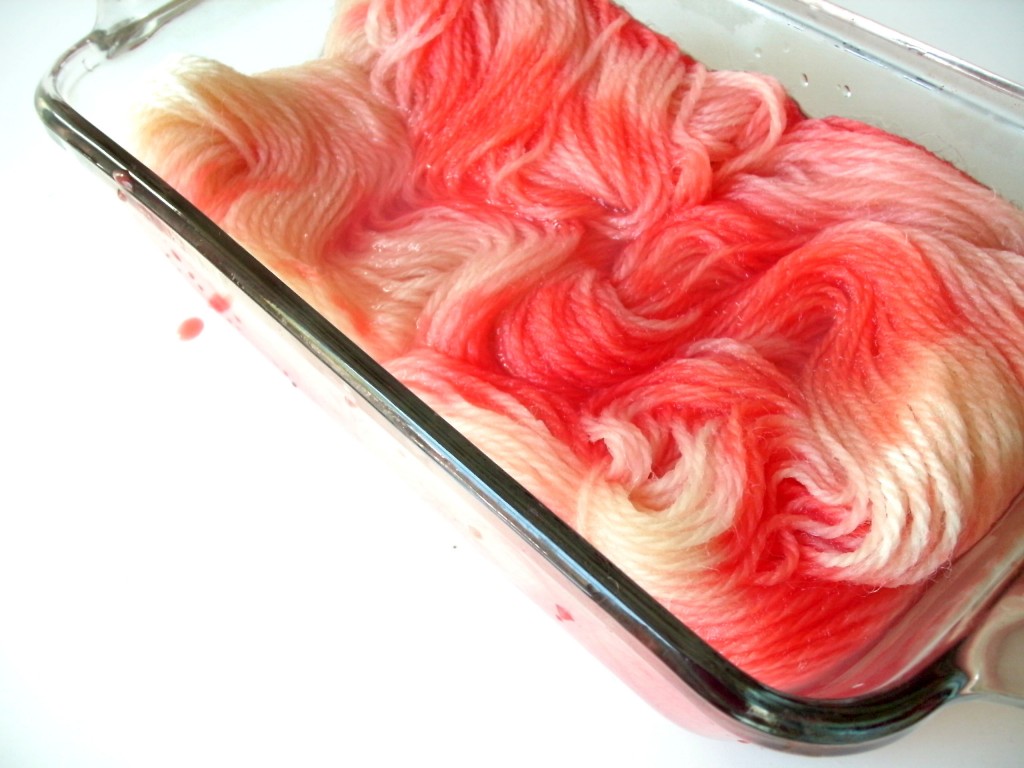
See how mine looks?

Some parts are darker, some parts are lighter. Perfect!

You’ll notice that the dye is sucked up into the yarn, and the remaining water will be clear:

Step 4: Rinse and dry!

That’s it! You don’t have to wait any length of time… once the color is in the yarn, it’s in.

Squeeze the water out of your yarn and allow to dry. You’ll end up with a beautiful skein!

Swatches

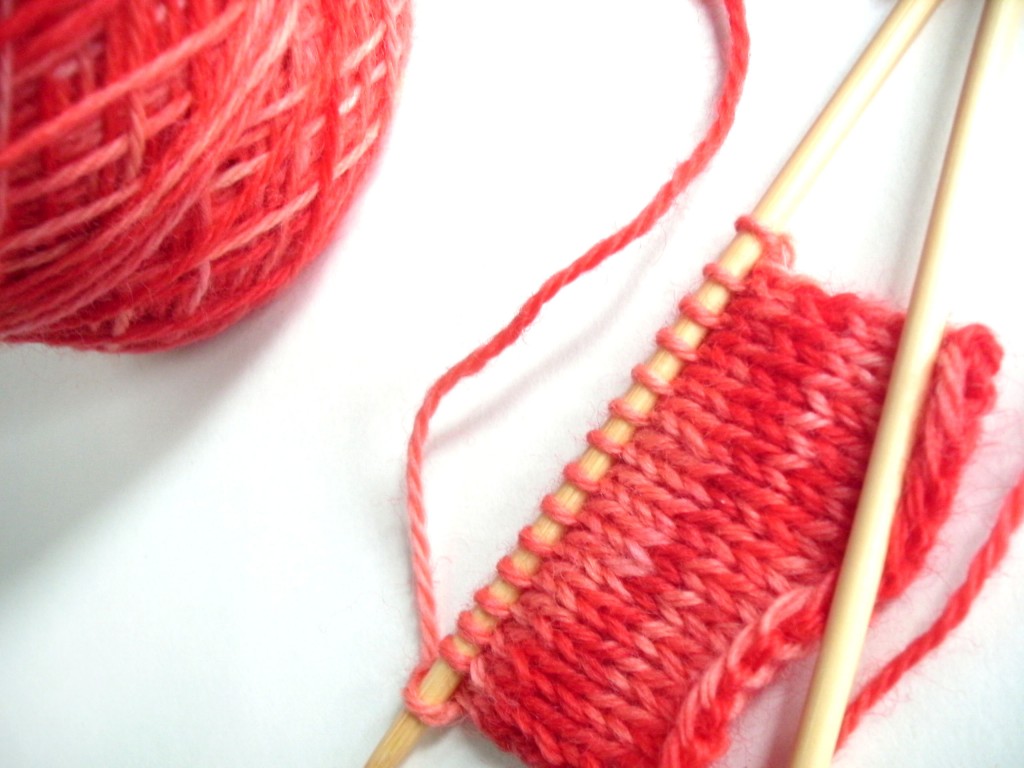
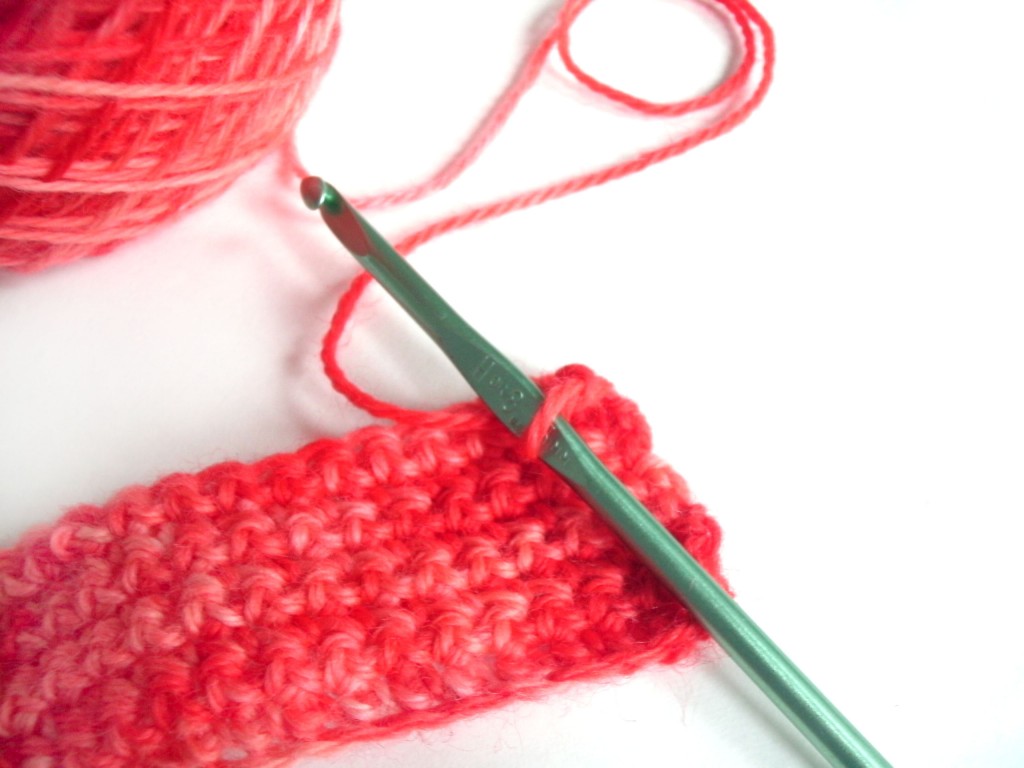
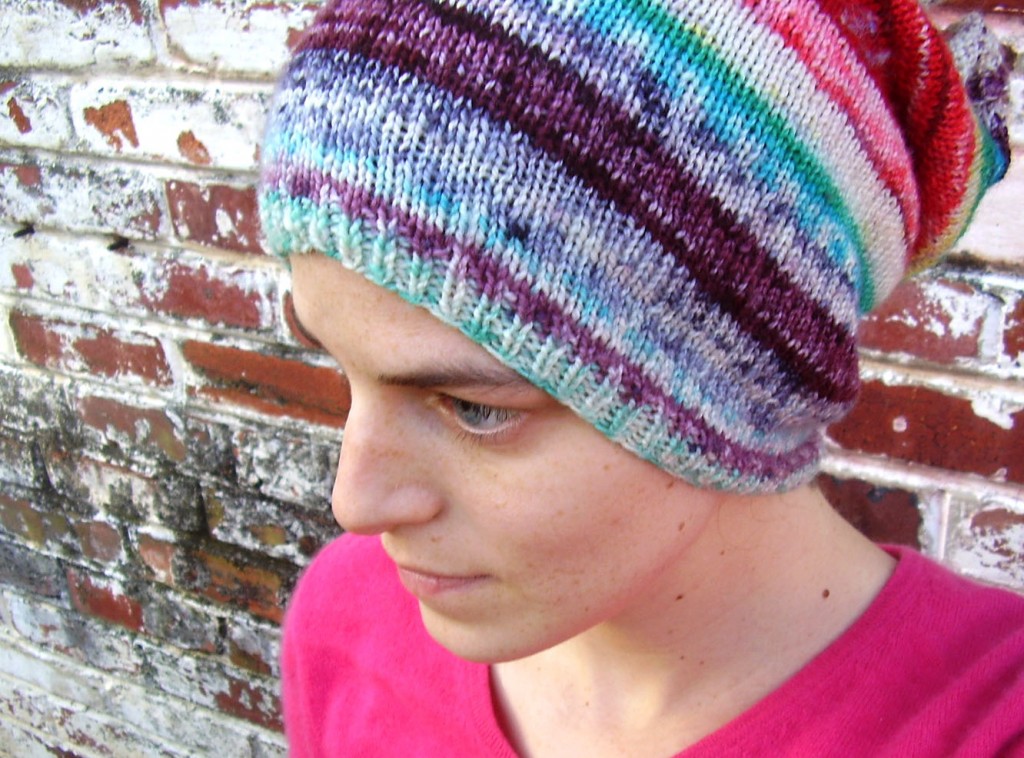
Isn’t it yummy? It’s a very subtle effect, and works up beautifully. I’ve made swatches in both knitting and crochet:


So lovely!

I hope you’ll give it a try and let me know how yours turns out!

Best,
Stacey

How to Dye Yarn with Kool-Aid: Getting Started

I’m so excited to kick off Kool-Aid Dye Week! Each day, I’ll be posting about a new technique for using Kool-Aid to dye yarn… all you’ll need is some natural-colored yarn, a few shades of Kool-Aid and some hot water. Easy!

Today, I’ll talk about the basics you need to know to get started.

Select your Yarn

Kool-Aid is primarily a drink (I’m just as surprised as you are!), so it’s not the most powerful dye on the market. I like Kool-Aid because it’s cheap, non-toxic and comes in lots of bright colors.

That said, it has some limitations. Your best bet is to stick with an animal fiber (like wool or alpaca), which will happily slurp up any dye you give it. Plant fibers aren’t as easy to dye, so I wouldn’t recommend using them.

Need a refresher on fiber types? I highly recommend The Knitter’s Book of Yarn, which has a great introduction to fiber types, including their happiness with taking dyes.

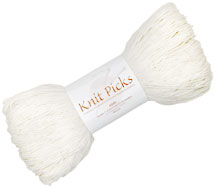
I recommend using an undyed (or natural) yarn to start out with. Knit Picks has a whole line of undyed yarn bases to choose from, and you’ll occasionally find other brands with a couple of blank bases at your LYS. An undyed yarn is preferable to a plain white yarn, which has probably been bleached, and may not soak up color as well.

However, my overwhelming recommendation is to try a test swatch first! I’ve had success with white yarns, as well as overdying (i.e. dyeing a yarn that’s already colored with even more dye) yarns with Kool-Aid, so feel free to experiment!

Selecting Colors

There are a lot of Kool-Aid colors available, and non-name-brands will also work (I’ve heard rumor that there’s a tamarind flavor of drink available in Hispanic markets that is coveted by dyers!).

So, head on over to your supermarket and start choosing! Take note: the color that the drink will be isn’t necessarily the color of the packet, but you can look at the color of the drink that Kool-Aid Man is holding as a clue. (I learned this lesson the hard way: I bought a stock of Tropical Punch flavored Kool-Aid thinking it would be blue… but it’s actually red. So, check out the color of Kool-Aid man’s drink!)

There’s an awesome review of Kool-Aid colors in this article on Knitty, so be sure to have a peek! If you’re unsure, a Kool-Aid Variety Pack may be the way to go!

Dye a test-sample

Every fiber reacts to the dye slightly differently, so the best thing to do is a little swatch to see what color your yarn will turn out to be. If you’re the experimental type, feel free to skip this step… as long as you don’t mind being surprised!

Step 1: Mix your Kool-Aid
There are two basic ways to dye with Kool-Aid: 1) Mix the powder with boiling water and dip your yarn in, or 2) mix the powder with the water to dissolve, then dip yarn in and heat (either by microwave or stovetop) to set the color. Most things I read online suggest the second, but in my experience, the heat present when you add boiling water is enough to set the color.

Whichever way you pick, I suggest doing your test swatches the same way you plan to do your final dyeing… just so there will be no surprises. In my photos, I’m using the boiling water technique:

Step 2: Add the yarn!
You can see here, I’ve just stuck in a tiny strip of yarn:

I felt like my tiny piece was enough to give me an idea of the color… but feel free to add in more yarn if you’d like.

Step 3: Check out your color!
Now take out your little piece of yarn and see how it looks!

You may want to make a little notebook to keep track of your yarn swatches and which color Kool-Aid you used.

You don’t have to stick with one color! Feel free to mix colors together and do swatches for these experimental colors, too.

Put your yarn to the test

Before you begin a big project, you might want to see how your yarn and color holds up. Are you using a machine-washable yarn, and are hoping the color holds up in the washing machine? Go ahead and wash your test yarn! It’s the only way to see how the color will perform, and will prevent any future disappointments.

In my experience, the color holds pretty well… although I’m the sort who hand-washes my woolens. I’ve had one kool-aid dyed cowl for over 2 years- and the color is still going strong!

Are you excited about the possibilities?

I am! I’m in love with Kool-Aid dyeing!

Tomorrow, we’re going to start dyeing skeins of yarn! I’m going to show you how to achieve the look of a kettle-dyed yarn (i.e. fancy-pants, Artisan-dyed yarn) with your Kool-Aid… you won’t want to miss it!

Best,
Stacey

Knook (knitting with a crochet hook): is it worth learning?

Have you heard of the Knook (pronounced ‘nook’)? It’s a very clever hook/technique that allows you to form a fabric that looks like knitting by using a special crochet hook.

While it’s a very interesting idea, it requires learning new stitches (not crochet stitches or knit stitches), so isn’t exactly a short cut for learning to knit. I’ll show you know knooking is done, then chat about the pros and cons, so you can decide whether you’d want to learn to knook, or would rather just learn to knit.

How to knook

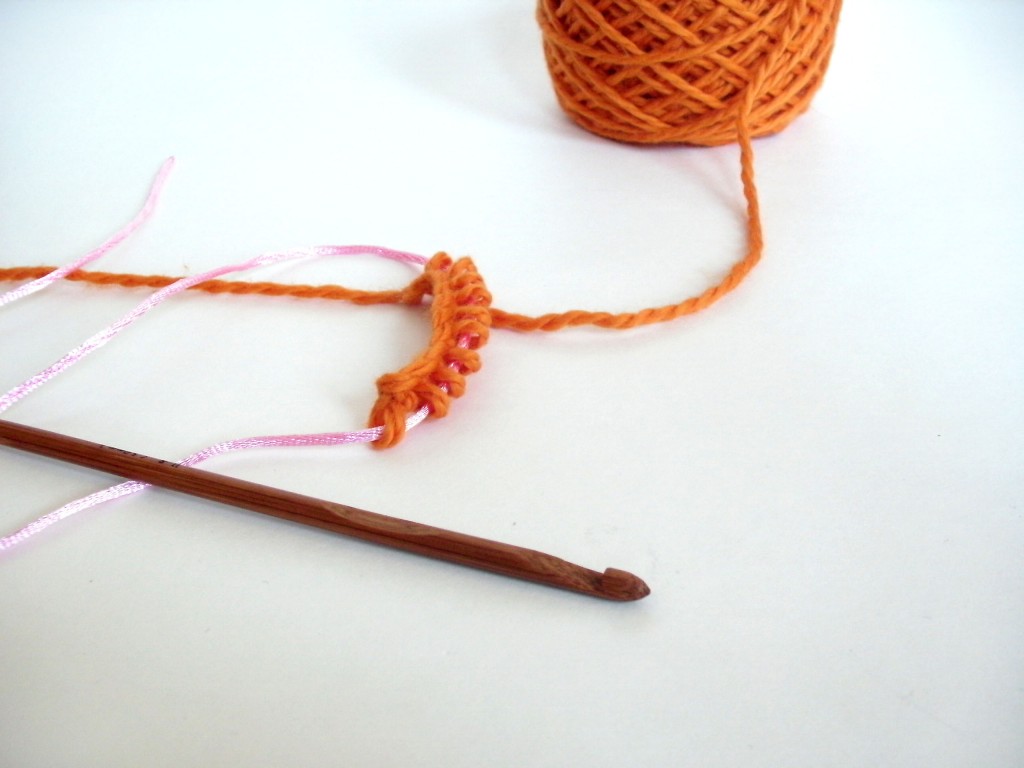
The knook is a crochet hook with an eye at the non-hook end (exactly like a locker hook, if you’re familiar with one) accompanied by a nylon cord. I haven’t seen knooks for sale alone in the store, so you’re probably best off grabbing The Knook Beginner Set, which comes with a variety of hooks, cords and a beginners book. Videos about how to knook are available on the Leisure Arts Website, and they’re pretty clear and easy to follow.

You begin knooking by threading the cord into the eye in the hook. The first row is done by crocheting a single chain, nothing tricky!

To Knook the first row, you insert your hook into the chain stitches and pick up your working yarn… similar to how you would work in Tunesian Crochet. Then, you slip all of your loops onto the cord:

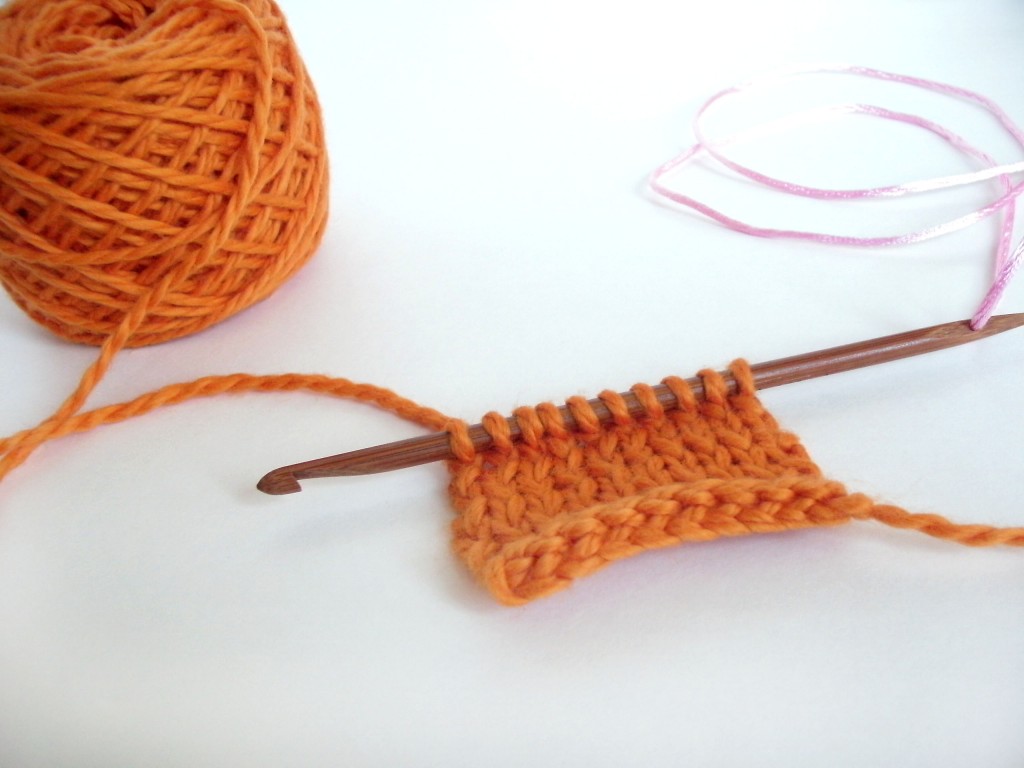
To continue, you use the hook to pick up a new row of stitches, inserting the hook into the loops that are now held on the cord. Whether you make knit or purl stitches depends on which way you wrap the yarn around the hook.

The fabric looks pretty impressively like a knit fabric!

The Advantages of Knooking

The advertisement is true: you can accomplish a fabric that looks like a knit fabric by using only the knook (crochet hook + cord). For crocheters, there are some big advantages:

  • If you’re already familiar with using a crochet hook, the movements will feel very natural, most likely making the technique easier to learn.
  • The first row is done by crocheting a chain, so there’s no need to learn a cast on.
  • Stitches remain on the cord while you’re working, so there’s less danger of dropped stitches (but see my exception to this in the next section).

The Downsides to Knooking

There’s no doubt that it’s a clever tool, but there are some downsides to learning knooking, especially if your goal is to make knitted items that you’ll see in patterns:

  • You need to learn how to wrap the yarn to knit and purl- these aren’t the same stitches that you already know from crochet.
  • A fair amount of translation is required if you wanted to make an item from a knitted pattern. There are knooking books available, but you’d be limited to that small selection of patterns.
  • The stitches are kept on a nylon cord with no method of securing the stitches. If you were to toss your knooking in a bag, you’ve have oodles of dropped stitches if the cord came out.

Is it worth it?

I’m going to start with an interesting statistic that I’ve gathered after years of teaching knitting and crochet. Knitters, when first learning crochet, typically do no better than the rest of the novice crocheters. (sorry, knitters!) However, crocheters, when learning to knit, typically learn much faster than newbie knitters!

Crocheters already know how to tension the yarn, hold things in their hands, and all they really need to learn (in order to knit) is how to pass a stitch from one needle to another. In my experience, with a good teacher and when learning to knit continental (i.e. holding the yarn in the left hand, which is how a crocheter holds it when crocheting), crocheters have a fairly easy time learning to knit.

So, if you’re deciding whether to learn to knook, it’s important to think about your goals. Do you want to knit socks? Learn to knit. Do you want to knit sweaters? Learn to knit. Do you just love the look of knitted fabric and want to make small projects? Maybe knooking is for you.

One main factor is that the knook is a product manufactured by one company… so you only have one hook style available to you and a limited selection of pattern books. Both crocheting and knitting have available lots of different hooks/needles to suit your particular style, and patterns made my thousands of designers. In order to invest time in learning to knook, you’ll have to be sure that you’re happy being limited to the options available.

I have spoken with some people who love that the action uses a crochet hook, and much prefer knooking over learning to knit. Wonderful! I’m happy whenever someone finds what works for them!

But if you have a hankering to knit… I’d recommend giving knitting a try!

Best,
Stacey

How to Embroider on Paper – video

How to Embroider on Paper - a video tutorial from Shiny Happy World


I love making embroidered cards on paper!

In this post I showed you a few cards I made for my daughter using my embroidery patterns to make collage images. In the card above I glued paper on for the cloud, but I stitched the raindrops with embroidery thread on the paper card. In this video I show you how to do that stitching.

The trick is in pre-punching the holes. In the video I’m punching those holes with an awl I picked up at a rummage sale ages ago. If you just want to play around with the technique you can use a push pin. It works, but it’s not ergonomically friendly. If you’re going to do a lot of this, invest a couple of bucks in the tool I mention in the video – it’s called a potter’s needle and it’s a really inexpensive tool you can find here. It has a thin (but strong) needle and a nice handle that your hand and wrist will thank you for.

On this card I used a running stitch, which I love on paper. Backstitch and lazy daisy also work well, but I don’t recommend split stitch or French knots. If you want to go beyond that just play around and see what works for you! I’d love to see what you make!

Here are links to all my posts about embroidery tools and supplies.

For Beginners

Specialty Fabrics

Threads

Stabilizers and Pattern Transfer Tools

Return to the Learn to Embroider main Table of Contents.

Move on to the posts about working with patterns.

Playing with Paper

Using my applique and embroidery patterns to make collage cards

Today my daughter is about halfway through her 3-week stay at camp. THREE WEEKS! She’s never been gone more than a week before! And those previous trips were to stay with family. I miss her – but I know she’s having a great time. I knew she would love it the second we set foot on the grounds – and every one of her letters confirms what a terrific time she’s having. Her last letter began with “I am so homesick” and then went on to detail everything she loves about camp. She loves the food – especially the bread (there’s fresh-baked bread every day). She quoted songs she’s learning. She’s gone swimming almost every day. She loves skits. Her tent mate loves the book of scary stories she brought with her and could I please send the other one in the series?

I don’t think she’s actually homesick. I think she’s trying on the idea of homesickness. And that’s okay. I want her to be happy to be there – and then happy to come home when that time is over.

The letters have, of course, been going both ways. We came home the other night to TWO bats in the house, so that gave me lots of exciting news to tell her.

I’ve been using some of her favorite patterns to make the cards I send to her – and I thought I’d share those with you today.

sly cat

This one is made from the Sly Cat embroidery pattern – shrunk down a bit to fit on a card.

anywhere bear

This one is made from a bear applique pattern. I had to shrink this one down a bit to fit on a card – but that’s easy to do with a copy machine or computer.

pink rainbow girl 1000 px

This one I had to enlarge just a bit to be a good card size. It’s one of the girls from the Rainbow Girls embroidery pattern.

I love making collage pictures like this. I have an enormous collection of paper that I’ve painted with various textures and it’s really easy to use the embroidery or applique patterns as a guide. I tape the pattern up in a window, then hold my painted paper over it and trace the shape I want to cut out. Cut it out with a pair of scissors or an exacto knife and glue it down with a glue stick. Easy peasy. I draw the faces (or other fine lines) with a fine-point Sharpie. If you want to stitch lines on this paper – this video will show you how.

If any of you have experimented with other ways to use the embroidery or applique patterns, I’d love to see them!

Hope you all are having a great week!

Best,
Wendi