Book Review: Woodland Knits

I adore Stephanie Dosen’s (aka Tiny Owl Knits) designs. She designs whimsical and fun knitting patterns… so I was really excited to see her book, Woodland Knits.

Woodland Knits by Tiny Owl Knits

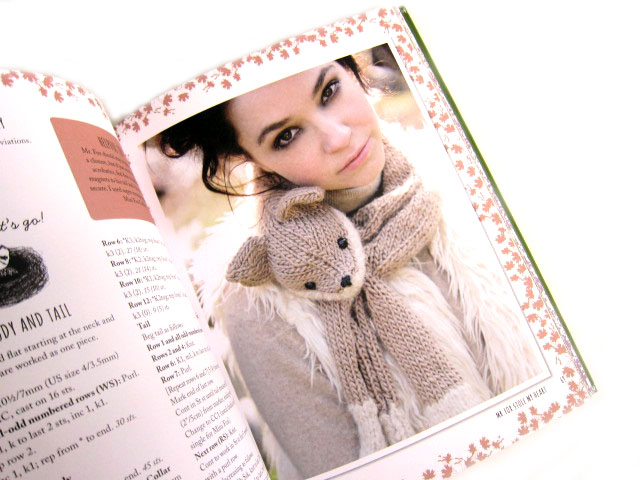
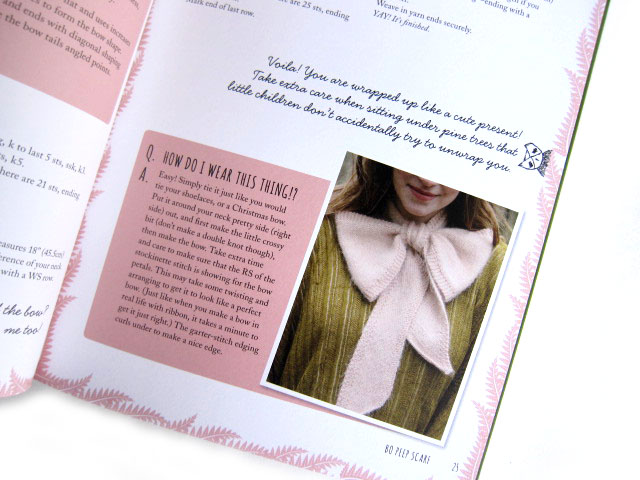
The book contains 21 adorable patterns, 10 of which are new designs for the book. The remaining 11 designs are well-loved favorites, like the deer with antlers hat, bo peep scarf and fawn poncho.

mr. fox stole my heart woodland knits

The book contains cute little notes and helpful tips throughout, but no introductory material. It’s 21 lovely patterns bound together in a book.

Woodland knits

I was surprised to see that all of the patterns in the book are available for individual purchase as pdf downloads. At around $5 a piece, if you’d like to make a few, then $20 for the book is a great deal!

Bo peep scarf tiny owl knits

Besides the discount over purchasing 21 individual patterns, though, you don’t get much additional content to the book. So, I would recommend having a peek at the included designs (which is tricky, since only the new 10 designs are listed as patterns in the book on Ravelry), and deciding whether there are a few you’d like to knit.

The patterns are cute and the book is very pretty… so if you can find a few, then I’d say go for it!


disclaimer

Book Review – Quilting Happiness

Quilting_HappinessWhen I read a book to review it, I read it with a notepad next to me so I can capture my thoughts as I go along. My notes for Quilting Happiness – a terrific new book by Diane Gilleland and Christina Lane ended up being a long list of things I loved.

So let me tell you what I love about Quilting Happiness. . .

I love the title. My business is called Shiny Happy World. How can I not immediately pick up a book called Quilting Happiness?

I love the quote mentioned in the dedication. “You’ll never notice it on a galloping horse.” That – in a nutshell – sums up my quilting spirit. It’s something I often tell my students when they fixate on a tiny “mistake” in a big, beautiful quilt.

I love the list 5 Things About Quilting That Makes Us Happy.

Quilting_Happiness_listI really connected immediately with both authors of the book – but especially with Diane’s last point. “Give me some hand quilting to do, a cup of coffee, and a Doctor Who marathon, and I’m one happy woman.” That’s exactly how I feel about all hand work – quilting, embroidery, finish work, etc. Although I’d also add in Sherlock, Downton Abbey, the Phryne Fisher Mysteries and lots of other favorite TV shows. 🙂

I love the many quizzes sprinkled throughout the book. They can help you articulate what kind of quilter you are – something I sometimes find difficult to do. And I love how the results of the quizzes point you to specific quilts in the book. It’s a fun “Choose Your Own Adventure” way to work your way through the projects.

I love that every single project has very specific suggestions for quilting each quilt.

Quilting_Happiness_Ideas_QuiltingSo many books just say “quilt as desired.” That’s not helpful at all! And not only does the book have specific suggestions – it has multiple suggestions for every project! And they range from simple line stitching to more complicated free motion stitching and even some hand quilting and tying suggestions. That is fantastic – and very unusual!

I love that the instructions for each quilt are super clear – with excellent diagrams.

I love that there are detailed instructions for cutting the fabric. A lot of books will tell how many of each shape and size to cut, but leave it up to you to figure out the most efficient way to do that. This book breaks it down step by step. It tells you how many strips to cut of each size, then exactly what pieces to cut from those strips. Very nice!

Crazy_Strips_Quilting_Happiness I love this Crazy Strips quilt. I think it’s my favorite in the whole book. It’s pieced improvisationally, but within a structure. That helps keep things balanced and can be less overwhelming to someone just getting started with that kind of loose approach.

I love the range and variety of projects. There are bold, dramatic, modern quilts. There are traditional quilts made with vintage-style fabrics. There are quilts for beginners and quilts for more advanced stitchers. There are small projects like pillows and tote bags, and there are large bed quilts. This is an especially great book for beginners who know they want to try quilting, but maybe aren’t sure what kind of quilts they want to make. They can take some of the quizzes to get pointed in one direction, then stretch their skills as they learn.

I love the “Happiness Practice” exercise about Finding Inspiration Guides. It’s a great guide to studying a quilter you admire – breaking down just what it is about their quilts that really works for you so you can apply that to your own work without copying them directly. What a terrific exercise!

I love the general instructions at the end of the book. They’re very clear and cover all the basics – how (and why) to square up your fabric, piecing curves, basting and binding your quilt and more. It’s a great reference.

Haphazard_Chevron_Pillow_Quilting_HappinessI love this Haphazard Chevron Pillow. It’s similar in many ways to the Crazy Strips quilt I mentioned above – in that it’s irregular piecing within a structure. But it’s a smaller project and one I could realistically tackle right now.  So I decided to make one for myself!

I strayed a bit from the instructions (of course) – not because they were unclear – they’re terrific! But I have overflowing scrap bins, I knew my daughter would really like a rainbow pillow, and I wanted to try a quilt-as-you-go technique I’ve been toying with. So here’s my Scrappy Rainbow Chevron Pillow. 🙂

Scrappy_Rainbow_Chevron_Pillow_quilt

My pillow form was a bit larger than the one in the book, but I used the same suggested range of widths for the strips I cut so it would have a similar effect.

I love it! Thanks so much for the inspiration!

Are you ready for some Quilting Happiness of your own? Get the book here.

Happy quilting!

Best,
Wendi
That's me!

Book Review: Beastly Crochet

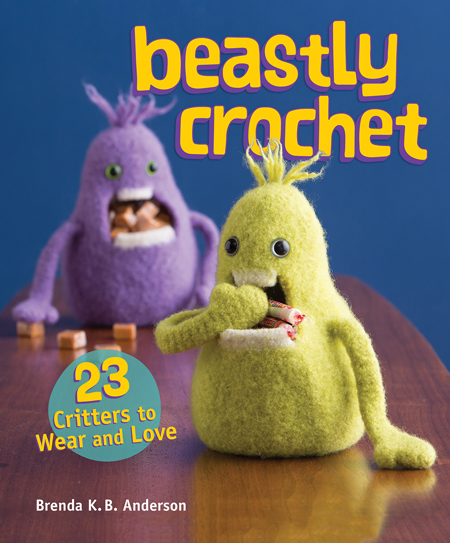
As soon as I saw the cover of Brenda Anderson’s new book, Beastly Crochet, I knew there would be some cuties inside:

Beastly Crochet

But… I had no idea there would be so much other awesome stuff! Let’s peek inside, shall we?

The Beasties

You know me, I can’t resist a cute stuffed animal. (Are monsters really animals?!? Hmm… I digress.)

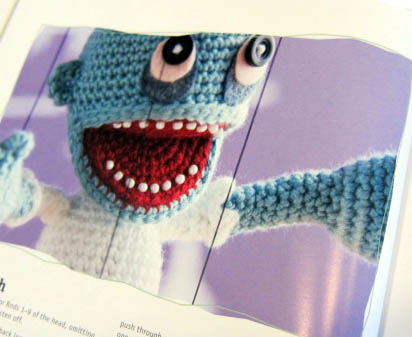
The thing I really love about the creatures in this book is that they feature a variety of crochet techniques. Check out ‘A Zombie named Skip’, a marionette who sports an open mouth with beads as teeth!

Crochet Zombie Pattern

The other critters (including a Frankenstein & his bride and an adorable yeti-type monster among others) feature colorwork, textured stitches, appliques and even felting (the cuties on the cover!). While there are a few patterns suitable for beginners, this book is targeted at crocheters who are looking for innovative patterns and want to add a new skill or technique to their repertoire.

The Wearables

The ‘Beastly’ part of the book is broadly construed to include: zombies, monsters, skulls, robots and myths. I was really surprised by some of the fabulous wearables in the book:

skull zipper cowl

This fun skull cowl is just one of many clothing patterns in the book. There are Sasquatch slippers, a couple great sweaters for kids as well as bibs and bags.

Seriously, how did Brenda fit all of this stuff in one book?

And more!

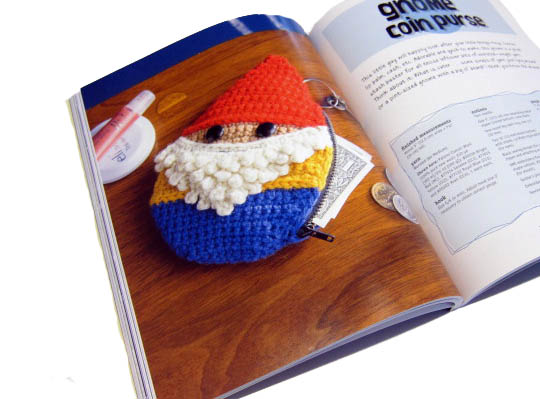
gnome coin purse

Look at that coin purse! Isn’t it ridiculously cute?

And this Tiki pillow:

Tiki Pillow

So clever and fun!

I particularly love the book’s section on ‘Principles of Cuteness’, where Brenda talks about eye shapes and spacing, so you’ll get the maximally cute monster!

The Verdict

With Halloween coming up, the timing of this book couldn’t be better! It contains 23 fabulous projects for anyone who loves monsters/robots/fantasy.

This book is aimed at the advanced beginner/intermediate crocheter. It doesn’t contain a lot of introductory material (so, expect to learn how to single crochet elsewhere!), but it’s packed with patterns that have great assembly/finishing information. A crocheter with a standard cache of skills won’t get lost, and will learn a bundle of new techniques and methods.

It’s a fab book! You can get it here.

disclaimer

Book Review: Flip Dolls & Other Toys That Zip, Stack, Hide, Grab & Go

Flip Dolls cover

As soon as I saw the name of this book I knew I had to have a closer look.

I LOVE softies that do something! And the toys in this book do the most clever things!

There’s a stacking tree that unstacks to make a forest of individual trees.

There’s a frog with an elastic tongue that can grab things.

There are cars with wheels that turn.

There are some trule amazing flip dolls. It’d be more accurate to call them reversible dolls – but that’s nitpicking. They’re incredibly fun and creative no matter what you call them! And she includes terrific instructions for a base doll to use to design your own. Score!

There’s a ukelele with elastic strings. Love! Speaking of ukeleles – here’s a link to my favorite ukelele video. Yes. I have a favorite ukelele video. Ukeleles are cool.

There’s a terrific crocodile with zipper teeth.

There are so many fun projects in here!

FD turtles

I asked my daughter which one she thought I should make for this review.

She flipped through the book – oohing and aahing a lot.

She tagged a ton of projects, including these incredibly cute turtles with removable shells.

So sweet!

FD horse

She also really liked this horse with the button-on wings.

But I’ve been working on a removable wing thing of my own for a few weeks now and didn’t want to start looking at a whole other technique.

Plus, I’m not crazy about making standing stuffed animals like that. I know they’re great to play with – I just don’t enjoy making them and I’m ok with that.

Gulp the Whale from the book Flip Dolls

Jo’s favorite toy in the whole book was Gulp the Whale.

So anxious-looking!

And so weirdly cute!

Now – I recently made a whale from a Zooguu pattern. And I have a whale pattern in my own book (Creature Camp, coming in November). I didn’t really feel like making another whale right now.

But that pocket! When I was a kid my favorite teddy bear had a hole in her neck. I used to hide things in there even though it wasn’t a pocket and they sometimes got lost in the stuffing. In fact – my diary key is still in there somewhere. 🙂

Ever since I started making softies I’ve wanted to make one with a proper pocket for hiding secret treasures. I included one in the proposal for my book but ended up cutting it for space reasons before I actually made it. This is a project I’ve sketched out and made in my head a hundred times, but never actually made in real life.

The time had finally come!

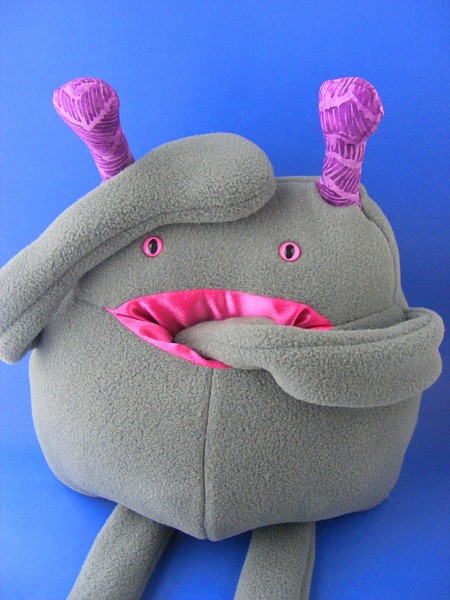
So I made a doll with a pocket mouth using the construction technique in the book, but my own pattern. Laura’s technique was very similar to what I had envisioned, and her instructions were very clear with just enough illustrations. And she had a nice tip for stuffing the softie before tucking the pocket inside which really helped keep things nice and full and smooth.

Want to see a sneak peek at my guy?

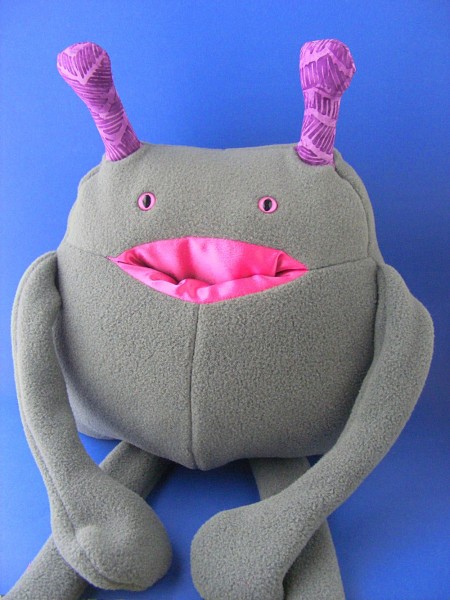
Glutton softie from Shiny Happy World
Hi there! I’ll be a pattern soon!

I’m not happy with the antennae and – now that I’ve played with him a bit and have a better idea of his personality – I have an idea that I like better.

Oh yes, I played with him. 🙂 A lot. I wanted to make his limbs long enough to really be playful. What I didn’t anticipate was how expressive he would be!

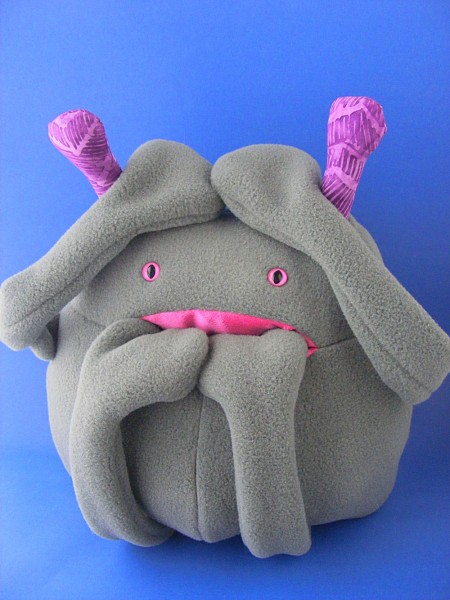
Scared Glutton softie from Shiny Happy World
“Sometimes when I’m scared I chew on my toes.”

This little photo shoot was so much fun!

Hand-eating Glutton from Shiny Happy World
Now what did I have for lunch?

The first thing Jo did was stuff one of his hands down into his belly. 🙂 Updated to add: You can find the pattern for Munch here!

I rarely make actual projects from the many (MANY) craft books I buy. They’re a source of inspiration and a way to learn new techniques – and Flip Dolls & Other Toys is all kinds of inspiring.

Maybe your kid isn’t into cars, but he LOVES windmills. Use the technique for spinning wheels from the book to make a windmill with spinning vanes!

Maybe your kid doesn’t care for robots (is that even possible?????) but loves those I Spy books. Use the very cool technique for the nuts & bolts robot to make pocket search games for the car. Or a little aquarium with fish that swim in and out of view!

That’s the thing about this book. The ideas are so clever and so fresh – the possibilities for spinning off the ideas are endless! For me that’s a great book – one that doesn’t just give me instructions for a handful of projects, but one that fires my imagination and gives me instructions for techniques I can use a lot of different ways.

For those who DO want to make the projects just as they see them in the book – here’s a little tip. The patterns all need to be enlarged. As someone who lives in a remote area a long way from a copy shop this is a real pet peeve. BUT! Lark now has full-sized templates on their website that you can easily download and print. Yay! Just save this link because I couldn’t find this nice feature or the link mentioned anywhere in the book itself.

So. Are you ready for some really clever softie designs unlike any I’ve seen before? Get this book! Flip Dolls & Other Toys That Zip, Stack, Hide, Grab & Go by Laura Wilson of We Wilsons. And get ready to have some fun!

Happy sewing!

Best,
Wendi

Applique Wendi (with fabulous hat)

Meet Abby Glassenberg – Softie Designer Extraordinaire

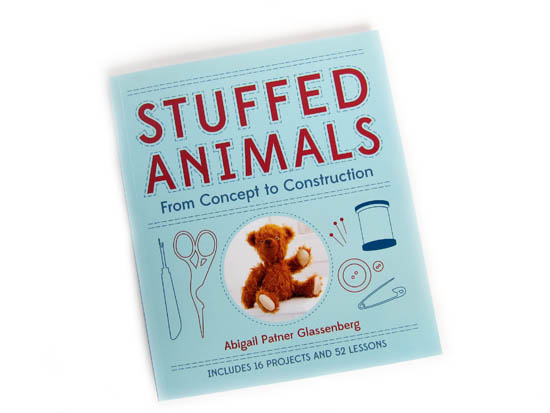
abby-glassenbergToday I’d like to introduce you all to a fellow pattern designer who makes softie patterns I think you’ll love to make. Meet Abby Glassenberg! She’s the author of Stuffed Animals: From Concept to Construction. She blogs at While She Naps, and sells digital patterns for softies in her shop.

I started following Abby several years ago and I’ve loved watching her work evolve and her business grow. I can’t wait for you to meet her, so let’s jump right in!

Hi Abby! Thanks so much for spending some time with us here at Shiny Happy World!

Those of us who run solo businesses tend to wear many hats – and that makes it hard sometimes to tell people what we do. But that’s the first thing I’m going to ask you to do! Tell readers a little bit about you and your work. How do you introduce yourself and what you do to a stranger?

I’m a sewing pattern designer, craft book author, sewing teacher and craft blogger. I design sewing patterns for dolls and stuffed animals. My patterns help you create softies that are adorable and look professionally made. Each pattern includes step-by-step photos and clear instructions written in language you can easily understand. I love sewing toys and I want you to have a great experience, too!

I love that you think of designing patterns as helping other people have a great sewing experience too. That’s terrific! So – in a sea of patterns out there, what makes your work unique?

My stuffed animals are truly three-dimensional. I like gussets and darts! I love the puzzle of drawing flat pattern pieces so that when they’re sewn together you get an oval-shaped sphere, for example, or a curved horn. While you sew you’ll see how the language of softie pattern pieces works and perhaps you’ll be inspired to design toys yourself!

Tell me a little bit more about your latest pattern. What made you decide to make it and what were some decisions you made along the way in the design process?

Emma dollMy latest pattern is Emma the Doll. She’s a big doll at 20”, she’s entirely machine sewn and she’s made from fleece. I’m a mom of three young daughters, ages 9,7, and 2, so I have a good handle on how kids really play. A few weeks ago my kids spent the afternoon on the front lawn with a huge pile of toys having a funeral for a pink stuffed boar!

When I dreamed up this new doll I wanted her to be big and sturdy, to have jointed arms and legs so that she can be posed, and to be machine washable. Emma achieves all of these things, and with style.

I love the Emma doll pattern! She’s so totally kid-friendly! And I was completely captivated by this photo of her (smiling) in the washing machine. As a mom – that really says it all. 🙂

It's ok! I'm just having a bath!

It’s ok! I’m just having a bath!

Emma’s a very playable doll, kid-friendly doll. But you started out making sculptural birds – definitely not toys. (Abby’s first book, The Artful Bird, teaches you how to make them.) What made you switch gears and move into stuffed animals designed to be played with?

I think my years designing and sewing birds were a great way to explore three-dimensional shaping in fabric. I learned how to control bulges and how to pull shapes inward in order to achieve the particular body shapes of each species. After I wrote my first book I felt free to delve into children’s toys and I’ve really enjoyed designing teddy bears and baby lovies, dolls and elephants, hobby horses and turtles, and everything in between!

So tell me about your new book. How did it come about? What was the most challenging part of writing it? What’s your favorite project from the book?

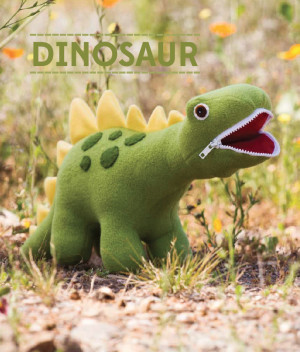
il_570xn-452002987_td5k1-570x600My new book is Stuffed Animals: From Concept to Construction and it was published by Lark Crafts in May. This book is all about designing your own stuffed animals and it’s perfect for beginners as well as those with more sewing and design experience under their belts. I actually thought of writing a book that would be a comprehensive guide to soft toy design like this one long before I wrote my first book, The Artful Bird. It took many years of research and experimentation to create a book of this depth and I’m really proud of it. I enjoyed every aspect of writing Stuffed Animals, even the tedious parts! It truly was a labor of love and a book that I felt I was made to write. My favorite project is the 16th pattern in the book – a dinosaur with a zippered mouth!
Dinosaur with zippered mouth

Roar!

I love this book so much! My “official” review is here.

What are your dreams for the future of your business?

My business is really two-fold: I design sewing patterns for toys, and I also write about running a creative business. I’d like to grow both sides of what I do. In the realm of sewing patterns, I’d like to teach an online class on sewing softies. I was a middle school teacher in my former career and I still really see myself as a teacher. And, of course, I have tons of ideas for new softie patterns. I truly feel that I could design stuffed animals and dolls for the rest of my life and never run out of ideas! In the realm of writing about running a creative business I will continue to seek out and speak with those in power about the craft industry and share my experiences running my own business. I love reporting about what’s going on in my niche and feel so thankful to have found a large audience who shares my interest.

Can you tell us about a typical day? Where do you work and what’s your routine like?

We wake up early in the Glassenberg household! I’m up at 6:10 every morning. I get the kids off to school and then I go running. I’m at my computer by 10:15 and I work until about 2:30. Those hours include a combination of writing blog posts and patterns, doing research, responding to emails, posting on social media, drawing, sewing, photographing my work, editing photos, and doing graphic design for my site and my patterns. Oh wait, there’s packaging orders and shipping, and sourcing supplies, too. Like most people who run a small business I do everything there is to be done, even the weekly bookkeeping. But I seriously do love it all. I also work in the evenings from 8-9:30pm.

What’s your favorite sewing tool?

Hemostats. I may have 12 pairs. Or 13. When I travel I panic that if my luggage gets lost I may be without my hemostats and that would be serious issue for me.

I should have known that’s what you’d say. 🙂 You rave about them so much that I finally tried a pair (you know that, I guess, since I bought them from you) and they really are a pretty awesome little tool. But 12 or 13 pairs? That’s true devotion.

What’s your most popular pattern? Why do you think it’s so popular?
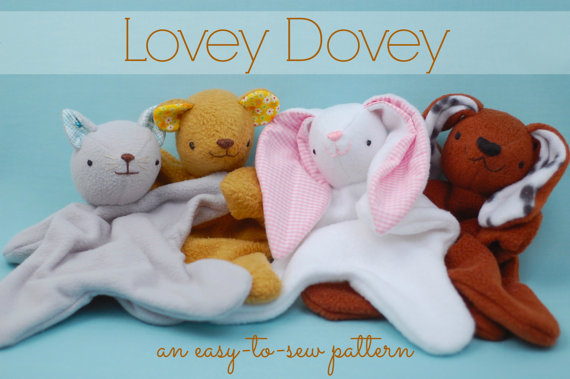
lovey doveyThe Lovey Dovey. It’s a great go-to project to make for a new baby and everyone wants to make something special to give as a baby gift.

This pattern comes with four variations (a bunny, a puppy, a bear, and a kitty) so you can customize what you’re making for each recipient. The pattern is also very approachable. You look at it and say, “Okay, I can handle that!” And it’s cute! You can’t deny the importance of cute when it comes to toys.
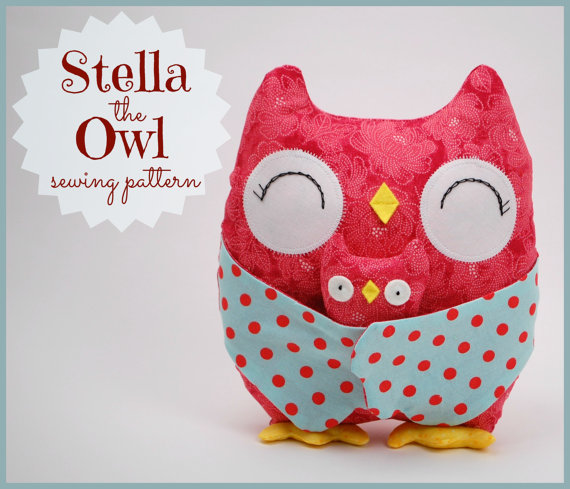
stella owlImagine someone with no sewing experience. She just took her first sewing machine out of the box and figured out how to thread it. She’s eager to make something – but also a little bit scared. Which one of your patterns do you recommend?

I’d recommend Stella the Owl. She’s a very straightforward design, but still really clever! Her wings come together with a bit of Velcro so that she can embrace her little owlet.

She’s so cute! And I think it would be really fun to choose fabric for the contrasting wings.
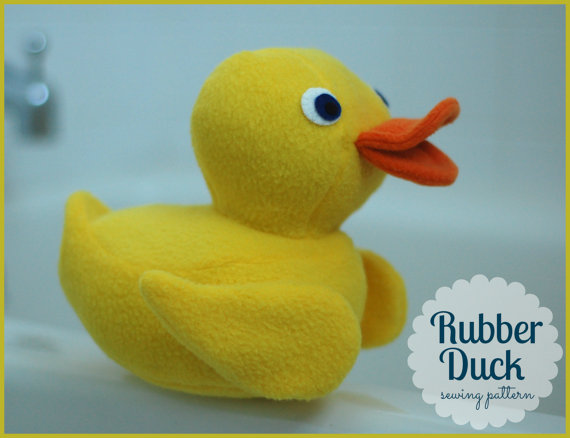
rubber duckieWhat’s your very favorite pattern? Why?

I’m really fond of my plush Rubber Duck. He’s a bath time favorite in plush form!

This pattern includes several really cool, but easy, construction techniques and the finished softie looks really professional.

I think this pattern is a really nice representation of my design style.

Can you suggest another designer that beginning sewists might like to get to know better?

I’m a big fan of Raynor Gellatly, a Scottish plush pattern designer whose business is called Elf Pop. Her dolls and toys have a very sweet, innocent look and I think they are ideal for relatively new sewists looking to create toys that kids will immediately want to hug!

Thanks so much, Abby!

I hope you all enjoyed getting to know Abby!

Happy sewing, everyone!

Best,
Wendi
Applique Wendi (with fabulous hat)

Meet Hadley the Horse/Zebra/Unicorn :-)

Six Months of Softies

Yesterday I reviewed a fabulous new book by Abby Glassenberg. Today I’m sharing her newest softie pattern with you.

Hadley the Horse softie pattern

Meet Hadley the Horse, the next pattern in the Six Months of Softies Club.

Hadley is a real cutie, made of super soft cuddle fleece with a snappy red bandana around his neck.

But look!

Make him up in black and white fabric and you have a zebra!

Hadley the Zebra softie pattern

Oooh! Look again!

Change the fabrics again and add a twisty horn and you have a unicorn!

unicorn softie patternDo you have three children or grandchildren? Make all three versions of this one pattern! Or just do it because it’s fun. 🙂

I think I’m going to make myself a blue horse in honor of Eric Carle – one of my very favorite artists.

Six Months of Softies

Want to make your own? Join the club! Everything you need is right here. Sign up now and you’ll get instant access to all four patterns released so far.

Sorry – the club is closed now – but you can get this pattern here on Abby’s site!

Happy sewing!

Best,
Wendi
That's me!

Stuffed Animals: From Concept to Construction

Stuffed Animals From Concept to ConstructionI’ve been looking forward to this book for a long time. Abby told me about it way way back in the early days when she was just starting to write it (it takes a long time for a book to come out!) and I’ve been following along with interest as she designed all the animals, took all the photos, and edited all the drafts.

And now it’s here.

And it’s fantastic!

In many ways it reminds me of Anatomy of a Doll – my very, VERY favorite doll-making reference book.

Like Anatomy of a Doll, the book is filled with detailed information showing the reader lots of different techniques (a variety of ways to attach a head, a ton of joint options, etc.). For each technique introduced, Anatomy of a Doll has loads of photos of finished dolls – showing you the many different ways that technique can be applied.

Stuffed Animals: From Concept to Construction goes one better and has a project! A project with detailed instructions and clear step-by-step photos showing you exactly how to do it so you can practice that new technique right away.

Brilliant!

As I said – I knew about this book long before I had a copy in my hands. As soon as I opened it up I knew I was in for a treat. People – the Table of Contents impressed me! I’m not kidding. Each chapter is the name of the animal you’ll be making, and below that is a list of all the lessons in that chapter.

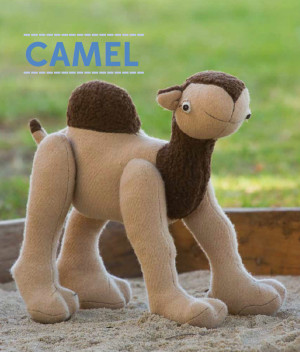
Camel softie from Stuffed Animals bookIn the Camel chapter (yes – there’s a very cute stuffed camel) you’ll learn. . .

  • How to Design a Jointed Animal
  • Thread Joints and Exposed Button Joints
  • Invisible Button Joints
  • Cleft Hooves
  • Eyelashes

Eyelashes! I love it!

I read the book from cover to cover and it’s simply terrific. Fun projects. Clear instructions. Good photography. Well organized. It’s all there!

Oooh – and here’s another nice feature. The pattern pieces are all (except one) full-sized. No enlarging needed! AND you can go to the website of Lark Books and download them so you have digital files – which would make it super easy to print them out on printable freezer paper. No tracing! (You all know how much I loathe tracing.)

Abby has written a book that will become a well-worn reference for both makers and designers. I love that she assumes from the beginning that readers will want to design their own softies at some point. 🙂

We all learn best by doing and Abby gives us 16 projects to make, with 52 lessons to learn. Those lessons are so well-explained that you learn why you do things a certain way to achieve a certain effect. You’ll become better at making softies from anyone’s patterns, and you’ll be on your way to designing your own creations.

I was going to make one of the projects from the book – but every time I opened it to decide what I wanted to make I kept being drawn to the interesting joint she teaches in the Kangaroo chapter. (Here’s a little video showing more about the kangaroo.)

Kangaroo Featurette from Abby Glassenberg on Vimeo.

I’ve never used it in any of my designs, and never run across it it any of the patterns I’ve sewn. I was intrigued! I decided instead of making one of the projects from the book, I’d use this technique to design a new softie in my own style.

I thought about making a remora (or suckerfish) attached to a shark, but then I realized very few people would actually want a remora-stuck-to-a-shark stuffed animal – and for the few kids who would want that, they’d want the remora to be removable.

So I decided on a caterpillar instead. 🙂

Caterpillar softie patternA cute, bendy caterpillar with very sturdy joints between all his segments. And easy to sew! (You can get his pattern here.)

It was so much fun trying out this new technique! It’s one that kind of twists your brain around, but Abby explained it so well that my prototype turned out perfectly on the very first try – which hardly ever happens. 🙂

Have I convinced you yet that you need this book? How about when I show you this?

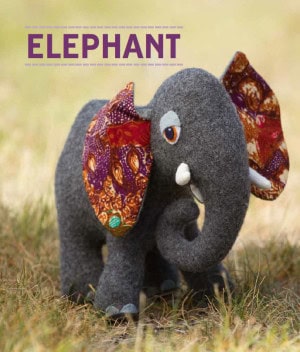
Elephant softie from Stuffed Animals book

My favorite project in the book. I love those droopy eyes!

Or this?

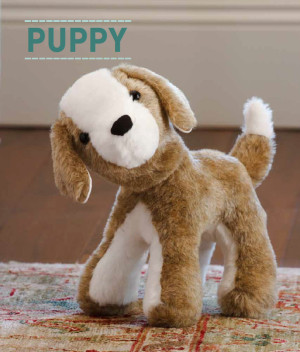
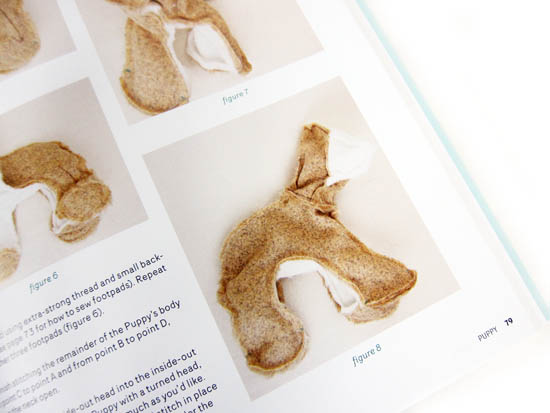
Puppy softie from Stuffed Animals book

Look at those big puppy feet!

Or this?

Dinosaur softie from Stuffed Animals book

You all know I love zipper mouths. . .

Seriously. This is the reference book on sewing stuffed animals. I’ve read (and I own) a lot of them and this is THE BEST.

Buy it.

You’ll use it over and over again for years of softie-making joy.

Happy sewing!

(For Stacey’s review of the same awesome book, click here.)

Best,
Wendi
That's me!

My favorite relaxing knitting projects…

It’s day two of Knitting and Crochet Blogging week!

4th Annual knitting and crochet blog week

Today’s topic is to write about a project inspired by your mascot. If you read yesterday’s post, you’ll remember that I’m a Manatee, because I love to knit projects that are fairly simple and relaxing.

So today, I’m going to share with you some of my favorite patterns for relaxing knitting!

What is relaxing knitting?

Relaxing (or mindless) knitting usually means that you’re knitting slightly below your skill level. For example, if you just learned to do cables, then a cabled sweater isn’t going to be relaxing. However, if you’ve been knitting cables for 20 years, then a lovely cabled sweater might be very relaxing for you!

I’m accomplished at knitting cables and lace and sweaters… but with these skills, I still find myself checking the pattern often, so they aren’t relaxing to me, yet. Projects that are relaxing to me are typically ones with an easy-to-memorize pattern or repeat, simple colorwork or short rows are allowed.

For me, relaxing knitting doesn’t mean boring knitting. Sure, I could do a blanket in garter stitch… but what’s the fun in that? To be fun, a project needs a little bit of interest!

I’m going to show you some of my faves… feel free to check them out for yourself! Who knows… you might find these patterns either too complicated or boring… but I highly recommend that you find your own collection of relaxing patterns for yourself!

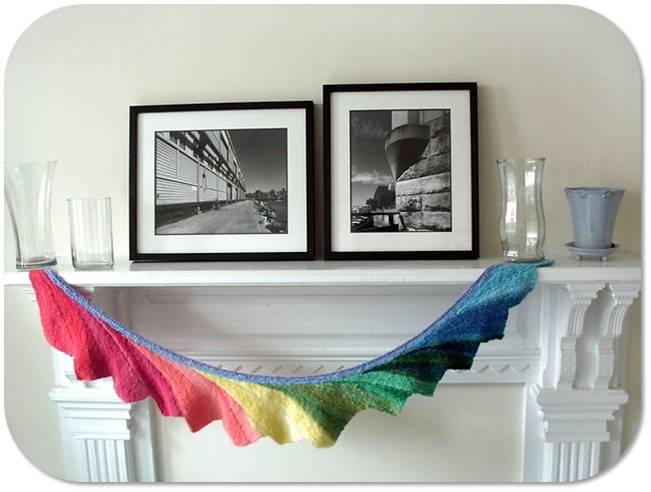
Wingspan

Wingspan by Maylin is a simple-to-memorize and beautiful shawl pattern. I’ve knit two!

Wingspan knitting

Although the pattern is easy once you get it, you have to do a repeat or two to internalize it. I’ve written some tips for knitting Wingspan to help!

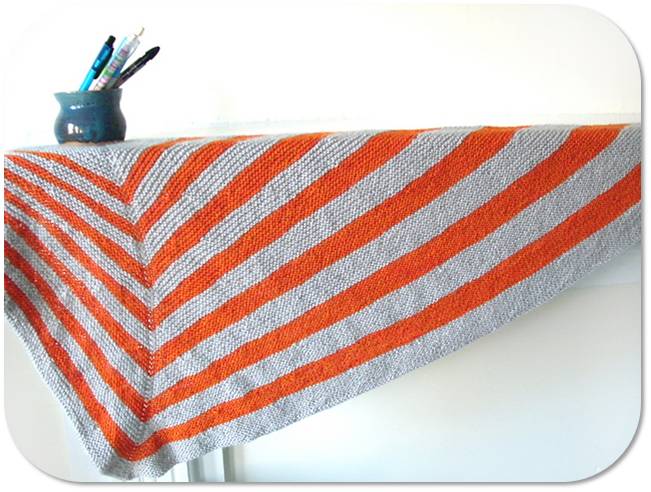
Stripe Study

I’ve knit three shawls from Stripe Study by Veera Valimaki… because it’s such a pleasure to knit!

Stripe Study Shawl by Vera Valimaki

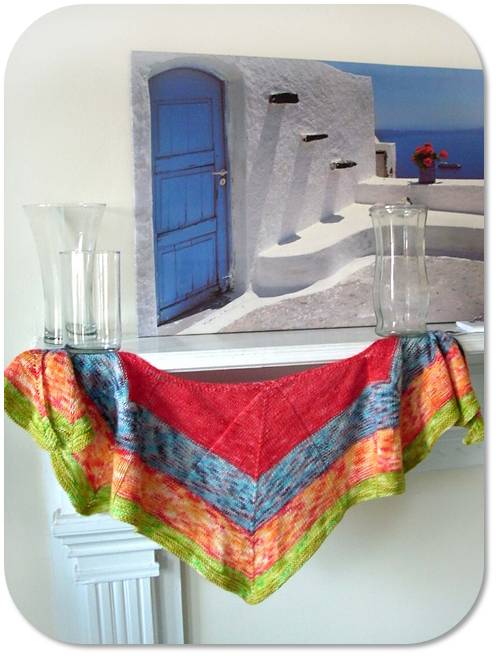
The pattern uses simple colorwork (changing colors every couple of rows, with the yarn carried up the side), an easy-to-remember short row pattern and increasing (placed at stitch markers) to create this delightful shawl!

The main downside is that it’s asymmetrical, and so is tricky to wear. It’s the only thing that’s stopped me from knitting a fourth!

Pogona

Pogona by Stephen West is another fabulous shawl. I’ve knit two!

Pogona by Stephen West

It’s a little bit of effort to start up (you’re placing quite a few stitch markers!), but once you get going, it’s just stockinette and reverse-stockinette with regular increases at the stitch markers. Love it!
Basic Sock

The Basic Sock by Churchmouse Yarns is my default knitting project. Take any sock yarn, and you’re guaranteed to get a great pair of socks!

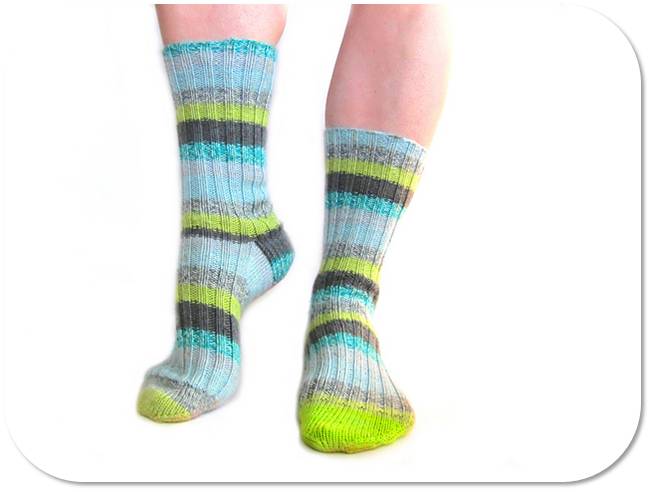
Basic sock pattern knitting

A sock isn’t relaxing the first (or second time), but once you’ve knit a few pairs, you get the ‘formula’ of the sock. I cast on, knit the cuff for a while, check the pattern for the heel-turn instructions, knit the foot and then decrease for the toe. That’s a lot of relaxing knitting in there!

I’ve knit 6 pairs from this pattern!

$5 in Paris

$5 in Paris is a fabulous top-down sweater pattern… I’ve done two with plans for more!

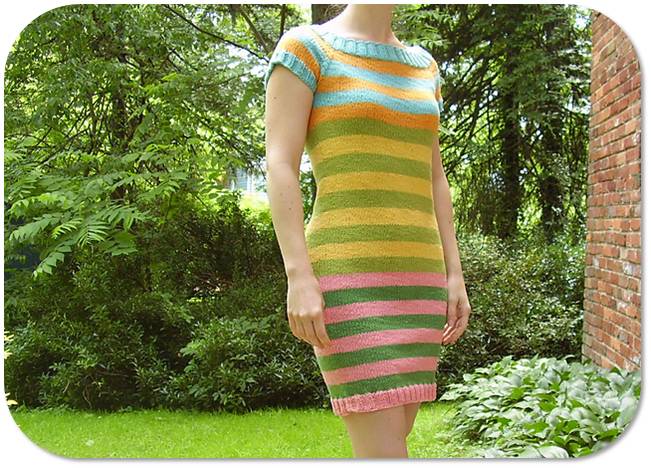
$5 in Paris by Anna Peck

A sweater isn’t usually very relaxing, because there’s lots of shaping and seaming, but this one is different! Starting at the neck, you increase regularly until it’s time to separate the sleeves, then the body is plain and simple knitting! The color changes of the stripes keep it from being mundane.
Because they’re 1/2-length sleeves, there isn’t even any shaping, there! Easy!

Citron

Citron by Hilary Smith Callis is another fabulous, but simple shawl. I’ve made two!

Citron Shawl Knitty

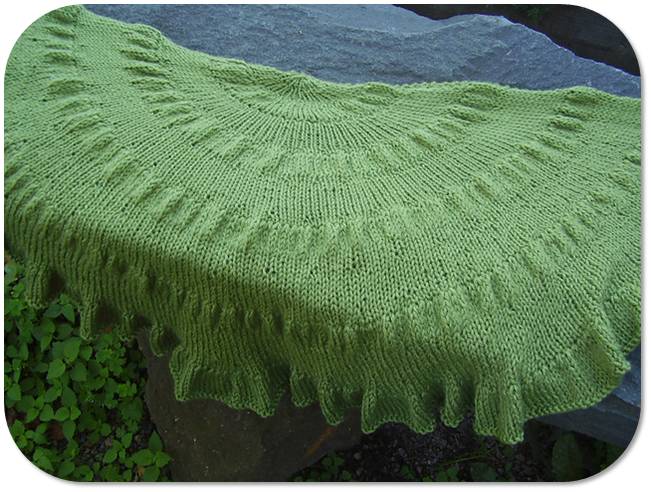
The cute little ruffles are made by increasing and decreasing quickly… and the remainder of the shawl is made by regularly-spaced increases. Cute and easy!

And you?

What are your faves? What’s your ‘go-to’ relaxing knitting project?
Any of my faves that you’re looking to try?
SHARE THIS

Stuffed Animals: the must-have sewing book of the year!

Oh, I know. It’s only April. How can I make such a bold claim?

Because this book is that good.

I’ve been waiting for this one…

Stuffed Animals: From Concept to Construction is a fabulous new book by stuffed animal designer (and buddy of mine), Abby Glassenberg.

Stuffed Animals design book by Abby Glassenberg

As she was writing the book, I could tell that Abby was really excited about it. She’s an incredibly passionate designer, and pours her heart into not only designing adorable stuff, but also teaching others how to make things. So, I knew this book would be good.

But now that the book is out, and I have my hands on a copy… I can tell you that this book is fabulous! Whether you’re new to sewing stuffed animals, or you’re a sewing pro who wants to get deep into designing, there’s oodles of information in this book that you’ll love!

Stuffed Animals: From Concept to Construction

Have a peek at this trailer for the book:

Stuffed Animals Book Trailer from Abby Glassenberg on Vimeo.

Squee! Doesn’t it look like so much fun?

What’s inside

Stuffed Animals contains 16 projects (complete patterns for sewn stuffed animals) and 52 lessons (designed not only to give you tips to complete the projects, but also to help you design your own pieces).

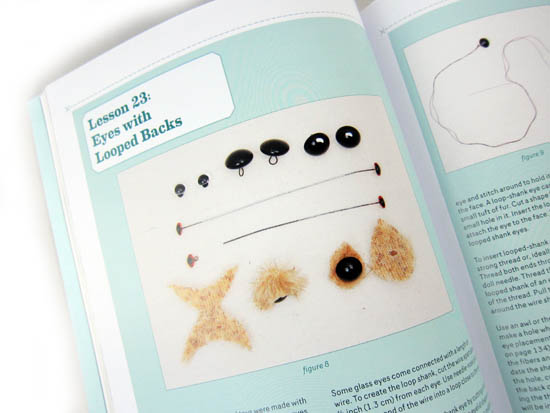
inside stuffed animals by Abby Glassenberg

The book also contains a hefty introduction, so that even if you’re a newbie to sewing, you’ll be set to start on the easier projects in the book! Some of the topics covered in the introduction are:

  • Basic materials needed (including a big secret… using hemostats!)
  • Using freezer paper for making sewing patterns
  • How to draw/mark/edit a pattern
  • Tips for using your fabric, including considering the grainline
  • Notes about seam allowance in patterns
  • How to adjust/correct your sewing machine tension
  • Various techniques for sewing stitches, by machine and hand
  • Step-by-step details on clipping curves, basting, turning & stuffing
  • Info about the proper finishing of your animal

And that’s just some of the topics covered in the intro!

The book continues… and features adorable patterns and oodles of great tips.

sewing camel pattern

And… (this book is almost 200 pages!) the pattern pieces are included in their actual size! That means that you can trace the pattern pieces without running to a copy shop to do fussy enlargements (as you need to do with some books).

pattern pieces in sewing

Each pattern and lesson contains step-by-step photos, so even if you’re not too confident about your sewing skills, you’ll be able to follow along! Love that!

inside1

What am I going to do?

Well… the first thing I’m going to do is re-read the entire book, cover to cover, because it’s just chock-full of so much inspiration!

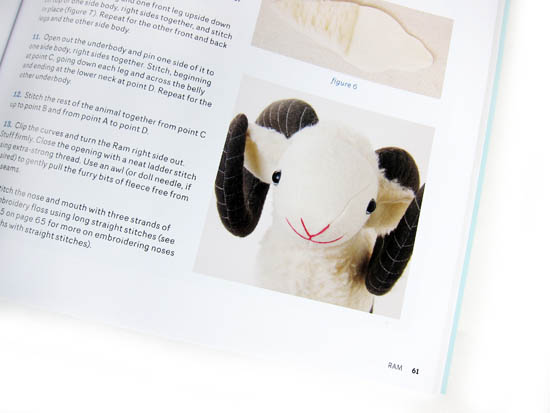
Then… this sheep is pretty darn irresistible:

ram stuffed animal pattern

(and get it? I knit and crochet… so he’d be sorta like a mascot!)

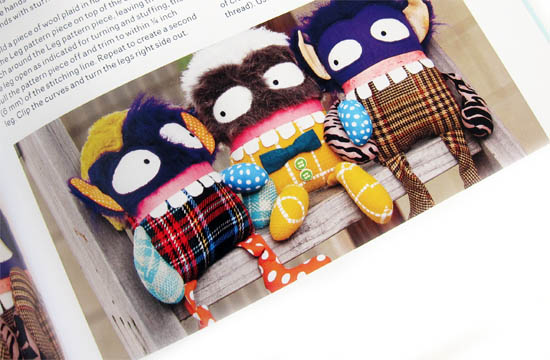
Or… I’m pretty drawn to these monsters that can be made up with scraps:

monster pattern abby glassenberg

(you know I love using leftovers!)

Can you tell I’m inspired?

Ready to get sewing?

If you’ve been looking to sew some adorable stuffed animals, then grab yourself a copy… you’ll love it!

I think this is the sort of book that’ll last your whole sewing life: from starting out as a newbie to designing your own adorable animals. What better value is there than that?

And if you’ve already snagged a copy… let me know what you think!

(To read Wendi’s review of the same awesome book, click here.)

Best,
Stacey

disclaimer

Adorn Anew Blog Tour: How to dye a gradient yarn with kool-aid!

Today I’m going to show you how to dye gradient yarn in two fabulous colors – with Kool-aid! But first, a little background. . .

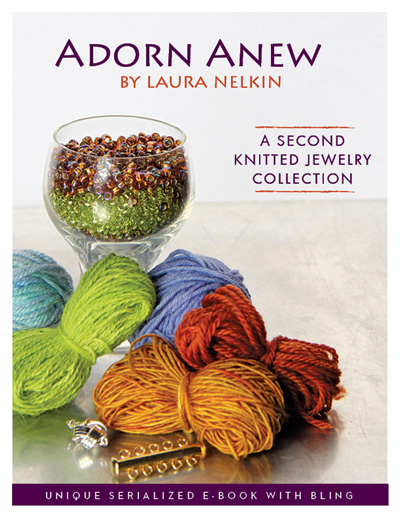
I was excited when Laura Nelkin asked me to be on the blog tour for her serialized ebook, Adorn Anew. It’s a beautiful collection of knitted & beaded jewelry and accessories, with a new pattern released each month in 2012.

Adorn Anew by Laura Nelkin - book cover showing yarn and beads

Laura is well-known as the ‘knitting with beads’ goddess (okay, I made the title up, but that’s an accurate description!), and is the instructor of the crazy popular Knitting with Beads course on Craftsy.

I had never knitted with beads before, so the reason I was so stoked to be on the blog tour is that I knew it would give me a push to give knitting with beads a try. Beads add such a beautiful bling to your project without increasing the difficulty by too much. Besides, I know Laura’s work. The instructions in her patterns and accompanying videos on her site are fabulous. I wouldn’t run into any trouble.

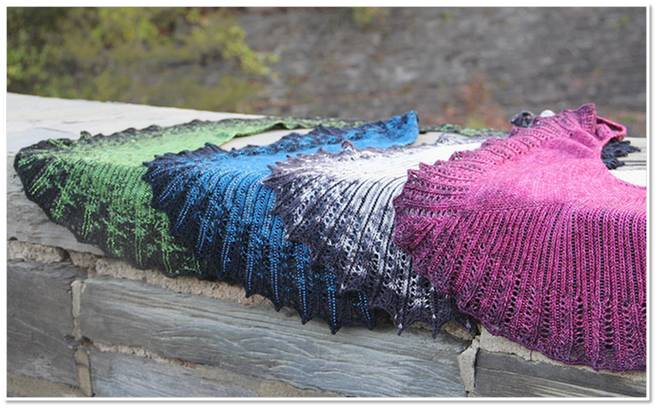
Four hand-knitted Stellani shawls draped over a wall - all made with gradient yarn

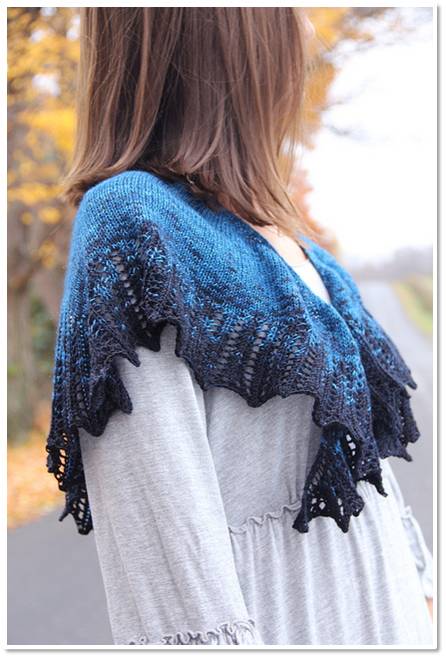
So, anyway… (this is one of those stories where my husband would say, “where’s the point of this story?” And I would say, “I have to tell the story chronologically!”) I signed up to be on Laura’s blog tour back in early summer, when only half of the patterns had been revealed. I was anxiously awaiting November, so I’d discover which pattern I’d be knitting. I nearly fell off my chair when I found out that November’s pattern is Stellanti! It’s an amazingly beautiful shawl… and I spotted Laura wearing it at Rhinebeck, but I had no idea it would be part of Adorn Anew! I had been coveting it… and I am so excited to be knitting it!

What is a gradient yarn?

A gradient yarn is a yarn that slowly shifts from one color into another. Although Stellanti would be beautiful with any fingering weight yarn… the gradient yarn used for the sample gives it a little extra pizzazz.

The samples were knit in Nightfall by Fibro Fibers, which is absolutely stunning. But since each skein is hand-dyed (and there’s currently a huge demand for Stellanti!), this particular yarn can be hard to get your hands on.

And since this shawl requires 490 yards, purchasing a standard 440 yard skein (of Noro or another commercial gradient yarn) won’t work… since you’d run out of yarn and would need a 2nd ball… which would mess with the gradient.

Sound like a pickle! No worries! I’m going to show you how to dye gradient yarn, using Kool-Aid! It’s fun, cheap and easy!

How to dye a gradient yarn

Let’s do it! You’ll need:

  • 490 yards of undyed yarn (details below)
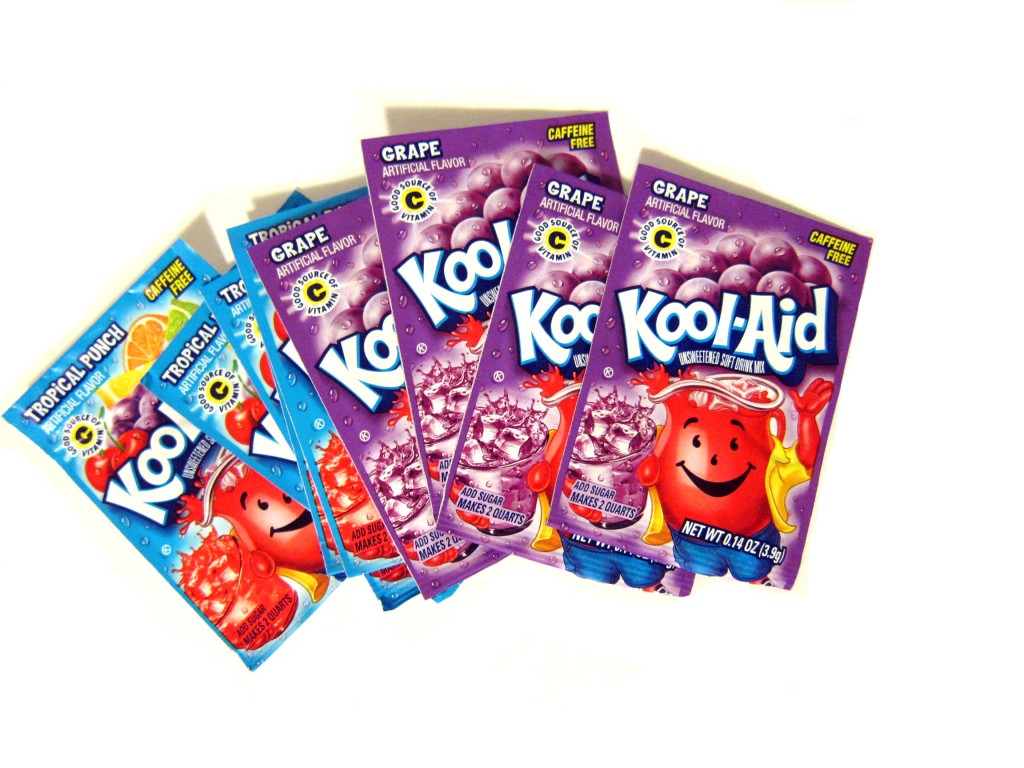
  • 2 colors of Kool-Aid, 5 packets each
  • 4 mason jars or containers

Prepare your yarn

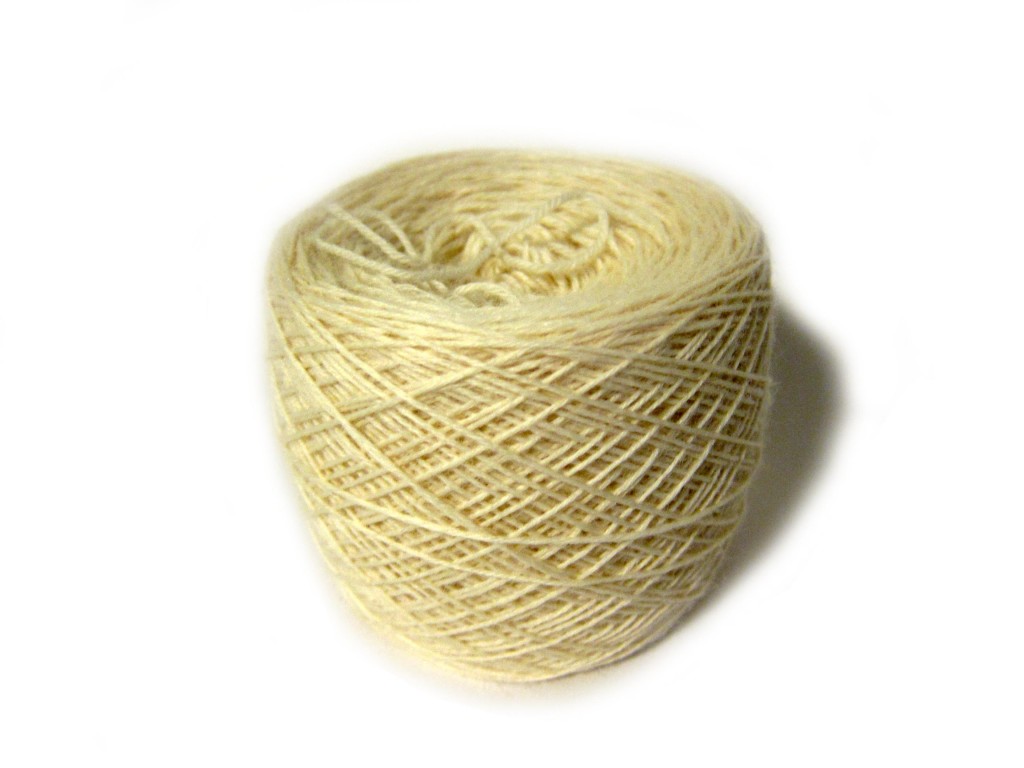
To begin, you’ll need 490 yards of an undyed fingering weight yarn, mostly wool (a little bit of nylon is fine, but avoid plant fibers, since these won’t take dye the same way). I’m using LB 1878 from Lion Brand, but I’ve also had great success with the bare skeins from Knit Picks:

Roll your yarn into a cake… this step is important!

Select your Kool-Aid

I’ve blogged about dyeing with Kool-Aid before (read the different techniques here!), but today we want to dye gradient yarn, which means selecting only 2 colors. For the effect I want, I need to make sure one of my colors is noticeably darker than the other.

I chose Tropical Punch (red) and Grape (purple). I discovered that there’s a special Halloween color called ‘Ghoul-Aid’, which is closer to black and would work amazingly, but I didn’t know about it when I was dyeing!

Prepare your yarn and Kool-Aid

First, prepare your yarn by separating it into 4 approximately-similar-sized chunks. This is easy because you wound your ball… pull out one center chunk, then another…

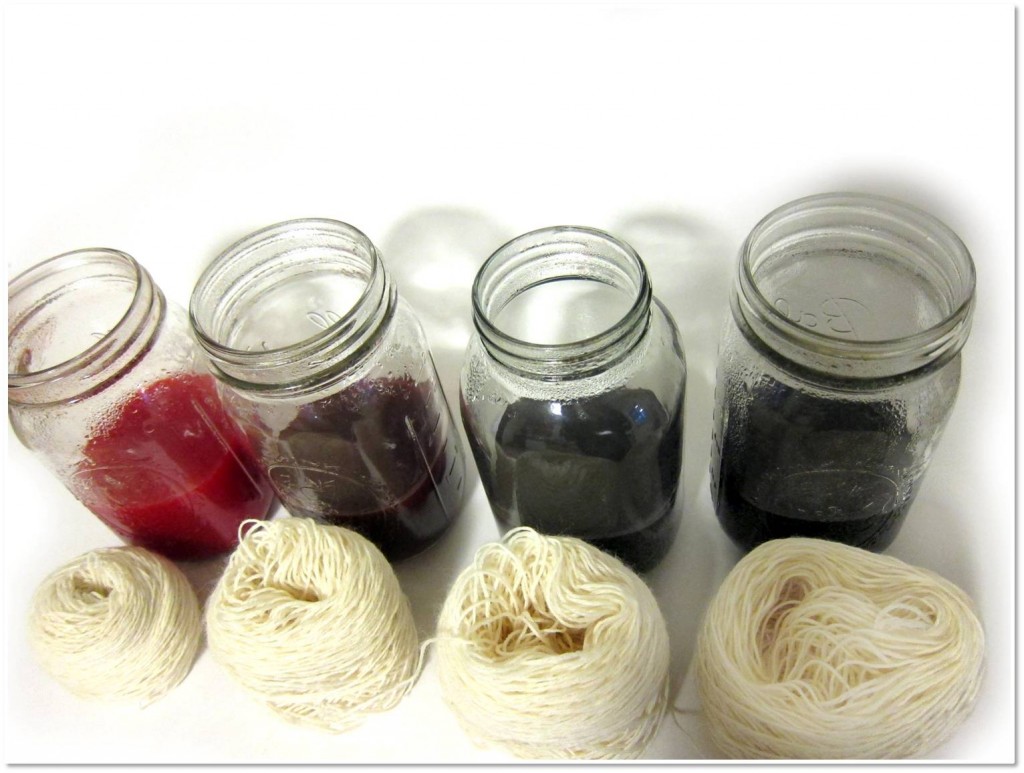
Line your mason jars up in a row. Pour 2 packets of color 1 into the far left one, then 2 packets of color 2 in the far right one. For the center two jars, combine the colors to create your gradient. For example, my 2nd jar contains 1 packet of Tropical Punch and a teaspoon of grape:

Setting up the colors to dye gradient yarn

Next, pour very hot water into your jars:

Four mason jars, each holding a different blend of colors to dye gradient yarn - with a bundle of white yarn sitting in front of each jar

At this point, it would be wise to stick a little sample yarn into each jar… just to make sure you like the color. You can add more Kool-Aid to alter the color at this point.

Dye!

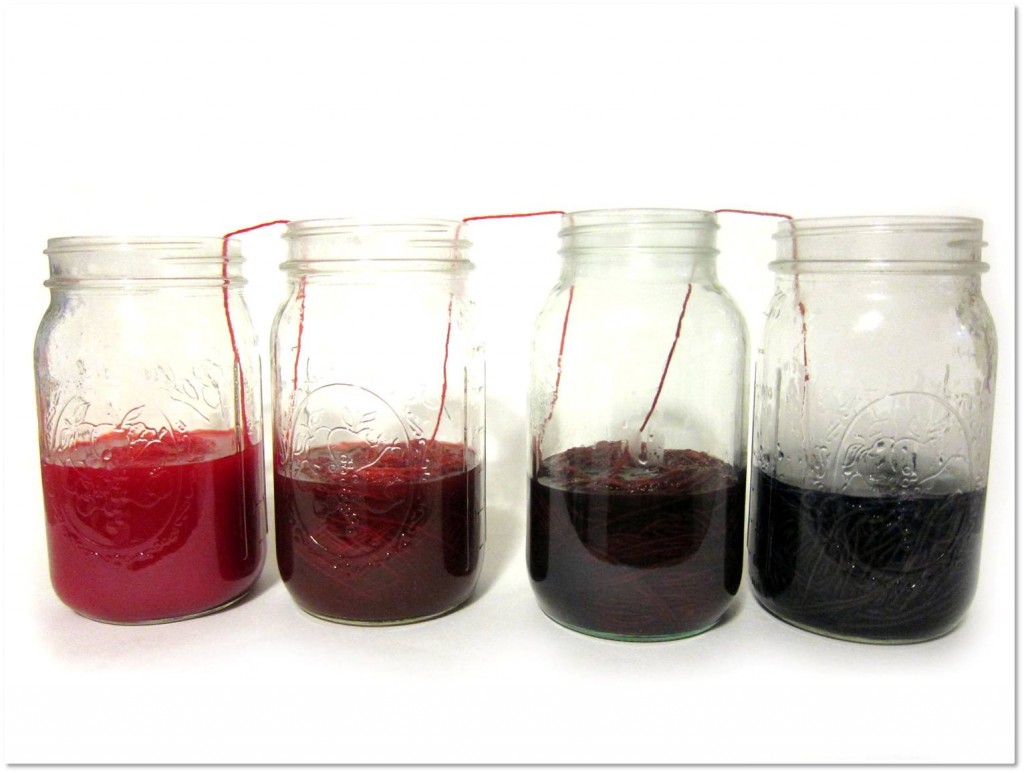
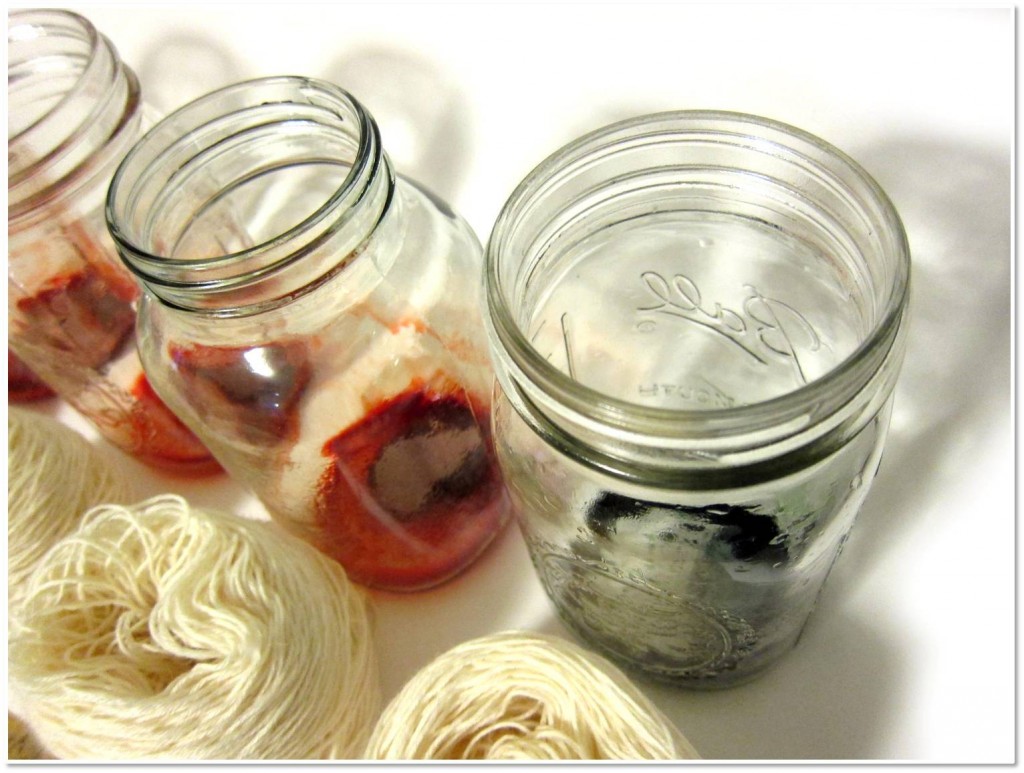
Stick the yarn in the jars! One yarn ball per jar. . .

Four mason jars holding a blend of dye shading from red to deep purple - each with a ball of yarn soaking up the dye

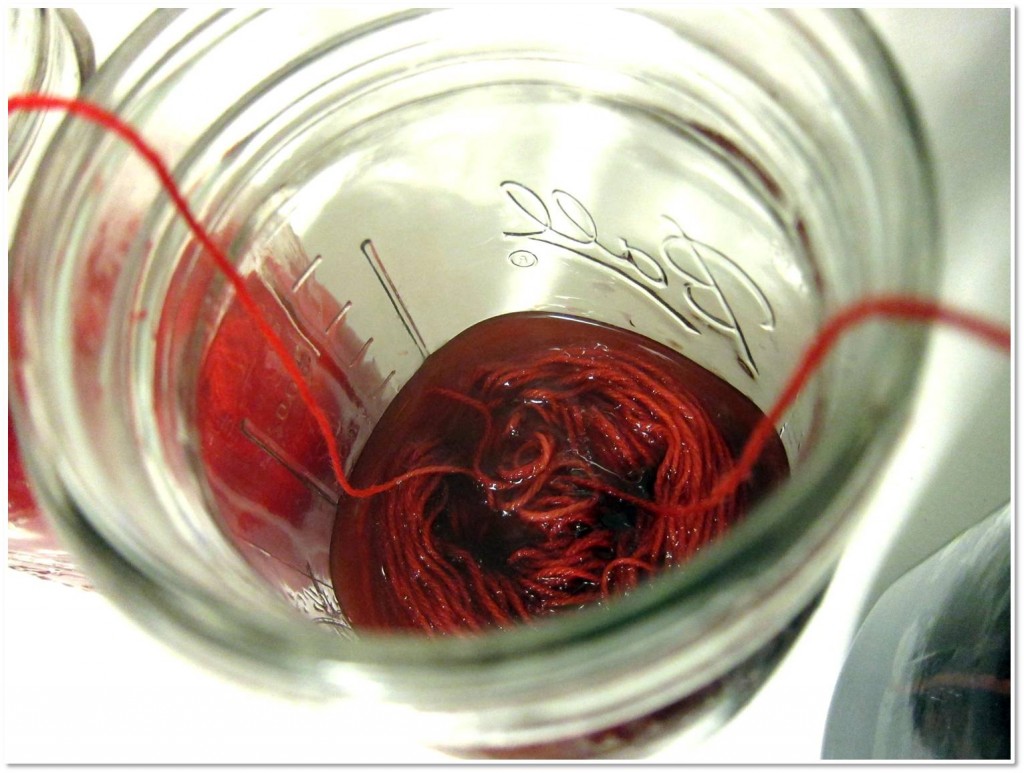
Use a utensil (remember, the water’s hot!) to poke at the yarn and make sure every bit of yarn is getting wet. If there’s a section that doesn’t absorb yarn, you’ll end up with a white blotch!

detail of yarn being dyed red

Do you notice a little section of white yarn between the jars? Be sure to dunk those sections into the dye as well!

Let dry

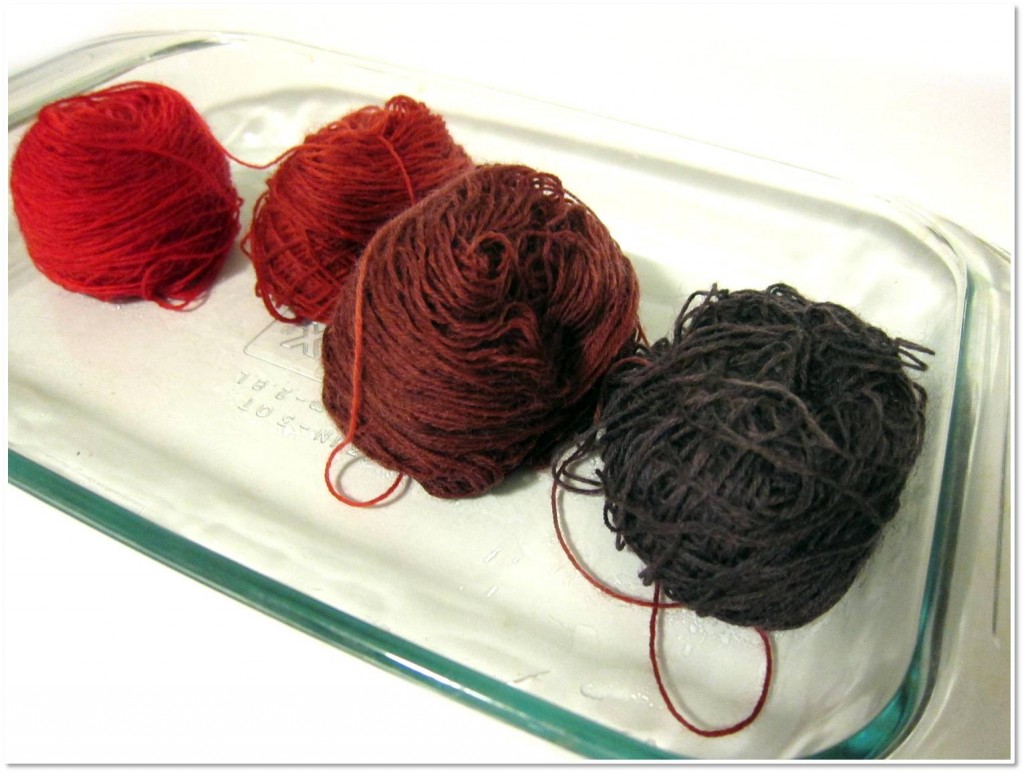
Remove the yarns and squeeze out the excess water:

How to dye gradient yarn - four balls of yarn each dyed a different color, shading from red to deep purple

Let these dry completely before you do anything else… you don’t want any tangles!

You have a gradient yarn!

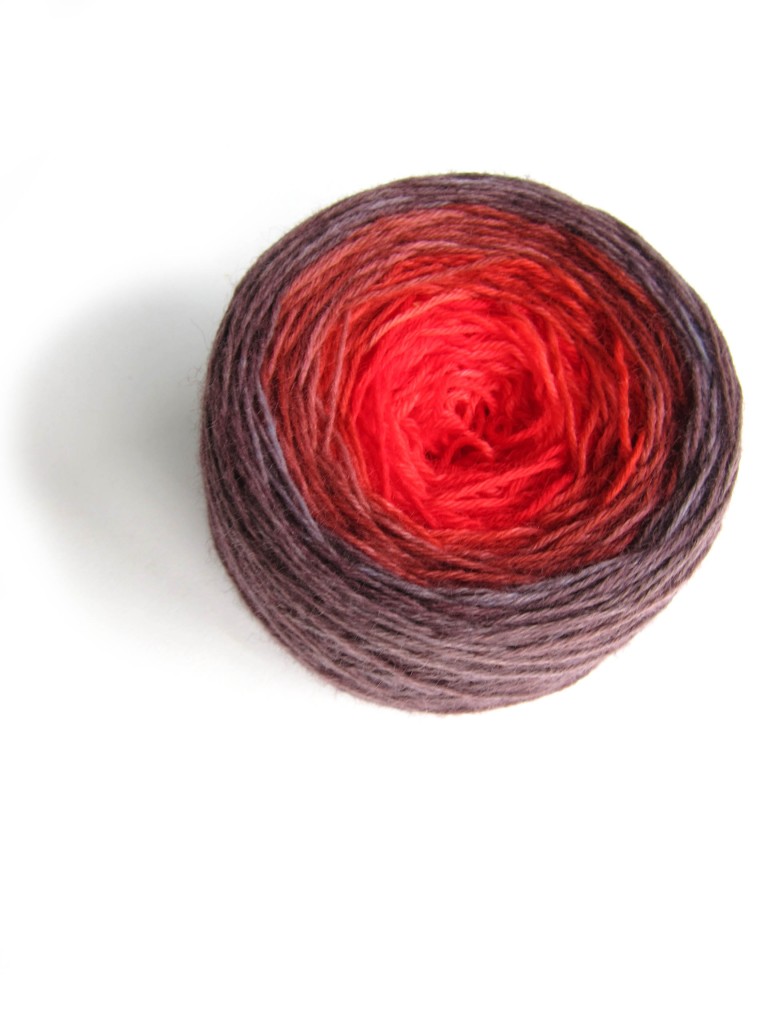
Once dry, wind into a cake:

Finished cake of yarn dyed in a  gradient from red to purple

Ta da! Isn’t it beautiful!

Want to see my progress?

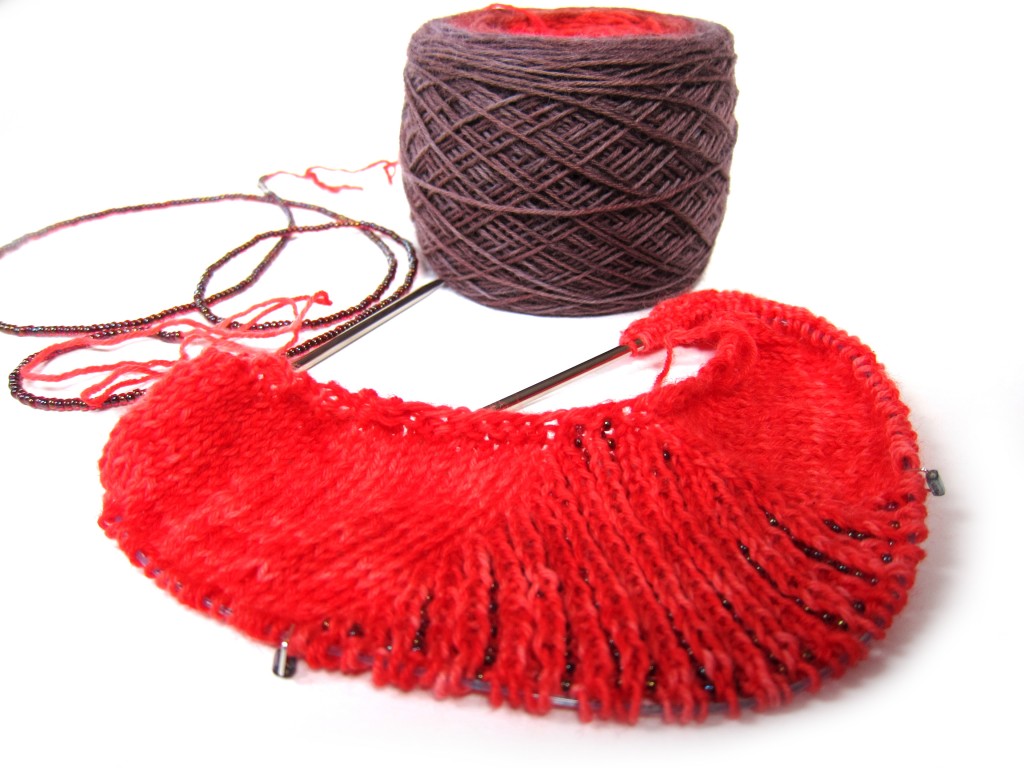
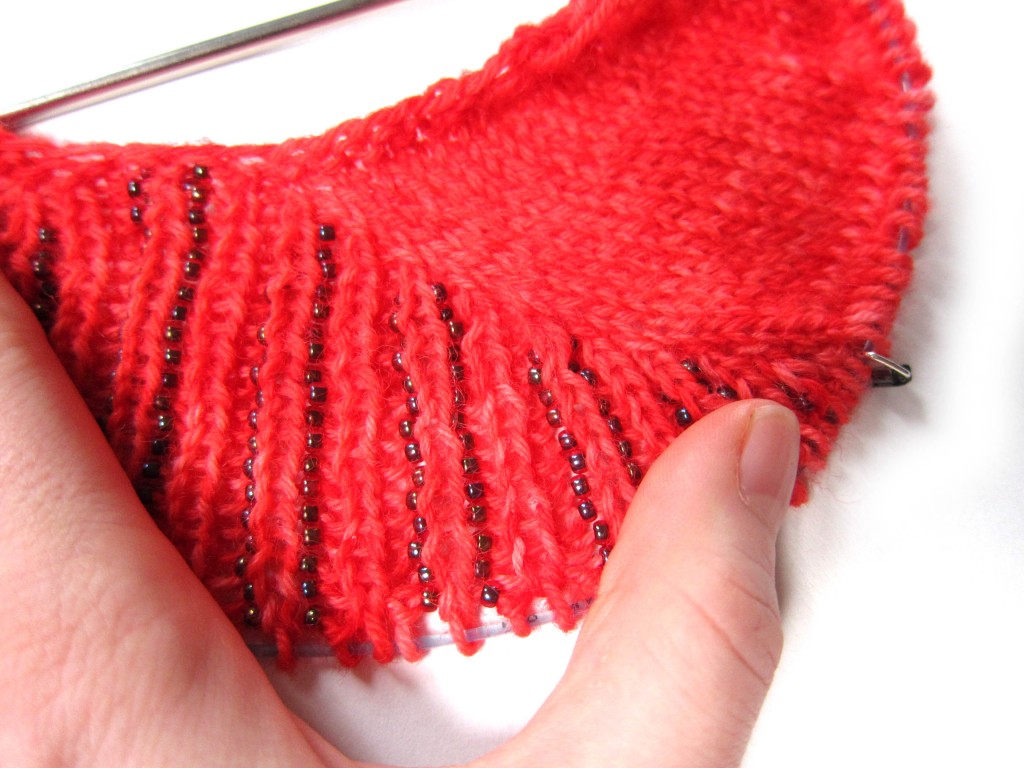
I think my Stellanti is knitting up beautifully!

And look at my beads! Aren’t they fabulous?

Knitting with beads isn’t too complicated… the most difficult part (in my opinion) is that once pre-strung, you have to keep scooting the beads down your yarn as you work. No biggie.

Want to get started?

Now you can dye gradient yarn yourself – no special tools or supplies needed, just two colors of Kool-aid! You can grab the Adorn Anew ebook (for the whole collection of fabulous patterns), or just the Stellanti pattern.

Happy stitching!