How to Outline Applique Pieces – Where to Start Stitching

In What Order Do I Stitch Appliqué?

People get stumped when it’s time to outline applique designs – and the more complicated the block, the more likely I am to get questions about how to approach that outline stitching.

Where to start?

There’s no right or wrong way – as long as you outline each piece, you’re good. But I do like to have all my lines connect (just like they would in a drawing) and I have a system that I use.

This system works for any block, using any pattern – but I’ll go over the specifics using this quilt block as an example. I loaded it up big. If you click on it you should get a larger version of the image so you can really zoom in on the details.

Applique paper doll used as an example to show how to outline applique pieces

Here’s the order I used to outline applique pieces. . .

Start with all the pieces on top – that is, not overlapped by any other pieces:

  1. hair
  2. belt
  3. shoes

Stitch all the way around each piece, then work your way out from those pieces:

  1. dress top
  2. arms
  3. dress bottom
  4. legs
  5. face

As long as you always start with the pieces on top, you’ll always have lines to connect to. The best example of that in this block is the outlining of the face. The sides of the face tuck under the hair, and the sides of the neck tuck under the dress. So make sure the hair and the dress are stitched before you do the face and you’ll always have lines to connect to.

This post shows my favorite sewing machine feet – include the clear applique foot I use to get good visibility. That’s essential if you want to neatly outline applique pieces.

If you like that sample block that I used in this post – it’s part of the Paper Dolls quilt pattern. You get pages and pages of templates for different hair and outfits. It’s so much fun to mix and match them into your own designs!

Here are links to all my posts about outline stitching.

Finished with this topic?

Return to the Let’s Make a Quilt main Table of Contents.

Move on to the lessons about how to trim and assemble your blocks.

Happy stitching!

Controlled Chaos Scrap Quilt – Block #16

Controlled Chaos Scrap Quilt - block #16

Here’s block #16 in the Controlled Chaos Quilt!

What You’ll Need

  • 36  two-inch squares in color A (shown in red)
  • 64 two-inch squares in color B (shown in light blue)

Instructions

Use 1/4″ seam allowances for all sewing.

Press all the seams. I’m pressing mine open for this quilt. I think it will make things simpler in the end.

Arrange your squares according to the diagram below.

Controlled Chaos Scrap Quilt - block #16

For this block I worked (mostly) in rows. I sewed things up in the following order. . .

  • Sew all your individual squares into pairs of matching colors. You should have 18 red pairs and 32 blue pairs.
  • Pair up the red pairs and sew them up into squares – each square is four red blocks.
  • Alternate those red squares with blue pairs to create the three rows in the block that have red squares in them.
  • Sew the remaining 20 blue pairs into 4 strips, each with ten blue squares.
  • Assemble the final block by alternating blue rows with the rows that have the red squares in them.

That’s 16 blocks done – just 4 more to go!

Controlled Chaos Scrap Quilt - block #16

I love how it’s coming together! And I feel like I’m so close to finishing!

Click here for all the Controlled Chaos posts.

Happy piecing!

Best,
Wendi
That's me!

How to Choose Fabric for a Quilt

How to Choose Fabric for a Quilt

I get a lot of questions about how to choose fabric for a quilt.

I’ve got a post here with some tips for beginners on choosing what types of fabric to work with, and I include information with almost all of my quilts about the fabrics I used in my sample, but I realized I’ve never spelled out some general guidelines for choosing fabrics for a project – specifically choosing colors and prints.

Of course, choosing color is a pretty personal thing. 🙂 These are just the guidelines that I use to give my quilts their particular “look” and to make the blocks a cohesive collection.

First let’s look at the different groups I put my fabrics into.

Multicolor Prints

There are multicolor prints (fabrics that don’t “read” as a single color) which I hardly ever use. When I do, it’s often in a larger appliqué piece where the print makes sense, like this truck.

How to Choose Fabric for a Quilt

These fabrics are awesome and they make good quilt backs and doll clothes, but I rarely use them for appliqué, so I’m going to leave them out of this discussion.

If you really want to work with these kinds of prints, these two posts will help you out.

  • Using Fabric Print Wisely – this post shows how you can use prints like stripes to do some of the work for you in an applique project
  • Applique with Prints – this post has more info about choosing colors to pair with these multicolor prints

One-Color Fabrics

What I’m left with is lots and lots of fabulous monochrome fabric – which makes up the bulk of my stash. Within that group I have solids, batiks, and tone on tone prints (also called blenders).

How to Choose Fabric for a Quilt

When I choose fabrics for a quilt I work with these categories. I often start by choosing a category for my background blocks. I choose one of those groups and use those fabrics for ALL of the background blocks in a quilt. That makes the finished top look very cohesive.

Solids

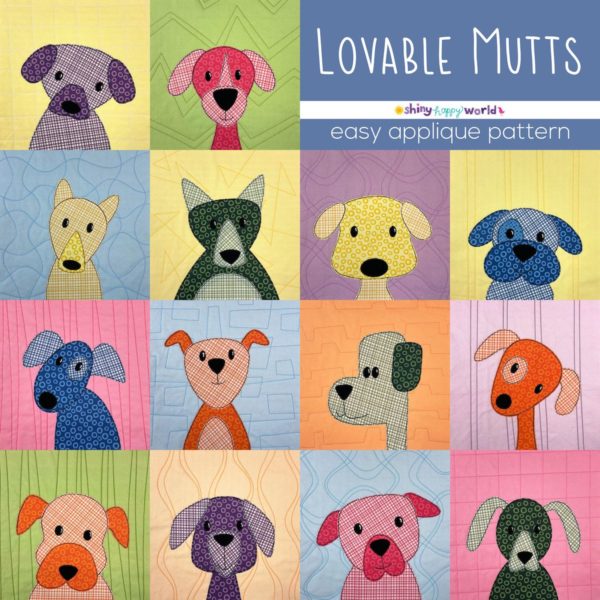
This sample of the Lovable Mutts pattern uses solids for all the backgrounds. The quilting REALLY shows up on these solid blocks, so this is my favorite choice.

I’ve got fabric especially designed for this kind of background blocks in my Spoonflower shop. They’re 12-inch squares of solid fabric with easy-to-follow quilting lines printed right on the fabric – grouped in handy color palettes. You can find them all here.

Lovable Mutts applique quilt pattern

Batiks

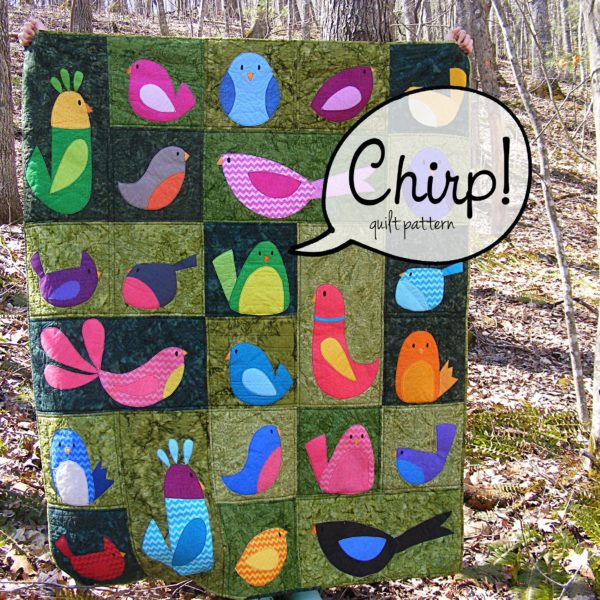
This sample of the Chirp quilt uses batiks for all the backgrounds. The quilting will tend to disappear in the dapply batik texture, so choose this if you’re not very confident in your quilting skills, or don’t want to put a ton of effort into the quilting.

Chirp - a bird quilt pattern from Shiny Happy World

Blenders

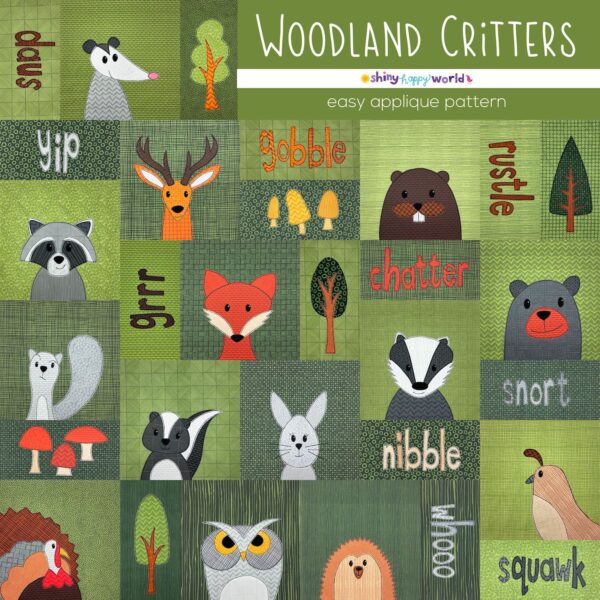
This sample of the Woodland Critters quilt pattern uses tone on tone prints for all the backgrounds.

The quilting won’t show as much as it does on solid fabric, but it will show up more than it does on a batik, so these tone on tone prints are a good middle of the road choice.

I design LOTS of blenders especially for my applique patterns, and they work for both the background blocks and for the applique – which means they’re very versatile fabrics to have in your stash.

In my Spoonflower shop you can shop by color collection – like this collection of Gemstone blenders. This is a great option if you want to have a lot of different colors in your backgrounds, but you want them all to go together.

Another option is to go for a more monochrome look. You can shop by color and get pale to very dark shades of the same color, all in different one on tone prints. Here’s an example of the Amethyst collection.

That Woodland Critters sample uses all Avocado Blenders for the background blocks.

Choosing all your background blocks from one type of fabric helps create a unified look right from the start. But what about the appliqués?

How to Choose Fabric for Applique Quilts

For choosing those I rely on The Rule of Two Out of Three.

I look at three categories, and I only choose fabrics that have contrast in two of the three categories.

Texture

This is the easiest. Look at those categories of monochrome prints and choose two different ones. If you have a batik background block and solid fabric for the bird appliqué, you have contrast in the texture category. If you have a solid background block with a tone on tone print for the appliqué, you have texture contrast. Here’s a good example of that. . .

cat applique from Shiny Happy World

Temperature

This is also mostly easy. Warm colors are fiery – red, orange and yellow. Cool colors are watery – blue, green and purple.

Things can get tricky with neutrals – there are warm greys and cool greys, for example – but mostly this is pretty straightforward. If you have a cool background and a warm applique fabric (like that cat block above), you have temperature contrast.

Value

This one’s easy too. Dark fabrics contrast with light ones.

It can be hard to read the value contrast, especially if your fabrics are different temperatures. If you’re having trouble, try this trick.

These fabrics look high contrast because one is warm and the other is cool.

green with orange sketch

Snap a quick photo of them on your phone, then use a black and white filter on them.

How to Choose Fabric for a Quilt

Whoa! They have almost the exact same value!

Let’s audition some fabrics. . .

Even though that green/orange combination above turned out to have the same value, they still pass The Rule of Two Out of Three, so I would still use them. They have no contrast in value, but they contrast in texture (solid vs. tone on tone) and temperature (warm vs. cold).

How about this combination?

How to Choose Fabric for a Quilt

This one has contrast in texture (solid vs. tone on tone), contrast in temperature (warm vs. cool) and contrast in value (dark magenta vs. light green). It passes on all three categories, so it will be a very successful block. And by that I mean it will have enough contrast that the appliqué won’t get lost on the background fabric.

Here’s another one.

How to Choose Fabric for a Quilt

I love red and orange together, but this combination fails. 🙁 They contrast in texture, but they are both warm, and both relatively dark. They only contrast in one category, so I’ll try again.

How to Choose Fabric for a Quilt

This one passes! It’s the same red (photographed at different times of day and not color corrected) but paired with a much lighter orange. They’re both warm, but now I have contrast in texture and in value, so I know this is a combination that will work.

So there you go – The Rule of Two Out of Three. It’s how I choose all the fabrics for my quilts.

Want an even deeper dive into what colors go together? Check out Color Theory 101.

Here are links to all the posts about choosing fabric.

And here are links to posts about using specialty fabrics.

Finished with this topic?

Return to the Let’s Make a Quilt main Table of Contents.

Happy stitching!

Book Review – All Points Patchwork

All Points Patchwork book review

I may have mentioned once or twice here that I really love handwork. 🙂

I love the feel of the fabric and thread in my hands.

I love the little pop I hear when the eye of the needle with the doubled-over thread passes through the fabric, followed by the low shush of the thread.

I love that I can take it anywhere.

I love the slow, meditative pace – and the fact that it allows me to sit and watch TV guilt-free. I’m “working” while I watch. 🙂

I can not believe that it has taken me this long to try English Paper Piecing.

I got interested a year or two ago when I started seeing fun projects popping up on Pinterest – but then I heard that Diane Gilleland was writing a book and I decided to wait for that. I’ve read Diane’s books before and they are always amazing and comprehensive and inspiring.

All Points Patchwork is available now – and it’s everything I knew it would be!

Quite simply – it’s the best craft book I’ve ever read. Even better than Anatomy of a Doll – the book that got me interested in 3D sewing.

Like Anatomy of a Doll, there are no projects – it’s pure instruction and inspiration from start to finish – exactly what I look for in a craft book.

Let me show you what I’m talking about. . .

I love that the front of the book shows a block with some of the pieces flipped over. On the back of the book you see the same block, entirely from the back (so you can see the construction details) and the most basic instructions for English Paper Piecing.

All Points Patchwork book review

Really – that’s all there is to it. Choose a shape and cut it out of paper. Baste some fabric around the shape. Join the bits together.

If it’s that simple, why do we need a whole book?

Because Diane teaches you EVERYTHING YOU NEED TO KNOW.

EVERYTHING.

The pros and cons of different template materials.

Where to buy pre-cut templates.

How to design your own blocks – on the computer with high-tech drawing tools or on paper with nothing more complicated than a compass and a straight edge.

Different basting techniques.

I could go on and on and on. It’s all in here.

And she doesn’t just throw the information out there. She anticipates any possible problem you might have and helps you fix it. I love this bit on getting the perfect, invisible whipstitch seam, with good and bad seams shown, along with several troubleshooting suggestions.

All Points Patchwork book review

The tone throughout the book is warm and encouraging – like she’s sitting on the sofa next to me helping me learn this new craft. Just what I need!

The book isn’t just for beginners, though. She includes more advanced techniques too, like how to add a pieced, finished edge to your work.

All Points Patchwork book review

So fabulous for a table runner or mug rug where the back will be seen and where you don’t want to square off the edges!

Or this bit, where she shows two different ways to baste diamond shapes, and then explains when she uses each method. Throughout the book she shows exactly what she’s doing (with really terrific photos), and also explains why. This is so rare – and so helpful!

All Points Patchwork book review

After a general intro with all the basics, she moves on to more detailed sections for each type of shape you might use. This, to me, was the real meat of the book.

For each shape she shows how to draft it by hand, and exactly how best to baste it.

All Points Patchwork book review

Then she shares a couple of pages showing sample layouts, the different kinds of arrangements that each shape lends itself to.

All Points Patchwork book review

Finally, she gives tips for how to join individual pieces and larger units together.

All Points Patchwork book review

She does this for hexies, diamonds, jewels, triangles, tumblers, octagons, pentagons and even curved shapes. It’s so comprehensive!

And then there are the “Project Inspiration” pages. They’re scattered throughout the book, and each one shows a finished project, with suggestions for fabric choices and alternate ways of using it.

All Points Patchwork book review

This lovely book cover, for example, is a great way to showcase tiny scraps of favorite fabrics – really setting the bits off surrounded by a frame of solids – and would also be good for placemats, a pillow, or a table runner.

Or this one, showing a softie made with EPP fabric.

All Points Patchwork book review

Basically, she’s showing us how to create fabric using EPP, then showing us how we can use that fabric with any of our favorite patterns!

I’m not sure I ever would have thought of using EPP for a softie, but now that I’ve seen this image, I can’t stop thinking about how great Bailey Bear or Bartholomew Bunny would look with this technique. Their construction is very simple, just like this little guy, and I’m going to have to try it now.

(If you don’t have a favorite pattern for a project, go to www.allpointspatchwork.com where Diane has collected links to tons of different patterns and organized them by category. Handy!)

Most of the projects shown are small, or are larger projects with smaller bits of EPP incorporated into them, like this quilt.

All Points Patchwork book review

These are a few EPP appliqués added to a whole cloth quilt, and she also reminds us that we can add them to a store-bought blanket, or even use them as patches to give a second life to a stained or worn quilt. I love that!

But I also love this. . .

All Points Patchwork book review

It’s a feature of someone who actually made an entire hexie quilt – in less than a year! She shared exactly how she did it – a totally doable approach for anyone who wants to tackle a big project.

All Points Patchwork is a craft book designed for the way most of us actually use craft books. It’s got. . .

  • Instruction! All the information we need, and a lot we didn’t even know we needed – the kinds of tidbits that you pick up from your mother or grandmother, or from years of practice and trial and error.
  • Clear organization with a solid table of contents and index.
  • Beautiful illustrations – terrific photos for all the how-tos and clear diagrams for all the layouts.
  • Inspirational eye candy – also beautifully photographed, and with extra tips for how to take each project in your own direction.

I just finished my first EPP project – this doll quilt.

my first EPP project!

It was so much fun to make that I already started a new project last night – and you can bet there will be more projects to come. I know I’ll be referring to this book again and again for years to come. It’s an incredible reference book for anyone – of any skill level – interested in EPP.

Get All Points Patchwork here. And get it now.

Happy sewing!

My Stitch & Stash Project Bag

I love, love LOVE my new project bag! It makes me smile every time I use it – and I’ve been using it steadily for about two months now.

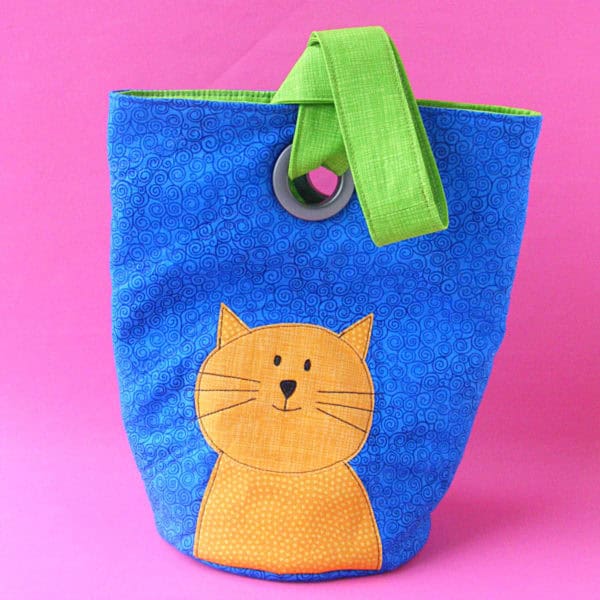
It’s made with the Stitch & Stash Project Bag pattern from Betz White – reversible, with no zippers or velcro to snag on my work, and with a handy pocket inside to hold my tools. Such a well-designed bag for crafters!

Of course, I had to add some appliqué to the front. Give me a flat surface in a pattern and I will add some appliqué. Guaranteed. 🙂

I only made a couple of simple changes to the project.

The original pattern has snaps on the sides, but I decided not to add them because I know I will never actually snap them and I like the shape without tucking in the sides.

I quilted the outer bag fabric instead of just staystitching the batting around the edges. I love the little bit of extra texture the swoopy quilted waves add to the front. I just quilted the batting to the main fabric – no need to add a backing fabric since the bag is lined. This is how I quilt all my quilts, too.

You might worry that that will make the seams too bulky, but if you use 100% cotton batting (I love Warm & Natural) and press the seams open, it’ll squish nice and flat.

Stitch & Stash Project Bag - in progress

When I work with batting like this I also use sewing clips instead of pins. They’re great for holding bulky fabrics in place with no distortion!

Stitch & Stash Project Bag - in progress

Of course, the main change I made was adding the cute kitty. 🙂

After I did the quilting, I appliquéd the cat in place with fusible adhesive and stitched around all the pieces with black thread. I love the cartoony pop that gives.

Here’s a video showing how I appliqué an image like this.

Stitch & Stash Project Bag - in progress

The cat is one of the blocks in my Cuddly Cats quilt pattern, shrunk down a bit. I made the small bag and resized the cat image to be 5 inches tall and 4 inches wide. That left plenty of breathing room between the top of the cat and that awesome big grommet, and fit from side to side nicely. I wouldn’t go any bigger than that in either direction for whatever image you’re adding.

I love it! Mine is holding my current EPP project (to be shared soon – it’s almost finished!) and Jo has already requested a larger one with a monster on it, and a tall, skinny pocket inside especially for holding a few crochet hooks. My plan is to make a few more in different sizes (the pattern includes three sizes) to hold various works in progress and hang them on some hooks on my studio walls. Cute AND functional. I see a lot more of these in my future. 🙂

Get the bag pattern here.

Get the cat quilt pattern here.

Happy sewing!

Free Applique Alphabet Pattern

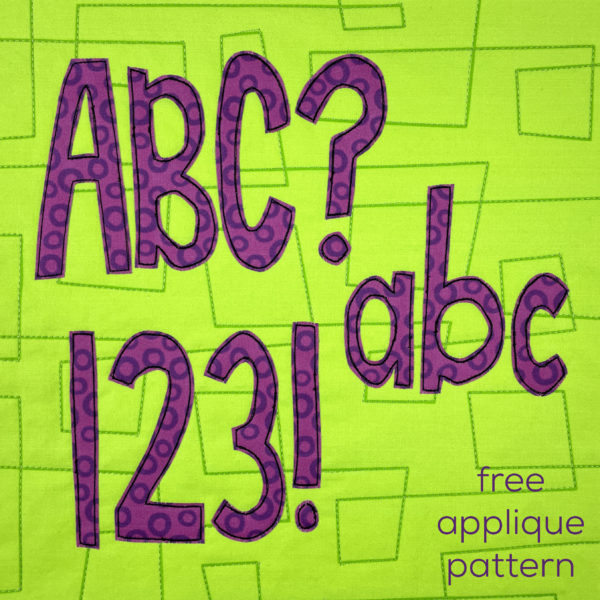
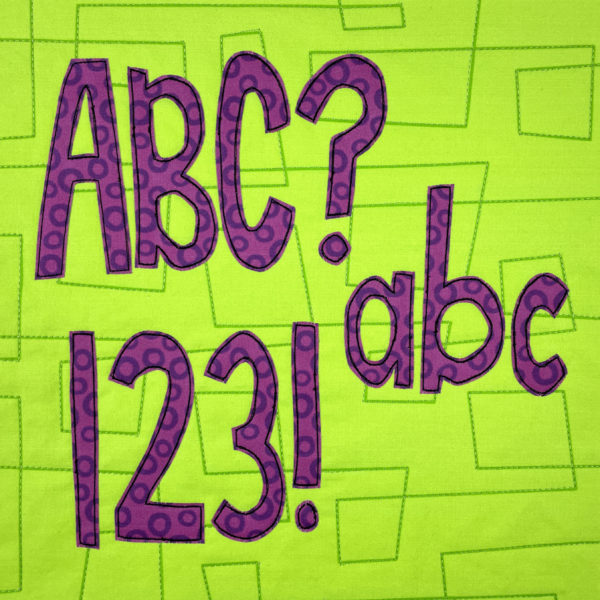
Here’s a free applique alphabet pattern!

You can use these to add words to any pattern. This post shows several different layout possibilities you can use with any Shiny Happy World pattern – including several that add words.

Add a name, a birth date, a gift date, animal sounds – even a poem or quote!

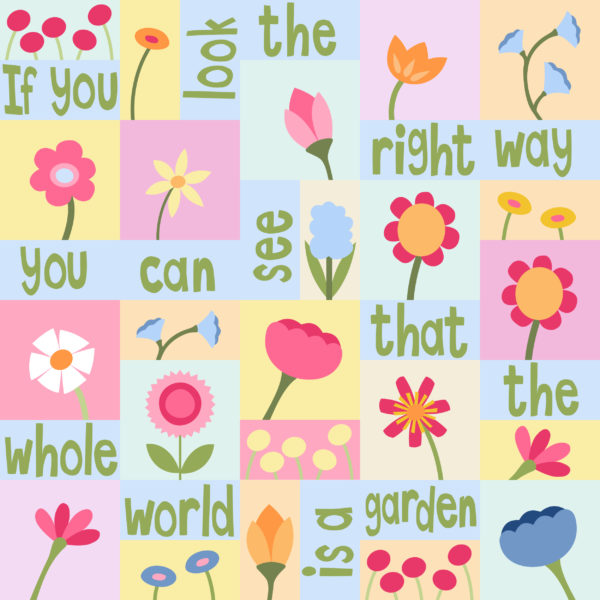
I especially love this version of the Wild Flowers pattern that adds a quote from The Secret Garden by Frances Hodgson Burnett.

Let your imagination run wild!

These letters are skinny-ish, allowing you to fit more letters in a standard block. They’re also very irregular so you can easily just shave a smidge off individual letters if you need to skinny them up just a touch to fit in a block and don’t want to go to the hassle of resizing them.

If you do want to go to the hassle of resizing them “properly” there’s a post here with the info you need.

Also – after many requests – this alphabet includes capital letters, numbers, and some punctuation. Yay!

There’s a post here with more info about adding half-size blocks to your quilts – perfect for adding words. The nutshell version is to cut your blocks 6 x 11 inches, then trim them down to 5 1/2 x 10 1/2 inches so that when you sew them together with a quarter inch seam allowance they finish at 5 x 10 inches – exactly half the size of one of my square blocks.

If you need more than six letters, I recommend cutting a larger block. That’s what I did for cock-a-doodle-doo up in the corner of this quilt. (This sample uses an old, chunkier alphabet that I don’t use anymore – but you get the idea.)

Noisy Farm Quilt pattern from Shiny Happy World

So. Here are the super basic instructions. Find more detailed fusible applique instructions (with videos) here.

Download the pattern here. It comes with all the letters the right way (for needle-turn applique) and reversed (for the applique with fusible adhesive technique I’m showing here).

Trace the reversed image of the letter onto the paper side of your fusible adhesive. Roughly cut around it.

h - mirror image traced onto fusible adhesive

Follow the manufacturer’s instructions and fuse it to the back of the fabric.

h - fused to the back side of fabric

Cut it out as neatly as you can.

h mirror image - cut out neatly

Peel off the paper and fuse the letter to your finished piece. Stitch around it if you like. Some adhesives require stitching – so read the label before you decide to skip it.

Use this free applique alphabet pattern to add words to your quilts, pillows, tote bags and more. Add your kids’ names to everything they own. Have fun with it!

If you like this pattern, sign up for the Shiny Happy News! Members get a weekly email with tutorials, patterns, sewing news, fun stuff and things to make you smile. 🙂

Happy stitching!

Controlled Chaos Scrap Quilt – Block #15

Controlled Chaos scrap quilt tutorial - block 15

Here’s block #15 in the Controlled Chaos Quilt!

What You’ll Need

  • 48  two-inch squares in color A (shown in pink)
  • 52 two-inch squares in color B (shown in green)

Instructions

Use 1/4″ seam allowances for all sewing.

Press all the seams. I’m pressing mine open for this quilt. I think it will make things simpler in the end.

Arrange your squares according to the diagram below.

Controlled Chaos scrap quilt tutorial - block 15

For this block I sewed things up in rows. The top and bottom rows are identical, as are rows 2 and 9, rows 3 and 7, etc. Knowing that can help you sew them up in batches.

Then sew those rows into one fabulous block. 🙂

That’s 15 blocks done – just 5 more to go!

Controlled Chaos scrap quilt tutorial - block 15

I love how it’s coming together! And I feel like I’m so close to finishing!

Click here for all the Controlled Chaos posts.

Happy piecing!

Best,
Wendi
That's me!

Controlled Chaos Scrap Quilt – Block #14

Controlled Chaos scrap quilt - block #14

I had to take a bit of a break from the Controlled Chaos quilt over the holidays and into this spring – but I’m ready to finish this baby!

Here’s block #14 in the Controlled Chaos Quilt!

What You’ll Need

  • 48  two-inch squares in color A (shown in aqua)
  • 52 two-inch squares in color B (shown in magenta)

Instructions

Use 1/4″ seam allowances for all sewing.

Press all the seams. I’m pressing mine open for this quilt. I think it will make things simpler in the end.

Arrange your squares according to the diagram below.

Controlled Chaos scrap quilt - block #14

For this block I sewed things up in rows. The top and bottom rows are identical, as are rows 2 and 9, rows 3 and 7, etc. Knowing that can help you sew them up in batches.

Then sew those rows into one fabulous block. 🙂

That’s 14 blocks done – just 6 more to go!

Controlled Chaos scrap quilt - block #14

I think I’m going to go with grey sashing between the blocks. I like the way it sets off each one as its own little composition. Plus – I’m heartily sick of matching up seams. 🙂

Click here for all the Controlled Chaos posts.

Happy piecing!

Best,
Wendi
That's me!

Made with Love – Donating Your Handmade Quilts and Softies

Donating Handmade Toys and QuiltsEvery once in a while I get an email from someone saying they love to make softies, but don’t have any children in their lives right now the right age to get them. They want some suggestions for where they can donate their creations.

There are so many wonderful places!

  • children’s hospitals
  • firefighters and police departments like to keep some on hand to give to traumatized children
  • homeless and family violence shelters
  • orphanages – both in the US and overseas

This is just a the tip of the iceberg! I put out a call in a recent newsletter asking readers where they give, and I got a bunch of great responses!

So let’s start with a few general guidelines and things to think about, and then move into the specific suggestions offered by readers.

The number one bit of advice I have is to ask first! Some organizations might have restrictions that you could never anticipate. Depending on the ward, some hospitals can only take toys that are made of hypoallergenic materials – they can give you a list of what is and isn’t allowed. One suggestion that surprised me (but made perfect sense) was to keep arms and legs minimal so there’s less to get hooked on tubes and wires.

My local shelter asked for toys to be small – they pointed out that each kid has a bed and a small shelf and that’s it – and when they leave they leave with a small bag. They can’t have a stuffed animal that takes up half the bag. They also asked for some teen-appropriate softies, saying the teens are often happy to have a softie to hug, but don’t want something that looks too babyish – a request that totally broke my heart. So contact the organization and ask first.

And remember – your favorite organization might prefer cash! I’ve lost count of the number of cat and dog quilts that have been made and auctioned off at shelter fundraisers! Every one of them makes me so happy!

Sarah of Dolls and Daydreams has some really great info about donating dolls abroad here.

And now – here are some responses from readers. . .

Lots and lots of people mentioned the Knit-a-Square organization. They collect knitted and crocheted squares to be joined into afghans, and also handmade stuffed animals and dolls – all going to AIDS orphans in Africa. Definitely take a look at their website – they have the infrastructure to distribute a LOT of love. 🙂

Julia writes. . .

I am about to send two quilts to Quilts For Kids, an organization that donates quilts for kids in hospitals. I have tons of baby-ish fabrics in my closet and feel great that they’re all going to a good cause.
After I found out about QFK heard a lovely story about a family that had premature twin babies in a NICU in New York–the NICU also had quilts and both parents commented on how comforting this was.

Beatrice writes. . .

Currently I am in the process of making lots of “Warrens” which will be donated to orphanages and cancer hospitals in Egypt. I have been living in this country for 18 years and donated lots of items and cash to help the poorest, which sadly are numerous. This time though, I feel really happy, because with every lovely bear finished I try to imagine a little girl or boy who will love what I have created.

Liz writes. . .

A local organization that I donate time, money, and material things to is Hope’s Door, in Dallas.  It’s a shelter for battered women and their children.  They do a wonderful job and are a great bunch of dedicated, insanely organized people.  Throughout the year, Hope’s Door does everything from toy drives to fun runs to auctions. If you’re going to post a list, I’d love for you to mention them, and I know they would appreciate it, too!  They always have needs because, sadly, they always have clients.

Cindy writes. . .

There is a woman who works with my husband who belongs to a small church that gives away bags of food once a month. For Christmas I donate lots of stuffed animals and dolls. And also at Easter I donate  Easter things – bunnies and chicks, etc. I’m so grateful I have the time and money to do this.

Candy writes. . .
Here’s a suggestion of where to donate softies; local hospitals and local woman’s shelters. I have been making and donating for several years now to both. The shelters love the animals or dolls because lots of times the families are rushed away from their homes because of fear and abuse and don’t have time to grab things of love and importance so having something to cling to (softie) is sometimes a life saver. This goes for kids as well as the women. Hospitals love any type of donation, whether it be softies, knitted things for babies, sewn things for babies and blankies. I know there are lots of other places to donate but these are my favorite.

Laura writes. . .

Wildlife rescue groups sometimes request crochet artificial nests for orphaned birds, bunnies, possums etc. Your readers can see if they can find one locally that needs some.

I have seen cat and dog rescues that take handmade fleece blankets to shelters so the animals don’t have to sleep in those harsh metal cages without any protection and warmth they can receive from a blanket. Just make sure to contact rescue first to obtain size wanted.
An excellent charity is your local domestic violence shelter. These families have fled their homes with nothing. They can use new blankets and quilts ( I have donated many fleece blankets for infants and toddlers), new handmade softies for the kids, hats gloves and scarves in the winter. This is an extremely rewarding charity to donate!

Ann writes. . .

I donate softies and dolls at my local hospital pediatrics ward and in the Emergency Room waiting area where children often are waiting with adults. I also go to the local pediatric office, pediatric dentist office, the sheriff’s department and the fire department.

Joan writes. . .

We are a small group of ladies that gather once a month to sew to donate. Some of local items we have donated are fleece hats given to our pre-school.  We used a pattern from Nancy’s Notions.  They loved them. Kid capes were given to our local day care centers. We borrowed a doll from the pre-school and made doll clothes, diapers, blankets, a mattress for a crib, etc. for their room. This month we are making pillows for cancer patients.  We are making a port pillow, heart shaped pillows, rectangle pillows.  These are delivered to local hospitals that give cancer treatments. One month we did walker bags for a local nursing home.  We did lap quilts for shut-ins. We have made burp cloths and receiving blankets and bibs for Northeast Nebraska Community Action Partnership.
We like to find local spots we can donate for we have found postage is soo expensive.

Finally – a couple of specific patterns.

I designed Warren the Charity Bear especially for donations. He can be made out of any kind of fabric, with any kind of stuffing, and has lots of possible variations so you won’t get bored if you decide to make a lot of them – like Kathy and many others have done. 🙂

Kathy made the Warrens in this photo and Caroline made the ones in the top photo – both for Knit-a-Square.

Lots of colorful and fun Warren Bears - made with a free pattern from Shiny Happy World

I’ve also heard that Warren makes an excellent post-op cough pillow for kids. People who have had chest or abdominal surgery are taught to hug a pillow when they cough, to help support the incision and ease pain. Warren is just the right size and shape for this. 🙂 He also has very small arms and legs – small enough that lines and cords in a hospital bed won’t get caught on them.

You can see how to make Warren here.

I also have a tutorial here showing how I made an easy scrap quilt for charity.

If you have any other suggestions – either for places to donate or favorite patterns to use – please leave a note in the comments section!

Happy sewing!

Free Bunny Applique Pattern with Fun Mix & Match Parts

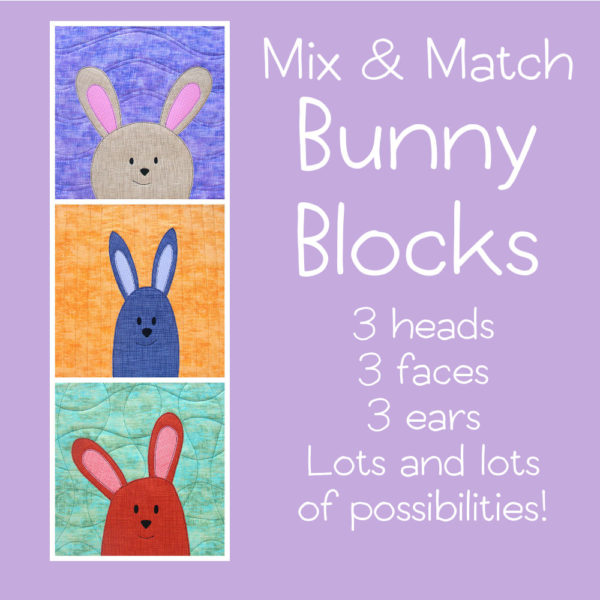
three stacked bunny faces made with the free Mix & Match Bunny Blocks applique pattern


I’ve been thinking about designing a bunny applique block for a couple of years now, but Easter always seems to come and go before I have a chance to do it.

But not this year!

And I didn’t just design a bunny block – I designed a free bunny applique pattern with mix & match parts so you can play with it to make lots and lots and lots of unique bunnies. 🙂

Playing is good!

The pattern has three bunny head shapes, three bunny ear shapes, and three bunny faces. You can mix and match those for (I think) 27 possible bunnies. Throw in different color possibilities and you could make a king-sized quilt with no repeated blocks!

Download the pattern here.

If you’ve made any of my quilts, the construction will look familiar. The patterns have already been reversed and exploded so they can be printed right on my beloved printable fusible adhesive. No tracing! La la la la la.

I strongly recommend prewashing any fabric you use with fusible adhesive. The sizing on the unwashed fabric can resist the adhesive. And don’t use fabric softener in your wash – it can do the same thing. (Dryer sheets are fine.)

You can trace onto your favorite fusible if you want to, but I’m lazy and like to skip right to the fun part.

If you prefer the freezer paper applique technique you can print the pieces onto freezer paper, but the instructions I’m giving here are for applique with fusible adhesive. For a complete overview of that technique (my favorite) click here. Find general instructions for freezer paper applique here, and needle turn applique here.

I’m completely in love with the Quilt As You Go method, so I did all the outline stitching and quilting through the top fabric and the batting. I usually do the quilting before I do the applique so I don’t have to work around the pieces. Easy peasy.

Cut each background block 10 1/2″ square.

Step 1

Roughly cut out the pattern pieces and fuse them to the back of your fabric.

Mix & Match free bunny applique pattern from Shiny Happy World

Step 2

Cut out the pieces neatly. Cut right on the solid lines. Leave a little extra seam allowance where there’s a dotted line – that bit of the piece will tuck behind another bit for a clean finish.

Mix & Match free bunny applique pattern from Shiny Happy World

Step 3

Choose a face and trace it onto the face piece.

Mix & Match free bunny applique pattern from Shiny Happy World

If you tape the face in a window and then hold the face fabric up against it, the image will shine right through for easy tracing.

I usually trace just inside the eyes and nose (so I don’t have to be perfect with how I position those applique pieces) and right on the mouth because I’m not using an erasable pen. Don’t use a Frixion pen to mark the face! It will disappear when you fuse the pieces together and you will be sad. 🙁

After I’m done tracing the face, I fuse the eyes and nose to black fabric for their applique pieces.

Step 4

Play around with the placement of the ears.

Mix & Match free bunny applique pattern from Shiny Happy World

Do you want them standing straight up? Spread wide? Wonky and uneven? There is no right answer – they’re all cute. Do what you like!

Step 5

Layer all the pieces and fuse in place following the manufacturer’s instructions.

Mix & Match free bunny applique pattern from Shiny Happy World

Don’t forget to tuck the base of the ears and inner ears behind the head before you fuse.

Step 6

Stitch around all your pieces.

Mix & Match free bunny applique pattern from Shiny Happy World

I machine stitch with regular all-purpose black thread with basic straight stitching everywhere. I love the cartoony look it gives! I go over the mouth twice to give it extra weight.

For help with those tight curves, watch this video.

If you don’t want to applique the eyes and nose, you’ll find several other options here.

Done! With that block, at least. 🙂

There are instructions for finishing a Quilt As You Go quilt here.

See how to layer and baste any quilt here.

Learn how to bind a quilt here.

Here are the details on the three bunnies I made. . .

Mix & Match free bunny applique pattern from Shiny Happy World

This bunny uses Head #1, Face #3 and the fat ears.

Mix & Match free bunny applique pattern from Shiny Happy World

This bunny uses head #2, face #2, and the skinny ears.

Mix & Match free bunny applique pattern from Shiny Happy World

This bunny uses head #3, face #1 and the medium ears.

Mix & Match free bunny applique pattern from Shiny Happy WorldI made my three blocks into a pretty springtime wall-hanging.

There are instructions for adding a hanging sleeve here.

Combine multiple blocks in any configuration to make a baby quilt, a wall hanging, or a bed quilt.

Like almost all of my applique quilt patterns this finishes to a 10″ block. That means you can easily pop a bunny into any of my other quilt designs. A cute bunny would be a great addition to the Wild Flowers quilt or the Noisy Farm quilt. 🙂

Remember – you can adjust the size of any digital pattern to make it work for all kinds of projects!

Add a single bunny to a T-shirt or a baby onesie.

Add a single applique to this free receiving blanket pattern.

Add a different bunny to each side of this free tablet cover pattern.

Applique a bunny to any tote bag pattern – like this free mini tote bag.

Make a pillow using this free tutorial.

Use the pattern pieces with pretty paper to make collage greeting cards, like these I make for my daughter.

You can even shrink them down extra small and use them for embroidery patterns!

Have fun playing with these bunnies!

If you like them – sign up for the Shiny Happy News so you never miss a free pattern, a new tutorial, or the little bits of happiness I like to share!

Happy sewing!
Best,
Wendi
That's me!