It’s Show & Tell Time!

I have so many Show & Tell photos waiting to be shared that I’m going to have to do this over a few weeks. This week I’m starting with QUILTS. Grab a cup of tea and get ready to enjoy some amazing creations!

Sprinkles doll quilt

Julie made this extra special Sprinkles quilt for her Lizzie doll.

Incredibly cute embroidered doll quilt made with the free Sprinkles pattern from Shiny Happy World.

The embroidery! Her name! The flowers with the little button centers! The little drawing of Lizzie! It’s all so incredibly cute!

Pattern: Sprinkles doll quilt (free)

More Sprinkles

Karen made this very pretty Sprinkles quilt.

Pretty Sprinkles doll quilt.

She writes. . .

I made this for my granddaughter who just turned two in August, for her favorite baby doll. She promptly pronounced it “mine” and took a nap with it! She usually takes some time to warm up to new things, so I was thrilled! Thanks for the wonderful pattern!

I love hearing that!

Pattern: Sprinkles doll quilt (free)

Puppies Quilt

Donna also added a name to her quilt. Look at the incredible Puppies quilt she made!

Awesome baby quilt made with a pattern from Shiny Happy World.

She writes. . .

I still have to sew down the binding, but couldn’t wait to show and tell. The quilt is for baby Jake and the pillow for his big bother….. The dog on the pillow is commenting on what a great big brother Luke is! Thanks for another great pattern. Oh yes, you may notice one of the dogs is actually a Canadian beaver… Lol… there is a reason for this. 🙂

Everything about this is incredibly cute! (Including the adorable beaver in the middle.)

Pattern: Puppies quilt pattern

Another Puppies Quilt

Look what Janette made for her grandson!

Janette's adorable dog playmat, made for her grandson.

She writes. . .

I love your patterns and thank you for making them so much fun. I have made a play mat for my grandson who loves the faces of the dogs.

I love how they’re all shades of blue, green and yellow – with that one bright red bulldog. I wonder if her grandson makes a beeline for that one every time. 🙂

Pattern: Puppies quilt pattern

And Another Puppies Quilt

I just love seeing all the different color combinations in these puppy quilts! Here’s one from Sue in Australia.

Sue's terrific puppy quilt. I love the use of geometric backgrounds - they contrast so well with the puppies!

So bright and fun! And I love all the geometric backgrounds – dots and checks and chevrons. They contrast so well with the puppies! And the addition of the Kind Charles Cavalier Spaniel right in the middle is great. 🙂

Pattern: Puppies quilt pattern

Cats Quilt

Delta made a very pretty Cats quilt.

Delta's pretty cat quilt - made with a pattern from Shiny Happy World.

I’m so glad she shared the pieced back too!

Pattern: Cats quilt pattern

Another Cats Quilt

Louise made this bright and cheerful Cats quilt.

Louise's bright and cheerful cat quilt, made from a Shiny Happy World pattern.

She writes. . .

I had never used fleece on the back it worked like a dream! I used a hem stitch so that it was somewhat wide and crossed over the seam. It made such a nice checkerboard on the back. We also found the perfect binding with bright colored squares.

Here’s a close-up of that stitch she used on the seam.

Stitch detail of Louise's Cats quilt.

I really like this idea and I think I’m going to have to give it a try!

Pattern: Cats quilt pattern

And Another Cats Quilt

Look at this absolutely stunning Cats Quilt that Kay made!

Kay's stunning cat quilt!

Wow! Wow! Wow! I love those crisp black outlines! And look at the outline versions of the cats on the yellow blocks on the back! Wait until you hear why she did that. 🙂

Kay writes. . .

Thought I would email my new “Cat” Quilt that I have just finished for you to have a look at. This is the first time I have done machine applique and I really enjoyed playing around with these little guys. When I was putting the yellow blocks together I realized that you could see the black applique stitching through the fabric, so I just decided to do black outline on the backing fabric. I am now looking forward to starting on my “Puppy” Quilt.  I think this one will be in girly colours of pink, mauve, green. I am so happy that I found “My Shiny Happy World” on the internet.  I love watching your lessons and receiving your emails and updates.

This is so bold and graphic and fantastic! And I love what she did with those yellow blocks. What a great way to turn a “mistake” into an asset!

Pattern: Cats quilt pattern

Cats and Dogs Living Together

Melinda made this terrific quilt for her animal-loving family. She combined blocks from the Cats and Dogs quilts. I love when people do that!

Melinda's terrific quilt combining Cats and Dogs from Shiny Happy World.

Patterns: Cats quilt pattern, Puppies quilt pattern

Thick & Thin Quilt

Jane made this beautiful Thick & Thin quilt!

Jane's Thick & Thin quilt. Free pattern from Shiny Happy World

She writes. . .

I made your quilt. Although you can’t tell from the horrible image, it’s stunning. I love it! Your pattern was easy, fun and very concise. Thank you so much. My granddaughter will have this treasure for a very long time to come.

I’ll bet she loves it!

Pattern: Thick & Thin (free)

Embroidered Quilt

Look at the beautiful doll quilt that Loretta made for her daughter!

Beautiful embroidered doll quilt made with patterns from Shiny Happy World.

She writes. . .

I just finished this little quilt for my 4 year old daughter’s dolls. Thought I’d share. I stinking love it!! I know you are not doing embroidery patterns any more for business reasons, but my those were my favorites. Thanks for helping me make such a precious thing for my baby girl. I would have never tried this stuff if it wasn’t for your encouraging website and business. I love it!

I love it too! And I know her daughter does. 🙂

Patterns: It’s Raining Rainbows (free), My Heart Is Full (free), Blossom (free) and Queen of Hearts

Safari Quilt

Brett made this stunning Safari Quilt!

Brett's stunning Safari Quilt!

She writes. . .

I finished the safari quilt and love how it turned out.  I know you are about to redesign this quilt, but I could not wait to finish this quilt. My son loves it and adores all the animals, especially the elephant! I think the gazelle is my favorite!I I tried some fabric colors/ fabrics that you suggested and was very pleased with the outcome.

I love it!

Pattern: Safari Quilt (The new pattern has smaller blocks that will almost all print out on a single sheet of paper.)

Monsters!

Caroline made a super fun monster quilt.

Super fun monster quilt made with a pattern from Shiny Happy World

She writes. . .

My monster quilt is finally finished. It’s not the neatest work you’ve ever seen and there’s plenty of folds and tucks despite using a walking foot. But my grandson loves it and so do I. I decided to quilt around each monster, my introduction to free motion quilting. Soon gave that up as a bad joke. The flannelette backing certainly didn’t help it glide. So I pushed and pulled and poked it through the machine till it was all done. Never again. Quilt as you go will be the only quilting I do from now on. I hope you don’t mind, I changed your curly horn monster and also left off the embroidered mouths. I thought they looked better. Thanks for the pattern, I really enjoyed making it (apart from the quilting) I also enjoy your blog.

I love it! All those googly eyes and such fun colors and patterns! And that’s funny about the mouths – Jo likes to leave them off sometimes too. 🙂

Pattern: Scary Squares monster quilt pattern

Spooky Cat

Jo Ann made this great mini quilt with the Spooky Cat pattern!

Spooky Kitty mini quilt made from a free pattern from Shiny Happy World

I love her against the black and white and orange pieced background!

Pattern: Spooky Kitty (free)

Cats Again!

Robin made this fun cats wall hanging as a silent auction item for her local animal rescue organization.

Cute kitty wall hanging!

I love the black and white speckled sashing with the bright colors of the blocks!

Pattern: Cats Quilt pattern

A Bunch of Dogs and One AWESOME Cat

Look closely at this quilt that Tina made.

A bunch of dogs and one awesome cat.

She writes. . .

Well my puppy quilt is done! Took a while, but great fun! I used QAYG and freezer paper. My son requested a cat too – so I included one that he drew – hence the crazy face… Here’s a pic! I never thought I would make a quilt so feeling pretty good!

That cat block in the middle is – hands down – my favorite block in the whole quilt. 🙂

Pattern: Puppies quilt pattern

One More With Cats

Diane made this lovely Cats Quilt for herself.

Diane's beautiful cat quilt

I love the pastels with just a few pops of chocolate brown. Such a pretty contrast!

Pattern: Cats quilt pattern

And she’s started work on a Safari quilt to hang on the wall of her church’s Sunday school wing.

The start of a Safari quilt.

Totally different color choices! 🙂

Pattern: Safari Quilt pattern

Thanks so much to everyone who shared photos! I’ll be back next week sharing some huggable stuffed animals you all have made!

Happy stitching!

Best,
Wendi

Free Quilt Pattern – Thick & Thin

Thick & Thin - a free quilt pattern from Shiny Happy World

I designed this quilt with two things in mind.

One – I wanted it to be easy and fun. Of course. That’s a main consideration in all my quilt designs. 🙂

Two – I wanted it to work especially well with those awesome fabric collections with great illustration that you just don’t want to cut up.

You know what I’m talking about.

How could I cut up this image?

Thick & Thin - a free quilt pattern from Shiny Happy WorldOr this?

Thick & Thin - a free quilt pattern from Shiny Happy World

Use larger scale prints for the wide stripes, smaller scale on the narrow stripes. It’s a great way to use a whole fabulous fabric collection – which is especially nice for folks who stress out about choosing fabric.

I used the absolutely gorgeous Wee Wander collection by Sarah Jane – one of the prettiest fabric collections I’ve ever seen. 🙂 I made this quilt over a year ago, so that particular fabric collection is going to be harder to find, but there are lots of other fun options out there! How about this pretty folk floral collection from Anna Maria Horner?

I designed it especially for great prints like these – but you’re not limited to that! Try it in solids in a nice ombre layout. Or create a rainbow from your favorite tone on tone prints.

Stripes are always in season – always in style. And they’re oh so easy to sew. 🙂

Thick & Thin is a free quilt pattern.

That’s right – FREE! And that doesn’t mean it’s some skimpy abbreviated form of one of my regular patterns. You’ll get everything one of my regular quilt patterns normally includes.

Complete instructions – including yardage requirements, cutting instructions, and assembly diagrams – for six different sizes.

  • Baby (36″ x 48″)
  • Crib (50″ x 52″)
  • Nap (65″ x 76″)
  • Twin (65″ x 88″)
  • Queen (86″ x 92″)
  • King (104″ x 92″)

Detailed instructions – you’ll never feel lost or wonder if you’re doing things wrong.

Instructions (and diagrams) for pieced backs for all the quilt sizes.

Links to videos teaching you all the skills you’ll need to complete the project – including basting, quilting and binding.

Detailed quilting instructions – none of this “quilt as desired” single line of instruction at the end. 🙂

This is a very easy quilt – easy to cut, easy to sew, and easy to machine quilt.

Want the pattern? Here’s the link to download it – free!

Download the Thick & Thin quilt pattern here.

If you like this pattern, sign up for the Shiny Happy News! Subscribers get a weekly newsletter with crafty tips and tricks, free patterns, special discounts and more.

Happy quilting, everyone!

Best,
Wendi
That's me!

How to Make a Quilt Hanging Sleeve

How to make a quilt hanging sleeve - sample sleeve shown from back

I get a lot of questions about how to make a quilt hanging sleeve, so here (finally!) is a tutorial. 🙂

1. Cut a strip of fabric 4 inches wide and as long as the width of your quilt. You’re going to hem the edges and that will bring the sides of your hanging sleeve in a bit from the edges of the quilt – which will allow you to hide the hanging hardware if you want.

2. Hem the sides of your strip. I turn it under roughly 3/8 inch and then another 3/8 inch – but it doesn’t need to be exact. (Here’s a video showing how to sew a double-fold hem.)

rectangle of fabric with hemmed sides

3. Fold the strip in half, right sides facing out. Press.

rectangle of green fabric on a blue background

If you’re going to use a really fat rod to hang the quilt, you might want to fold it not-exactly in half, so that the sleeve pouches out a bit in back to make a little extra room for the rod. I always use a fairly slender curtain rod, though, so I just fold it in half.

4. Line up the raw edges of the sleeve with the raw edge of the top of the quilt and pin or clip in place.

Green sleeve pinned to the back of a blue quilt

5. Sew the hanging sleeve in place while you attach the binding – one easy step! (This video shows how I bind my quilts.)

hanging sleeve sewn to the top edge of a quilt

6. Hand sew the bottom of the hanging sleeve in place when you hand sew the back of the binding.

Finished back of quilt with a hanging sleeve at the top - a tutorial from Shiny Happy World

Done!

You want to see the front of this little wall hanging, don’t you?

finished applique cat mini quilt/wall hanging - fat orange cat on a purple background

It’s my favorite block from this Cat Quilt pattern. 🙂

Want to add a little extra fanciness to a single-block wall-hanging? Add a wonky churn dash frame around the block, like I did here.

Make a Wall Hanging - How to Add a Wonky Churn Dash Frame to Your Favorite Quilt Block - tutorial from Shiny Happy World

So cute! Single-blocks wall hangings like this are a great way to get extra use out of your quilt patterns.

Here are all my posts about how to bind and finish your quilt.

Finished with this topic?

Return to the Let’s Make a Quilt main Table of Contents.

Move on to more info about other things (not quilts!) that you can make with your applique patterns.

Happy sewing!

Free Santa Applique Pattern

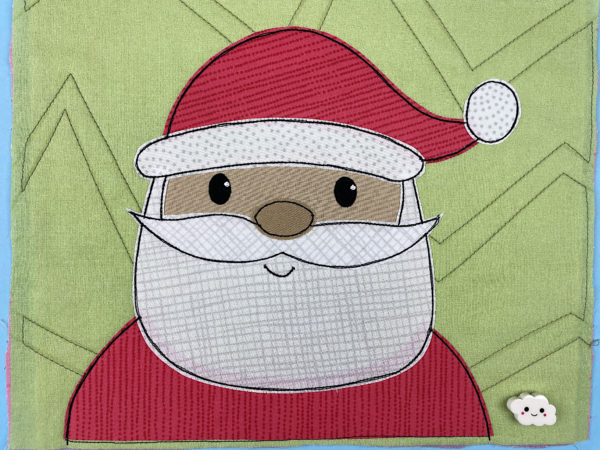
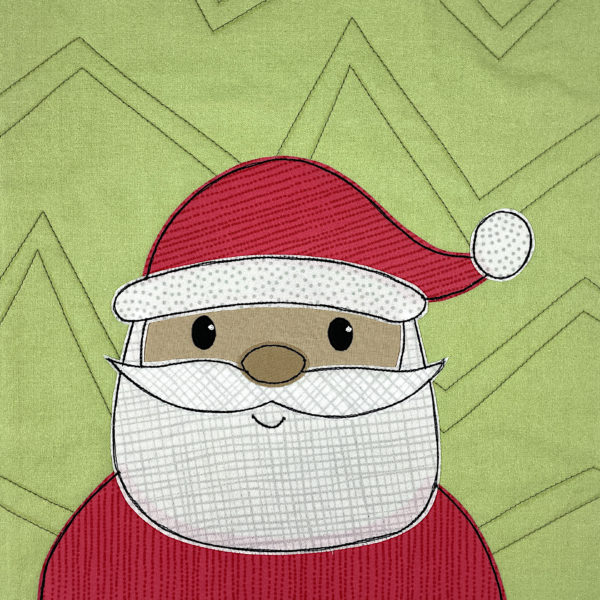
Use this free Santa applique pattern to make all kinds of things! Here are just a few ideas (with links to free patterns) . . .

The pieces are designed to make an applique that fits in a 10 inch block. That makes it really easy to resize as needed. Do you want to make a 4 inch coaster? Print the pieces at 40% size. Do you want to make a tote bag that’s 17 inches square? Print the pieces at 170% size.

The question is – where can’t you use a jolly old elf?

A Little Extra Help

If you’ve never done any applique before, or are new to my method) there’s a free video workshop here. You can work through the lessons using any pattern – including this Santa.

There’s also a single video here that takes you through all the basic steps of my method.

You can find loads of single-topic tutorial videos here, and also by using the search box at the top of the page.

Prep Your Block

Cut an 11” square of fabric for the background, and an 11 inch square of batting.

Press them both (with steam) and let them cool. Layer the background square over the batting square and quilt the two layers together. Do NOT add the backing yet. This video shows some of my favorite straight-line patterns, and this video shows some of my favorite wavy line patterns.

Press the quilted block again (with steam) and let it cool.

This video has a general intro to my Quilt As You Go method, along with complete instructions for how to assemble the block. It’s a long video, but there’s timestamp info to help you skip to the specific instructions you want.

Cut Your Pieces

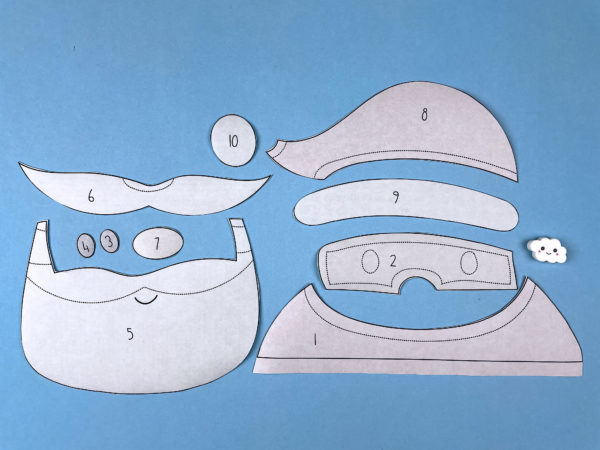
Download the template pieces and placement guide here.

If you have an electric cutting machine, you can use it to cut your pieces. Download the SVG file here.

The image in the SVG file is NOT reversed. If your cutting machine has you cut your pieces fabric side up, leave the orientation as it is. If your cutting machine has you cut your pieces fabric side down, you’ll need to flip the image horizontally.

Different cutting machine brands import the image at what seems to be totally random sizes. To fit the appliqué on a block that finishes at 10 inches square, check to make sure the small square in the image is one inch, and resize if necessary before ungrouping the pieces. Delete that square after resizing so your machine doesn’t try to cut it. 🙂

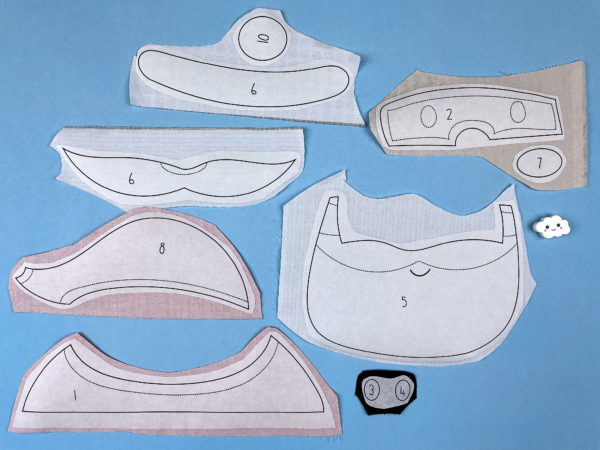
Print your templates.

If you’re cutting everything by hand you’ll need to print the reversed and exploded templates. If you’re using printable fusible adhesive (I use Heat & Bond Lite for all my quilts) you can print those pages directly onto the paper side of your fusible.

If you’re using a lightbox you’ll also need to print the placement guide.

Roughly cut around each shape. Leave a little bit extra all the way around each piece.

Follow the package instructions and fuse each piece to the wrong side of the fabric.

Cut out each piece neatly, directly on the solid lines.

Cutting after you fuse ensures that the adhesive goes right to the very edge of the fabric.

Trace the dotted lines onto the fabric. If you hold the pieces up to a window, the light will make the lines very visible – even on dark fabric.

If you want to skip this step, this video shows how to use a light box. If you use a light box, you only need to transfer the smile.

Put It All Together

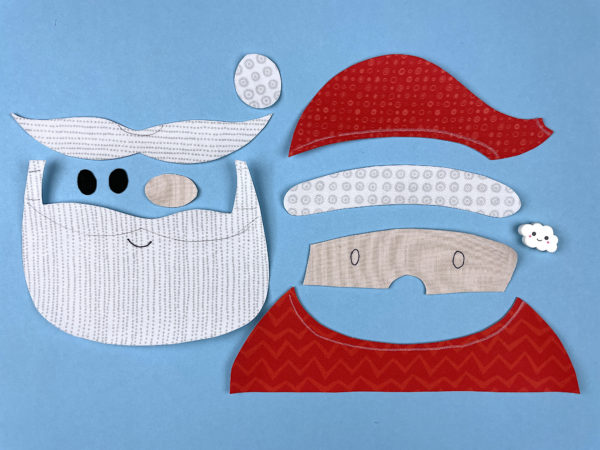
Peel off the paper backing and arrange the pieces on your background block. Fuse in place according to the adhesive package instructions.

This video shows the assembly with me explaining how I’m layering the pieces.

This video shows the same thing – but using a light box to guide placement.

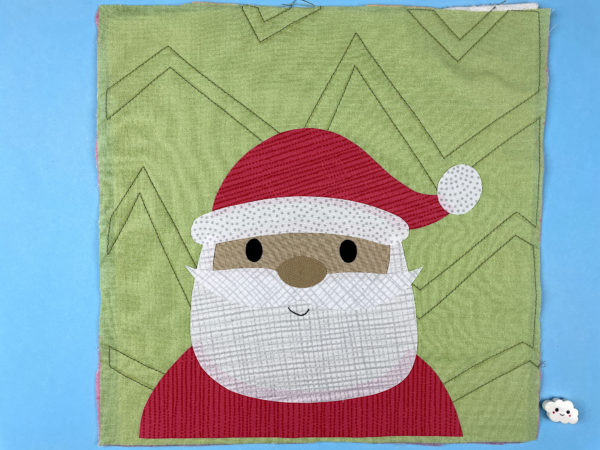
Stitch all the edges down. You can use any stitch you like, in matching or contrasting thread. I really love the cartoony look of a simple straight stitch with black thread.

I demonstrate sewing with different thread weights here.

This post will help you with the order in which to stitch.

This post has tips for stitching tight curves.

And this post shows three ways to add catchlights to the eyes.

Finished!

For this slightly subdued color palette I used colors from the Farmers Market collection.

The background block is one of these pre-printed quilt blocks in Farmers Market – Light.

The reds are from the Strawberry Blenders and the whites are from Salt & Pepper Blenders.

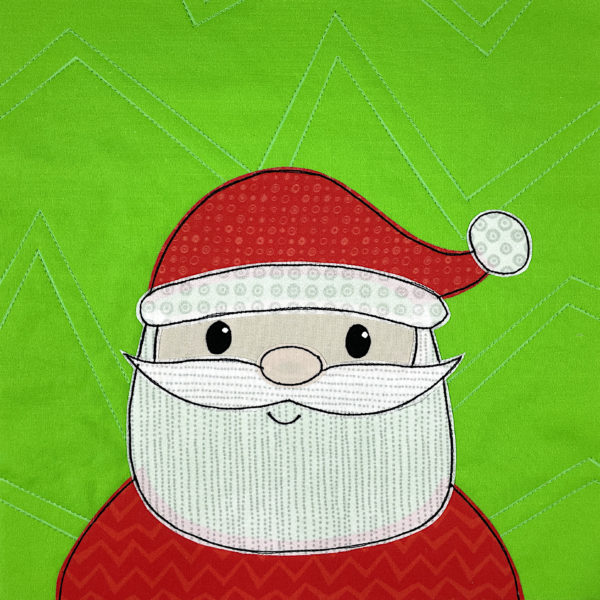
And here’s a version I did in the brightest, most saturated colors I have.

This color palette is called Classic Rainbow.

The background block is one of these pre-printed quilt blocks in Classic Rainbow – Medium.

The reds are from the Red Blenders and the whites are from Salt & Pepper Blenders.

Finishing

If you’re making a quilt, trim your finished block to 10 1/2” square.

If you’re using your block to make something else, just follow the pattern instructions for whatever you’re making. You’ll find a bunch of project ideas (and free patterns) here.

Merry Christmas!

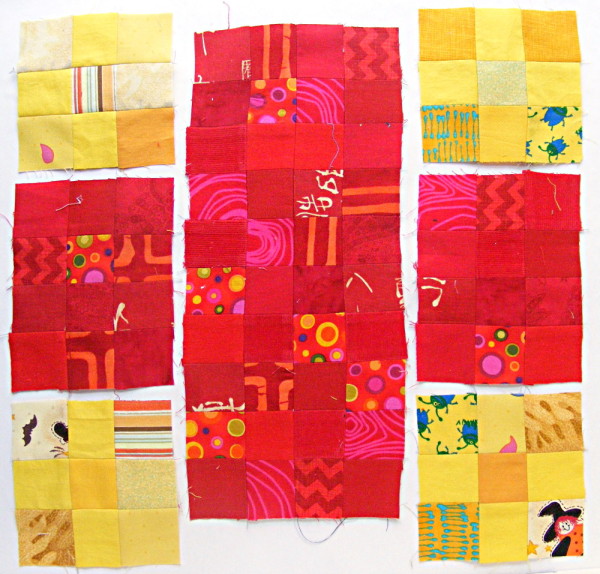
Controlled Chaos Block #13 – Scrap Quilt Tutorial

Controlled Chaos Scrap Quilt - Block 13

I realized that I didn’t have much diagonal action in the quilt yet, so I’m correcting that with the next few blocks.

Here’s block #13 in the Controlled Chaos Quilt!

What You’ll Need

  • 48  two-inch squares in color A (shown in purple)
  • 52 two-inch squares in color B (shown in yellow)

Instructions

Use 1/4″ seam allowances for all sewing.

Press all the seams. I’m pressing mine open for this quilt. I think it will make things simpler in the end.

Arrange your squares according to the diagram below.

Controlled Chaos Scrap Quilt - Block 13

For this block I sewed things up in rows. First we’ll sew some groups of like colors together. . .

1. Sew up 12 sets of three purple squares.

2. Sew up 14 sets of three yellow squares.

3. Sew up 4 pairs of two purple squares.

4. Sew up 4 pairs of two yellow squares.

Use the diagram above to sew those groups into rows.

Controlled Chaos Scrap Quilt - Block 13

Then sew those rows into one fabulous block. 🙂

That’s 13 blocks done – just 7 more to go!

Controlled Chaos quilt so far - 13 blocks

I still haven’t decided whether I’ll use sashing between the blocks or not. If I do it will be in a nice slate grey. If I d0 use sashing it’ll be 310 seams I don’t have to match up – a major plus in my book. 🙂

Click here for all the Controlled Chaos posts.

Happy piecing!

Best,
Wendi
That's me!

How to Make an Easy Charity Quilt – a simple and fun tutorial

The easy charity quilt I made for Craft Hope is finished and on its way. I love how it turned out! 

How to Make a Charity Quilt - an easy and fun tutorial from Shiny Happy World

Craft Hope is an organization that partners with different organizations to collect handmade items for donation. I know lots of crafters like making items to donate  and there’s always a demand for patterns for easy charity quilts, so when I made my Craft Hope Quilt I decided to share the how-to so you could make one too, if you’re so inclined.

It’s an easy and fun technique – great for beginners of all ages. I’ve been posting lots of in-progress photos as I go and I’ve been getting a ton of questions, so I’m going to answer them here all in one place. . .

How are you piecing and quilting the blocks all at once?

That is the magic of Quilt As You Go. It really is the perfect no-stress way to make a scrap quilt of this kind.

You can see a full tutorial for the process here.

Did you really make it all from scraps?

Yep. I have (had) a lot of scraps and I store them in baskets sorted by color – which made it really easy to make this kind of quilt without making a HUGE mess in my studio. It was more of a manageable mess. 🙂

If you did all the quilting while you pieced, how are you backing it? Do you have to quilt it again?

Here’s what the back of the quilt looks like.

How to Make a Charity Quilt - an easy and fun tutorial from Shiny Happy World

I backed it in Cuddle Fleece – delightfully soft, cuddly, and easy to work with. I used it as the back of a quilt for my daughter a little over a year ago and she loves it so much that she basically told me I should never use anything else. 🙂

You can see that the front is nice and crinkly after washing – every seam is also quilted so it crinkles up nicely.

The back has a lot less quilting. I sewed all the finished, quilted blocks together, pressed the seams open, backed it with the fleece, basted it (I use safety pins) and then quilted 1/4″ from each block-joining seam. I like the kind of frame-ish effect around each block and I like the big grid on the back.

There’s a video here showing that technique in more detail.

How big is the finished quilt?

Each block is a 10″ square, finished, so the full quilt is 60″ wide and 90″ tall. You could very easily make it bigger or smaller just by adding or removing blocks. You could also change the size of the blocks, but I don’t think I’d make them much bigger – a 10″ grid on the back of the quilt works very well but there might be some bagging or sagging if you went a lot bigger. I’ve done some quilts with 12″ blocks and that works fine too.

Why don’t you spray baste?

I tried it once (many years ago) and it was a disaster. The fumes are pretty intense and you’re supposed to do it outside – but there’s no clean place in my yard to do it and I don’t have a clothesline to use for that method. So I tried it inside where the fumes almost killed me. I got overspray in my carpet (which was very hard to wash out) and then the adhesive gummed up my needle the whole time I was sewing. The product has probably improved a lot since then (I don’t even remember what brand I tried) but it will be a while before I’m ready to try it again. 😛

How do you pick your binding on a quilt with so many colors?

I really love to use black and white or dark grey bindings with a rainbow quilt like this. I actually would have preferred a nice crisp black and white stripe for this, but I didn’t have enough of that and I needed to ship the quilt out to make the deadline so I went with the black and white gingham-ish print you see in the photo above. I love black and white with bright colors!

That’s it!

With winter and the holidays coming, a lot of organizations are calling for quilts – especially twin quilts and crib quilts for kids in need and lap quilts for seniors. This is a fun technique for an easy charity quilt that even beginning quilters can make successfully. Kids can do it too! Give it a try!

Happy quilting!

Best,
Wendi
That's me!

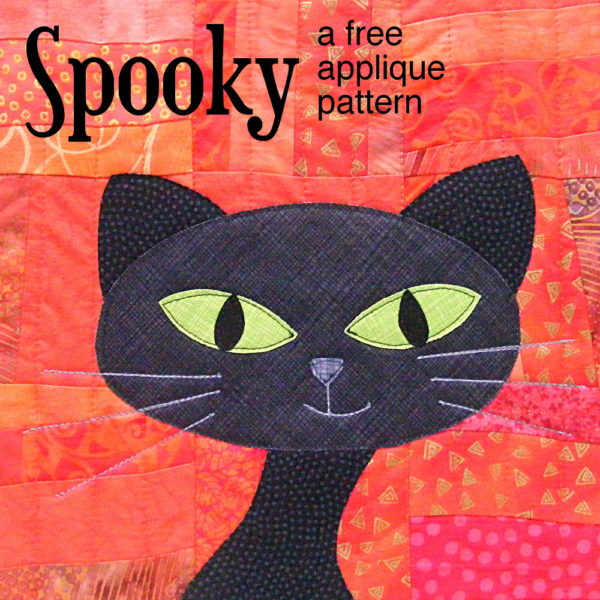
Spooky – a free cat applique pattern

Spooky - free cat applique pattern from Shiny Happy World

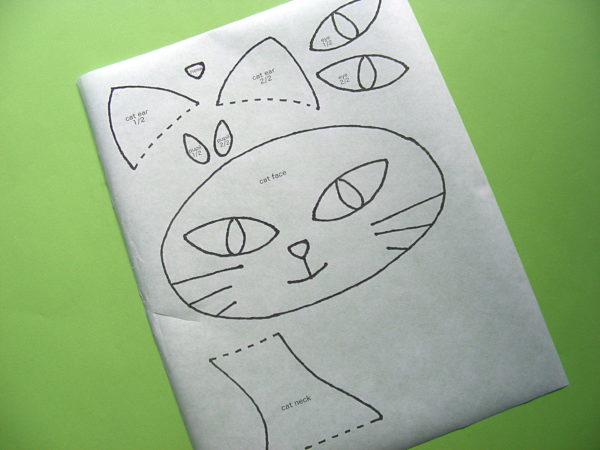
You can add this free cat applique pattern to your Cuddly Cats quilt pattern if you like. I designed it especially to have really terrific eyes for a black cat – but you can make it any color you like.

I love black cats! I grew up with two of them – Nasty and Gandalf. But it can be tricky to applique the eyes on a black cat. Almost all of my animals in all of my applique patterns have simple black oval eyes. That helps give all my designs a cohesive look – and they’re also simple to applique. But what if the animal you’re making is black? Black bears, black panda eyes, black raccoon eyes, black penguin eyes, and, of course, black cat eyes.

This post shows you a quick and easy trick to applique dark eyes on dark faces. But I really love black cats and I really wanted to make a free cat applique pattern with big, glowy cat eyes.

So I did!

Especially for Halloween, I created this spooky black cat applique – a single block applique pattern – with huge luminous green eyes. I love her! And the pattern is the same size as the blocks in the Cuddly Cats quilt so you can mix and match if you like. 🙂

There’s a tutorial here with instructions for making a hanging sleeve so you can make your block into a Halloween wall decoration. It’s easy!

Here’s how to make the block. (This video shows all the steps for working with fusible adhesive – if you’ve never done it before you’ll find it helpful.)

Step 1

Download the template pieces here.

Step 2

Trace or print the pattern onto the paper side of the fusible adhesive.

Spooky - free cat applique pattern from Shiny Happy World

I use Heat & Bond Lite printable fusible adhesive sheets so I just printed out the page. No tracing!

The image has already been reversed, so just trace or print. If you’re tracing, be sure to trace the facial features too. You’ll need those for Step 5.

Step 3

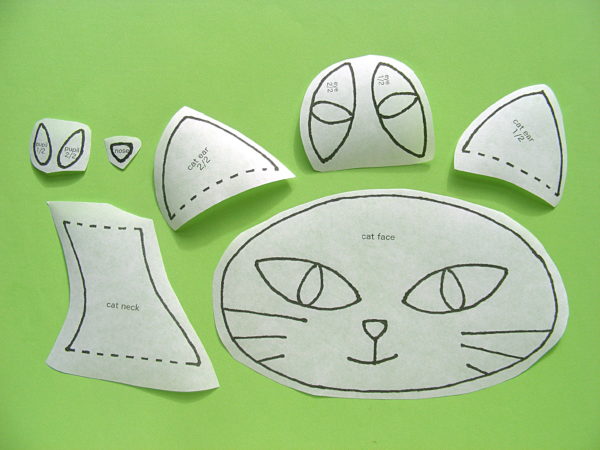
Rough cut around each shape and fuse it to the back of your fabric.

applique pattern pieces cut out - from the Spooky free cat applique pattern from Shiny Happy World

Leave a little bit extra all the way around ­- a little extra extra (at least 1/4 inch) where there’s a dotted line, like the top of neck shoulders and the base of the ears.

Step 4

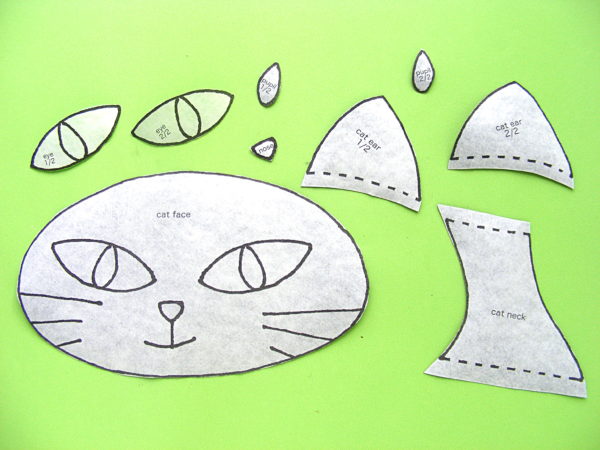
Cut around each piece neatly. Cut directly on the solid lines.

Spooky - free cat applique pattern from Shiny Happy World

Leave a little seam allowance on the dotted lines ­- the top of the neck and the base of the ears will tuck behind the head.

Step 5

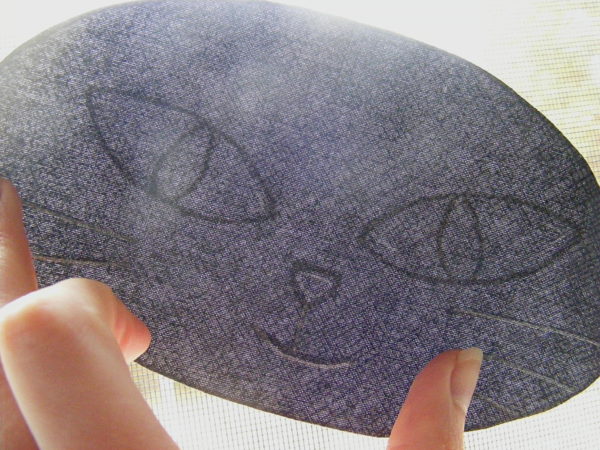
Remember when I told you to make sure you traced the facial features in Step 1? Now you’re going to use that. Hold the face up to a window so the light shines through it. You’ll be able to see the lines, and the adhesive will stabilize the fabric so you can trace on it without it crinkling up.

Spooky - free cat applique pattern from Shiny Happy World

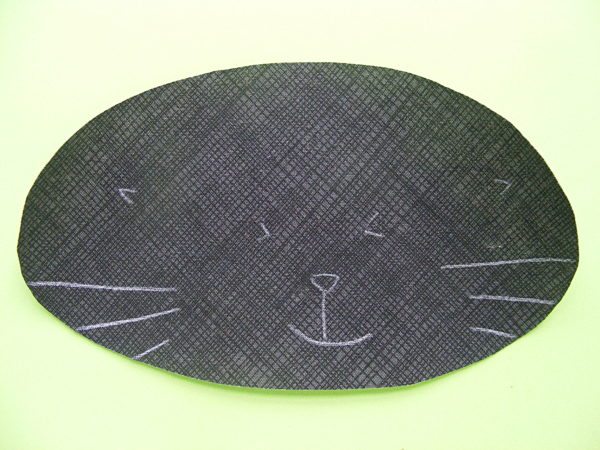
Since this is a dark fabric, I traced with a white chalk pencil.

Here you can see all the tracing I did – without the light shining through.

Spooky - free cat applique pattern from Shiny Happy World

I traced the whiskers and mouth exactly, since I’ll be stitching over those lines. I traced the nose a little smaller, and just marked the corners of the eyes to help me position the applique pieces later.

Step 6

If you’re doing Quilt As You Go (I did) then you can quilt your block before adding the applique. So easy!

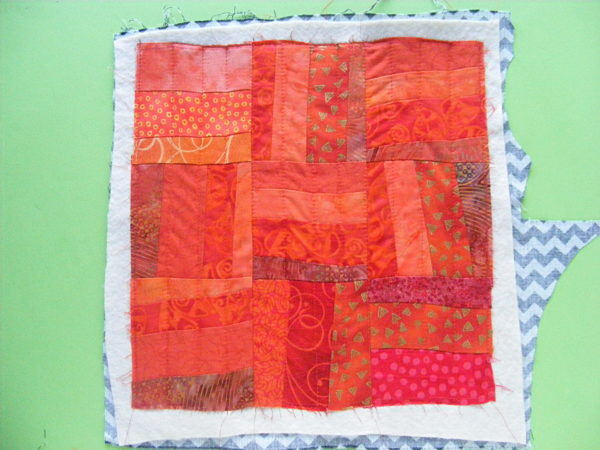
Spooky - free cat applique pattern from Shiny Happy World

I used a bunch of orange scrappy strips all sewn together for a super textured background, but you can use just one solid square.

Cut your background fabric and a piece of 100% cotton batting 11 inches square.

Layer the block with a piece of 100% cotton batting. Quilt any pattern you like!

Find all the Quilt As You Go tutorials here.

If you’ll do the quilting later, simply skip this step.

Step 7

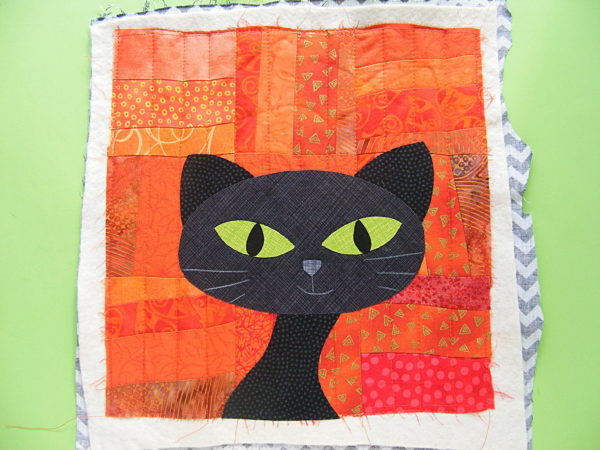
Peel off the paper backing and arrange the pieces on a background block. Tuck the ears and the neck behind the head.

Spooky - free cat applique pattern from Shiny Happy World

Remember -­ all the dotted lines indicate where pieces tuck behind other pieces.

Fuse the pieces in place.

Step 8

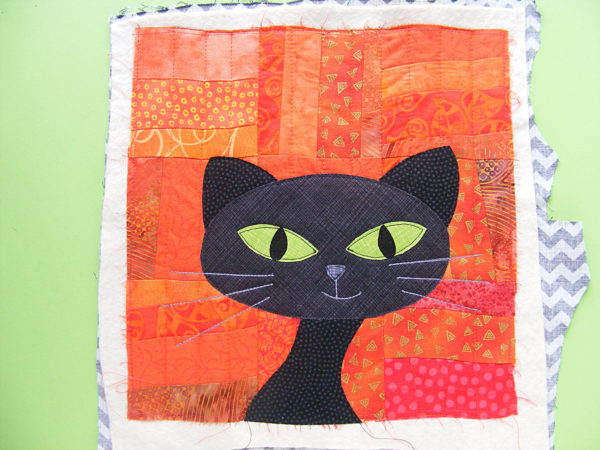
Outline all the pieces with black thread and a simple straight stitch – or choose your favorite decorative stitch.

Spooky - free cat applique pattern from Shiny Happy World

This video has some tips for outlining those tight curves.

Done!

One free cat applique pattern, all finished!

If you’re making a one-block project, go ahead and finish it up!

If you’re making a bunch of cats to join into a quilt -­ have fun!

Please share a photo of what you make! You can share it in the Shiny Happy People group or tag it with #shinyhappyworld on Instagram.

Happy stitching!

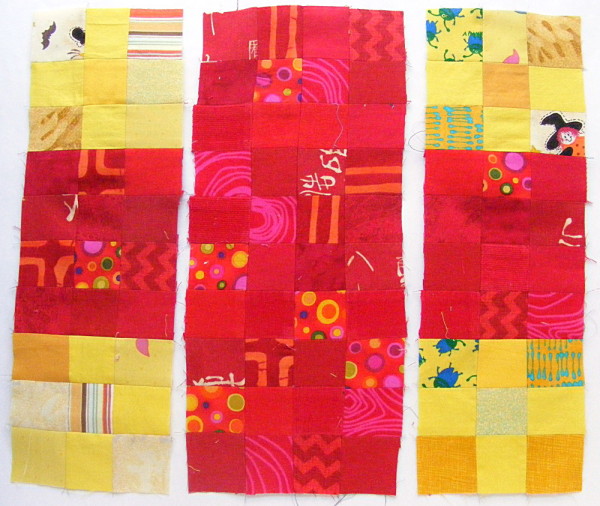
Block 12 in the Controlled Chaos Scrappy Quilt-Along

Block 12 in the Controlled Chaos Scrappy Quilt-Along

Here’s block #12 in the Controlled Chaos Quilt!

What You’ll Need

  • 64  two-inch squares in color A (shown in red)
  • 36 two-inch squares in color B (shown in yellow)

Instructions

Use 1/4″ seam allowances for all sewing.

Press all the seams. I’m pressing mine open for this quilt. I think it will make things simpler in the end.

Arrange your squares according to the diagram below.

Block 12 in the Controlled Chaos Scrappy Quilt-Along

For this block I sewed things up in chunks in order to keep the edges of each color perfectly straight, even if my seams weren’t lined up perfectly.

We’re going to sew the whole thing into three fat columns, but we’re going to sew some parts of those columns into chunks first.

1. Sew up four yellow 3×3 squares.

2. Sew up two red 3×4 rectangles and one red 4×10 rectangle.

Arrange those chunks as you see below.

Block 12 in the Controlled Chaos Scrappy Quilt-Along

Now sew all those chunks into columns.

Block 12 in the Controlled Chaos Scrappy Quilt-Along

Finally – sew those three columns into one fabulous block. 🙂

Here’s what my twelve blocks look like so far. Just eight more to go!

Controlled Chaos scrappy quilt-in-progress

Click here for all the Controlled Chaos posts.

Happy piecing!

Best,
Wendi
That's me!

Free – Sprinkles Doll Quilt Pattern

Sprinkles! A free doll quilt pattern for the Dress Up Bunch at Shiny Happy World

Sprinkles is a doll quilt pattern I designed especially for the rag dolls in The Dress Up Bunch – but it’s also just the right size for American Girl dolls and lots of random teddy bears and stuffed animals.

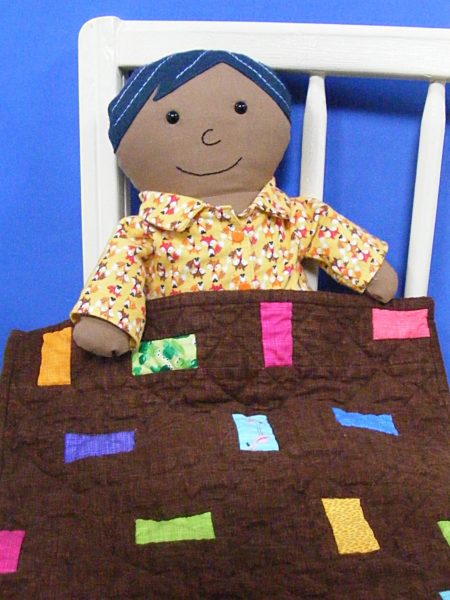
Look at Bean – all ready for bed in his flannel jammies, cozily tucked in under his brand new quilt.

He’s ready for his bedtime story!

The quilt (and the name) are inspired by a river of hot fudge covered with brightly-colored sprinkles. That’s sure to bring him sweet dreams. 🙂

It’s super easy to make – comes together in just a few hours. You can make it during a naptime or two!

If you’ve never made a quilt before, this is a great one to start with. I designed it to be especially easy! The blocks are easy to cut, they go together without any fussy seam intersections, and the quilting is easy.

Here’s how to make it!

Materials

  • 1/2 yard chocolate brown fabric
  • 1 fat quarter backing fabric
  • small scraps for the sprinkles (less than 1/4 yard total)
  • small piece (approximately 16″ x 20″) of batting

Step 1

Cut all your pieces. Watch this video to see how to use rotary cutting tools to square your fabric and cut strips.

Chocolate brown fabric Cut 4 strips 2 1/2″ wide, the full width of the fabric. From those strips cut the following. . .

  • 4 rectangles, each 2 1/2″ x 14″
  • 17 squares, each 2 1/2″ x 2 1/2″
  • 18 rectangles, each 2 1/2″ x 1 1/2″

Cut 2 strips 2 1/4″ wide for the binding

Sprinkles fabrics Cut 18 rectangles, each 2 1/2″ x 1 1/2″

Backing fabric 1 fat quarter, uncut

Step 2

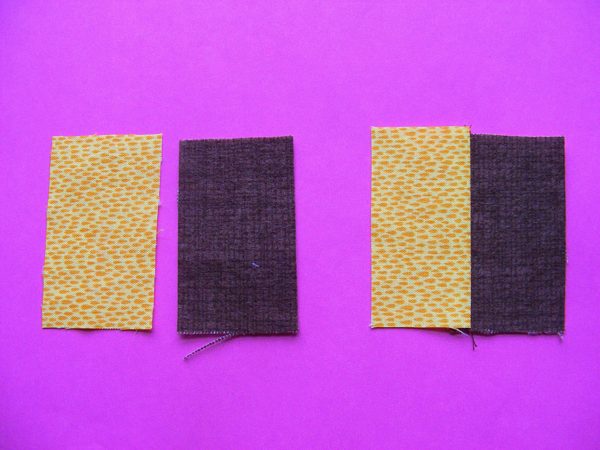
Join your smallest rectangles into squares. For each square join 1 brown rectangle with one sprinkle/colored rectangle. Sew them together with a 1/4″ seam allowance (I very strongly recommend using a 1/4″ foot on your sewing machine for accurate piecing!)

Partially-pieced blocks for the Sprinkles doll quilt

Press the seam allowance flat. It doesn’t matter which way you press it ­- this quilt has no nested seams. I usually press toward the darker fabric, but in this case, the brown flannel was thicker than the sprinkles fabric so I pressed it toward the thinner fabric.

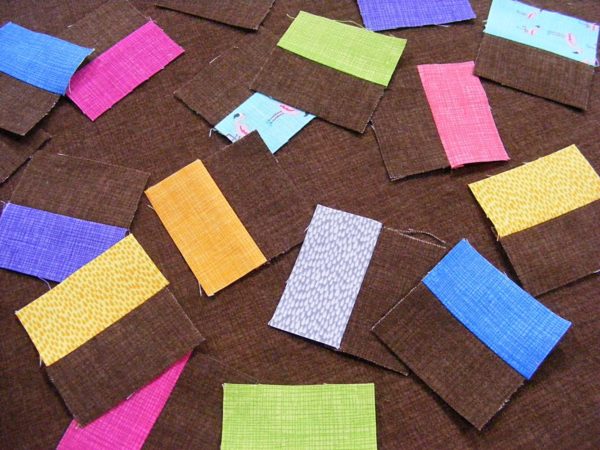
Repeat with the remaining small rectangles until you have 18 squares.

Sprinkles blocks ready to assemble for the doll quilt pattern

Step 3

Join all the blocks together as shown in the diagram.

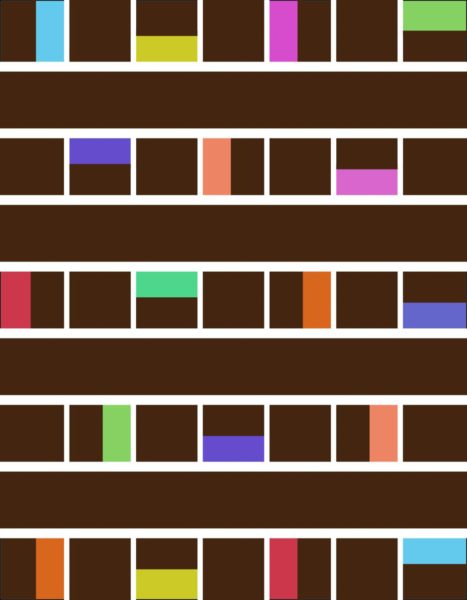
Sprinkles - doll quilt pattern assembly diagram

First sew the blocks into rows, alternating brown blocks with the pieced brown/sprinkles blocks you made in Step 2. Press all your seams flat.

Then sew those rows together with your long rectangles between them. Press your seams flat.

You’re done with your quilt top!

Step 4

Time to put the layers together! Watch this video to see how to layer and baste your quilt sandwich.

Step 5

Time to quilt!

Watch this video to see how to machine quilt.

A small doll quilt pattern like this is also a great opportunity to give Big Stitch Quilting a try.

I quilted this top in two steps. First I quilted around each sprinkle. Then I quilted across the surface of the entire quilt with diagonal lines that went corner to corner on all the squares – skipping over the sprinkles.

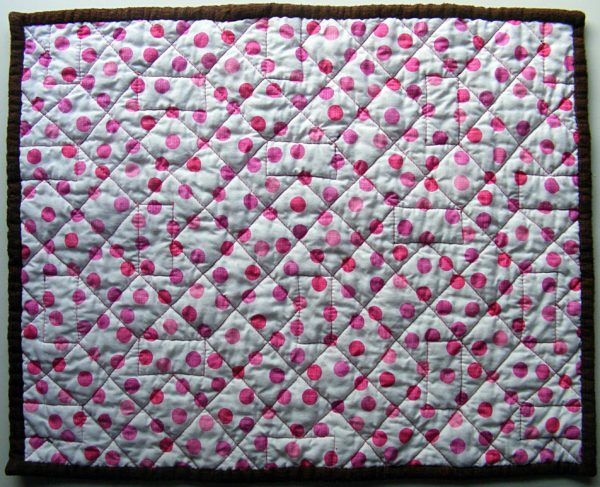
The squares are small enough that no marking is needed ­- just eyeball it. You can see the quilting in these photos of the front and back of the quilt.

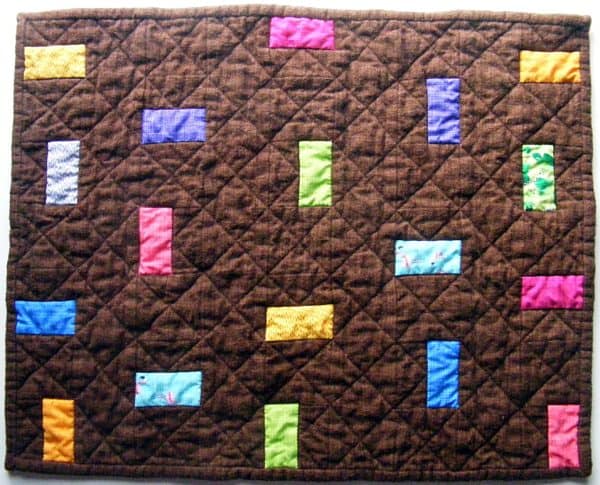
Finished Sprinkles doll quilt - made with a free pattern from Shiny Happy World
doll quilt back showing the quilting lines

Step 6

Almost done! Now you just have to bind the edges -­ my favorite part. Watch this video to see how to bind your quilt.

Finished!

Dress your doll in their favorite jammies, read them a story, then tuck them in under their cozy new quilt. Then brag a little! Or a lot. :­-) You just made a quilt! Pat yourself on the back. Call everyone you know. Take photos and share them in the Shiny Happy People group. Share them other places too – but tag them #shinyhappyworld so I see them too. 🙂

cozy doll bedtime

So many patterns!

So much bedtime fun!

Happy stitching!

If you like this pattern, sign up for the Shiny Happy News! Members get a weekly newsletter with sewing tips and tricks, links to free patterns, special discounts, and more.
The Dress Up Bunch is a collection of cute and cuddly rag dolls. Get patterns for the dolls, plus all their fun outfits and accessories!

Charity Quilt Tutorial

Red and purple improv log cabin blocks made with the free scrap quilt pattern from Shiny Happy World

For a while now I’ve been thinking about designing a free scrap quilt pattern that’s as fun, easy and versatile as the Warren the Charity Bear pattern.

Just like Warren, I wanted something that was fast. I know some of you make and give away a LOT of these quilt every year.

I wanted something that was easy. Easy enough for a beginner or a child to make.

I wanted something that was versatile. Something that you could play around with and make a lot of different looks – and not get bored making lots of them.

When Craft Hope announced that they were looking for some quilts for part of their newest project, I jumped right in.

I’m making my quilt entirely from scraps. I sort my scraps by color and I’m tackling one basket at a time, so the blocks so far are all purple and red. When I’m done it’ll include all the colors of the rainbow. 🙂

My quilt also uses Quilt As You Go – but a different technique from what you’ve seen me use for the applique quilts. For this quilt I’m actually quilting as I piece – a huge time-saver and lots of fun. This method also allows me to use batting scraps. Bonus!

Here’s how I build a block. . .

Batting squares cut and ready to use in a free scrap quilt pattern.

Cut some batting squares a little bit bigger than the size you want your finished blocks to be. My finished blocks will be 10 inches square, which means I’d normally cut them 10 1/2 inches – but I cut mine 11 inches square to give myself a bit of wiggle room. That wiggle room lets you be a bit imperfect in your cutting – see how the fold in the batting made a little jagged pointy bit on the left side? That’s ok – it’ll get trimmed off. 🙂

Important! You must use 100% cotton batting. You’re going to press this a lot and anything with polyester in it will melt to your iron. I always use Warm & Natural – you can read my review of it here.

Blue and yellow beetle fabric on a batting square

Pick a piece of fabric to be your center feature and cut it (roughly) into the shape you want. All of mine are four sides – but nowhere near perfect squares or rectangles. I used scissors (not rotary cutting tools) and just eyeballed everything. Slap that piece down in the middle-ish of a batting square.

detail image showing how to piece an improv log cabin block

Now pick another scrap of fabric. Trim it to match the width of the starter scrap, lay it face down over the starter scrap with the raw edges mostly lined up, and sew across the edge using 1/4 inch-ish seam allowance. You’re sewing through both pieces of fabric and the batting.

detail image showing how to piece an improv log cabin block

Flip that piece up and press it flat.

Now we’ll add another strip. I like to work clockwise, but it really doesn’t matter.

detail image showing how to piece an improv log cabin block

Lay a strip face down over both your earlier pieces and trim it (roughly) to fit. Sew it in place just like the first one. (You can click on the photo if you need to see it bigger.)

detail image showing how to piece an improv log cabin block

Flip that piece open and press it flat.

first rings of red strips sewn around a yellow rectangle, demonstrating a free scrap quilt pattern

Keep working your way around that center, building up the size of your block. I added the zigzag piece next, then the skinny stripes.

Keep adding strips until the batting is completely covered.

detail image showing how to piece an improv log cabin block

Those first four red strips were pretty uniform, so it’s time for a skinnier strip. I like to keep things mixed up for more interesting blocks.

detail image showing how to piece an improv log cabin block

I also like to make sure some of my strips go slanty – so they’re thicker at one end and thinner at the other. To do that, I don’t line up the raw edges exactly – I let the new strip slope up or down a bit, like in the photo above.

detail image showing how to piece an improv log cabin block

See how that looks when it’s pressed open? It’s not the most efficient use of fabric, but I’m only wasting a tiny bit and I think it makes the block much more interesting.

detail image showing how to piece an improv log cabin block

Sometimes I use a new fabric with every strip and sometimes I’ll use the same fabric a few times in a row to build interesting shapes. Two consecutive strips of the same fabric makes an L. Three makes a U. And four makes a frame.

detail image showing how to piece an improv log cabin block

Sometimes I only have strips that are too short to reach all the way from edge to edge of the block – especially as the center section gets bigger.

When that happens, I just sew two strips together and use the new, longer strip in my piecing. Sometimes I use two strips of the same fabric, and sometimes I use different fabrics (like in the strip on the right in the photo above). It totally depends on my mood at the moment.

Red improv log cabin block with raggedy edges, waiting to be trimmed. Free scrap quilt pattern.

Keep going until your batting square is completely covered.

Finished block in a free scrap quilt pattern, shown from the back so you can see the quilting lines

Here it is from the back. See how there’s fabric showing all around the edge of the batting? And look at the nice quilting already done – holding everything together. I’m going to back this quilt with cuddle fleece for special cuddly warmth. There are tips here for using cuddle fleece for the back.

Trimmed block (shown from the back) in a free scrap quilt pattern

Trim your block down to size from the back, so you can see that you’re getting batting in the entire block. I trimmed mine down to 10 1/2″ square.

And here’s the finished block!

Finished red improv log cabin block - a sample demo block in a free scrap quilt pattern

In the very first photo I showed the blocks arranged in a checkerboard-ish pattern, with red blocks alternating with purple. I’m not sure yet what the final arrangement for the quilt will be – it kind of depends on how many blocks I end up with for each color. Here’s an alternate possibility where the blocks blend from one color to another.

Red and purple sample block arrangement for a free scrap quilt pattern from Shiny Happy World

Whatever arrangement I choose, the final quilt will be bright and cheerful and cuddly and warm – just what I want to give a child. 🙂

Update! You can see the finished free scrap quilt here. Along with showing the finished quilt, I also answered a lot of questions people had about the process. Click over to get more details.

A couple of final notes. . .

I think improvisational scrap blocks like this look best when you sort your fabrics a bit first. You can see that within the red blocks there’s a brick red block, a red and white block, two bright pink blocks, one light pink block, and several bright red blocks. Within the purples I have one magenta-ish purple block, three lighter purple blocks, and lots of dark purple blocks. Sticking to one shade or tone per block keeps a little order.

This would be a really fun way to make an I Spy quilt – with pairs of center pieces to match up. I have two of the larger blue/green stars and two of the girl in the blue tree.

Here’s a post with some helpful info about where you can donate your finished beauties made with this free scrap quilt pattern.

Happy quilting!