How I Care for My Fabric Scissors

The Great Scissor Rotation - how to get the most use out of every pair of scissors

Everyone knows not to use your good fabric scissors on paper, right?

RIGHT?

Today I thought I’d go beyond that very basic info with some extra detail on how I manage all my scissors – including my fabric scissors. This is going to answer a few questions that I get all the time.

Do you use expensive scissors?

Nope. Don’t get me wrong – I’m a big fan of high quality tools. I KNOW that quality scissors are better than cheap ones. But I also know that I am terrible at things like. . . bringing scissors in to get them professionally sharpened.

Good quality scissors that are painfully dull because I don’t know how to sharpen them myself and I can’t seem to coordinate my life well enough to get them professionally sharpened are worse than cheap scissors.

I can get a decent pair of Fiskars sewing shears at any big box fabric or craft store for under $20 – and then replace them every year. More on that replacement in a bit. . .

Which scissors do you use for cutting fabric and paper together – like with fusible adhesive or freezer paper?

Ah – that brings me to The Great Scissor Rotation.

I keep three pairs of big scissors in my fabric room. (This is only about the big scissors (shears, if you want to get technical) – I also have spring-loaded snips at the sewing machine and an assortment of tiny scissors for precision work.)

My newest pair of scissors is for fabric only.

When I bring in a new pair, the old fabric scissors become the scissors I use for fabric fused to paper.

(Update! I’ve discovered some specialty scissors that I REALLY love for cutting applique pieces, so now I use these for that purpose exclusively, and I leave this step out of my rotation)

The old fabric-fused-to-paper scissors become my paper scissors.

My old paper scissors move into the kitchen for snipping herbs, cutting waffles into dipping strips, cutting open packaging, etc.

And my old kitchen scissors move into the toolbox for real heavy duty work.

The scissors that were in the toolbox are usually totally destroyed by this time and they finally go in the trash.

I buy a new pair of scissors about once a year. While that may seem wasteful at $20 a pair when I could buy a quality pair that will last a lifetime for just under $100 – every pair of scissors I bring in gets used for about five years. Not bad at all! And I never need to coordinate bringing them in to be sharpened. 🙂

I mentioned above that this rotation only applies to basic shears. I do have some other specialty scissors that I love and am very particular about.

By the way – because I know someone is going to ask. I do sharpen my kitchen knives – but sharpening scissors is a different matter, one that I’ve been told repeatedly is best left to professionals. The angle of the sharpening is very different and you need to get both blades to work together. It’s more complicated and beyond my rudimentary knife-sharpening skills.

Here are handy links to all the posts about quilting tools and supplies.

Sewing Machine

Iron

Rotary Cutting Tools

Scissors

Other General Sewing Room Supplies

One More Hugely Popular Post that Seems to Fit Here Better than Anywhere Else

Return to the Let’s Make a Quilt main Table of Contents.

Move on to the posts about choosing your quilt pattern.

Happy stitching!

Free Butterfly Applique Pattern

Lovely Butterfly - a free applique pattern from Shiny Happy World

Want to learn how to make a quilt with an easy online workshop – totally free?

Sign up for Let’s Make a Quilt here. You’ll learn how to get started, the tools and supplies you’ll need, and how to make a quilt from start to finish using Quilt As You Go and applique with fusible adhesive.

It’s the easiest, most fun way to make an applique quilt. You can do it!


Applique a pretty butterfly with this free pattern!

When I was designing the Wild Flowers quilt pattern, I thought about adding a few bugs to the garden.

Nothing creepy. A ladybug, a bee and a butterfly. Maybe a grasshopper and a worm.

In the end I decided to just make it a wild riot of colorful flowers – bug free.

But I kept thinking about the bugs. The zinnias in my garden and the butterfly bushes in my yard are in full bloom right now and they are covered with swarms of beautiful butterflies.

I realized that I could release a free butterfly pattern, scaled to match the blocks in the Wild Flowers quilt. That way you can substitute one (or more) butterfly blocks for any of the square blocks in the quilt.

Fun!

Of course, you don’t have to make a quilt. You could use this solo block pattern in a pillow, a tote bag, a tablet cover, a wall hanging or more. You could applique it on a finished T-shirt or on a tea towel.

You could also go totally quilt crazy and make a bunch of butterfly blocks in different colors and join them into one joyous, colorful quilt!

Have fun with it!

Want to see a mock up of the butterfly applique pattern mixed in with the flowers from the Wild Flowers pattern?

Lovely Butterfly - a free applique pattern mixed into a Wild Flowers quilt

See it? I tweaked the color a bit in photo editing to make it stand out more, but you’d let it blend in real life. 🙂

This is easy peasy applique. All of the instructions use my favorite applique with fusible adhesive technique (with links to video tutorials, of course) but you could also use needle turn or freezer paper applique.

Materials Needed

For each block you’ll need an 11 inch square of fabric for the background, scraps of fabric for the butterfly and one sheet of fusible adhesive. (I use this printable product – no tracing!)

If you’re doing Quilt As You Go you’ll also need an 11 inch square of cotton batting.

Download the free butterfly applique pattern templates here.

Step 1

Trace the pattern onto the paper side of the fusible adhesive.

free butterfly applique pattern templates - photo showing them printed out

I use this printable fusible adhesive so I just printed out the page. No tracing!

The image has already been reversed, so just trace or print.

Step 2

Rough cut around each shape.

butterfly pattern pieces cut apart

Leave a little bit extra all the way around ­- a little extra extra (at least 1/4 inch) where there’s a dotted line ­- the inside edges of the wings where they’ll tuck under the body.

Step 3

Fuse each pattern piece to the wrong side of the fabric.

butterfly applique pattern pieces fused to the back side of the fabric

Step 4

Cut around each piece.

butterfly applique pieces cut out neatly

Cut directly on the solid lines. Leave a little seam allowance on the dotted lines – that’s where­ the inside edges of the wings will tuck under the main body piece.

close up showing the extra seam allowance at the base of the wings of butterfly applique pieces

Step 5

If you’re doing Quilt As You Go then you can quilt your block before adding the applique. So easy!

Cut your background block and your batting 11 inches square. Layer them together and quilt any pattern you like!

This link goes to a post showing all my favorite straight line quilting patterns, and this link goes to my favorite wavy line patterns.

If you’ll do the quilting later, simply skip this step. (That’s what I did for my sample block – so you won’t see a quilted background in the following photos.)

Step 6

Peel off the paper backing and arrange the butterfly pieces on your background block. Tuck the edges of the wings behind the body, and the top wings behind the bottom wings.

Remember -­ all the dotted lines indicate where pieces tuck behind other pieces.

Fuse the pieces in place, following the package instructions for whatever brand of fusible adhesive you’re using.

Step 7

Stitch around all the pieces. I just did simple straight line stitching in black thread.

I love the cartoony effect.

This post has more information about outlining stitching your applique.

Done!

One free butterfly applique pattern becomes as lovely fabric butterfly block!

If you’re making one-­block project, go ahead and finish it up!

If you’re making a bunch of butterfly blocks to join into a quilt -­ have fun!

Happy quilting!

If you like this free pattern, sign up for my weekly newsletter! You’ll get notifications of new tutorials, free patterns, sewing tips and tricks, fun videos, yummy recipes and special discounts. 🙂

Jo’s Finished T-shirt Quilt

Jo with her finished T-shirt quilt. Learn how to make it at Shiny Happy World!
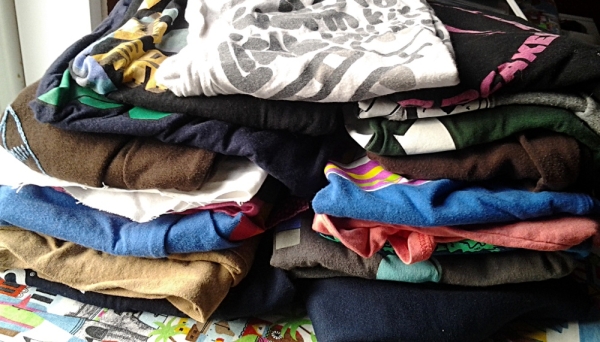
It’s finished! Jo’s T-shirt quilt is finished – and just in time.

Whew!

I finished the last bit of the binding at midnight the night before she had to leave for school. It’s a good thing Jo wanted to spend her final night at home watching a Doctor Who marathon (perfect for binding handwork) otherwise I was sure I’d be finishing it in the car on the way. 🙂

Yes – that’s Cuddle Fleece on the back. She’s just crazy about that stuff! She actually asked me to make her a pillowcase out of it the morning before leaving for school. I had to tell her I’d mail it to her. 🙂

The finished quilt fits a twin-size bed with an overhang all around. It’s 72 inches wide and 87 inches long – made up of thirty 15-inch squares.

You can see all the posts about making it here.

I know you can’t see all the individual blocks with it wrapped around her, so here it is all flat.

Finished T-shirt quilt. Learn how to make it at Shiny Happy World!

The image is actually a digital mock-up of the finished blocks. I used it to help me decide on the final layout without crawling around on the floor.

The blank gray squares you see are where Jo didn’t have quite enough T-shirts for the size quilt she wanted. I filled those spots in with favorite fabrics she picked from my stash.

I love how it’s a collection of all the things she’s loved/been obsessed with over the last 8 or 9 years. I see a lot of cats in there. . .

Cat Block for a T-shirt quilt. Learn how to make it at Shiny Happy World.

. . . some geeky goodness. . .

Jawa block for a T-shirt quilt. Learn how to make it at Shiny Happy World.

. . . a reminder of a terrific Dragon*Con panel with the creators of Fraggle Rock. . .

Making a T-shirt quilt

. . . Minecraft and other video games. . .

Minecraft block for a T-shirt quilt. Learn how to make it at Shiny Happy World.

. . .our trip to Japan. . .

Pig block for a T-shirt quilt. Learn how to make it at Shiny Happy World.

. . . and (of course) Doctor Who.

Little Mermaid/Doctor Who block for a T-shirt quilt. Learn how to make it at Shiny Happy World.

Quilting was simple. She didn’t want batting – just the Cuddle Fleece backing – so I didn’t have to worry about quilting closely enough to hold the batting in place. I just stitched in the ditch between each block. Here are some videos to help you with the final steps of the project.

If you make a T-shirt quilt with this method, I’d love to see it!

Happy quilting!

Best,
Wendi
Applique Wendi (with fabulous hat)

T-shirt Quilt – Almost Finished

T-shirt Quilt In progress - tutorial at Shiny Happy World

Here’s a quick update on the T-shirt quilt.

22 blocks finished, 8 still to go.

But I only have 5 T-shirts left in my pile!

Jo’s cleaning out her closet today and she may pull out a couple more that are getting too small. If that doesn’t net us three more I’ll be hitting my fabric stash and just cutting 3 big blocks of fabric she loves for the last few squares.

We had one of her favorite T-shirts that didn’t make it into the quilt. It was just too tall and she didn’t want to lose any of the image – not even a smidgen. So she asked if I could make her a pillow out of it.

Soft Kitty T-shirt pillow

Done!

It’s a nice squishy pillow and she loves it!

I used this method to make the pillow – only instead of adding framing all the way around I just added strips to the sides. It’s the same idea though! And I always put a zipper in the back so I can remove the cover and wash it.

Jo LOVES these pillows and uses them instead of bed pillows. In case you’re wondering, it’s Fairfield brand Home Elegance Ultimate Luxury PIllow – it feels exactly like a pricey down pillow but it’s less expensive and machine washable. Win!

You can see all the posts about making a T-shirt quilt here.

And don’t forget about Diane Gilleland’s online T-shirt Quilt Class happening today!

Happy sewing!

Best,
Wendi
Applique Wendi (with fabulous hat)

Fletcher – a FREE Chevron Quilt Pattern

Fletcher - a free pattern for an easy Chevron Quilt from Shiny Happy World

Want to add a dramatic angle to your quilting?

Try this easy chevron quilt pattern. It’s free. 🙂

That’s right – FREE! And that doesn’t mean it’s some skimpy abbreviated form of one of my regular patterns. You’ll get everything one of my regular quilt patterns normally includes.

Complete instructions – including yardage requirements, cutting instructions, and assembly diagrams – for five different sizes.

  • Crib (48″ x 61″)
  • Nap (60″ x 72″)
  • Twin (66″ x 83″)
  • Queen (84″ x 94″)
  • King (108″ x 94″)

Detailed instructions with step-by-step photos showing how to assemble the blocks.

Instructions (and diagrams) for pieced backs for all the quilt sizes.

Links to videos teaching you all the skills you’ll need to complete the project – including basting, quilting and binding.

This is a very easy quilt – easy to cut, easy to sew, and easy to machine quilt. And it’s designed to make efficient use of fat quarters and all your scraps. Wait until you see how this one goes together!

Want the pattern? Here’s the link to download it!

Download the Fletcher quilt pattern here.

If you like this free pattern, sign up for the Shiny Happy News! Members get a weekly newsletter full of sewing tips and tricks, free patterns, special discounts, and other things to make you smile. 🙂

Happy stitching!

Making a T-shirt Quilt – Part 4

Today I’m going to share a bit of problem-solving with you for your T-shirt quilts.

Most T-shirt designes are pretty well centered, with some room all the way around.

But sometimes the design of a T-shirt goes right up to the armhole, making it difficult to cut a square corner and get all the important bits.

Take, for example, this Fraggle design.

Making a T-shirt quilt

I cut this out as close to the arm seam as possible, but Mokey Fraggle is right up against the cut. The sleeve fabric was kind of yucky and worn there – so I definitely wanted to cut it away – but I didn’t want to lose Mokey!

I made the cut and did the interfacing as though there was fabric there. (I didn’t press that loose corner of interfacing – that would have fused it to the ironing board. I just left it unpressed while I fused the rest down.) Then I cut out the image – again pretending that there was fabric in that corner.

Of course, the next step is to sew in some real fabric to replace the pretend stuff. 🙂

Making a T-shirt quilt

I cut a strip of fabric big enough to cover the missing corner, laid it along the edge of the armhole cut, and sewed it in place with a straight seam.

Making a T-shirt quilt

Then I flipped the strip over the corner and pressed the seam flat (from the back so I didn’t smear the image).

Making a T-shirt quilt

Trim the corner to square up the block.

Making a T-shirt quilt

Then frame it out just like all the other blocks.

Problem solved!

I ran into the same issue with the Nyan Cat T-shirt.

Making a T-shirt quilt

And solved it the same way. 🙂

Here’s what the blocks look like so far.

Making a T-shirt quilt

I’m hoping to finish all the blocks this week, so next week will be joining, basting, quilting and binding. In my dreams I’m handsewing the binding while I watch Diane Gilleland’s T-shirt Quilt class and learn all the things I could have done better. (It looks amazing and it’s free! Sign up here and watch with me!) In reality I’ll probably be doing it in the car on the way to drop Jo off at school. 😛

Read all the posts about my T-shirt quilt here.

Happy quilting!

Best,
Wendi
Applique Wendi (with fabulous hat)

Making a T-shirt Quilt – Part 3

Making a T-shirt quilt

Here’s where things stand right now on Jo’s T-shirt quilt. I’ve fused the interfacing and cut images from all the T-shirts in the stack, and I’ve got finished, framed blocks for eight of them.

I wrote about the tools and supplies I’m using for this quilt here.

And I wrote about the hows and whys of the interfacing here.

Today I’ll show you how I’m framing the images to make uniform blocks.

The shirts I’m using in this quilt range from children’s XS to men’s XL. That, my friends, is a big range of sizes.

There are some amazingly complex T-shirt quilts out there that fit all those sizes together like a jigsaw puzzle. You can see some of them in this Pinterest board I’ve been building.

Frankly – the thought of planning that out made my head hurt. And then the cutting and piecing would have to be really precise and I would be quickly getting far away from the kind of quilts I like to make.

(One of the things I’m most eager to hear in Diane Gilleland’s class about T-shirt quilts is how she plans the layouts. Her T-shirt quilts have a lovely harmony and simplicity to them, and I can’t figure out how she does it just by seeing the finished quilts. I can’t wait to learn more about her approach! RSVP for the free video workshop happening on August 21 and 22 and take the class with me!)

Until I learn Diane’s magic secret – I decided to keep things simple.

1. I already own a 15 inch square ruler – so all the blocks will be 15 inch square blocks. Easy.

2. I cut the T-shirt images whatever size works best for the image. Then I add fabric around the image until it’s bigger than 15 inches. Then I use that handy-dandy ruler to trim it to the exact right size.

Today I’m going to show how I do that framing.

Here’s where we left off in the interfacing post.

Making a T-shirt quilt

The T-shirt has interfacing fused to the back and it’s trimmed where I like it.

I hit my stash and pulled some blue that very closely matched the blue of the T-shirt.

My original plan was to use contrasting fabric for the frame – like pulling out the green of her tail or the orange of her hair – but in the end I decided that would be too busy. I want the focus to be on the T-shirt images, so my frames add a bit of extra texture (none of them are solids) without adding additional color.

I added strips all the way around the image until the block was bigger than 15 inches. I added strips to the top and bottom first, then pressed it and added strips to the two sides and pressed again.

You can add to the sides first and then the top and bottom. Or you can work your way around the block log-cabin-style. It doesn’t really matter – just get fabric on all four sides.

Press all your seams away from the T-shirt center. And press everything from the back so you don’t smear your image!

Making a T-shirt quilt

Here’s the framed block with my 15 inch ruler set on top so you can see the extra all the way around.

Now – position that ruler where you want it and cut around all four sides. I wanted my blocks off center – but straight – so I lined one of the ruler lines up with a seam between the T-shirt image and the frame so everything stays nice and straight. If you look closely (click on the image to zoom in) you can see that the one-inch line on the ruler is lined up with the seam on the right side of the block.

I think it would be fun to have the images at interesting angles in the quilt, but Jo wanted them straight. 🙂

Making a T-shirt quilt

And here’s the finished block!

You can see I added wider strips to some sides, and narrower to others. I don’t want the image centered in the block, so unevenness is good. Also – then I don’t have to measure anything. 🙂 The effect is even more noticeable in some of the blocks with smaller images. Scroll back up to the top of the post to see the rest of the blocks so far.

Tony the Tiger was the only image big enough to cut 15″ square with no framing – so he’s in there just just from the T-shirt. Everything else is getting at least some framing.

Next week I’ll be back with a post about handling T-shirts whose images go right up to the armholes.

See all the T-shirt quilt posts here.

Happy quilting! Have a great weekend!

Best,
Wendi
Applique Wendi (with fabulous hat)


Making a T-Shirt Quilt – Part 2

How to Make a T-shirt quilt

Yesterday I wrote a bit about the tools and materials I’ll be using to make Jo’s new T-shirt quilt.

Today I’m actually getting started!

As I mentioned yesterday – the main challenge in making a T-shirt quilt is that T-shirts are stretchy. Stretchy fabric is usually the LAST thing you would choose to make a quilt. It stretches – which makes precise measuring hard. And the edges curl when they’re cut which is really annoying.

So the first step is to make your stretchy T-shirts no longer stretchy.

For that I used interfacing.

Specifically – Pellon 906F. It’s the lightest weight interfacing I could find.

Here’s how the interfacing works. . .

The Pellon 906F is a fisuble interfacing. That means you iron it to the back of your fabric and it creates a permanent bond. You’re basically gluing a non-stretchy fabric to the back of a stretchy fabric – which makes the stretchy fabric no longer stretchy.

Clever!

I chose the lightest weight interfacing I could find because I didn’t want to make my fabric overly heavy or stiff. With the 906F it still drapes nicely – so that’s good!

Here’s the step-by-step. . .

Step 1 – Cut away the front of the shirt

How to Make a T-shirt quilt

I cut right up the side seams and across the shoulder seams, as close as I could get to the seams without being too crazy fussy about the whole thing.

Step 2 – Add interfacing

How to Make a T-shirt quilt

See the interfacing peeking out where the armholes were? That gives you a sense of how big I cut the piece of interfacing. From the back it’s just a big square of white fabric stuck to some blue fabric – not the most useful image.

Cut a piece of interfacing larger than the image on the front of your shirt.

Lay the shirt front face down on your ironing board.

Iron the interfacing to the back of the image. Follow the package instructions as best you can.

This involves slowly counting to ten over and over and over and over again. It’s very boring – but it’s not hard and it’s what makes the whole thing work. Just listen to some music or a podcast or watch TV while you do it. 🙂

Important note – the instructions for the Pellon 906F say to flip the fabric over after the initial fuse and iron again with steam from the front.

Don’t do that!

A lot of the inks and image transfers used on T-shirts will melt and smear if you iron directly on them. Instead I lightly spritzed the back all over with water and pressed the whole thing again until it was dry.

Step 3 – Cut the image however you like

How to Make a T-shirt quilt

I’m cutting all the images for this quilt with square corners. That’s easy if you use clear rulers and rotary cutting tools. You don’t have to do it – but it will make for easy framing.

For the technique I’m using I’m not measuring at all. Easy peasy! I’m just cutting around the image in a way that looks good to me for that image.

And that’s it! The T-shirt is no longer stretchy. The cut edges don’t curl. And I have a nice, easy shape to frame out for the final block. Tomorrow I’ll show you that step – how I frame the images to get blocks that are all the same size. With no measuring!

Disclaimer – This is my first T-shirt quilt ever. I’ve made a lot of quilts and I’ve worked with knit fabrics – so I’m not starting from nowhere. But I am in no way an expert! If you want to learn from an expert, sign up for Diane Gilleland’s class here. She makes some BEE-YOO-TEE-FUL T-shirt quilts and I’m definitely taking the class myself. It’s free if you RSVP for the live version!

Happy quilting!

Best,
Wendi
Applique Wendi (with fabulous hat)

Making a T-Shirt Quilt – Part 1


We’re a T-shirt-wearing family. All three of us wear T-shirts all the time – the geekier the better. (Our favorite source for great designs is Tee Fury. They have a new design every day – available for only a day. Fun!)

Jo has been saving her outgrown T-shirts for years, with the thought that someday I would make her a T-shirt quilt with them.

Someday is suddenly NOW. She’s going away to school in a couple of weeks and has requested a T-shirt quilt for her bed.

I have never made a T-shirt quilt.

A couple of months ago I saw that Diane Gilleland is offering a video class showing how to make T-shirt quilts. Awesome!

Diane is a terrific teacher and the author of the wonderful book Quilting Happiness. You can read my review here.

And her T-shirt quilt class is FREE if you watch it live. Even more awesome!

Get all the details and get signed up here.

Seriously! Do it! I’m doing it!

But first I’m going to muddle through one on my own because Diane’s class is happening the last two days before Jo heads off to school and I know I’m setting myself up for major stress if I try to actually make the entire quilt in two days.

And guess what?

I’m going to share the muddling through part with all of you! I always get such nice emails when I share my mistakes publicly and this has the potential for some truly spectacular failures. 🙂

I’ve done a little bit of research about T-shirt quilts, but mostly I’m winging it. I figure I’ll learn all the good stuff in Diane’s class. 🙂 But here are a couple of key things I’ll be doing/tools I’ll be using. . .

Interfacing

T-shirts are stretchy. Stretch is bad when you’re trying to do precise piecing and end up with nice, straight lines. Plus the cut edges will curl up and make me crazy when I’m trying to sew them together.

So the first thing I’m going to do is make my stretchy fabric not stretchy anymore. For that I’m using fusible interfacing.

I don’t sew clothes or structured bags much, so I’m no interfacing expert. I decided to use Pellon 906F – a very lightweight fusible interfacing. I took a totally wildly random guess and bought 6 yards for my quilt. I’ll let you know later if that was enough. 🙂

I’ll write a post showing what I do with the interfacing.

Totally Random Sizes

The pile of shirts ranges from children’s XS to men’s XL (she added a couple of Alan’s old shirts to the stash too). We want to keep the images on the front of the shirts as intact as possible, so I decided to frame each image with scraps of regular fabric. I’m a little worried about mixing wovens with knits, but it’s what Jo asked for and I’m willing to give it a try. I’ll let you know how that works.

The finished blocks will all be 15 inches square. Why? Because I already have a 15 inch square ruler and I’m going to use it to make trimming the blocks to their final size quick and easy.

I’ll share how I standardize the sizes of the blocks in its own post.

Jo wants a twin-sized quilt, so I’ll be making 30 blocks. I think she has 28 T-shirts so I’ll fill in the last couple of blocks with fabric of Jo’s choice.

Tune in tomorrow for the post about the interfacing!

And remember to sign up for Diane’s class if you want to learn from someone who has actually DONE THIS already and done it very well. No – I’m not an affiliate or anything. I’m just really confident that the class is going to be awesome and I want you to get in on it. 🙂

Happy quilting!

Best,
Wendi
Applique Wendi (with fabulous hat)

How to Applique with Whipstitch – a video tutorial

How to Applique with Whip Stitch - video tutorial. Sample shown of a green dot stitched to a square of turquoise felt with pink thread

There are a lot of different stitches to choose from when you applique felt – buttonhole stitch and running stitch are especially popular. But my very favorite stitch to use is whip stitch.

It’s fast.

It’s easy.

I love the way it looks.

Want to learn how? Here’s a video!

See how easy?

I stitched the whip stitch sample in the video with contrasting thread so you could really see the stitches, but usually I use thread that matches the applique pieces, so mistakes and uneven stitches won’t be very visible. (Sneaky.)

I should note that applique with whip stitch is a little bit different than whip stitching the edges of felt pieces together. I have a separate video showing how to do that here.

Applique with wool felt is one of my very favorite things to do!

It’s all done by hand, so it’s work that’s easy to carry around with me for quick stitching in free moments here and there. And the wool felt and smooth embroidery thread feel so nice in my hands! Plus the colors are so rich and pretty!

Give it a try with this fancy felt coffee sleeve. It uses whip stitch to applique all the felt pieces, and blanket stitch to sew the edges of the sleeve.

Fancy Felt Coffee Sleeve - a free pattern from Shiny Happy World

Get the free pattern here.

I also used whip stitch to applique the polkadots on Rhonda Rhino‘s fabulous dress.

Rhonda Rhinoceros - a cute felt softie of a rhino wearing a polkadot dress and holding a balloon

And the fancy decorations on this felt Dala Horse Christmas Ornament.

felt dala horse Christmas ornament with embroidery and whip stitch applique decorations - made with a pattern from Shiny Happy World

You can use whip stitch to add decoration to so many different felt projects. I love it!

Happy stitching!

Play with some felt! Try the Oddballs – a fun pattern for silly monsters.