Book Review: The Knitter’s Curiosity Cabinet

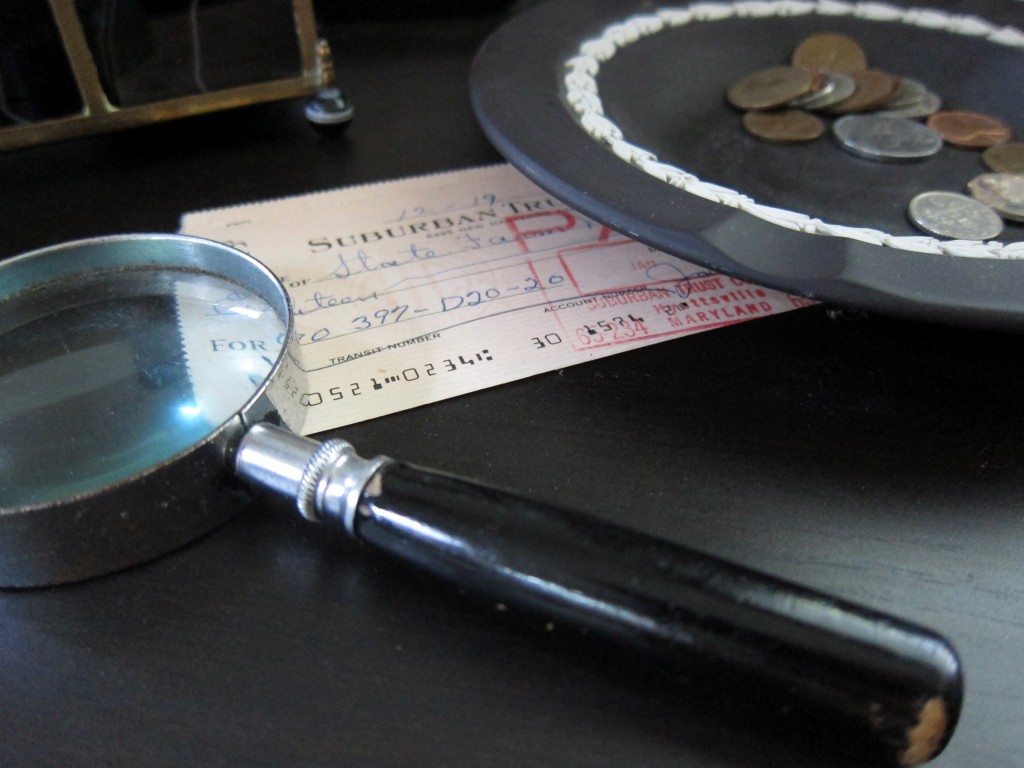
I’m no stranger to keeping mementos out around the house. They’re pieces that serve as decorations, but also contain little memories… organized in my favorite manner: by color. There’s my ‘Poppop corner’, which contains my Grandfather’s magnifying glass, a cancelled check that he wrote and a lovely Wedgewood dish of change that fits the color scheme:

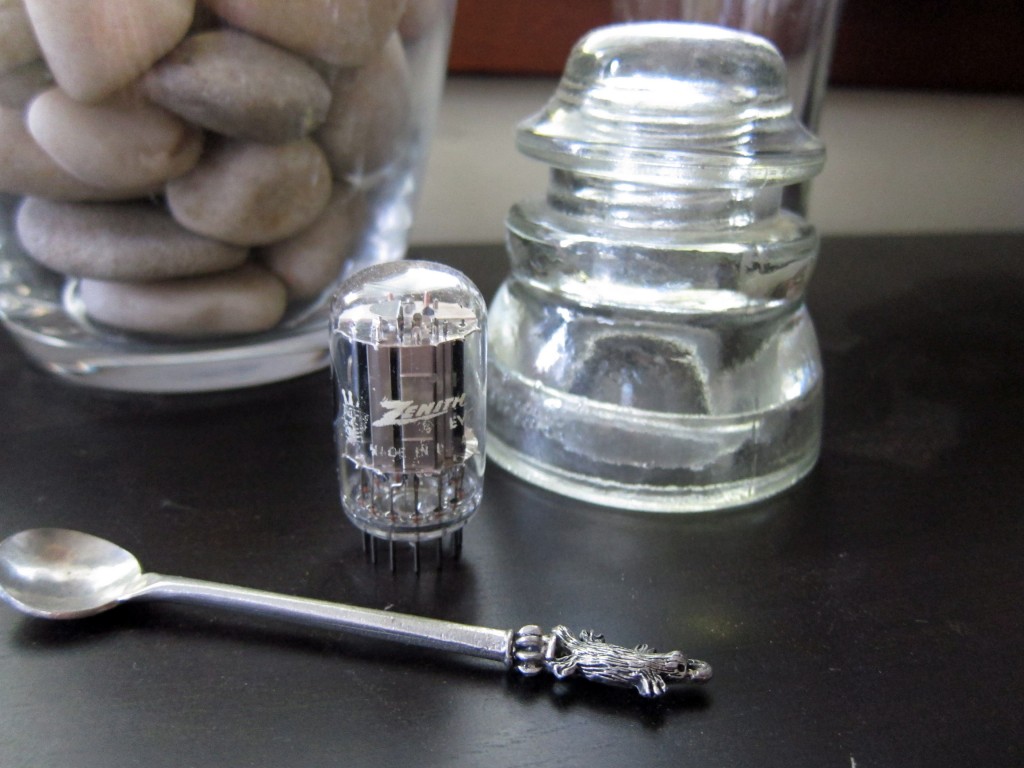
I have a collection of ‘clear glass & silver’: an old insulator cap, a weird thing-y from an old tv, a platypus spoon from Australia and some vases:

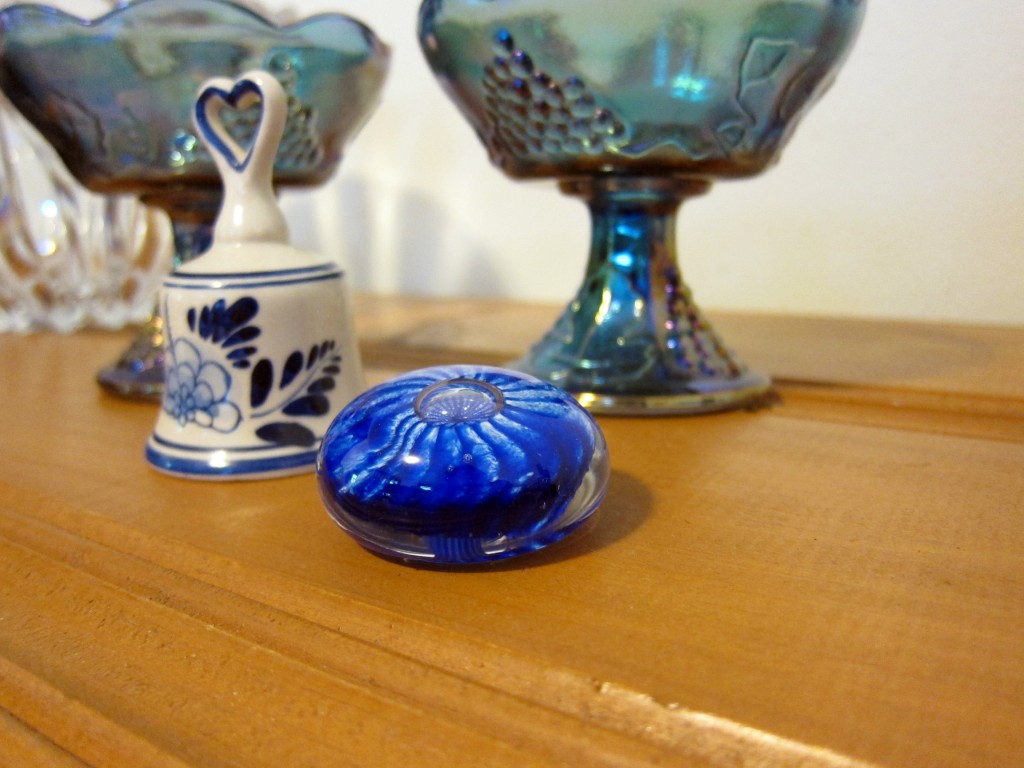
And of course, there’s some blues… a paperweight I got from a glass-blowing shop in Bermuda, a bell from Holland and some candlestick holders that were my Grandmother’s:

They’re things I look at every day: reminders of pleasant memories and conversation points when friends come to visit.

The Curiosity Cabinet

In contrast to my mementos out for all to see, Curiosity Cabinets (a tradition dating back to the 17th century) contained personal collections usually kept closed in a cupboard. These cabinets contained trinkets from exotic locales (like my Bermudan paperweight!) or perhaps an interesting sketch.

I didn’t know about curiosity cabinets until Hunter Hammersen’s delightful description of the concept in her book, The Knitter’s Curiosity Cabinet. Hunter has unlocked the secrets of these oft-mysterious collections and developed a series of knitting patterns based off of the botanical illustrations one could expect to find inside.
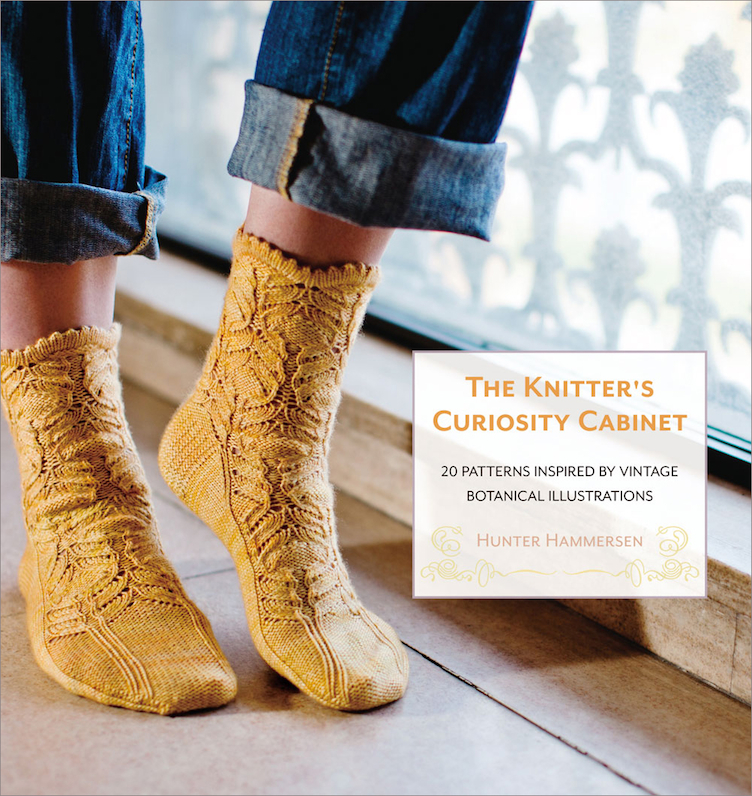
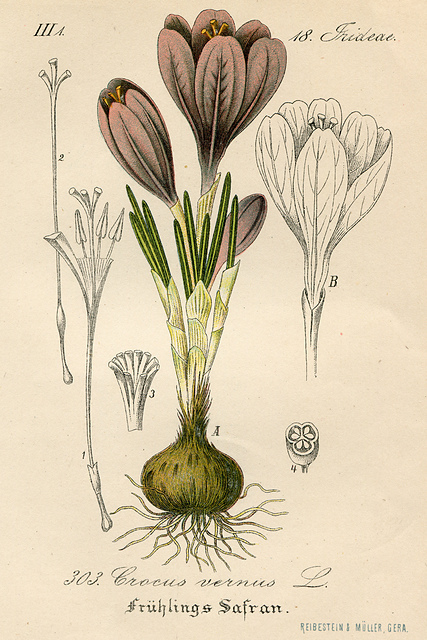
The book contains 10 botanical illustrations, each inspiring a sock and an accessory pattern. What transpires inside this book is part history lesson & part botany lesson, inside a book of knitting patterns teeming with Hunter’s passion for vintage botanical prints.

Interview with Hunter

Don’t you want to get to know the woman who’s clever mind created an entire book of knitting patterns… inspired from the vintage botanical illustrations found in curiosity cabinets? I do!

I love the idea of a Curiosity Cabinet! Tell us about a few items in yours.

I have such conflicting feelings on this one. A big part of me is almost alarmingly minimalist. I have a habit of going around my house and getting rid of stuff I don’t need whenever I’m in a bad mood. The vast majority of the house is more or less totally free of little bits of stuff. But, I also have magpie tendencies. I am forever picking up all sorts of wee treasures. I indulge this tendency to collect in my office. I’ve got one bookcase in particular that we refer to as the home for wayward knitting props. I have a whole array of old hat forms and old glove forms. They’re totally practical (by far the best way to block and display hats and cuffs), but I love them just as art objects. I’ve more or less convinced myself I have enough hat forms, but I’m still officially on the look out for more of the hands.

I can totally relate! If it’s a display item that has a function… then it’s okay, right?
This book contains a lot of sock patterns, so I have to know: what’s your favorite way to knit socks? Dpns? Two circs? Magic Loop?

DPNs all the way! I’ve tried both (Cat Bordhi herself snatched my DPNs away, put circulars in my hands, and supervised the process), but I just like the feel of DPNs better. The circulars always seem too small and flimsy. Besides, all those sharp points and flailing sticks look suitably impressive to non-knitters!

Wow! Dpns despite explicit instruction from a sock-goddess… you’re hard-core! What characteristics do you look for in a good sock yarn?

Tight twist! It makes all the difference. Also, I’m a big fan of nylon in sock yarn. It dramatically extends the life, and I don’t find that it compromises the look or the feel. If I’m making socks, I more or less insist on it (though I will occasionally hold a strand of woolly nylon along with the yarn for the sole of the foot if I’m overcome by the beauty of a slightly unsuitable yarn).
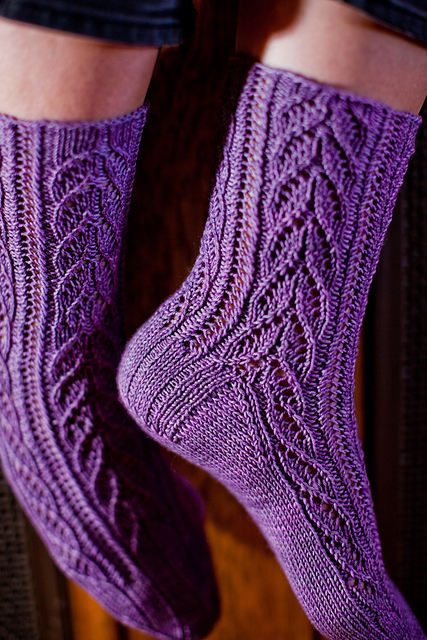
I also like what I tend to call fat sock yarns. Something with a bit more heft to it (I have big feet and I’m impatient…fat yarn helps the socks go faster). The secret to long lasting socks is making a tight fabric. That’s easier to do (for me at least) if I use a fatter yarn. Some of my favorites are Nichole by Schaefer, Casbah by Handmaiden, and Everlasting by Dream in Color (that one doesn’t have nylon, but it’s so yummy it’s worth it).

Describe a bit about the process of designing lace patterns inspired by botanical designs. Did you draw your own sketches? Or just get straight to knitting/charting?

It’s sort of a hard process to describe. It usually starts with doodling on the botanical print (well…on a photo copy of it…not on the print itself). That lets me see which parts of the print I want to play with. After that, there’s a long period of playing with graph paper (sometimes with the aid of a handy collection of stitch dictionaries) to try and capture those aspects of the print in stitches. The best of the graph paper doodles eventually get worked up in yarn.
That leaves me with some neat stitch patterns, but that’s only half the project. Then you have to figure out what to do with them…how to take the stitches and turn them into knitted objects. That means a bit of math and quite a bit of planning. Somewhere along the way it’s also important to pick out yarns and swatch the stitch with the actual yarn you plan to use for the piece itself (don’t ever ever ever skip this step).

The whole thing happens in sort of a non-linear fashion too. It’s not like you can plow through each print in turn from start to finish. There’s a fair bit of scattershot experimentation and switching from one project to the next with wild abandon. In the end it all gets done though!

Do you have any advice for knitters who might be new to charts? Tell us a bit about why you used charts (over written directions).

I am a huge proponent of charts. They just make so much more sense than written directions. I know they can seem a tiny bit intimidating the first time you see them, but I promise they’re worth getting used to. I really think learning to use charts is the trick to becoming a comfortable and confident knitter.

Remember, charts are stylized pictures of what your knitting will look like. So you can look at a chart and see…actually see…’oh hey, look, this line of decreases goes like so and it’s a mirror image of that line of decreases over there.’ That means you’re less likely to make mistakes in your knitting, because you know ahead of time what sort of shapes and lines you should be expecting. It also makes it easy to get into that lovely zen state where you’ve really understood the stitch pattern and you can just sit back and knit, rather than struggling to read a list of abbreviations. You totally owe it to yourself to try them, you’ll be glad you did!

Tell me a bit about your workspace!

Alrighty…for you, I’ll vacuum and dust! My office is a long, narrow room, painted a lovely rich red, and filled to the brim with books and yarn. The red part means it’s awfully hard to take a decent picture, but maybe this will do. What you see there is the view from my desk (if you, you know, stand up and peer over the computer monitor).
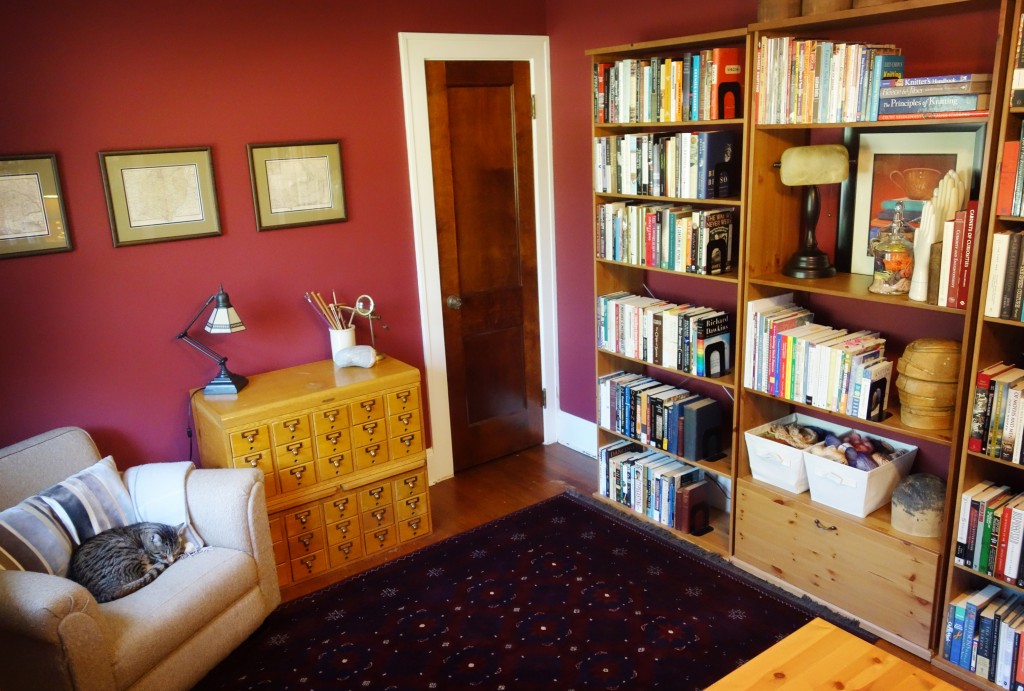
I wasn’t kidding about the books part…there are a few more bookcases behind the desk that didn’t quite fit into the picture. Acquiring books is something of a family curse. Not one of us can leave a bookstore unscathed.
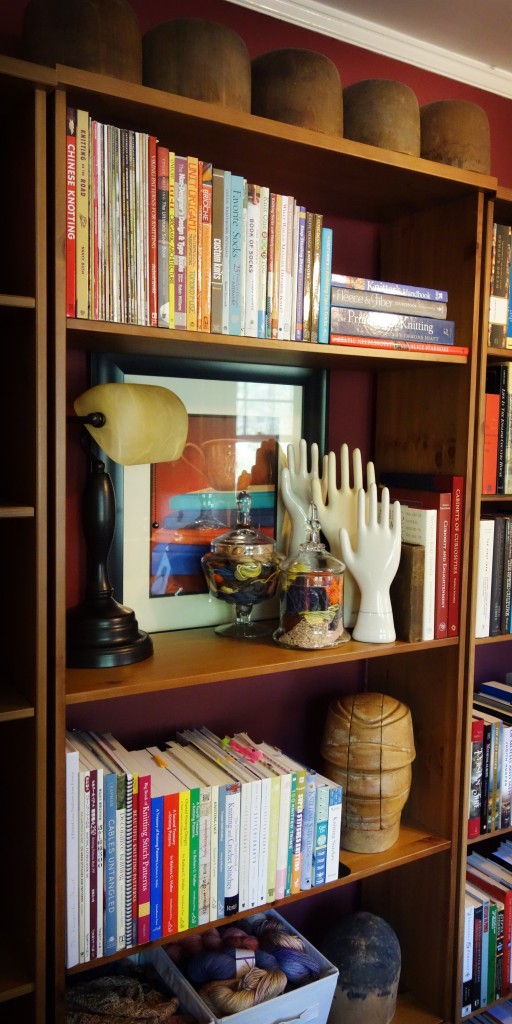
Given these tendencies, I think the card catalog makes perfect sense. It’s one of my favorite things in the whole house. It holds my sock yarn. Well…most of my sock yarn. It’s actually quite well suited to the job. Each drawer holds 2 big skeins. I may just possibly have been known to organize it in rainbow order when I had the flu and needed to pet yarn but was too sick to do anything more useful. The closet holds the rest of the stash (it is not nearly so tidy) and other crafting supplies like my poor neglected sewing machine.

Then, of course, there is the all important comfy chair. If I’m in the graph paper stage of working on new patterns, that’s where you’ll find me, (colored pencils in hand and cup of tea by my side). It’s where I do a fair bit of my swatching too, hence the crock of various needles at the ready. Barry the Wonder Cat has graciously offered to keep my seat warm for me while I’m not there.

What’s currently on your knitting needles?

Will you think I’m terribly boring if I confess that I’ve only got one lone pair of socks going at the moment? And that they’ve been waiting for the toe (of the second sock) for the better part of a week now? Shameful I know. In my defense, I did just finish up a project for the next book! It’s a lovely smooshy purple thing, that must (alas) remain secret for a bit longer yet. I’m starting to feel a hat-knitting urge though. I’ve got some yarn on hand that is destined to become a hat for my husband, and it’s been whispering to me for the last few days.

That’s not boring at all!

Thanks so much for coming over and having a chat, Hunter!

Find Hunter and the book!

Get the book here!
Meet Craftwich: maker of delicious hand-carved crochet hooks!

I love wood. Real wood. And I’m a sucker for super-smooth, sanded wood… I’ve been known to stand in my kitchen, just holding (well, fondling, really) my handmade wooden spoons. (That’s not weird… is it?)

Anyway… a few months ago, I heard a rumor on the crochet grapevine: there was a chick up in the Pacific NW who made hand-carved crochet hooks that were divine. And I knew I had to try one.

I patiently waited until this fabled carver, Monica, officially launched Craftwich Creations. Then I grabbed one of her hooks and scored an interview with her, as well.

You’ll want one too… trust me!

My Hook

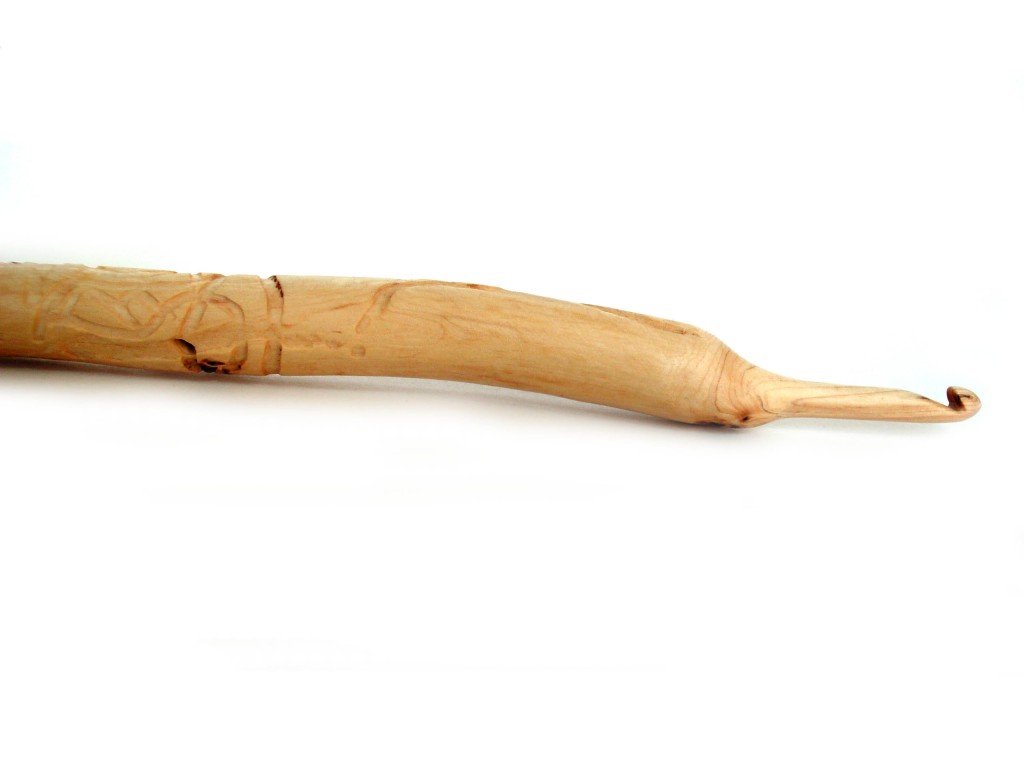
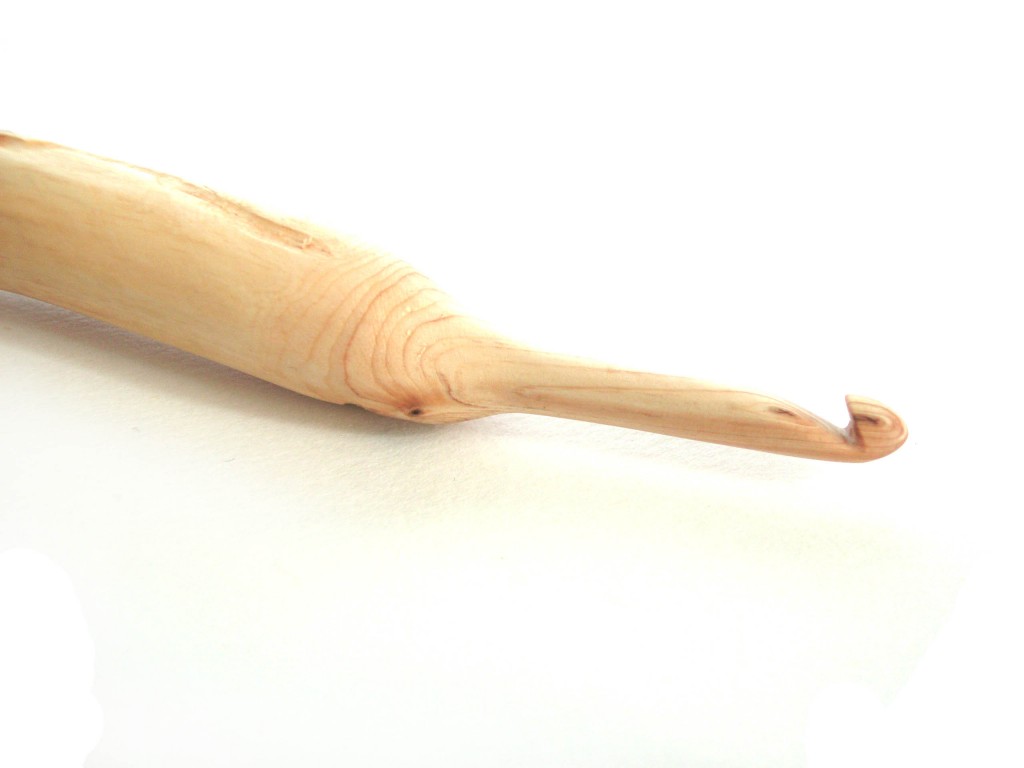
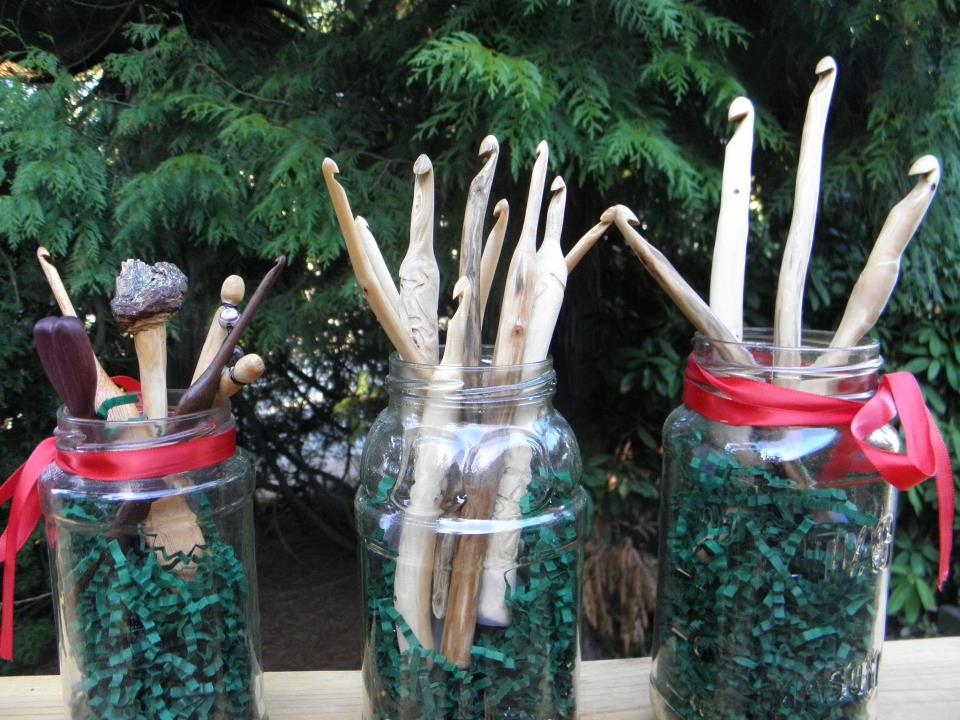
My hook is a piece of art. It’s a size H hook carved from a stunningly beautiful piece of domestic wood. It’s as smooth as a baby’s butt. And it feels like it was made to fit in the palm of my hand.

Did I mention it’s smooth? (I just spend the time waiting for that picture to upload stroking the hook against my cheek. I swear… that’s normal behavior!)

Monica isn’t just a carver… she’s a wood-whisperer. And I trusted her to pick the right hook for me. So, I told her that I held my crochet hook like a knife (instead of the pencil-hold) and that I wanted a size H hook.

The handle is curved perfectly for the way I hold my hook, the tip is a little pointy (but not too pointy!) and the groove is nice and deep (making it easy to catch your yarn). How did she do it? It’s all that wood-whispering!

I couldn’t be happier!

The Process of Carving a Crochet Hook

I love making things with my hands: I sew, I knit, I crochet, I bake… but I have to admit, the idea of carving something out of wood seems both amazing and baffling. I was delighted that Monica was willing to give me some insight into her process.

Choosing the Wood

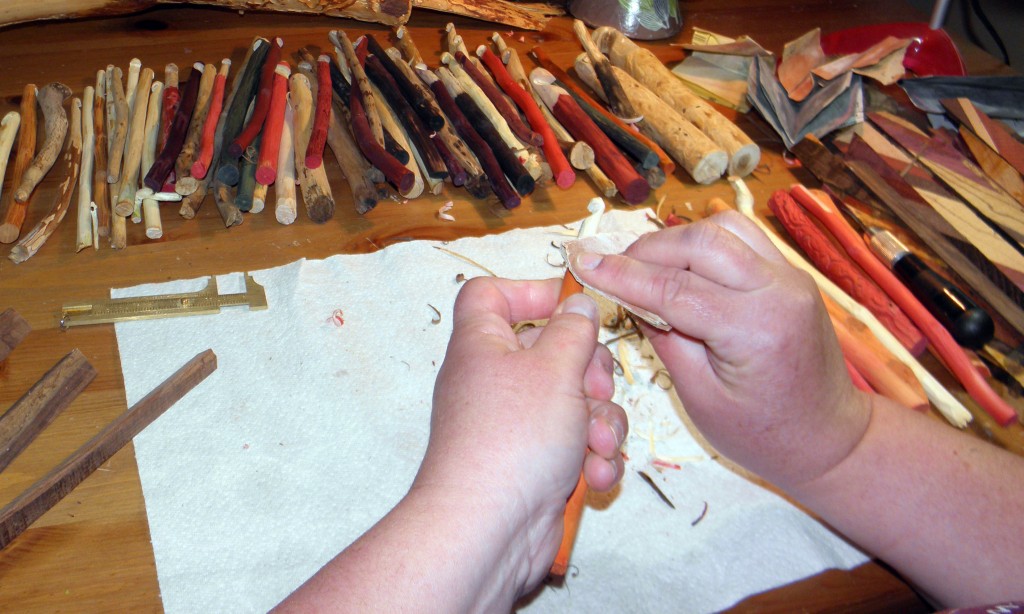
It all begins with selecting the right raw materials. Monica says, “I collect wood from my backyard, neighbors, friends, walks in the parks, etc. I also purchase some exotic woods so I can carve smaller sizes, usually for the sizes F, G, 7, H. I go through it and determine if it’s suitable – it can’t have a soft “pith”, or middle. Then I trim down to a good hook length, depending on the features of the wood – where knots are, scars in the bark/wood, neat looking bends that I think will be comfortable, etc.?”

“I use a bigger knife to strip away the bark and see what’s underneath – the whole process is SO cool to me, every step, the wood changes!”

Dyeing

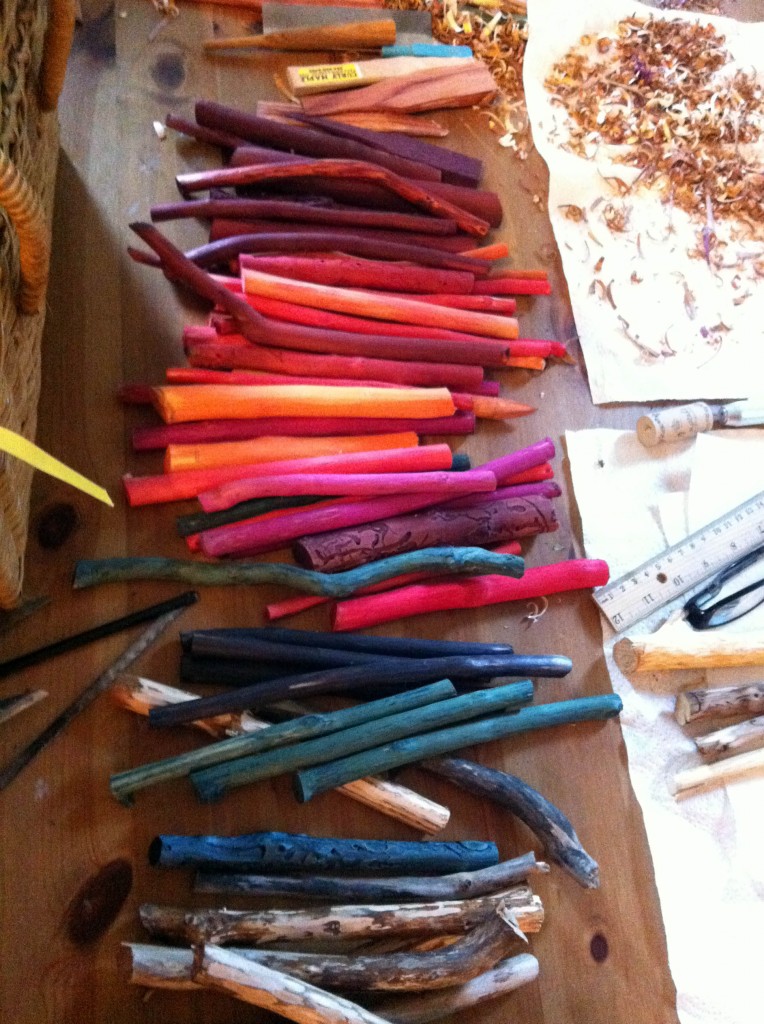
Monica has a line of dyed crochet hooks, and this is the stage where she dyes the wood into brilliant colors:

Carving

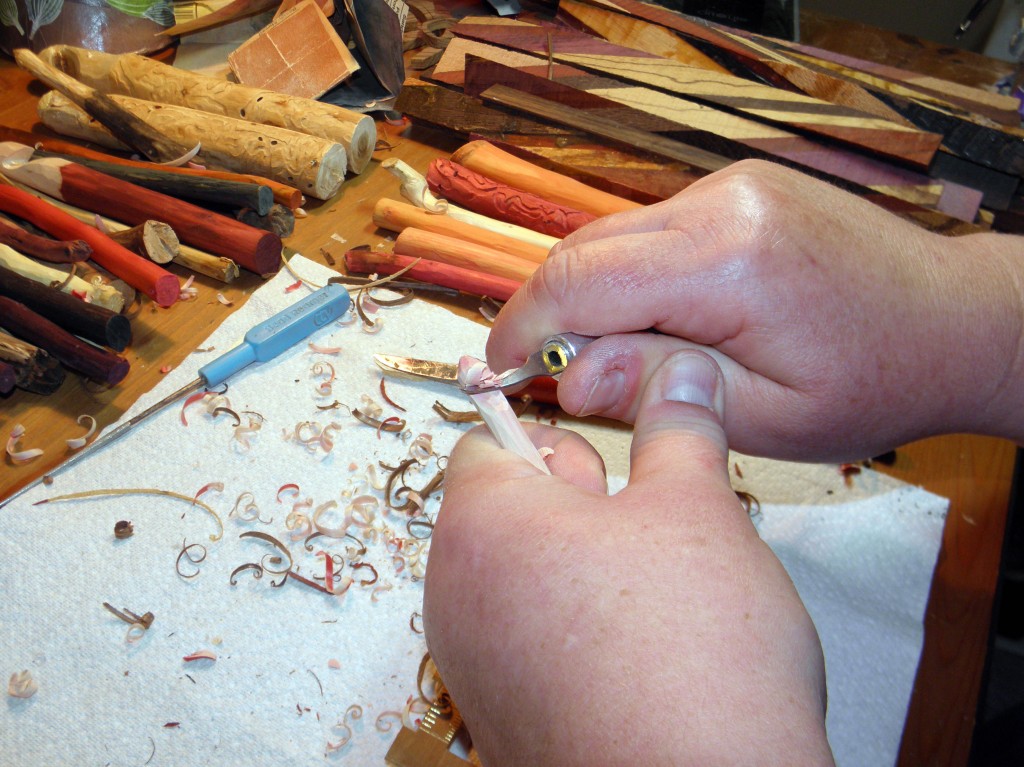
The next step is the rough-carving. “I’ll do some light sanding, then start roughing out the neck /shaft area, trim the bottom, always looking to see what the wood wants to do. Sometimes the hook-to-be wants to have more curves, sometimes it wants to have a thumb or finger holds, sometimes it just has a big attitude. Once in a while they tell me a name (I swear, I’m sane..really..) They’re all different.”

“Before I completely sand and fuss with the handle, it’s time to carve the actual hook part, because if the wood doesn’t want to be a hook, I don’t want to waste the time on the handle! It’s happened. Sometimes the wood ends up being too soft, or cracked, or some other fault that turns it into a shawl/hair stick instead, or even kindling. Ah, well.”

Sanding

Then comes the part that made my hook oh-so-smooth: the sanding. Monica says, “If we get a good strong hook, then it’s time to use my small knife and give it some finesse. And lots of sanding. I use six different grades – from 150 to 1500! I find that using the really fine grade gives it a good polishing, and that’s very important especially on the working parts of the hook.

Finishing

Although a ton of work has already gone into the making of each hook, it’s not done, yet! “The last step is the wood preserver. I found one I really like which is vegetable based and smells great. It has soybean and coconut oils, carnuba and bees wax, tangerine and sandalwood oils. All natural – just like the hooks! I like it that way – I feel like it really brings the art of crochet back to nature, in a sense. And it truly makes each one a one-of-a-kind piece.”

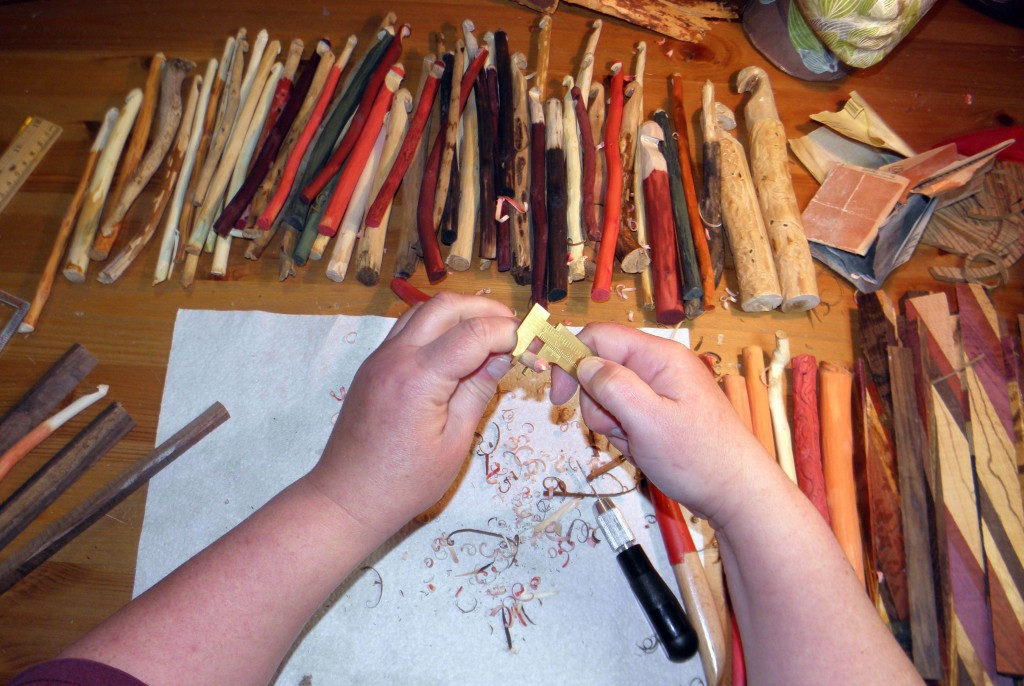
Of course, Monica measures each hook before it goes out, to make sure her unique, hand-carved creations are a standard hook size:

Isn’t it just fabulous when you find a piece of art that you can use every day?

Selecting a Hook

Since Monica hand-carves each piece, every hook is unique: taking on the natural shape and characteristics of the piece of wood. So, how do you find the hook that’s right for you?

Know Thyself

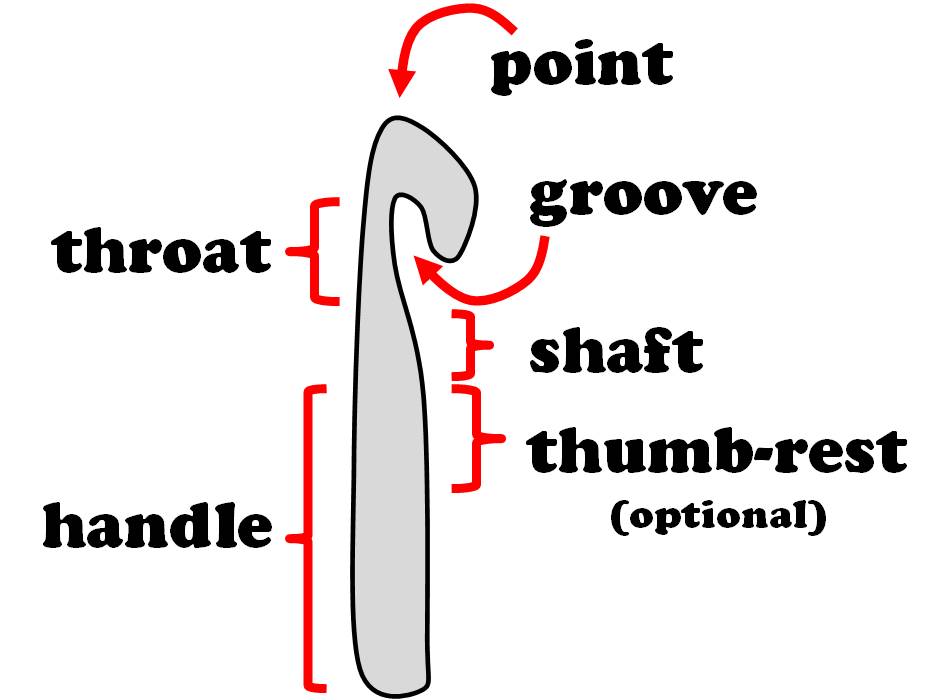
I recommend reading Crochet Hook Anatomy in Action to discover which features of a hook are important to you. Do you hold your hook like a pencil or a knife? Do you split your yarn often? Maybe a more rounded tip is for you. Do you want a thick handle, or one that’s thinner?

Get a little advice

Once you have an idea about your crocheting style, you can browse Craftwich to select your hook.

Monica can help you select the hook that’s right for you, and is happy to rounding the tip off of (an existing) hook to suit your taste. There’s no excuse for not getting the perfect hook!

A handmade hook is only a step away!

I just adore the passion that Monica brings to her craft. She says, “I think my most favorite part of the whole process is actually the bark stripping and initial carving right afterwards – that’s when I discover the beauty of the individual pieces; the colors of the rings, whether bugs carved paths into it or interesting discolorations – if I found a particularly old piece of wood, you can see the effects weather has had on it, and so forth. Quite a process of discovery.”

As a person who takes great care to make beautiful crochet pieces, I think it’s almost poetic to have a hook that was crafted with the same care!
Find Craftwich

A HUGE thank-you to Monica for coming by the blog and giving us a peek into her process… all of the lovely in-progress photos are hers!

And reward all of her hard work by stopping by her page and giving her a visit!

Want to make socks w/o knitting? A Review of the Sock Loom!

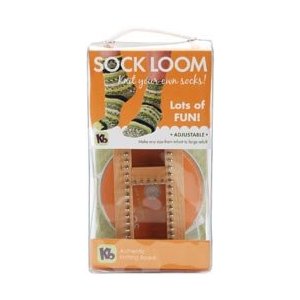
Almost every crafty person I know has, at some time or another, thought of making their own socks. I was intrigued when I saw the Authentic Sock Loom Knitting Board, which allows you to make socks without knitting! I had to give it a try!

About the Loom

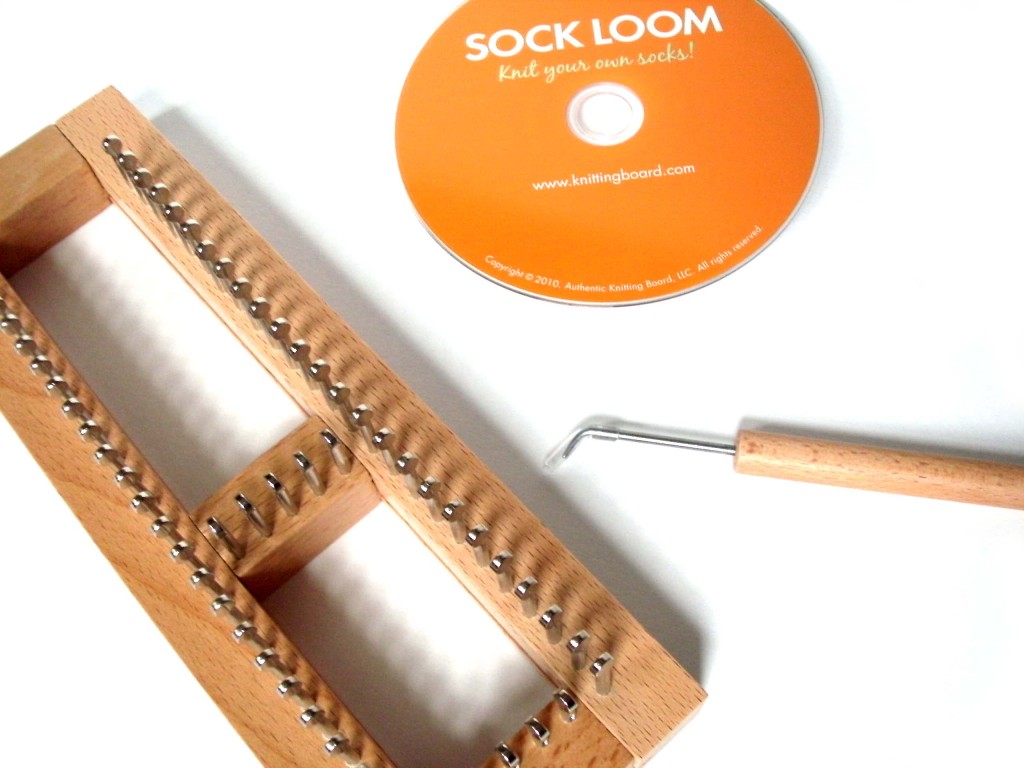
The kit contains an adjustable knitting loom (the center bar on the board pictured slides so that you can get exactly the size sock that you want), a hook (that you use to make stitches on the loom) and an instructional DVD.

I was surprised by the high quality of each of the components. For less than $30, you could picture receiving a flimsy loom or a shoddily-produced DVD. However, the loom is quite hefty: constructed with solid wood and very secure and sturdy pegs. The DVD is neatly divided into sections (casting on, the knit stitch, turning the heel, etc.) and gives complete instructions for operating the loom.

How the loom works

A properly-fitting sock needs to be the appropriate size: so that it’s small enough to fit snugly, but not too small so that it doesn’t fit. The first step in using the loom is to set the knitting board so that it creates an appropriately sized sock for your foot. Fear not… this step is easy: you simply follow the calculations provided in the kit, and slide the center bar to the proper position.

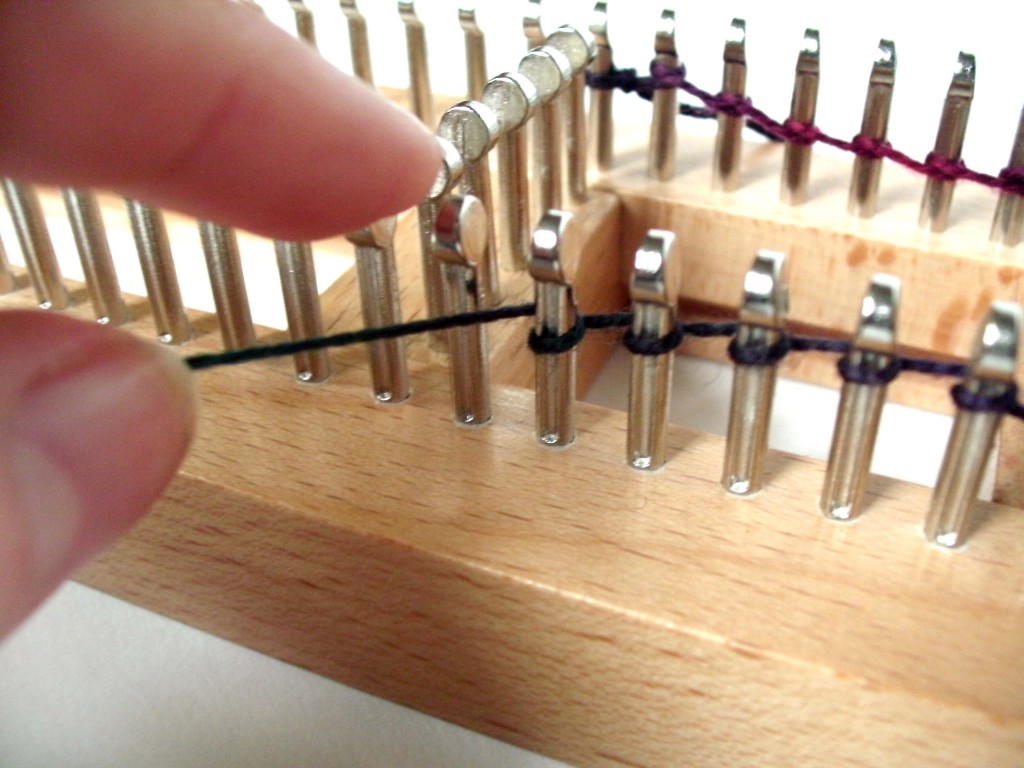
The remaining steps mirror the steps involved in knitting a sock. You begin by ‘casting on’ the stitches:

Even though the actual motion for casting on stitches with the loom is different from knitting, the philosophy is the same, and the procedure is well-explained in the DVD.

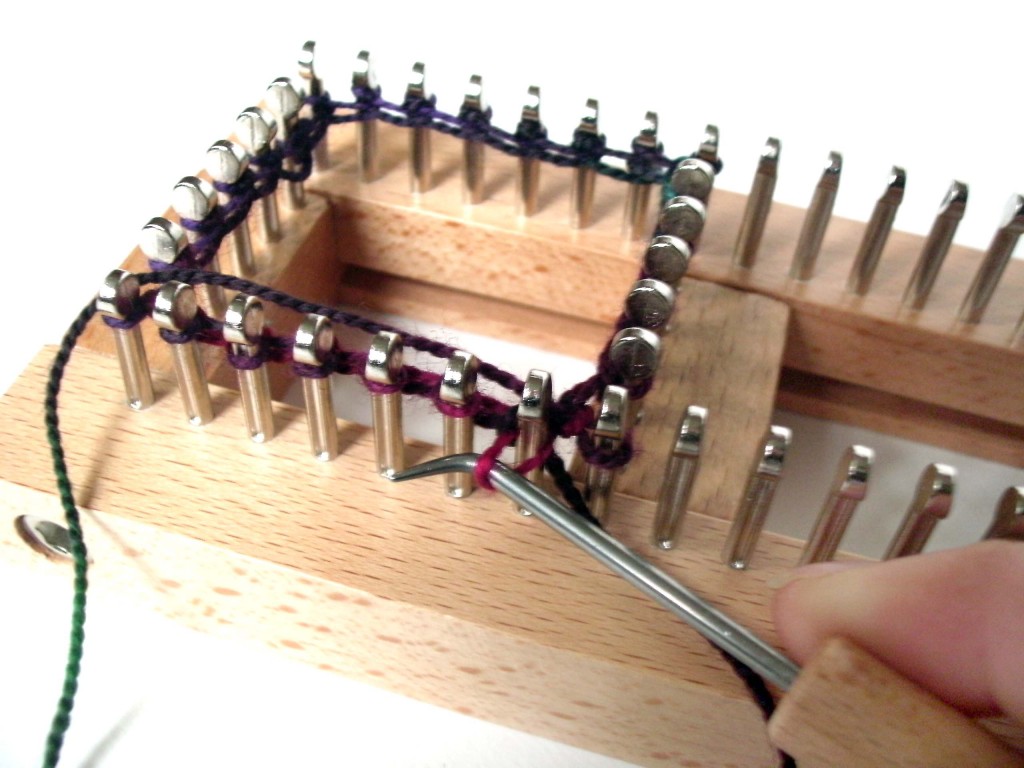
After the initial cast-on, you begin ‘knitting’ your sock. Each stitch is created by pulling the working yarn through the stitch on the loom, using the hook:

Exactly how you manipulate the hook & yarn determines whether you produce a knit or a purl stitch.

You continue knitting and purling to create the cuff of the sock and then, just like knitting, you work a limited number of the stitches to form the heel. Then, you return to working all of the stitches for the foot of the sock.

The toe is constructed slightly differently on the loom than when knitting a sock: stitches for the top and bottom of the sock are decreased separately and then grafted across the entire toe. There is an option to remove the stitches from the loom and use double-point needles for a ‘traditional’ toe, but this seems to be an advanced option.

Benefits to the Sock Loom

The sock loom is an easy entry into making socks for those who don’t/can’t knit. Highlights include:

  • A well-constructed loom and instructional DVD (as well as further videos/support on their website: www.knittingboard.com).
  • Once you get a hang of the basic operation of the hook, you can create knit and purl stitches (and make an entire sock!) with ease.
  • Grooves in the pegs make it very easy to use the hook to manipulate the yarn.
  • Since the loom is adjustable, you can make socks of any size.
  • The design of the loom takes away many of the complicated calculations associated with knitting socks. Once you establish the number of pegs required, no further calculations are needed.

Disadvantages to the Loom

In my personal opinion, this loom is designed for people who do not currently knit. People who are already proficient knitters will find the experience of using the loom slightly tedious: it’s like using a crochet hook to create each new knit stitch.

Other downsides include:

  • The loom isn’t obviously portable. Although I suppose it may be, in principle… in practice, carrying a loom around is more awkward than carrying knitting needles.
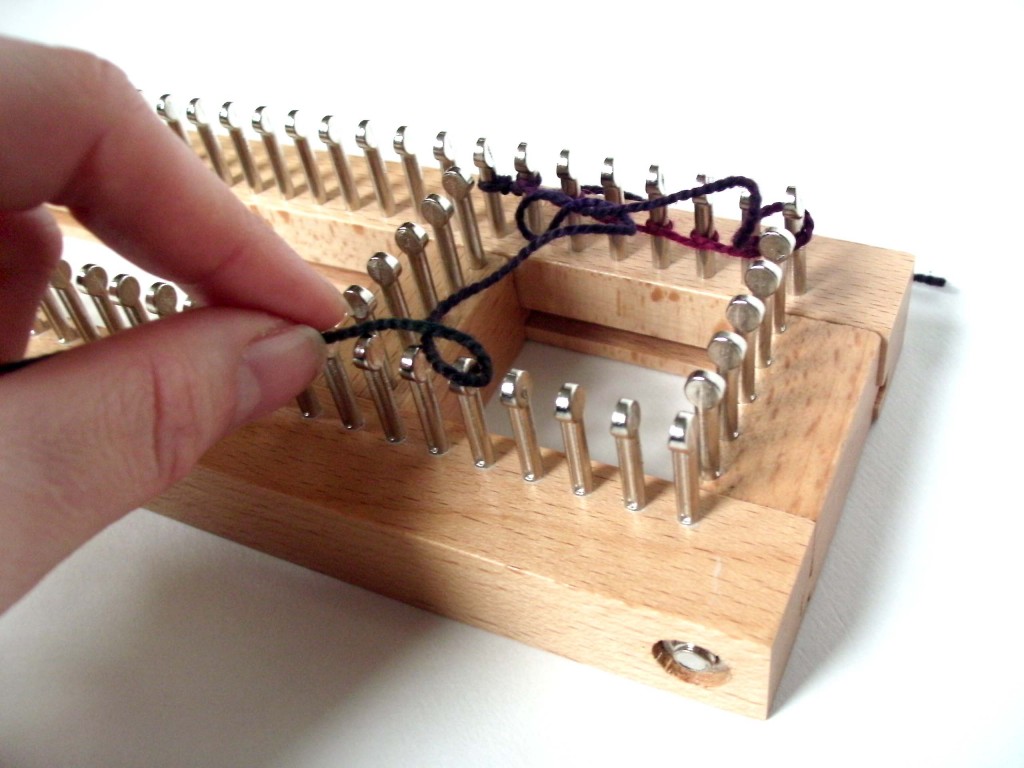
  • Stitches can slide off of the pegs, particularly during the cast-on (see above photo, which happened as I was taking photos of my cast-on). In this case, the only option is to begin your cast-on, again.
  • The DVD doesn’t have many details on fixing mistakes. I assume this is because the loom is a new product, and I’d imagine that these will be videos added in the future.

Overview

The Sock Loom Knitting Board is an ingenious product that is well-crafted and allows you to create socks easily, without knitting.

This board isn’t a short-cut to making socks for people who already knit. I would advise knitters (who are afraid of socks) to find a helpful, beginner-sock pattern instead of turning to the loom. Some first-time sock knitting patterns are: Easy Peasy Socks and Basic Sock.

If you’ve been looking to make socks, and aren’t interested in knitting… this loom is your ticket!

Best,
Stacey

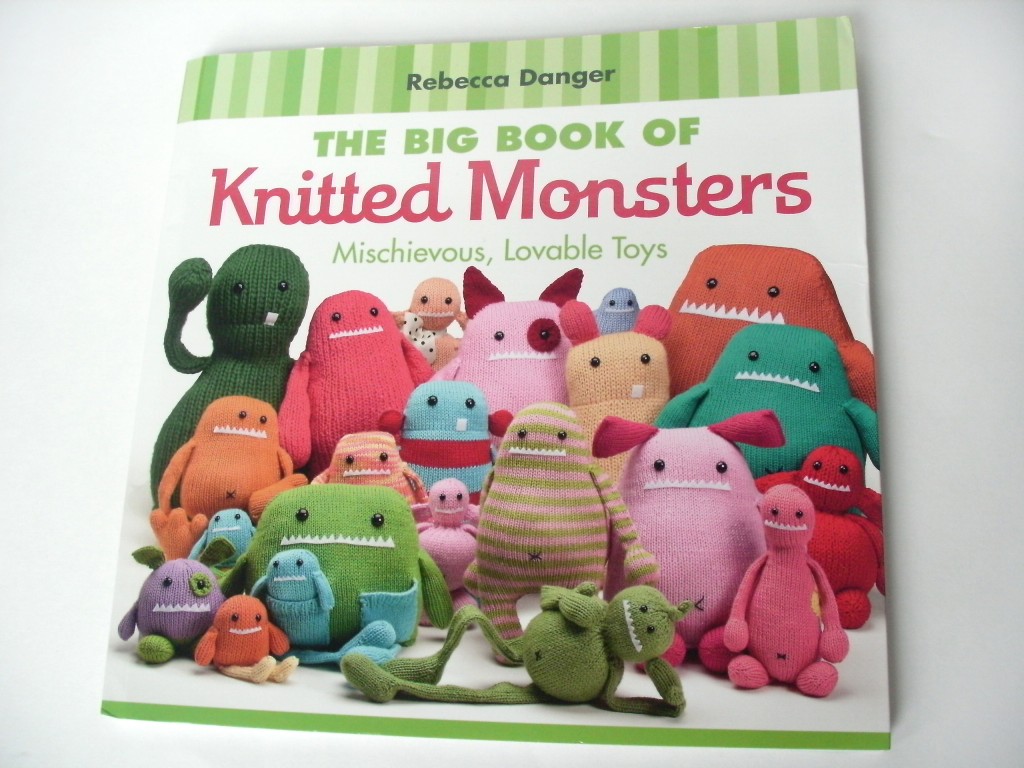
Review of The Big Book of Knitted Monsters by Rebecca Danger

Love knitting cute monsters? Rebecca Danger’s Big Book of Knitted Monsters has been on the wish-list of every monster-knitter I know! And for good reason: it’s packed full of adorable monster patterns. This book isn’t for every knitter out there, so you’ll want to skip down to reading my review to see if it’s for you. But first, I want to show off the cutie I knitted from the book!

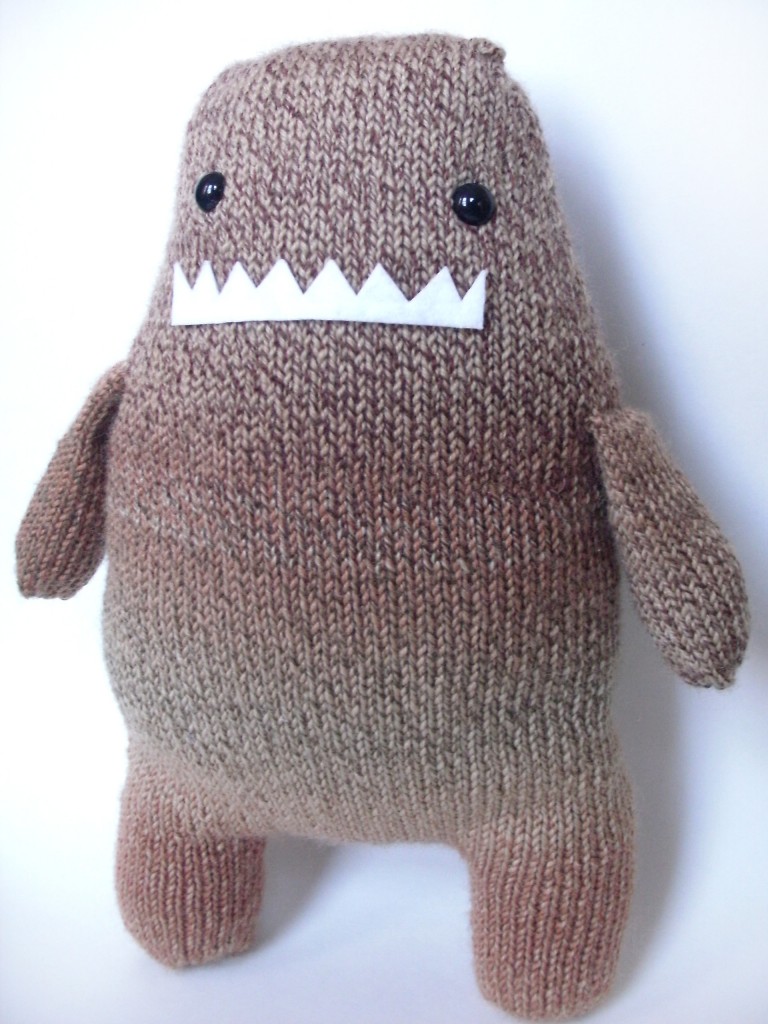
Hugo the Couch Monster

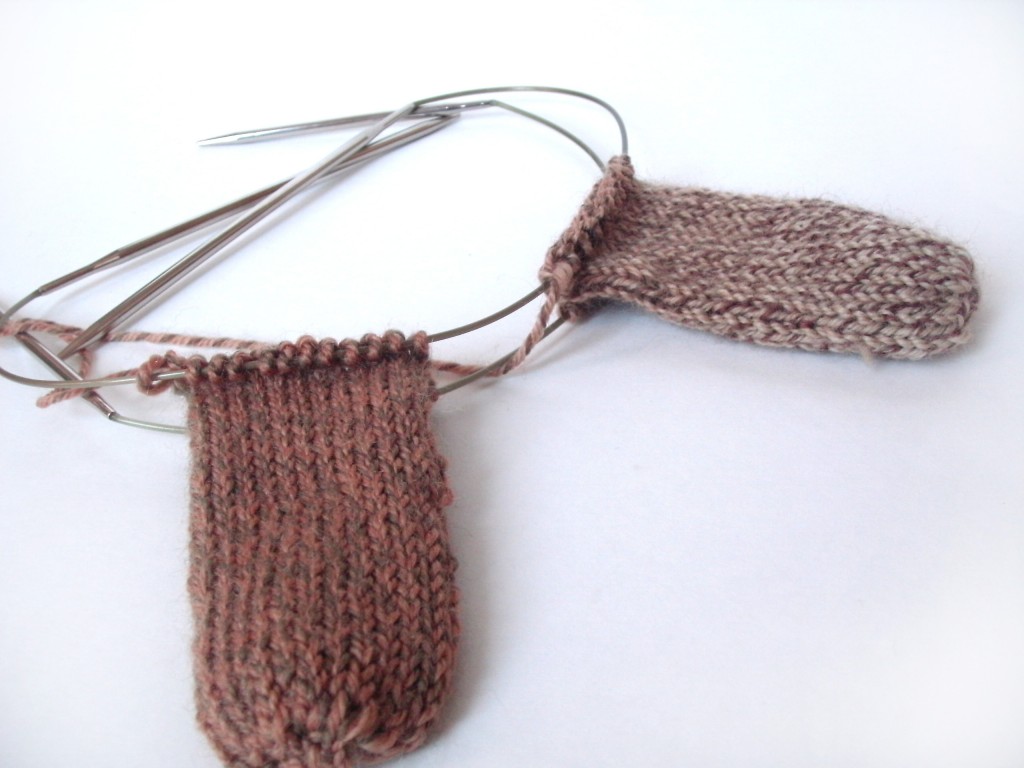
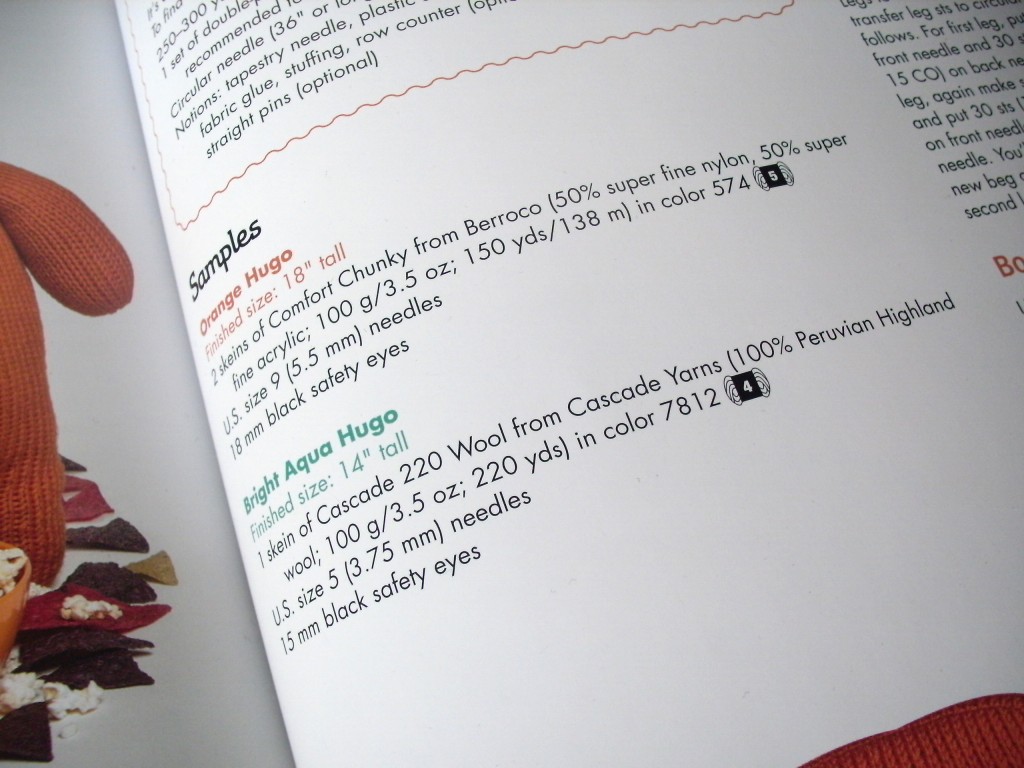
I couldn’t wait to break into the book and make a monster of my own! I chose Hugo the Couch Monster… he’s a real cutie! Since all of the patterns in the book are ‘any size, any yarn’ patterns… I was pleased to use up some of my stash! Hooray!
The book recommends using magic loop, but I’m a two-circulars sort-of-girl, and that technique worked out just fine!

And I’m very happy with my resulting cutie!

What do you think?

The Review

If you’re familiar with Rebecca Danger and her adorable monster patterns, then you know what this book is about! Big Book of Knitted Monsters contains 20 patterns for cuddly monsters that you can customize to be any size you’d like.

Besides the cuteness of the monsters, one of the big strengths of this book is the variety of yarns that are used to make the samples. Rebecca says in the introduction that the monsters can be knitted with any thickness yarn (and the appropriate sized needle), and she demonstrates the flexibility of her patterns throughout the book. Every monster in the book is knitted in at least two yarns: often a bulky yarn and a worsted weight yarn. It’s really great that you’re able to see how the pattern works up in different yarn choices… gets your creativity flowing!

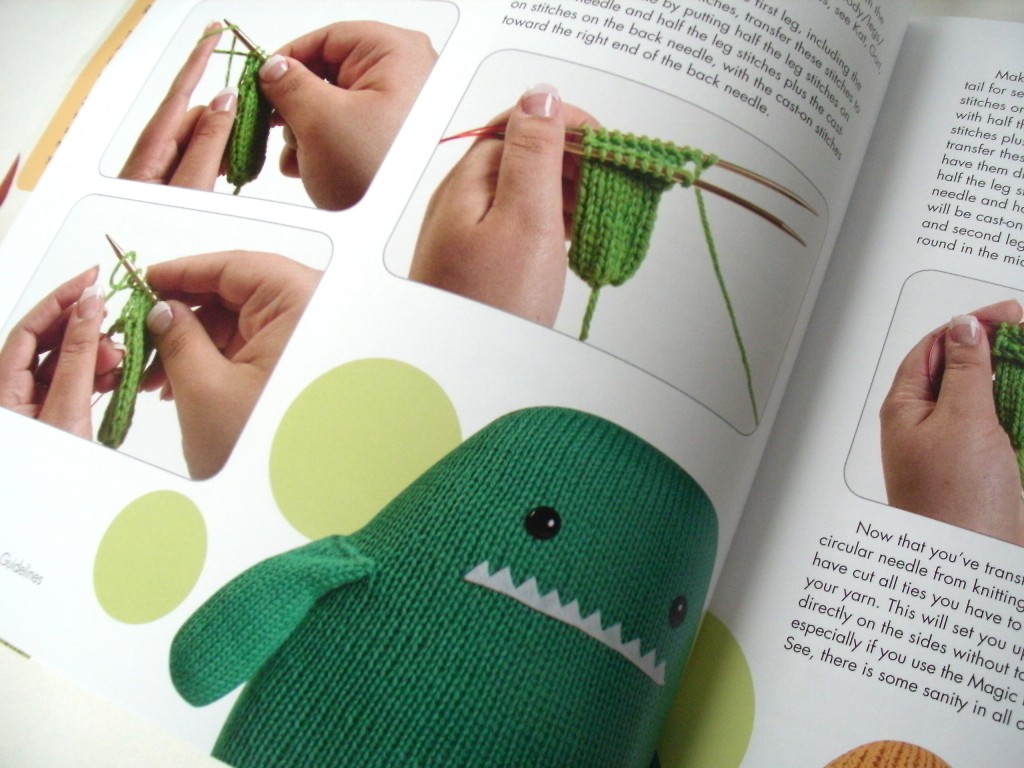
One of the weaknesses of this book is the lack of detailed introductory and finishing information. I know why there isn’t: Martingale (the publisher) imposes an 80 page limit on its books. So of course, if you have a book with 20 different patterns, there isn’t much room for details. There are very helpful photographs sprinkled throughout the book, which I appreciate… but there are a few spots where you’re left to fill in the gaps. You’ll be instructed to ‘sew the arms on using a whipstitch’, but the exact positioning of the arms is up to you to sort out from the photograph (or maybe, your own creativity!).

Pros

  • The writing in the book is whimsical, playful and enjoyable to read.
  • The monsters are adorable.
  • Each pattern can be knitted in a variety of yarn thicknesses and colorways, so there’s lots of options!
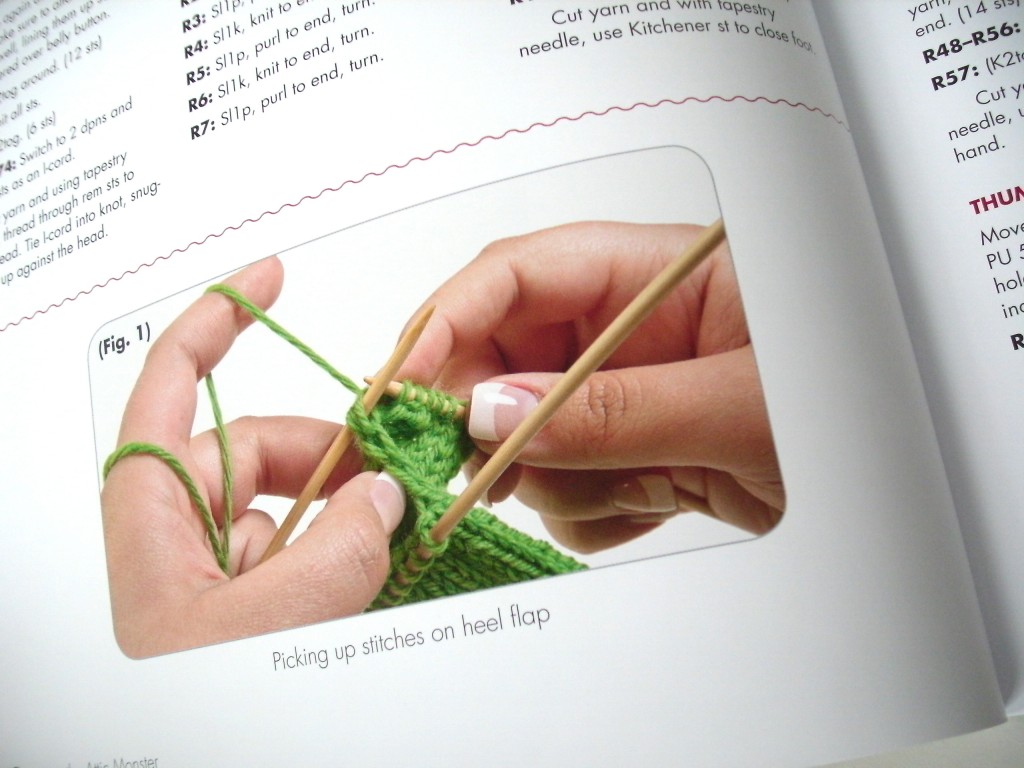
  • Tricky knitting techniques are demonstrated through photographs: which are much clearer than an illustration.
  • If you can knit on double points (or two circulars, or magic loop), you can do almost any of the patterns in this book. Most of the monsters are fairly simple to knit.

Cons

  • The introduction is sparse. It contains information about how to do the magic loop technique, but you’ll need to look at an outside resource if you need help with other knitting techniques.
  • Other reviews I’ve read have been disappointed in the similarity between the various monsters in the book. I, personally, am not too bothered by this… they’re knitted in Rebecca’s signature style, and each one demonstrates a different shape/feature. However, each monster has a glued-on mouth, and I would have liked to have seen one that doesn’t- since glued-on mouths aren’t safe for small children to play with. She mentions in the introduction that the monster would be just as cute with an embroidered mouth, but we don’t ever see one knitted up.

So, if you like monsters and are comfortable with basic knitting techniques (or, at least, feel confident looking for outside help if you need it), then this book is for you! Happy monster knitting!

Ultimate Crochet Hook Review: the review!

As I said before, there’s no such thing as a perfect hook. What works well for one person may be a disaster for someone with a different crocheting style. The best thing that I can do, as a reviewer, is tell you the pluses and pitfalls of various crochet hooks. What you end up loving is going to be dependent on your style! On Wednesday, you learned what kinds of hooks suit your particular crochet style (if you weren’t here on Wednesday, no worries… go do it now!).

There are oodles of crochet hooks on the market, and I didn’t have the time to review them all! And, to be honest with you, I’m not sure you’d be interested in reading all of them. I mean, lots of companies make a bamboo hook… and the differences between them are pretty minimal. So, in this review, I’ve focused on hooks that are different from the rest!

They each have pros and cons… and only some will be suited for your particular crochet needs. Let me know which ones work for you!

Addi Swing

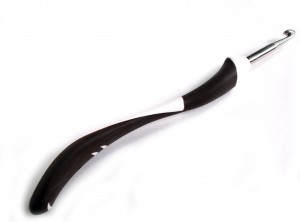
The Addi Swing is the ‘most ergonomic’ hook that I’ve tried: it really is made to fit perfectly in the palm of your hand. It also has some flexibility (the actual handle is some type of plastic, without the metal hook penetrating into the handle), so it’s very comfortable on your hands.

And the hook is made from the same high-polished chrome as the Addi knitting needle (my personal favorite needle), making for low-friction and speedy crocheting.

Even though I love holding the hook, I don’t love actually crocheting with it. Perhaps my hands are too small? I can’t pin it down exactly, but something about the design of the hook forces my palm to be further from my thumb than I like it to be. Despite giving it a fair go, I just can’t get used to it.

Pluses: The handle is super-comfortable, the head is quick and the hooks are clearly labelled for size.
Pitfalls: Because the hook is made to fit the hand, it might not be perfect for everyone’s hand or crocheting style.
Verdict: Totally worth giving a try if your hands are a bit achy. Although, I might try to find a friend with one to test out before splurging.

Kollage Square Crochet Hook

The square handle was invented by Kollage… so it’s completely unique to the brand. The package claims that the hook decreases stress and strain, and is perfect for those who have arthritis or carpal tunnel syndrome.

I have the same general comment with this hook as the Addi… it feels fabulous! But, I have trouble crocheting with it. Maybe it’s me! The Kollage hook has the thumb rest 1″ lower than the Susan Bates or Addi Premium hooks, which for me, is just too far away. However, I think there are oodles of people out there who would love this hook.

Pluses: The handle is super-comfortable and isn’t as ‘hand-specific’ as other ergonomic hooks.
Pitfalls: The thumb rest is much lower than other hooks, which may require some adjustment for folks.
Verdict: Feels lovely, but like other ergonomic hooks on the ‘nice’ side, I’d try to touch one in person before committing.

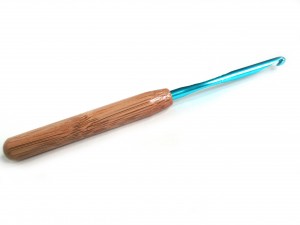
Susan Bates Bamboo Handle

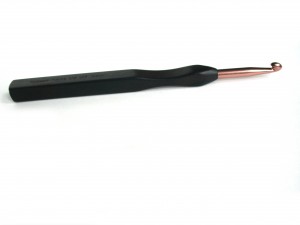
This hook sports the ‘standard’ Susan bates hook, with a bamboo handle below the thumb rest.

Because the handle is below the thumb rest, using this hook feels a lot like crocheting with a Standard Susan Bates hook. The advantage is a slightly bigger handle to hold on to.

Pluses: The bamboo handle may feel more comfortable for some crocheters.
Pitfalls: Since only the handle (below the thumb rest) is bamboo, the design may not be sufficiently ‘comforting’ enough for those with pain to experience relief.
Verdict: If you’re in love with Susan Bates hooks, and are looking for a step up, give this one a try.

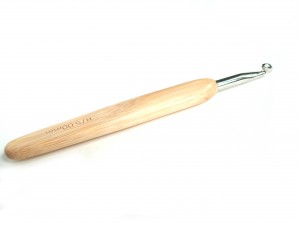
ChiaoGoo Comfort Grip

This hook features a sleek metal head with an oval-shaped bamboo handle, laser-etched with the hook size information.

The bamboo on this hook is super-smooth… I just love touching it! The handle is also very comfortable: fits nicely in your hand without being over-shaped.

Pluses: The hook feels wonderful, and gives a nice handle for someone who wants to hold onto wood, but crochet with metal. Unlike other comfort hooks, the handle begins comparatively high up the shaft, making this hook comfortable for those with smaller hands.
Pitfalls: This hook is about 1/2″ shorter than other hooks, so it may not be comfortable for those with bigger hands.
Verdict: If you have arthritis (that’s helped by working with wood over metal), this hook and the Kollage are two hooks on the market that still allow you to crochet with the speed of a metal head. This hook may not be for you if you have larger hands, but see if you can try it out in person. This hook feels amazing to the touch.

Addi Comfort Grip

This hook features the same head as the Addi Swing (above), but with a much simpler handle. The handle is slightly thicker than normal hooks, and provides ridges for better grip.

The hook is marked only with ‘5’ (it’s a 5.0mm size H hook), which might not be convenient for those who haven’t fully gotten the hang of the metric system. The handles, though, are also color-coded, which is useful for picking the right size out quickly from a whole assortment.

Pluses: This hook gives you a bit more to hold onto than a plain hook, and the ridges will be welcome to people who find metal hooks too slippery. (yes, one side-effect of crocheting too speedily is sweaty hands!)
Pitfalls: There isn’t much ‘comfort’ to this hook except that the handle is thicker than an average hook.
Verdict: If you find an average hook too skinny, this handle will be a welcome improvement for you. I’m not convinced it’s the best hook for those looking for comfort in the sense of ‘lessening aches in hands while crocheting’.

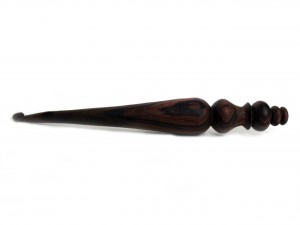
Furls hand-carved hook

This hand-carved hook is a fabulous piece of artistry. I can’t believe someone out there has the talent to make these… but obviously, the folks at Furls do!

The hook is absolutely beautiful, feels incredibly smooth and has a medium-pointy point. The shaft on the hook is tapered, which means that there isn’t a part of the hook that has a resting place for the stitches (perhaps there’s a centimeter where it isn’t tapered? It’s hard to tell.). This feature will probably make it difficult for many crocheters to obtain an even gauge… although maybe it just takes practice.

Pluses: This. hook. is. stunning.
Pitfalls: The tapered shaft is a sticky point. In practice, my loop slides way too far down the handle, giving me bigger stitches than I’d wanted.
Verdict: With practice, you could probably develop a rhythm that will give you even stitches. Functionality aside, this hook is beautiful, and makes an amazing addition to any collection.

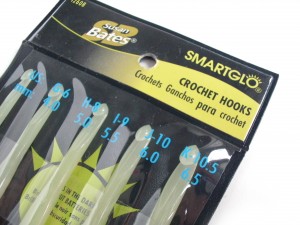
Susan Bates SmartGlo hooks

These hooks really do glow in the dark!

I tried these hooks out during my 36-hour power outage (courtesy of Hurricane Irene), and although they really glowed, they’re not meant to actually let you crochet in the dark. These hooks would be beneficial if you’re working on very dark yarn or if your eyes need extra light as you work (as so many of us do as we age).

Pluses: They’re fun! They glow… that’s kinda cool.
Pitfalls: They aren’t a replacement for a lamp.
Verdict: Being a youngster with great eyes (I’m actually light-sensitive, so I’m rarely seeking out more lighting) who works at home (where I can turn on a lamp if I want), I probably wouldn’t use these. But, if you work on-the-go in places where the lighting isn’t great (the subway comes to mind), these might give you the boost you need!

Ultimate Crochet Hook Review Wrap-up

Phew! That’s a lot of hooks! There’s even more on the market… there’s too many to get them all!

I really hope you’ve enjoyed all of this information and maybe you’ve spied a new hook you want to try!

I’d love to hear in the comments about your favorite hook! What’s the one you love using now? Are there any you’re inspired to try? Let me know!

Ultimate Crochet Hook Review: Susan Bates controversy

A few weeks ago, one event rocked the crochet world.

Okay, maybe I’m being a bit dramatic… but when word spread that Susan Bates had changed its hook design, there was a whole lotta chatter about it!

Susan Bates (aluminum, size H) has always been my absolute favorite crochet hook. And, not because it’s cheap (even though it is). I loved the little-bit pointy point and deep groove. It just fit me.

What’s the new design like?
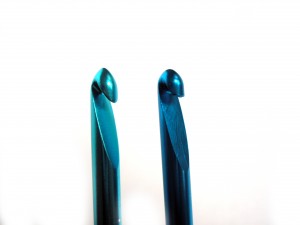
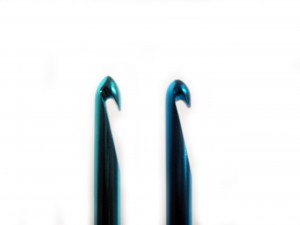
The new design features a rounder point and a shallower groove (although, the shallower groove seems to be the result of a smaller head, not of a change in the depth of the groove, per se).

Front view: old hook, left and new hook, right

Side view: old hook, left and new hook, right
I contacted Coats and Clark (the makers of Susan Bates hooks), and received this response:

The rounded head on the Susan Bates crochet hook is actually the original design for this product. Over the years, many of our long-time consumers have told us how much they prefer the original head as it doesn’t split the yarn the way the more pointed head does. When we were given the opportunity to return to that design, we took it.

Please note that the inline feature of our crochet hooks remains the same; the hook is the same size from the throat of the head to the thumb rest, ensuring a consistent size to all your stitches.

The new, rounded head resembles the head available in Boye, Addi and many other crochet hook brands. However, Susan Bates is keeping its signature inline throat, which is a comparatively unique feature among hooks.

Which hooks are affected?
Most of the Susan Bates hooks are being revised according to the new design. However, I discovered that a Luxite hook I recently received had the design I know and love. I emailed Coats and Clark to find out if it was a remnant, or if the design will remain unchanged. I received this response:

The Luxite hooks up to size P have a typical Susan Bates In Line head. The Q hook has an A Line head. They have not changed.

For now, it seems, the Luxite hook is keeping the old design. However, I could not get any comment on whether this design is be the permanent Luxite design, or if it is scheduled to be redesigned in the future.

Moving forward…
If you were in love with the old Susan Bates design, you have a couple of options: you can switch to the Luxite hook (which, for now, isn’t changing in design) or scope out yard sales for some older hooks.

The Susan Bates hooks are keeping their signature inline hooks… a feature I know many folks appreciate!