How To Use Snaps – video

How to Use Hammer-On Snaps - a video tutorial from Shiny Happy World

Back when I first started sewing, I did everything possible to avoid buttons.

Or zippers.

One of the notions I turned to was snaps. My first experience was bad – I tried using those sew-on snaps, thinking they’d be the easiest option. But I hated sewing them on and I found it really hard to held them in place while I sewed.

My life changed when I discovered regular snaps. A neat professional finish with just a hammer? I had NO IDEA you could do this from home! Why was nobody shouting this from the rooftops? Snaps are really easy to use and look terrific. Here’s how. . .

Give them a try!

That tiny little shirt you see up top is one of the shirts for the Dress Up Bunch dolls. All the dolls have the same basic body pattern – which means they can all share clothes. Fun!

Update! The pretty colored snaps I used to carry are no longer available in shops. 🙁 The good news is that you can now choose individual colors and buy direct from the manufacturer. The best size for Dress Up Bunch doll clothes is size 14.

Happy sewing!

Best,
Wendi


10 Tips for Sewing with Kids

10 Tips for Sewing with Kids from Shiny Happy World

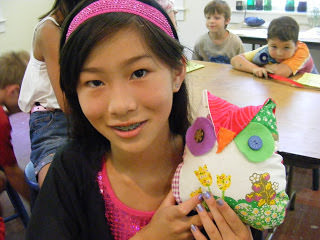
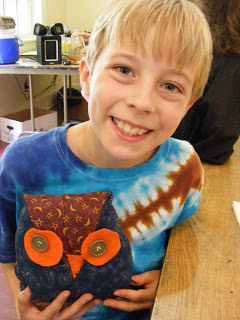
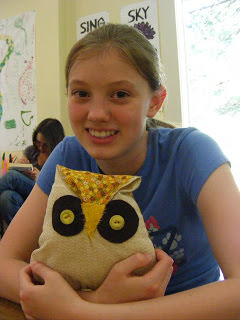
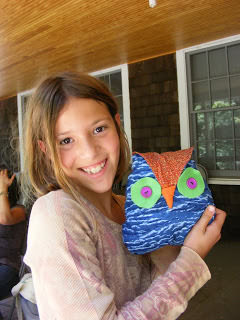
Last week I sewed owls with 20 kids in the Harry Potter Camp I taught, and it reminded me to write up a post with some tips on sewing with kids. I’ve taught a LOT of kids sewing classes, and I’ve learned a lot over the years. So here are my top 10 tips for sewing with kids, in no particular order.

1. Let them choose the fabric. 
Nothing gets them more excited to start the project than to get to choose their own fabric. Nothing. And this is your first chance to let go of what YOU think the finished project should look like. They are guaranteed not to choose the fabrics you would have chosen. And that’s okay.

2. Prepare easy-to-trace pattern pieces by cutting them out of cereal boxes or manila folders.
Punch holes where they need to transfer markings (like for placement of eyes). Let the kids trace around the pattern pieces directly onto the fabric and THEN cut things out. It’s much easier for them to cut smoothly on a drawn line than to cut around a pattern piece pinned to fabric. Also – help them place the pattern piece efficiently on the fabric – otherwise you’ll end up with small holes cut exactly out of the middle of large pieces of fabric.

3. Draw the stitching lines on the fabric for kids.
Whether sewing by hand or on the machine, it’s almost impossible for them to follow an imaginary line. And when they’re sewing on the machine, every instinct is telling them to keep an eye on the needle – not on the ruler engraved into the throat plate. If you draw the lines for them they can watch the needle AND guide the line right into it.

4. Don’t force them to use the machine if they’re scared of it.
On less complicated pieces I’ll let them push the foot pedal while I steer. After a few tries with that they’re usually ready to sit at the machine themselves. If you do this you need to be very clear with them that when you say STOP they need to immediately take their foot all the way off the pedal. Immediately! Look them in the eye and make sure they understand.

5. If they are hand-sewing, try letting them use hand-quilting thread instead of all-purpose.
It doesn’t tangle as easily and it’s easier for them to thread a needle with the stiffer thread. I don’t tie the thread onto the needles and there’s usually a lot of re-threading until they get the hang of how to pull it through without pulling the needle off the thread.

6. Give them specific guidance.
For example, when stuffing softies they’ll be amazed at how much stuffing it takes. Look at the softie, see where the empty spots are, and tell them to add more stuffing here and here. Or tell them to add 6 more big handfuls and then bring it back to you.

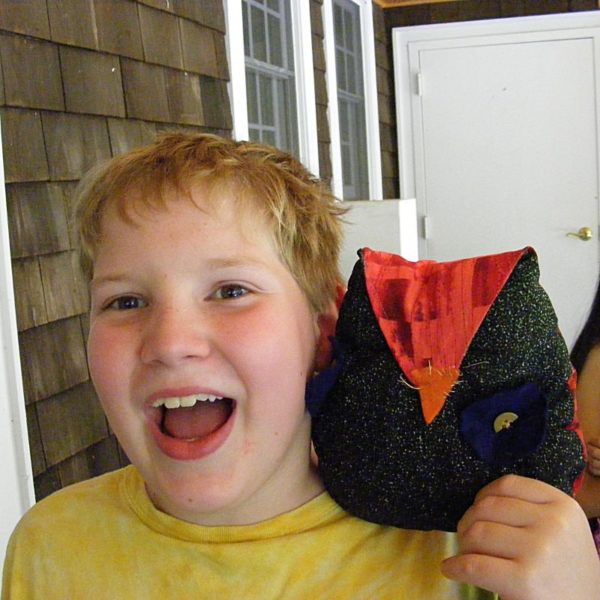
Ten Tips for Sewing with Kids - proud kid with an owl she sewed herself

7. For repetitive tasks, give them a mantra to repeat.
When I show kids how to whipstitch a stuffing opening closed, I’ll show them that it’s like a little mouth and they need to poke the needle “up through the bottom lip, up through the top lip, and pull, up through the bottom lip, up through the top lip, and pull.” Encourage them to say the steps out loud while they do it. Your class will be full of muttering kids, but for repeating multi-step processes, there’s nothing like it for helping them remember what to do and keeping them focused.

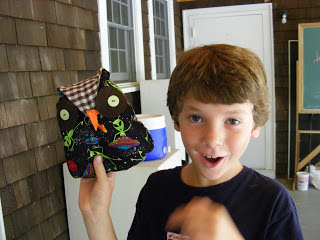
happy boy with an owl he sewed himself

8. Let them do it themselves.
Their stitches will be crooked and their buttons will be loose and you’ll be astounded at the snarls of thread that can result – but they will be SO PROUD! The more they do themselves (and the more pride they feel) the more they’ll want to do it again. And the more they do it, the better they’ll get and all those beginner mistakes will start to disappear.

9. Let go of your own ideas of what the finished project should look like and follow their lead.
One kid in the Harry Potter Camp added a cape to his owl – which means that lots of kids wanted to add capes. So I showed them how to add capes. One very young child brought me a long, scraggly scrap of fabric that he wanted to attach as a cape. It was easily three times as long as the owl. Just as I was opening my mouth to suggest trimming it shorter, he started to tell me how great this super-long piece of fabric was because now it was a cape that the owl could use to whip around and knock down his enemies. In my eyes it looked awful – like he had just grabbed the first scrap that he came to. But he had a vision and he was so happy to have that vision realized.

10. Have fun!
When you’re sewing with kids, choose projects that are easy and simple – with not too many steps or pattern pieces. Happily, those are usually also the patterns that have lots of room for playing around with them.

Don’t you love all those owls? You can make one too! The pattern is available here.

Happy sewing!

Best,
Wendi

The Simplest Skirt Pattern

The Simplest Skirt - a free pattern from Shiny Happy World

Here it is – the simplest skirt you can possibly make and the best project I know for beginning sewists who want to make clothing.

Size this one up to fit adults – or down to fit dolls and stuffed animals. It’s all good.

What you’ll need

  • fabric (amount will depend on your measurements)
  • elastic
  • double-fold bias tape (optional)
  • sewing machine, thread, basic sewing tools
  • less than an hour. I mean it. I’ve never actually timed myself, but I think I can make one of these in 15 minutes.

Difficulty

Very, very, very easy.

Here’s how to make it.

Step 1

Measure around your waist and the desired length of the skirt.

waist _______________ length ______________

For a skirt with “average” fullness, cut your rectangle twice your waist measurement, plus 1 inch for seam allowance. This does not need to be an exact measurement.

My daughter’s waist is 24 inches. My target for the total length of my fabric rectangle was 49 inches, but the fabric was 44 inches wide. Did I piece in an additional 5 inches? No way. I just used the existing width of the fabric.

Anything from 1 1/2 – 2 1/2 times the waist measurement will look good and have some fullness, but you can go even smaller for a more fitted look, and even larger with a very thin fabric. Play around with it!

What width elastic will you be using?
You’ll need to add enough to your total cut length to make an elastic casing. Add the width of the elastic + 5/8 inch. That’s enough to turn it under 3/8 inch, press, then turn it under the width of the elastic + 1/4 inch.

You can see a video showing how to use elastic in a casing here.

Will you be adding a hem?
I usually add 1 inch hem allowance – enough to turn it under 1/2 inch, press, then another 1/2 inch, press, and stitch. Some people like wider hems. In this sample I didn’t hem at all – just bound the lower edge with bias tape. It’s up to you!

Cut your fabric rectangle.

Step 2

Fold your rectangle in half, right sides together, and stitch the short edge with 1/2 inch seam allowance.

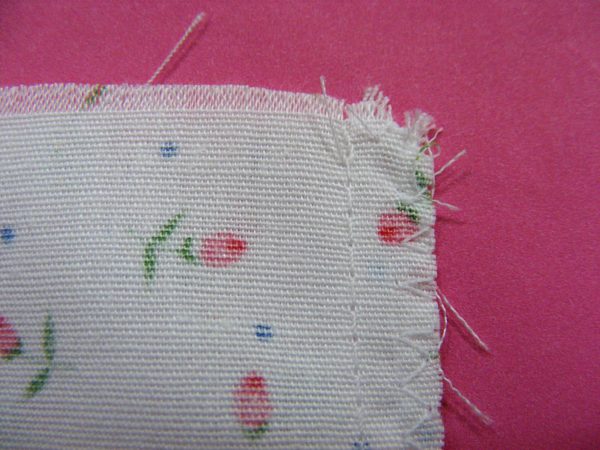
Finish the seam allowance. This was kind of a ravelly fabric, so I zigzagged the seam. You can see how to do that and another easy seam finish option in this video.

Step 3

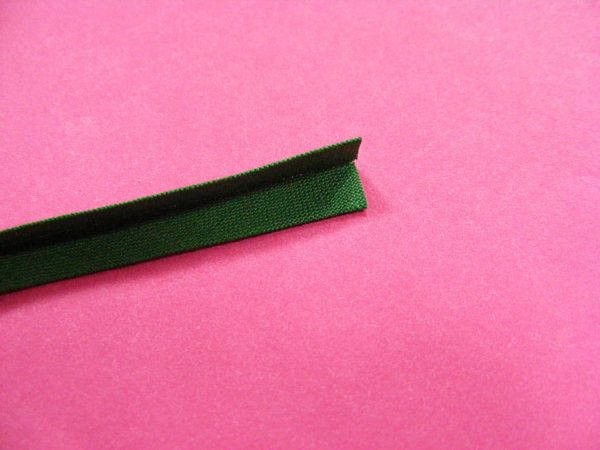
If you’re going to use bias tape to finish the seam, prepare it now. I found a packet of very old single fold bias tape that I wanted to use. Since it was single fold, I needed to fold it in half one more time and press it.

If you want to make your own and don’t know how – watch this video. For this project you can cut your strips on the straight grain.

Step 4

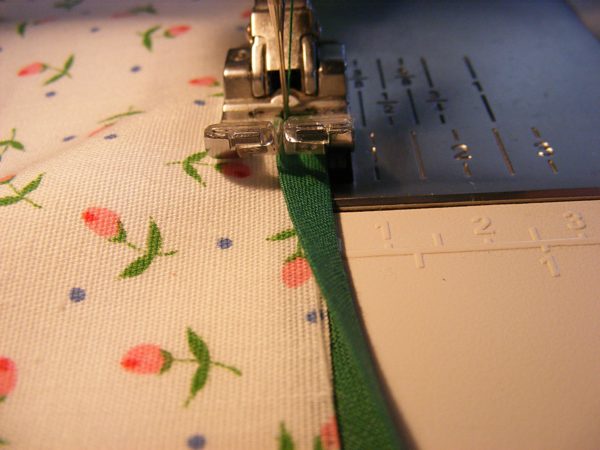
Attach the bias tape by folding it around the raw edge of the skirt fabric and stitching it in place.

Step 5

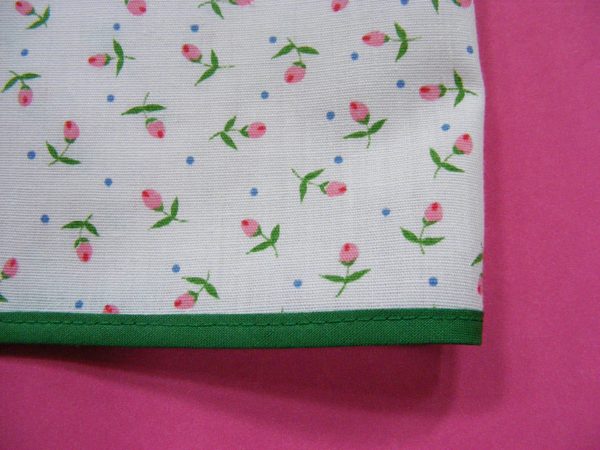
Here’s what your finished hem will look like.

If you want to do a regular folded hem instead, you can see how in this video.

Step 6

Fold the top edge under 3/8 inch. Press. Fold again the width of the elastic plus 1/4 inch. Press. (I used 1 inch elastic on this skirt.)

Stitch the casing as close to that folded edge as possible, leaving about 3 inches open for inserting the elastic. Thread in the elastic, pin the ends together and TRY IT ON.

If you want to see me do this step on this very skirt, watch this video.

Step 7

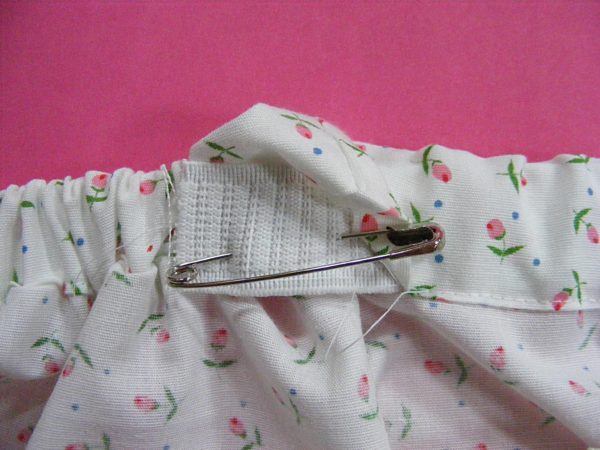
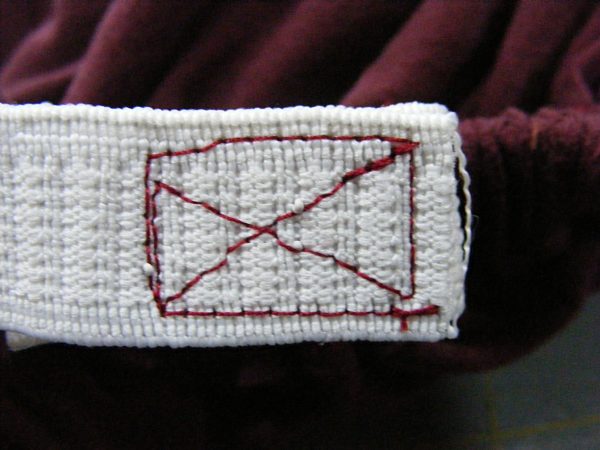
Once you know the fit is good, securely sew the ends of your elastic together. I sew a box around the edges of the overlapped bits, then sew an X across the box.

I’m showing you an example from another project because if I sewed this one in a thread dark enough to see, it would also show through the very thin white fabric of the skirt, and that would’t be pretty.

You can see all of this in the same video I mentioned in Step 6.

Step 8

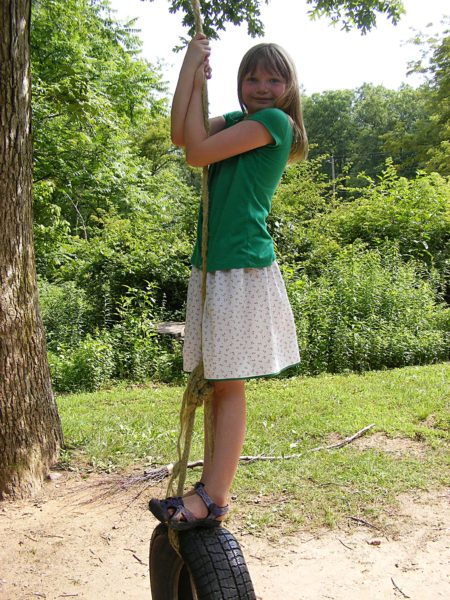
Let the elastic pop back into the casing, fold the casing back in place, and stitch that opening closed. Throw on the skirt and go play on a tire swing.

It really is that easy!

You can size this to fit anyone – though the shape isn’t terribly flattering on most adult women. Those of us with hips, anyway. 🙂

This is a great project for kids to make for themselves and also for their dolls and stuffed animals – easy to sew, easy on and off, and really inexpensive.

Want to see what some kids have made with this basic pattern?


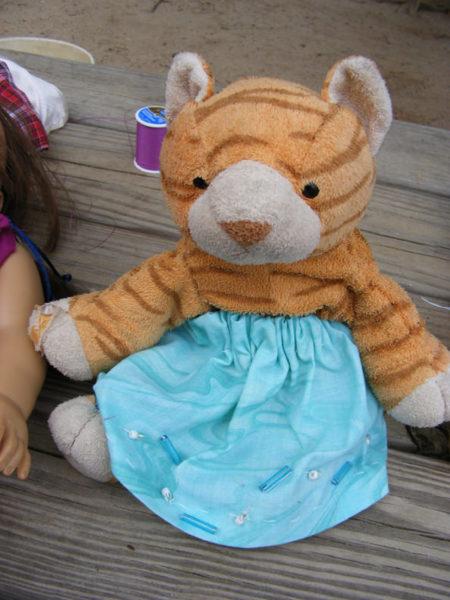
This skirt got some fancy beading.

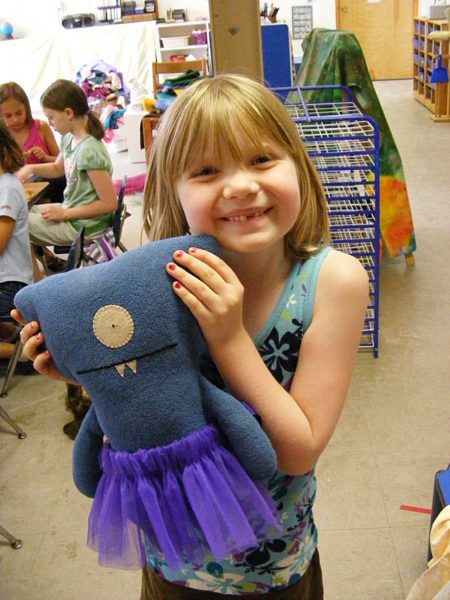
And I love the tutu on this Ugly Doll – made with tulle and no hem needed.

And, of course, the gap-toothed kid holding it! 🙂

These were all from a Summer Camp I taught a couple of years ago.

Best,
Wendi

How to Use Elastic in a Casing – video

How to Use Elastic in a Casing - video tutorial from Shiny Happy World

This one’s on the longish side, but I show you pretty much everything you need to know about using elastic in a casing.

We start with what kind of elastic to use (did you know there were different kinds?), some tips on pre-stretching and measuring, how to measure for and sew the casing, how to thread the elastic through the casing and sew it up. I even show you a little trick I use to help kids put on handmade clothes (with no tags) the right way!

Update – after making this video I discovered a new tool for threading elastic through a casing. It’s called an elastic bodkin and it’s pretty much the best thing ever. This is the one I use. They’re super cheap and they make that step of the process a million times easier. I wish I had known about this tool twenty years ago!

Want to practice your new elastic skills? Try this free simple skirt pattern. It has instructions for sizes to fit everyone from dolls to grown-ups.

I also use elastic in a lot of the dress patterns for Dress Up Bunch dolls. Look for the ones with gathers around the neck like this one.

Lizzie in her new Cat's Meow outfit

That’s the Cat’s Meow pattern, but there are several others with a similar neck finish. Those gathers means there’s elastic in a casing around the neck – which means no fasteners for little hands to wrestle with!

Happy stitching!

Easy Apron – Free Sewing Pattern

Easy Apron - a free sewing pattern from Shiny Happy World

Aprons.

This is about the easiest apron you can possibly sew. A rectangle of fabric, gathered at the top, and edged with double-fold tape that also serves as a tie.

Easy peasy!


Follow this pattern to whip one up in an afternoon, and you’ll be an expert – ready for some really fun variations – patchwork aprons, ruffled aprons, and frilly, fancy, useless aprons.

But first – an easy apron.

What you’ll need

  • fabric for the main apron and pocket (amount will depend on your measurements)
  • sewing machine, thread, basic sewing tools
  • 1-2 hours

Step 1

Cut the following pieces. . .

For the main apron piece, measure all the way around the waist, and measure from the waist down to the desired length (usually anywhere from mid-thigh to the knee, depending on the look you prefer).

Cut a rectangle of fabric the width of the total waist measurement, and the height of the desired length plus 1 inch.

For the pocket, cut two squares of fabric, both 6 inches square. This will make one pocket. If you want to make two pockets, cut four squares.

For the wasitband/tie, cut strips (on the straight grain) 3 inches wide. You’ll need to cut multiple strips and join them together to get the desired length.

  • For a girl’s apron that ties in the back, you’ll need a total length of 58 inches. To double-wrap and tie in the front you’ll need 84 inches.
  • For a woman’s apron that ties in the back you’ll need 72 inches. To tie it in the front you’ll need 96 inches.

Step 2

Place two pocket squares right sides together.

Easy Apron - a free pattern from Shiny Happy World

Using 1/4 inch seam allowance, stitch almost all the way around the edge, leaving a two-inch hole to turn it right side out. (If you’re new to sewing, this video shows how to sew straight lines and turn corners.)

Don’t forget to backstitch at the beginning and end of your stitching.

Clip the corners close to, but not into the stitching.

Step 3

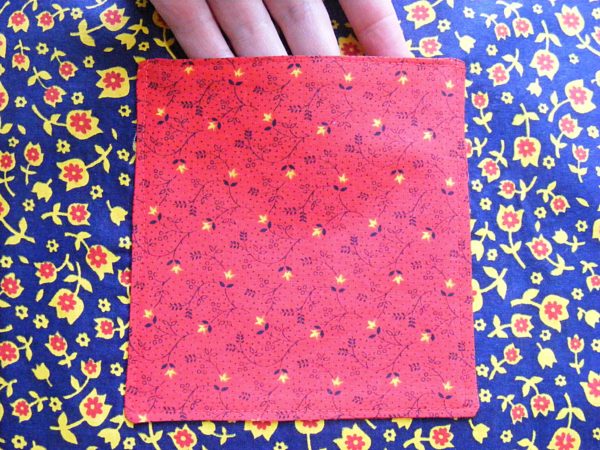
Turn the pocket right side out. Tuck in the raw edges at the opening you used for turning and press all the edges flat.

Easy Apron - a free pattern from Shiny Happy World

Stitch along the top edge of the pocket, as close to the edge as possible.

Easy Apron - a free pattern from Shiny Happy World

Repeat for a second pocket, if you choose.

Step 4

Position the pocket so that the top left corner is 5 inches down from the top edge of the apron piece, and 5 inches in from the left edge of the apron piece.

Easy Apron - a free pattern from Shiny Happy World

Stitch the pocket in place, very close to the edge of the pocket. Stitch down one side, across the bottom (closing up the opening you used for turning), and up the other side.

Easy Apron - a free pattern from Shiny Happy World

It’s VERY important to remember to backstitch at the beginning and end of your stitching. Otherwise your pocket will eventually come loose and fall off and you’ll be sad.

Step 6

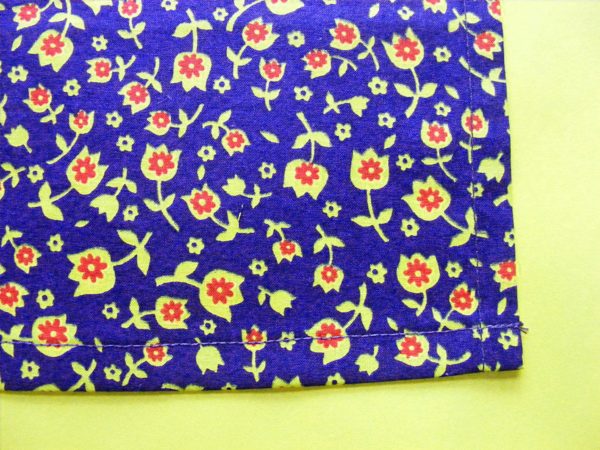
Hem each side of the main apron piece.

This video shows how to hem.

Turn the edge under 1/2 inch. Press. Turn under another half inch. Press. Stitch down very close to the folded edge of the fabric.

Easy Apron - a free pattern from Shiny Happy World

Repeat with the second side.

Repeat for the bottom edge of the apron.

Step 7

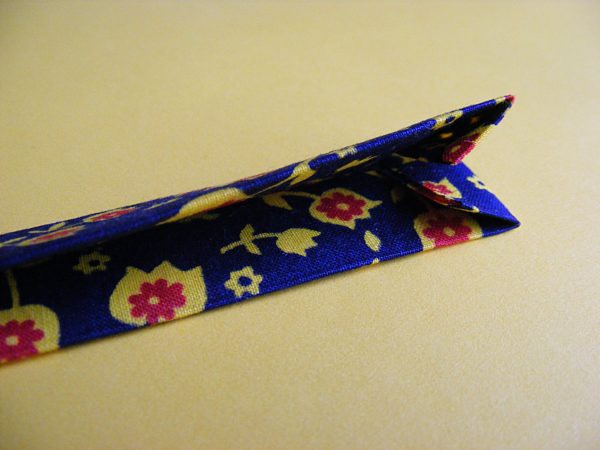
Time to prep the waistband/tie. Essentially – we’re going to make some wide double-fold tape. There’s a video here showing how.

Easy Apron - a free pattern from Shiny Happy World

Use a 1 1/2″ bias tape tool to turn your 3″ strip into double-fold tape. If you don’t have the right tool, just do it by hand.

Fold the strip in half the long way. Press.

Fold each long edge into the center. Press.

Refold the center. Press.

The tool is handy, but doing it the old-fashioned way doesn’t take long. 🙂

Open up the center fold and turn the short end under 1/4 inch. Refold and press. Now you’ll have a neat end to your tie.

Step 8

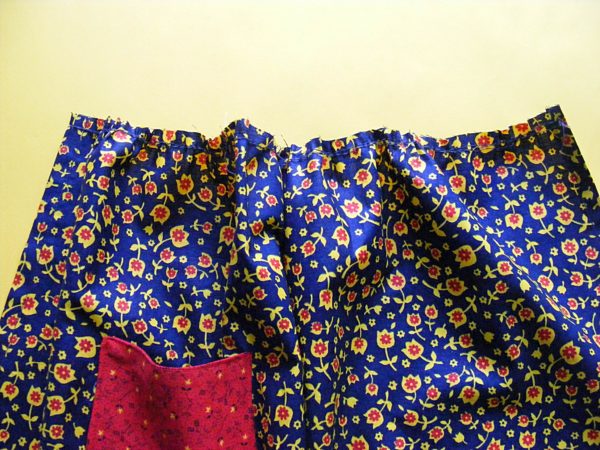
Gather up the top edge of the apron (using either a gathering foot or the basting-stitch method from this video) until it’s the desired width, usually a little more than half of the total waist measurement.

Easy Apron - a free pattern from Shiny Happy World

This isn’t rocket science, so don’t tear out your hair (or your stitches) if you end up a little longer or shorter than you wanted. A little bit of variation won’t look bad.

Step 9

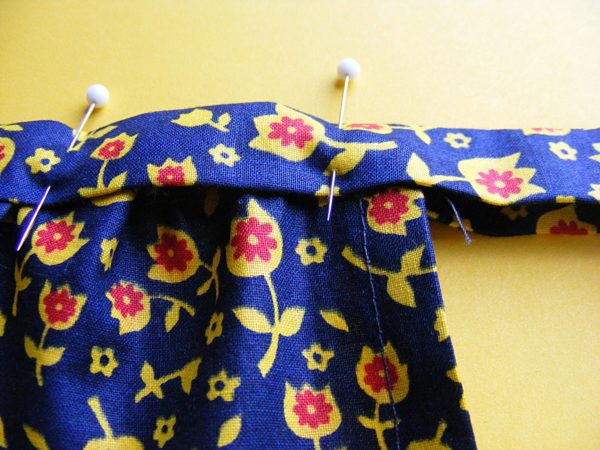
Fold your double-fold tape over the raw, gathered edge of the top of your apron.

Easy Apron - a free pattern from Shiny Happy World

If you pin the center of your tie to the center of your apron piece and work your way out from that center point, it’s very easy to get everything even with no measuring.

Pin the double-fold tape in place.

Step 10

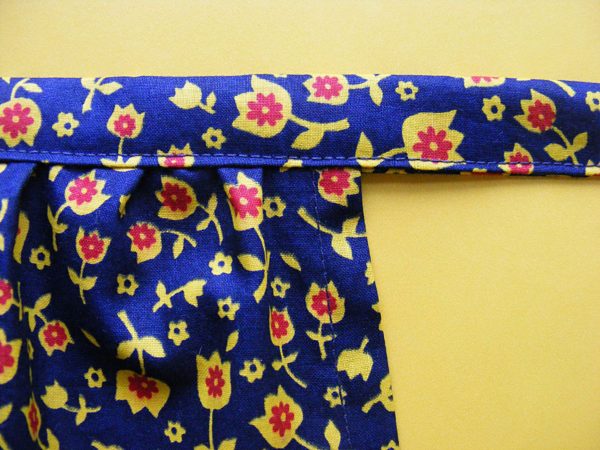
Stitch the folded edges together, the whole length of the waistband/tie.

Easy Apron - a free pattern from Shiny Happy World

Start at one end. Stitch the short end together. Turn the corner and stitch all the way down the length of the tie, enclosing the gathered edge of the apron top in the fold. Sew slowly, making sure that you are catching the back fold of the tape in your stitching. Turn the corner and stitch the other short edge.

Finished!

Easy Apron - a free sewing pattern from Shiny Happy World

You’re done! Tie on your new apron and get ready to make another. Now that you have the basics down you’re ready to try all kinds of fabulous variations!

Brag a little!

Don’t forget to take a picture of your finished apron! Post it to the Shiny Happy People group so everyone can see and be inspired by your work. Sharing is fun!

Happy stitching!

Best,
Wendi

How to Gather Fabric – video

How to Gather Fabric - a video tutorial from Shiny Happy World

Okay – here’s the scoop on how to gather! The video shows two methods – the traditional way (terrific for short pieces) and an easy way to gather fabric (especially good for long pieces).

Let’s talk about the “old-fashioned” way.

In a nutshell, you sew two rows of basting stitches, then draw up the bobbin threads, gathering the fabric as you go.

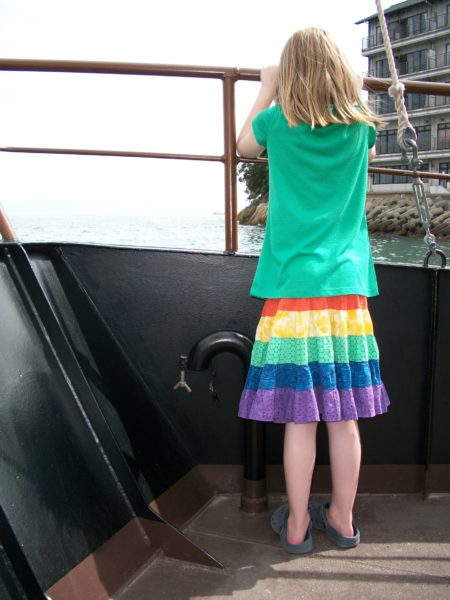
One the plus side – it’s easy to get the gathered fabric exactly the width you want it to be. On the minus side – it’s a huge, HUGE pain in the patootie to gather up fabric longer than a couple of feet. Which means that when I made this skirt. . .

girl on a boat wearing a rainbow skirt made with strips of gathered fabric

. . . it took a long time and a lot of swear words. (But Jo loved it so much that it was totally worth it! She wore it for YEARS and when she couldn’t wear it anymore she passed it on to a smaller friend who also wore it for YEARS.)

The second method I show is an easy way to gather fabric – especially if you’re working with really long pieces. This method uses a magical gathering foot that probably doesn’t come with your machine. On the plus side – it’s super easy. On the minus side – you have to pay for the special foot (though it’s not too expensive) and in order to figure out what setting to use to get it gathered the amount you want – you have to do math.

That’s right – math.

I didn’t go over this in the video because I was afraid if I started tossing out numbers and percentage calculations I would sound like the teacher in Charlie Brown. So I’m doing it here in writing so you can actually look at the formulas and say, “Hey – that’s really not bad at all!”

Here goes. In the video I show you how to do a sample gather on a 10 inch strip of fabric. With my machine set at 2.5 (regular sewing stitch length), the finished, gathered strip ended up 9.5 inches long. 9.5 divided by 10 is .95 – so that means the finished gathered strip was 95% of the starting length. (See why I use a 10 inch strip? I didn’t even have to use my calculator for that!)

When I sewed a 10 inch strip using a stitch length of 6 (the longest setting on my machine) the finished length was 8 inches. 8 divided by 10 is .8, so that means the finished gathered strip was 80% of the starting length.

I forgot to show this in the video, but you can also adjust the amount of gathering by adjusting the tension. Less tension = more gathers. So if I need more than 80% gathering, and I can’t make my stitches longer than 6, I start adjusting the tension. With a stitch length of 6, and tension at 2 (I usually sew at 4), then the finished strip is 6.5 inches – or 65% of the starting length.

Now here’s where it gets fun. Say I’m making an apron. The width of the skirt panel is 23 inches. I want to fit it into a 15″ section of the waistband. Where the heck do I set my stitch length and tension to gather the top of the skirt?

Easy peasy.

Take your desired (gathered) width and divide it by the current (ungathered) width. That will give you the % change you need. So 15″ divided by 23″ equals .65 or 65%. Hey! That’s exactly what I got when I set my stitch length at 6 and my tension at 2!

See how that works?

I tested out lots of strips of regular woven cotton fabric at various length and tension settings and wrote it all down. That’s a fabric I use a lot and it gives me a good starting point whenever I do this – so I don’t have to start from scratch with all of that trial and error. I look up what I did to get the % change I want for whatever project I’m working on. I test it once with the actual fabric I’ll be using, and then I make a small adjustment if I need to. I hardly ever have to make a change if I’m using another woven cotton, but if I’m switching to something a lot heavier or lighter (like a corduroy or a chiffon) I will almost always need to adjust.

Does this seem like a lot of work? Let’s look back at that rainbow skirt, shall we? Each strip was 1 1/2 times longer than the one above it. If I made it for her today the red strip would be 30″. The orange strip would be 45″. The yellow strip would be 68″. The green strip would be 102″. The blue strip would be 153″. And the purple strip would be 230.” That’s over 19 FEET LONG! Now imagine pulling up those bobbin threads for 19 feet – keeping all your gathers even – and without breaking the thread. The trial and error involved in making that chart doesn’t look too bad now, does it? And think of it this way – make the chart once and use it over and over again for as long as you have your machine.

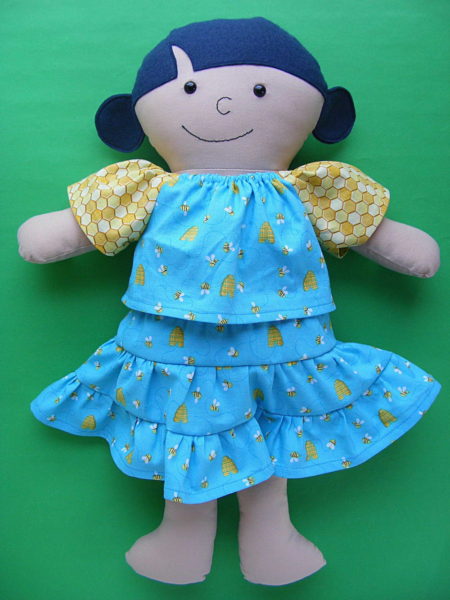
Want to practice gathering fabric on a small project? This outfit for Dress Up Bunch Dolls gathers fabric two ways.

Dress Up Bunch doll pattern - beekeeper dress and felt flowers

The skirt uses the gathering method shown in this post. The top uses elastic to gather the fabric. Practice both!

Happy sewing!

How to Topstitch and Edgestitch – Video

How to Topstitch and Edgestitch - a video tutorial from Shiny Happy World

In this video I showed you how to topstitch beside a zipper and I got an email asking me the difference between topstitching and edgestitching.

Not much!

You’ll run into both terms in different patterns so I thought it would be good to talk about the “official” difference between them. In a nutshell – any stitching done on the top of the fabric (that is – not on a seam that will be hidden) is topstitching.

Edgestitching is just topstitching that runs really close to the edge of the project.

In the video I show you some tips and tricks for doing them both, including examples for three different ways you’ll use them.

One thing that helps me get a nice straight topstitch is my clear presser foot. I made sure to point it out at the beginning of the video, but when I did the editing I realized that it’s hard to see the “clearness” of the foot, so here’s a still photo.

That clear part right around where the needle goes in is invaluable for letting me see exactly how close to the edge I’m stitching. If your machine has a solid metal foot, buying a clear foot is almost always an option. It won’t be very expensive and it will be VERY useful. I’m always a fan of seeing what I’m doing. 🙂

The outline stitching I do around all my applique blocks is also a kind of topstitching. On my current machine I have a foot that’s entirely made of clear plastic called (naturally) a clear applique foot. It’s marvelous!

Here are links to all my posts about outline stitching.

Finished with this topic?

Return to the Let’s Make a Quilt main Table of Contents.

Move on to the lessons about how to trim and assemble your blocks.

Happy stitching!

Free Sewing Pattern – Zippered Bag

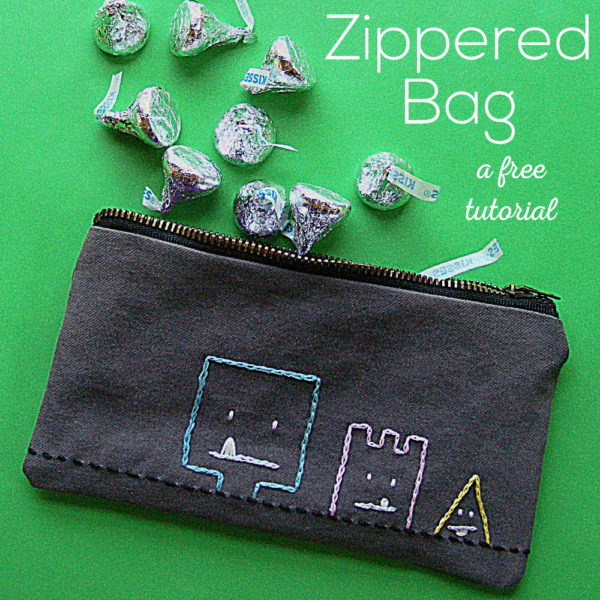
How to Make a Zippered Bag - free tutorial from Shiny Happy World

Let’s learn to make an easy zippered bag!

I cut up a lot of old clothes to reuse the fabric.

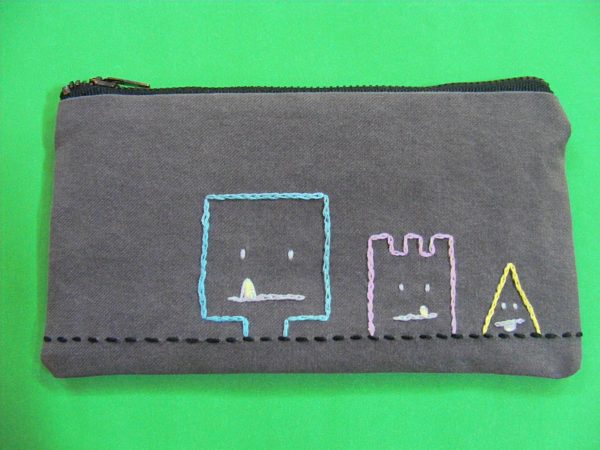
I can’t stand to throw anything away, and I end up turning a lot of the zippers into handy-dandy zippered bags like this one.

Make them in grown-up fabrics to hold make-up, money, membership cards, etc.

Make them in kid-friendly fabrics to hold candy, money, colored pencils and a little notebook, tiny toys, rocks, etc.

(Why does everything I make end up holding rocks?)

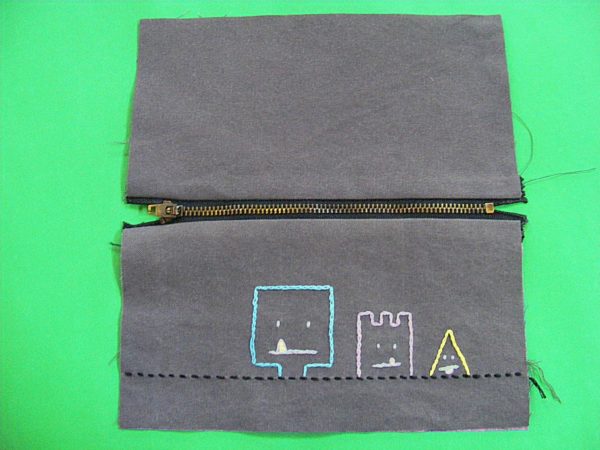
Anyway. . . make it in a plain fabric and fancy it up with some applique or embroidery. I chose three monsters from the Monster Mash embroidery pattern to stitch on this one. Or make it in a stunning fabric that sings on its own.

Make one zippered bag according to the pattern and you’ll have the skills to make as many as you want – in any size and shape you need. And as if that wasn’t enough – it’s a great project for launching into the brave new world of ZIPPERS!

If you’ve been nervous about trying zippers this is a great first project using them.

And did I mention it’s lined?

Materials

  • scraps of fabric for the outside and the lining
  • 7 inch zipper
  • embroidery thread for embellishing (optional)
  • sewing machine with a zipper foot, thread, basic sewing tools

Step 1

Cut two rectangles – each 8″ x 4 1/2″ for the outside of the bag.

Cut two more identical rectangles from your lining fabric.

If you want to add embroidery, applique or some other decoration to the front of the pouch, now is the time to do it. I chose three monsters from the Monster Mash embroidery pattern and stitched them to the front rectangle.

Step 2

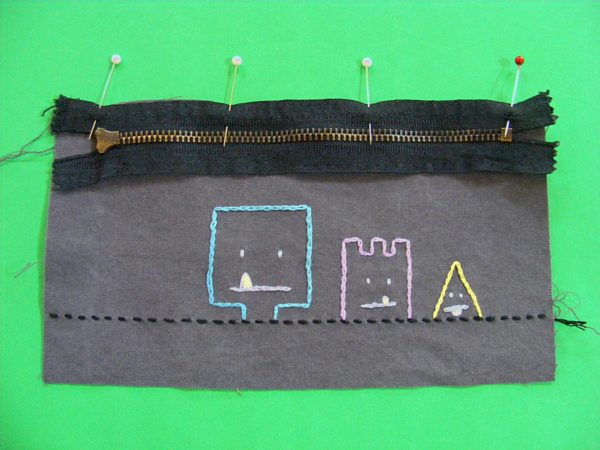
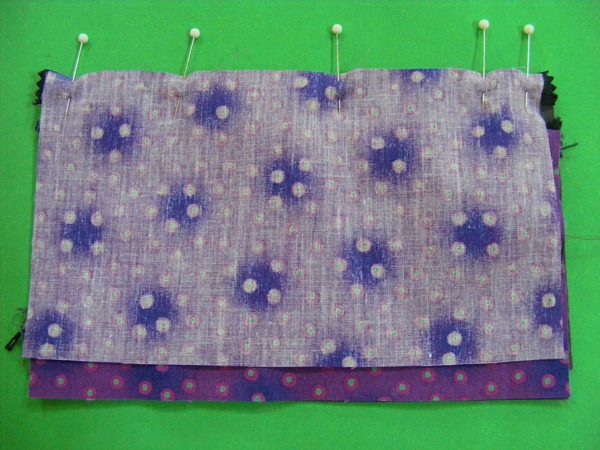
Lay the rectangle that will be the front of the pouch right side up. Lay your zipper right side down on top of it.

How to Make a Zippered Bag - free tutorial from Shiny Happy World

Pin along the top edge.

Step 3

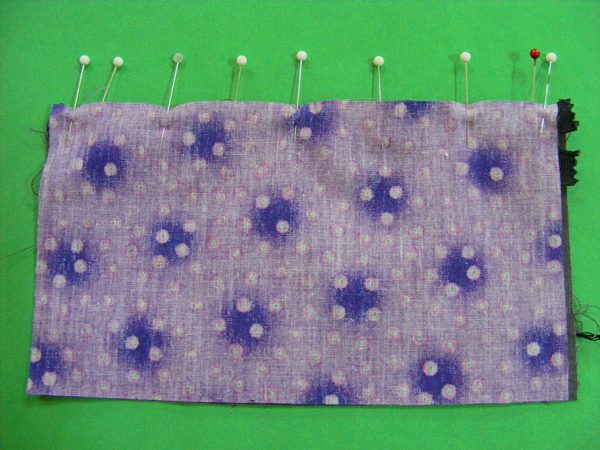
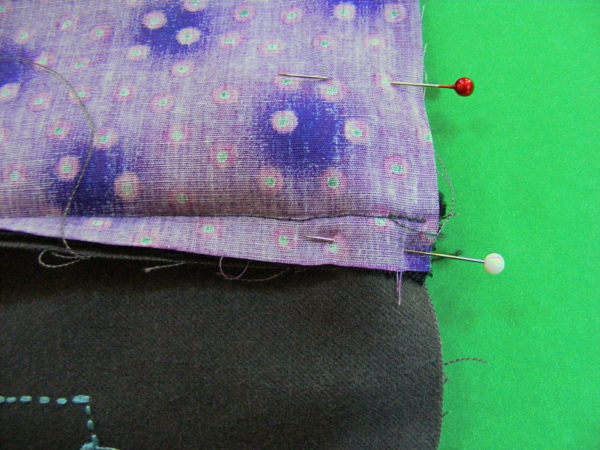
Now lay one of the lining pieces face down over the front piece, with the zipper sandwiched between the two layers. Pin so that all three edges are lined up at the top.

How to Make a Zippered Bag - free tutorial from Shiny Happy World

After you get the hang of this you can combine steps 2 and 3, but it’s helpful for beginners to do them as two separate steps.

Step 4

How to Make a Zippered Bag - free tutorial from Shiny Happy World

Put your zipper foot into your machine and sew the three layers together as close to the teeth of the zipper as your zipper foot will allow.

Watch this video first if you’ve never worked with zippers before.

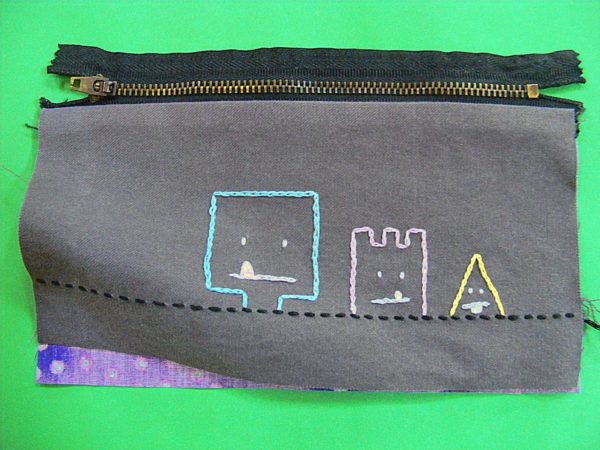
Flip the pieces right side out so it looks like the photo.

How to Make a Zippered Bag - free tutorial from Shiny Happy World

Step 5

Repeat for the other side of the zipper.

Lay the outer rectangle face up. Lay the zipper (with the other outer and lining pieces sewn to it) face down. Lay the lining piece face down.

Pin all along the top edge and sew.

How to Make a Zippered Bag - free tutorial from Shiny Happy World

Step 6

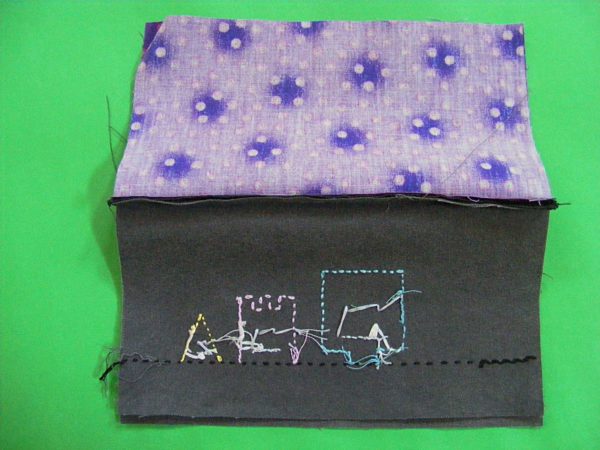
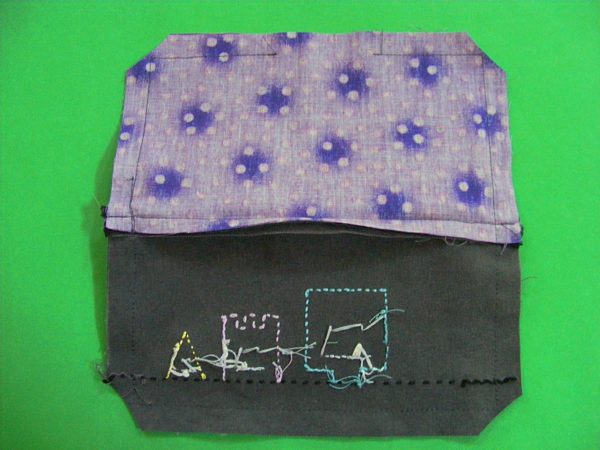
Now when you flip everything right side out it will look like this.

If you turn it over you should see the right sides of both lining pieces.

Press the seams on either side of the zipper flat.

How to Make a Zippered Bag - free tutorial from Shiny Happy World

Step 7

Now unzip the zipper about halfway. If you skip this step you will be VERY unhappy – so please do it now.

Flip things around so that the right sides of the outer fabric are facing each other, and the right sides of the lining pieces are facing each other.

Step 8

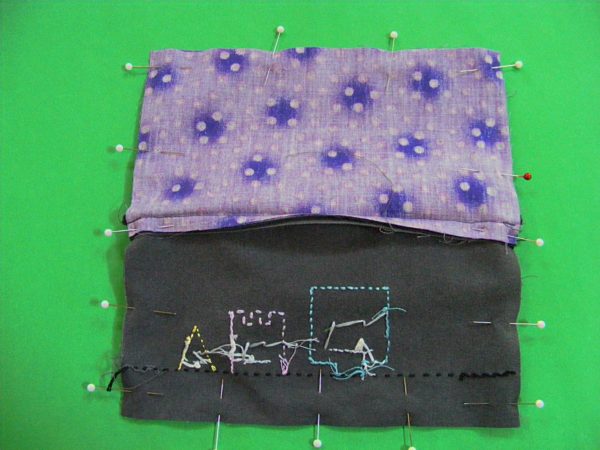
How to Make a Zippered Bag - free tutorial from Shiny Happy World

Pin all the way around the outside edge. You’ll want to leave a 3 inch opening in the lining seam so you can turn everything right side out.

How to Make a Zippered Bag - free tutorial from Shiny Happy World

Pay special attention to which way your seam allowance is facing. You want to flip it toward the main fabric.

This will make the teeth of the zipper inside tend to point toward the lining fabric and that is very important. Check those teeth before you sew. Are they pointing toward the lining? Good!

How to Make a Zippered Bag - free tutorial from Shiny Happy World

Step 9

Using 1/2 inch seam allowance, stitch all the way around the edge, leaving a 3 inch opening in the lining seam.

Remember to backstitch at the beginning and end of all your stitching.

Clip your corners close to, but not into, your stitching.

Step 10

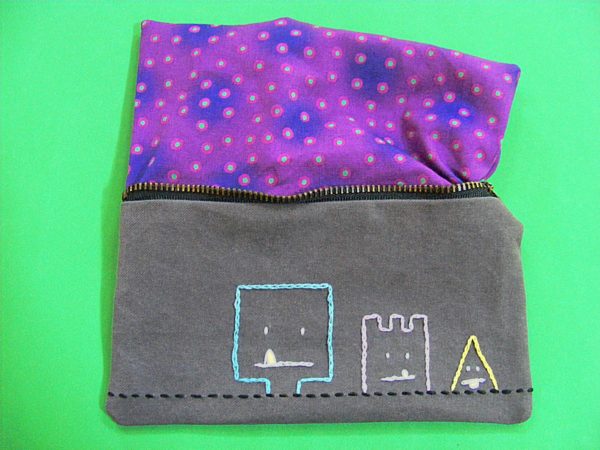
Ready for some magic? Turn the whole thing right side out through the opening you left in the lining. (See why you had to unzip that zipper?)

Ta daa!

Use a stick or other tool to poke your corners out nice and smooth. Press everything flat. If you added embroidery be sure to press around it, otherwise you will squish it and then you will be sad.

Step 11

How to Make a Zippered Bag - free tutorial from Shiny Happy World

Sew up the opening you used for turning. I used the ladder stitch but beginners might opt for whipstitch instead. (Those links go to videos teaching how to do both stitches.)

Tuck the lining inside the zippered bag.

Finished!

Now that you’ve made one you can make as many as you want, in any sizes you want. Just remember to cut your fabric rectangles to match the length of the entire zipper tape – not just the toothed part. Using a 1/2 inch seam allowance will usually butt your side seams right up to the top and bottom of the zipper teeth, but double-check to make sure.

Happy stitching!

How to Sew in an Exposed Zipper – Video

How to Sew an Exposed Zipper - a video tutorial from Shiny Happy World

There are a few different ways to work with zippers – this is one of the easiest.

Zippers aren’t hard at all, but they have a reputation for being tricky so I’m going to ease you into it.

This is NOT the technique you’d use for most garment sewing – that’s “hiding” a zipper behind a seam and you can find that video here.

This video is sewing a visible zipper and it’s great for craft applications like pouches, bags, pillows, etc. And, like I said, it’s easy peasy. So find your zipper foot and sew along!

Oh – and if you’re looking for the embroidery pattern for those monsters in the top image, you can find that here. And the free patterned for the zippered pouch they become is here.

Happy sewing!

Best,
Wendi
That's me!

Free Sewing Pattern – Receiving Blanket for Baby

Free Pattern baby's receiving blanket

Click here to download the FREE pattern.

A receiving blanket is a baby staple – a lightweight blanket perfect for swaddling, for warmth or shade, for impromptu diaper changes, for a nursing cover-up – you can’t have too many.

Luckily, they’re really easy to whip up.

On my sample I decided to add an appliqued bear. Recognize him? It’s the Anywhere Bear applique pattern, enlarged just a bit. This pattern is currently being redesigned and is due to reappear June 2016. In the meanwhile, please check the Shiny Happy World store for many single block applique patterns that will add that extra adorable factor to your receiving blanket.

In the pattern I give instructions for three finishing techniques – one quick and easy technique for making a stack of utilitarian blankets, one slightly fancier, and one heirloom-quality.

You decide how much time you want to invest.

What you’ll need

• 1 yard each of two fabrics
• 13 feet of purchased double-fold binding (optional)
• 1/4 yard of fabric to make double-fold binding (optional)
• materials for embellishing (optional)
• sewing machine, thread, basic sewing tools

Difficulty

Very easy. Even the fancy heirloom-quality technique is very easy. It’s not harder – it just takes more time.

sewing 1

Click here to download the pattern.

Happy stitching!
Best,
Wendi

SHARE THIS