Free Puppet Theater Pattern!

Free pattern - easy doorway puppet theater

Can you sew a hem?

Yes?

Then you can make this easy doorway puppet theater.

No?

Then you’re about to learn – the pattern has links to videos teaching you all the skills you’ll need so you can make it.

It hangs in any doorway so there’s plenty of room “back stage.” And when you’re not using it it’s easy to just fold up and put away. Plus – it’s FREE!

What you’ll need

  • 1 yard solid-colored fabric for the backdrop
  • 1 1/3 yard patterned fabric for the bottom curtain
  • 2 spring tension rods long enough to fit in the doorway you’ll be using
  • Thread
  • Sewing machine
  • Basic sewing tools
  • less than an hour

Difficulty

Crazy easy. Seriously.

sewing 1

There’s also a free template for two ships included!ย Just print, color, paste them to some cardboard, cut them out, add sticks for handles and you’re ready for the show!

Happy stitching!

Best,
Wendi
Applique Wendi (with fabulous hat)

How to Turn a Hem – video

How to Hem - video tutorial from Shiny Happy World

You’re the master of the straight line now, right? Well, now you get to practice it a little more. In this video you’ll learn how to turn a hem and stitch it in place.

This is a basic, double-turned hem on a straight edge – used for casual clothing and lots of craft projects. There are fancier ways of stitching invisible hems on more elaborate clothing but this is a good, easy technique for a basic hem.

Happy sewing!

Best,
Wendi
That's me!

How to Make Fancy Schmancy Cloth Napkins

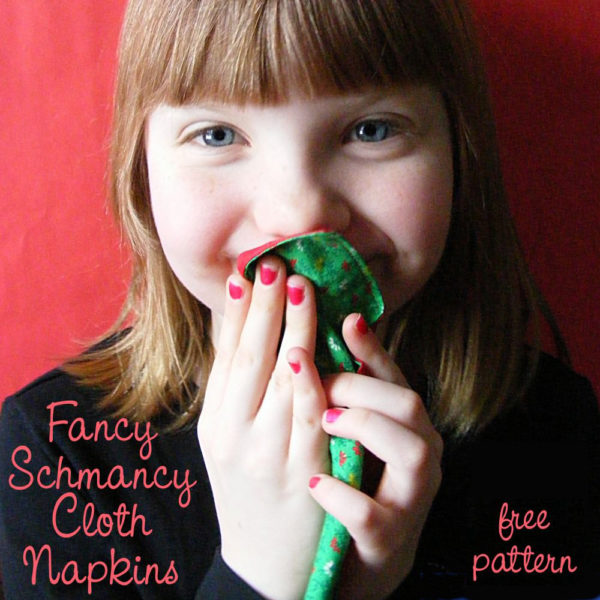
Photo of a young girl holding a cloth napkin to her mouth.

How to Make Fancy Schmancy Cloth napkins - a free tutorial.

Make some fancy schmancy cloth napkins!

It’s the perfect project is to practice straight-line sewing on the machine!

You get to practice sewing around the edge with a nice, straight, 1/4 inch seam allowance, and then you get to go around the edge again with a topstitch.

Easy peasy!

So here’s a free pattern for you.

What You’ll Need for Each Cloth Napkin

  • Two squares of fabric. I use 12-inch squares but you could go a little larger or smaller if you like. The two fabrics can match, can coordinate, or can be  completely random – it’s all up to you. I usually use a print and a solid that I think looks good with it.
  • Matching thread
  • Sewing machine
  • Iron
  • Pins

You read the part about this being good for practicing sewing straight lines, right? This is definitely for beginners.

If you want to get really fancy you can embroider on one of the squares of fabric before you sew them together. Maybe an initial? Or a flower? Or a small beetle?

There are a bunch of embroidery patterns here, and this book has over 500 motifs, including really unusual ones like chainsaws, lumberjacks, succulents, toys, and kitchen equipment.

Step 1

Iron your fabric so it’s nice and smooth.

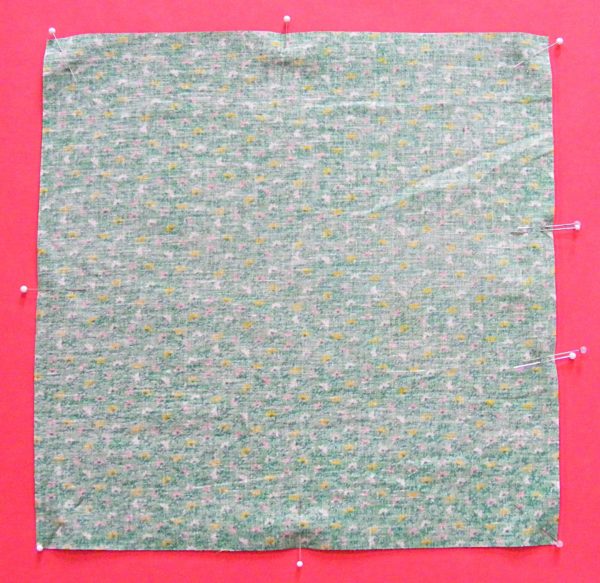
Stack the two squares of fabric with their right sides together and their edges lined up. The napkin should be “inside-out.”

Pin the two layers together around the edges.

Step 2

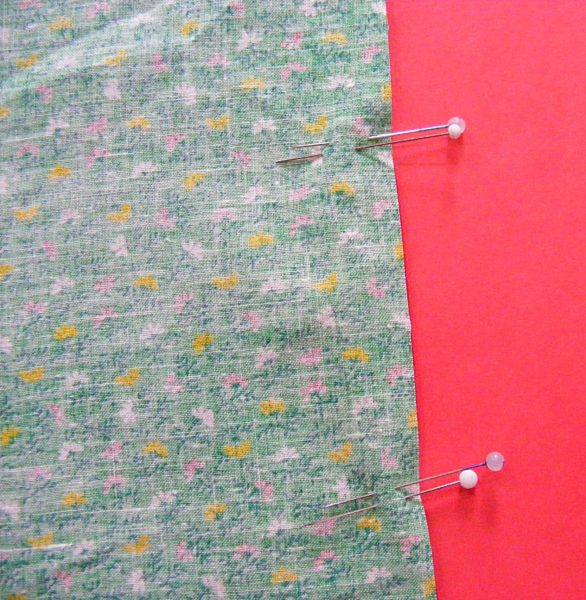
Leave an opening of at least 3 inches so you can turn the napkin right-side-out after stitching.

I like to mark the beginning and end of my opening with double pins so I remember not to sew it closed.

Step 3

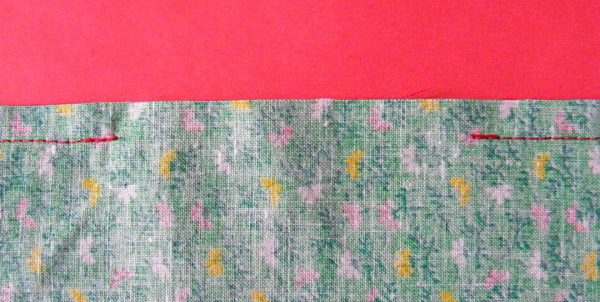
Using 1/4 inch seam allowance, stitch all around the edge of the napkin – except for the part you’re leaving open.

Remember to backstitch a few stitches at the beginning and end of your stitching.

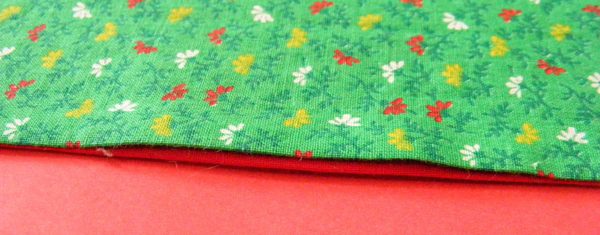
The opening should look like this.

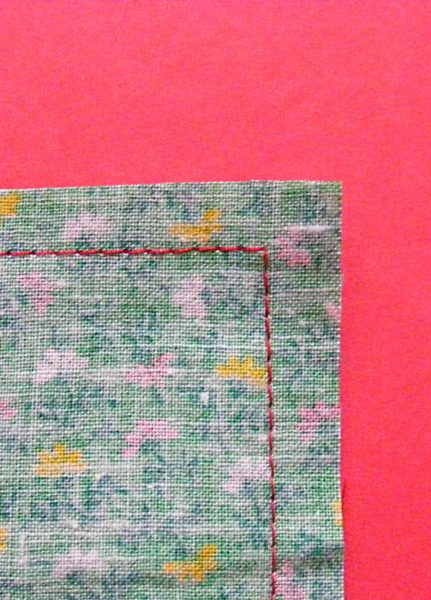
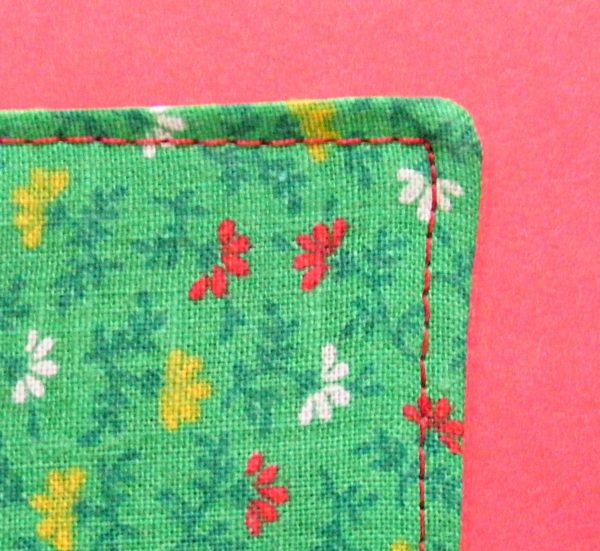
And the corners should look like this.

If you need help with your seam allowance or turning corners, watch this video.

Step 4

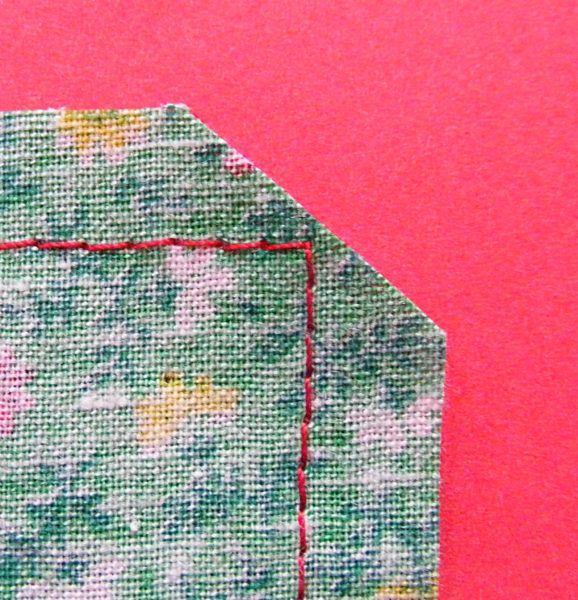
Trim away excess fabric at each corner. This will help make your corners nice and flat when you turn the napkin right-side-out.

Be careful not to cut through your stitches – your cut should be just a little bit out from the corner of your stitching.

Step 5

Turn your napkin right side out. Use a chopstick (or some other pointy, but not too pointy tool) to help pop the corners all the way out.

Smooth everything out and carefully press all the seams. Take your time and make the sides as square as possible.

Step 6

The unstitched edges of your opening should fold in pretty perfectly all by themselves, but give them some help if you need to. They should look like this before pressing. . .

And like this after pressing. . .

Step 7

Now you have two options. You can use ladder stitch to sew up the opening. It’s invisible, but some people don’t like hand stitching.

If you want to do the whole thing by machine, just stitch all the way around the edge, very close to the edge of the napkin. This is called topstitching and there’s a video here showing how to do it.

Every corner should be nice and square and this stitching will seal up the opening you used for turning. Easy peasy!

Trim your threads and press your napkin one more time. That last pressing will help the threads of your topstitching sink down into the fabric and look nice and finished.

Now – have a snack!

We have a big stack of colorful napkins in our house and everyone has their own favorites. This is a great way to use up random bits of favorite fabrics.

Happy stitching!

How To Sew a Straight Line on the Machine – video

How to Sew a Straight Line and Turn Corners - a video tutorial

Here it is – the moment you’ve all been waiting for – sewing on the machine! We’re going to start with straight lines and then we’ll have a separate lesson on sewing curved lines. In the video you’ll see me sewing on a piece of paper. You can download that sheet here.

One thing I don’t think I emphasized enough in the video – you have to backstitch a few stitches at the beginning and at the end of all sewing. The backstitching works as a knot and keeps your stitching from unraveling – so don’t forget that step.

Ready? Let’s sew!

Best,
Wendi
That's me!

How To Sew Without a Machine – video

How to Sew without a Machine

I know everyone’s eager to get on the machine – but sometimes you have to do a bit of handwork and this is the most basic hand sewing stitch there is. It’s not tricky and it actually goes much faster than you’d expect. And once you get the hang of it you can sew ANYTHING ANYWHERE. Really. Clothing, quilts, toys, repairs – you can do it all with just a needle and thread.

Just grab a scrap of fabric and a needle and thread and practice some hand sewing. Once you get a feel for the stitch – try to make something! You can sew any pattern by hand. ๐Ÿ™‚

Happy sewing!

Best,
Wendi
Applique Wendi (with fabulous hat)

How To Tie a Sewing Knot – video

How to tie a sewing knot - a video showing the super easy knot I use in the tail of my thread for all hand sewing.

I know it seems silly to record a video about how to tie a sewing knot – but this knot is so awesome it’s worth teaching.

When I’m sewing in public and strangers see me tie this knot – they stop and ask me how I did that. Yes – it’s that cool.

And it’s easy. ๐Ÿ™‚

With just a little practice you can look like a sewing superstar.

I’ve heard it called a tailor’s knot and a quilter’s knot – but I just call it my favorite knot. ๐Ÿ™‚

I use it for any and all hand sewing that I do – sewing, embroidery, hand quilting, you name it. If it calls for a needle and thread, with a knot in the tail of the thread – this is the sewing knot I use.

Here are all my posts about knots.

Before you knot that thread you need to know how much to use, so here’s one more post that doesn’t really have a better place to live. ๐Ÿ™‚ How Many Strands of Thread Should I Use?

Return to the Learn to Embroider main Table of Contents.

Move on to the lessons for the four most basic embroidery stitches.

Pattern Cutting Basics – video

Pattern cutting basics - a video tutorial from Shiny Happy World

In this video I give you an introduction to some pattern cutting basics.

When I say basics I do mean basics. This isn’t about transferring complicated markings from garment patterns to your fabric. This is very basic stuff about how to lay out a pattern piece and cut around it.

It may seem like I’m overemphasizing the “lay your pattern out as close to the edge of the fabric as you can get it” stuff – but every time I teach a sewing class I come home with at least one large piece of fabric with a small hole cut smack out of the middle of it.

Surprise!

Like this one. ๐Ÿ™‚

Here’s the video. . .

So there you are – a simple introduction to pattern cutting. If you want to get just a tiny bit more advanced, check out this post about fabric grain. Happy sewing!

Best,
Wendi
That's me!

How to Use and Maintain Your Steam Iron

Best Steam Iron - How to use and Maintain It

The most dangerous tool in the sewing room isn’t the machine with the fast-moving super-sharp needle. It’s the steam iron.

Really!

It’s so easy to burn yourself either by touching the iron directly, or by the steam that comes shooting out the sides. ๐Ÿ™

Do you know how to take care of your iron?

Did you know that there’s a difference between pressing and ironing?

Do you know how to remove gunk that has baked onto the sole plate of your iron?

From safety to maintenance to proper use – this video has everything you ever wanted to know about your steam iron.

A lot of people ask about what steam iron I use.

For a few years I used an Oliso Pro.

I loved it! It got nice and hot, generated plenty of steam, and didn’t need to be propped upright. But then it started to die. It never leaked, but it stopped getting up to full temperature. If I were still teaching kids I would have replaced it with the same model. That stand-up feature is AWESOME for kids who often leave the iron sitting flat on the ironing board. ๐Ÿ™„

But I don’t teach kids very often anymore, so I bought a less expensive iron – a Sunbeam Turbo Steam Iron. It’s a great iron too! It has three steam settings – no steam, normal steam, and a crazy insane amount of steam. ๐Ÿ˜‚ It holds temperature well, has a big tank for water, and has tiny steam holes – a feature I like for fusible applique.

If you’ve got an iron, you’ll need an ironing board. Here are a few more handy posts. . .

And here’s a post especially for those who do embroidery – How to Iron Your Embroidery without Smooshing the Stitches.

Here are handy links to all the posts about quilting tools and supplies.

Sewing Machine

Iron

Rotary Cutting Tools

Scissors

Other General Sewing Room Supplies

One More Hugely Popular Post that Seems to Fit Here Better than Anywhere Else

Return to the Let’s Make a Quilt main Table of Contents.

Move on to the posts about choosing your quilt pattern.

Happy stitching!

SHARE THIS

How To Choose Fabric – video

How to Choose Fabric for Beginners

You’ve got your machine and all your tools and you’re ready for the fun part – picking out theย fabric. Woo hoo! What you might not know is that some fabrics are a dream to work with – and some are a nightmare.

This video gives you some tips on how to choose fabric for a beginning sewist.ย Hint: It’s not the velvet and satin! At least not for beginners. After you have some of the basics under your belt we’ll have a few special lessons on working with all the “tricky” fabrics I mention. You will learn to sew with velvet – just not for your first project. ๐Ÿ™‚

Want to jump ahead to working with some of those “fancy” fabrics? Here are links to some lessons. . .

And I have a whole bunch of info about working with felt – one of my favorite fabrics.

If you’re looking for specific info about choosing fabrics (and colors) for a quilt, here are some helpful posts for you.

Now that you know how to choose fabric that will be easy to work with – pick a project and start sewing! There are a bunch of free patterns here.

Happy sewing!

Best,
Wendi
That's me!

Basic Sewing Machine Maintenance

Easy Sewing Machine Maintenance - a video from Shiny Happy World

So, you’ve got yourself a sewing machine. Now you have to learn how to take care of it. Don’t worry! Sewing machine maintenance is pretty easy – just regular cleaning and the occasional drop of oil. You’ll have to change the needle pretty often too. I show you how to do it all in this video.

Update! A lot of commenters on YouTube have freaked out because I blow compressed air into my machine. The guy who cleans my sewing machine actually taught me to do this, so I feel pretty ok about it – but it’s important to do it after you brush all the big, obvious stuff out. It helps to get the little bits that are hidden in nooks and crannies. 

See how easy basic sewing machine maintenance is? I give my machine a good cleaning and oiling in between every major project – and sometimes multiple times during larger projects like a quilt. It only takes a minute and your machine will thank you. ๐Ÿ™‚

Here are handy links to all the posts about quilting tools and supplies.

Sewing Machine

Iron

Rotary Cutting Tools

Scissors

Other General Sewing Room Supplies

One More Hugely Popular Post that Seems to Fit Here Better than Anywhere Else

Return to the Let’s Make a Quilt main Table of Contents.

Move on to the posts about choosing your quilt pattern.

Happy sewing!