How to Make a Quilt

You’ll find hundreds of helpful tutorials here at Shiny Happy World, but sometimes all that help can be a little overwhelming. Where should you start?

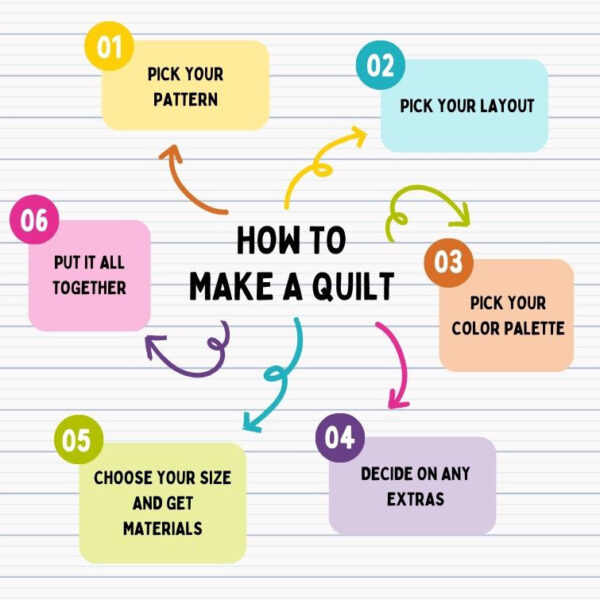
Making a quilt really boils down to six steps.

Step 1 – Pick Your Pattern

You can make a quilt with one block repeated over and over again, or make a quilt using many different blocks.

Shop for individual block patterns here.

Shop for bundles of multiple blocks and pre-made collections here.

You’ll find more info about choosing a quilt pattern here.

Step 2 – Pick Your Layout

Do you want a simple grid? Sashing? Added half blocks? This post shows quilts in lots of different layouts, with links to more info about each.

Step 3 – Pick Your Color Palette

You’ll find all the color palettes I use over and over again here. You can use these fabrics I designed especially for applique, or you can use them as inspiration to take to the fabric store.

This post has LOTS more info about choosing fabric for a quilt.

Step 4 – Decide on Any Extras

This post will get you started with info about working with specialty fabrics. It’s specifically about working with shiny tissue lamé, but it includes links to other posts about applique with fleece, satin, fur, and more.

Want to add flappy ears? Doors that open? Puffy bits? This post will get you started on adding 3D elements and it has links to lots of other possibilities.

Want to add fun accessories likes hats and mustaches? There’s a pattern here.

Want to make your applique bust out of its frame and into a neighboring block? This post has all the info you need.

Step 5 – Choose Your Size and Buy Materials

I design my quilts for 6 different sizes, from Itty Bitty Baby to King Size.

For each layout style, you’ll find a downloadable PDF with fabric requirements, cutting guides, and assembly diagrams for all six sizes in this post – Quilt Sizes and Supplies Needed.

Step 6 – Make Your Quilt

This post has everything you need to know about how to make a quilt using my Quilt As You Go method. This is a VERY detailed post that takes you from cutting your squares to binding your quilt, with links out to detailed tutorials for every step of the process.

If you prefer video learning, this post has a 25 minute video explaining all the steps in detail, with a time stamp table of contents so you can skip to the parts you need most.

That’s it!

If you’d like to see all the quilting tutorials in one place, organized by topic, you can find that here.

Let’s make a quilt!

SHARE THIS

Basic Quilt Block Cutting and Quilting Instructions

I like to quilt my blocks before I add applique. It makes the process so easy and fun! Just zoom back and forth on the sewing machine and you’re done. 🙂

Some people prefer to applique first and then quilt around it – that’s fine too! The quilting lines CAN show through the applique pieces – especially if you’re appliqueing with a light-colored or solid fabric.

All of my applique quilts except Paper Dolls are built on a 10″ finished square block. The Dinosaurs quilt has the option of making special two-color landscape blocks.

If you’re making Paper Dolls, follow that pattern’s instructions for cutting your blocks.

If you’re making Dinosaurs and want to use the landscape blocks, get those instructions here.

For everything else, cut your main squares 11 inches. That doesn’t have to be a perfect cut, it just needs to be bigger than 10 1/2″ square, because that’s the size you’ll trim down to after you finish your applique and quilting.

If your quilt includes half blocks (like the word blocks in Beep Beep or Noisy Farm) cut those 6 inches x 11 inches.

If your quilt includes double blocks (like in Sea Creatures) cut those blocks 11 inches x 21 inches.

Cut a piece of batting the same size for each block. Again – this doesn’t have to be exact. I often cut my batting just a smidge bigger than my background fabric. I like being able to see it all the way around when I layer the pieces together.

You do not need to prewash your batting, but I recommend pressing your squares (with steam) and letting them cool before layering them with your fabric.

Layer a square of fabric over the batting, quilt those two layers together (no backing!), then press them again (with steam) and set them aside to wait for applique.

Here are links to all the posts about cutting your blocks.

Here are links to all the posts about quilting your blocks.

Finished with this topic?

Return to the Let’s Make a Quilt main Table of Contents.

Move on to the lessons about how to applique.

SHARE THIS

Working with Clip Art

Shiny Happy World has clip art now!

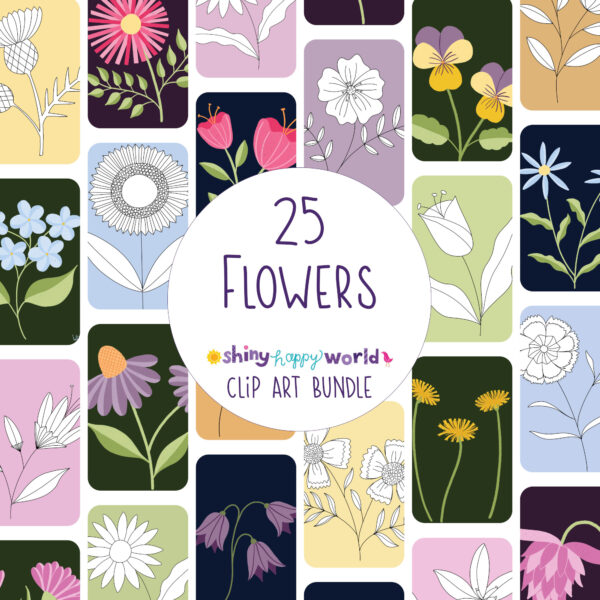
Here’s the first bundle – 25 pretty flowers. 🙂

Cover image showinf a bunch of rectangles filled with pretty flowers clip art - some in color and some as black and white line art. Text reads: 25 Flowers - Shiny Happy World - Clip Art Bundle.

You can find it here.

I’ve been drawing a LOT, and I get a lot of requests for patterns using a lot of my new drawings. But some people want applique quilt patterns, some want embroidery patterns, some want felt applique patterns. And then there are the people who purchase my quilt patterns, but never use the instructions because they’re actually painting furniture or decorating cookies or making greeting cards with the designs.

Add to that a recent survey where a number of people mentioned that they didn’t need the step by step instructions for my applique patterns because they’ve already made several. They just need the templates (but understand the need to include the instructions in every single pattern).

That got me to thinking.

What if I start releasing some of my drawings as clip art? That way I can make more art available faster, and you can get the designs for less because I’m not taking the time to make detailed tutorials.

Everybody wins!

That means these clip art designs (when used as craft patterns) are most appropriate for folks who already have some experience with the craft they want to use them for.

Craft Projects

If you’re starting from fresh – never fear! You can find all my free lessons and tutorials here. And if you want a project to teach you my methods before you jump into, say, designing your own applique pattern from one of my drawings – there’s a treasury of free patterns here. Pick one and work your way through it as a free introductory workshop.

I do have one post here specifically about how to turn ANY drawing into an applique pattern.

Digital Projects

For those who are not interested in using my clip art designs for craft patterns, here’s a bit more very general info for you. Specific instructions will vary depending on the specific design or photo editing software you’re using, so Google is your best friend for those. I’m also a HUGE fan of Skillshare for art and design classes.

When you download your zip file you’ll open up a folder (or folders) with individual files for each design. Everything is 300 dpi, which is the resolution you need for nice, clear printing.

Most designs are sized to print as either a 12 inch square or an 8 x 10 inch image. You can make the images smaller, but making them larger will result in some blurring. That may be fine if you’re using them for pattern purposes (like making a giant applique) but not for printing and framing.

Most bundles will include both JPG and PNG images.

I use JPG images when I want you to have a full image with a background – like a pretty pink flower on a dark blue background. You can print those and frame them, use them in scrapbooking or greeting cards, etc.

I use PNG files when I want you to have the image with a transparent background. So, for example, you can have that same pink flower with no background at all – allowing you to drop it into a birth announcement or scrapbooking project or anything else – without an icky white background.

I also use PNG files for black and white line drawings – so you get JUST the lines with no background, allowing you to drop them on a colored background, or group a bunch of them together on a single page to make a coloring sheet or more detailed pattern.

Clip Art Permissions

Your purchase gives you a limited commercial license to the designs.

For an extended commercial license – talk to me! (smile@shinyhappyworld.com) I’m a big supporter of cottage industry and we’ll negotiate a fair agreement that works for both of us.

Personal Use

You may use these designs in any way you like for personal use. 

Selling What You Make

You may sell things you make with the designs, as long as you are making them yourself. You may not resell the designs themselves.

For example – if you want to program your embroidery machine to embroider one of these designs on pillowcases that you then sell, that’s fine as long as you are making them yourself.

If you are hiring out any part of the making, then talk to me and we’ll negotiate a fair extended licensing agreement.

If you want to sell the digital embroidery machine files you created, talk to me and we’ll negotiate a fair extended commercial licensing agreement.

Using with Print on Demand Sites

You may upload the designs to Print On Demand sites for your own personal use, but not for sale.

For example, if you want to upload one of the designs to Spoonflower to have tea towels made to give as gifts, that’s fine.

If you want to upload one of the designs to Spoonflower to have tea towels made to sell at a craft fair, talk to me and we’ll negotiate a fair extended commercial licensing agreement.

If you want to use one of the designs to create a new pattern to upload to Spoonflower to make it available for others to buy, talk to me and we’ll negotiate a fair extended commercial licensing agreement.

I hope you enjoy the new clip art options! I can’t wait to see what you make with it!
SHARE THIS

Finishing Your Work, Plus Other Ways to Use Embroidery – Learn to Embroider

Once you’re done stitching, there are a number of different ways to finish your work. I’ve also included here some extra lessons about other ways to use embroidery.

Here are all the posts about finishing embroidery projects.

Basic Finishing

Other Ways to Use Embroidery

Return to the Learn to Embroider main Table of Contents.

Happy stitching!

SHARE THIS

Other Stitches – Learn to Embroider

Here we are at the random catch-all group of lessons – Other Stitches. 🙂

This is where you’ll find all the other random embroidery stitches I use – everything that’s not an outline stitch or a fill stitch.

Two of these stitches have already been covered in the Four Beginner Stitches lesson – lazy daisy for drop shapes and French knots for dots.

There are thousands of available embroidery stitches – these are just the ones I use in my own work, and that I recommend in my patterns.

Here are all my lessons for other stitches.

Return to the Learn to Embroider main Table of Contents.

Move on to the lessons about finishing your work.

SHARE THIS

Fill Stitches – How to Embroider

Any time you want an area of solid stitching in embroidery, you use what’s called a fill stitch. I usually recommend satin stitch for beginners, but that only works for smallish areas, and it has a very particular smooth texture that might not be the look you’re after.

There are thousands of available embroidery stitches – these are just the ones I use in my own work, and that I recommend in my patterns.

Here are all my lessons for fill stitches (besides satin stitch).

Return to the Learn to Embroider main Table of Contents.

Move on to the lessons for all the other stitches.

SHARE THIS

Outline Stitches – Learn to Embroider

Any line in an embroidery pattern can be stitched with any outline stitch. I usually recommend backstitch for beginners, but beyond that you can choose anything you like.

There are thousands of available embroidery stitches – these are just the ones I use in my own work, and that I recommend in my patterns.

Here are all my lessons for outline embroidery stitches.

Return to the Learn to Embroider main Table of Contents.

Move on to the lessons teaching fill stitches.

SHARE THIS

The Four Most Basic Embroidery Stitches – Learn to Embroider

Regardless of what the instructions say, you can embroider almost any design using just four super simple stitches. You need something for lines, something for dots, something for drop shapes, and something to fill in solid areas.

Here are my lessons for the four most basic embroidery stitches I recommend for beginners.

Return to the Learn to Embroider main Table of Contents.

Move on to the lessons teaching other options for outline stitches.

SHARE THIS

Knots – Learn to Embroider

Knots.

Yes – I have more than one lesson about knots! They’re a hot topic in the embroidery world. 🙂

Here are all my posts about knots.

Before you knot that thread you need to know how much to use, so here’s one more post that doesn’t really have a better place to live. 🙂 How Many Strands of Thread Should I Use?

Return to the Learn to Embroider main Table of Contents.

Move on to the lessons for the four most basic embroidery stitches.

SHARE THIS

Working with Patterns – Learn to Embroider

When it comes to working with embroidery patterns, there are only a few things you need to know – where to get patterns, and how to transfer them to whatever you’re embroidering.

If you’re getting a little more advanced you might also want to know how to enlarge or reduce a pattern to make it exactly the size you need.

Here are all my posts about working with patterns.

Pattern Sources

How to Resize a Pattern

Return to the Learn to Embroider main Table of Contents.

Move on to the posts about knots. Yes – a whole section about knots. 🙂

SHARE THIS