Adorable Easter Eggs – a free crochet pattern

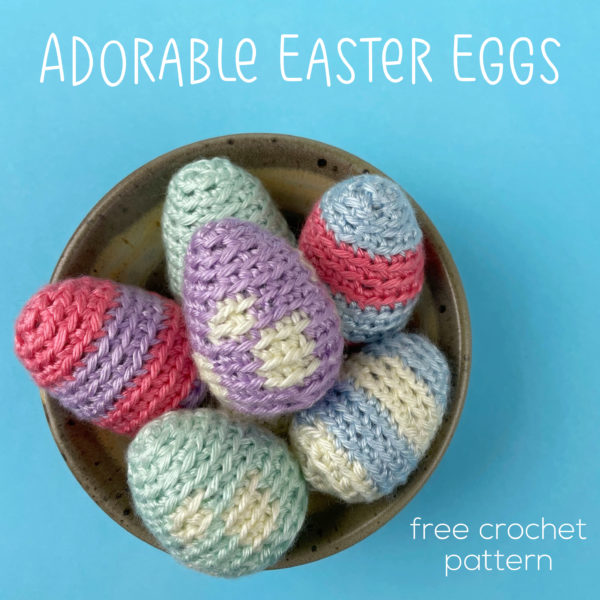
Bowl of colorful crocheted Easter eggs made with a free pattern from Shiny Happy World.

Stitch up some easy crocheted Easter eggs with this free pattern.

These little eggs are super fun to stitch up – and a great way to use up your smallest yarn scraps.

The pattern includes instructions for a plain egg, a striped egg, and a spotted egg.
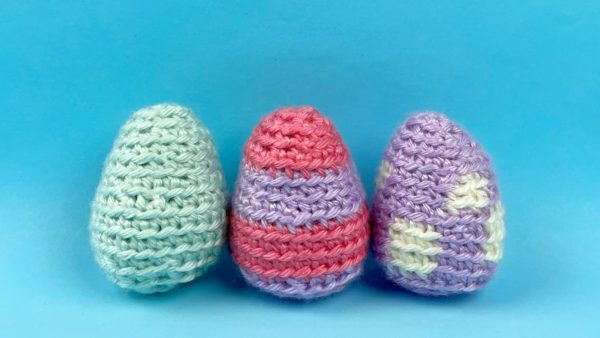
Row of three colorful crocheted Easter eggs - one solid, one striped, and one polkadot

Are you new to crochet and you don’t think you have the skills? Not to worry! These crocheted Easter eggs are a really easy pattern – just increasing and decreasing – nothing to attach. Plus – the links within the pattern go to tutorials showing how to do each step.

If you’re just getting started, start with the plain egg. It’s a great way to learn the basic stitches – single crochet, increase, and decrease.

After you have one under your belt you can try some simple color changes.

Have fun!

You can use any size yarn for this pattern – but if you’re doing stripes or spots, make sure both yarns are as close to the same thickness as possible. Use the hook size recommended on the yarn band – or one size smaller if needed to get a nice tight stitch.

Plain Crocheted Egg

Start out with a sloppy slip knot.

Ch 2. This video shows how to chain stitch.

Round 1 Sc 6 times in 2nd ch from hook (6) This video shows how to single crochet, and this video will help you find the second chain from the hook.

Round 2 Sc twice in each stitch (12) This video will help you with that increase round, if you need it.

Round 3 Sc in each st (12)

Round 4 [Sc twice in next st, sc in next st] 6 times (18) If you’re confused by those brackets and parentheses, take a look at this post about How to Read a Crochet Pattern.

Round 5-6 Sc in each st (18)

Round 7 [Sc twice in next st, sc in each of next 2 sts] 6 times (24)

Rounds 8-10 Sc in each st (24)

Round 11 [Sc2tog, sc in each of next 2 sts] 6 times (18) This video will help you with this first decrease round.

Stuff the egg.

Round 12 [Sc2tog, sc in next st] 6 times (12)

Round 13 [Sc2tog] 6 times (6)

Round 14 Use the drawstring method to close up those last six stitches, leaving a perfectly smooth top. This video shows the drawstring method of closing up amigurumi.

Fasten off, pulling the knot towards the center. This video shows how to fasten off.

Done!

Striped Crocheted Easter Egg

For the striped egg you’ll be changing yarn colors. This video shows the basics of how to change colors when you’re doing single crochet, and this video has some tips for making those colors changes a little smoother.

MC is your main color. SC is your second color.

Start out with a sloppy slip knot.

With MC, ch 2.

Round 1 Sc 6 times in 2nd ch from hook (6)

Round 2 Sc twice in each stitch (12)

Round 3 Sc in each st (12)

Round 4 [Sc twice in next st, sc in next st] 6 times (18)

Round 5-6 With SC, sc in each st (18)

Round 7 [Sc twice in next st, sc in each of next 2 sts] 6 times (24)

Rounds 8-10 With MC, sc in each st (24)

Round 11 With SC, [sc2tog, sc in each of next 2 sts] 6 times (18)

Stuff the egg.

Round 12 [Sc2tog, sc in next st] 6 times (12)

Round 13 [Sc2tog] 6 times (6)

Round 14 Use the drawstring method to close up those last six stitches.

Fasten off, pulling the knot towards the center.

Done!

Polkadot Crocheted Easter Egg

For the spotted egg you’ll be changing colors for just a few stitches at a time. You do that just like the color change in the striped egg, EXCEPT you don’t need to cut and knot your yarn between those changes. Just drop one color and pick up the new color without cutting the yarn. The color you’re not using will just carry on the back of the work. This is called “stranding” and there’s a video showing how to do it here.

MC is your main color. SC is your second color.

Start out with a sloppy slip knot.

With MC, ch 2.

Round 1 Sc 6 times in 2nd ch from hook (6)

Round 2 Sc twice in each stitch (12)

Round 3 Sc in each st (12)

Round 4 [Sc twice in next st, sc in next st] 6 times (18)

Round 5-6 [With MC, sc in next 4 sts. With SC, sc in next 2 sts] 3 times (18)

Round 7 With MC [sc twice in next st, sc in each of next 2 sts] 6 times (24)

Rounds 8-10 [With SC, sc in next 3 sts. With MC, sc in next 3 sts] 4 times (24)

Round 11 [Sc2tog, sc in each of next 2 sts] 6 times (18)

Stuff the egg.

Round 12 [Sc2tog, sc in next st] 6 times (12)

Round 13 [Sc2tog] 6 times (6)

Round 14 Use the drawstring method to close up those last six stitches.

Fasten off, pulling the knot towards the center.

Done!

And here’s a sweet little lavender version of Blair Bunny. She’s traded her Halloween ghost costume for a pile of cute crocheted Easter eggs!
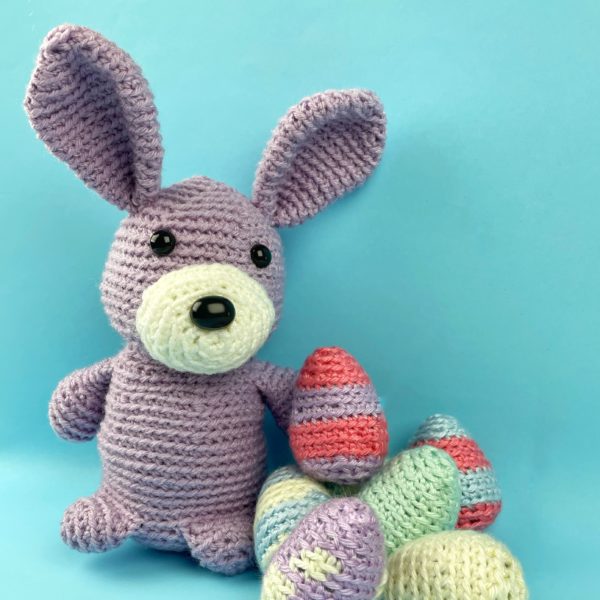
Lavender crocheted bunny with a pile of colorful crocheted Easter eggs made with a free pattern from Shiny Happy World.

Happy stitching!

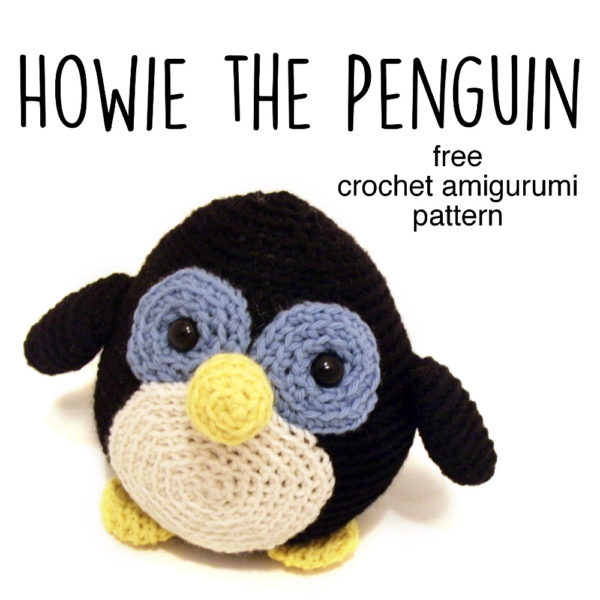
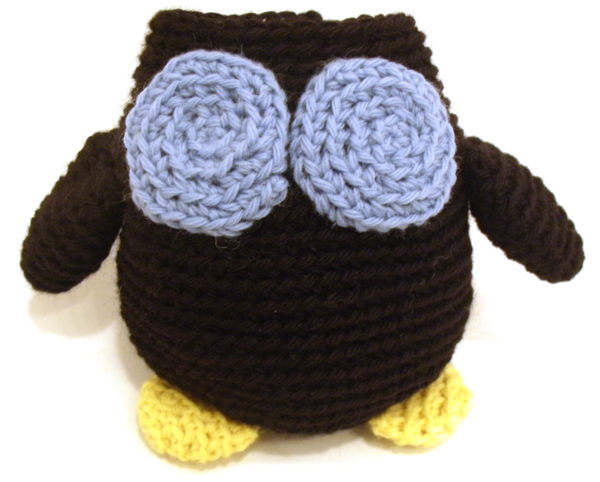
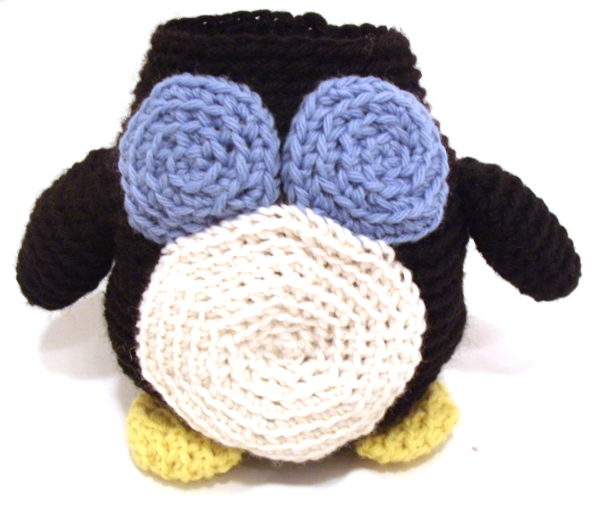
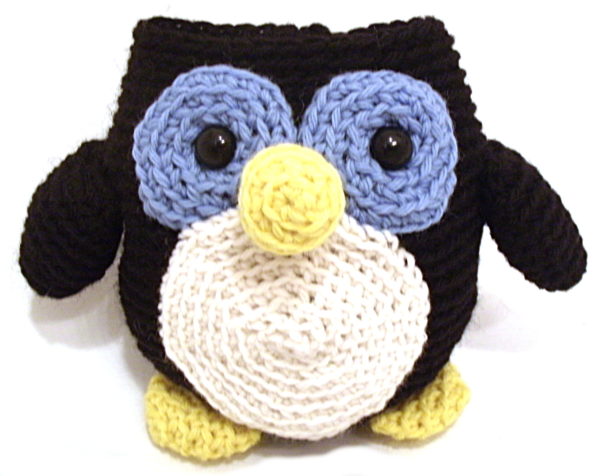
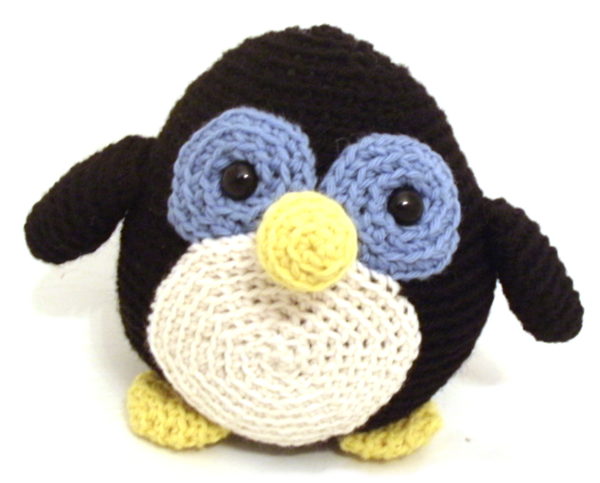
Howie the Penguin – free crochet amigurumi pattern

Howie the Penguin - gree crochet amigurumi pattern from Shiny Happy World and FreshStitchesHowie is a great pattern for those just getting started, because he uses only a few of the most basic skills. You’ll find links to those skills sprinkled throughout the pattern wherever you need them – that way you can learn as you go! Just click on the link to hop to the tutorial.

There are loads of free video lessons here that take you through everything you need to know to get started with amigurumi. You can work your way through those lessons using this free pattern if you like. 🙂

The skills you’ll need for just about any amigurumi are. . .

Additional skills for this pattern. . .

You can go through all those posts now, or just hop to them as you get to those points in the pattern – whatever works best for you!

Yarn

This pattern can be used with any weight yarn! Just use the hook recommended on the ball band, and adjust as needed (see ‘gauge notes’ below). For a bigger, super-cuddly animal, try a bulky weight yarn! Just keep in mind that you’ll use more yardage than recommended. The sample is crocheted in worsted weight yarn, and all yardage/ hook recommendations are calculated based on the sample.

Less than 220 yards (1 skein) is required of each color. For the yarn, Stacey used 100% wool worsted weight (Ella Rae Classic the brand used in the sample). However, any worsted weight yarn can be substituted.

  • MC- Black (Plymouth Galway Worsted color # 154)
  • SC- White (Ella Rae Classic color #01)
  • AC1- Yellow (Ella Rae Classic color #44)
  • AC2- Blue (Ella Rae Classic color #83)

Other Tools and Supplies

Gauge Notes

This pattern doesn’t specify a gauge. It’s a stuffed animal, and you don’t need to be too picky about exact sizing. The most important thing is that you use a hook size that creates a nice looking fabric for your yarn. If you use the recommended hook size, and your fabric looks very loose (so that stuffing would show through), then you will want to use a smaller hook. Other than that, no measuring required!

In case you’re curious about getting the exact gauge Stacey does, it’s 5 rounds=2 inches. Note that you will need to have this gauge for the yardage suggestions to provide an accurate estimation.

Stitch into the Back

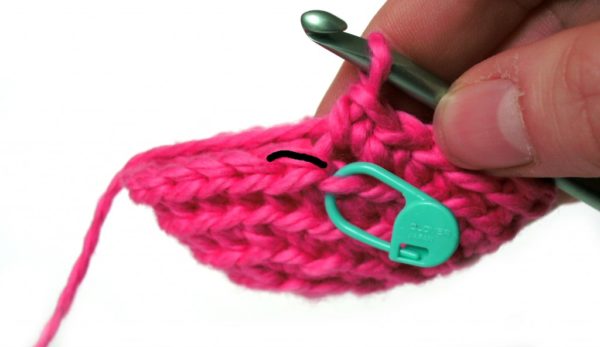
All stitches in this pattern (that are worked in the round) are worked through the back loop only, unless otherwise directed. Look at this picture.

Stitching in the Back Loop

See how one loop is highlighted in black? This is the back loop, and it’s what you’ll stitch into. Stitching into the back loop creates ridges on the right side of the piece.

Want to see crocheting through the back loop in action? Check out this blog post. It talks all about why Stacey crochets through the back loop and even has a handy dandy video showing how to find that loop. 🙂

Abbreviations

  • ch: chain
  • sc: single crochet
  • sc2tog: single crochet 2 stitches together
  • st(s): stitch(es)

Ready? Let’s jump in!

The Pattern

Eye Circles

Make 2.
With AC2, ch 2 (I like to start with a sloppy slip knot. This video shows how. And this video shows how to chain.)
Round 1 sc 6 in 2nd ch from hook (6) This post will help you find that second chain from the hook.
Round 2 sc twice in each st (12) This video will help you if you find it tricky to start the second round.
Round 3 [sc twice in next st, sc in next st.] 6 times (18) (Whoa! What’s with the brackets? It’s just telling you that set is going to repeat. So do everything in the brackets, and then repeat that same series for a total of six times. No big deal. And the 18 in parentheses is telling you that this round is a total of 18 stitches. It’s a good way to check your work.)
Round 4 [sc twice in next st, sc in next 2 sts.] 6 times (24)

Fasten off with long tail.

Feet

Make 2.
With AC1, ch 2
Round 1 sc 6 in 2nd ch from hook (6)
Round 2 sc twice in each st (12)
Round 3 [sc twice in next st, sc in next st.] 6 times (18)
Rounds 4-5 sc in each st (18, 2 rounds)

Fasten off with long tail.

Wings

Make 2.
With MC, ch 2
Round 1 sc 6 times in 2nd ch from hook (6)
Round 2 sc twice in each st (12)
Rounds 3-4 sc in each st (12, 2 rounds)
Round 5 [sc twice in next st, sc in next st] 6 times (18)
Rounds 6-9 sc in each st (18, 4 rounds)
Round 10 [sc2tog, sc in next st] 6 times (12)

Fasten off with long tail.

Beak

With AC1, ch 2
Round 1 sc 6 times in 2nd ch from hook (6)
Round 2 sc twice in each st (12)
Rounds 3-5 sc in each st (12, 3 rounds)

Fasten off with long tail.

Tummy Circle

With SC, ch 2
Round 1 sc 6 times in 2nd ch from hook (6)
Round 2 sc twice in each st (12)
Round 3 [sc twice in next st, sc in next st] 6 times (18)
Round 4 [sc twice in next st, sc in next 2 sts] 6 times (24)
Round 5 [sc twice in next st, sc in next 3 sts] 6 times (30)
Round 6 [sc twice in next st, sc in next 4 sts] 6 times (36)
Round 7 [sc twice in next st, sc in next 5 sts] 6 times (42)
Round 8 [sc twice in next st, sc in next 6 sts] 6 times (48)

Fasten off with long tail.

Body

With MC, ch 2
Round 1 sc 6 times in 2nd ch from hook (6)
Round 2 sc twice in each st (12)
Round 3 [sc twice in next st, sc in next st] 6 times (18)
Round 4 [sc twice in next st, sc in next 2 sts] 6 times (24)
Round 5 [sc twice in next st, sc in next 3 sts] 6 times (30)
Round 6 [sc twice in next st, sc in next 4 sts] 6 times (36)
Round 7 [sc twice in next st, sc in next 5 sts] 6 times (42)
Round 8 [sc twice in next st, sc in next 6 sts] 6 times (48)
Round 9 [sc twice in next st, sc in next 7 sts] 6 times (54)
Round 10 [sc twice in next st, sc in next 8 sts] 6 times (60)
Rounds 11-21 sc in each st (60, 11 rounds)
Round 22 [sc2tog, sc in next 8 sts] 6 times (54)
Round 23 sc in each st (54)
Round 24 [sc2tog, sc in next 7 sts] 6 times (48)
Round 25 sc in each st (48)
Round 26 [sc2tog, sc in next 6 sts] 6 times (42)
Round 27 sc in each st (42)
Round 28 [sc2tog, sc in next 5 sts] 6 times (36)
Round 29 sc in each st (36)
Round 30 [sc2tog, sc in next 4 sts] 6 times (30)
Round 31 sc in each st (30)

Remove hook, but do not fasten off!

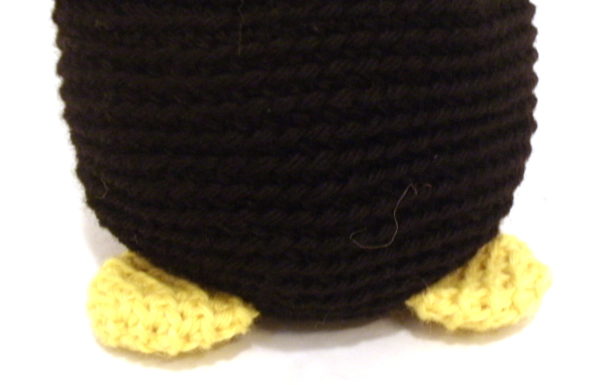
Flatten feet, and attach to round 7 of body. This post shows to how flatten and attach amigurumi pieces.

Howie the Penguin - free crochet amigurumi pattern from Shiny Happy World and FreshStitches

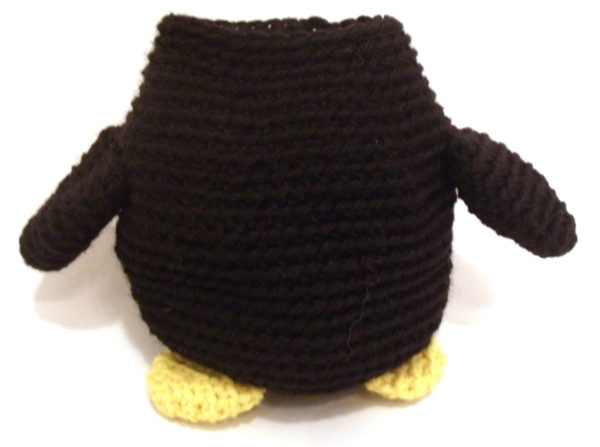
Flatten wings, and attach to each side of body, at approximately round 22.

Howie the Penguin - free crochet amigurumi pattern from Shiny Happy World and FreshStitches

Attach eye circles to body. The bottom of the eye circles should be attached to round 21, and the top of the eye circles will reach round 27. Be sure that the two eye circles touch in the center. This post shows how to use running stitch to attach flat pieces (like spots) to amigurumi.

Howie the Penguin - free crochet amigurumi pattern from Shiny Happy World and FreshStitches

Attach tummy circle to body. The bottom should be attached at round 9 (two rounds above the feet), and slightly overlap the bottom of the eye circles at the top.

Howie the Penguin - free crochet amigurumi pattern from Shiny Happy World and FreshStitches

Fasten eyes onto the head. To do so, just insert the post where you want the eye to go (for Howie it’s in the center of his eye circles) and press the washer onto the back post to secure. Make sure the washer is pushed on all the way.

Stuff beak slightly, and attach over the point where the eye circles and tummy circle meet. This post shows how to do that kind of attachment.

Howie the Penguin - free crochet amigurumi pattern from Shiny Happy World and FreshStitches

Stuff the penguin body and continue crocheting.

This post has tips for stuffing amigurumi (it’s a little different from sewn softies), and this video has some terrific help for closing up those last few rounds.

Round 32 [sc2tog, sc in next 3 sts] 6 times (24)
Round 33 [sc2tog, sc in next 2 sts] 6 times (18)
Round 34 [sc2tog, sc in next st] 6 times (12)
Round 35 [sc2tog] 6 times (6)

Ta da! You made a penguin!

Howie the Penguin - free crochet amigurumi pattern from Shiny Happy World and FreshStitches

Aren’t you proud? You should be!

Click here to download a handy dandy printable PDF of the free Howie the penguin amigurumi pattern.

Snap a photo and share it with us over in the Shiny Happy People group! If you share it on social media, tag with with #shinyhappyworld so I can see it. 🙂

I hope you want to make something else now. You can shop for more crochet patterns here.

Happy stitching!

Best,
Wendi

Free Crochet Heart Pattern

Free Hearts Crochet Pattern - from Shiny Happy World

Want to learn how to make adorable crocheted stuffed animals with an easy online workshop – totally free?

Sign up for Let’s Make Amigurumi here. You’ll learn how to get started, the tools and supplies you’ll need, and how to make an easy amigurumi from start to finish using simple crochet stitches.

It’s a fun, inexpensive, and totally portable craft. You can do it!

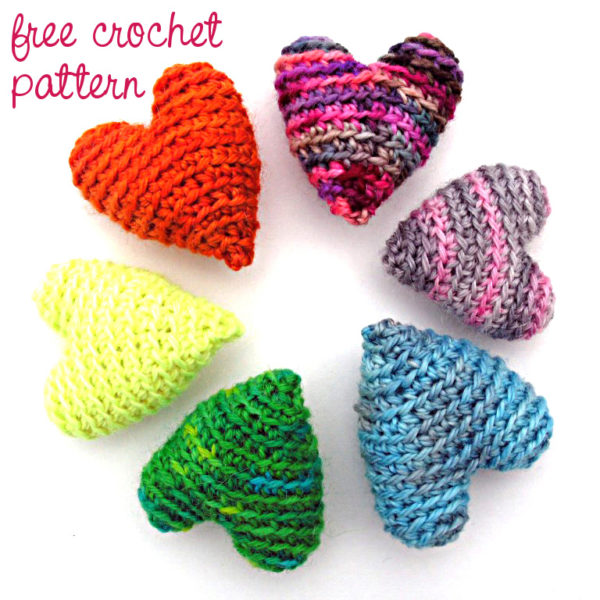
Crochet these fun hearts!

What’s better than hearts for Valentine’s Day? This pattern contains instructions for 3 sizes of stuffed hearts! The small measures 2.5 inches tall, the medium is 5 inches tall, and the large is a whopping 7 inches tall!!

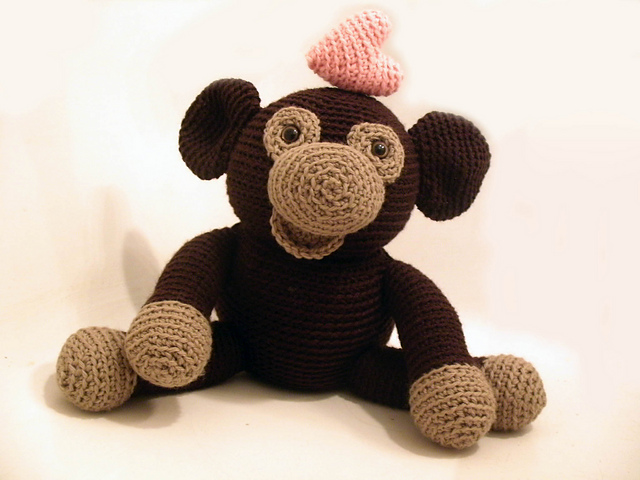
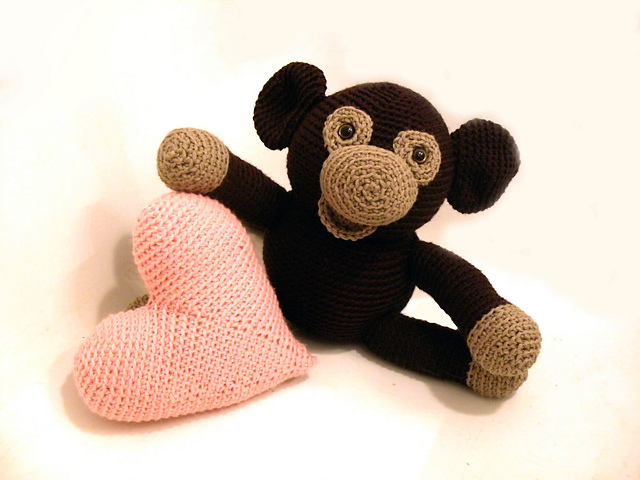
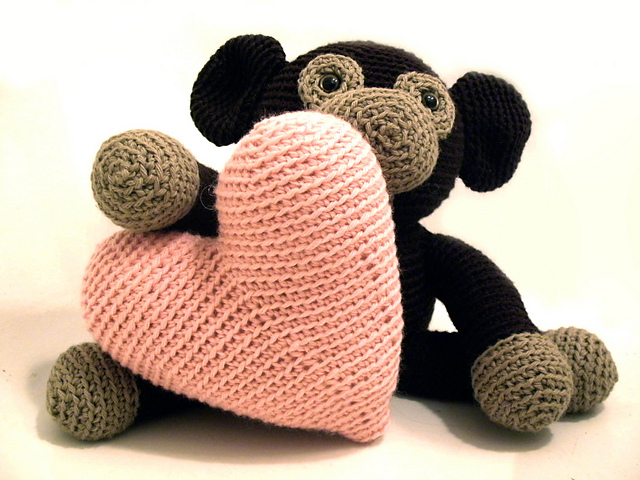
These hearts are adorable plush decorations on their own… but the medium size is specially designed to turn any FreshStitches amigurumi into a Valentine’s Day amigurumi!

Here you can see the same Owen the Monkey with the three different size hearts. 🙂

Download the free pattern here!

Happy stitching!

The Crochet Wildlife Guide Review + FREE Penguin Pattern + Giveaway!

I am so excited! I love showing off a great book to you… and there are so many goodies! Keep reading to grab a FREE download of the Chinstrap Penguin by Philip Ha (aka Sir Purl Grey) AND enter to win a digital copy of the book, The Crochet Wildlife Guide.

The Crochet Wildlife Guide

You may have heard me say this before on the blog, but I get a lot of amigurumi books across my desk and for many of them, I say, ‘oh, ok. This has some cute patterns.’ And it ends there.

And I’ll admit it, my books are among them.

Much of the bare-bones nature of many books you see is completely driven by the publisher’s desire to save money. Cute illustrations? You have to pay an illustrator for those. Step-by-step detailed instructions? Nope. That takes too many pages. Fancy shaping techniques? Oh, no. That doesn’t appeal to a wide-enough audience.

For a crocheter who wants extra information either because they’re a beginner (and need the help and explanations) or are adventurous and want to try something new (hence, needing explanations of new and complicated stitches), this formula can be very frustrating.

Needless to say, when a book comes to me that breaks the mold, I jump out of my chair with glee!

The Crochet Wildlife Guide

The Crochet Wildlife Guide is a self-published book by Philip Ha and Jeff Wiehler, and the book is filled with creative crochet ideas and an artist’s touch. I was impressed by the coverage of basic crochet techniques as well as detailed instructions and illustrations for each animal.

The Crochet Wildlife Guide bird

Each project contains a diagram (as shown above) that allows you to see each piece and how they are put together. These photos are often what takes a good pattern and makes it amazing and easy-to-follow. (It’s why I include step-by-step photos in all of my individual patterns… no matter how many words you have, sometimes, you just need a photo!)

I was also enchanted by the darling illustrations in the book (including this table of contents).

The Crochet Wildlife Guide table of Contents

The patterns included in the book walk the line perfectly between wildlife-realism and kawaii cuteness. Amigurumi like the red panda on the cover, have little details so the animal is instantly identifiable and unique, but not fussy and still cute with wide appeal.

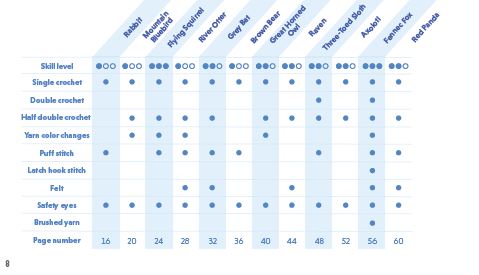
The book also includes a table of the skills required for each pattern. This is such a great idea… you can identify the project that’s just right for you!

The Crochet Wildlife Guide difficulty levels

Throughout the book, the authors emphasize places where you can become your own designer, by highlighting small changes you can make or pointing out the design techniques used to create a particular shape.

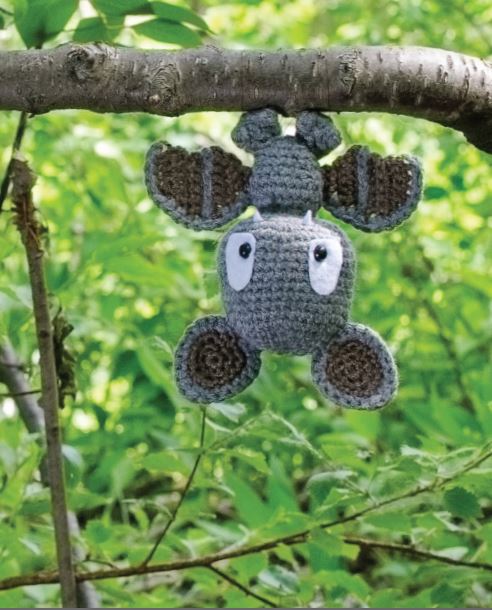
The Crochet Wildlife Guide Bat

The photography, with animals photographed in nature, is lovely as well.

The book is available for purchase in digital or print form, from The Crochet Wildlife Guide website or from Amazon.

FREE Chinstrap Penguin Pattern

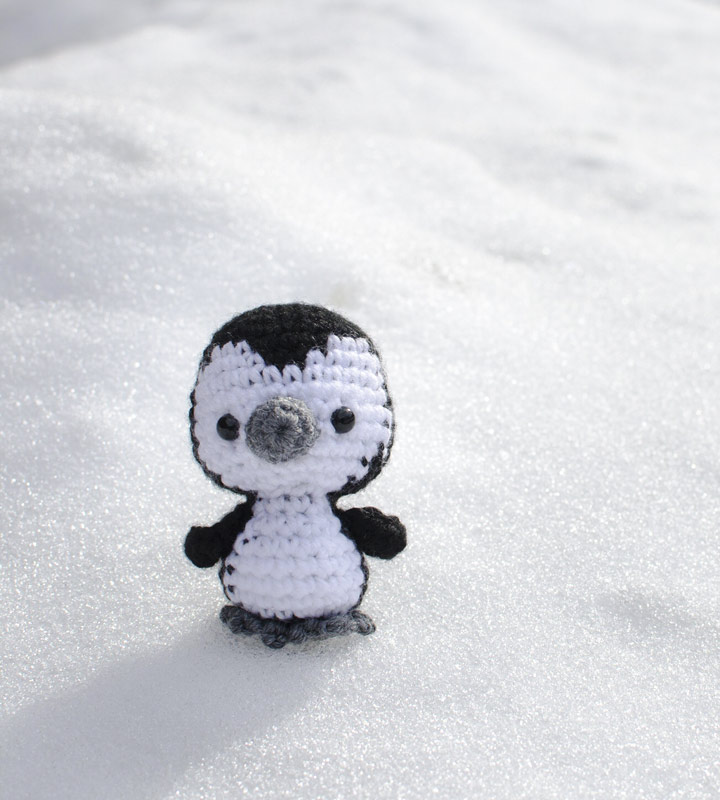
Free penguin crochet pattern

Phillip and Jeffrey have given us a pattern that didn’t make the book for FREE so that you can get started on some crochet cuteness right away!

Click here to download the pattern:  Penguin pattern by SirPurlGrey

Happy stitching!
Zoomigurumi 5 Review + Giveaway!

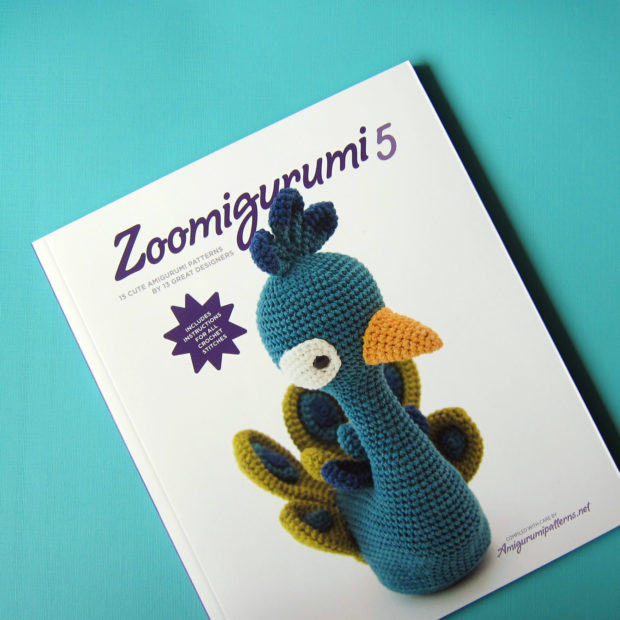
Zoomigurumi 5

Today I’m reviewing and having a giveaway for Zoomigurumi 5! I’m really excited about this one… keep reading for details on how to enter the giveaway.

The Zoomigurumi series is published by the folks at AmigrurumiPatterns.net, which, in my opinion, is the premiere place for amigurumi patterns. The offerings are curated (giggle, I’ve even had some of my patterns rejected!), so you’re browsing through a lovely selection of both paid and free patterns by the leading designers.  There are over 22,000 amigurumi patterns on Ravelry. It can be overwhelming.

And by the way, Zoomigurumi 6 is available for pre-order! It’s your chance to get one of the first copies!

Zoomigurumi 6

The Review

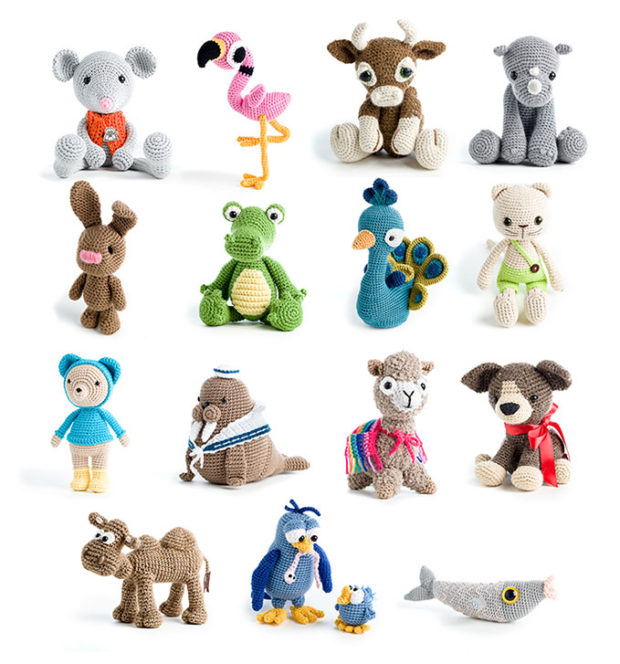
All of the Zoomigurumi books are curated by the editor of AmigurumiPatterns.net… and the result is 15 amazing and adorable patterns! Other AmigurumiPatterns books (like Amigurumi Circus) are created by customer votes on submissions… isn’t that such a great idea, too?

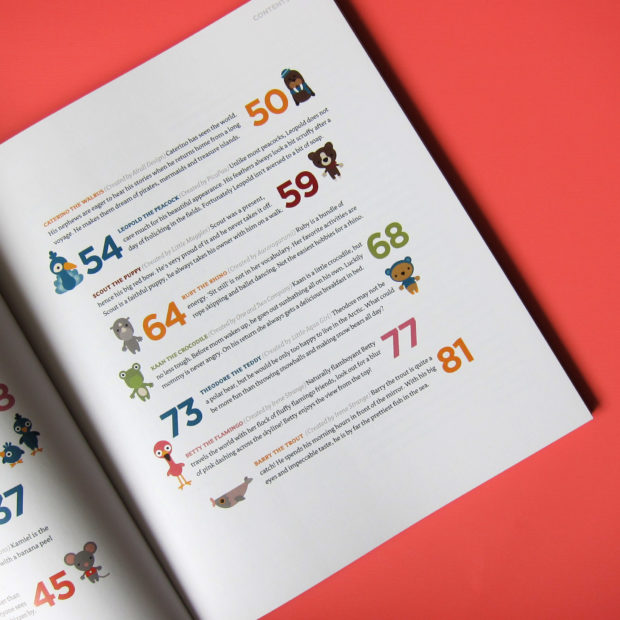
table of contents for Zoomigurumi

I don’t think I’ve ever said this before, but I’m going to say it: this book is as close to a perfect amigurumi book as you can get. At least in my opinion, anyway.

Look at all these cuties!

Zoomigurumi 5It’s a pretty thin book, only 80 pages. So I was expecting compromises. Sometimes small books skimp on the step-by-step photos. Or they don’t include tutorials on the basics, like how to single crochet or do magic ring. Or they write the patterns in a super-cramped format (like “[inc, 2] 6 times”). Or the patterns are crazy simple to keep the instructions really short. But this book doesn’t take any of those shortcuts.

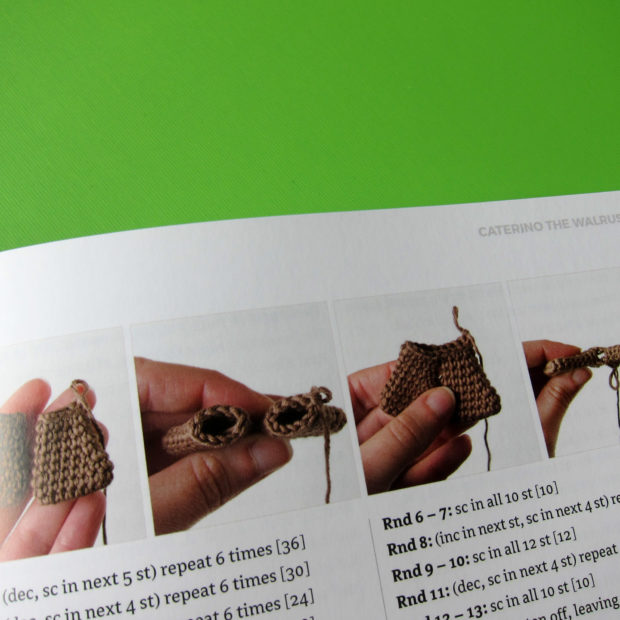
inside of Zoomigurumi 5

The patterns are delightfully complex (not overly complicated, but have significant character) and the pattern pages feature step-by-step photos of advanced parts. The introduction covers all of the basic stitches and skills (with illustrations!) and the patterns are well-written and include the specific rounds in the attaching instructions.

And a beautifully illustrated table of contents and biographies of the authors! How did they squeeze it all in? I have no idea.

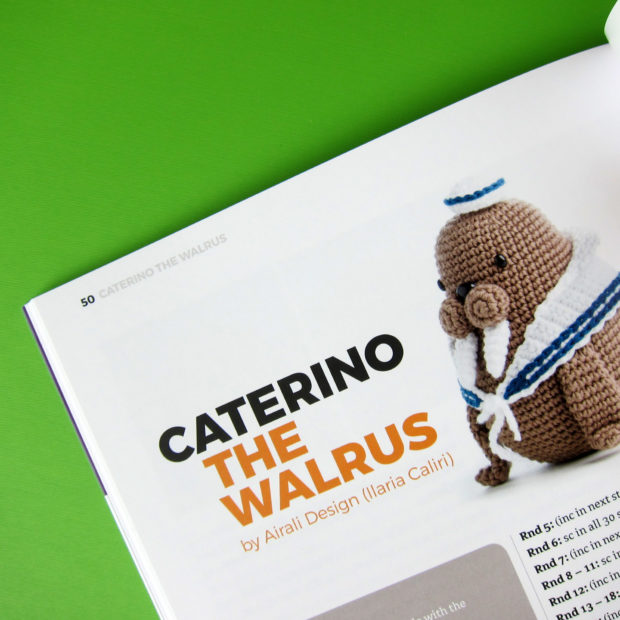
caterino the walrus from zoomigurumi 5

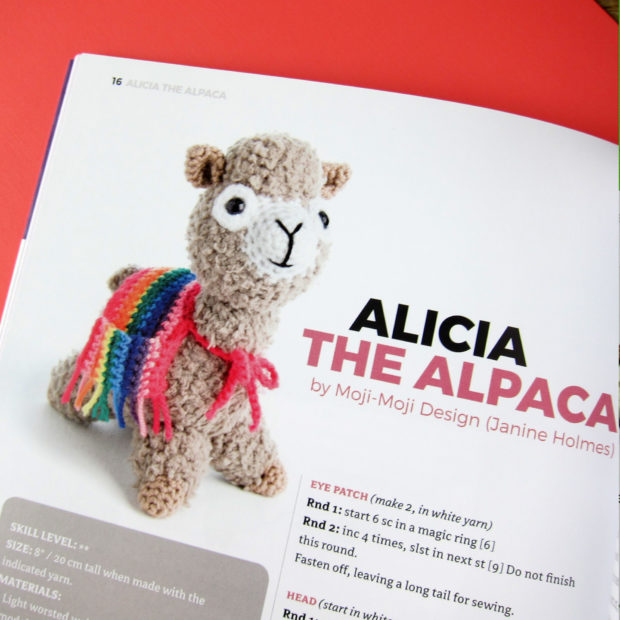
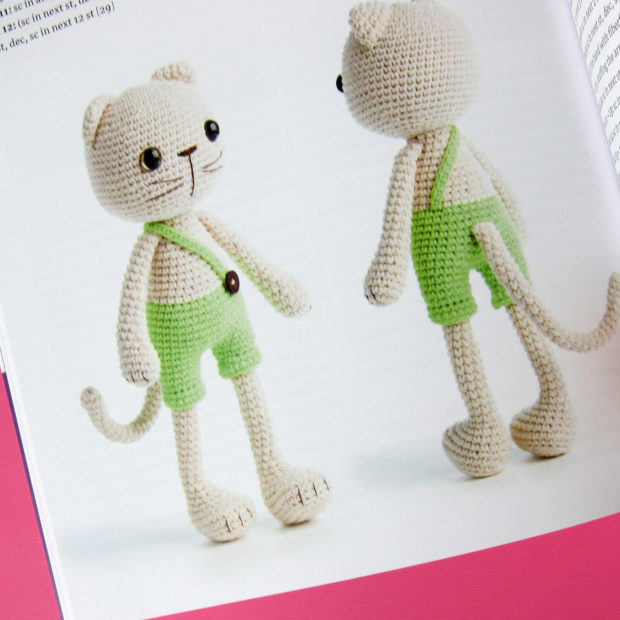
Each pattern features multiple photos of the finished object, so you can see it from every angle.  It’s truly very lovely.

Each pattern includes the yarn weight, recommended hook size and yarn shown in the sample, something that is often omitted from amigurumi books. Sometimes you really DO want to know what yarn the author used!

If you love these cuties, then grab this book. I don’t think you’ll see patterns done much more clearly in a printed book. And they’re adorable!

Giveaway

Would you like to win a copy? Sure you would!

To enter, just leave a comment on this page! It’s that easy! A winner will be randomly chosen on Tuesday, February 14th.

Update – The giveaway is closed now.

Good luck!

Save

Save

Free Waves Stitch Pattern + Cowl Tutorial!

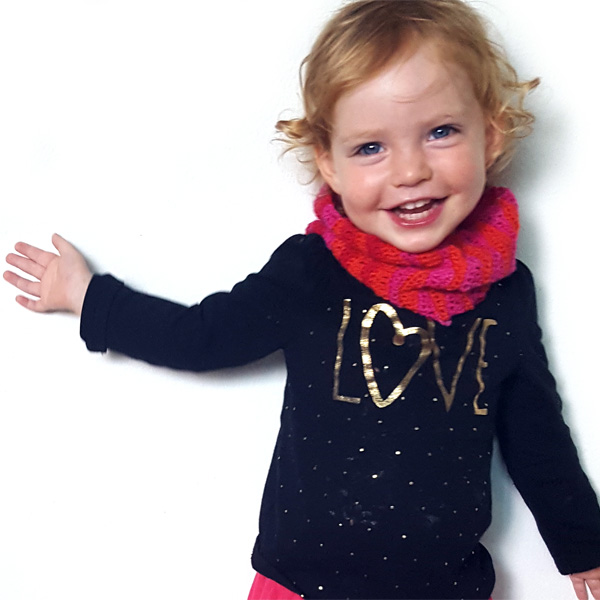
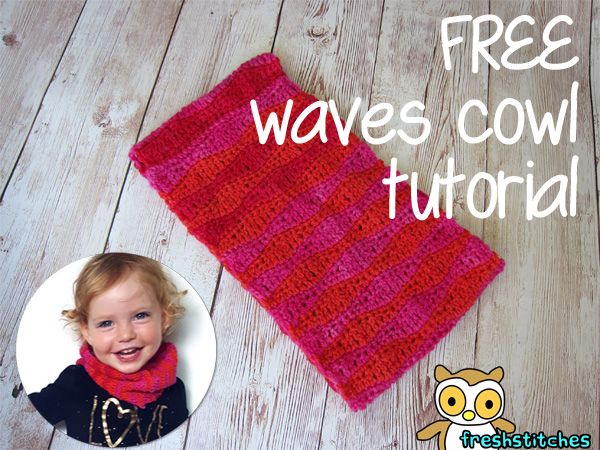
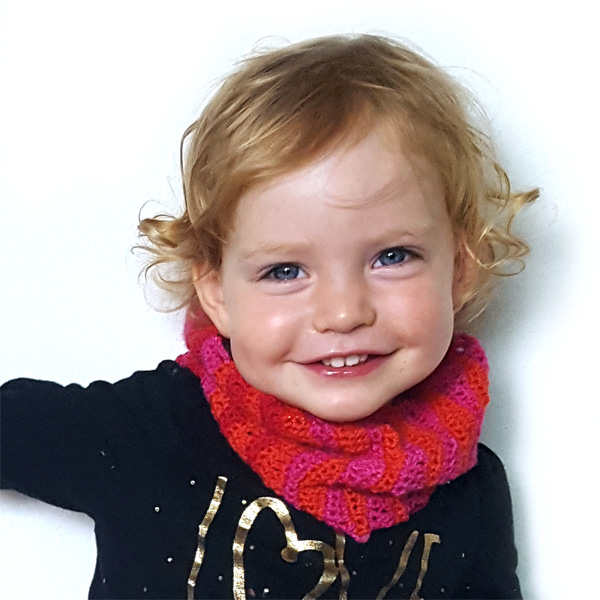
One of my favorite stitches is the wave stitch. So, when Maddie asked for a scarf for fall, I knew right where to turn!

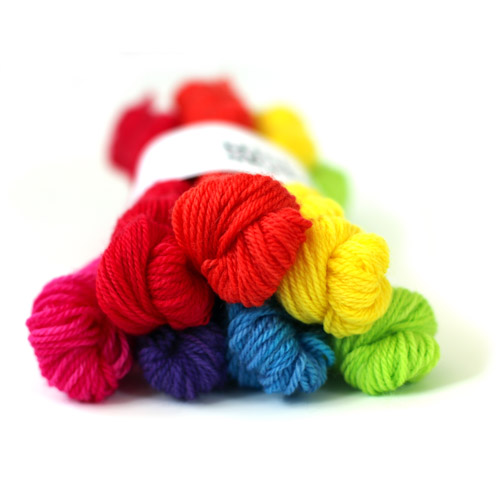
First, I pulled out a SpaceCadet Rainbow Mini-Skein Bundle and let Maddie choose the colors she wanted.

Rainbow Mini skeins for FreshStitches from SpaceCadet

(Since each mini-skein is 70 yards, I needed less than 3 to make a baby cowl… but one set would more than make an adult one!) Maddie is really into red, so she selected the red, pink and orange.

Then, I grabbed a hook and started crocheting! With this fingering weight yarn, I used a C hook.
free crochet cowl tutorial
The result is lovely and drapey… and Maddie loves it!

Let me give you the pattern!

The Waves Pattern

In this pattern. . .

  • sl= slip stitch
  • sc= single crochet
  • dc= double crochet
  • hdc= half double crochet
  • tr= treble crochet
    Free Crochet cowl tutorial
    With A, ch 30.
    Row 1: Sc in 2nd ch from hook and each ch across. (29)
    Row 2: With A, ch 1, turn, sc in next sc, * sc in next sc, hdc in next 2 sts, dc in next 2 sts, tr in next 3 sts, dc in next 2 sts, hdc in next 2 sts, sc in next 2 sts. Repeat from * once. (29)
    Row 3: Ch 1, turn. Sc in each st. (29)
    Row 4: With B, Ch 4 (counts as tr), turn. * Tr in next st, dc in next 2 sts, hdc in next 2 sts, sc in next 3 sts, hdc in next 2 sts, dc in next 2 sts, tr in next 2 sts. Repeat from * once.
    Row 5: Ch 1, turn. Sc in each st. (29)
    Repeat rows 2-5 until piece measures desired length (circumference of the cowl) and fasten off and sew ends together!

Free Waves cowl pattern

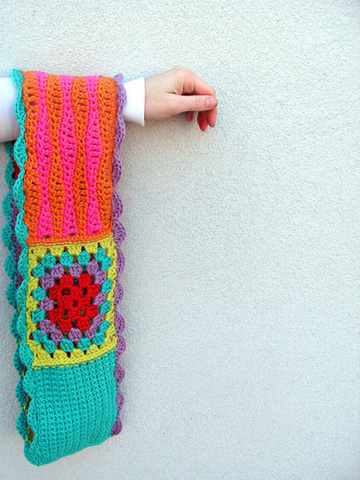
I used this pattern to make a cowl, but you can also use this pattern (repeating rows 2-5 until piece measures 5.5″ long) and add with other blocks to make a sampler cowl!
freshstitches sampler cowl

Visit this blog post for a granny square pattern!

What are you going to make?

So… you have the pattern for the waves stitch. . . what are you waiting for to get started? I can’t wait to see what you make!

My Favorite Online Crochet Classes

My favorite online crochet classes - I made this hat in one of them.

This post contains affiliate links. That means I make a little commission if you buy something after clicking through. All affiliate links are marked with an *.

I learned how to crochet when I was a kid – but I only learned the most basic stitches and for 40+ years I only ever made flat, rectangular things – afghans and scarves. Last summer I decided to explore some online crochet classes to learn how to make not-flat things. It was so much fun!

Here’s why online craft classes are always my first choice for learning a new skill. In a nutshell – I can watch any time I want, as many times as I need to, and I always have a front row seat and close-up view. 🙂

I started off with a hat-making class. I love handmade hats, but I’ve stopped buying them because they’re always too small for my head. I decided I would finally learn to make my own – to crochet round things!

My favorite online crochet class - Crocheting in the Round with Stacey Trock

I chose the class Crocheting in the Round: Mix & Match Hats* because it’s on the Craftsy* platform – which I love – and is taught by Stacey Trock. I’ve watched some of her videos on FreshStitches and I knew she was a good teacher. 🙂

This was a terrific class! Not only did Stacey teach me to make several different hats – she also teaches the why behind everything she does, so when she gets to the section about designing your own hat patterns, it totally makes sense! Now I can make any hat, any style I want – and it will always fit. And it’s actually super easy!

Jo (age 12 at the time) took the class with me and she loved it too. As you can see from these photos, she really got into the unit on colorwork. 🙂

Jo got so into colorwork that she made three hats in the Fresh Stitches Mix & Match Hat Class.

Jo is still making tons of hats. I think she’s made at least one for every kid at her school. She even figured out how to make the top pointy instead of flat and made a bunch of elf hats too. So cute! But she’s not just making hats. . .

From hats she moved on to this class – Design Your Own Monster*!

Awesome online crochet class from Stacey Trock on Craftsy

Monsters are great for this kind of class because you can never do anything really wrong. So maybe the body is a little weird and the arms are super long and the eyes bug out way more than you expected. It’s a monster! Nobody can say, “Monsters don’t really look like that!” 🙂

Stacey teaches basic formulas for different shapes – cones, spheres, etc. and how to attach arms and legs and how to add faces and excellent stuffing tips. I can’t show any finished cuties because Jo keeps giving them away before I can photograph them. Also – all of a sudden she can read crochet patterns and design her own! Her current obsession is making amigurumi turtles with spiral striped shells. 🙂

Jo and I aren’t done with online crochet classes – here are a few more on our wish lists.

Jo is definitely ready to learn some new stitches. She’s already figured out some weird crochet cable stitch and how to bobble stitch with YouTube videos, but now she says she wants a class that will take her through a bunch of new stitches in a systematic way. I’m getting her this Textured Crochet Stitches class* for this summer.

One of many online crochet classes on my wish list.

She also really likes to make Useful Things That Everyone At School Will Wear so I think she’ll really like this class on making mittens and fingerless gloves*.

One of many online crochet classes on my wish list.

And for me? I think a fancy little edge on the bottom of one of my hats will be just the thing, so I’ve got this Fantastic Finishes class* on my list.

One of many online crochet classes on my wish list.

The number and variety of classes is truly astounding! I’ll be reviewing some of my favorite cooking and embroidery classes next week. 🙂

Happy stitching!
Best,
Wendi
That's me!

Peek Behind the Scenes: My Book Proposal!

My new book, Modern Baby Crochet, was released last week… and I’m so excited about it!

The seed of a book is planted when you write a book proposal and submit it to a publishing company. I thought it would be fun to share some of what goes into writing a book proposal… who knows, you may want to write one yourself!

Getting Started

I knew that I wanted to do a crochet book full of nursery patterns… but you need more than that for a book proposal. A publishing company will expect you to explain what makes your book exciting and different from all of the other ones on the market.

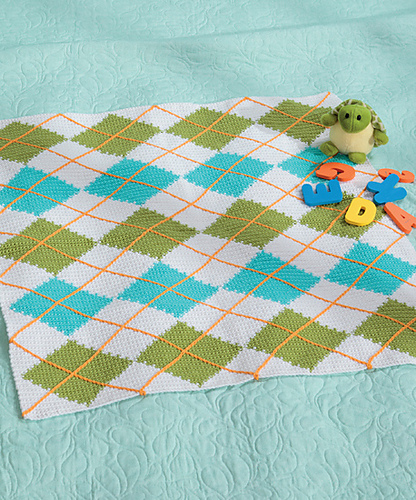
crochet argyle afghan

I had a look at the books on the market, and saw that there was a place for a book full of modern nursery decorations, particularly using ‘non-standard’ nursery colors like greys, rainbows, neon brights and neutrals.

The process of submitting a proposal varies by publisher, but Martingale (the publisher of my last 3 books) makes it easy: a proposal packet is available for download on their website!

Other Things to Think About

Although the particular questions you are asked to answer vary by the publishing company, here are some basic questions you can expect to see.

  • What makes you qualified as a designer? What other work have you done?
  • How is your proposed book different from what’s already on the market?
  • Can you demonstrate that there’s a market for the book you want to write?
  • Do you have enough projects for a book? Are you including reference material beyond the project instructions?
  • What’s your timeline?

Filling out this type of information for my proposal was easier because I’ve written two (successful) books. But, even though I didn’t need to convince the publishing company that I was capable, I still needed to carefully articulate the concept behind this book and explain why it would be fabulous!

Samples Sell!

No matter how amazing your idea is, your proposal might get passed up if it isn’t obvious to the publisher that your idea is fabulous.

It’s important to include as much information about your proposed designs as possible, including sketches and maybe even samples.

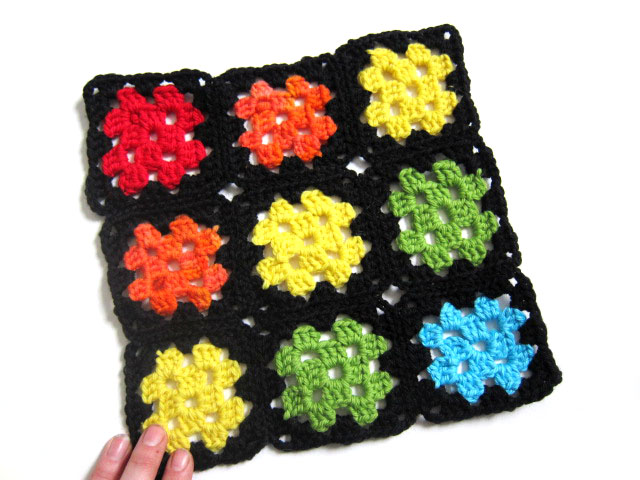
Since I typically design stuffed animals, I thought it was important to include (miniature) samples of a few of my nursery designs.

I made a little afghan:

mini rainbow afghan

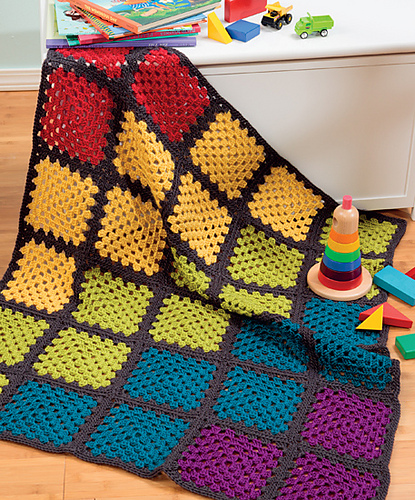
Which, as you can see by my hand in the picture, is only about a foot long. However, even a tiny piece helped to convey my idea for a rainbow-colored granny square afghan:

rainbow granny square afghan

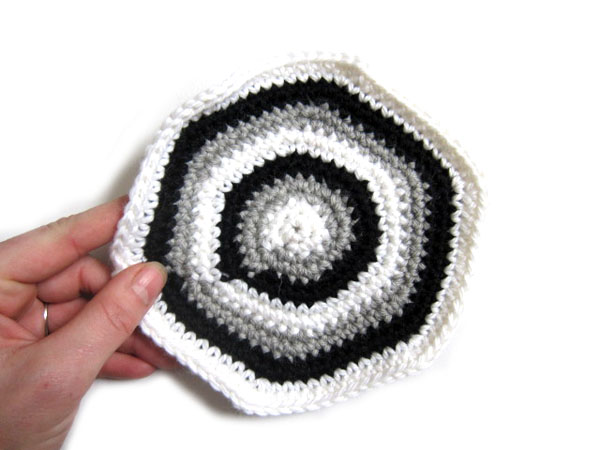
I also crocheted a very tiny circle:

small crochet sample

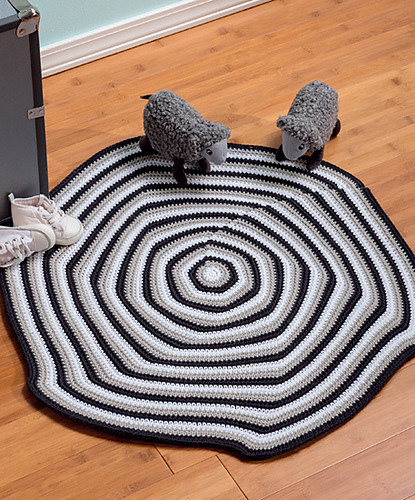
… that showed the start of the pattern for my Monochromatic Spiral Rug:

baby rug

Obviously, the size isn’t too important… but it is key to use the samples to demonstrate stitch detail that might not be illustrated in a sketch or written description. For the rug, I was interested in showing the join of the rounds, the non-circular overall shape and the slight spiral of the rounds.

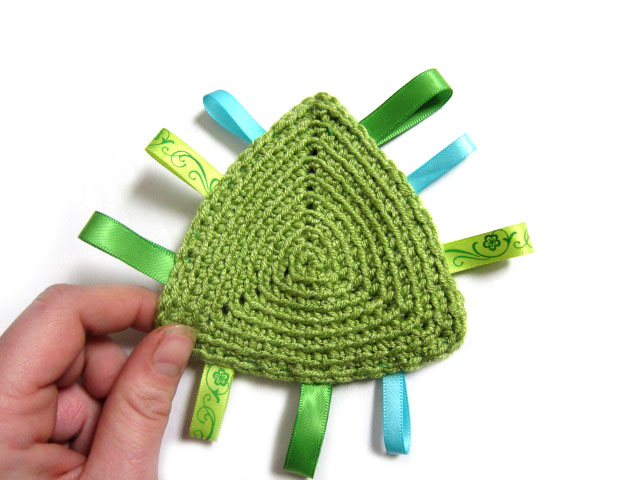
This tiny cutie showed off the basic triangular shape…

triangle toy

… that would turn into the Crinkly Triangle Toy!

Then the hard part… waiting!

After you’ve followed the publisher’s instructions very carefully and submitted your proposals and samples, expect to wait a month or two to hear back from the publishing company. The decision is usually made by an acquisitions team that might only meet every month or so to discuss new submissions.

In my experience, if the publishing company likes your concept but thinks it needs a little tweak, they’ll contact you to discuss instead of tossing your proposal out right away.


This is what happened with my first book, Cuddly Crochet. I had proposed a book of stuffed animals, and they asked if I’d be interested in adding some baby items. And I was happy to!

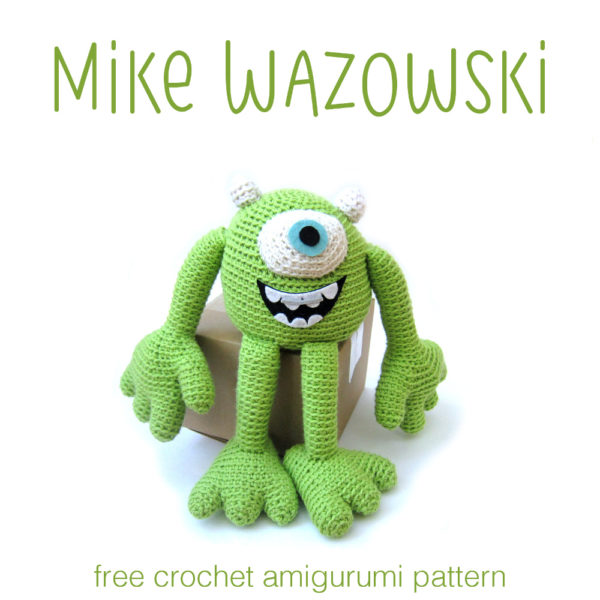
Crochet Mike the Monster from Monsters University!


I love monsters. And I love crocheting monsters. So, when I found out that Disney was looking for bloggers to write tutorials for crafts based on Monsters University, I nearly fell out of my chair.

Monsters-University banner

My love for monsters must have poured through the computer screen… because here I am, sharing my super-awesome crochet tutorial with you!

This tutorial is celebrating the release of Monsters University (in a Blu-ray combo pack) tomorrow! Hooray!

How do you pick just one monster?

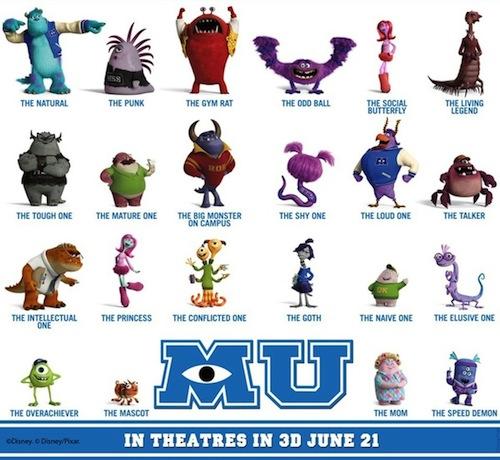
I’ll confess. It was really hard to pick a monster from Monsters University to turn into crochet-form. The movie is just so darn chock-full of adorable and creative monsters!

Characters from Monsters University

I was tempted by Squishy (the multi-eyed cutie with a knit sweater!) and Terry & Terry (the double-headed duo)… what great shapes!

But in the end… I had to go with familiar and loveable Mike.

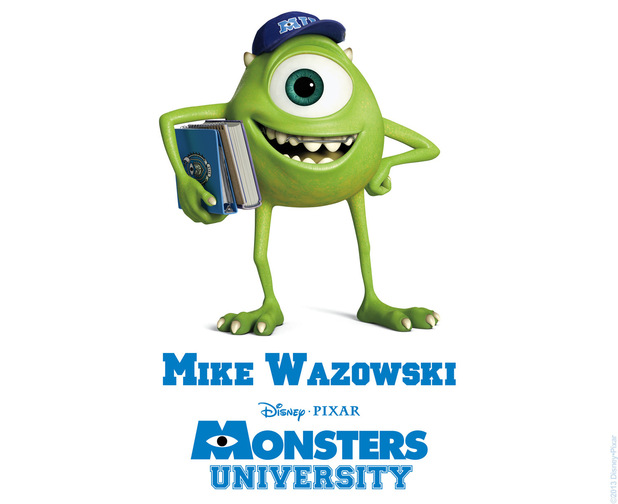
movies-monsters-university-character-art-4

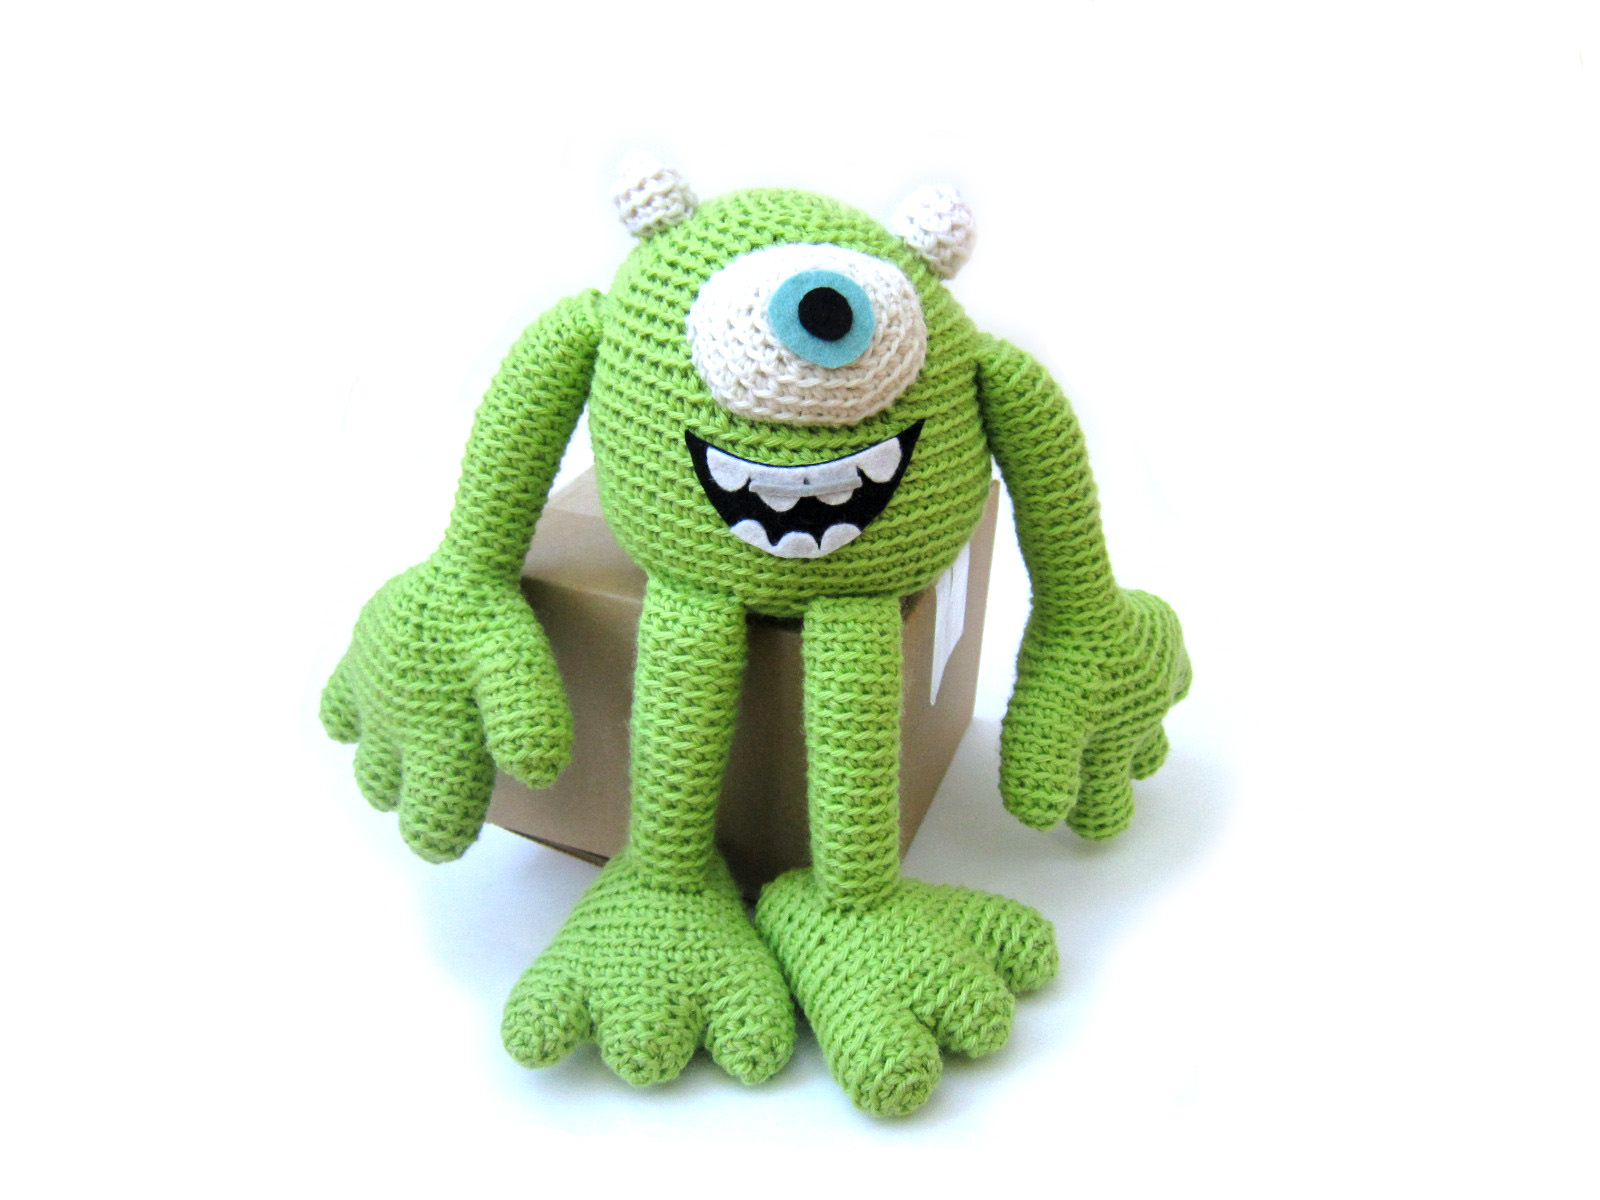
You can crochet your own Mike!


To crochet Mike, you’ll need:

  • 2 colors of worsted weight yarn: green (250 yards) and white (15 yards)
  • Size H (5.0mm) crochet hook
  • Tapestry Needle
  • Polyester stuffing
  • Small amounts of felt: black, white, grey and blue
  • Craft glue (one that works for fabrics)

Once you have your supplies gathered, download now.

The pattern download will take you step-by-step through the stitches you’ll need to bring Mike to life… too many for just one blog post!

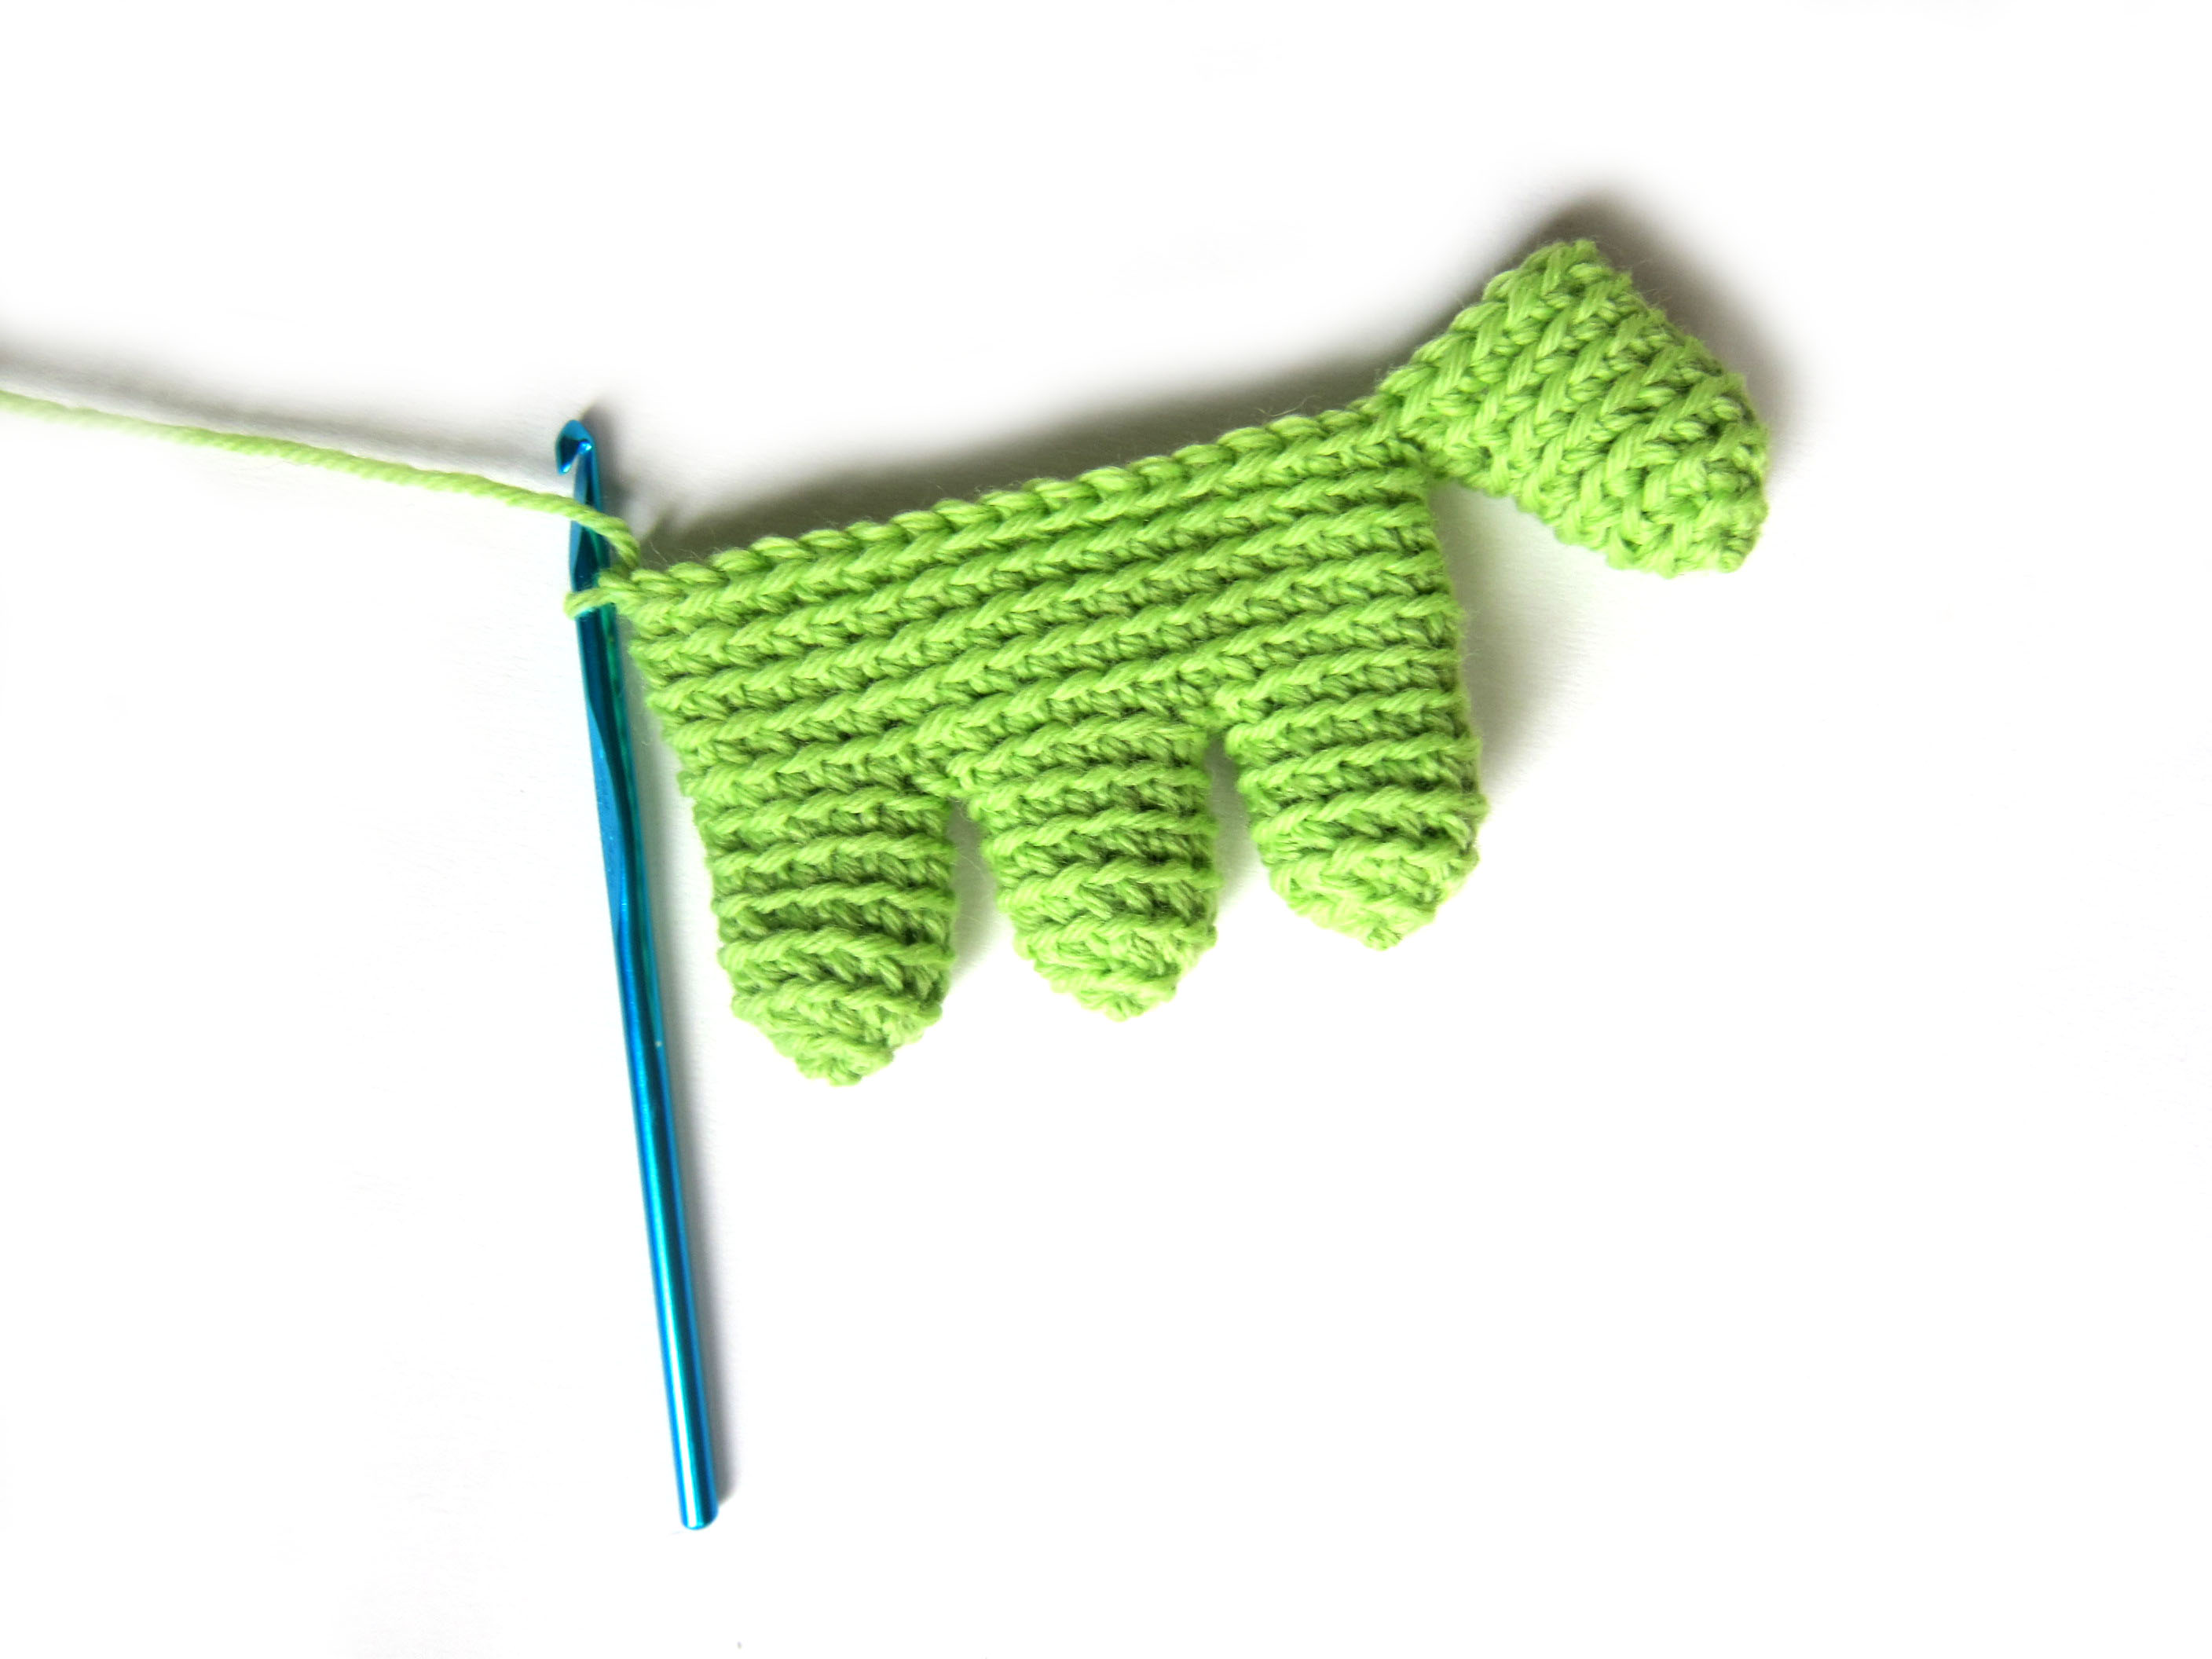
Crocheted fingers

One of the things I love about Monsters University is how lifelike the animation is… and I didn’t want to lose any of that detail in the crochet version. That’s why I made sure to give Mike separate fingers and toes!

It’s a little extra crocheting… but I hope you love the results!

Add the details…

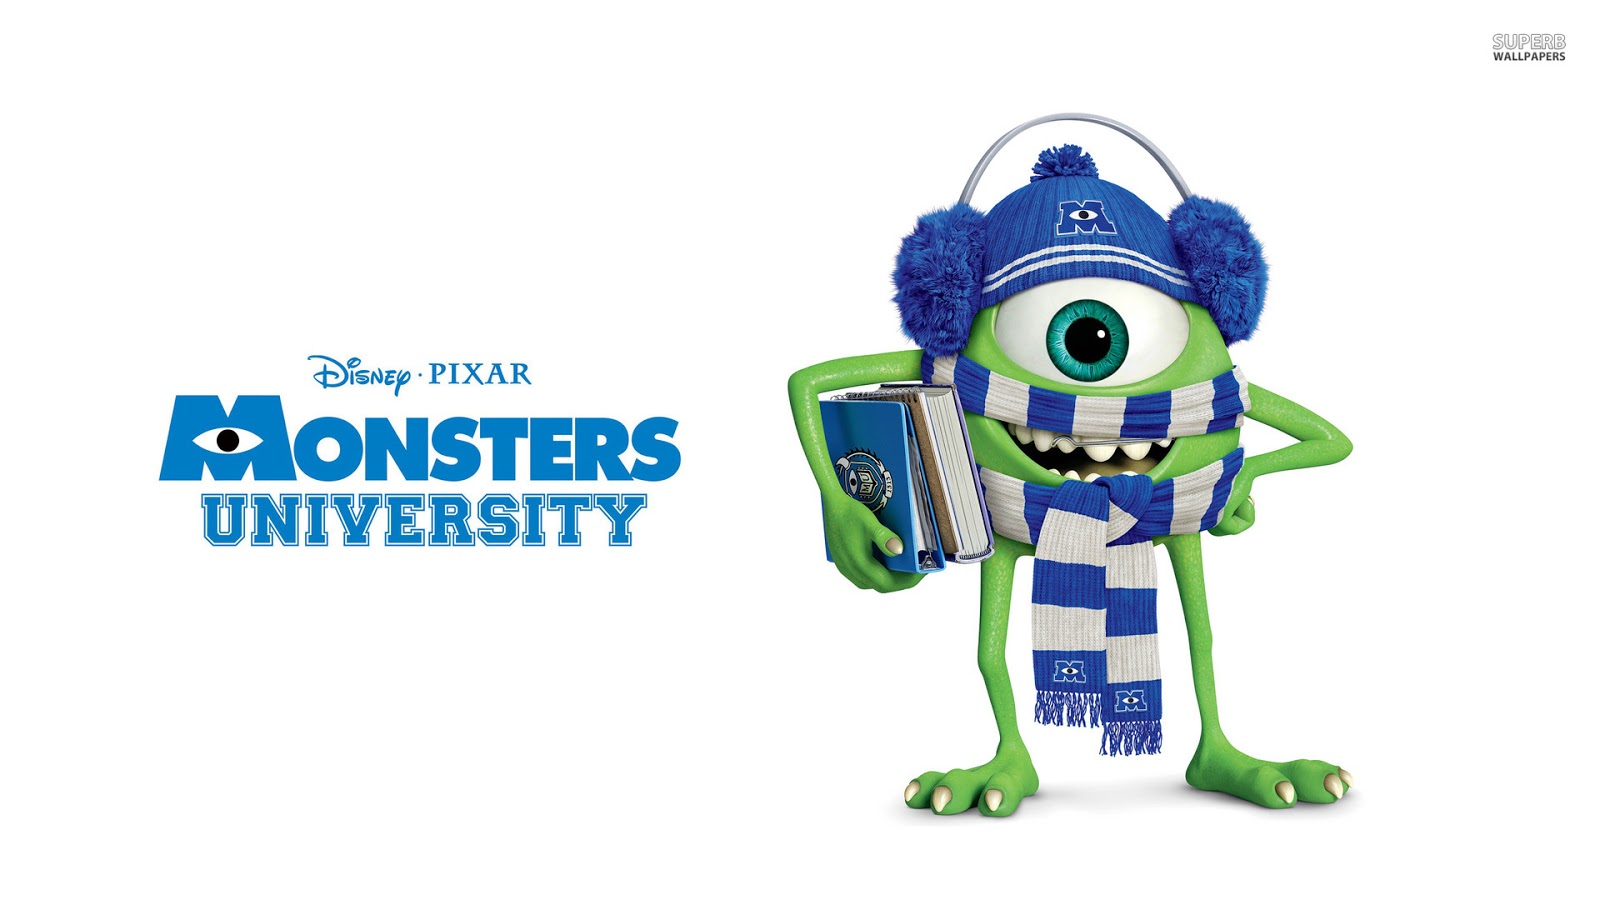
Once you’ve finished crocheting the pieces, you’ll need to decide which expression you’re going to give to Mike… during the course of the movie, you’ll notice that he sports quite a few!

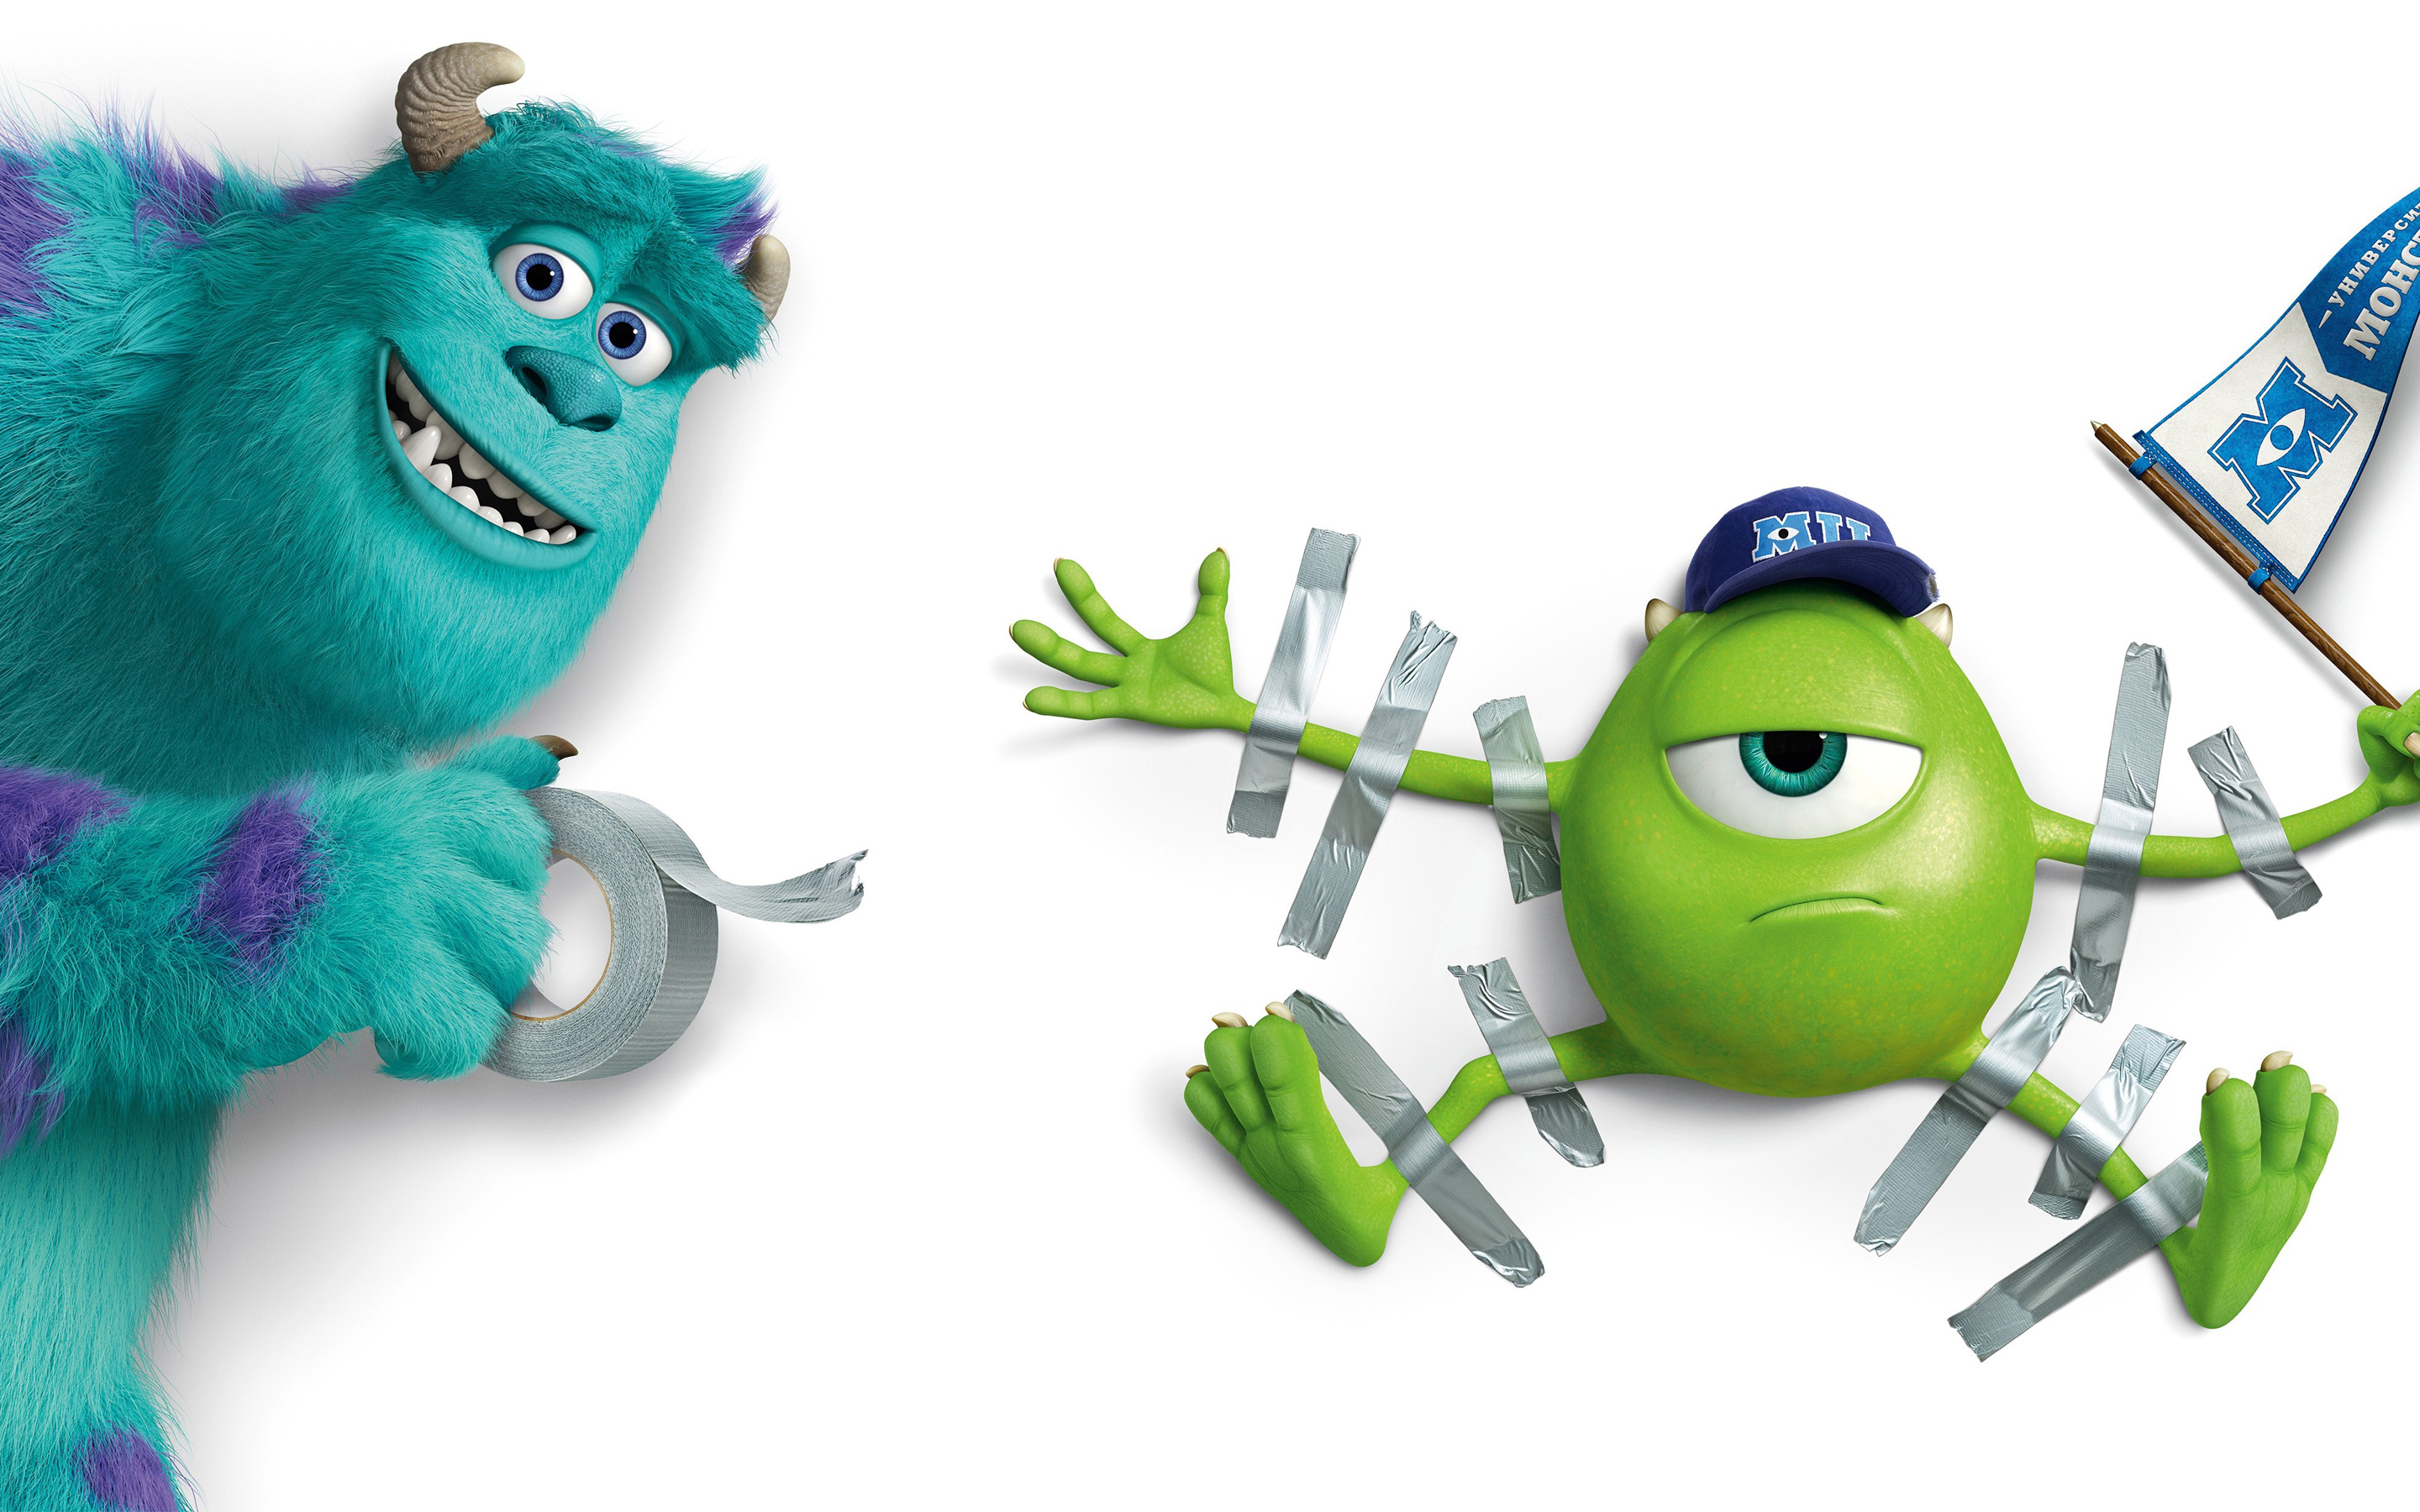
mike-and-sulley-monster-university-wallpaper-wide

I decided to give Mike the wide grin (with retainer!) that’s featured on the cover of the DVD:

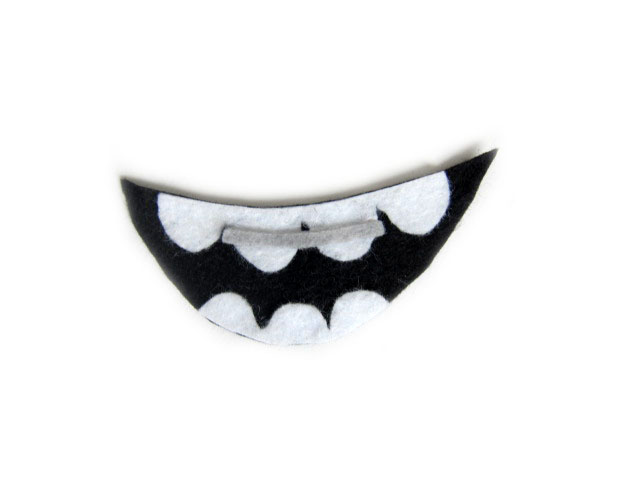
felt mouth

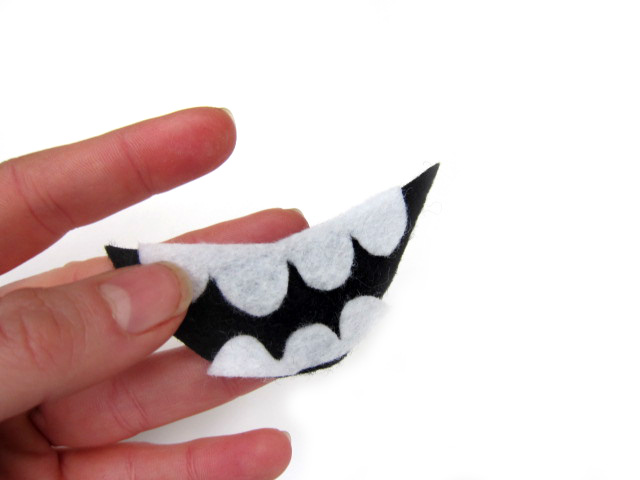
To make Mike’s mouth, use your pieces of felt and cut out the shapes you’ll need. First, cut a smile (or frown) from the black felt. Next, cut bumps (for teeth) from the white.

Here’s a trick: you don’t need to cut the teeth to fit the mouth perfectly. Just cut the top ridges for the teeth, then glue in place on the black mouth. Notice how, in my photo below, the white is hanging off the side of the black:

shaping a felt mouth

Once the glue dries, trim the excess white, and you’ll have a perfect mouth! A simple line of grey makes the retainer.

Since you’ve used yarn to make Mike, a craft glue will hold the smile in place:

mike1

Isn’t he so cute?

More accessory ideas

I’m a real sucker for the University-wear sported in the movie!

mike-wazowski-monsters-university-18119-1920x1080

How cute would your crocheted Mike look with a knitted blue and white scarf? Or an MU pennant made from felt? Use your imagination!

You can also get super-creative and make multiple expressions… and attach them to Mike with use hook and loop tape! He’ll be a toy with many emotions!

Are you going to get crocheting?

I had so much fun watching Monsters University and crocheting a Mike… I see more monsters in my future.

I hope you absolutely love this free pattern download as much as I do!

Helpful Links

Be sure to share the cutie monster you crochet!

Disclosure: This is a compensated post from Disney and Blueprint Social. I received a copy of Monsters University. All opinions are my own. I received permission to create a pattern using the likeness of Mike.

Happy stitching!
Best,
Stacey

Book Review: Beastly Crochet

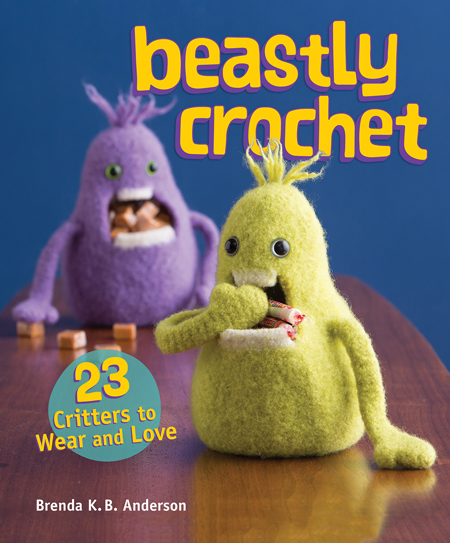
As soon as I saw the cover of Brenda Anderson’s new book, Beastly Crochet, I knew there would be some cuties inside:

Beastly Crochet

But… I had no idea there would be so much other awesome stuff! Let’s peek inside, shall we?

The Beasties

You know me, I can’t resist a cute stuffed animal. (Are monsters really animals?!? Hmm… I digress.)

The thing I really love about the creatures in this book is that they feature a variety of crochet techniques. Check out ‘A Zombie named Skip’, a marionette who sports an open mouth with beads as teeth!
Crochet Zombie Pattern

The other critters (including a Frankenstein & his bride and an adorable yeti-type monster among others) feature colorwork, textured stitches, appliques and even felting (the cuties on the cover!). While there are a few patterns suitable for beginners, this book is targeted at crocheters who are looking for innovative patterns and want to add a new skill or technique to their repertoire.

The Wearables

The ‘Beastly’ part of the book is broadly construed to include: zombies, monsters, skulls, robots and myths. I was really surprised by some of the fabulous wearables in the book:

skull zipper cowl

This fun skull cowl is just one of many clothing patterns in the book. There are Sasquatch slippers, a couple great sweaters for kids as well as bibs and bags.

Seriously, how did Brenda fit all of this stuff in one book?

And more!

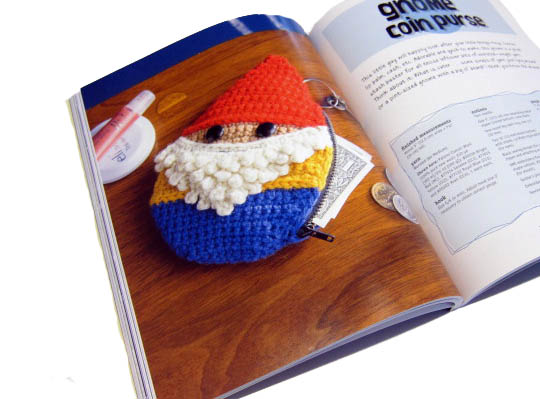
gnome coin purse

Look at that coin purse! Isn’t it ridiculously cute?

And this Tiki pillow:

Tiki Pillow

So clever and fun!

I particularly love the book’s section on ‘Principles of Cuteness’, where Brenda talks about eye shapes and spacing, so you’ll get the maximally cute monster!

The Verdict

With Halloween coming up, the timing of this book couldn’t be better! It contains 23 fabulous projects for anyone who loves monsters/robots/fantasy.

This book is aimed at the advanced beginner/intermediate crocheter. It doesn’t contain a lot of introductory material (so, expect to learn how to single crochet elsewhere!), but it’s packed with patterns that have great assembly/finishing information. A crocheter with a standard cache of skills won’t get lost, and will learn a bundle of new techniques and methods.

It’s a fab book! You can get it here.

disclaimer