A Crocheter’s Guide to Pattern Reading- free download

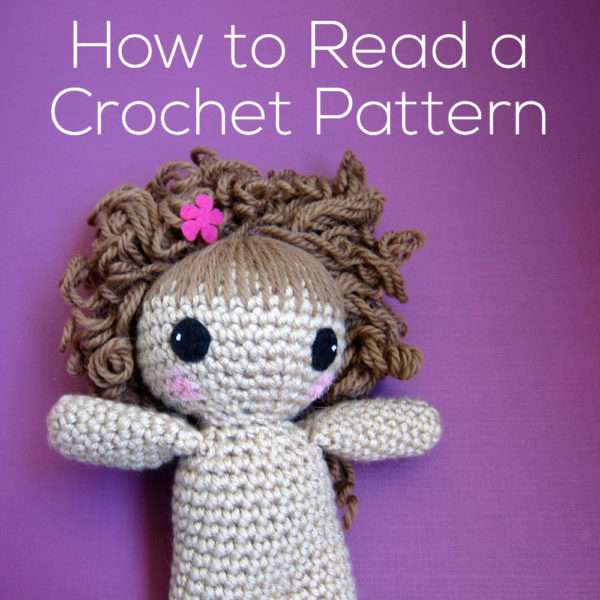
How to Read a Crochet Pattern - from Shiny Happy World and FreshStitches

Do you know how to crochet, but feel like patterns are a foreign language? You’re not alone!

Many of us crocheters learn how to do the stitches from a family member or friend, and don’t learn to read the patterns until much later. And it’s true, reading a pattern can be scary… but well worth learning how! Once you can read crochet patterns, you’ll be able to make anything!

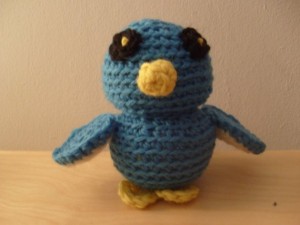
The patterns you find here at Shiny Happy World are written in a little more “plain English” than you may see elsewhere – but we still use abbreviations and common conventions. I’ll walk you through the instructions for making Howie the Penguin’s wings below. (Howie is a free pattern you can find here.)

The instructions are in regular black text. The “translation” is below it in pink. 🙂 If there’s a link in the translation, that’s taking you to a tutorial demonstrating that skill.

Wings

Make 2.

This is just telling you that you need to make two wings. Make one from start to finish – then make a second one just like it.

With MC, ch 2

With the main color of yarn, chain two.

Round 1 sc 6 times in 2nd ch from hook (6)

The instructions number each round in the project. Single crochet 6 times in the second chain from the hook. The 6 in parentheses tells you that there are 6 total stitches in this round.

Round 2 sc twice in each st (12)

Single crochet twice in each stitch (that’s an increase), for a total of 12 stitches in round 2.

Rounds 3-4 sc in each st (12, 2 rounds)

This line of instructions applies to two rounds. Single crochet in each stitch for a total of twelve stitches, and repeat for a total of two rounds.

Round 5 [sc twice in next st, sc in next st] 6 times (18)

These brackets look scary, but they’re actually easy. They just tell you that everything in the brackets will be repeated. So for round 5, single crochet twice in the next stitch, then single crochet one in the next stitch. Repeat that sequence [single crochet twice in the next stitch, then single crochet once in the next stitch] for a total of 6 times. It will be a total of 18 stitches in the round.

Rounds 6-9 sc in each st (18, 4 rounds)

Single crochet in each stitch for a total of 18 stitches in the round. And repeat that round for a total of 4 rounds.

Round 10 [sc2tog, sc in next st] 6 times (12)

Single crochet 2 together (that’s a decrease), and then single crochet in the next stitch. Repeat that sequence for a total of 6 times. There should be 12 stitches total in the round.

Fasten off with long tail.

You’re done! Fasten off, but don’t cut your yarn short. Leave a tail of at least a foot.

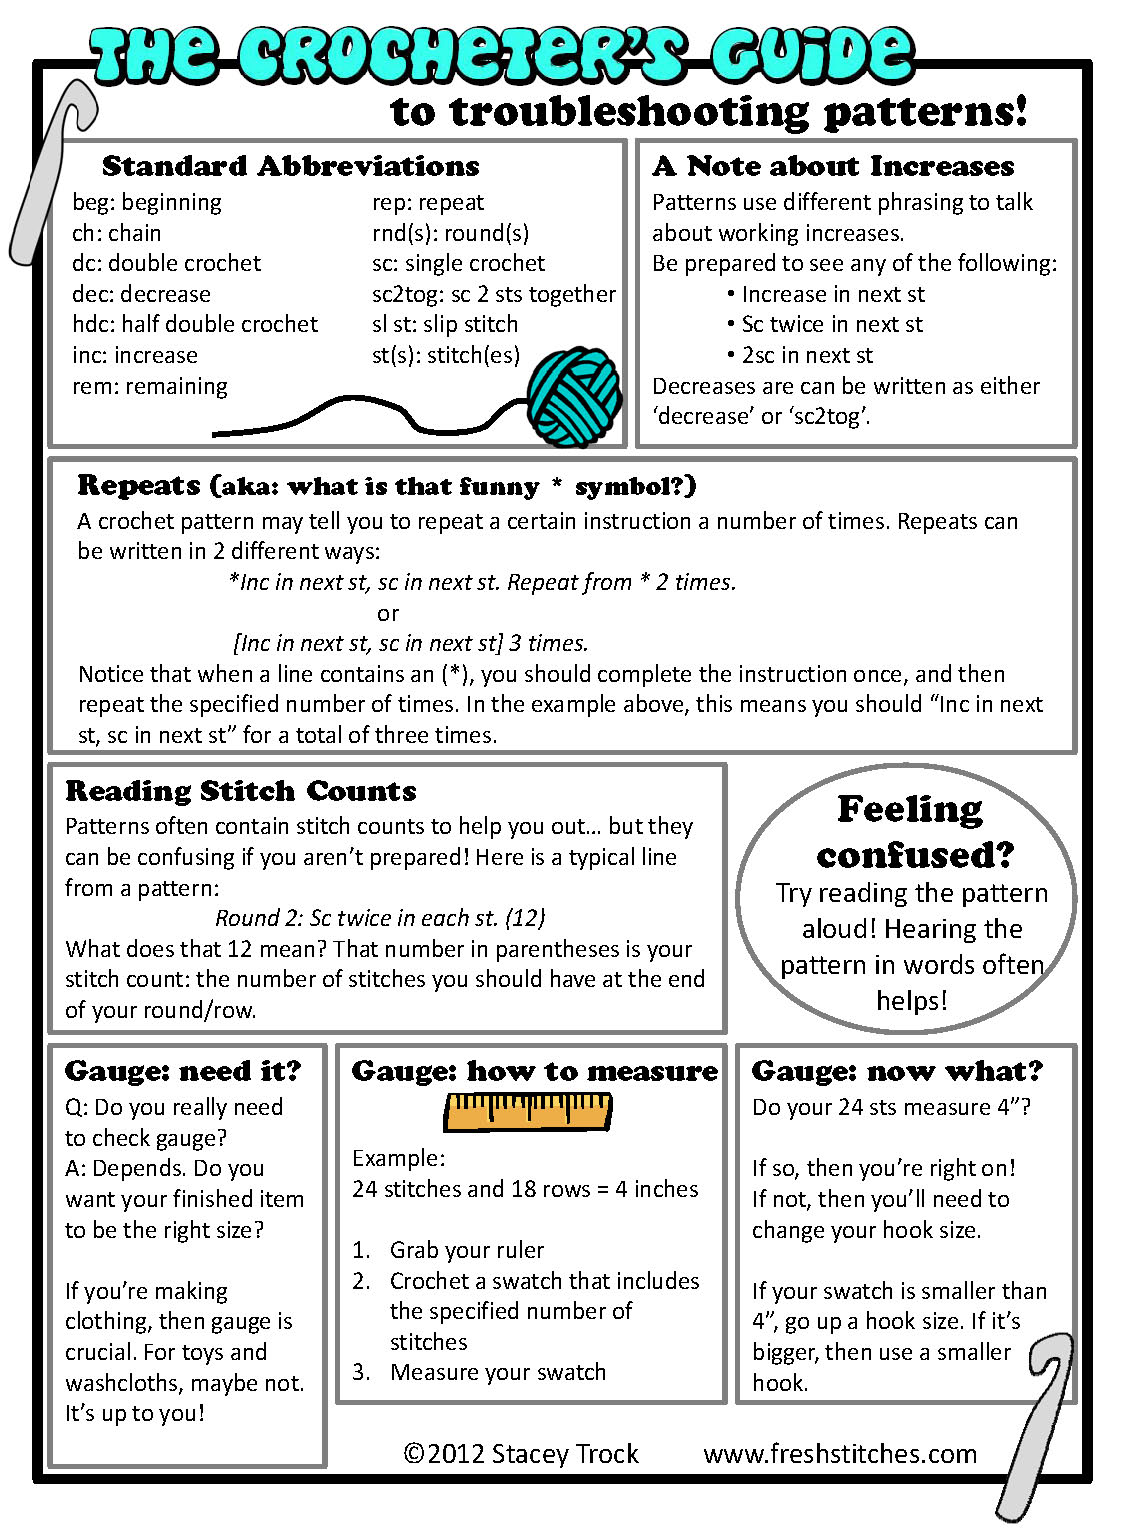
That one little pattern for a wing includes most of the major conventions you’ll run into in patterns. It has starting, fastening off, increasing, decreasing, repeating sections, and repeating rows. Beyond that – or for patterns from other companies who abbreviate a bit more or use different abbreviations – this tip sheet will help you out a lot.

Click here to download this page as a pdf (much better resolution)!

Now that you can read crochet patterns, what are you going to make?

Here are handy links to all the posts about working with crochet patterns. . .

Return to the main table of contents for Let’s Learn to Crochet Amigurumi.

Move on to the lessons for working the first round of your crochet pattern.

Happy stitching!

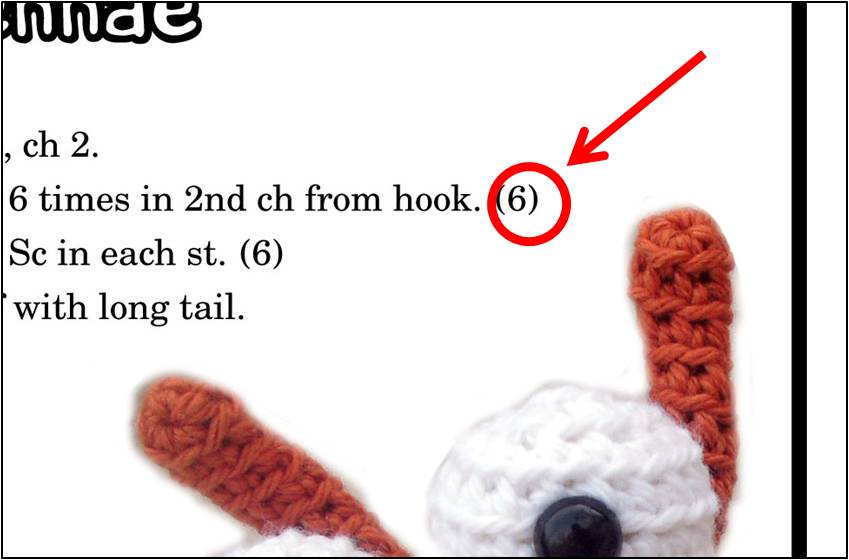
What does the number in parentheses mean in a crochet pattern?

Have you ever looked at a crochet (or knitting) pattern and wonder what those numbers at the end of the line are?

numbers in parentheses in crochet knitting patterns

Those numbers are the stitch count for that line of the pattern… in other words, how many stitches you should have in that row/round (6 stitches in the above example).

Sometimes a pattern may be more explicit and say “6 sc” (meaning there should be 6 single crochet stitches), but often the type of stitch is left out, leaving just a number.

So, fear not- it’s not some crazy instruction telling you to do more stitches… it’s just meant to help you out!

How to Add a Crocheted Edge to Anything – video and PDF

How to Add a Crochet Edge to Anything - a video tutorial from Shiny Happy World

Today we’re going all out with the fancification you can add to the hem of a simple skirt (or a pillowcase, a hankie, a tea towel – anything with a hem really). Today I bring you my favorite fancy schmancy embellishment – the crocheted scallop edge.

Here’s what it looks like. I happen to think this elevates a simple T-shirt skirt into something really nice. That simple band of color around the bottom, the addition of a different texture – it just works. And it works for grown up clothes too!

Want to see it closer?

You can click on any of the images to see them even bigger.

I don’t care if you’ve never picked up a crochet hook before – you can totally do this! The video is longish – not because it’s extra complicated, but because I take you slowly through every step. AND I’ve also made up a printable PDF with a kajillion step by step photos that you can keep near you on the sofa while you work. You can download that here. I tell you what needle size to use and I even took photos of the label of the yarn I use so you can see all the details. You can do this!

This is the last of this batch of skirt fancification videos. Here’s a rundown of the other posts.

How to Add Ruffles to a T-shirt Skirt (video)

How to Embroider the Hem of a T-shirt Skirt (video)

How to Add a Crocheted Scallop Edge to Anything. That’s this one. 🙂

Are you ready to sew some fabulous skirts? I’m ready to see them! Post photos to the Shiny Happy People group! 🙂

Happy stitching everyone!

Best,
Wendi
Applique Wendi (with fabulous hat)

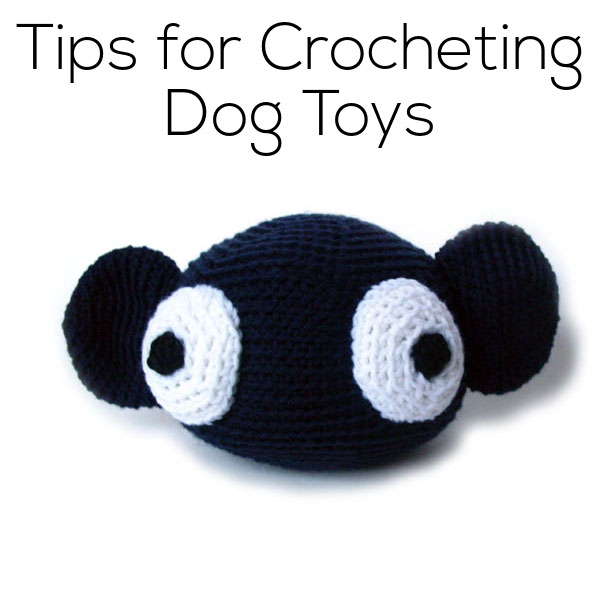
Guide to Crocheting Dog Toys

Tips for Crocheting Dog Toys - from Shiny Happy World

If you have a dog, you probably think of him as a member of the family… so wouldn’t you want to crochet him a sweet toy?

When crocheting for a dog, safety is the top priority! It’s a lot like crocheting for a baby, with a few extra considerations to keep in mind.

Don’t use buttons or plastic parts!

Some dogs are avid chewers, and even ‘safety eyes’ can come off when the fabric they’re attached to has been chewed through. I don’t need to give details about the digestion distress a swallowed eye can give your pup… so just avoid them!

dogs and plastic eyes

For any plush, you can easily add baby-safe crocheted eyes instead of plastic ones.

Select a Sturdy Yarn

Linen would totally rock, but so would wool or cotton. Nothing too soft (no merino!), because you want it to hold up. Even the gentle-est dog will have the toy in its mouth!

You can also look at thin rope in the hardware store. It’ll be sturdy and strong – you’ll just need to do some experimenting to find the right hook size.

Don’t forget to also select a machine washable yarn… because you’ll probably want to wash it!

Crochet a tighter gauge than usual

I used a size G hook on a worsted weight yarn- giving me a very stiff fabric. This will help almost any yarn last longer and stand up to more chewing.

Keep it Safe

Don’t make a super-tiny toy. I don’t know what the exact minimum size is, but make a toy that’s about the size of the toys you see sold in shops- that way you know you’ll be safe.

If you follow these tips, you can crochet an adorable toy that your pup will love… and will last through lots of playing!

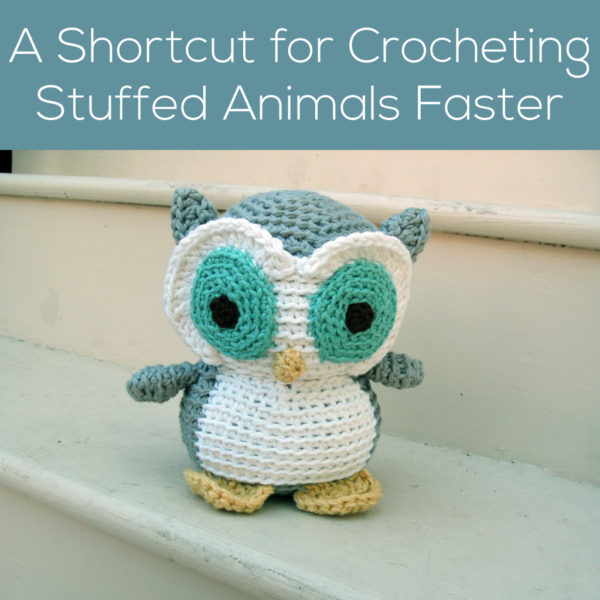
A shortcut for crocheting stuffed animals more quickly!

crochet own stuffed animal

It’s Tip Tuesday! Today, I’m going to share my trick for cutting down on the crochet-time of an adorable stuffed animal!

We’ve all been there before: you have a baby shower/birthday party/event to go to this weekend, you want to crochet an adorable stuffed animal, but you don’t have a lot of time. What can you do?

You can slash your crocheting time with a combo approach: use a bulky yarn and downsize the pattern!

I do this all the time… and it cuts my crochet time by about 30%, and you still get a great result! Let me walk you through it.

The side-by-side comparison

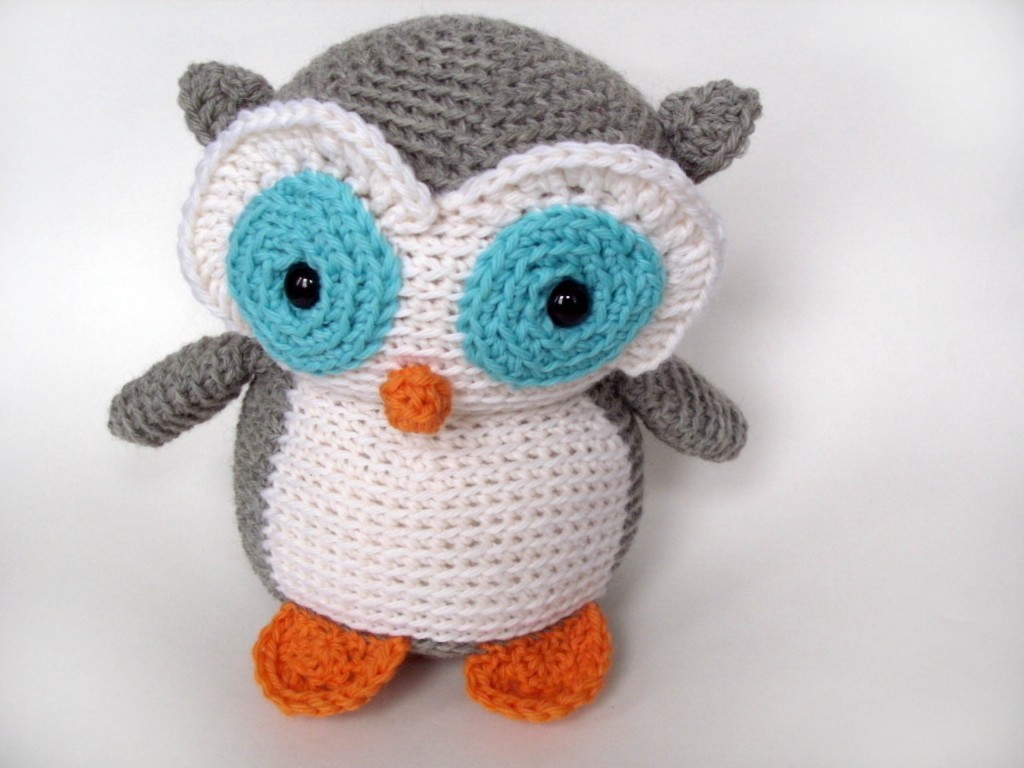
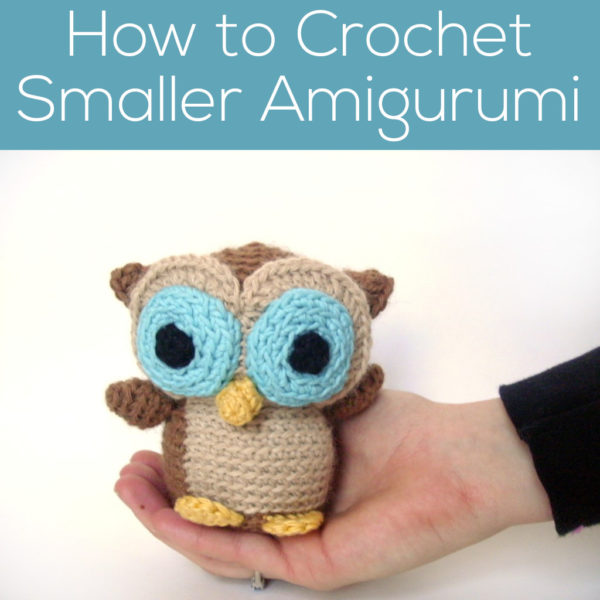
Here is an owl that I crocheted following the pattern exactly (using a worsted weight yarn):

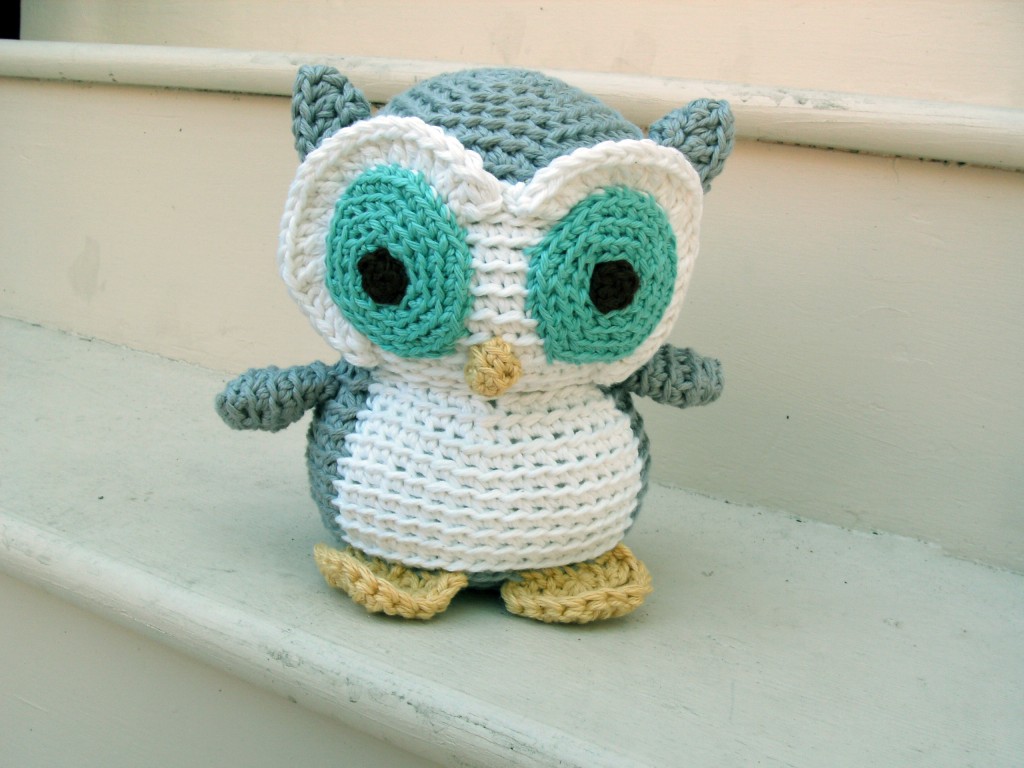
Now, here is an owl that I crocheted using a bulky yarn and a ‘downsized’ pattern:

Can you see a big difference? Probably not! They’re both 8″ tall… but the second one took me far less time to crochet! And you can do it, too!

The trick

The pattern I’m using is Nelson the Owl, but this trick will work on almost any amigurumi pattern.

My owl pattern calls for a worsted weight yarn, and tells me to do work 10 increase rounds for the head & body. So, here’s what I do to speed up the process: I use a bulky-weight (thicker) yarn and tweak the pattern to crochet a smaller amigurumi, basically working fewer increase rounds than the pattern says to.

You’ll want to read this blog post for details on how to crochet a smaller amigurumi… why smaller? Well, because you’re using a thicker yarn- you’ll end up with the same sized owl, but with less crochet time!

You ready to try it?

For my quicker owl, I worked 7 increase rounds on the head and body and crocheted the other features as written in the pattern. This means that the features (eyes, feet, ears) will be slightly proportionally bigger than on the original owl… but that doesn’t bother me! In fact, I think it’s a little extra-cute!

So, are you ready to give it a try? It takes a little bit of experimentation (to get the hang of making a smaller amigurumi pattern), but once you’ve got it… you can save oodles of time!

Here are handy links to all the posts about crocheting stuffed animals in different sizes. . .

Return to the main table of contents for Let’s Learn to Crochet Amigurumi.

Move on to the lessons for crocheting more advanced shapes.

Happy stitching!
How to crochet a smaller amigurumi!

The easiest way to make a smaller amigurumi is to use thinner yarn and a smaller hook. You can even use embroidery thread!

But if you want to use regular yarn, there’s still a way to do it!

You’ll need to do some figuring on your own, but altering existing patterns is the first step to designing your own… so give it a try!

As an example, I’m going to talk about how to make any size Mike the Microbe, from my book Crocheted Softies. Feel free to try it out with any pattern!

Identify the parts of the Pattern

Have a good look at your pattern, and try to identify big chunks of the pattern.

When you have a look at the small microbe’s pattern, you’ll notice that rounds 1-9 are increase rounds (rounds where you add stitches), followed by 7 plain rounds (where no increasing or decreasing occurs) and 8 decrease rounds (rounds where you decrease stitches).

Start crocheting… with fewer rounds!

Mike the Microbe is adorable as is… but how do you make him smaller? Crochet fewer of all kinds of rounds!

I crocheted one baby microbe by crocheting 5 increase rounds, 3 plain rounds and then 5 decrease rounds to finish.

After the end of 5 increase rounds, I had 30 stitches… so when it was time to decrease, I started at round in the decrease instructions that had 30 stitches. Who knew so many instructions were built into the pattern?

Make features smaller, too!

Follow a similar logic for making smaller features… working fewer increase and plain rounds. Above, I decided to omit the buggy eyes- they were too hard to make smaller!

I also made a microbe adding the eyes that were in the pattern without modification- notice that they’re proportionally bigger on the body… but I think that’s cute, too!

So tiny and so cute!

Try it on everything!

Once you’ve tried ‘shrinking’ a simple pattern like a microbe, it’s time to this trick with other amigurumi! I crocheted a tiny version of Nelson the Owl by crocheting 5 increase rounds and 5 plain rounds instead of the 10 called for in the pattern.

I worked fewer increase rounds on the wings and eye circles… and it’s important to keep in mind that it’s okay if the smaller version doesn’t look exactly like the bigger version. As long as it’s cute, you’re doing great!

Hope you give ‘shrinking’ some amigurumi patterns a try!

Here are handy links to all the posts about crocheting stuffed animals in different sizes. . .

Return to the main table of contents for Let’s Learn to Crochet Amigurumi.

Move on to the lessons for crocheting more advanced shapes.

Happy stitching!

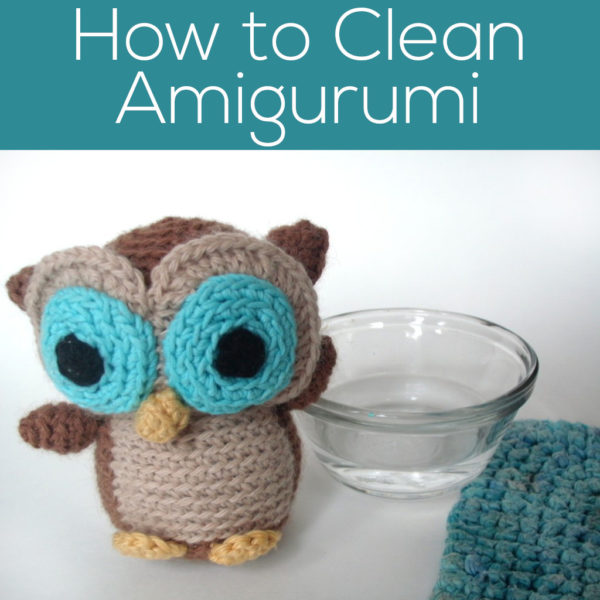
How to Clean Amigurumi

Happy Tip Tuesday! I get asked pretty often, ‘how do you wash your amigurumi, especially if you use non-machine washable yarn?’ Well, that’s today’s topic!

I crocheted two owls that I used as cake toppers. Even though the icing was pretty hardened, one owl inevitably ended up with icing on his owl-butt. Ooops.

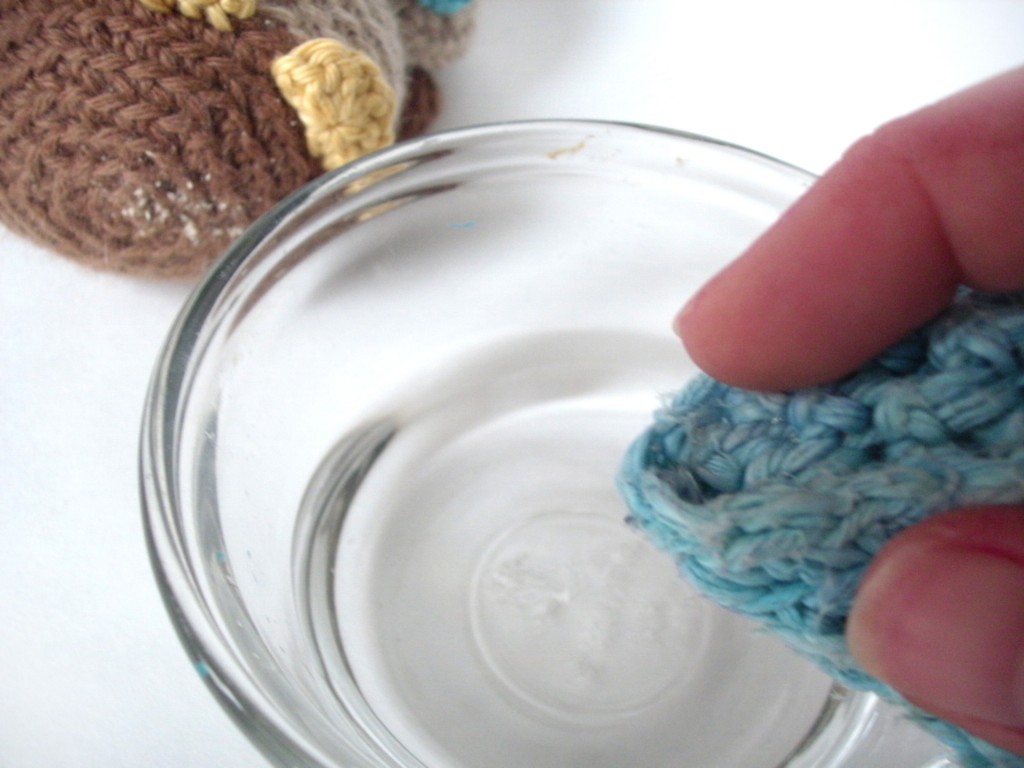
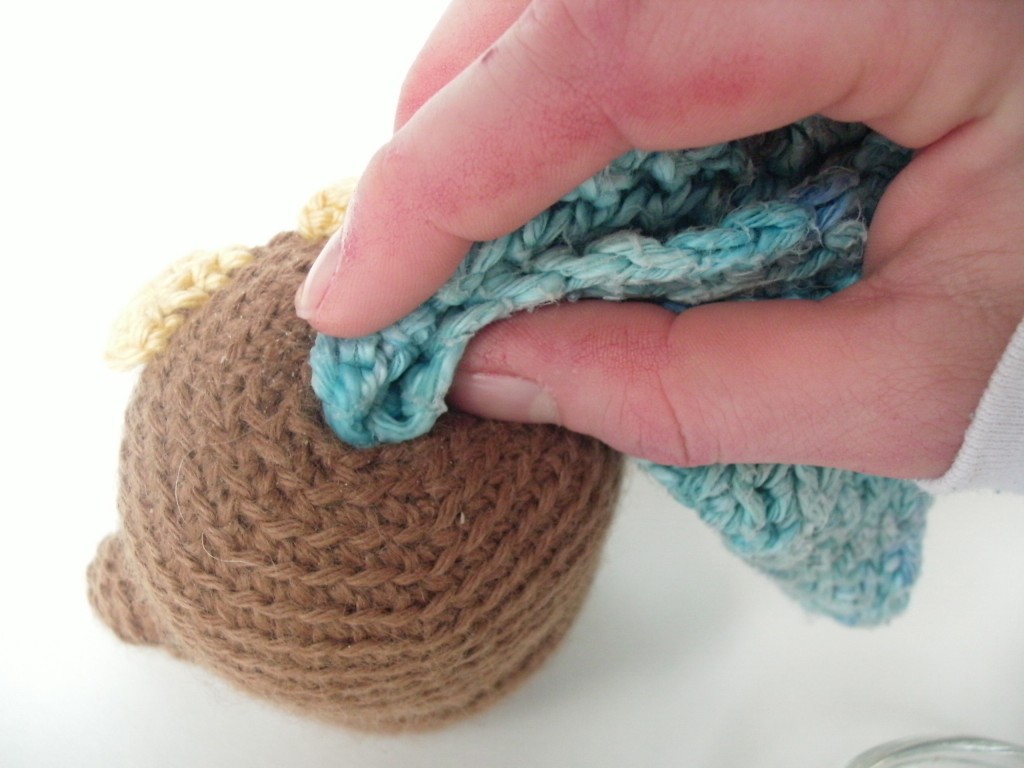
Even though this owl is crocheted with a hand-wash-only yarn… there’s no problem! Almost all messes can be ‘spot cleaned’ using water and a cloth (that is, unless you drop an amigurumi in a mud puddle… then he may need an all-over wash). I just dip a washcloth in a little bit of water:

And dab at the spot:

… until it’s clean!

Hooray!

Now, what if your amigurumi is really dirty? Here are a couple of suggestions:

  • Try using a little bit of soap in your water for smaller (but hard to get out) spots
  • Soak your amigurumi in a sink of water and wool-wash (like Eucalan). Gently squeeze all of the water out, and let dry completely.
  • Animals made from non-machine-washable yarns can be machine washed without felting completely. The stuffing keeps the yarn from felting as much as loose fabric would. Of course, you may see some felting (due to agitation and hot water), but not as much as you may expect. Try machine washing on delicate with cold water… your amigurumi will come out clean as a whistle!

Here are handy links to all the crochet troubleshooting posts. . .

Return to the main table of contents for Let’s Learn to Crochet Amigurumi.

Happy stitching!
How to embroider a smile on your amigurumi!

About a week ago, Tiffany wrote on the FreshStitches Facebook wall, and asked if I could post about how to embroider a smile on amigurumi. Sure thing!

If you’re shaky on doing embroidery, check out my video on embroidering amigurumi. That’ll help you with the basic technique. And now, I’ll show you how to get a nice, even smile!

Planning the smile

So, we begin with a blank canvas (in this case, an amigurumi head):

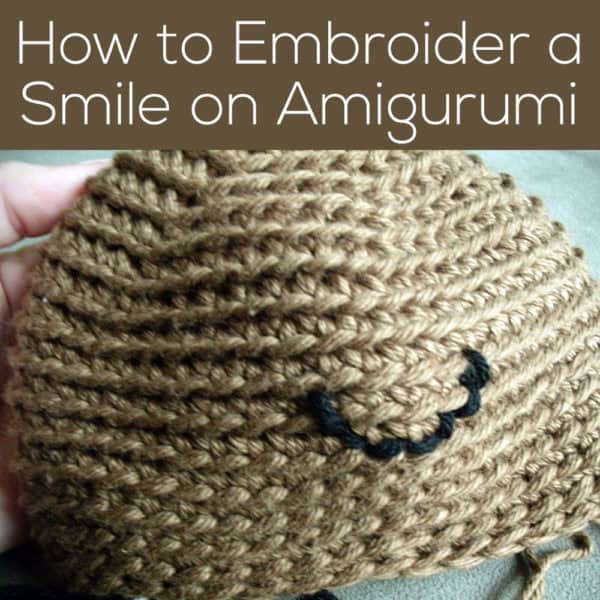
Now, here’s the real trick: I use locking stitch markers to plan out the shape of my smile! Here, I put one marker in each of the upper corners of the smile, and one at the bottom. You can use more if you feel like you need a bit more guidance while embroidering.

Embroidering
Now, with the smile all planned, you can begin embroidering! First, thread your tapestry needle with the yarn you want to embroider with:

… and get started! If you want to see how to embroider in more detail, check out my video on embroidering amigurumi.

And, you’re done!
Since you used the locking stitch markers as your guide, you have a nice, even smile!

Just remove the markers… isn’t it lovely?

Hope you enjoyed this Tip Tuesday… and that it’ll inspire you to dress up your amigurumi with pretty smiles!

Here are handy links to all the posts about faces and details. . .

Return to the main table of contents for Let’s Learn to Crochet Amigurumi.

Move on to the lessons about eyes.

Happy stitching!
Crocheting baby-safe eyes for amigurumi

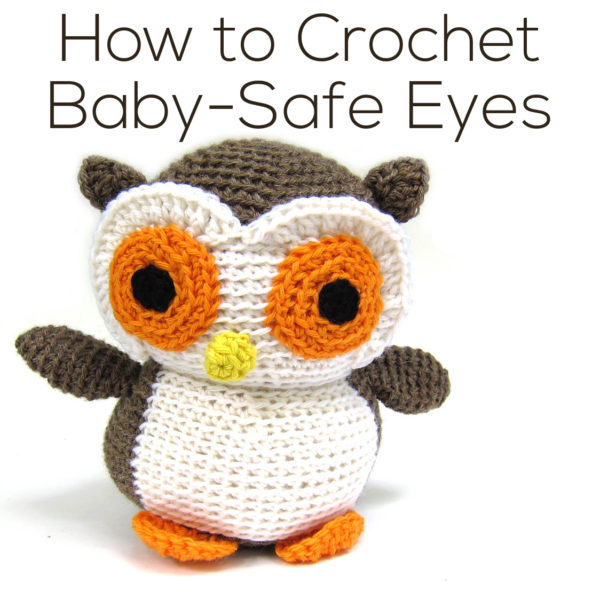
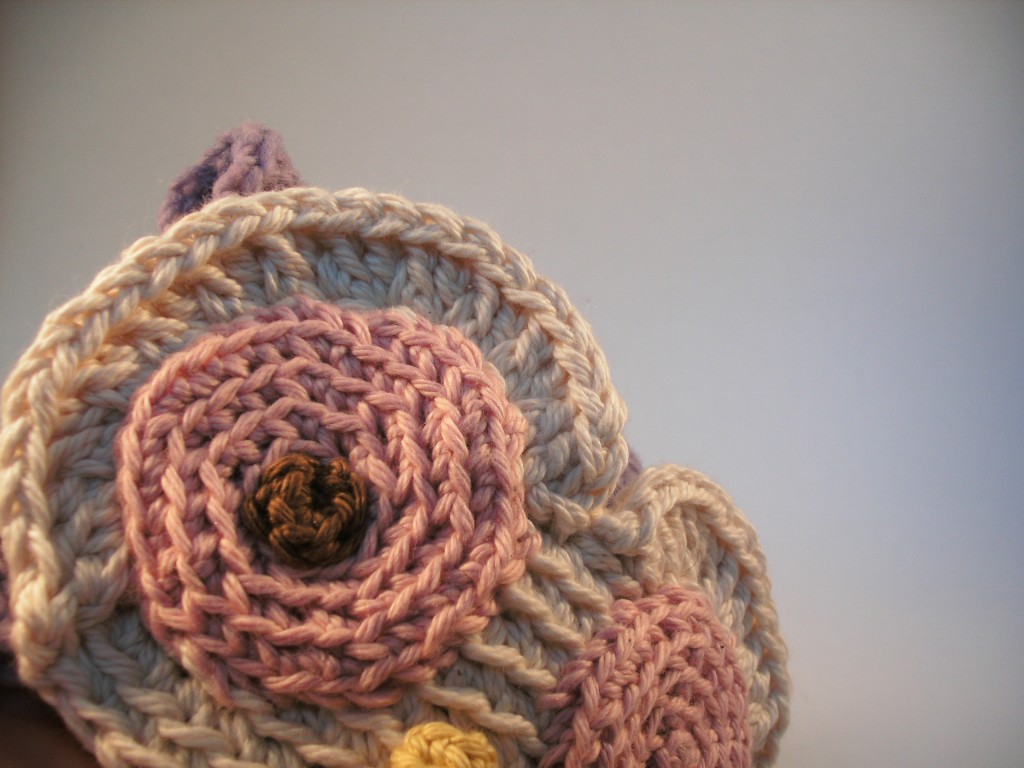
Larger-sized amigurumi make lovely presents for babies… but you’ve got to make sure they’re safe for the little ones! Today, I’m going to give you the pattern for crocheting baby-safe eyes (to replace the plastic eyes often called for in patterns), and show you a technique for attaching the eyes so you’ll end up with an awesome plushie!

crochet owl

Pattern for Baby-safe Crocheted Eyes

Even though the plastic eyes used in amigurumi are often called ‘safety eyes’, they’re not approved for use by children under 3. So, whenever I’m making a toy for a baby, I crochet the eyes. Here’s the pattern:

With black yarn (in weight and hook called for in the remainder of the pattern), ch 2.
Round 1: sc 6 times into 2nd ch from hook. (6)
Round 2 (optional): Sc twice into each st. (12)
Fasten off with a long tail.

That’s it! Easy!

Attaching Crocheted Eyes

When you are attaching limbs, I recommend that you use a whipstitch to attach the piece to the loops on the fabric. However, because the eyes are so tiny, this technique makes the eyes stick out a bit:


This is the first baby-safe toy I crocheted… see how his eyes are a little buggy?


To get the eyes to lay flat, you’ll want to stitch all the way through the fabric that you are attaching to. Let’s look at an example of attaching baby-safe eyes to an owl.

To begin, I thread my tapestry needle with the tail of the yarn, as usual. Then, I stick my tapestry needle through the eye, then all the way through the head of the owl (going all the way to the wrong side of the owl head):

attaching a baby safe eye in amigurumi

Then, to complete a second stitch, I stick the needle back up through the next stitch- through the owl head and through the eye:

crocheting a baby safe eye on amigurumi

This is attaching the eye using a running stitch, and pulls the edges of the eye much closer to the head than with a whipstitch. Isn’t the final result pretty?

amigurumi crochet owl

Ideas for Variations

You don’t just have to crochet a black eye… you can be creative! Try:

  • Embroidering a french knot with a scrap of white in the center for a pupil
  • Crocheting a second round of white, so that the black is the pupil
  • Use a funky color!

Hope this tip helps you create a fabulous baby-safe toy! So, next time you have a baby shower to go to… think ‘stuffed animal’!

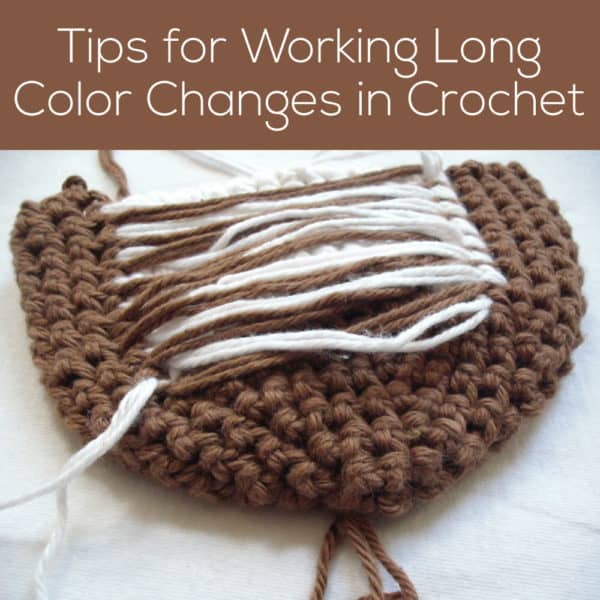
Tip for working long color changes in crochet

Happy Tip Tuesday! Last week, I talked about how to crochet with 2 colors of yarn, using a technique called stranding. This technique works wonderfully when there are only a few stitches between color changes.

crochet owl by freshstitches

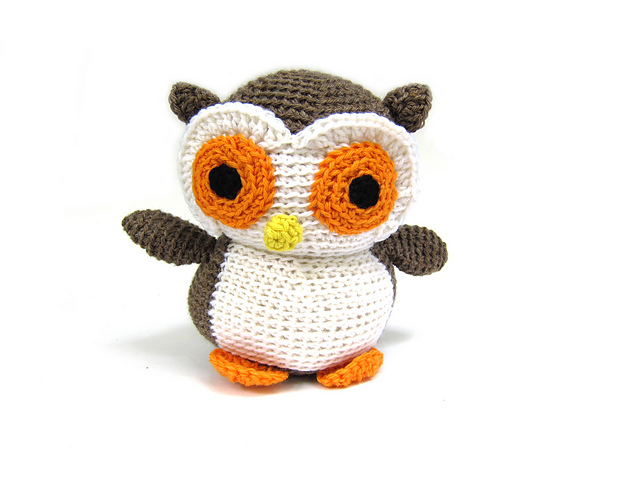
I get a lot of questions about how to handle the color changes for the body of Nelson the Owl. To crochet Nelson’s body and head, you crochet 20 stitches in one color, then 40 stitches in another color, meaning stranding doesn’t work too well. Today, I’ll show you what I do!

One option is to cut the yarn every time you change colors, and tie a knot. However, this is time consuming, and makes the process of crocheting this cutie owl a drag… so I skip it!

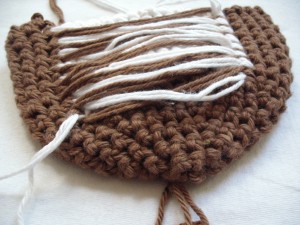
What I do is strand the yarn across the back while crocheting! Crochet just like you would with a short color change, leaving the yarn stranded across the 20 stitch color change, as pictured:

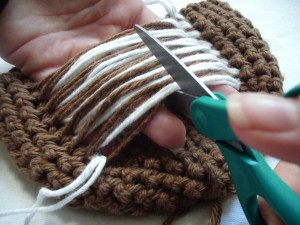
Now, you can’t just leave them like this, because of two reasons. One, the stranding won’t allow you to stuff the owl well. Two, all of that extra yarn with no tension on it will make the edge stitches uneven. So, what you need to do is cut down the center of the strand:

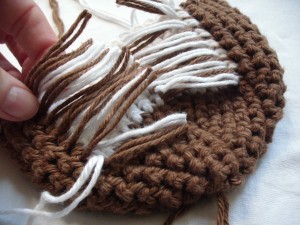
It will look like this when you’re finished:

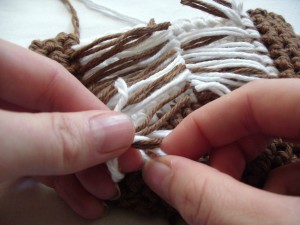
Now, you need to tie these ends into knots to secure them. I start at the bottom of each side, and tie a square knot (you know, that boring kind of knot) with one strand of white and one strand of brown. (If you’re wondering why there looks like there are too many strands here, it’s because I crocheted this particular owl using two strands of yarn at once… try to ignore that if you can!)

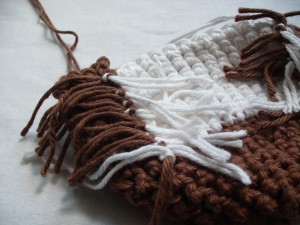
Here’s how it will look:

Yay! With this technique, the knot tying happens all at once, which means it takes less time overall. I’ve gotten pretty speedy with my owls!
Hope you enjoyed this crochet tip!

Here are handy links to all the posts about changing yarn color in crochet. . .

Return to the main table of contents for Let’s Learn to Crochet Amigurumi.

Move on to the lessons about crocheting stuffed animals in different sizes.

Happy stitching!