How to crochet with 2 colors, stranding

Hi everyone! On this Tip Tuesday, I’m going to talk about how to crochet with 2 (or more) colors by stranding the unused color along the back of the work. This is a great technique to use for crocheting vertical stripes, or other patterns where there aren’t many stitches between color changes. Since I know a lot of you are visual learners (and sometimes photos just aren’t enough!), I’ve filmed a video tutorial. Scroll down to see it!

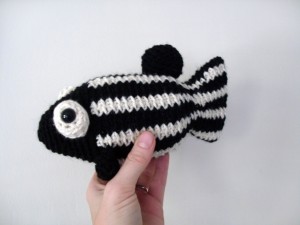
Last week, I received a custom order in my Etsy shop to crochet a zebrafish, a fish with black and white stripes. I used the Wal the Tiny Fish pattern, and instead of crocheting in one color, crocheted black and white stripes.

Since these stripes are vertical (with respect to the direction of crocheting), I needed to change colors every couple of stitches. Now, you can imagine how annoying it would be to cut the yarn and tie a knot every couple of stitches to change yarn… which is why I didn’t do that! Instead, I did something called ‘stranding’, which is carrying the unused color along the back of the work. Stranding is a great technique to use anytime there aren’t more than 4 or so stitches between color changes.

Here’s how it’s done:

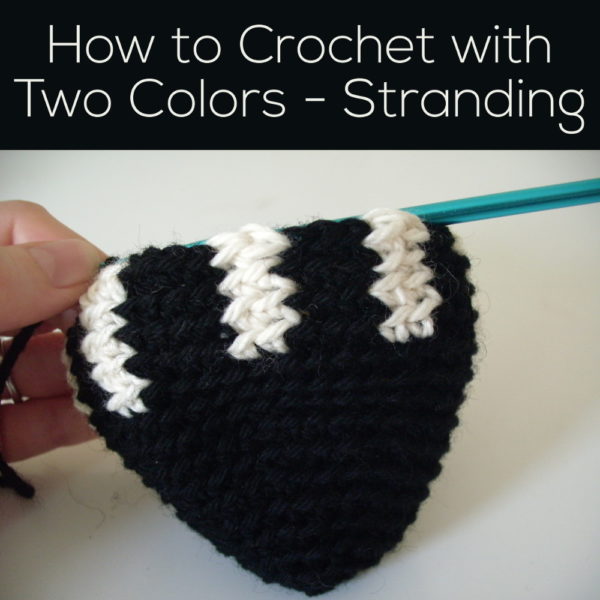
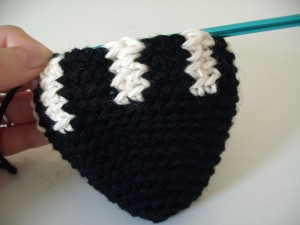
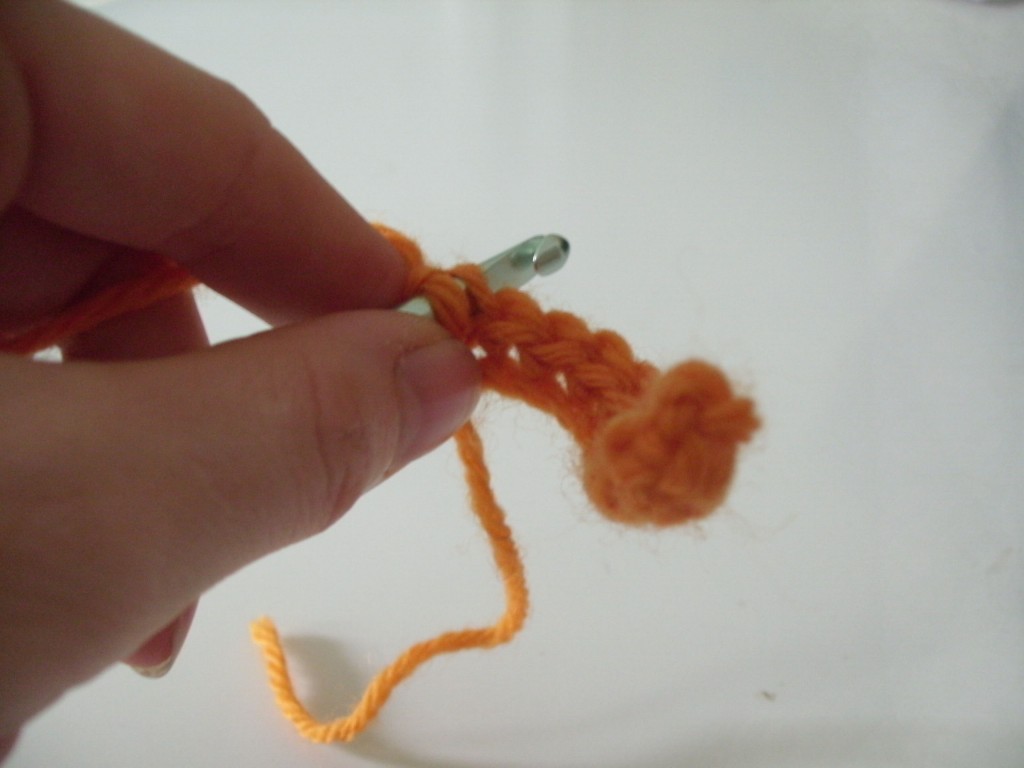
Above is what the first half of my little zebra fishie looked like! You can see that there are vertical stripes, with the white stripes 2 stitches wide and the black stripes 3 stitches wide.


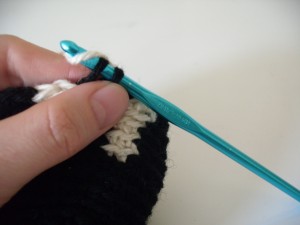
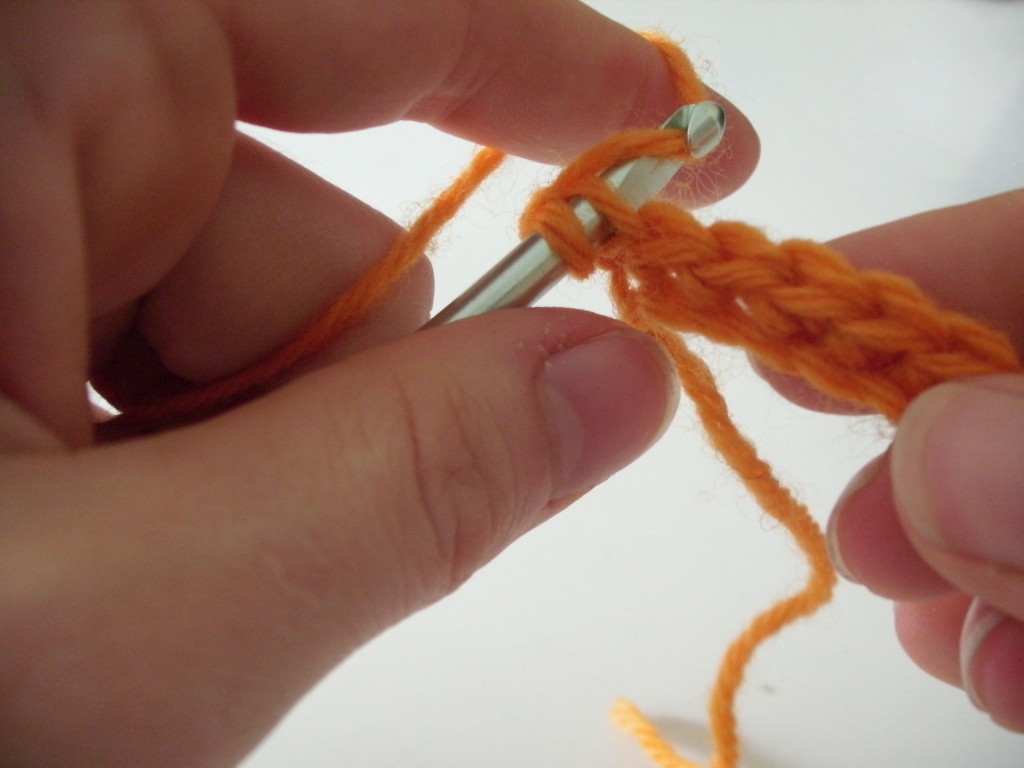
Okay, now it’s time for me to change colors (I’m at the end of a black stripe). If you’re unfamiliar with how to change colors cleanly, check out my tutorial on clean color changes. Now that it’s time to use the white yarn, I pick it up (it’s dangling in the back from the last time I used it) and pull it across the back of the work.


Now, using the yarn I just picked up, I’ll begin crocheting with it!


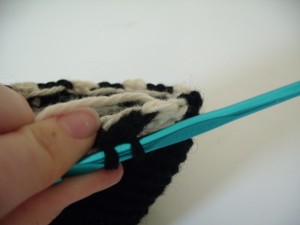
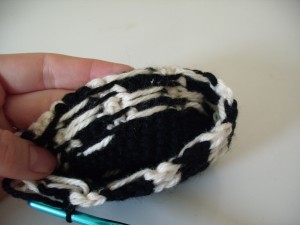
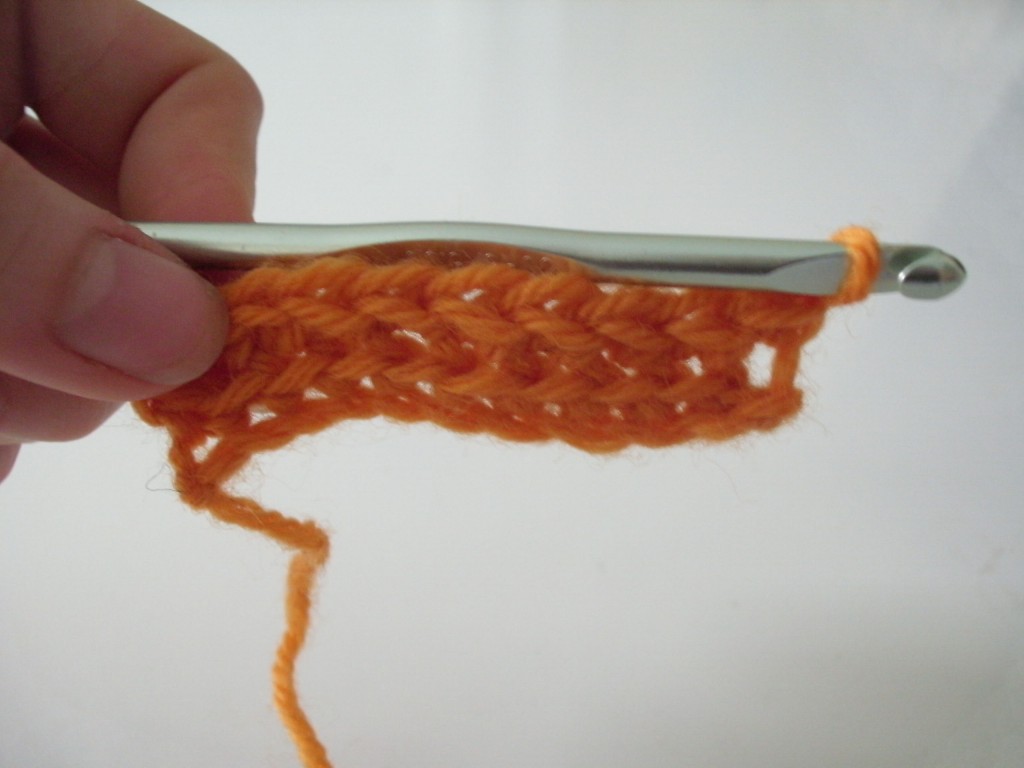
As you can see, when you look at the back of the work, you’ll have lots of little horizontal lines between each color change. Beautiful!

If you’d like to see this in action, check out my video:

As I said, this technique is best for when there aren’t too many stitches between color changes. So, what do you do when there are lots of stitches between changes, like for Nelson the Owl? I show you that in this post about working long color changes in crochet.

Here are handy links to all the posts about changing yarn color in crochet. . .

Return to the main table of contents for Let’s Learn to Crochet Amigurumi.

Move on to the lessons about crocheting stuffed animals in different sizes.

Happy stitching!

New, Super-Easy Magic Ring!

NEW! Super Easy Magic Ring for Starting Amigurumi - a video tutorial from Shiny Happy World and FreshStitches

Update! If you want the easiest method for starting your amigurumi (easier than any version of the Magic Ring) try a sloppy slip knot. I started using it a few years ago and I’ll never go back to a Magic Ring.

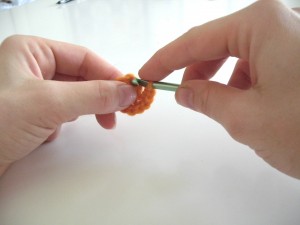
Has the magic ring method for beginning to crochet in the round gotten you all tied up in knots? No worries! I’m going to show you a new and super-easy method for getting an adjustable (magic) ring to begin crocheting your amigurumi. First, I’ll show you in photos, but scroll down if you’d rather just watch the video!

In this technique, you begin by making a slip knot, then creating the adjustable loop. With this method, there are less loops flying around, so it’s more accessible to beginners. Who knows, it may become your favorite!

Step one: make a slip knot
Start off by getting the hook and yarn called for in your pattern.

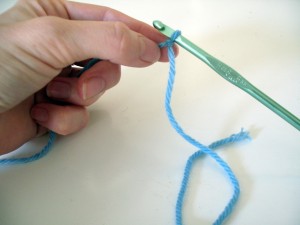
Then, make a slip knot with about 6 inches remaining at the tail, and insert the hook into the slip knot.

Step two: make a loop
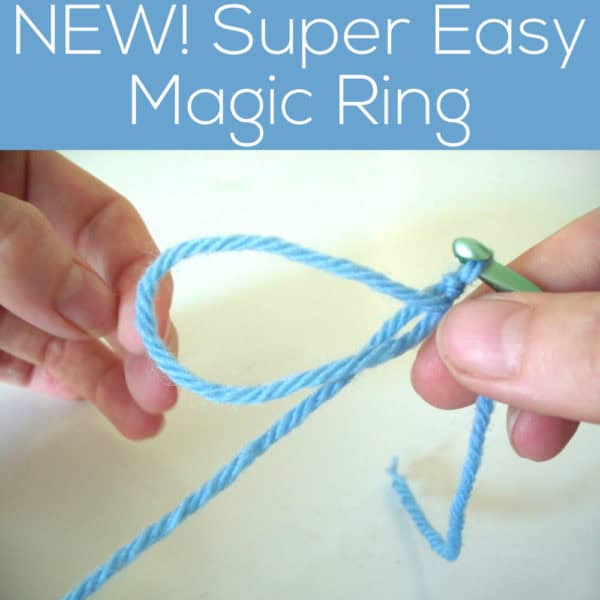
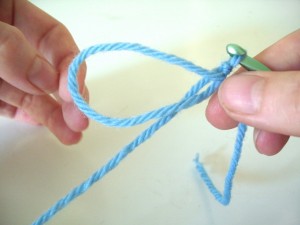
With that 6 inches you left in in the tail, make a loop, as pictured:

Step three: crochet into the loop
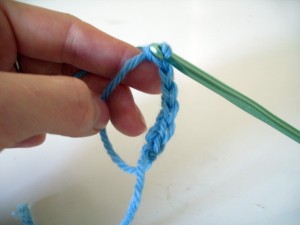
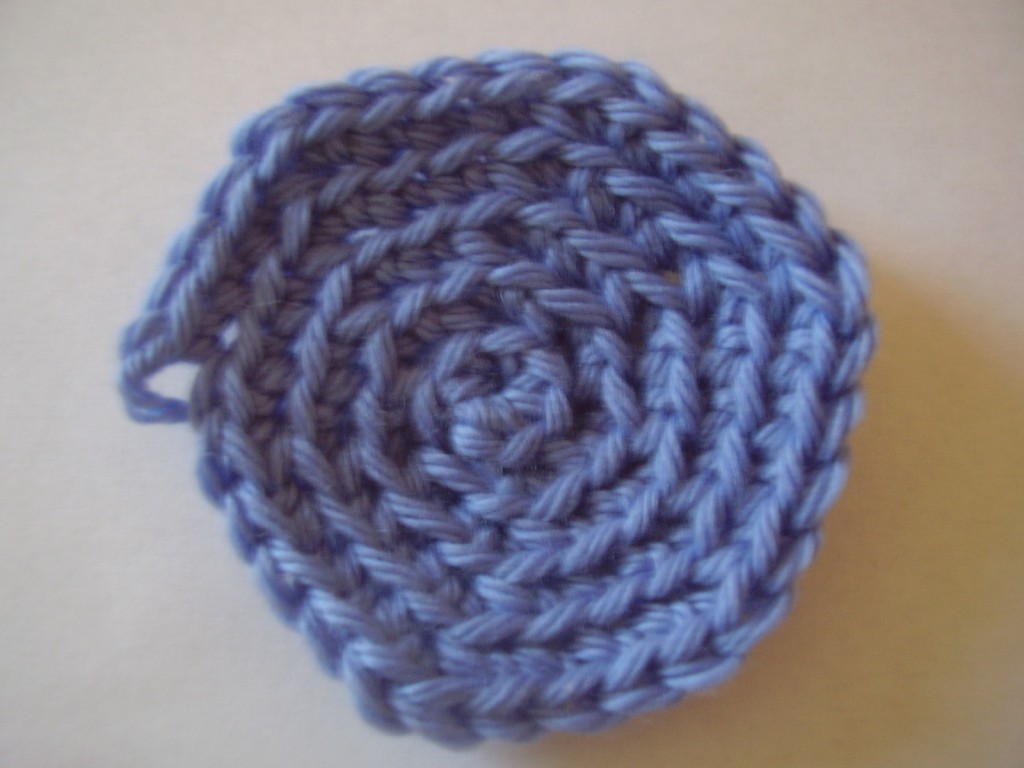
Pretend that GIANT loop is just one crochet stitch. Crochet into it six times (or do however many stitches called for in your pattern). To single crochet one stitch into the loop: insert your hook into the loop, wrap your yarn over the hook and pull through the loop, then wrap your yarn over your hook again and pull through the two loops on your hook! Repeat this until you’ve crocheted all of your stitches! Your piece will look like this:

Step four: pull, and you’re done!
To close up the hole, pull on the tail!

You’re done! Hooray!

If that went by too fast, have a look at the video I recorded of the technique:

I hope you found today’s post useful for demystifying the magic ring!

If not – seriously – just use the sloppy slip knot. 🙂

Here are handy links to all the posts about working the first round of your crochet pattern. . .

Return to the main table of contents for Let’s Learn to Crochet Amigurumi.

Move on to the lessons for round two and beyond of your pattern.

Happy stitching!

Help! Crocheting in the back loop is too hard!

Today’s tip is inspired by a customer question!

Recently, I received this email from Nicole:

I saw that your recommend stitching in the back and it looks a lot nicer. I can do it but it is very difficult. I find it very hard to get my hook into that stitch. For some reason that back stitch is very tight. Is that normal? Is there a trick? Thanks appreciate any insight you have.

After some further emails, Nicole and I figured out that she wasn’t actually crocheting in ‘the back loop’, but picking up a loop that is even further back, and quite tricky to grab!

I’ve written blog posts about crocheting through the back loop before, but I haven’t taken up-close photos to help you figure out which loop is the back loop! So, here it is!

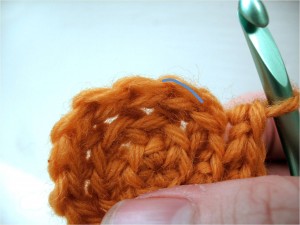
If we’re working in the round, we’ll have the piece below after the 3rd round.

The back loop is the loop that I’ve highlighted with a blue line:

As you can see, when you’re looking at your work, it’s right along the top of the piece, and should be relatively easy to stick your crochet hook into.

Now, what was that tricky loop that was giving Nicole trouble? Let’s look at our crochet from the side to find it… so we’ll rotate our piece a bit…

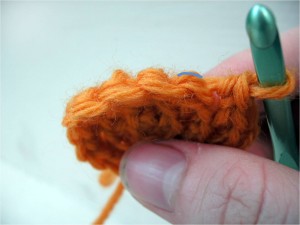
Then, a little more, until we can see the piece from the side:

If you look at your crochet from this angle, you can see that there is another loop back there, which I’ve highlighted with a blue line:

This is the loop giving Nicole all of her trouble!

So, to crochet through the back loop, go for the easy one shown in the first photos, instead of that super-tricky loop on the side. Then, you’ll be crocheting with ease!

Thanks so much for your question, Nicole!

Here are handy links to all the crochet troubleshooting posts. . .

Return to the main table of contents for Let’s Learn to Crochet Amigurumi.

Happy stitching!

How to crochet in rows without turning

I love crocheting in the round, because I like how the right side of crochet looks. When you crochet in the round (spirals), you don’t need to turn, so you always have the pretty side of the stitches facing you.

Typically, when you crochet in rows, you turn your work at the end of the row, which means that half of your rows have the ‘wrong side’ of the stitch facing you. Particularly because I like to crochet through the back loop (read this post to read about the different loops you can crochet into), I fantasized about ways to make my rows look like my crocheting in the round…

So, here’s the trick: you’ll need to crochet with your non-dominant hand, every other row. Sounds crazy! I know! But, it’s really cool. Let’s walk through it…

(just so you know, I’m right handed, so crocheting with my right hand is my ‘normal’. If you’re left-handed, just switch this around backwards… most southpaws are pretty used to doing that anyway!


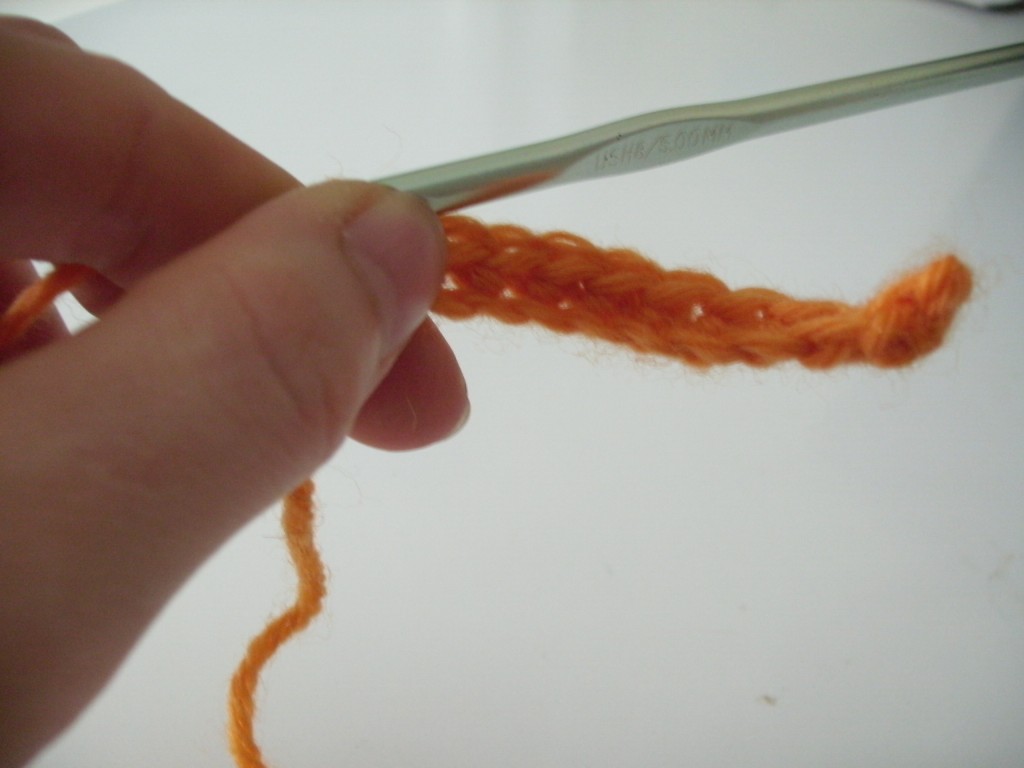
To start, I crocheted a chain, and then turned, and crocheted across with my right hand. (You can do the same trick I’m about to show you for the first row, but I just wanted to get us started!).

Okay, so now we’re at the end of the row. Chain one, but don’t turn…

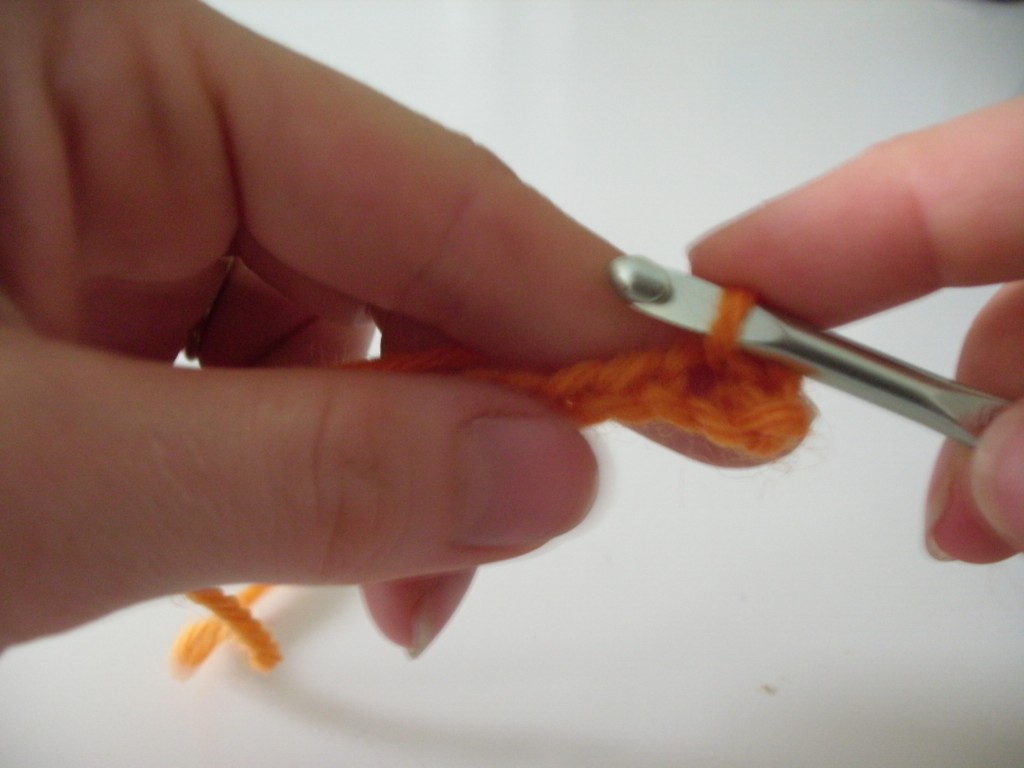
You’re going to hold the hook in your left hand, and work from left to right.

I know! This feels backwards and weird… but give it a try. (Besides, I think it works the other side of your brain and prevents Alzheimer’s… so there’s good reason to do it!) I still don’t have the best technique down (I wrap the yarn with my left hand, still, which is a little funny), but it works!

And look! When you’re at the end of the row, you have only pretty-right-side stitches… just like crocheting in the round!

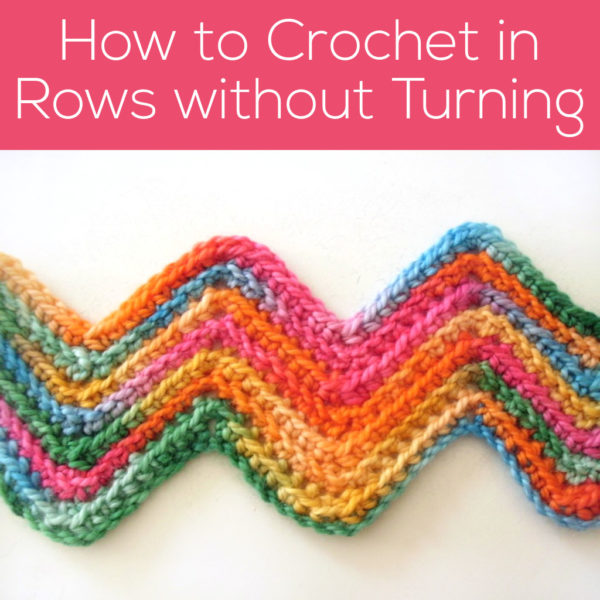
Look at this pretty zig-zag swatch I made with this technique… ridges (from working in the back loops) on every row. Hooray! For those of you who knit, the same technique (knitting left-handed) allows you to work in rows without turning, saving you from the dreaded purl!

Hope you’ve enjoyed this Tip Tuesday! Let me know if you give this technique a try!

Different ways to space crochet increases!

Happy Tip Tuesday, everyone!

I’m going to chat about a topic that’s very important to amigurumi-making: increases. Why is it so important? Because almost every amigurumi requires that you increase! Today, I’m going to compare two popular ways to position your increases, so when you’re crocheting, you can pick the way you like best!

For this blog post, I’m going to assume that we are crocheting a piece in the round, using the spiral method- that’s going around and around without turning (if you don’t know what I mean, fear not! I’ll talk about the different ways to crochet in the round another day!). To increase, you simply crochet twice in the same stitch… but there’s more to it than that!

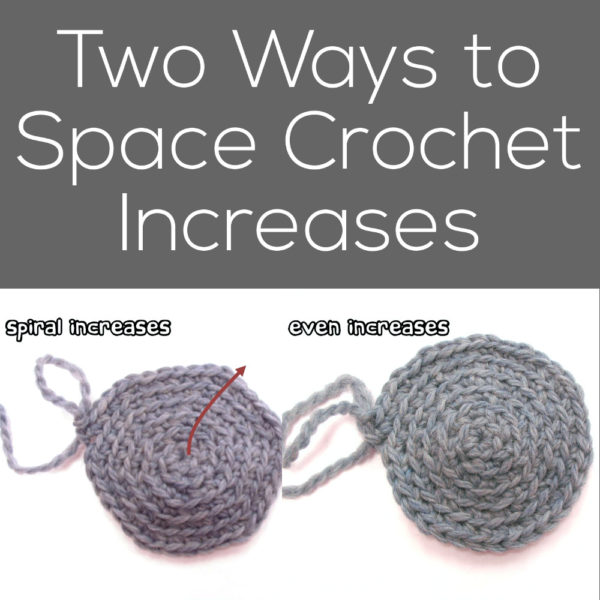
There are two basic ways to space your increases: spiral increases and evenly spaced increases. They give slightly different looks, and different folks prefer different techniques.

Spiral increases


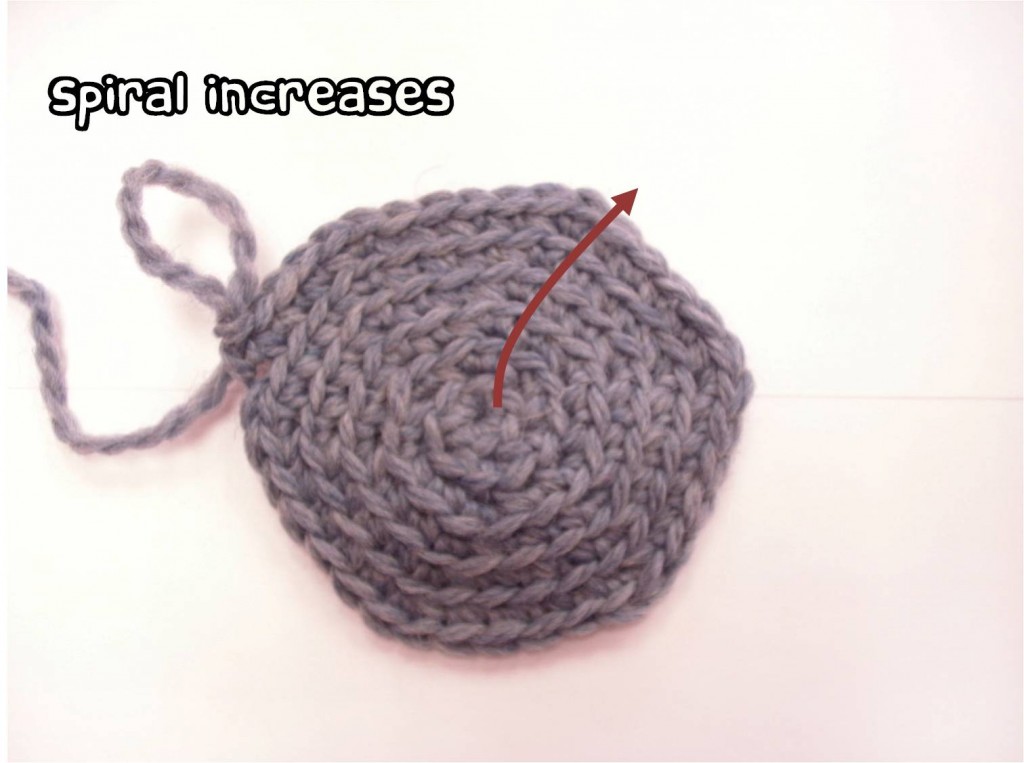
One way to increase is the ‘spiral increase’ method, where you position the increases at the same spot in every round. Instructions for this type of increase typically look something like:


Round 4: [sc twice in next st, sc in next 2 sts] 6 times (24)
Round 5: [sc twice in next st, sc in next 3 sts] 6 times (30)
and so on…

In this technique, the increases occur evenly spaced from each other, and at the same spot every round, so you can see a spiral shape occurring (see the arrow in the photo above) with the increases.

Advantages to the Spiral increase technique

  • The instructions for doing this technique are easy to write/read
  • Because you are increasing at the same spot every round, you can eventually learn to increase without counting (yay!)

Disadvantages to the Spiral increase technique

  • Only works well if you are making a simple circle (and not a more complicated shape)
  • Some people don’t like the look that the spiral makes

Even increases


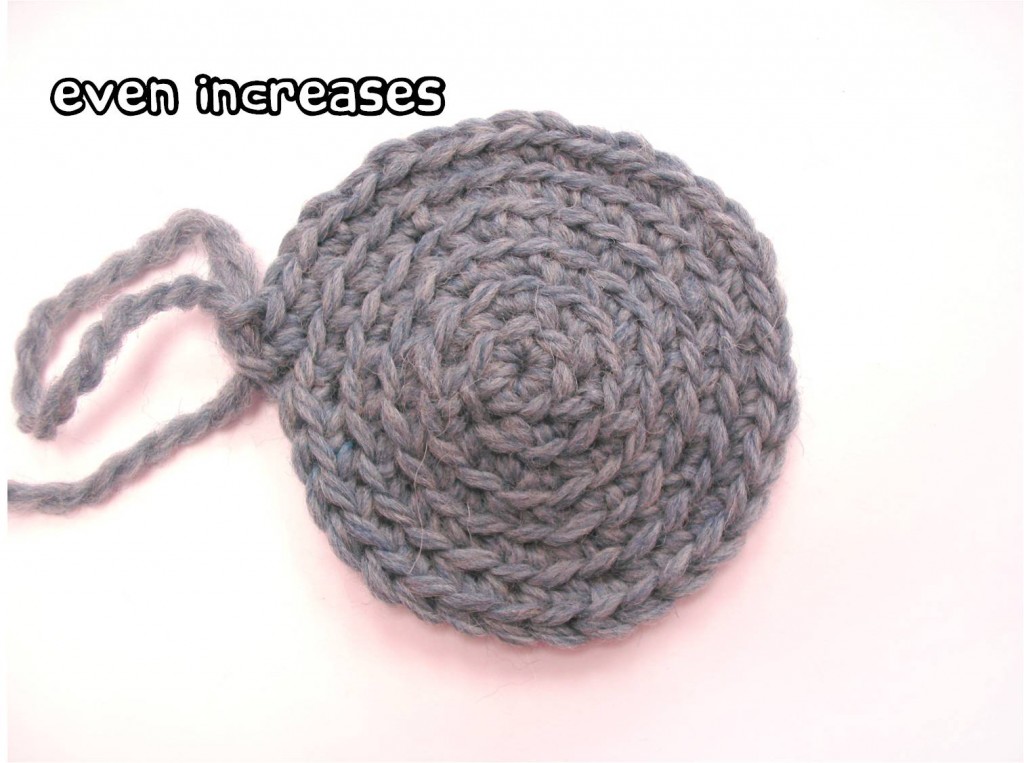
A second way to increase is to position the increases at random (but evenly distributed) around the round. Instructions for this type of increase typically look something like:


Increase 6 sts in each round for the next 4 rounds.

In this technique, the increases don’t occur in the same spot every round, so they become a less pronounced part of the design. Notice how this increase results in a more circular shape, as compared to the spiral increases, which make a hexagonal shape.

Advantages to the Spiral increase technique

  • The instructions for doing this technique can be very condensed
  • Because you only need to make sure to increase 6 times per round, counting isn’t very necessary
  • Some people find the roundness more aesthetically pleasing

Disadvantages to the Spiral increase technique

  • It can be difficult to make sure the increases are randomly distributed
  • Although the instructions are short and condensed, they can be tricky to spell out, and can be tricky for beginners

What will you choose?

It’s a personal choice that’s up to you! I’m a spiral-increase kind of girl… what kind of increaser are you?

Best,
Stacey

What’s the right way to hold a crochet hook?

It’s a question that I see on forums all the time: what’s the right way to hold the hook? So, I though I would tackle my answer to this question for this Tip Tuesday: and I think that the answer is good news for most of us… there’s no right way! As long as you’re holding the hook in a way that allows you to crochet comfortably, then that’s the right way for you!

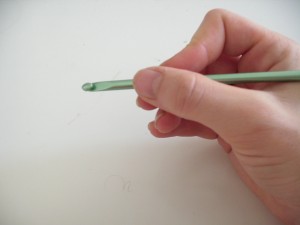
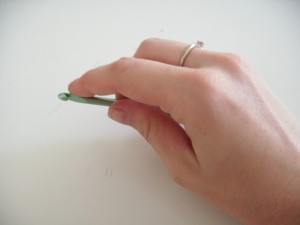
There are two very popular ways to hold a hook: the pencil hold and the knife hold: named because the holds resemble how you would hold other items.

The Pencil Hold
The pencil hold is the name for the method of holding your hook like you would hold your pencil. In this method, the hook rests on top of your hand, as pictured:

Here’s a photo of me crocheting using the pencil hold:

I’m not a native pencil holder… I use the knife hold (which I’ll talk about next). However, my mom (as well of loads of other folks that I’ve met) use the pencil hold – and I haven’t noticed that either one is faster or easier.

The Knife Hold
It goes without saying… the knife hold is the method where you hold your crochet hook like it’s a knife. The crochet hook is underneath of your hand, as pictured:

Below is a picture of me crocheting with the knife hold:

So, there you go… two ways (and probably a couple more) to hold your hook!

How do you hold your hook?

Best,
Stacey

What does 'sc in 2nd ch from hook' mean?

Hi everyone! Welcome to another Tip Tuesday! Today, I’m going to talk about an instruction that is common in crochet, but only pops up once in a while when making amigurumi. Tiffany emailed and asked:

[The pattern said] “Ch 11. [next row]: turn, sc twice in 2nd ch from hook…” I was just a tiny bit confused. Can you clarify that for me please?

Of course! First of all, I should explain why this particular instruction is fairly rare in making amigurumi. It’s because, for most amigurumi, the pieces are crocheted in rounds, and you begin with a very few number of starting chains. And many patterns are worked in spiral rounds, meaning that you’ll rarely turn your work.

However, there are some pieces where you will crochet in rows when crocheting amigurumi: such as the oval-shaped snout of a hippo or the beak of a duck. So, now that we know you’ll encounter this instruction occasionally… let’s talk about what it tells you to do!

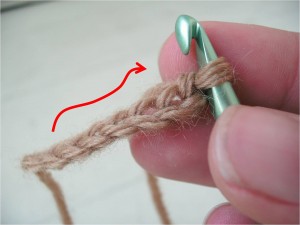
The first part of the instruction we’re investigating tells you to ‘ch 11’, which means that you should chain eleven times. (Not sure how to chain? Check out our video on how to do the chain stitch). If you’re a right-handed person, new stitches will be created to the right (in the direction of the arrow). If you’re a left-handed person, reverse everything that you’re about to read!

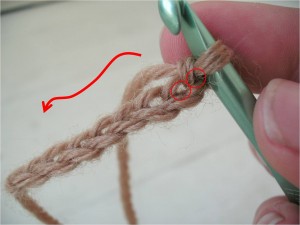
Now, the next part of the instruction says, ‘turn, sc in 2nd ch from hook’. When you only have a little chain, the ‘turn’ instruction can be confusing… it basically means that you want to get your new stitches going in the other way. (When you turn after completing the first row of crocheting, you really do physically turn the work around… but the motion isn’t as obvious on the chain stitches). So, we want to make our stitches go from right to left (in the direction of the arrow), and find out which stitch is the 2nd from the hook. In the photo below, you can see that I’ve circled the stitches with a red circle (you can click to enlarge the photo). The loop on the hook doesn’t count, the first chain that you see is the ‘1st ch’, and so we want to crochet into the next one!

So, you single crochet into that 2nd chain from the hook… and keep going!

And here’s how it looks! Yippee!

Thanks so much, Tiffany, for emailing in your question! If you guys in the blog-o-sphere have any more… send them my way!

How to Remove Safety Craft Eyes

I recommend using safety craft eyes (the ones with little ridges on the post) for my amigurumi because they’re difficult to remove (meaning they’ll withstand the pulling and prodding of small children). The downside, however, is that they’re difficult to remove – especially when you make a mistake in positioning them.

The best defense, obviously, is to be sure you like them before putting them in (check out my tips on positioning eyes for help!), but we all make mistakes. Ashley recently asked how to remove a pair of eyes… so Ashley, this post is for you!


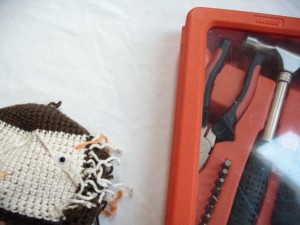
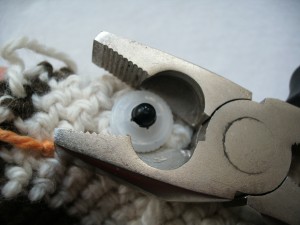
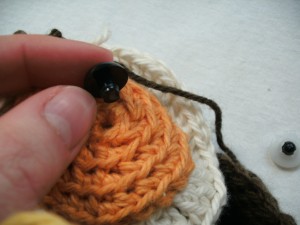
First, you’ll need your toolbox… here, you’ll see my amigurumi owl head (with eyes that I needed to remove because I didn’t like where I positioned his orange eye-circles) and a pair of pliers.

Now, this part can be a little scary… you’re going to have to cut the post, above the washer. Alternatively, you can use a utility knife to cut the washer off of the post (if you’re desperate to save the eye itself), just make sure you don’t let that knife nick your fingers!


Ta da! Now you can remove the eye with ease. Yes, you lost an (amigurumi safety eye) in the process… but you saved your stuffed animal! Hooray!

Here are handy links to all the posts about amigurumi eyes. . .

Return to the main table of contents for Let’s Learn to Crochet Amigurumi.

Move on to the lessons for standing legs.

Happy stitching!

Easy Trick for Counting Rounds in Crochet!

A lot of amigurumi are made by crocheting in the round. When teaching classes, I’ve noticed that counting rounds is something that gives a lot of crocheters trouble… I mean, who wants to count every stitch? In this post, I’ll show you the shortcut that I use for counting rounds.

Let’s do a little example.

I’ve been following my pattern instructions for the first three rounds (read this post if reading patterns baffles you!), and now my pattern says:

Rounds 4-6: sc in each st (18)

How can we do this without counting?

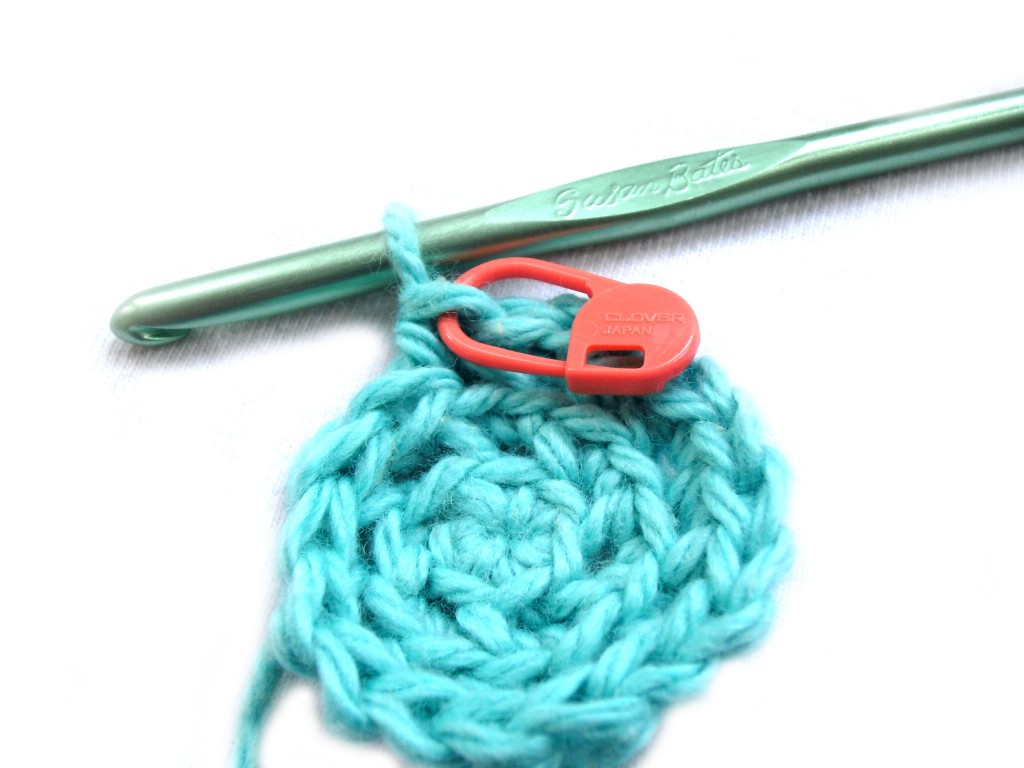
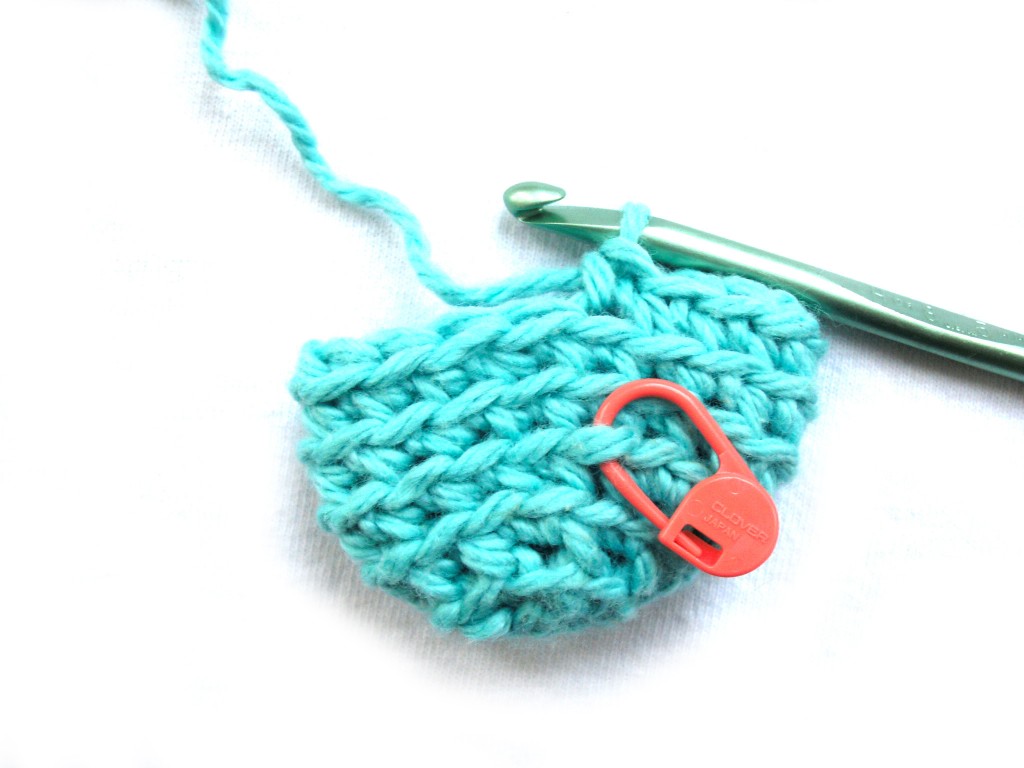
I take a locking stitch marker (the orange thing in the photo above), and lock it onto the last stitch of the round. Then, I’m just going to keep crocheting around and around until I’m exactly 3 rounds above my marker!


Check out the photo above… and you’ll also see why I prefer crocheting through the back loops- each round leaves behind a little horizontal ridge that makes each round super-easy to count!

So, give this trick a try, and you can probably ditch your row counter!

Best,
Stacey

Help for a too-pointy amigurumi head!

It’s Tip Tuesday! Hooray! I just got an email from Pam, asking:

I’m having trouble with making the heads of any animals round, it’s always pointy on the top. Do you know how I can fix that? Thanks!

Happy to help! When there is a too-pointy top, a couple of things could be the problem.

  1. How’s your slip knot? If you’re using a standard slip knot, you could be getting a hole that makes the center puff up. I recommend using the sloppy slip knot (or magic ring, if you prefer) to get a nice center. If you’re using one of those techniques and still getting a point, make sure to pull really tightly! That solves a large number of the too-pointy problems!
  2. Is your gauge consistent? If you are a new crocheter, your gauge is probably changing as you get more experienced. If you begin your piece by crocheting loosely, and tighten up a few rounds later, then the first rounds will puff out- making a pointy top. Try starting again, and try out your new, tighter gauge at the start!
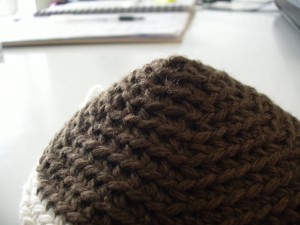
  3. Maybe there is no problem! The heads of animals don’t have to be perfectly flat… they’ll even out a lot after stuffing. Below is a photo of an amigurumi that I just crocheted:

    It may look a little pointy, but it rounded out perfectly after stuffing!
Hope that helps! Happy crocheting!
Best,
Stacey