Patterns & the sale of finished items, one designer’s perspective

I began designing crochet patterns 4 years ago this month (whoa!). Soon after I began selling patterns, I received the question:

Oh, dear. I hadn’t thought about that! So, I looked online to see what other designers did.

The majority of designers did not allow customers to sell the finished items made from their patterns. In fact, the policy seems to spread beyond indie designers: take a peek at the copyright notice in a pattern book or the small print on a McCall’s sewing pattern that you buy from the craft store.

The message is the same:

Surely these experienced companies must know something really important, right?

I, a newbie designer, followed suit. I replied to my customers that my patterns were for personal use, only. (don’t worry… this story has a happy ending, so keep reading!)

The Fear Factor

Why don’t many designers permit customers to sell finished items from their patterns? Let’s take a look at some of the reasons I read:

  • Allowing customers to sell finished items allows factories in China to mass-produce your design, making millions of dollars and stealing your potential customers.
  • If you allow a customer to sell finished items from your pattern, they could make thousands! And they only gave you $5! That’s not fair!
  • What if you allow a customer to sell items made from your pattern, but the crocheter has very poor craftsmanship. Then this will reflect poorly on your design.
  • If someone sells items from your pattern, it takes away customers who will buy the finished items you make!
  • Allowing people to sell items from your pattern promotes the illegal copying/distribution of your pattern.

Boy… the designing world is suddenly a very scary place, isn’t it?

Everything I read suggested that if you allow customers to sell items made from your pattern, you’re signing the death certificate of your design company. Scary stuff!

But… do any of the items listed above seem a bit extreme? Uh, yeah… they did to me, too.

Having a serious think about the problem

After a while (as I gained confidence as a designer), it became less clear to me that prohibiting the sale of finished items from my patterns was the right thing to do. So, I looked at all of the reasons I read about, and had a really serious think about them.

Below are my thoughts about each of the points mentioned above.

Allowing customers to sell finished items allows factories in China to mass-produce your design, making millions of dollars and stealing your potential customers.

This is a really common fear amongst designers: that a factory in China (or Vietnam or wherever) will snatch up your design and mass-produce it without your permission. We see these knock-offs happening to designers of red-carpet gowns the day after an awards show.

But, here’s the important question for our discussion: is allowing customers to sell items made from your pattern make knock-offs any more likely? My opinion is: no. Firstly, the knock-offs that happen are knock-offs precisely because they are copying your design, meaning they don’t care if they have your permission or not. Put differently, your design can be stolen at any time. Secondly, if you allow customers to sell finished items, you are not also licensing out the mass-production of your design.

Finally, crochet is notoriously difficult to mass-produce. So even if a factory fell in love with my design, it’s unlikely it would be profitable for them to reproduce it. They would turn to a knitted/sewn design, instead.

If you allow a customer to sell finished items from your pattern, they could make thousands! And they only gave you $5! That’s not fair!

Let’s get serious. No one is becoming rich by hand-crocheting items from home. In fact, I frequently talk about how to make a profit at all!

The fairness issue is something to mull over. Some designers license their patterns to crafters. For example, if you wanted to sell owls, you might be charged a ‘cottage-industry fee’ (maybe $50) to get permission to sell items made from my owl pattern.

To resolve this issue for myself, I had to think about my customers. I made up a customer, Zoe:

Zoe represents my typical customer. She loves to crochet, and her family and friends have asked her to make some stuffed animals for them. Because she values her time, she wants to charge for making a stuffed animal. Let’s pretend that I charge her a fee. One of three things will happen:

  • Zoe will think the fee isn’t worth it, and will use another pattern that permits her to sell the finished items without a fee.
  • Zoe will decide that the fee is too expensive, so instead of charging for her hard work, she will give the animals away so that she isn’t ‘selling’ them.
  • Zoe will pay the fee, significantly reducing her profit.

You see… most of my customers want to sell just a few finished products. Charging a fee would significantly impact their product.

And realistically, I want them to use my pattern! I love seeing people make items from my patterns. Why drive them away from my patterns by charging?

What if you allow a customer to sell items made from your pattern, but the crocheter has very poor craftsmanship. Then this will reflect poorly on your design.

Hmm… I suppose this is true. But frankly, people will crochet what they crochet and post the photos online regardless of whether or not they are selling them. And they’ll link to your pattern. Not sure what you can do about that.

The flip side is true, too! Customers will post beautiful photos as well! And oftentimes, the crocheter is happy to let you post the photo on your company’s Facebook page.

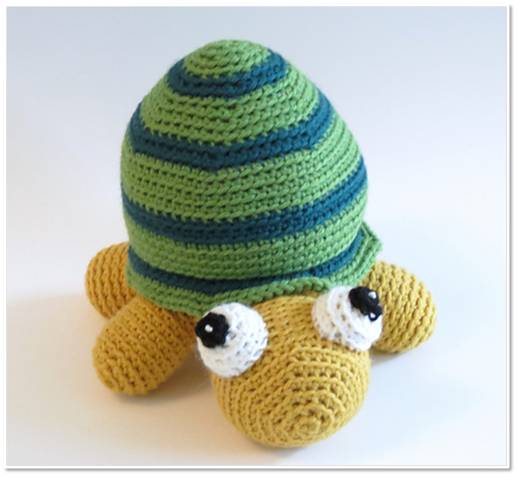
A photo of my Tino the Turtle, crocheted by Adriana. Just one of the many beautiful customer photos I get!
In my opinion, the solution is to promote the lovely photos instead of attempting to disconnect yourself from your patterns.

If someone sells items from your pattern, it takes away customers who will buy the finished items you make!

How severely this ‘scare’ affects you depends on your business model. My business is to sell patterns. I actually don’t have time to make many finished items for sale. So, if others sell finished items, it doesn’t take business away from me!

In fact, others selling finished items actually increases my business, because more crocheters are buying my patterns!

Allowing people to sell items from your pattern promotes the illegal copying/distribution of your pattern.

Uhh… I’ve read this a lot, but I just don’t understand how it could be true. People make illegal pdfs. But this is totally unrelated to whether or not you allow crocheters to sell finished items.

My policy

Have I busted all of those scary scenarios? I hope so!

I decided that, for my business, it was actually beneficial to allow customers to sell finished items from my patterns. Why?

  • It results in increased pattern sales: from customers who choose my patterns over others because I permit the sale of items.
  • I benefit from the increased number of projects connected to my patterns. If a crocheter makes 20 owl for sale, those 20 owls are listed on Ravelry, making my pattern more popular.
  • Customers are often keen to share their photos with me, and posting these additional photos on my Facebook page shows the variety of colors that look great in my pattern!
  • I am personally passionate about helping crocheters make a fair wage from their handiwork. By not charging a licensing fee, I am contributing to making stitching a viable wage-earning job.
  • I couldn’t find any reason not to allow folks to sell the items!

So here’s my policy: You are welcome to sell items from my pdf patterns. I ask that you include a note about the item being a ‘FreshStitches Design’ on the tag (at a craft fair) or a link to my shop (in an online store like Etsy).

It makes me happy. It makes my customers happy. What could be better?

Chime in!

Are you a designer? What’s your policy and why?

Are you a crocheter? How does the ability to sell finished items affect your pattern purchases?

I want to hear!

Best,
Stacey

How I designed 10 monsters (without getting bored)!

Do you want to know the question I’m asked most often?

No kidding. Almost everyone asks me this. It was actually the only downside that my husband brought up when I began designing. “Aren’t you going to run out?”

In fact, the inverse is true: the more I design, the more ideas I get!

The key: flourish in the constraints

Do you watch Project Runway? Most of the time, the participating clothing designers are given difficult constraints: like designing a garment using $250 of candy.

And what challenge to contestants usually say is hardest? The one with the least constraints. While you might think it’s freeing to be able to do whatever you want… it’s actually debilitating. How do you know what to do? What criteria do you use to make your choices?

In my designs, I set a lot of constraints:

  • The yarns must be commercially available and easily substituted.
  • There can be no more than one technically complicated stitch (for example, the loop or bobble stitch)
  • Overall, the design must be accessible to a crocheter who has accomplished one simple amigurumi, and is open to learning a new skill.
  • Any new technique that I use must be accompanied by a video/descriptive blog post to assist my customers.

Why do I do this? I began placing these constraints so that my customer would receive the best possible pattern. With these constraints in place, my customers are guaranteed that:

  • they won’t get lost in a pattern due to insufficient photos/videos/help.
  • the quality of the finished product isn’t dependent on non-quantifiable artistic skills (because I have none!). If they follow the directions (attach to round 25), then their finished product will look lovely!
  • the pattern is accessible to their skill level and fun (uh… no color changes with a loop stitch and attaching felt pieces at the same time!)

This makes customers happy. But, over time, I discovered… the constraints make my designing happy!

The tale of 10 monsters

A few months ago, I was asked by Knitting Fever (the distributor of Ella Rae Classic, a yarn I frequently use in my designs) to design 10 monsters for distribution on their site.

Now… you get to ask that gem of a question: how do you design 10 monsters without getting bored?!? And, how do you come up with 10 different monsters?

I’m not going to fib… the number 10 even had me a little worried. After all, I’ve taught a course on designing your own monsters (which included patterns for about 7 monsters), and I couldn’t repeat any of those!

I started sketching…

As I was sketching, I knew it was not only important that I didn’t feel bored with my monsters, but that a customer would really want to crochet all 10… and love every minute of it! That meant that every monster needed a purpose: a novel shape or technique. And what’s that? More constraints!

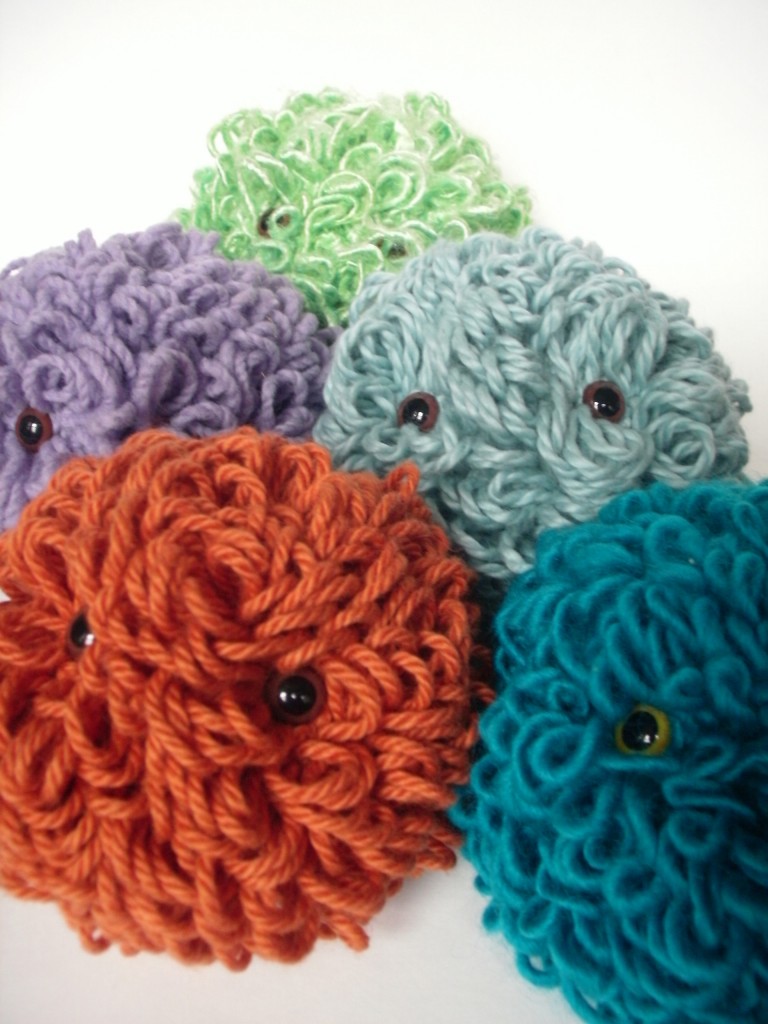
In the end, I came up with 10 that I really loved:

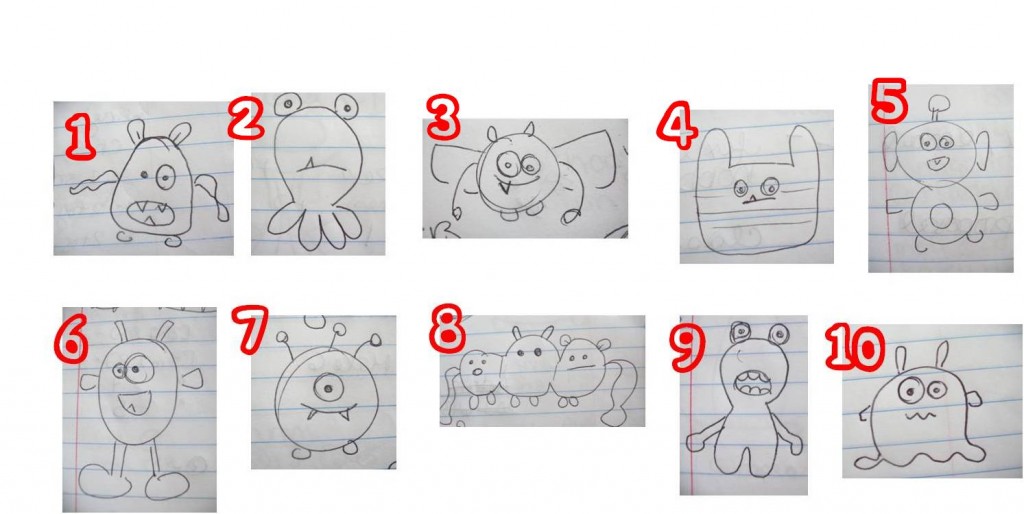
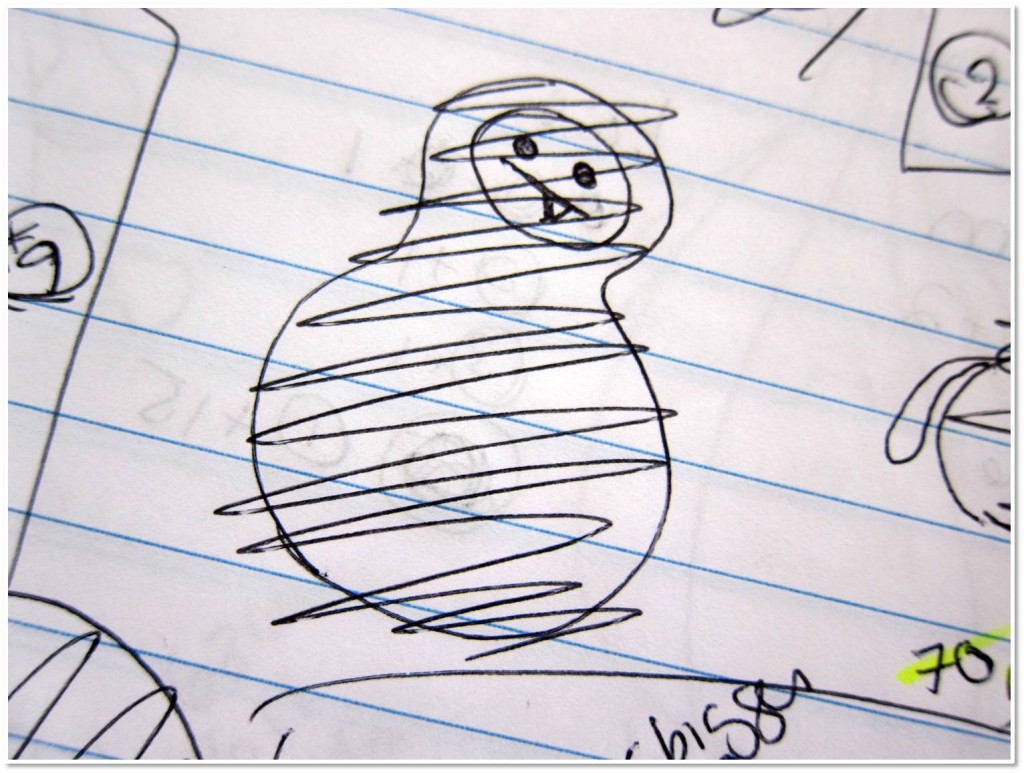
And some that didn’t make the cut:

Among the winners were some great techniques, shapes and skills that I new customers would be excited about:

  • Legs that are joined as you crochet, instead of the usual stitch-them-on-afterwards
  • A ruffle!
  • Stripes that make use of stranding as you change colors
  • A fun rectangular-shape that uses working the bottom side of the foundation chain to begin
  • A monster that begins with a long chain: and not the standard circle
  • Funny antennae that make use of pipe cleaners for structure
  • Crocheted-on mouths with (simple triangle) felt teeth

All of these features (at least I hoped!) would make the crocheting exciting, but also teach the crocheter a skill that they could apply to other animals. Don’t like the mouth on a pattern? Now you’ll know how to crochet a smile and stick on a felt tooth!

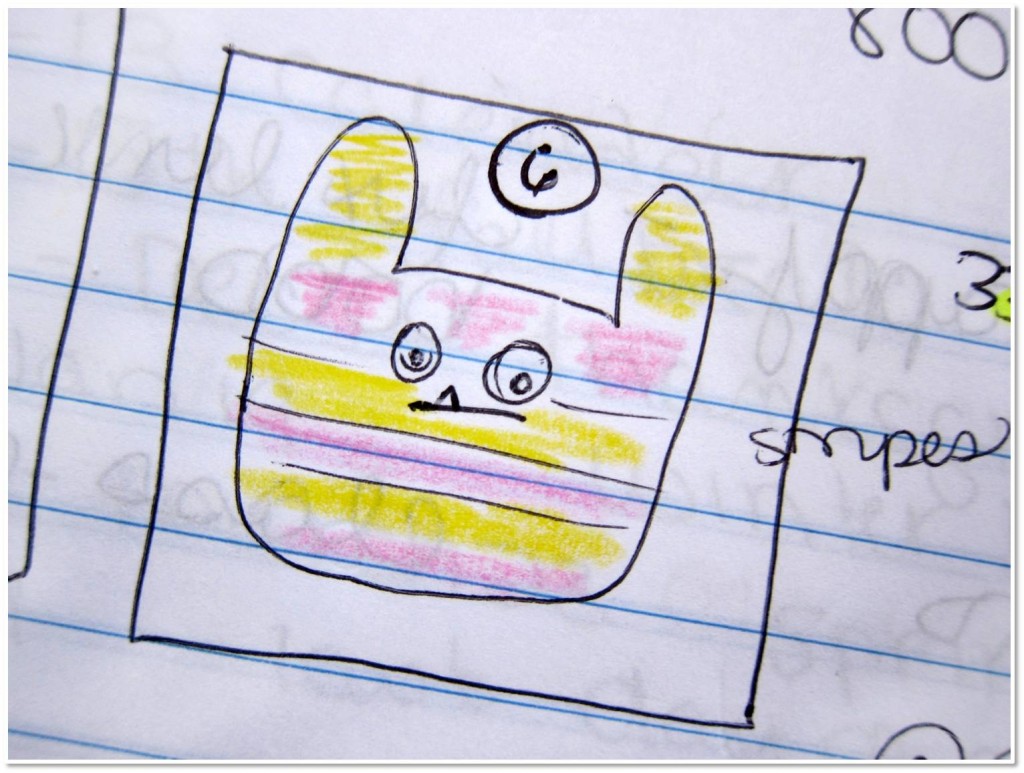
Once I had my faves, I colored in my sketches so I could figure out which colors of yarn I’d like to use:

So does this mean that I could design another 10 monsters? I don’t know… maybe! But I can say that what helped me is coming up with specific goals (aka constraints) that I wanted each design to accomplish.

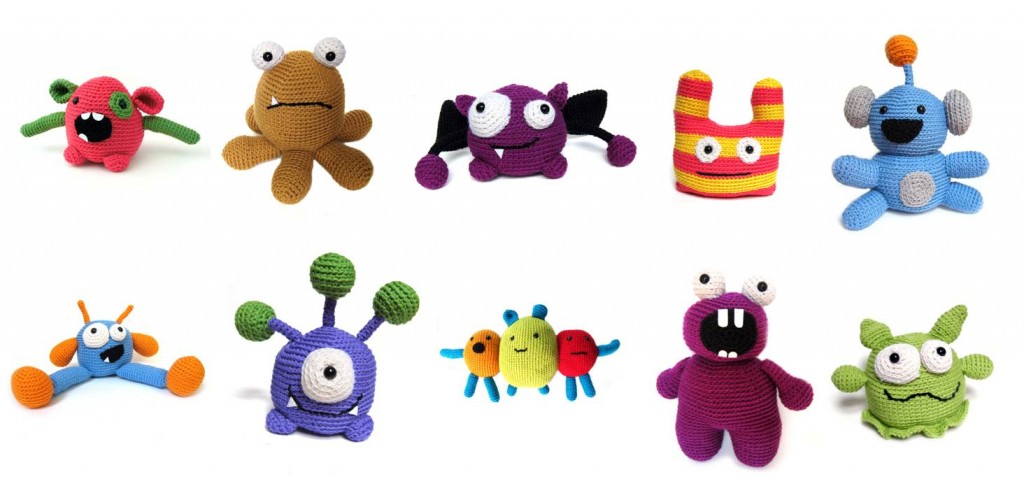
The finished monsters

Here’s the whole gang… do you like them?

I hope you do!

And you can have them all!

All 10 of these patterns are available as free downloads from Knitting Fever! Isn’t that awesome?

I really hope that you grab them and enjoy the process of crocheting these fun monsters!

Thanks for stopping by and reading!

If you want to see more great finished items… make sure to visit Tami’s Amis blog, the organizer of this great FO Friday theme!

I hope you have an awesome and craft-filled weekend!

Designing a Banana Slug: a peek into the process

Right now, I’m in Santa Cruz, CA… tagging along with the hubby who has a conference to attend at the University of California, Santa Cruz.

In case you didn’t know, the UCSC mascot is a banana slug:

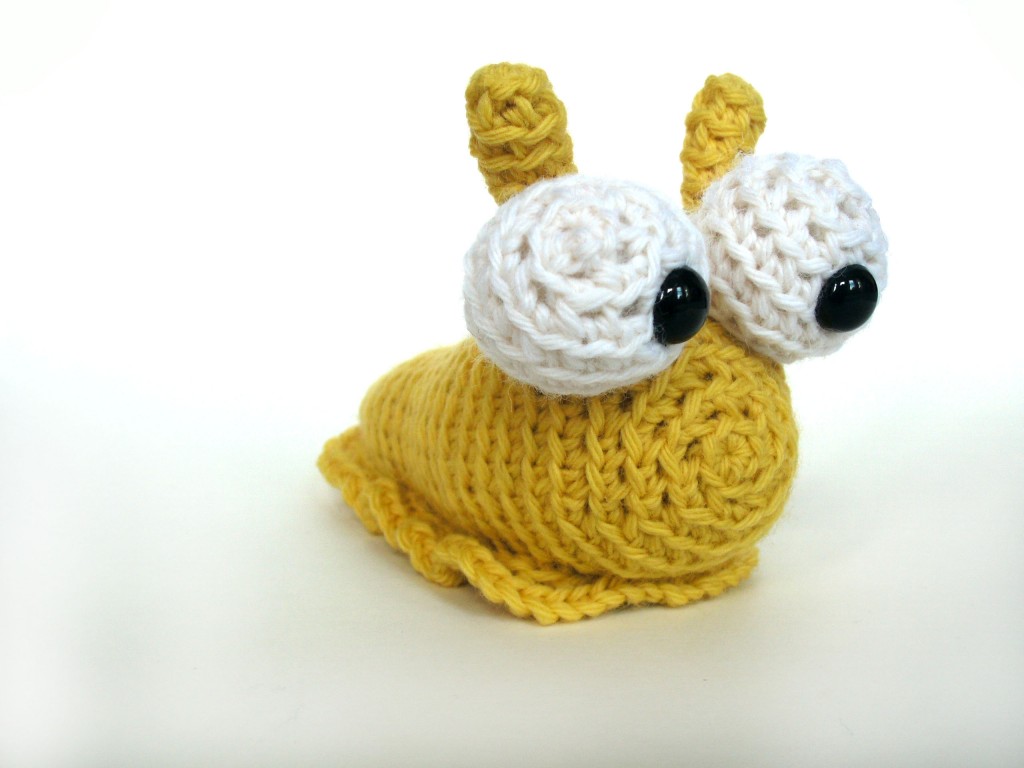
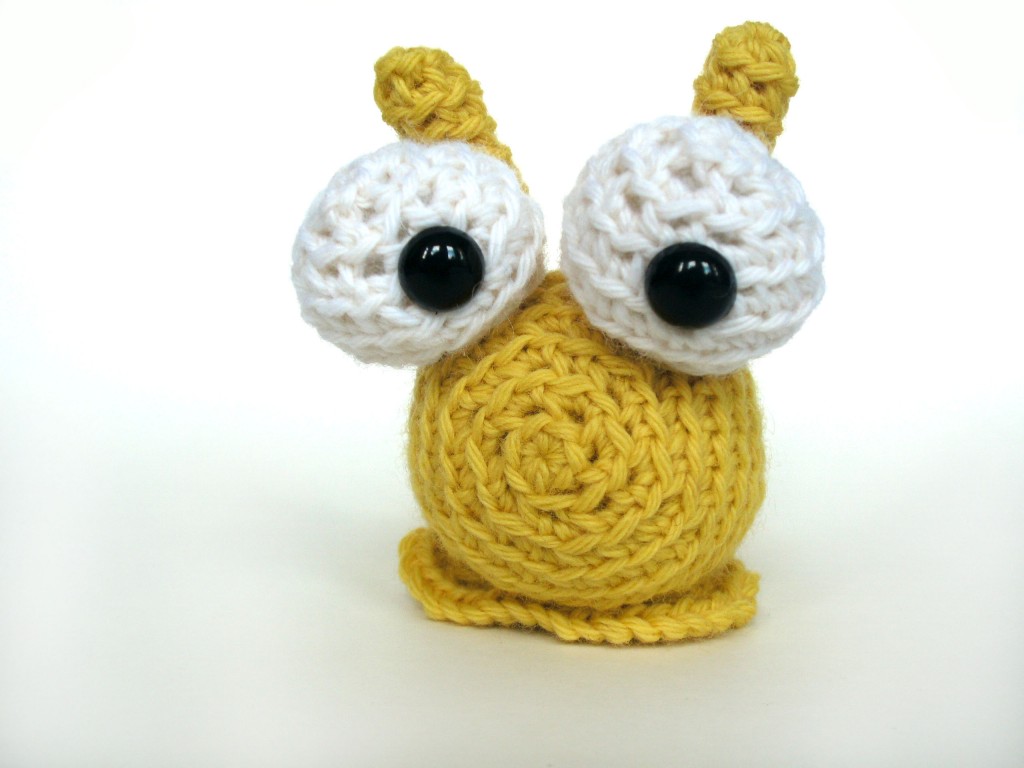
It’s not a fierce mascot, but a darn cute one. I, personally, am a lover of snails and slugs, so I just couldn’t help but to design a crocheted banana slug for the occasion:

How did I design a banana slug… you may wonder? Here’s how it went:

The sketch

When I’m designing a plushie, I want to make sure that I’m not copying anyone else’s design… and that my design is different enough from existing designs so that it’s clearly my own.

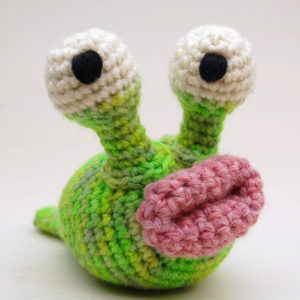
In the case of slugs, there is one undisputed queen of crocheted slugs, and that’s Cheezombie.

image from Cheezombie’s Etsy Shop
Cheezombie’s slug is characterized by a big mouth, eyes on stalks and a distinctive tail shape.

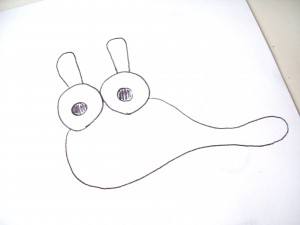
Fortunately, the sketch I had in my head of a slug was quite different:

My idea for a slug had no mouth, buggy eyes and separate antennae. Different and adorable- it was time to get crocheting!

As an aside: I don’t always sketch before I start crocheting. In this case, I had an idea in my head and got straight to work. I just drew this sketch for you to see… I’m so terrible at drawing that making a sketch rarely contributes much!

Starting to crochet

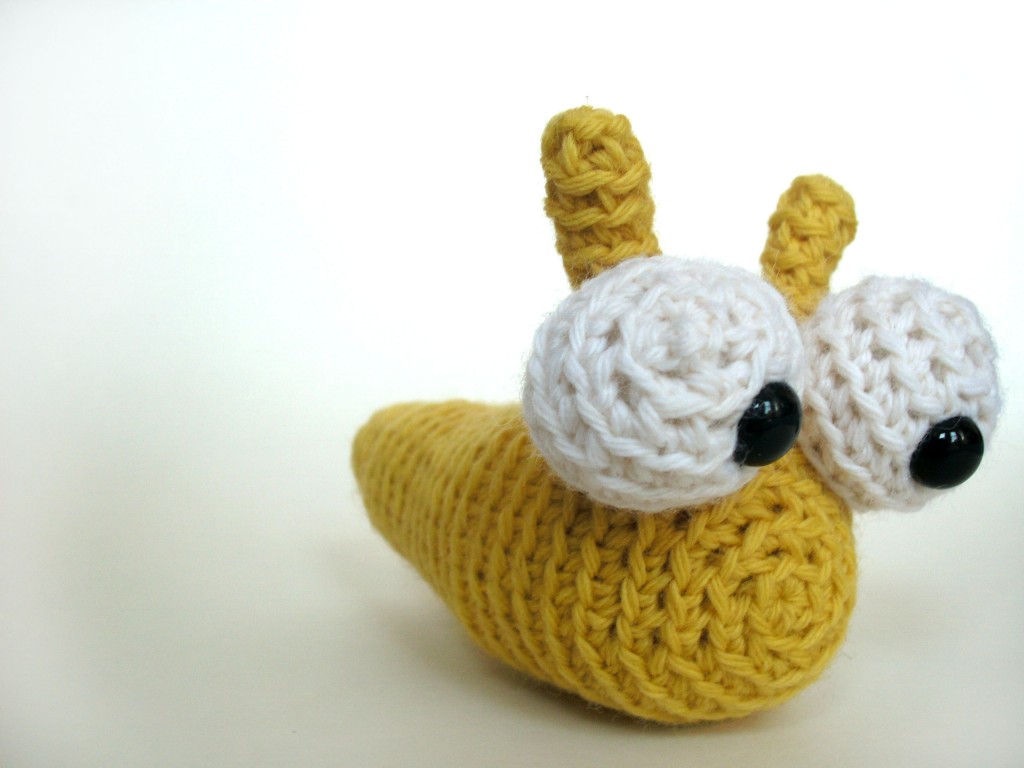
I started crocheting the pieces according to the idea I had in my head… and came up with a guy who was pretty cute:

He was cute… but had two problems:

  1. He was a bit front-heavy, meaning that he’d topple forward unless positioned very carefully.
  2. He just didn’t look… well, slug-y enough!

What to do?

Then it hit me… he needed a foot-ruffle!

The finished slug

I added a foot ruffle, and was very pleased with the result!

The ruffle allows him to sit nicely without toppling, and added that extra slug-i-ness I was looking for!

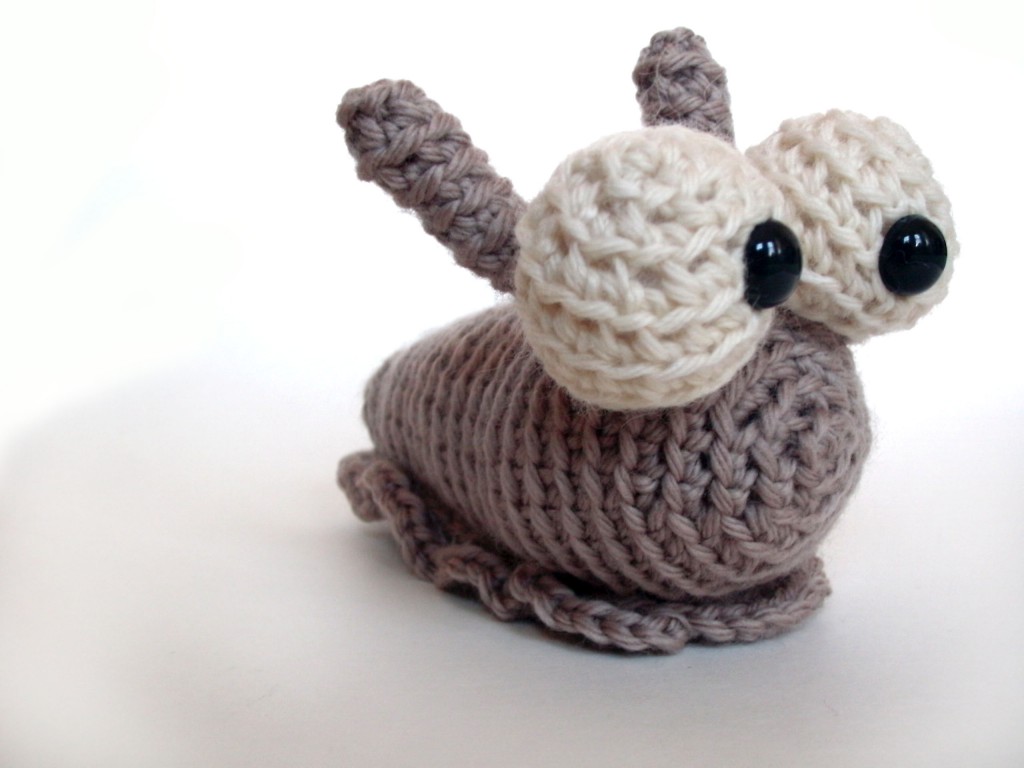
I loved him so much, that I made a ‘normal’ slug color as well:

Look out for the pattern!

That was a little peek into my process: a little sketching (sometimes), then crocheting and adjusting until it comes out right!

Get the pattern here.

Best,
Stacey
How to crochet a smaller amigurumi!

The easiest way to make a smaller amigurumi is to use thinner yarn and a smaller hook. You can even use embroidery thread!

But if you want to use regular yarn, there’s still a way to do it!

You’ll need to do some figuring on your own, but altering existing patterns is the first step to designing your own… so give it a try!

As an example, I’m going to talk about how to make any size Mike the Microbe, from my book Crocheted Softies. Feel free to try it out with any pattern!

Identify the parts of the Pattern

Have a good look at your pattern, and try to identify big chunks of the pattern.

When you have a look at the small microbe’s pattern, you’ll notice that rounds 1-9 are increase rounds (rounds where you add stitches), followed by 7 plain rounds (where no increasing or decreasing occurs) and 8 decrease rounds (rounds where you decrease stitches).

Start crocheting… with fewer rounds!

Mike the Microbe is adorable as is… but how do you make him smaller? Crochet fewer of all kinds of rounds!

I crocheted one baby microbe by crocheting 5 increase rounds, 3 plain rounds and then 5 decrease rounds to finish.

After the end of 5 increase rounds, I had 30 stitches… so when it was time to decrease, I started at round in the decrease instructions that had 30 stitches. Who knew so many instructions were built into the pattern?

Make features smaller, too!

Follow a similar logic for making smaller features… working fewer increase and plain rounds. Above, I decided to omit the buggy eyes- they were too hard to make smaller!

I also made a microbe adding the eyes that were in the pattern without modification- notice that they’re proportionally bigger on the body… but I think that’s cute, too!

So tiny and so cute!

Try it on everything!

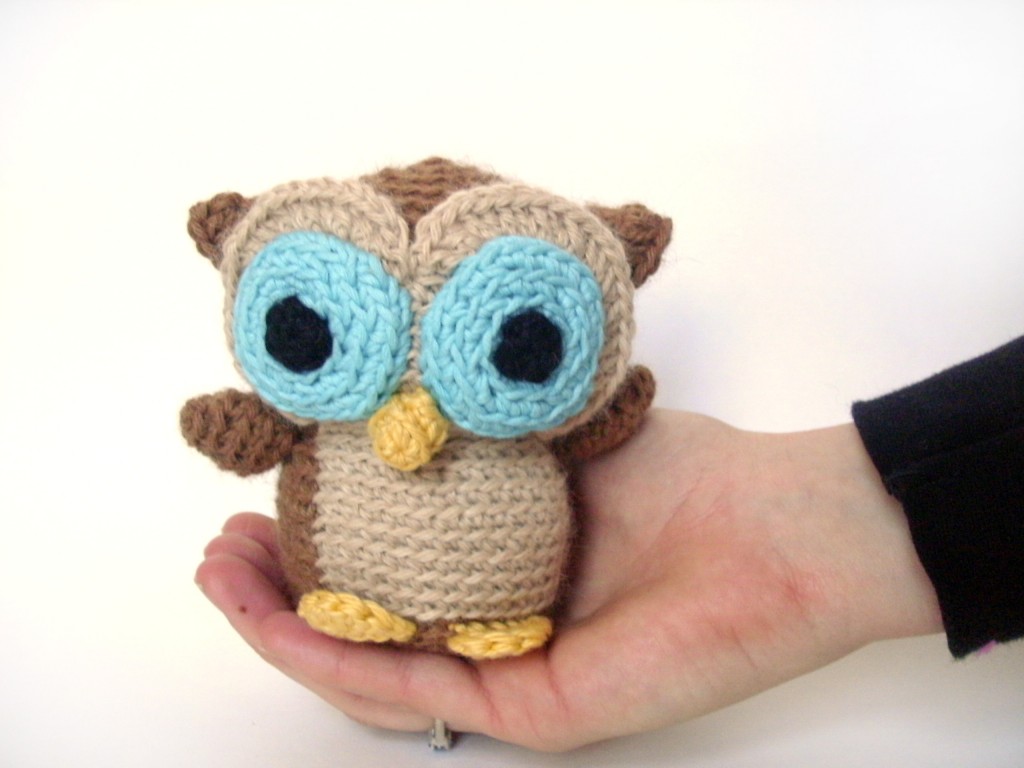
Once you’ve tried ‘shrinking’ a simple pattern like a microbe, it’s time to this trick with other amigurumi! I crocheted a tiny version of Nelson the Owl by crocheting 5 increase rounds and 5 plain rounds instead of the 10 called for in the pattern.

I worked fewer increase rounds on the wings and eye circles… and it’s important to keep in mind that it’s okay if the smaller version doesn’t look exactly like the bigger version. As long as it’s cute, you’re doing great!

Hope you give ‘shrinking’ some amigurumi patterns a try!

Here are handy links to all the posts about crocheting stuffed animals in different sizes. . .

Return to the main table of contents for Let’s Learn to Crochet Amigurumi.

Move on to the lessons for crocheting more advanced shapes.

Happy stitching!

Different ways to space crochet increases!

Happy Tip Tuesday, everyone!

I’m going to chat about a topic that’s very important to amigurumi-making: increases. Why is it so important? Because almost every amigurumi requires that you increase! Today, I’m going to compare two popular ways to position your increases, so when you’re crocheting, you can pick the way you like best!

For this blog post, I’m going to assume that we are crocheting a piece in the round, using the spiral method- that’s going around and around without turning (if you don’t know what I mean, fear not! I’ll talk about the different ways to crochet in the round another day!). To increase, you simply crochet twice in the same stitch… but there’s more to it than that!

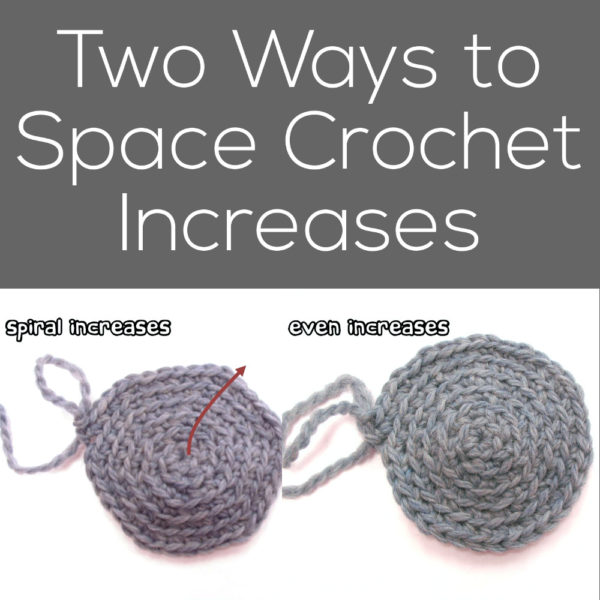
There are two basic ways to space your increases: spiral increases and evenly spaced increases. They give slightly different looks, and different folks prefer different techniques.

Spiral increases


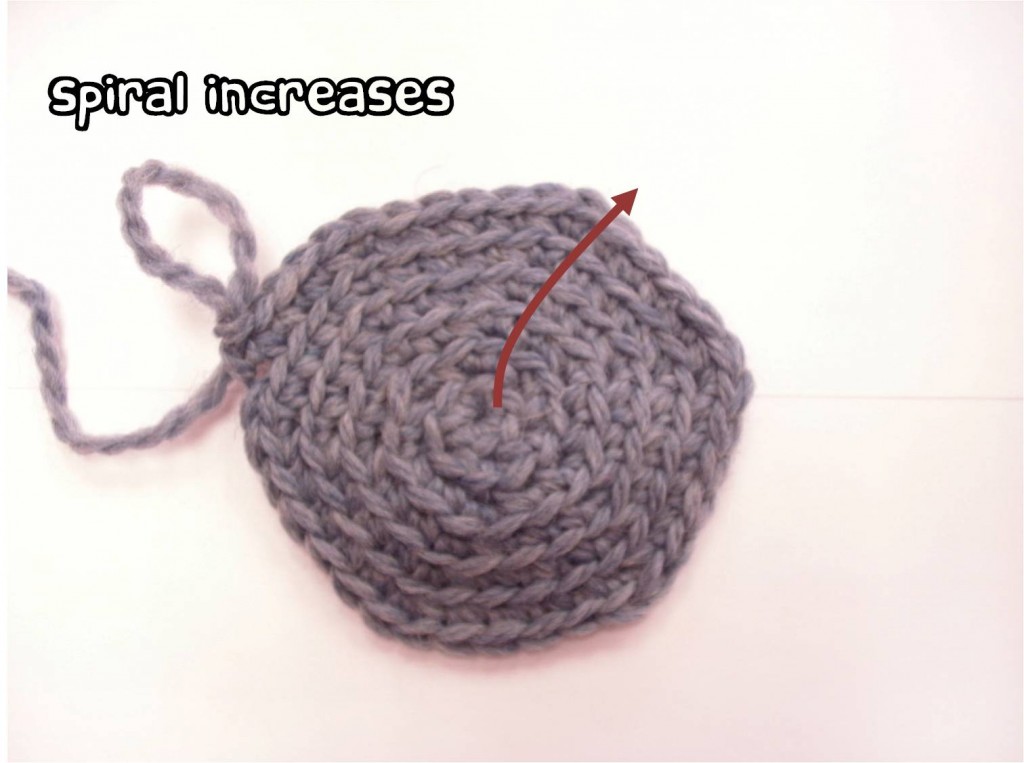
One way to increase is the ‘spiral increase’ method, where you position the increases at the same spot in every round. Instructions for this type of increase typically look something like:


Round 4: [sc twice in next st, sc in next 2 sts] 6 times (24)
Round 5: [sc twice in next st, sc in next 3 sts] 6 times (30)
and so on…

In this technique, the increases occur evenly spaced from each other, and at the same spot every round, so you can see a spiral shape occurring (see the arrow in the photo above) with the increases.

Advantages to the Spiral increase technique

  • The instructions for doing this technique are easy to write/read
  • Because you are increasing at the same spot every round, you can eventually learn to increase without counting (yay!)

Disadvantages to the Spiral increase technique

  • Only works well if you are making a simple circle (and not a more complicated shape)
  • Some people don’t like the look that the spiral makes

Even increases


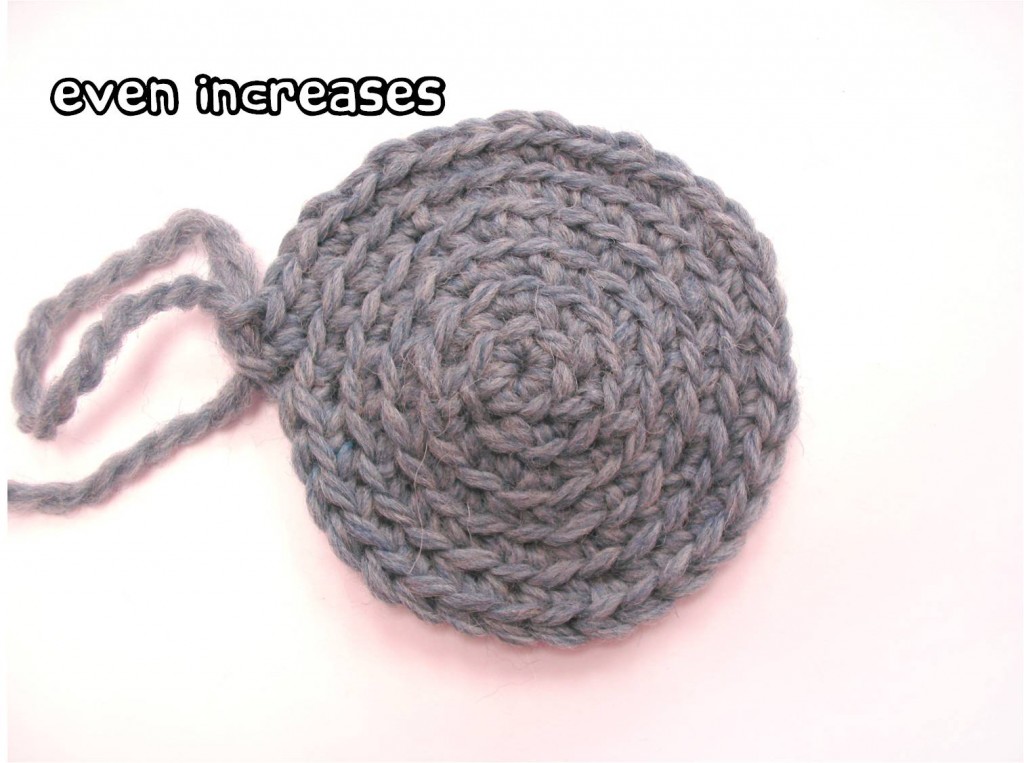
A second way to increase is to position the increases at random (but evenly distributed) around the round. Instructions for this type of increase typically look something like:


Increase 6 sts in each round for the next 4 rounds.

In this technique, the increases don’t occur in the same spot every round, so they become a less pronounced part of the design. Notice how this increase results in a more circular shape, as compared to the spiral increases, which make a hexagonal shape.

Advantages to the Spiral increase technique

  • The instructions for doing this technique can be very condensed
  • Because you only need to make sure to increase 6 times per round, counting isn’t very necessary
  • Some people find the roundness more aesthetically pleasing

Disadvantages to the Spiral increase technique

  • It can be difficult to make sure the increases are randomly distributed
  • Although the instructions are short and condensed, they can be tricky to spell out, and can be tricky for beginners

What will you choose?

It’s a personal choice that’s up to you! I’m a spiral-increase kind of girl… what kind of increaser are you?

Best,
Stacey
Creating cone shapes in amigurumi

Want to learn how to make adorable crocheted stuffed animals with an easy online workshop – totally free?

Sign up for Let’s Make Amigurumi here. You’ll learn how to get started, the tools and supplies you’ll need, and how to make an easy amigurumi from start to finish using simple crochet stitches.

It’s a fun, inexpensive, and totally portable craft. You can do it!

A basic amigurumi circle is made by working an increase round (usually 6 evenly-distributed increases) every round. This standard pattern of increasing is how you get nice round shapes, such as the baby penguin’s head and body.

crocheted baby penguin

In this blog post, we’re going to show how changing the number of increase rounds can provide you with different cone shapes. Once you’ve learned how to make them, you won’t want to stop!


In sample #1, we’ve increased every other round (working the remainder of the rounds without increasing). This creates a cone with about 45 degree-angle sides. If you increase every third round (as we’ve done in sample #2), you the head of my squid and I’ve used this shape in making the hat for my gnome. Can you think of other animals that might have a cone shape in them?

There are already oodles of possibilities for what you can do with cones… but you can do even more! All of these shapes can be flattened, and used for other amigurumi parts. For example, I used a flattened elongated cone as the hat in our holiday penguin. Flattened cones can also be used as dinosaur spikes, pointy ears… and so much more!

I hope that you have fun experimenting with some fun cone shapes!

Easy Cowl Tutorial

SUPER easy cowl pattern FREE
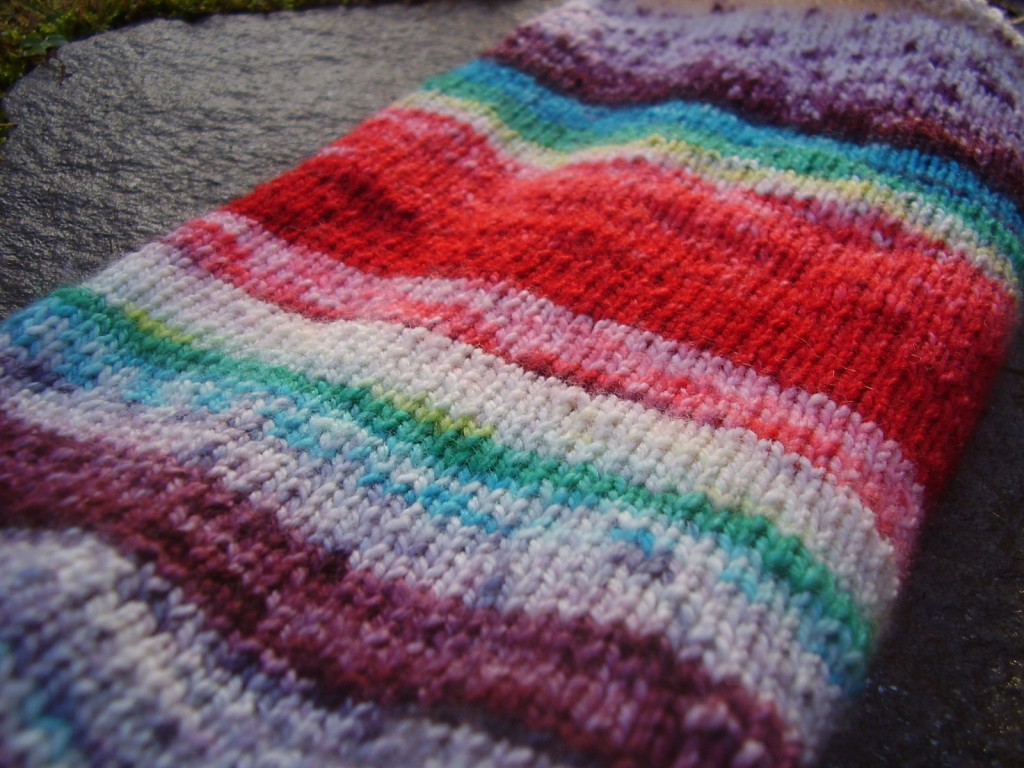
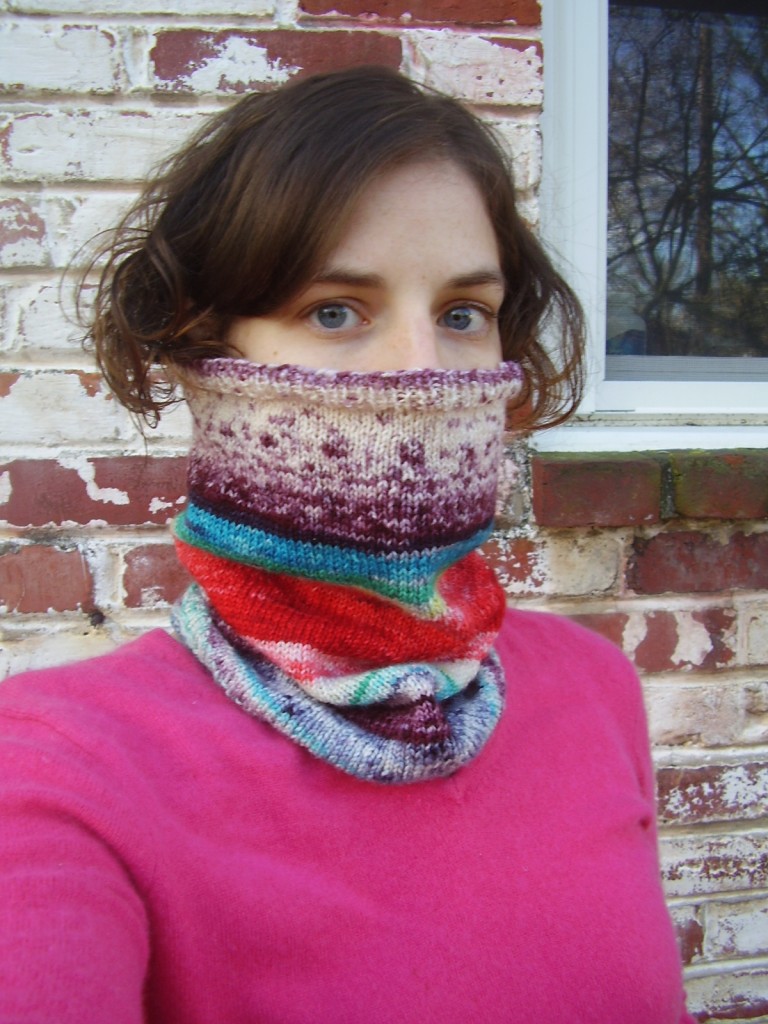
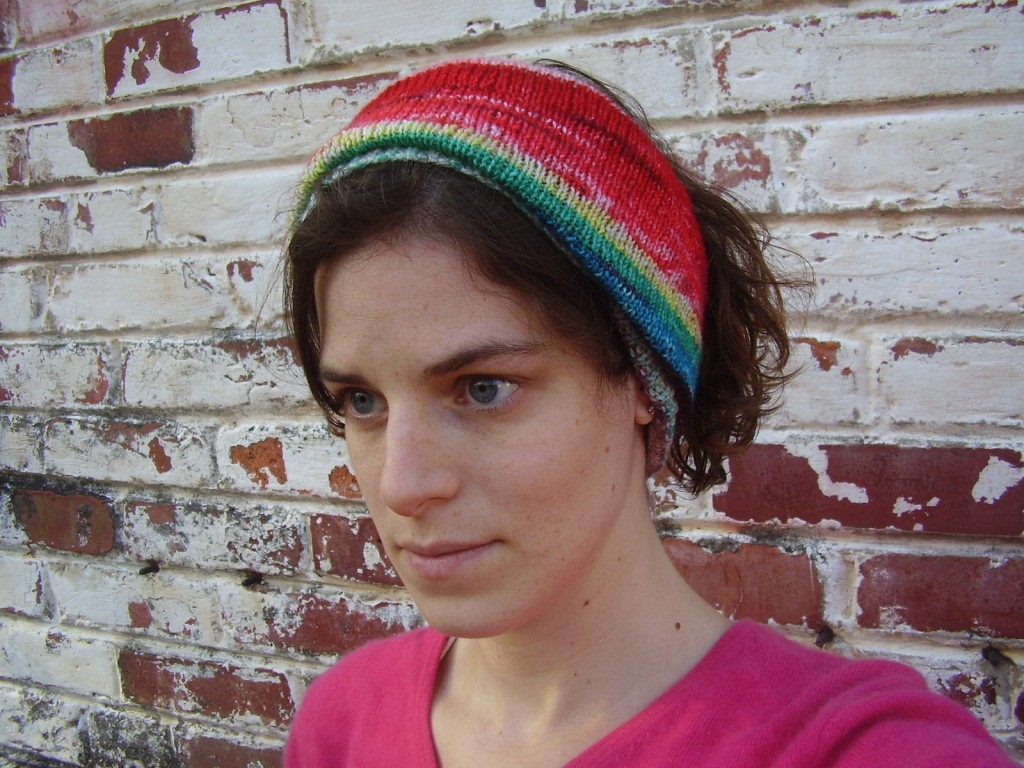
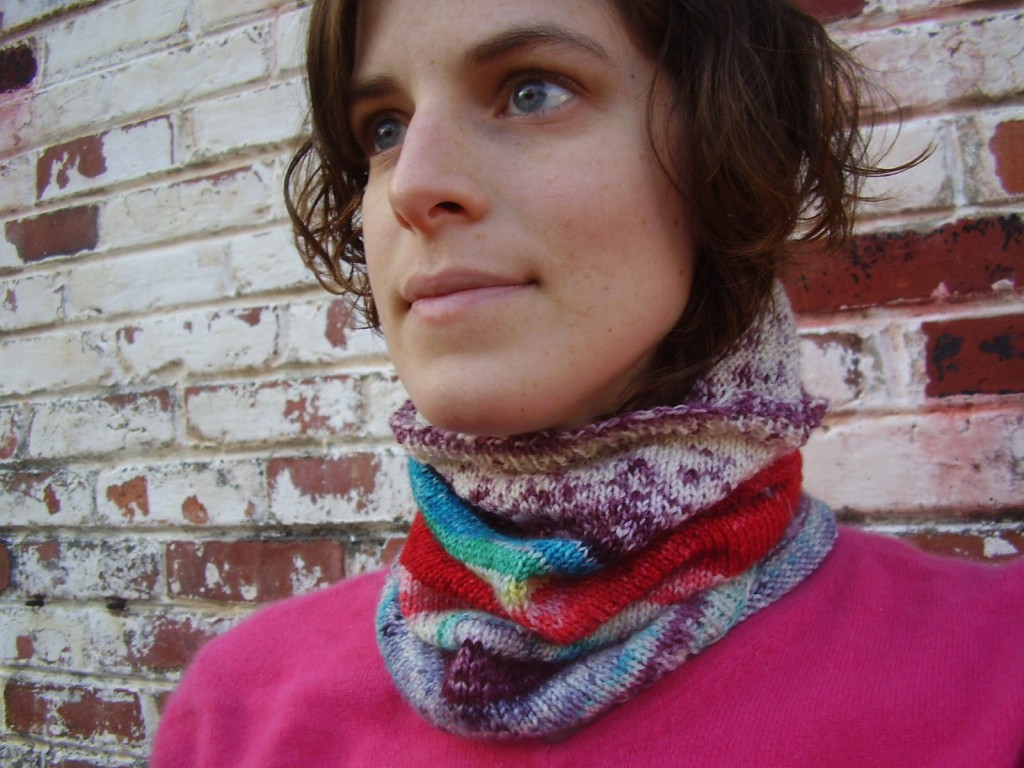
I’ve talked about dyeing yarn with Kool-aid… and now I have a finished project: an awesome cowl! Cowls seem to be everywhere this season, and I love them because they’re so versatile. As you can see in the photos above, they can be worn around the neck as a scarf, on your head like a hat, rolled up like a headband, or as a hood!

SUPER easy cowl pattern FREE
I knitted a simple stockinette cowl so that the color changes of the yarn were the main feature. It’s a fairly easy pattern that allows you to use any yarn you want! Here’s what you do if you want a simple cowl like mine:

  1. Pick your yarn and an appropriately sized needle. I selected a fingering weight yarn, and a size 5 needle (slightly large for the yarn), to get a loose, soft fabric.
  2. Knit a test swatch to determine your gauge (number of stitches per inch). Try to do a 4×4″ (10x10cm) swatch to get a good idea. My gauge was 6 sts/inch.
  3. Measure your head and calculate how many stitches it will take to get around it. My head is 21″ in circumference, and I wanted a tight fitting cowl, so I aimed for a 19″ cowl circumference. If you want a looser fit, just make this number larger. To calculate, multiply the number of inches by number of stitches per inch. I needed 19×6, or 114 sts.
  4. Cast on the number of required stitches (rounded to an even number).
  5. Knit in a ribbing for an inch or so. I did a 1×1 rib (knit one, purl one, and repeat), but if you have a multiple of 4, you could do a 2×2 rib.
  6. Knit in stockinette. I knit until I was close to using up the full skein, which ended up being about 12 inches… but you can keep going until you have the length you want!
  7. Knit another inch or so of ribbing, and cast off.

SUPER easy cowl pattern FREE

That’s it! It’s a simple cowl that will show off a lovely yarn texture or color. I hope to enjoy my cowl all winter long!

SUPER easy cowl pattern FREE