Free Pattern – Easter Accessories for Toys

Easter Eggstras - Free Pattern for Easter accessories for toys from Shiny Happy World

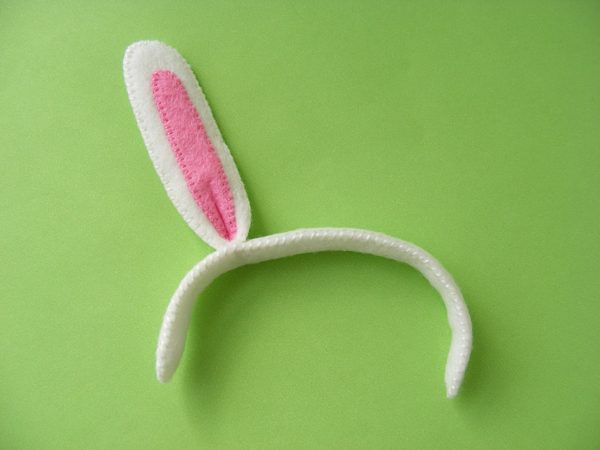
You know what your favorite toy needs for Easter? Adjustable bunny ears and a tiny embroidered egg!

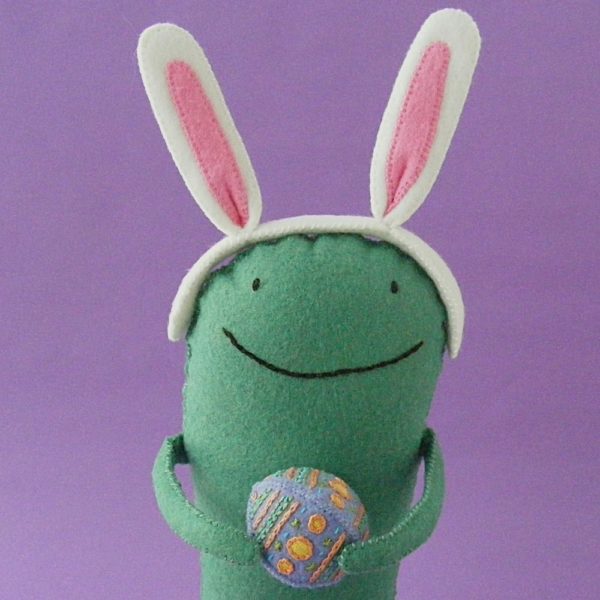
I made these to fit The Oddballs – but guess what? They fit all kinds of things!

In a completely unscientific test, my daughter and I tried them on almost all the softies in the enormous pile on her bed.

(Seriously. I don’t know how she can sleep in there!)

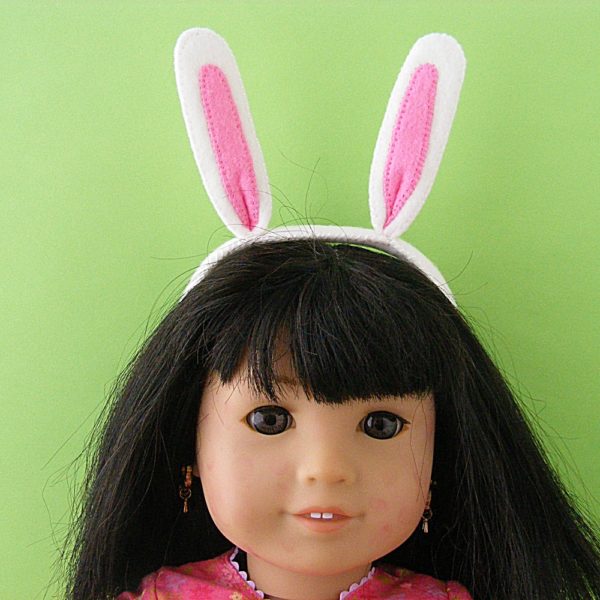
They fit tons of random teddy bears and softies – including her old American Girl dolls. Look at Ivy in her cute bunny ears!

Ivy (American Girl doll) wearing felt bunny ears made with a free pattern from Shiny Happy World

Ignore the red splotches on her face. Jo was obsessed with diseases for a while and stuck clay dots all over Ivy’s face to give her smallpox.

FYI – red modeling clay will stain the skin of American Girl dolls.

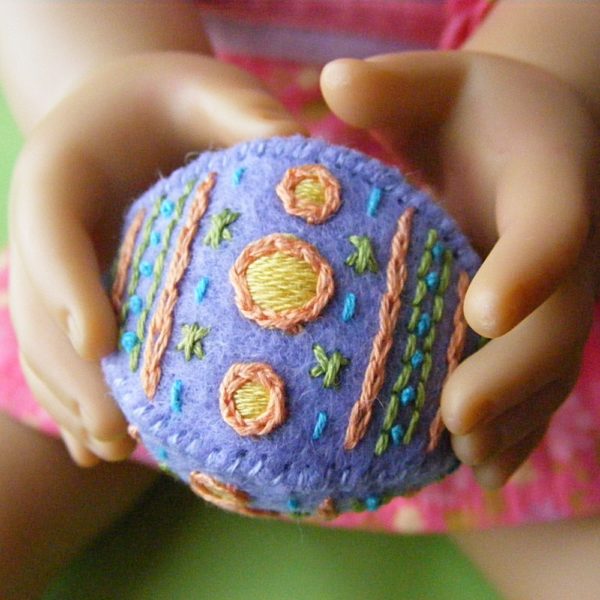
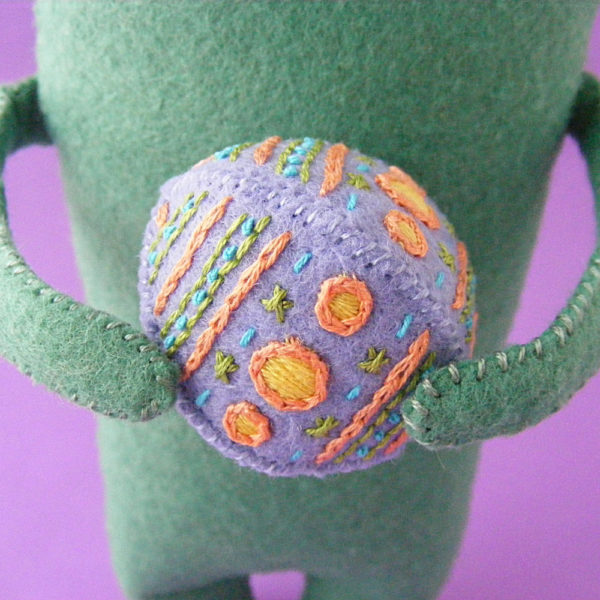
And here’s the egg in Ivy’s hands. It’s tiny – just 2 inches tall.

You can make bunny ears and eggs for your favorite toys. 🙂

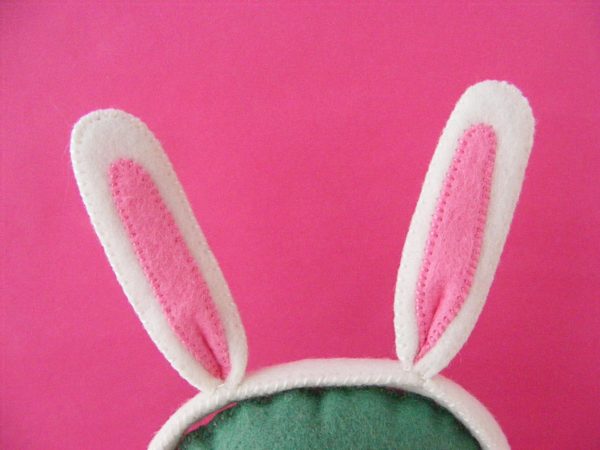
Close up on felt bunny ears made with a free pattern from Shiny Happy World

Here’s how.

Download the template pieces here.

Make the Bunny Ears

You’ll need. . .

  • scraps of wool felt in white and pink
  • two 12 inch pipe cleaners
  • matching embroidery thread
  • freezer paper

You can find links to all my favorite tools and supplies here.

Step 1

Trace or print the ear and headband pieces onto some freezer paper. Fuse to the felt and cut out all the pieces. Cut right through the freezer paper and felt together, then peel the freezer paper away. It’s the easiest way to accurately cut small shapes like this.

Step 2

Whipstitch applique one inner ear to one larger ear piece using thread that matches the inner ear.

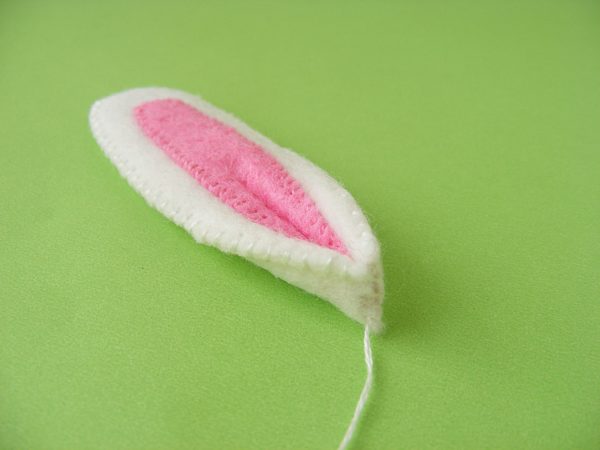
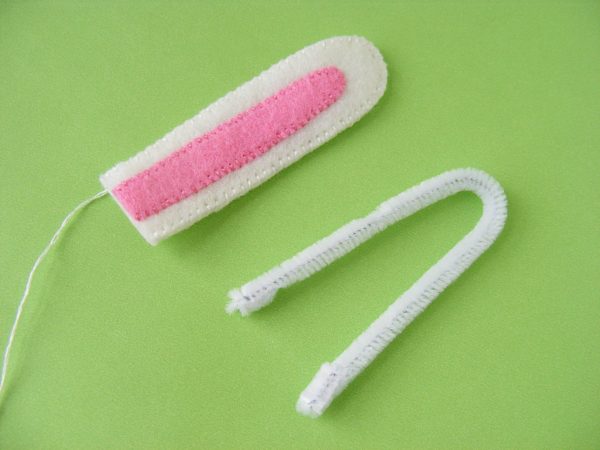
Whipstitch that piece to a second larger ear piece, leaving the bottom unstitched. Leave your thread tail attached.
Easter Eggstras - Free Pattern for Easter accessories for toys from Shiny Happy World

(Whipstitch is slightly different from whipstitch applique – those links go to two different tutorials.)

Cut a pipecleaner in half. Bend it into a gentle curve and fold both cut ends down about 1/2 inch -­ short enough to just fit inside the ear.

Step 3

Slide the bent pipecleaner up into the ear. Fold the bottom of the ear in half and whipstitch it closed. Don’t cut off your thread yet.

Easter Eggstras - Free Pattern for Easter accessories for toys from Shiny Happy World

Repeat Steps 2 and 3 for the second ear.

Step 3

Whipstitch the two headband pieces together, leaving the curve at one end unstitched.

Bend a pipecleaner in half. Measure it against the headband pieces and fold down the excess at the cut ends. Slide the pipecleaner into the headband and finish stitching the headband closed.

Fit the headband to whoever will be wearing it and mark where you want the ears to go.

Step 3 Whipstitch the two headband pieces together, leaving the curve at one end unstitched. Bend a pipecleaner in half. Measure it against the headband pieces and fold down the excess at the cut ends. Slide the pipecleaner into the headband and finish stitching it closed. Fit the headband to whoever will be wearing it and mark where you want the ears to go.

Step 4

Stitch one ear to the headband. I used ladder stitch but you could also use whipstitch.

Step 4 Stitch one ear to the headband. I used ladder stitch but you could also use whipstitch. I went around the base of the ear twice to make sure it was attached securely. Attach the second ear.

I went around the base of the ear twice to make sure it was attached securely.

Attach the second ear.

green felt monster (made from the Oddballs pattern) wearing bunny ears made with the free Easter Eggstras pattern from Shiny Happy World

Done!

Now it’s time to make that fancy Easter egg.

You’ll need. . .

  • scraps of wool felt
  • matching embroidery thread
  • contrasting embroidery thread
  • small bit of fiberfill stuffing
  • Sulky Sticky Fabri-solvy

I used Periwinkle felt for the egg and matching thread DMC #156 to sew the pieces together.

Step 1

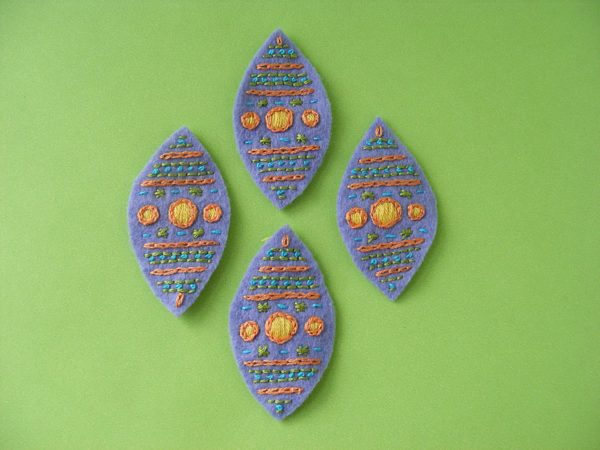
Trace or print the Easter egg pattern to some Sulky Sticky Fabri-solvy and stitch. You’ll be stitching right through the stabilizer AND the felt.

These are the thread colors (two strands throughout) and stitches I used ­- you should use whatever makes YOU happy. :­-) All links go to video tutorials teaching the stitches.

Satin stitch the large circles in DMC #726.

Chain stitch all fat lines (including around circles) with DMC #722.

Use the same color to stitch the lazy daisy at one end of the egg.

Backstitch narrow lines and stitch stars with DMC #704.

French knots and running stitches between stars with DMC #3845.

Step 2

Cut around the edges of the egg pieces, soak off the Sulky Sticky Fabri-solvy in cold water. I usually drop the pieces face down in a bowl of water, let them soak for 15 minutes or so (longer is just fine – I often forget about them and fish them out hours later) and then rinse off the soggy stabilizer under cold running water. If there are any stubborn bits, a quick hit with the kitchen sprayer usually does the trick.

Easter Eggstras - Free Pattern for Easter accessories for toys from Shiny Happy World

Lay them out on a towel to dry. Don’t wring, twist, or even smoosh them. Just let them dry.

Step 3

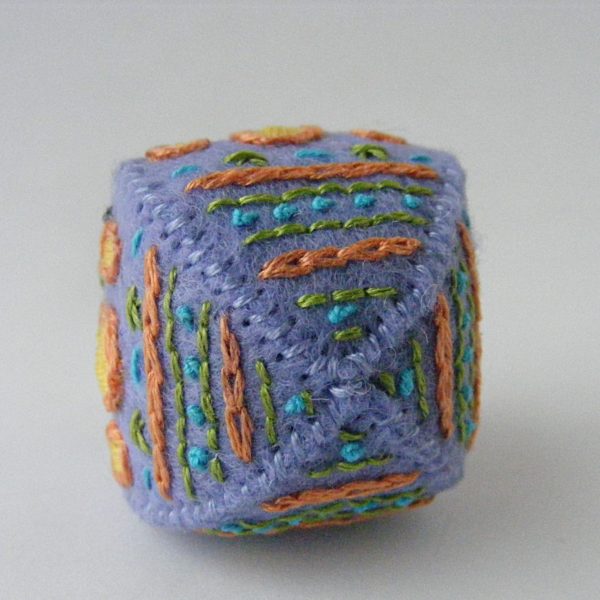
Whipstitch all the pieces together. I like to sew two pieces together, then sew two more pieces together, then join the pairs as the final step.

Easter Eggstras - Free Pattern for Easter accessories for toys from Shiny Happy World

I made the design slightly different at the top and bottom so you could easily tell them apart. 🙂 Make sure all the single French knots are together at the bottom of the egg and the single lazy daisies are together at the top.

Easter Eggstras - Free Pattern for Easter accessories for toys from Shiny Happy World

Done!

Even if you don’t play with dolls, it would be so pretty to make up a little basket and fill it with some of these tiny stitched eggs. 🙂

Happy stitching!

Play with some felt! Try the Oddballs – a fun pattern for silly monsters.

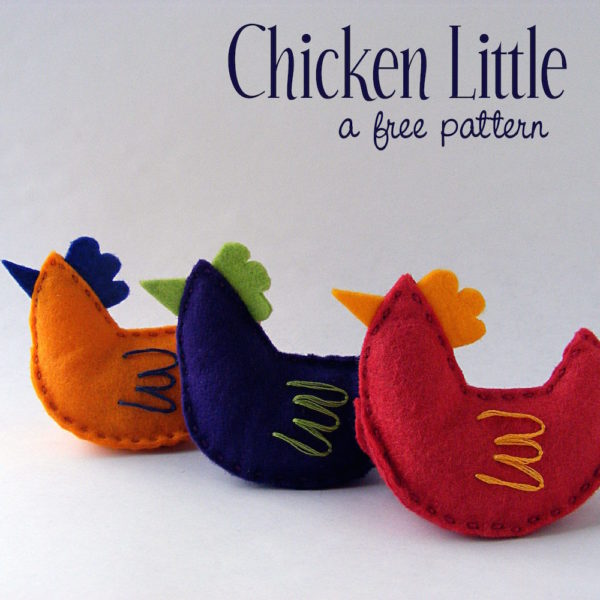
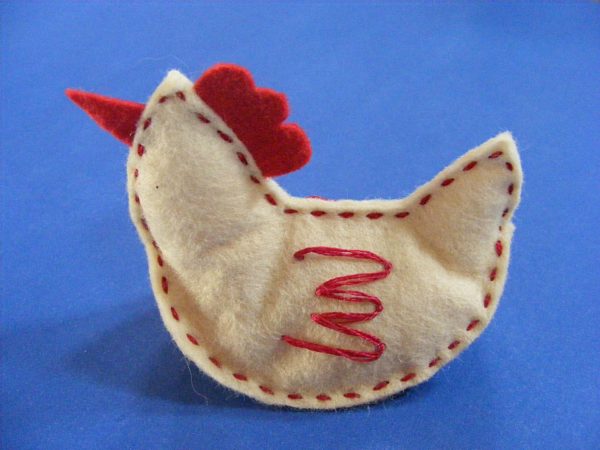
Free Felt Chicken Pattern

A row of three colorful felt chickens made with a free hand sewing pattern from Shiny Happy World

Make a sweet little softie with this free felt chicken pattern.

These simple little hens can be so many things!

Fill them with heavy aquarium gravel and you have some pretty dang fancy pattern weights.

Fill them with lightweight Poly-fil Stuffing and add a loop to the back and you have a pretty ornament for your tree.

Fill them with plastic pellets and you have a pocket-sized softie that sits in the palm of your hand.

These felt chickens are hand-sewn from scraps and a bit of embroidery thread and take about an hour to make. Want a little quiet handwork for couch-potato time? This is the perfect project. And it’s FREE!

Here’s what you’ll need. . .

  • download the pattern here
  • scraps of wool felt
  • freezer paper (optional)
  • stuffing (gravel, Poly­fil and/or plastic pellets)
  • embroidery thread and needle
  • your favorite embroidery pattern transfer tools
  • sharp scissors

Step 1

Cut out all the pieces. I don’t like to trace onto felt, because I don’t want even a tiny bit of that marking line to show on the finished piece. I trace or print my pattern pieces onto freezer paper, cut them out roughly, fuse them to the felt, and then cut around the edge.

It’s a nice way to cut clean, precise shapes.

Step 2

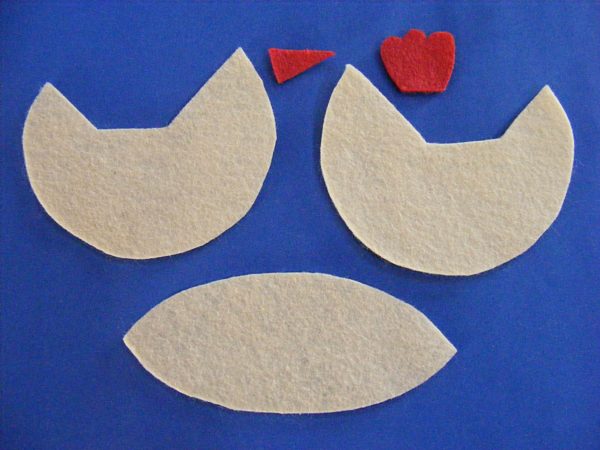
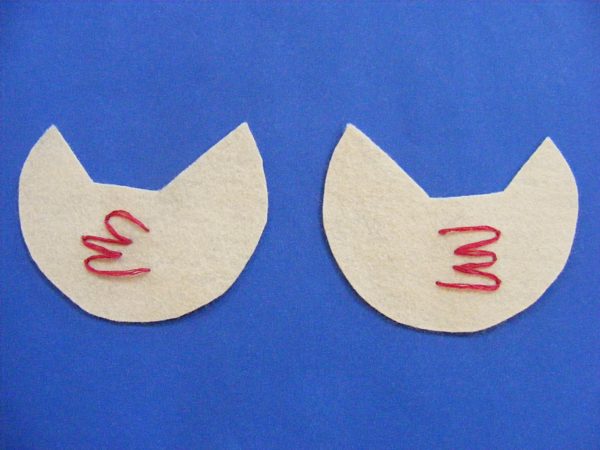
You’ll need two body pieces, one gusset, one beak, and one comb.

All the pieces needed to make a felt chicken

Step 3

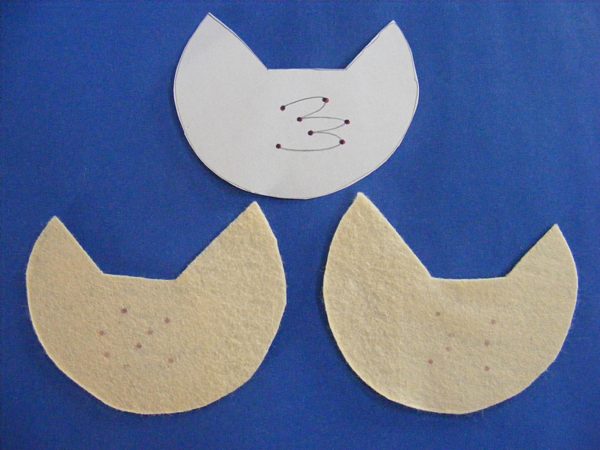
Transfer the dots you’ll use as guidelines for stitching the wings.

chicken pieces with guide-dots marked to show where to embroider the wings

I don’t like to draw the whole wing shape because the thread of my U­stitches might not sit right on that line, so I just mark the dots where each stitch will start, stop, and be tacked down.

Step 4

Stitch the wings in a contrasting color (I like to match the beak and comb color) using the U-­stitch and four strands of embroidery thread.

chicken sides with embroidered wings

If you want really precise lines you can use backstitch, split stitch, or stem stitch, but the tight curves at the tips of the wings won’t be loads of fun in any of those stitches.

Step 5

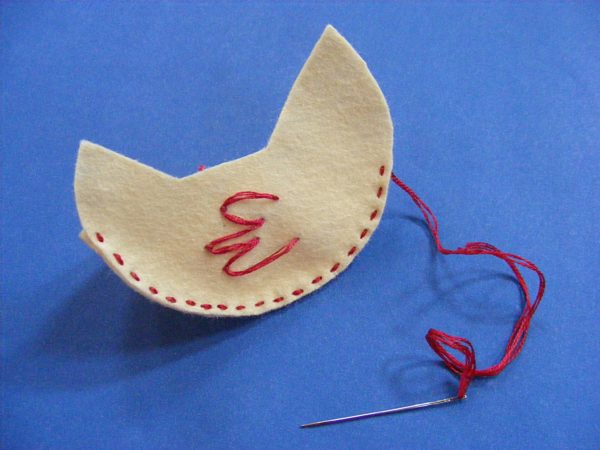
Lay the gusset along the bottom edge of one of the body pieces and stitch the two layers together using a running stitch and four strands of thread. If you use 36 inches of thread you’ll have enough to sew the whole hen without having to knot off and start a new thread. Sneaky. :­)

partially sewn felt hen

I would normally use thread that matches the chicken body. I used contrasting here just so you could see it better.

You could use whipstitch instead of running stitch -­ choose the look you like.

Step 6

When you get to the end of the gusset piece, layer the second body piece with the first one.

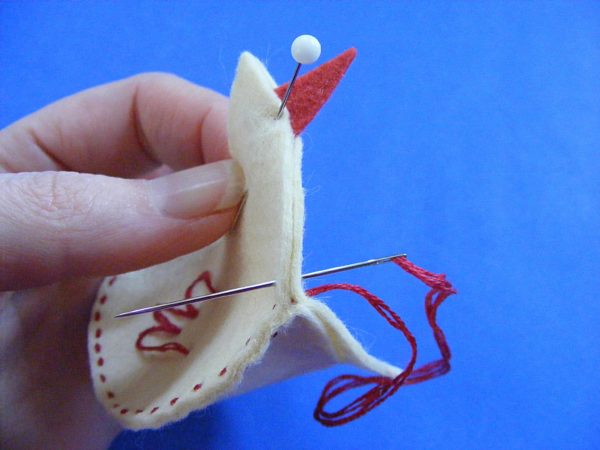
adding the beak to a chicken softie as you sew

Pin the beak between the two layers and start stitching your way up the front of the hen’s face.

Step 7

Stitch up to the top of the hen’s head.

partially sewn felt hen

Step 8

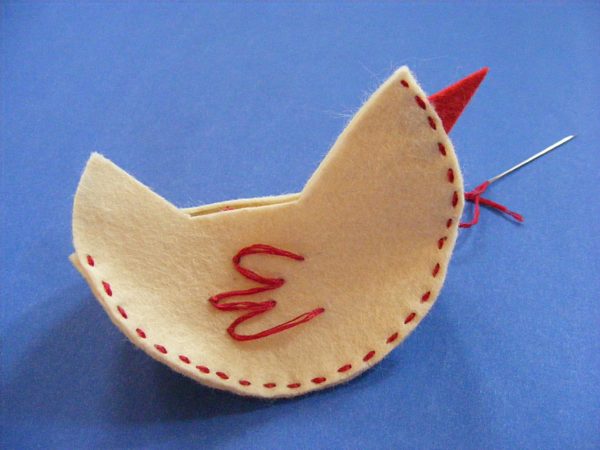
Slip the comb in between the two layers at the back of the head and stitch the rest of the way across the top of the body.

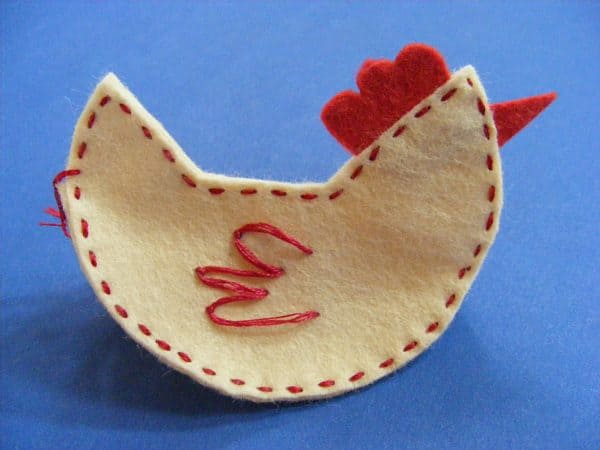
chicken softie sewn up - waiting for stuffing

A little felt chicken – all finished. Right? It looks like it’s done, doesn’t it?

Step 9

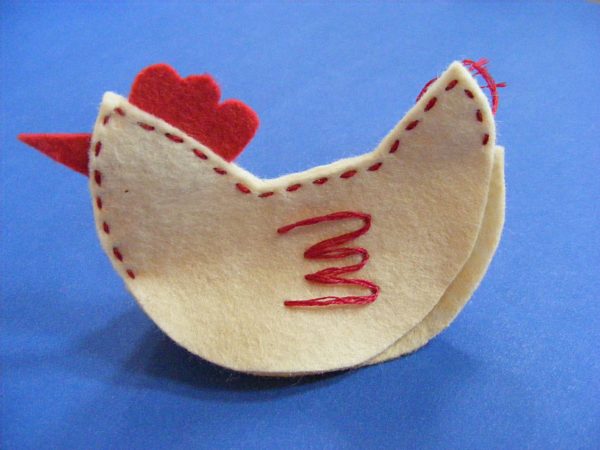
Not quite. Turn it around and you can see that you still need to sew the bottom part of the other side of the body.

Unsewn side of a chicken softie

Line up the body edge with the gusset edge and keep stitching.

Step 10

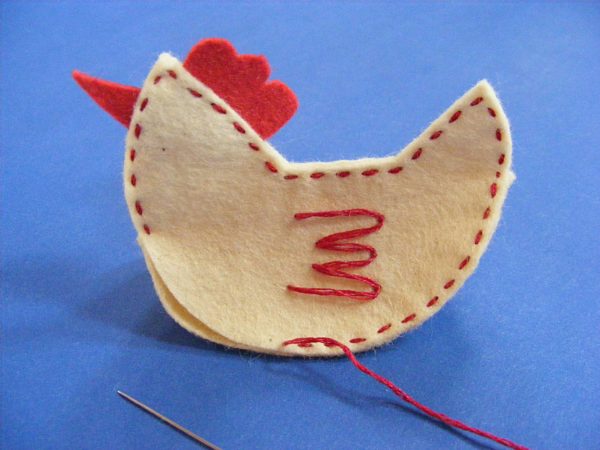
Sew most of the way along the bottom edge.

When the opening is just big enough to slip your thumb inside, stop stitching but leave your thread tail there. I even leave it threaded on my needle.

Step 11

Tuck a tiny pinch of Poly­fil stuffing in the head and another in the tail. Work it right up into the points.

partially stuffed chicken softie

If you’re making a tree ornament, fill the whole body with Poly­fil stuffing.

If you’re making a pattern weight, add two tablespoons of aquarium gravel.

If you’re making a softie, add two tablespoons of plastic pellets.

Step 12

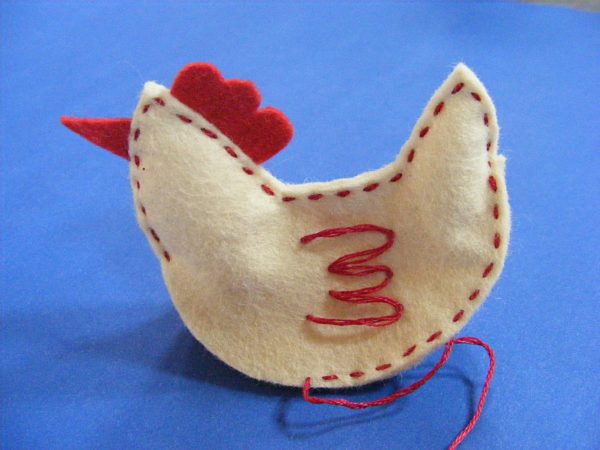
Pick the needle and thread back up and finish stitching across the bottom of the chicken. Tie a knot and bury the tail inside the hen.

You’re done! Better make another ­- chickens don’t like to live alone. Now even felt chickens!

Happy stitching!

Play with some felt! Try the Oddballs – a fun pattern for silly monsters.

Mini Tote – Free Sewing Pattern PDF

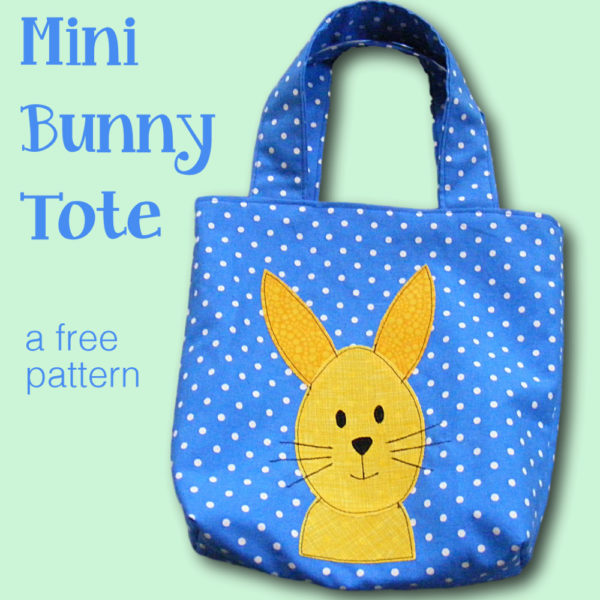
Mini Tote Bag pattern - free from Shiny Happy World

Here’s a free tote bag pattern!

This mini tote bag measures 6 inches wide x 7 inches tall x 2 inches deep.

It’s the perfect size for packing your lunch, carrying a few books, or toting some toys.

And it’s easy to make!

You can decorate your bag any way you like. For that adorable bunny bag (perfect for Easter egg hunting) I used one of the blocks from this Woodland Critters quilt pattern, with the size reduced.

If you’re looking for free bunnies, I’ve got those too. Click here for the free Mix & Match Bunny applique pattern with several super cute bunny appliques. For all of these you’ll need to print the pattern pages at 60% to get the right size for the bag.

If you’re using a different pattern or your own design (or maybe a child’s drawing for an extra special bag) just make sure that the image is no more than 5 inches wide and 6 inches tall.

On the sample bag I used for the step-by-step photos below, I embroidered one of my favorite birds from this Bird Sampler pattern onto a solid fabric before sewing it up in Step 3. You’ll see the pretty bird in the final step. 🙂

You could also use a fabulous print that needs no extra fancification.

Choose a fun coordinating color for the lining and you’re ready to sew!

It’s a totally versatile tote bag pattern that you can use in so many different ways. Have fun with it!

What You’ll Need

  • one fat quarter of the main fabric
  • one fat quarter (or less) for the lining fabric
  • any additional materials you want for optional embellishing

Step 1

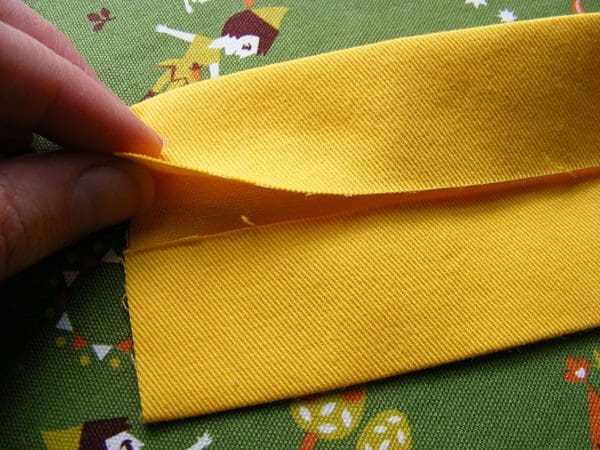
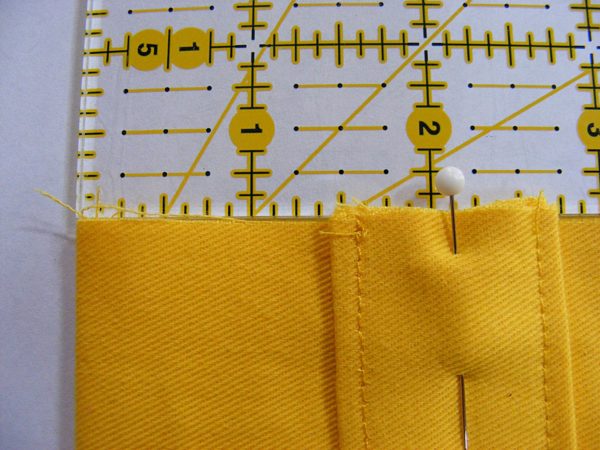
We’ll start with the handles. Cut two strips of the main fabric, each 5 x 12 inches. Fold one of the fabric strips in half the long way, right sides facing out. Press. Open the strip back up and fold each long edge in toward the center fold. Press.

preparing the handles

There’s a video showing how to make double­fold bias tape here. And if you’re new to rotary cutting, there’s a video here that will get you started.

Step 2

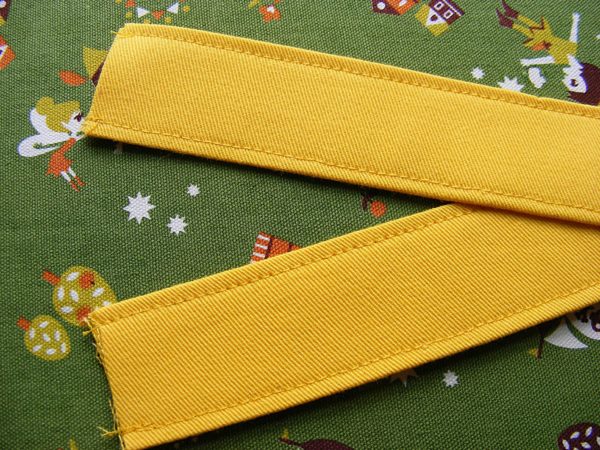
Fold in half again along the center fold so that you have one long strip, four layers of fabric thick. This makes a nice, sturdy strap. Press.

Topstitch along both long edges, about 1/8 inch from the edge.

topstitched handles

Repeat for the second handle.

Step 3

Now for the bag. Cut two 9 inch squares from the main fabric, and two from the lining fabric. If you’re going to embroider your bag (or embellish it in any other way) ­do this now before you sew the pieces together.

Pin the two main fabric squares right sides together. Using 1/4 inch seam allowance, stitch around both sides and the bottom of the bag.

Is this your first sewing machine project? This video will show you how to sew straight lines and turn corners. 🙂
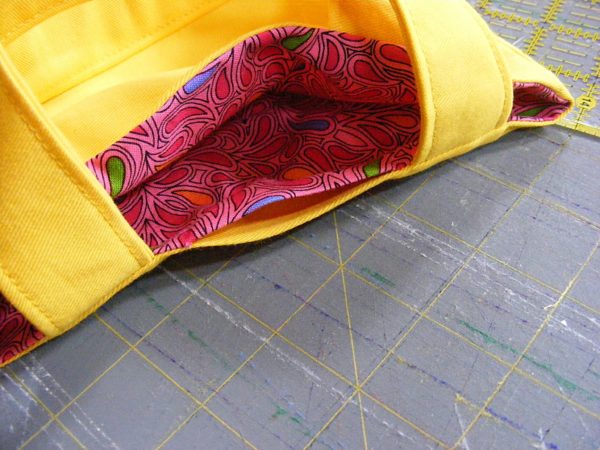
Repeat for the lining pieces.

Step 4

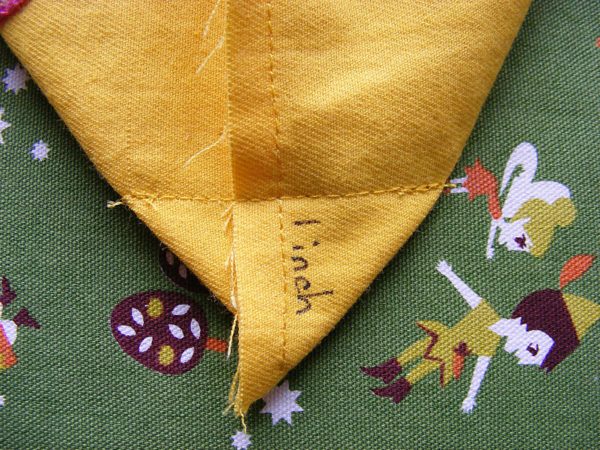
Open out one bottom corner of the bag so that the side seam and center bottom seam line up, and the corner of the bag makes a point. Measure up one inch from the tip of the stitching (NOT the tip of the fabric triangle) and stitch a line perpendicular to the side seam.

boxing the corners

Repeat for the other corner.

Repeat for the lining.

There’s a video showing how to box corners here.

Step 5

Turn the main bag right side out. Leave the lining inside out.

Pin the edge of one strap to the top edge of the bag, 1 1/2 inches in from the side seam.

positioning the handles

Repeat for the other end of the strap.

Repeat with the second strap on the other side of the bag.

Step 6

Put the main bag (right side out) inside the lining (wrong side out), with the straps sandwiched between the two layers.
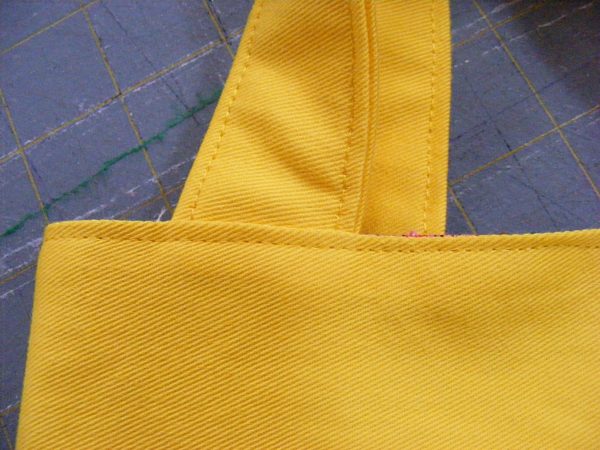
The bag and lining should be right sides together.

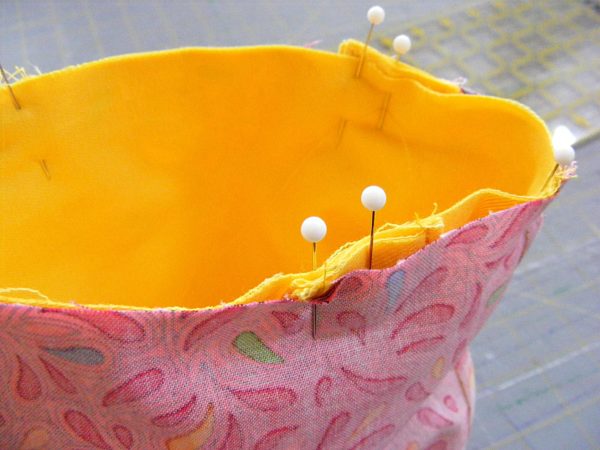
Line up the side seams and pin the layers together around the top edge of the bag.

handles pinned in place

Step 7

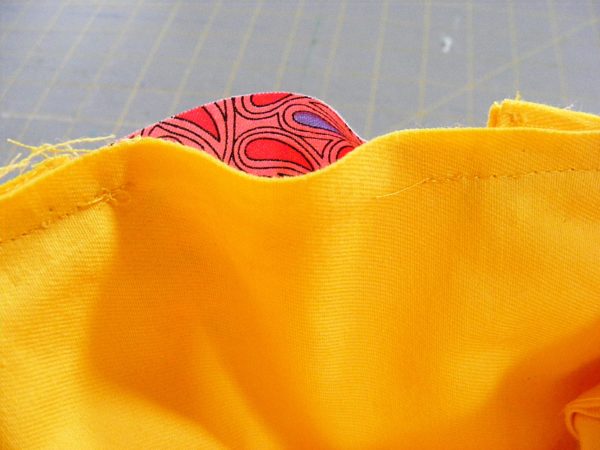
Using 1/4 inch seam allowance, stitch almost all the way around the top edge of the bag. Leave the space between the two ends of one handle unstitched, so you can pull the bag through the opening.

The easiest way to do this is to start sewing right at the inside edge of one handle. Sew through that handle, around the side seam, through both handles on the other side, around the second side seam, and through the last handle. Stop as soon as you sew over the last handle.

leave an opening to turn the tote bag right side out

Be sure to backstitch at the beginning and end of your stitching. This is a pretty small opening and there will be some pressure on the edges as you pull the bag through.

Step 8

Reach into the opening and pull the main bag through. Pull through the handles, then pull the lining right side out and tuck it into the bag.

Press around the top edge, being especially careful to press the open edges evenly.

pressed opening

Step 9

Topstitch around the bag, about 1/8 inch from the top edge.

topstitched tote bag

Be sure that the folded edges of the opening you used for turning are lined up and that you catch both layers in the topstitching to hold them together. No hand stitching needed. 🙂

Mini Tote Bag pattern - free from Shiny Happy World

Finished!

Here are several free patterns that work with my basic 10-inch applique squares – no resizing needed!

Here are several free patterns that work with just some simple resizing. This post about making coasters has info about resizing an applique pattern that can be applied to any of these projects.
Return to the main Let’s Make a Quilt Table of Contents.
Happy sewing!

Carrot Full o’ Candy – Free Pattern

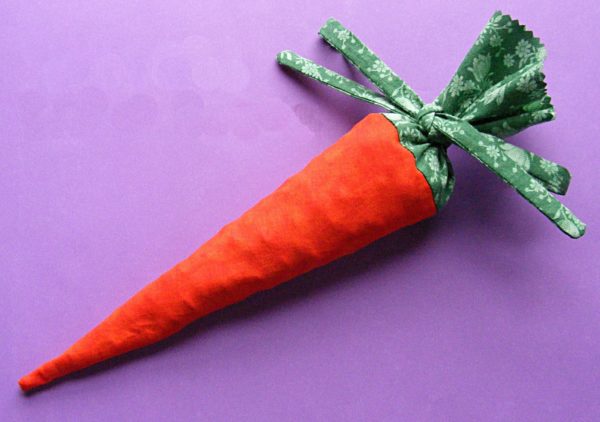
Carrot Full of Candy - free pattern

I was inspired by Chez Beeper Bebe’s remake of the classic paratrooper dimestore toy (You haven’t seen it? Well go check it out, for goodness’s sake! It’s fabulous!) and I decided to remake those carrot-shaped cellophane bags you find filled with candy at Easter.

My version is made from fabric – thus hiding what kind of candy is inside. Is it M&Ms? Is it jellybeans? Oooh – the suspense! Plus it’s reusable and feels so much nicer than the plastic bags. And – it’s oh so easy.

What you need

  • scraps of orange fabric
  • scraps of green fabric
  • sewing machine
  • thread
  • candy
  • less than an hour

Carrot Full of Candy - an easy and fun (and free!) fabric carrot pattern from Shiny Happy World

Step 1

Download the pattern templates here.

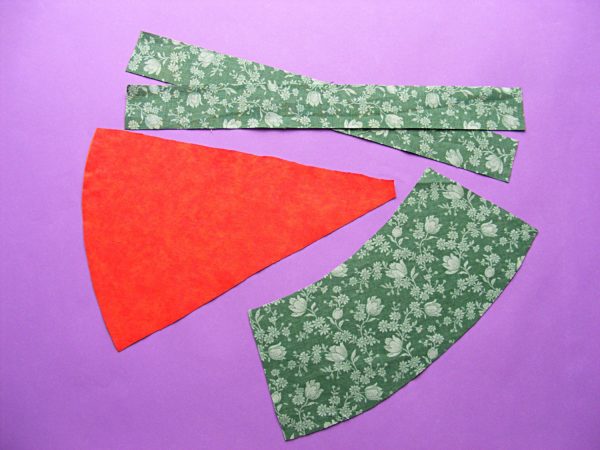
Press your fabric and cut out all your pieces as shown on the pattern page. You should have one orange wedge, one green piece, and two strips for ties.

Carrot Full of Candy - an easy and fun (and free!) fabric carrot pattern from Shiny Happy World

Step 2

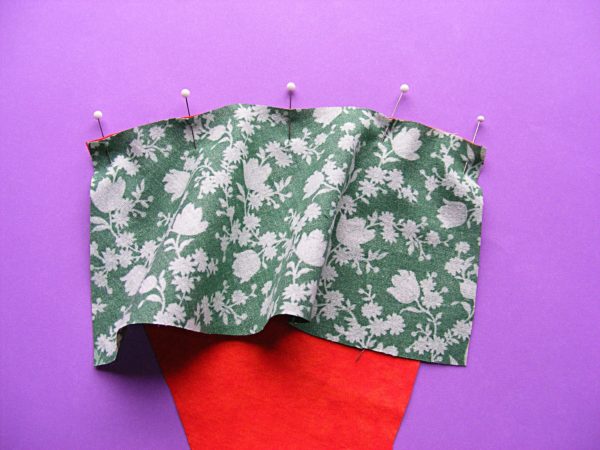
Pin the carrot to the green, right sides together. You’ll be pinning a convex curve to a concave curve, so the green part will be floppy at the bottom. Sew using 1/4 inch seam allowance.

Carrot Full of Candy - an easy and fun (and free!) fabric carrot pattern from Shiny Happy World

Step 3

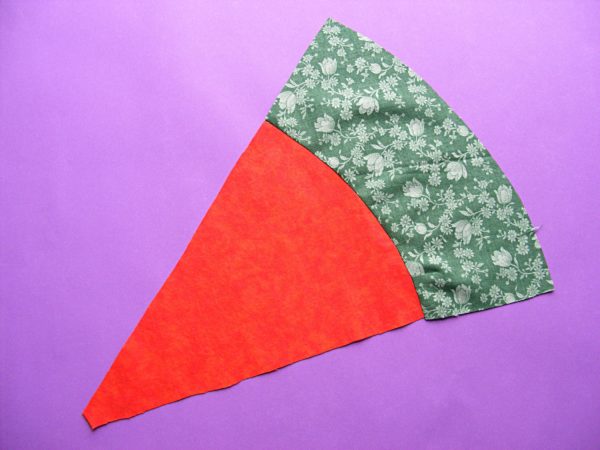
Open the carrot up and press the seam allowance toward the green.

Step 4

Fold one strip in half the long way and stitch along the long edge and one short edge. Turn the tube right side out and press flat. Repeat with the second strip.

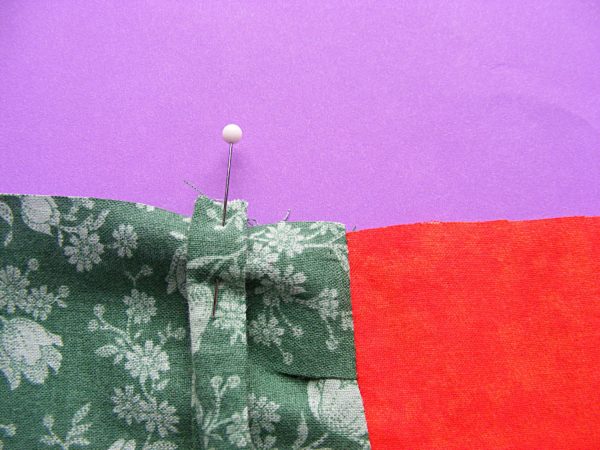
Carrot Full of Candy - an easy and fun (and free!) fabric carrot pattern from Shiny Happy World

Step 5

Pin both strips to the green, 1 inch from the seam between orange and green, with the raw edges of the strips lined up with the raw edges of the green.

Fold the carrot wedge in half the long way, right sides together, with the strips sandwiched between the layers.

Stitch up the long seam using 1/4 inch seam allowance.

Step 6

Trim away any excess seam allowance from the tip of the carrot and turn it right side out. Press the seam flat. Trim the raw edge of the green with pinking shears, fill the carrot with candy, and tie it closed.

Carrot Full of Candy - an easy and fun (and free!) fabric carrot pattern from Shiny Happy World

Finished!

Happy stitching!

Best,
Wendi