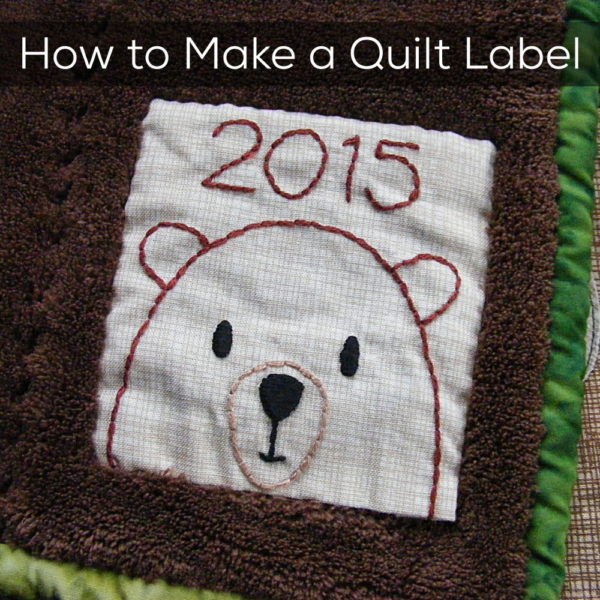
Add an Embroidered Label to Your Quilt

How to Make a Quilt Label - tutorial from Shiny Happy World

It’s easy to add a quilt label to your creation – and it’s fun to make it coordinate with the designs on the front of the quilt.

I like my labels to be about 4 inches wide. To resize any block design to fit in that size you print it at 40% of the original size. Easy peasy!

The bear you see on this label is one of the blocks from this Woodland Critters quilt pattern.

Cut a piece of fabric big enough for the full four inch square to fit flat in a hoop. A seven inch square of fabric should work just fine.

Stitch the design on your quilt label. I used 4 strands of thread and two simple stitches – backstitch for all the lines, and satin stitch for the solid eyes and nose.

If you want to add a date – or maybe a name – there’s a free alphabet embroidery pattern here – with letters that are relatively simple to stitch, with no serifs, curlicues, or extra-tight curves. ๐Ÿ™‚

When you finish stitching, trim the fabric so there’s about an extra inch all the way around the part you want to show as the quilt label. Fold about 1/2 inch under on each side and press.

There’s a video here showing how to press your embroidery without smooshing the stitches.

Position the label where you want it (I always put mine in the lower right corner) and pin or glue it in place to hold it secure while you stitch it.

Stitch the label to the quilt back all the way around the edge, being sure to only stitch through the quilt backing. Don’t let your stitches go through to the front of the quilt. I like to use ladder stitch.

That’s it!

It doesn’t take long and it’s a really nice finishing touch. ๐Ÿ™‚

Here are all my posts about how to bind and finish your quilt.

Finished with this topic?

Return to the Let’s Make a Quilt main Table of Contents.

Move on to more info about other things (not quilts!) that you can make with your applique patterns.

Happy stitching!

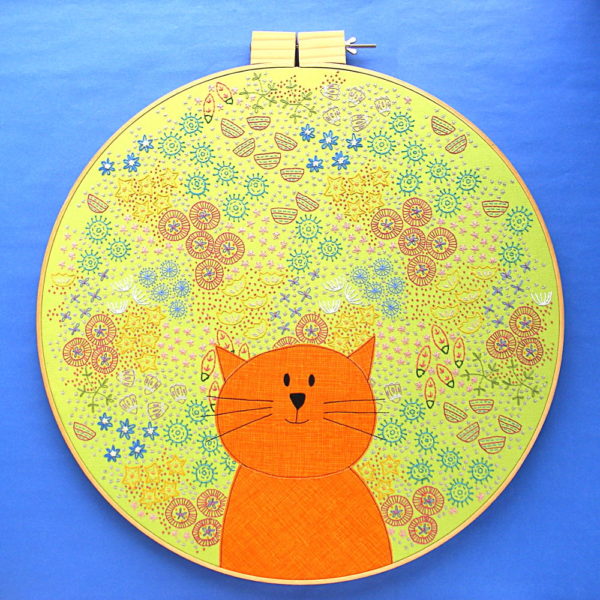
A BIG Embroidery Project – Cat Among the Flowers

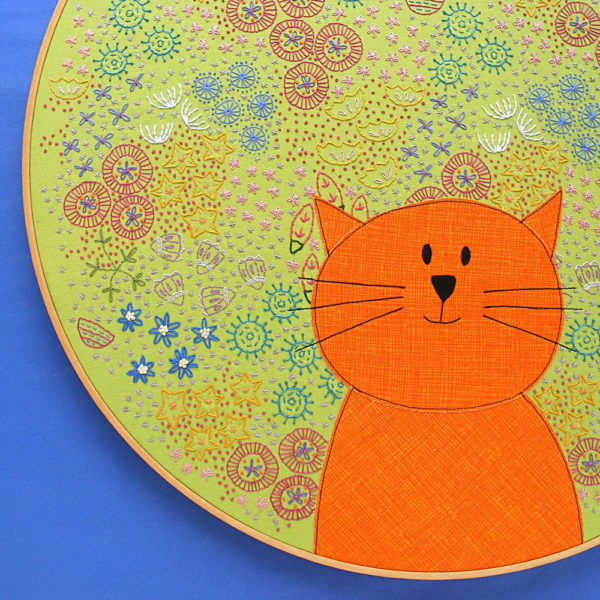
A BIG embroidery project! This cat surrounded by embroidered flowers is in an 18 inch hoop!

Now that Quilt Market is over I can finally share details about some of those BIG embroidery projects I was working on back in April. ๐Ÿ™‚

This post isย all about how I made this cat surrounded by lots and lots of embroidered flowers. It’sย in an 18-inch hoop!

I started out by enlarging my favorite cat (Maurice) from my Cats Quilt pattern and appliquรฉing it on a big square of fabric. I enlarged him just a bit (printed the pattern page as big as I could and still get it to fit on a single page) and used my normal fusible adhesive method.

First I appliqued the cat to the background fabric and stitched down the edges.

I stitched down all the edges, but I did NOT stitch the whiskers yet. They’re just drawn in for now with a fine-tip Sharpie.

Then it was time to add the flowers. It doesn’t matter that the full piece is bigger than a single sheet of paper because the Continuous Stitching pattern is a seamless repeating pattern. See how you can overlap the edges for a continuous pattern? That means you can make BIG embroidery. As big as you want!

Continuous Stitches is a seamless repeating pattern, so you can cover as much area with pretty stitched flowers as you want!

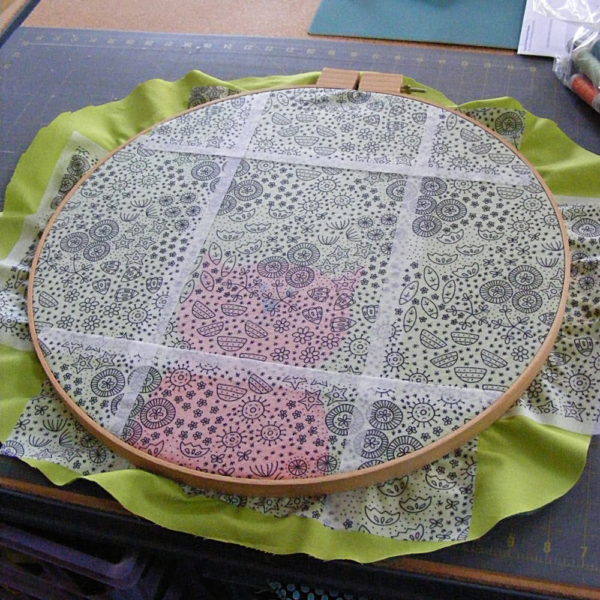
It took me several sheets of Sulky Stick & Stitch (the new – and much better – name for Sulky Sticky Fabri-solvy) to cover the whole hooped area.

It took 5 sheets of Sulky Stick & Stitch to cover my hooped area. Such a big embroidery project!

I just stuck the sheets right over the cat. So many flowers!

I don’t normally have problems with the Sulky Stick & Stitch pulling loose, but I don’t usually stitch this large, so I started stitching in all the overlapping areas first, just to keep things secure.

I don't normally stitch projects this big, so I started with all the overlapping pattern areas.

I used one or two strands of Sulky Petites 12 wt. thread for all the stitching.

So many pretty threads!

So many pretty colors!

Here are some details of the different kids of flowers. . .

Lots and lots of pretty embroidered flowers!

One of the things I love about working with Sulky Stick & Stitch is that I can change my mind about things partway through stitching. All the markings will wash away, so I don’t really have to stick with my original drawing. Take these tulips. . .

Pretty embroidered tulips.

Those little purple dashes were supposed to be dots, but when I got to them I changed them to dashes. No big deal.

All the stitching is finally finished! I just skipped right over that applique cat – it was easy to see him through the stabilizer.

Finished stitching! That's a lot of flowers. :-)

Here it is having its soak.

Soaking off the Sulky. Almost finished!

Yep – that’s the messy back. Here are some more shots of the back of the piece.

The messy back of my embroidery. :-)

I do NOT believe that that back of your work should be as pretty as the front. ๐Ÿ™‚ I’m a thread-carrier and it would drive me batty to tie off my thread after each individual flower!

But – recognizing that I’m a thread carrier means I do something a little different with pieces like this. See how dark green that fabric is? That’s not the same lime green you see on the front of the piece! That’s because I backed the piece with a second layer of darker fabric behind the main fabric. It keeps my thread carries from showing through to the front! Tricky. ๐Ÿ™‚

I soaked the piece for about an hour in cold water, sprayed off the bits of mushy stabilizer, gave it another quick swishย in clean water, then ironed it dry. One more step before finishing. . .

Ready to stitch the whiskers. . .

Remember how I didn’t stitch those whiskers when I appliquรฉd the cat? Time to do it now. I waited because I wanted the black whisker lines to go over the embroidered flowers. This part was totally nerve-wracking, but it did just fine. ๐Ÿ™‚

Finished kitty whiskers!

I hooped the finished piece in a quilting hoop using this method. No way was I letting glue anywhere near a piece that took this long to stitch!

A BIG embroidery project! This cat surrounded by embroidered flowers is in an 18 inch hoop!

Finished!

That is one BIG embroidery piece!

I’m super happy with this piece! Sulky had it hanging in their booth for Quilt Market and they’ll be exhibiting it at a few more shows, but Jo has already claimed it for her room when it comes home. ๐Ÿ™‚

Here are the other BIG embroidery pieces I stitched for the same project.

Primavera โ€“ an Embroidered Springtime Girl

Embroidered Mandala Sun

April Showers

Happy stitching!

How to Frame Embroidery – a video tutorial

How to Frame Embroidery - a video tutorial from Shiny Happy World

How do you frame embroidery?

I get this question a lot.

Actually – I get a lot of questions about what do do with an embroidered piece. They’re super fun to stitch, but then what do you do with them?

This video shows how to frame embroidery in a hoop – without using any glue.

This post shows an easy way toย cover the “ugly” back side of your stitching when you hoop frame.

And now I have a video showing how to prepare your embroidery for framing in any standard frame.

If you use this method you don’t need to cut into the fabric at all, and you don’t need to use potentially damaging glue or tape. It’s a great way to display – while still preserving – any fabric art you like.

Whether you frame embroidery in a hoop or in a traditional frame, you’ll need to give it a good pressing first. Here’s the video I mentioned showing how to press your finished embroidery without smooshing the stitches.

So dig out some of your favorite embroidered pieces (or applique – this technique works for all fabric art) and display them proudly in a frame. Hang them somewhere you’ll see them every day so they can make you happy. ๐Ÿ™‚

Here are all the posts about finishing embroidery projects.

Basic Finishing

Other Ways to Use Embroidery

Return to the Learn to Embroider main Table of Contents.

Happy stitching!
How to Machine Stitch Eyes

How to Machine Stitch Eyes

Did you know you can use a standard sewing machine to machine stitch eyes on your applique blocks?

You can!

The eyes are often the most difficult part of any of my appliquรฉ patterns.

It can be tricky stitching around those small pieces!

(Tips – shorten your stitch length, go sloooooooooow, raise your presser foot often to spin the piece in tighter turns.)

But with the new Paper Doll Quilt I have reached new lows in tiny eyes.

These eyes are too small to appliquรฉ. Don’t even try it.

So what to do?

You have a few options for the Paper Dolls quilt.

1. You can draw on the eyes with a marker. This is totally ok to do! But please test your marker first – and test it on every fabric you’ll be using because the results can vary. For bigger eyes (like all my animal quilts) I like my Marvy fabric markers. For smaller eyes like these paper dolls I get the best results with a small Sharpie. The worst bleeding I’ve ever had was with official “laundry” markers – go figure. (I share my favorite markers and paints here.)

2. You can embroider the eyes by hand. I really like this stitch for eyes. If you’re using Quilt As You Go you won’t even need to worry about a visible thread carry between the eyes because the batting should completely block it – even with a light color background block and skin color.

3. You can machine stitch the eyes. By machine! And you don’t need an embroidery machine, though it will need to have some fancy stitch options.

(Update – if you DO have a fancy embroidery machine, there are some free downloadable files for embroidered eyes here.)

See all my different eye options here.

I’ve heard from a lot of you who have arthritis and appreciate as many machine options as possible – so I think a lot of you are really going to like this method. I loved it!

Here’s how I did mine. . .

Scroll through your decorative stitches and find one that is a series of round or oval satin stitches.

How to Machine Stitch Eyes

On my Bernina it’s stitch #407. My much-less-fancy Pfaff has an identical stitch #26. Most machines with decorative stitches will have something like this.

Now comes the slightly tedious part. Start playing around with the length and width of the stitch until you find one that’s right for your project. Once you find the settings you like – write them down! I actually make a little sample of the stitch on white fabric and write the settings directly on the fabric.

How to Machine Stitch Eyes

I stitched up one eye and made a note of the stitch number, the length and the width. See how this matches the settings on the screen above? Now I can make eyes all the same size whenever I want – and skip the playing around with settings step. ๐Ÿ™‚

I have a whole stack of these swatches for any decorative stitch I think I might possibly use again.

When you’re ready to machine stitch eyes, you’re all set!

  1. Check to make sure your bobbin is full. You don’t want to run out in the middle of an eye.
  2. Put your block in the sewing machine and carefully lower the needle right into the top of the eye.
  3. Lower the presser foot.
  4. Stitch one oval. Watch carefully and stop stitching when it gets to the bottom of the oval. Backstitch just a stitch or two and remove it.
  5. One eye done! Pause to admire the neat (easy!) stitching and be excited that we live in a time when such wonders are possible. ๐Ÿ™‚
  6. Repeat for the second eye.
How to Machine Stitch Eyes - one face from the Paper Dolls quilt pattern

Troubleshooting tips. . .

The combination of fusible adhesive and batting behind the block makes a great stabilizer. If you’re not using those (of if you find the fabric is bunching up under your eyes) use a stabilizer behind your stitching. It can be as simple as layering a piece of tissue paper behind the block. You might also need to adjust your tension.

Don’t push or pull or hold back the fabric going through the machine. You really need to just let it go through on its own or you might find that you are making the eyes longer or shorter than what the stitch really should be – and it will be nearly impossible to match every time. Just let those feed dogs do their thing. ๐Ÿ™‚

That’s it!

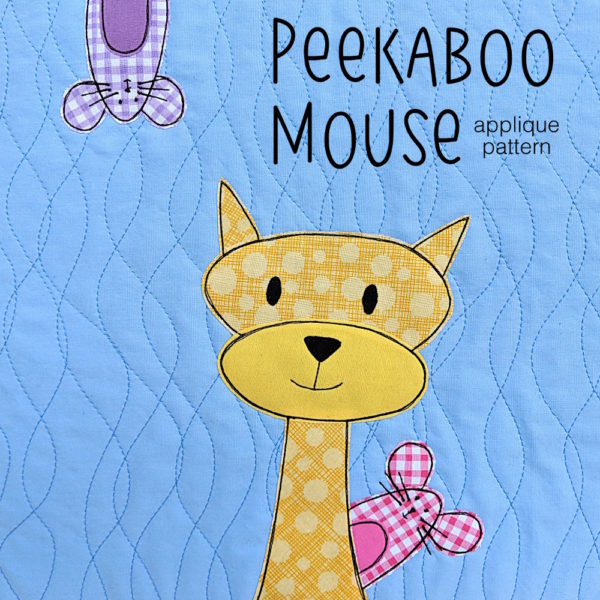
Peekaboo Mouse applique pattern cover showing a cat and two mice

The examples in the post are from the Paper Dolls quilt pattern – but you can use this method to machine stitch eyes any time the eyes are really tiny. In the cover image for the Peekaboo Mouse pattern you can see I used applique eyes on the cat, and machine stitched eyes on the little mice.

Here are links to all the posts showing how to applique with fusible adhesive – my favorite method. It’s fast and easy and (with the right materials) it holds up beautifully to rough use and repeated washing.

Here are links to special posts about eyes.

Here are links to some extra fun things you can do with your applique.

Other Applique Methods

Finished with this topic?

Return to the Let’s Make a Quilt main Table of Contents.

Move on to the lessons about outline stitching.

Happy stitching!

Backstitched Chain Stitch – video tutorial

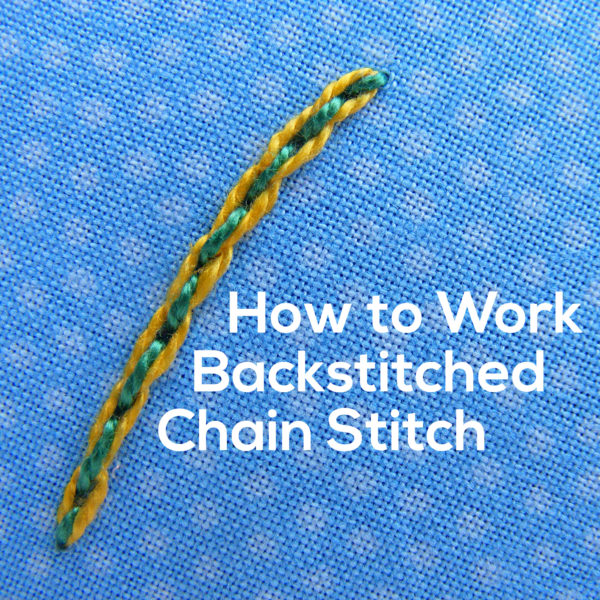
sample line of backstitched chain stitch - showing yellow chain stitching with green backstitching

Oooh! Two colors!

You know I occasionally love to throw in a fancy-looking stitch combination that uses two thread colors. See whipped backstitch and running stitch here, and threaded backstitch and running stitch here.

Those both have a twisty, barber pole kind of look – one color spirals around or weaves through the other.

This combination is different. It layers one stitch right on top of the other for a really terrific texture.

It’s called Backstitched Chain Stitch and I love it!

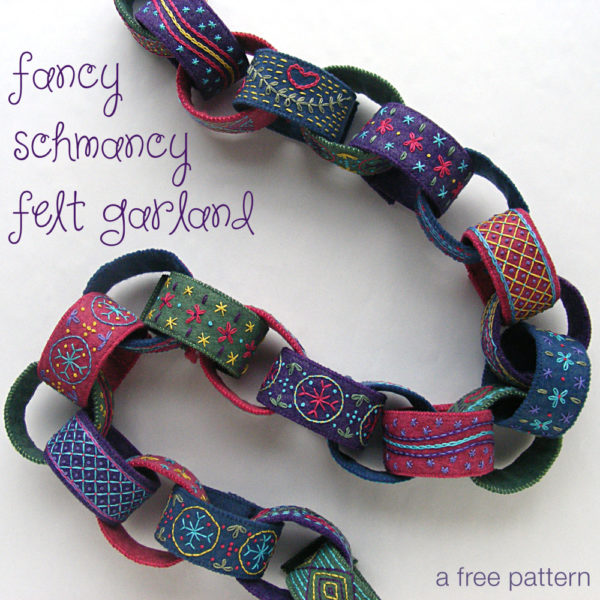
I used it to outline the lattice work on some of the rings in this fancy-schmancy embroidered felt garland.

Fancy Schmacy embroidered felt garland - a free pattern

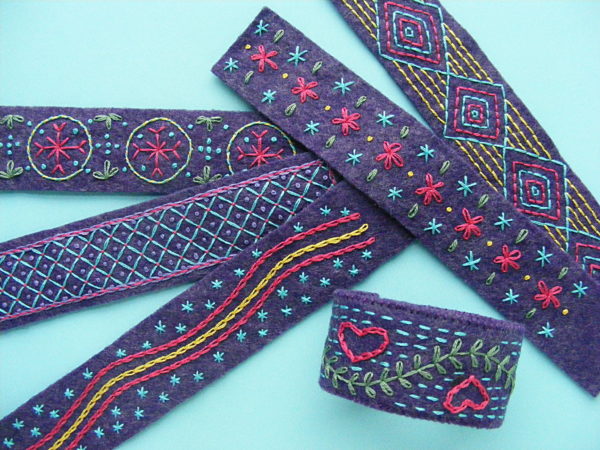
You can see that detail up close here. See the pink and purple stripe at the top and bottom of the wide lattice stripe in the middle band on the left?

purple felt garland embroidered with fancy stitches - including backstitched chain stitch

That’s backstitched chain stitch. First you chain stitch in purple, then backstitch over it with pink thread.

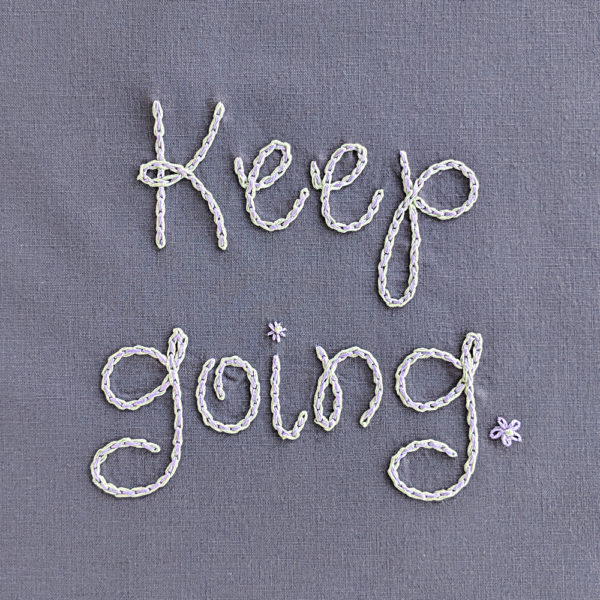
Here’s a piece that uses just this stitch – plus a tiny lazy daisy period at the end.

Keep going. A stitched reminder from Shiny Happy World.

Here’s the video showing how to do this fancy-looking-but-easy-to-embroider stitch.

See how easy?

It’s just two of the most basic stitches, stacked right on top of each other. ๐Ÿ™‚ Backstitched chain stitch – exactly what it’s called.

Here are all my lessons for outline embroidery stitches.

Return to the Learn to Embroider main Table of Contents.

Move on to the lessons teaching fill stitches.

Video – How to Do Turkey Work Embroidery

How to Do Turkey Work Embroidery - a video tutorial from Shiny Happy World

Turkey work is an unusual embroidery stitch that gives you a special effect. If you make long loops you can get a hairy or fringy look. Shorter loops can be trimmed to look like the pile of a rug or shorter hair.

Neat!

Turkey work stitching isn’t difficult, but it does require a bit of focus so you don’t lose track of what you’re doing. I tend to mumble to myself while I do it. . . flat stitch, loopy stitch, flat stitch, loopy stitch. . .

Here’s what I’m talking about.

See what I mean?

You can work this stitch on flat embroidery – you’ll often see it as the center of flowers, for example.

But I use Turkey work most often on little felt softies. It opens up a whole range of possibilities for hair, manes, tails, bushy eyebrows and more. ๐Ÿ™‚

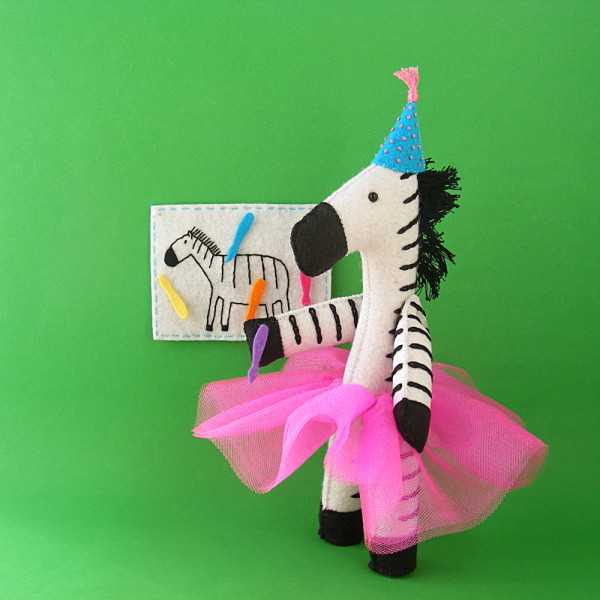
I used it here for the mane on Zoey Zebra.

Zoey playing Pin the Tail on the Zebra

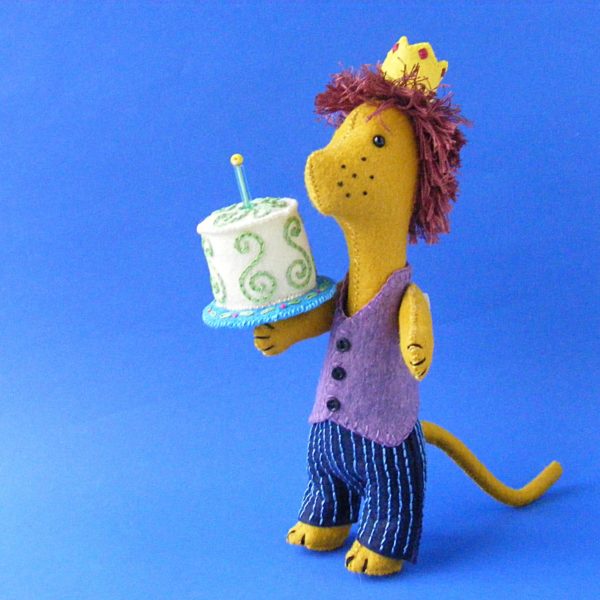
In the video you saw me working on Leon Lion’s mane. Here he is all finished.

Leon Lion - felt lion softie holding a birthday cake. I used Turkey work embroidery for his shaggy mane.

You can get the Leon Lion pattern here.

Want to see another way to add longer hair to a softie? This tutorial shows how to add yarn hair to a crocheted amigurumi, but you could use the same method with embroidery thread on a smaller felt softie.

Here are all my lessons for fill stitches (besides satin stitch).

Return to the Learn to Embroider main Table of Contents.

Move on to the lessons for all the other stitches.

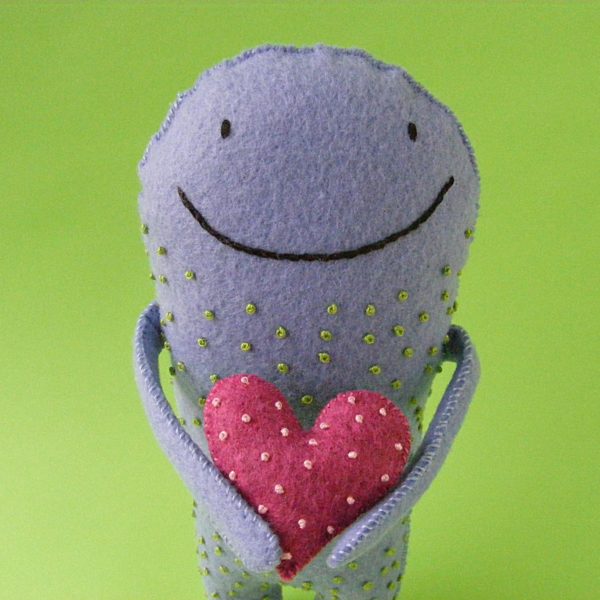
Play with some felt! Try the Oddballs – a fun pattern for silly monsters.

How to Hide the Messy Back of Your Hooped Embroidery

How to Hide the Messy Back of a Hooped Embroidery Piece - a tutorial from Shiny Happy World

I’ve never worried too much about hiding the back of my embroidery when I frame it in a hoop. There’s a part of me that kind of likes leaving all the “ugly” visible to anyone who’s curious enough to flip it over and take a look. ๐Ÿ™‚

But I understand wanting to cover up the mess (especially if you’re making something like a little hooped Christmas tree ornament) and I get a LOT of questions about how to do it.

This technique is really just a simple adaptation of my How to Frame Embroidery in a Hoop (Without Glue!) video. You can watch that here.

And when I say simple adaptation – I mean simple. As in – simply add an extra piece of fabric to cover the back.

Here it is in just a few easy steps. . .

How to Hide the Messy Back of Your Hooped Embroidery - a tutorial from Shiny Happy World

That’s all one stacked image – feel free to pin it for handy-dandy reference. ๐Ÿ™‚

Want that sweet snail embroidery pattern? It’s free!

Here are all the posts about finishing embroidery projects.

Basic Finishing

Other Ways to Use Embroidery

Return to the Learn to Embroider main Table of Contents.

Happy stitching!
How to Embroider a Mouth on an Already-Stuffed Softie – video

How to Stitch a Smile on a Finished Softie - video

Usually my patterns include instructions for embroidering the face before you sew your softie together. That makes it easy to transfer the pattern and position it correctly, and easy to hoop it for stitching.

But sometimes it just works better to stitch some features on after it’s all sewn up. This mouse doll is one of those times. And it’s really not hard at all! But you do need a couple of special tools. Nothing expensive or hard to find – just a doll needle and a water-erasable marker.

I show you the tools – and how to use them – in this video. Watch Miss Squeak get her smile!

See? That wasn’t hard at all!

Want a refresher on the stitch I’m using? Watch the backstitch video here.

You can find theย Squeak the Mouse pattern here!

Happy stitching!

Best,
Wendi
Wendi_Gratz_Shiny_Happy_World

ย 

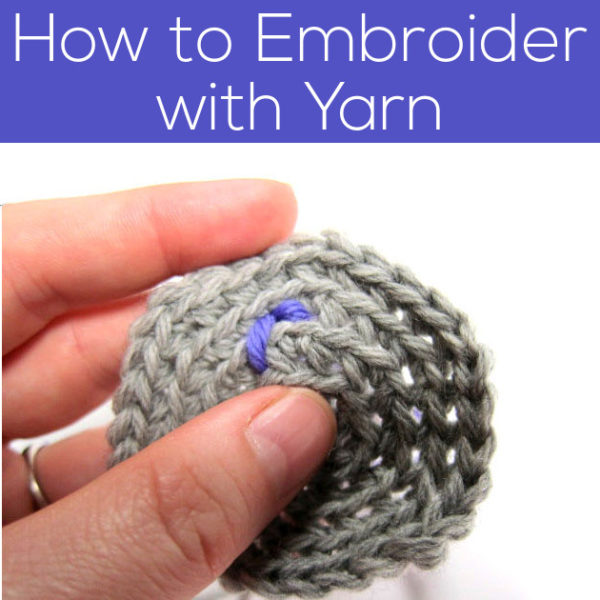
How to Embroider with Yarn

How to Embroider with Yarn - tips for stitching amigurumi faces from FreshStitches and Shiny Happy World

Today, I’m going to show you how I embroider features on my stuffed animals. It’s a little different than regular embroidery… because you stuff the inside of an animal, there’s no need to worry about tying knots!

There’s a video at the end of this post too – for those who want to see every step in action. ๐Ÿ™‚

My technique makes a slip-proof knot and creates a double-thickness of yarn, so your embroidery will stand out!

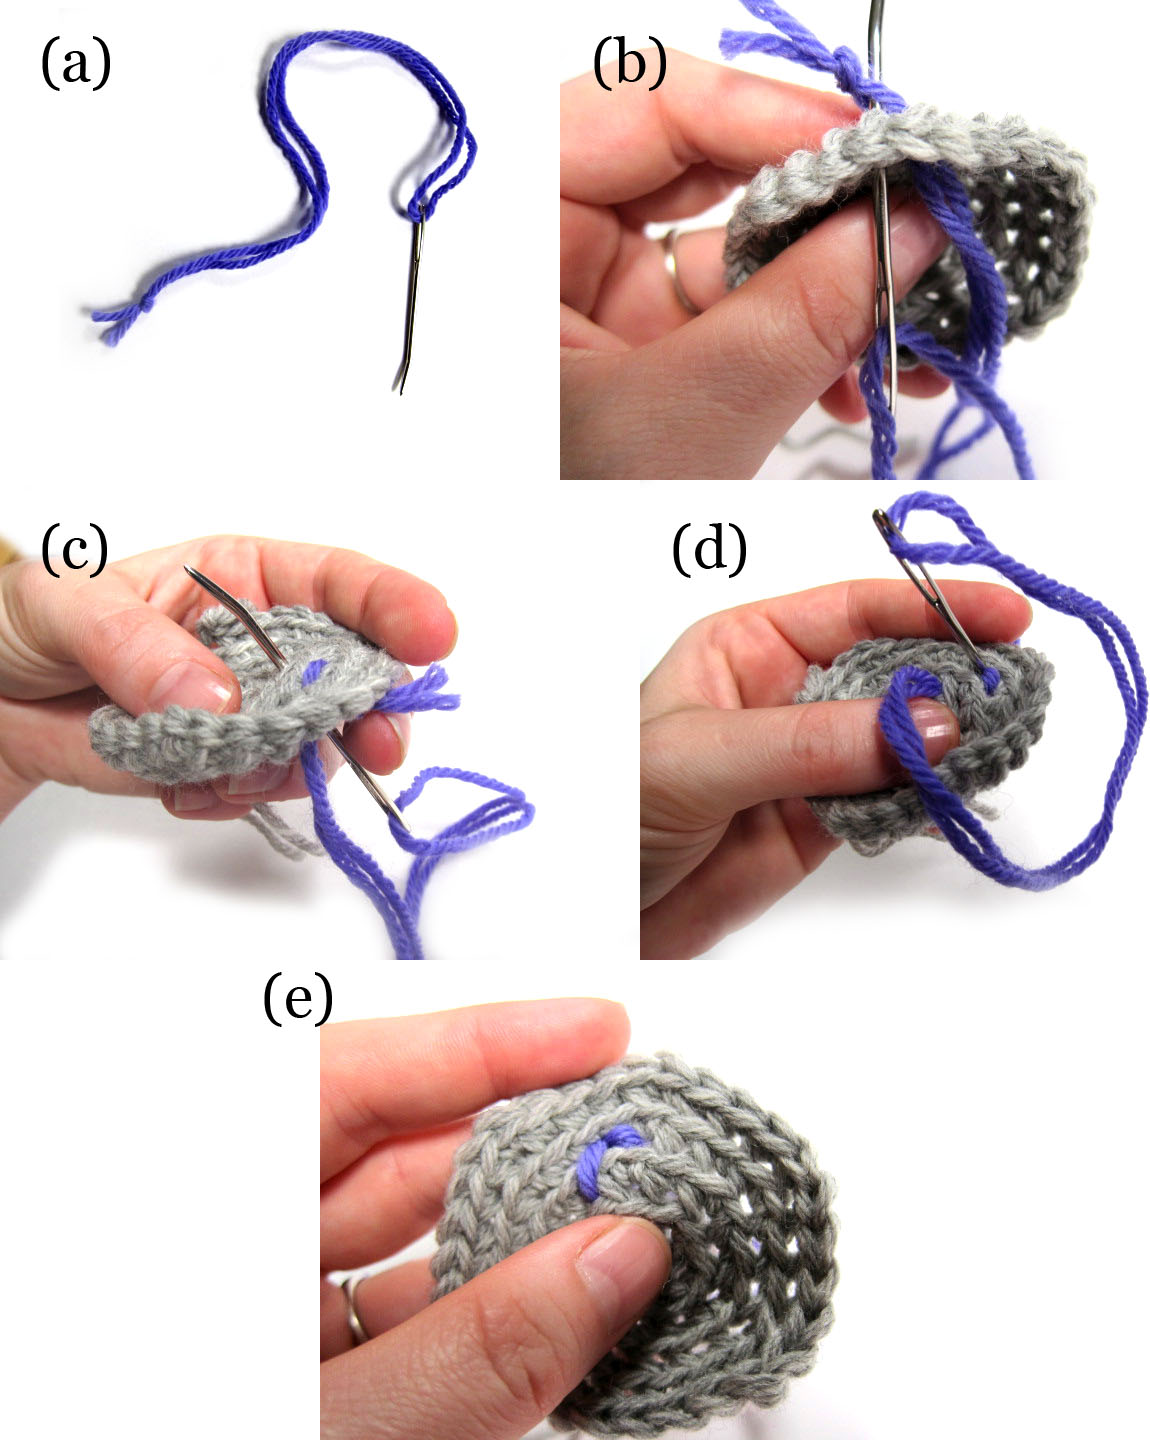
Step 1: thread the tapestry needle with a length of yarn (about a foot or two). Tie the two ends of the yarn together with a knot, as pictured in (a).

how to embroider with yarn

Step 2: pull the needle through to the the front of the work, leaving about an inch between the knot and the back of the work, and then poke the needle from front to back, and through the loop created (between the knot and back of work) by the two pieces of yarn, as shown in (b). Tug, and this anchors your work!

Step 3: to do a stitch, put the needle (from back to front) where you’d like the stitch to go (c), about 1/4 inch (5mm) from where your previous stitch (or knot) is anchored.

Step 4: to finish the stitch, push the needle from front to back, connecting the stitch to your previous work (d). Continue stitching (following steps 3 and 4) according to the desired pattern.

Step 5: to finish, cut your yarn-loop in half, and use the two ends of yarn to tie a knot!

Easy, huh?

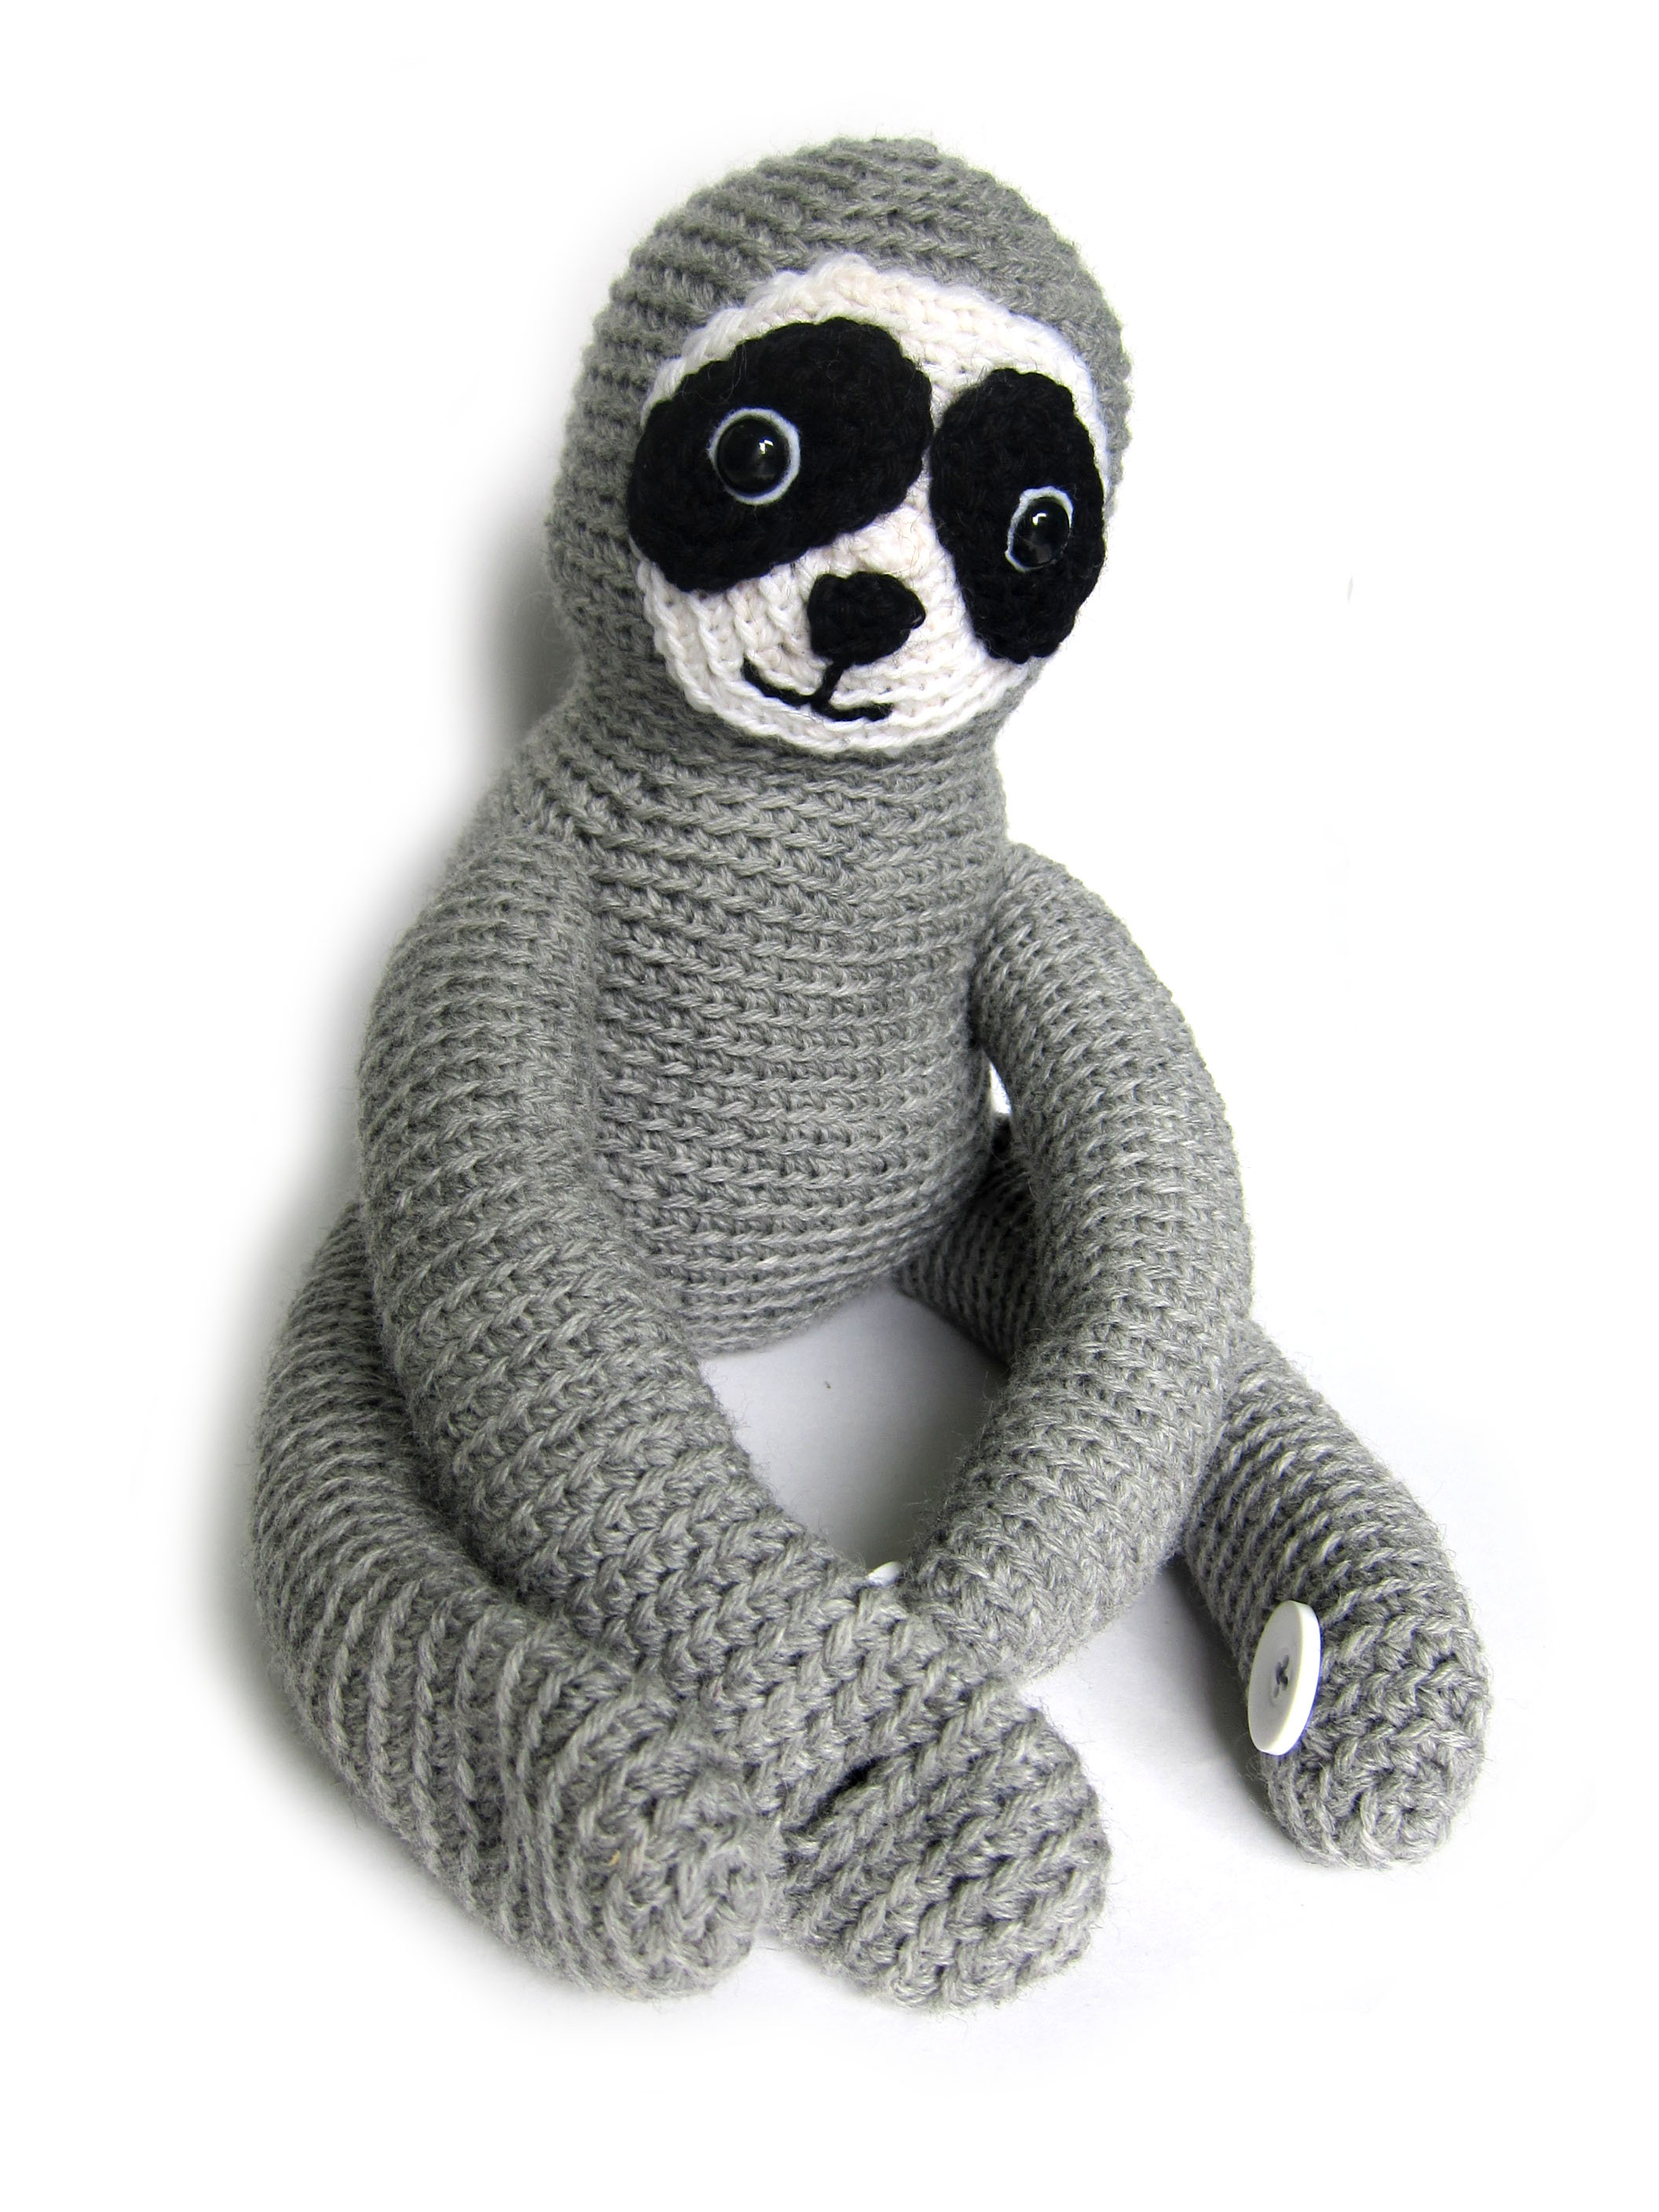
Sloth

See the embroidery that makes this sloth’s mouth? Cute!

Now here’s the video.

Give it a try!

Here are handy links to all the posts about faces and details. . .

Return to the main table of contents for Letโ€™s Learn to Crochet Amigurumi.

Move on to the lessons about eyes.

Happy stitching!

Video – How to Iron Embroidery

How to Iron Embroidery (without smooshing the stitches) - video

I’ve had a LOT of people asking me how to iron their finished embroidery. There’s a little trick to doing it without smooshing your stitches – and that’s what I show you in this video. Don’t worry – it’s easy and doesn’t require anything special. ๐Ÿ™‚

That bird you see in the video isย a free pattern. You can find it here.

And if it’s birds you like – you can find all my patterns featuring birds here.

Here are all the posts about finishing embroidery projects.

Basic Finishing

Other Ways to Use Embroidery

Return to the Learn to Embroider main Table of Contents.

Happy stitching!