I love getting all the mileage I can out of my quilt patterns – using them for lots of other projects besides quilts.
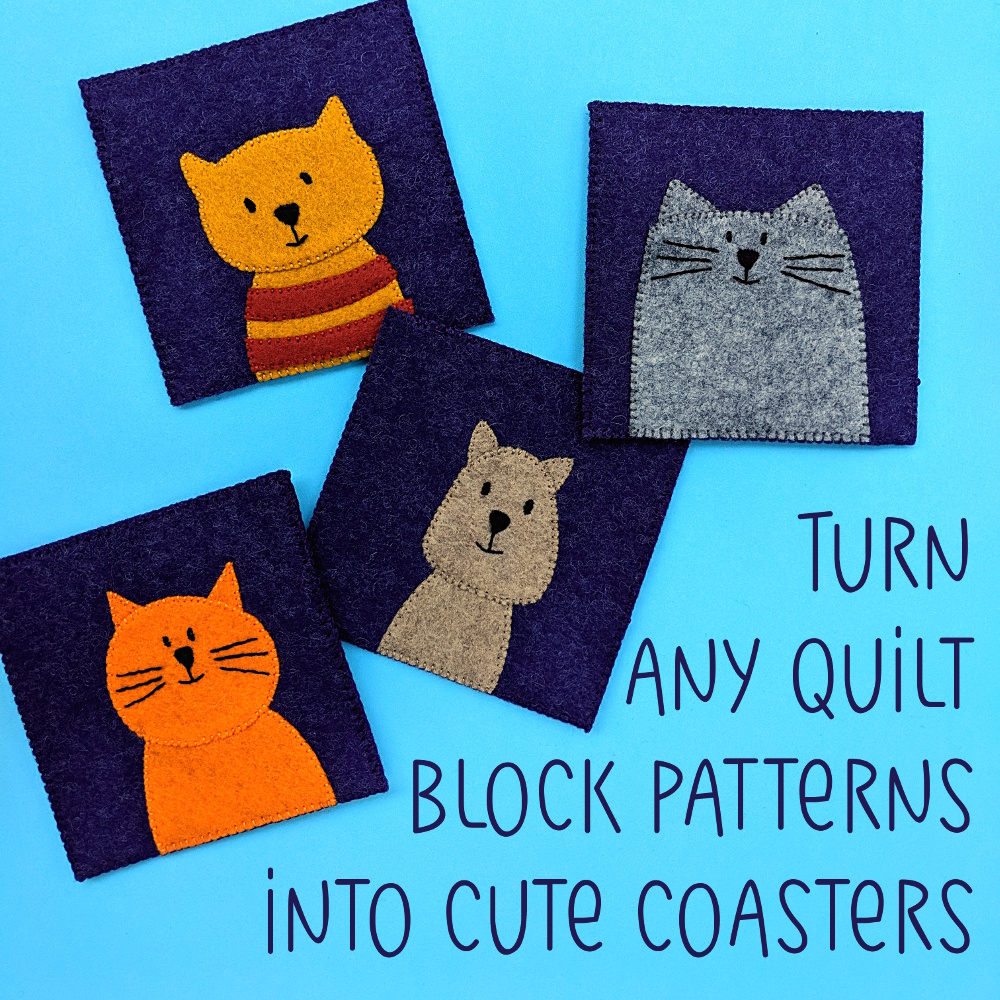
One of my favorite things to make is felt coasters. I’ve got them scattered all over my house, in lots of different designs. The cats you see above are some of my favorites!
It’s super easy.
Choose the design you want to use and print that pattern page out at 40% size. Any square block from any of my patterns.
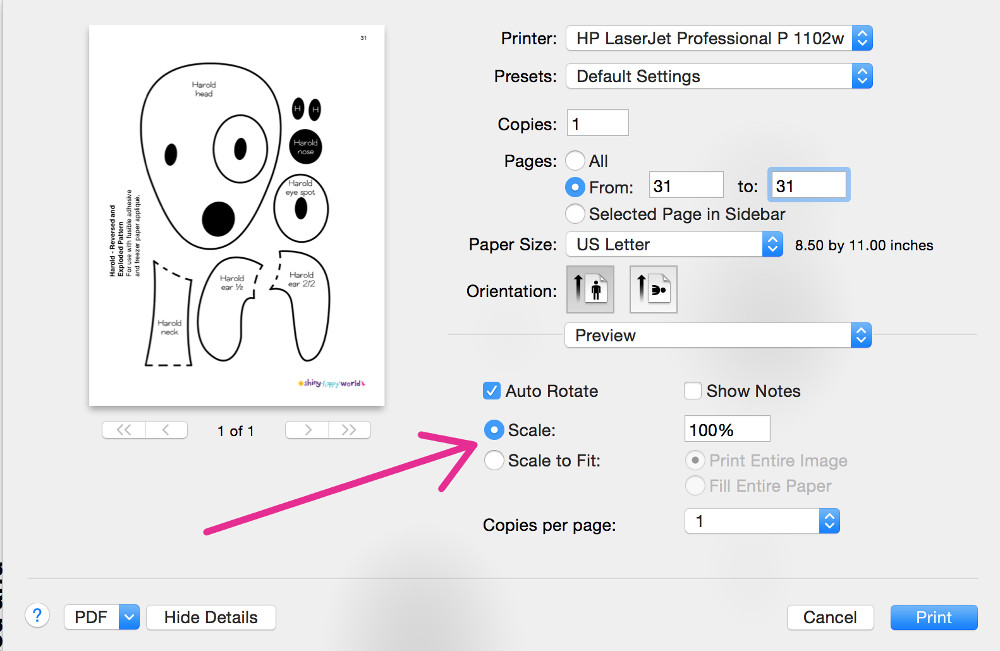
Your print window may look slightly different than this (it’s different for every computer, printer, and operating system) but it should be similar.
Look for something like that “scale” entry. It will probably default to 100%, but you can change it to anything you like. Change it to 40%.
From this point on, follow the instructions you’ll find at this post showing how to make some cute bear coasters. (And if you want to try out the technique – those bear patterns are free.) You can use those instructions to make cute coasters from any of my square quilt block patterns. Just reduce the pattern size to 40%. 🙂
Here are several free patterns that work with my basic 10-inch applique squares – no resizing needed!
Here are several free patterns that work with just some simple resizing. This post about making coasters has info about resizing an applique pattern that can be applied to any of these projects.
If you’e using an electric cutting machine like a Cricut. . .
Upload the file to your machine.
Resize if needed. (To fit a block that finishes at 10 inches square, the image should be 7.5 inches wide.)
Ungroup the pieces and assign colors
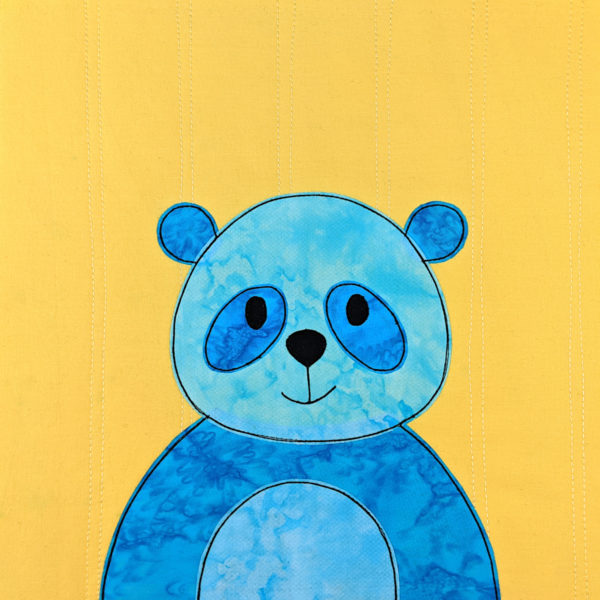
Cut the belly and the face from the lightest color fabric
Cut the shoulders, ears, and eye patches from the darkest color fabric
Cut the eyes and nose from solid black
Cut.
Step 2
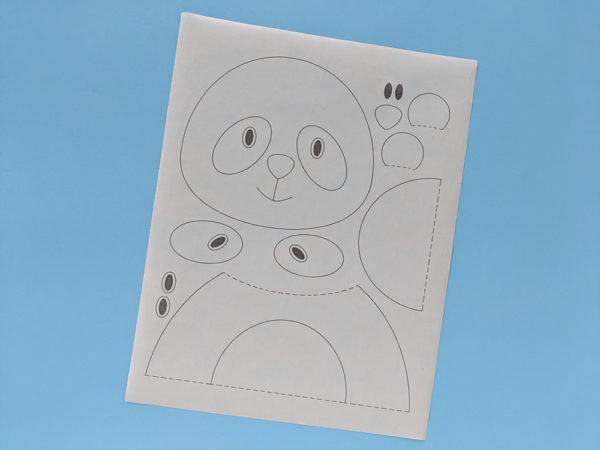
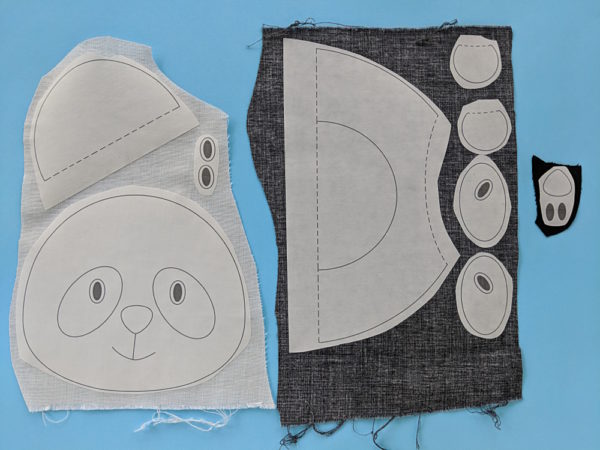
Trace or print the pattern onto the paper side of the fusible adhesive.
I use printable Heat & Bond Lite fusible adhesive so I just printed out the page. No tracing!
The image has already been reversed, so just trace or print. If you’re tracing, be sure to trace the facial features and placement guidelines too. You’ll need those for Step 5.
Step 3
Rough cut around each shape and fuse it to the back of your fabric.
Note – if you’re making your panda in realistic colors, use the large eye template pieces to make light-colored eye backings do the dark eyes show up on the dark eye patches. Use the small eye templates for your solid black eyes.
If you’re making a panda in fantasy colors, use the large eye templates for your solid black eyes, and discard the small eye templates.
There’s a video here with more information about helping make sure dark eyes show up well on a dark background.
Step 4
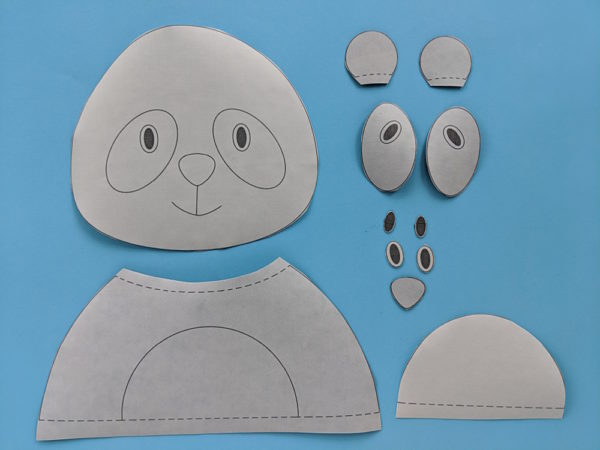
Cut around each piece neatly. Cut directly on the solid lines.
Step 5
Remember back in Step 2 when I told you to make sure you traced the facial features? Now you’re going to do that. Hold the face up to a window so the light shines through it. You’ll be able to see all the dotted placement lines, and the adhesive will stabilize the fabric so you can trace on it without it crinkling up.
Trace the lines to show where all the applique pieces are placed – the eye patches, eyes, nose and mouth are especially important. The belly piece is one you can probably place well without a guide.
Optional – trace the lines to show where pieces overlap, to help you position the ears on the head and the head on the shoulders. These placement lines are less important – you can play around a lot with the placement of these parts.
Step 6
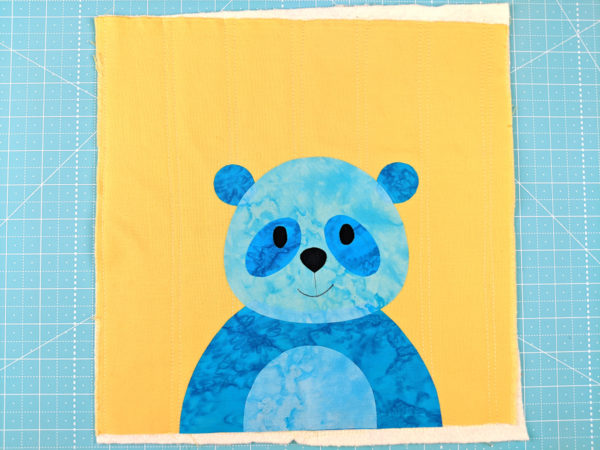
If you’re doing Quilt As You Go (I did) then you can quilt your block before adding the applique. So easy!
Cut your background fabric and a piece of 100% cotton batting 11 inches square.
Layer the block with a piece of 100% cotton batting. Quilt any pattern you like!
Have fun! And share a photo of what you make! You can share it in the Shiny Happy People group or tag it with #shinyhappyworld on Instagram.
If you like this free pattern, sign up for the Shiny Happy News! Subscribers get a weekly newsletter full of sewing tips and tricks, free patterns, special discounts, and other things to make you smile. 🙂
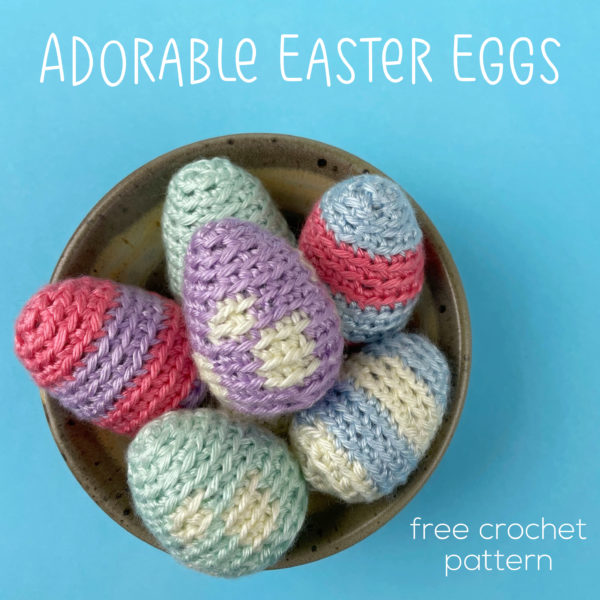
Stitch up some easy crocheted Easter eggs with this free pattern.
These little eggs are super fun to stitch up – and a great way to use up your smallest yarn scraps.
The pattern includes instructions for a plain egg, a striped egg, and a spotted egg.
Are you new to crochet and you don’t think you have the skills? Not to worry! These crocheted Easter eggs are a really easy pattern – just increasing and decreasing – nothing to attach. Plus – the links within the pattern go to tutorials showing how to do each step.
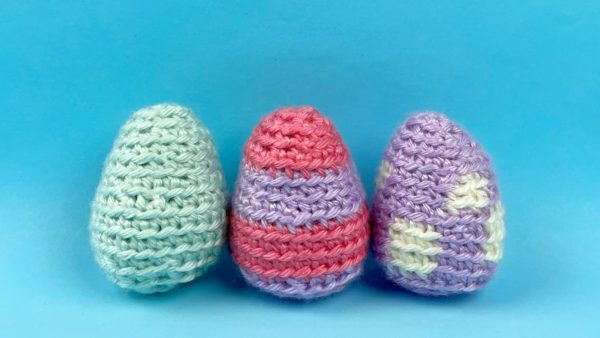
If you’re just getting started, start with the plain egg. It’s a great way to learn the basic stitches – single crochet, increase, and decrease.
After you have one under your belt you can try some simple color changes.
Have fun!
You can use any size yarn for this pattern – but if you’re doing stripes or spots, make sure both yarns are as close to the same thickness as possible. Use the hook size recommended on the yarn band – or one size smaller if needed to get a nice tight stitch.
Round 4 [Sc twice in next st, sc in next st] 6 times (18)
Round 5-6 With SC, sc in each st (18)
Round 7 [Sc twice in next st, sc in each of next 2 sts] 6 times (24)
Rounds 8-10 With MC, sc in each st (24)
Round 11 With SC, [sc2tog, sc in each of next 2 sts] 6 times (18)
Stuff the egg.
Round 12 [Sc2tog, sc in next st] 6 times (12)
Round 13 [Sc2tog] 6 times (6)
Round 14 Use the drawstring method to close up those last six stitches.
Fasten off, pulling the knot towards the center.
Done!
Polkadot Crocheted Easter Egg
For the spotted egg you’ll be changing colors for just a few stitches at a time. You do that just like the color change in the striped egg, EXCEPT you don’t need to cut and knot your yarn between those changes. Just drop one color and pick up the new color without cutting the yarn. The color you’re not using will just carry on the back of the work. This is called “stranding” and there’s a video showing how to do it here.
MC is your main color. SC is your second color.
Start out with a sloppy slip knot.
With MC, ch 2.
Round 1 Sc 6 times in 2nd ch from hook (6)
Round 2 Sc twice in each stitch (12)
Round 3 Sc in each st (12)
Round 4 [Sc twice in next st, sc in next st] 6 times (18)
Round 5-6 [With MC, sc in next 4 sts. With SC, sc in next 2 sts] 3 times (18)
Round 7 With MC [sc twice in next st, sc in each of next 2 sts] 6 times (24)
Rounds 8-10 [With SC, sc in next 3 sts. With MC, sc in next 3 sts] 4 times (24)
Round 11 [Sc2tog, sc in each of next 2 sts] 6 times (18)
Stuff the egg.
Round 12 [Sc2tog, sc in next st] 6 times (12)
Round 13 [Sc2tog] 6 times (6)
Round 14 Use the drawstring method to close up those last six stitches.
Fasten off, pulling the knot towards the center.
Done!
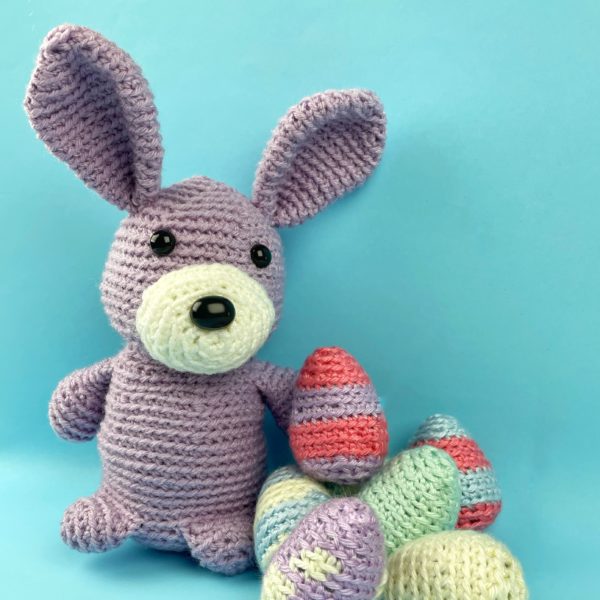
And here’s a sweet little lavender version of Blair Bunny. She’s traded her Halloween ghost costume for a pile of cute crocheted Easter eggs!
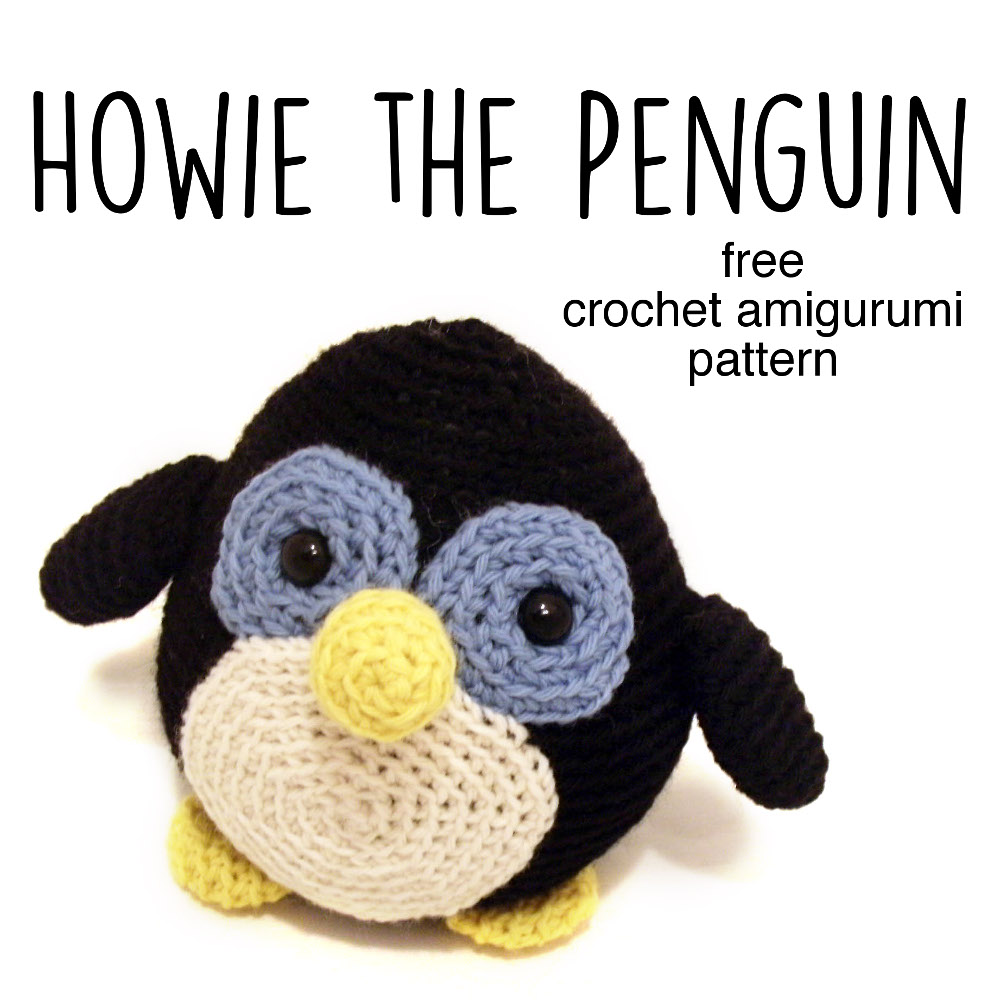
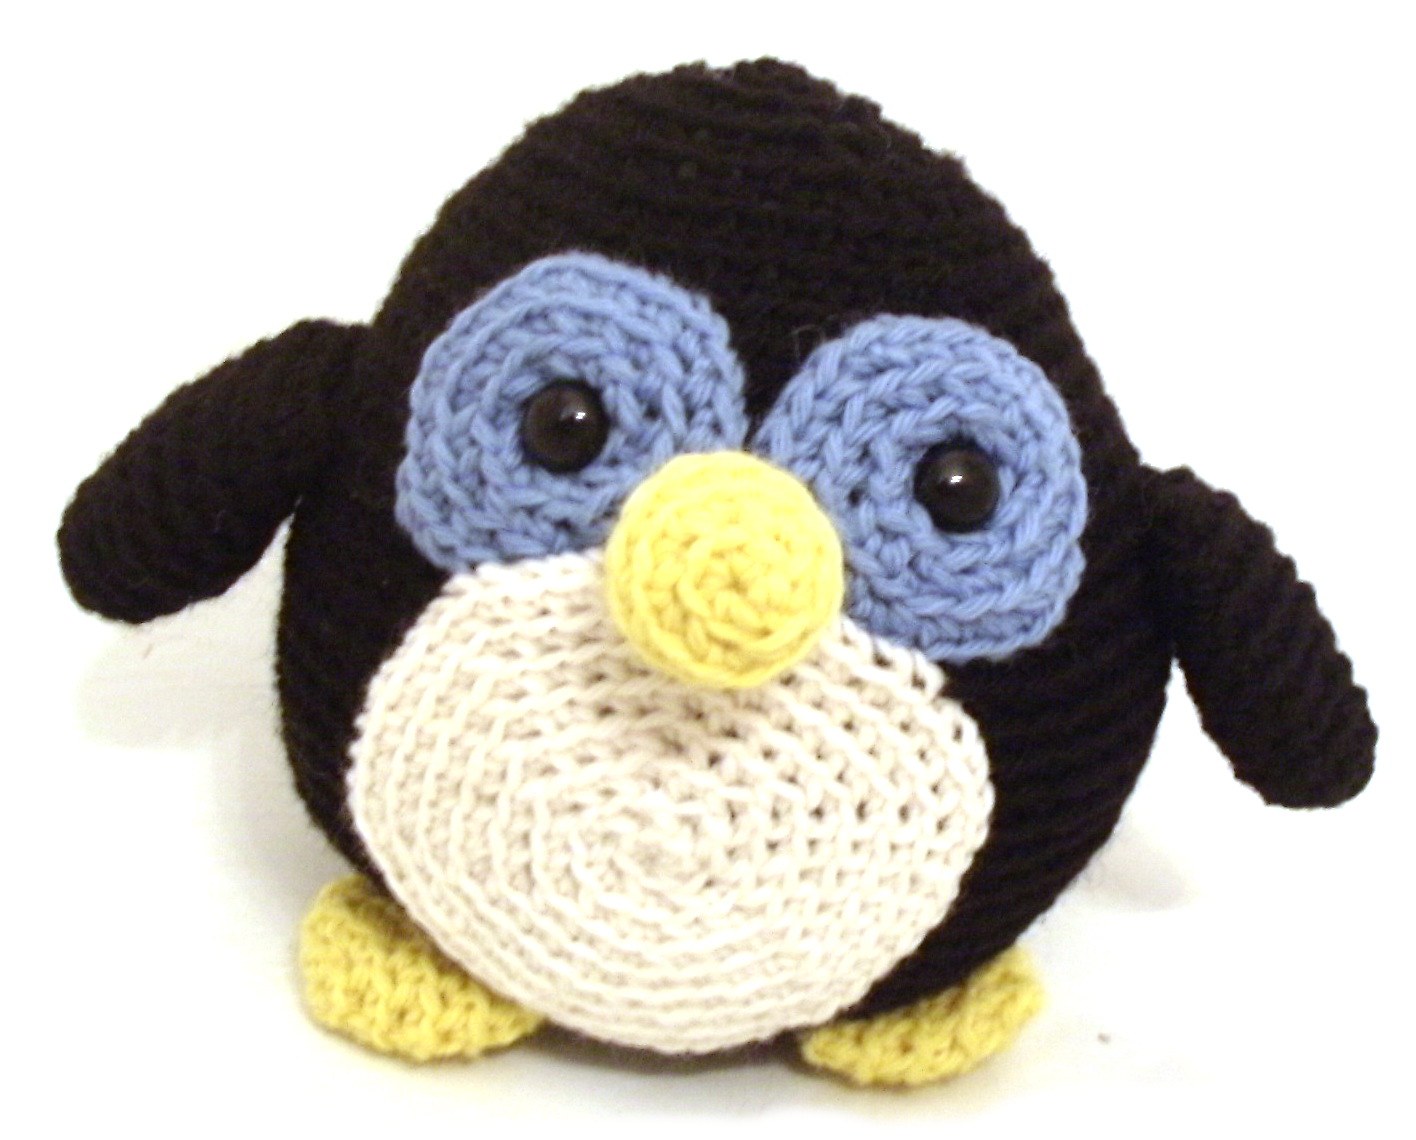
Howie is a great pattern for those just getting started, because he uses only a few of the most basic skills. You’ll find links to those skills sprinkled throughout the pattern wherever you need them – that way you can learn as you go! Just click on the link to hop to the tutorial.
There are loads of free video lessons here that take you through everything you need to know to get started with amigurumi. You can work your way through those lessons using this free pattern if you like. 🙂
The skills you’ll need for just about any amigurumi are. . .
You can go through all those posts now, or just hop to them as you get to those points in the pattern – whatever works best for you!
Yarn
This pattern can be used with any weight yarn! Just use the hook recommended on the ball band, and adjust as needed (see ‘gauge notes’ below). For a bigger, super-cuddly animal, try a bulky weight yarn! Just keep in mind that you’ll use more yardage than recommended. The sample is crocheted in worsted weight yarn, and all yardage/ hook recommendations are calculated based on the sample.
Less than 220 yards (1 skein) is required of each color. For the yarn, Stacey used 100% wool worsted weight (Ella Rae Classic the brand used in the sample). However, any worsted weight yarn can be substituted.
This pattern doesn’t specify a gauge. It’s a stuffed animal, and you don’t need to be too picky about exact sizing. The most important thing is that you use a hook size that creates a nice looking fabric for your yarn. If you use the recommended hook size, and your fabric looks very loose (so that stuffing would show through), then you will want to use a smaller hook. Other than that, no measuring required!
In case you’re curious about getting the exact gauge Stacey does, it’s 5 rounds=2 inches. Note that you will need to have this gauge for the yardage suggestions to provide an accurate estimation.
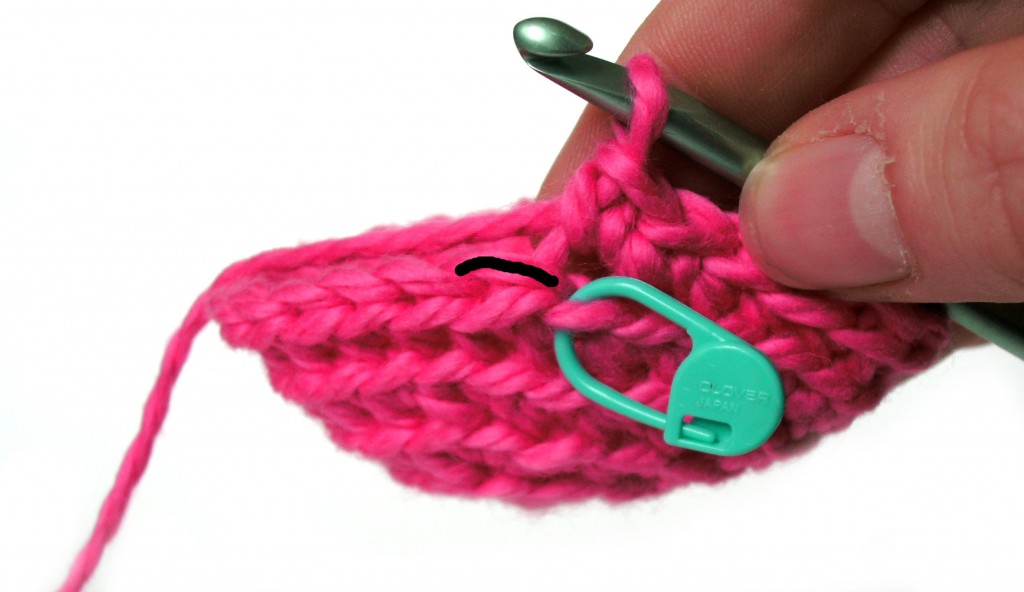
Stitch into the Back
All stitches in this pattern (that are worked in the round) are worked through the back loop only, unless otherwise directed. Look at this picture.
See how one loop is highlighted in black? This is the back loop, and it’s what you’ll stitch into. Stitching into the back loop creates ridges on the right side of the piece.
Want to see crocheting through the back loop in action? Check out this blog post. It talks all about why Stacey crochets through the back loop and even has a handy dandy video showing how to find that loop. 🙂
Abbreviations
ch: chain
sc: single crochet
sc2tog: single crochet 2 stitches together
st(s): stitch(es)
Ready? Let’s jump in!
The Pattern
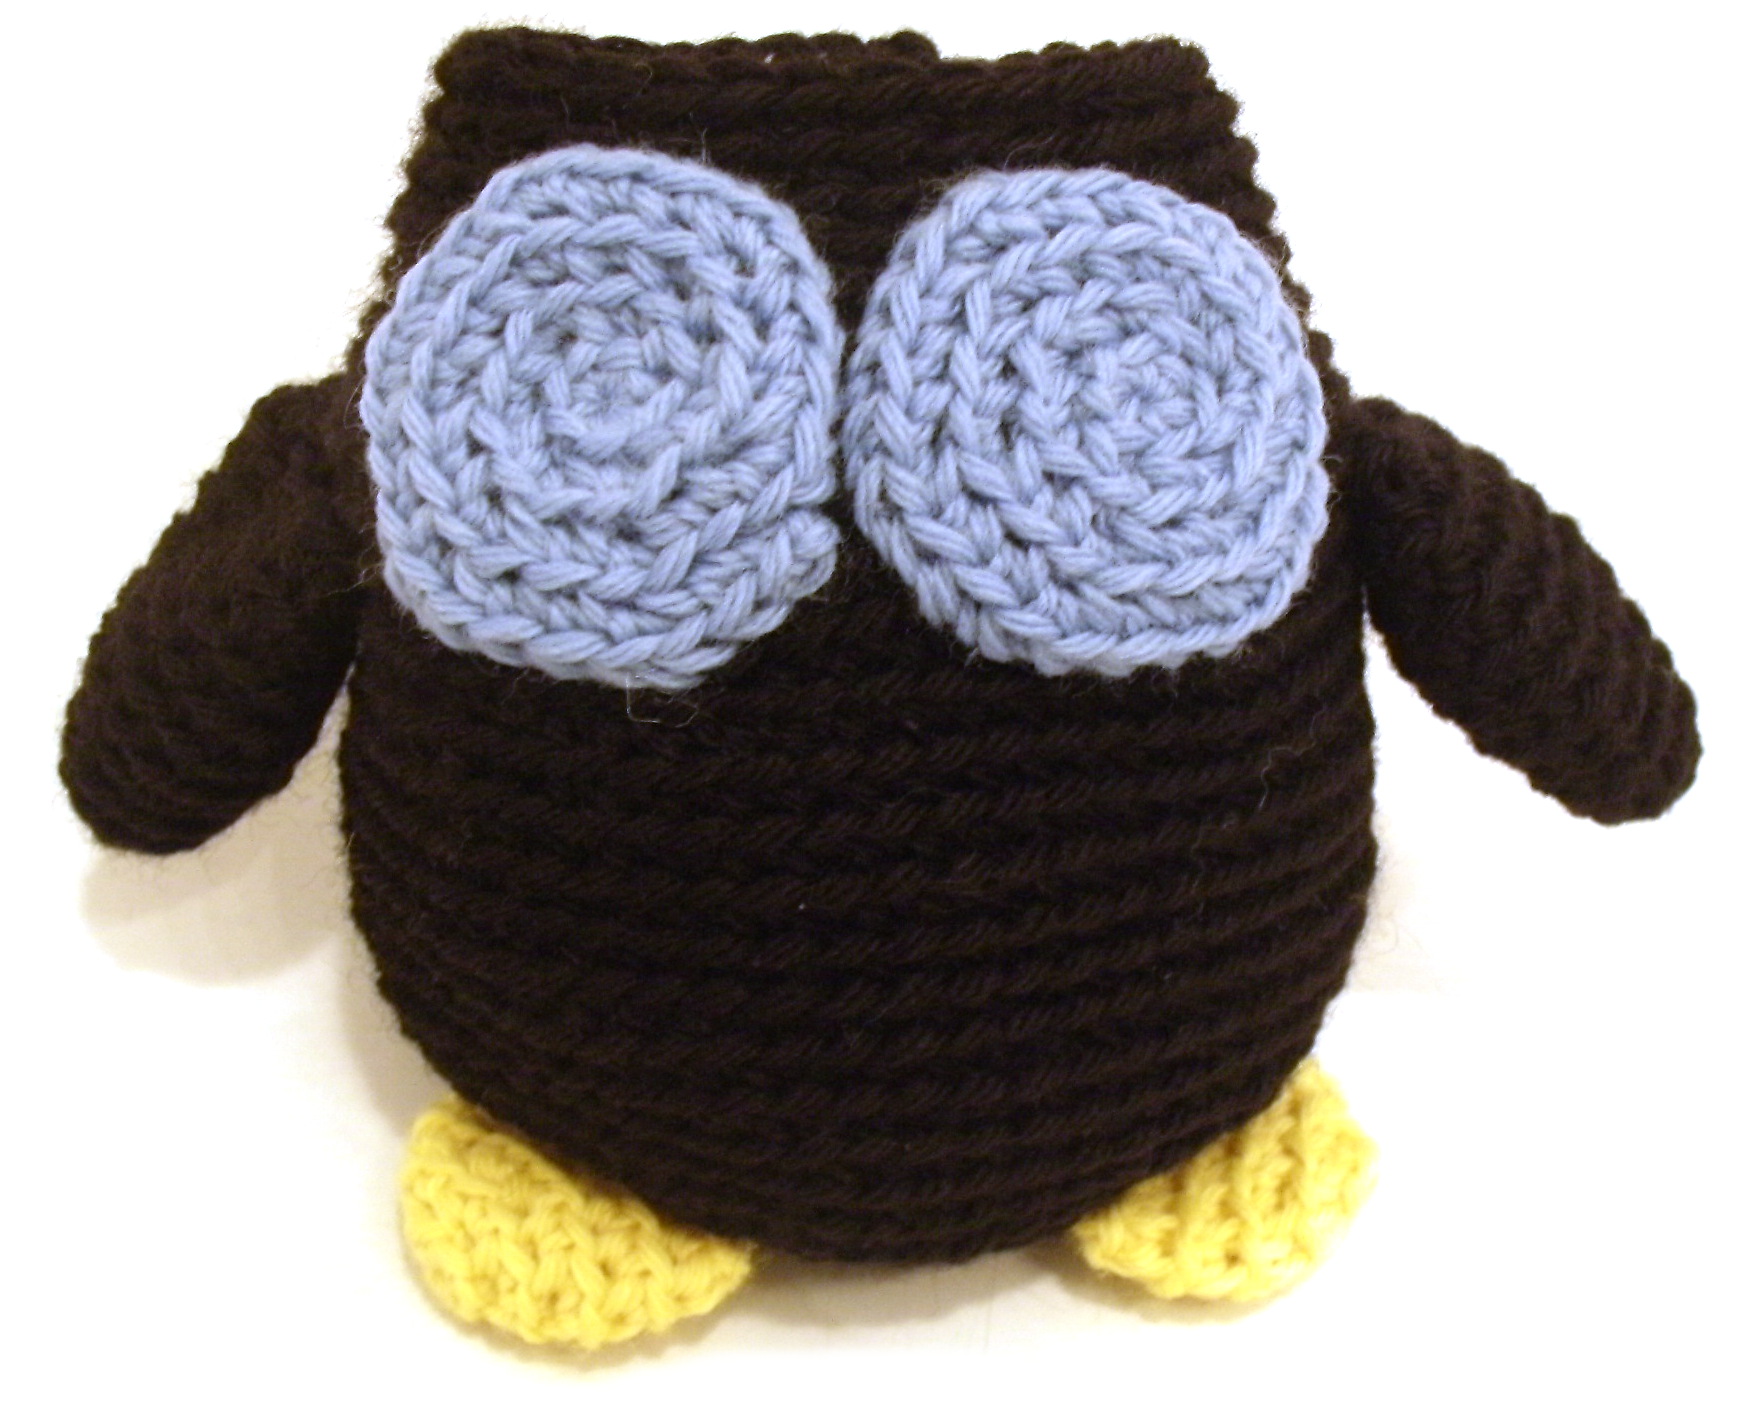
Eye Circles
Make 2.
With AC2, ch 2 (I like to start with a sloppy slip knot. This video shows how. And this video shows how to chain.) Round 1 sc 6 in 2nd ch from hook (6) This post will help you find that second chain from the hook. Round 2 sc twice in each st (12) This video will help you if you find it tricky to start the second round. Round 3 [sc twice in next st, sc in next st.] 6 times (18) (Whoa! What’s with the brackets? It’s just telling you that set is going to repeat. So do everything in the brackets, and then repeat that same series for a total of six times. No big deal. And the 18 in parentheses is telling you that this round is a total of 18 stitches. It’s a good way to check your work.) Round 4 [sc twice in next st, sc in next 2 sts.] 6 times (24)
Make 2.
With AC1, ch 2 Round 1 sc 6 in 2nd ch from hook (6) Round 2 sc twice in each st (12) Round 3 [sc twice in next st, sc in next st.] 6 times (18) Rounds 4-5 sc in each st (18, 2 rounds)
Fasten off with long tail.
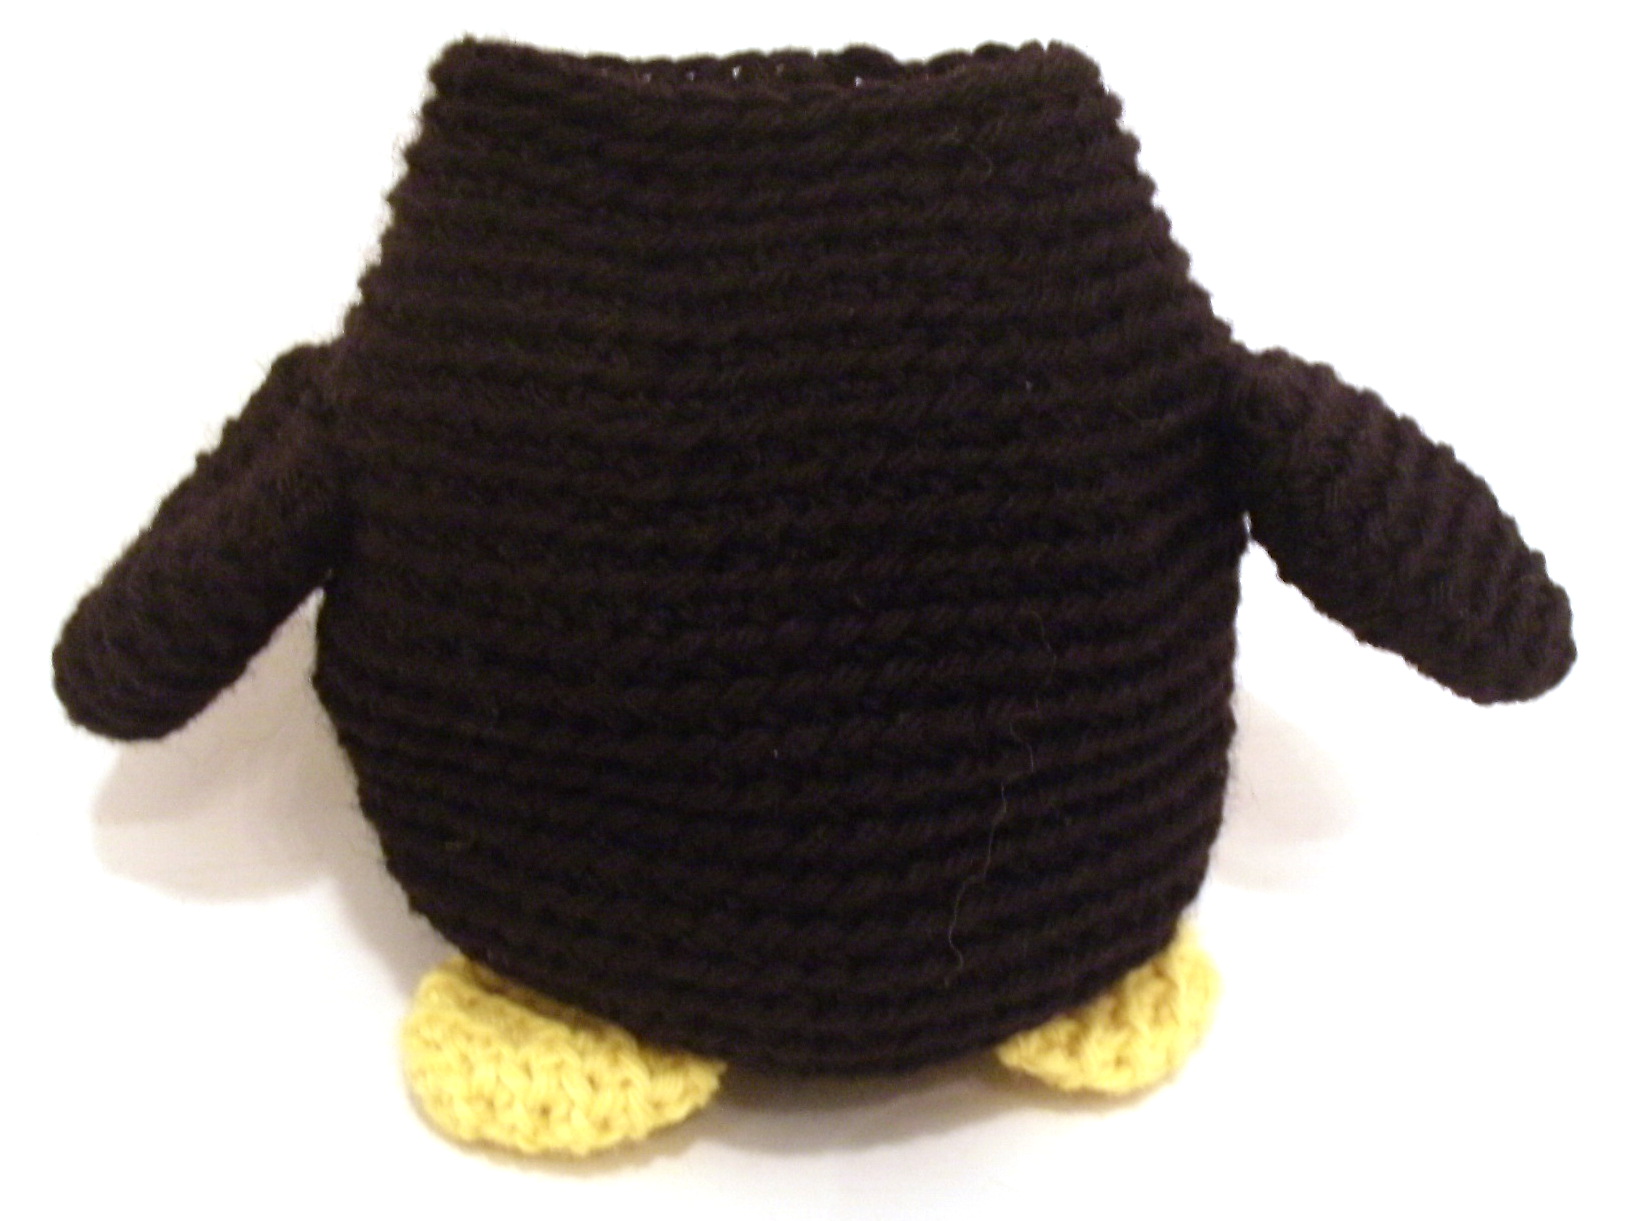
Wings
Make 2.
With MC, ch 2 Round 1 sc 6 times in 2nd ch from hook (6) Round 2 sc twice in each st (12) Rounds 3-4 sc in each st (12, 2 rounds) Round 5 [sc twice in next st, sc in next st] 6 times (18) Rounds 6-9 sc in each st (18, 4 rounds) Round 10 [sc2tog, sc in next st] 6 times (12)
Fasten off with long tail.
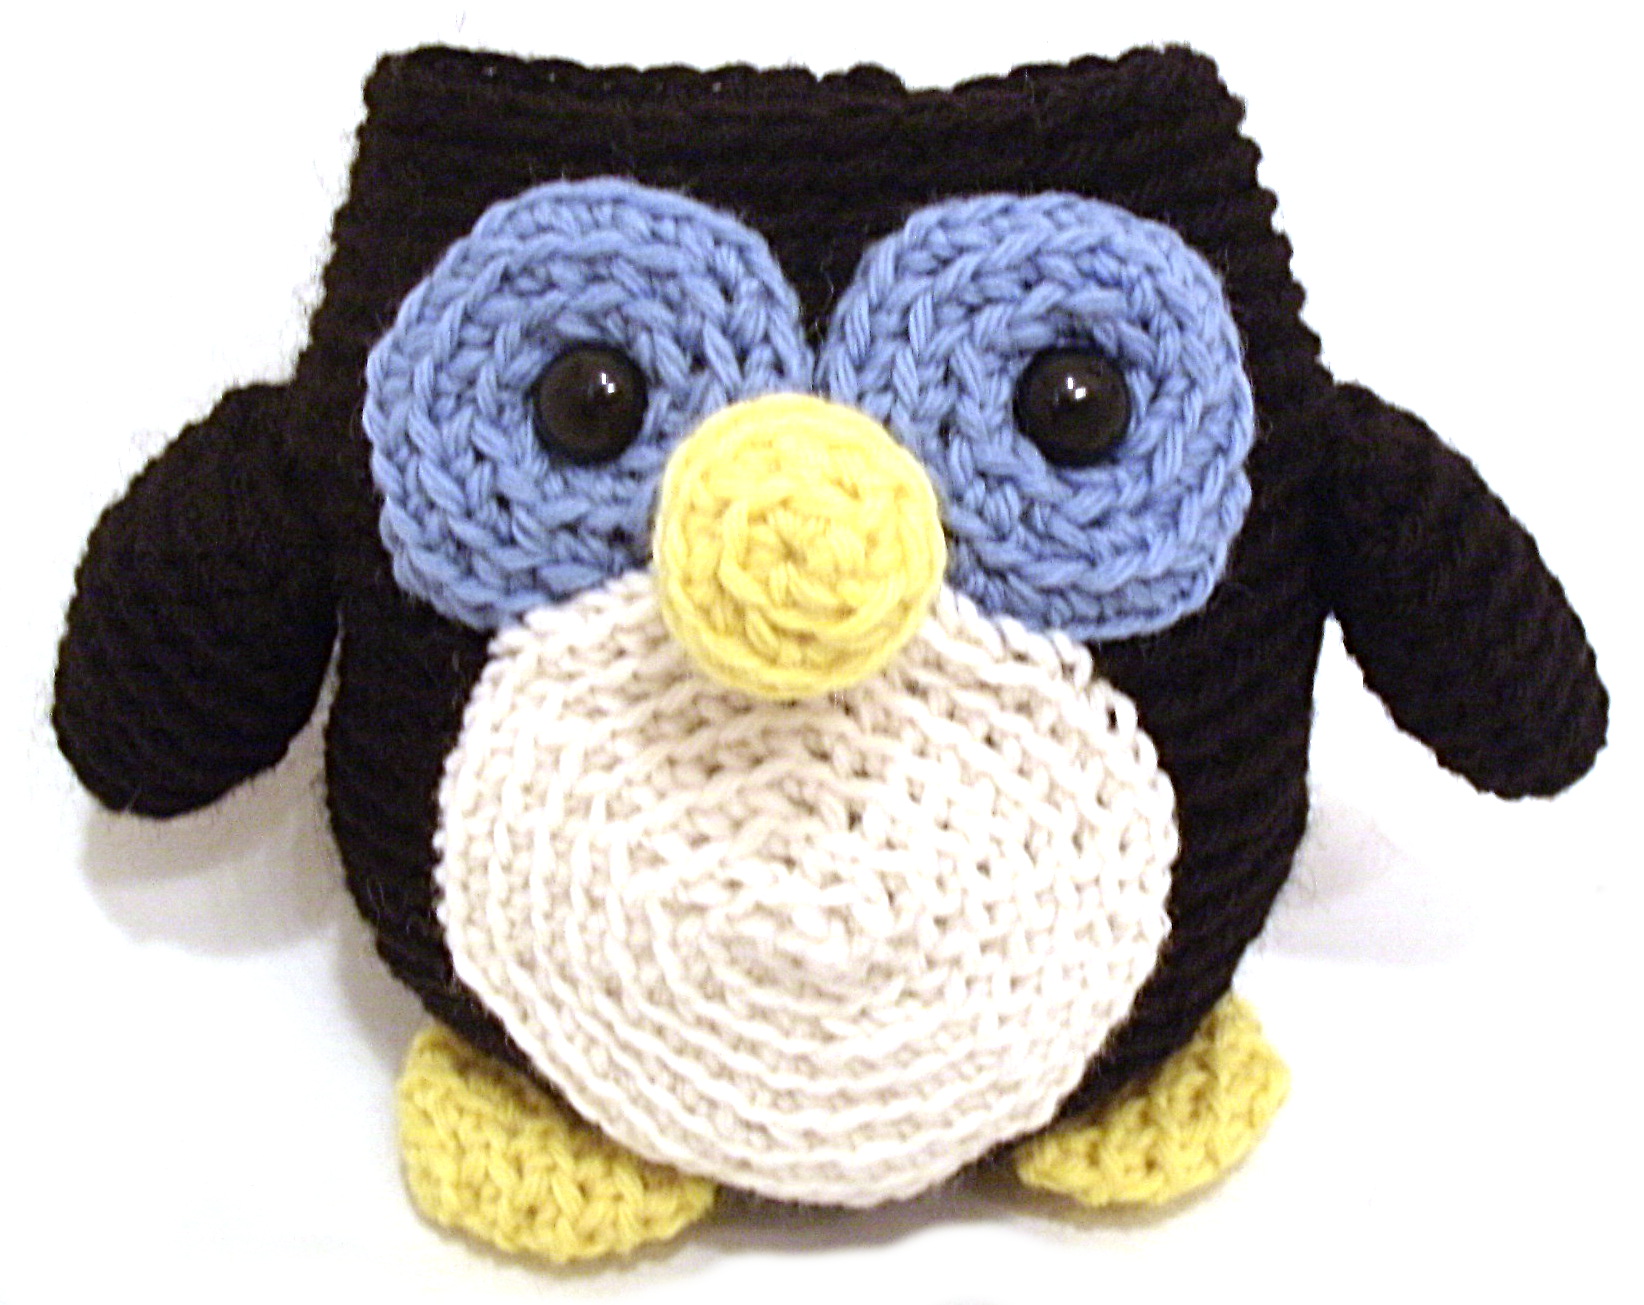
Beak
With AC1, ch 2 Round 1 sc 6 times in 2nd ch from hook (6) Round 2 sc twice in each st (12) Rounds 3-5 sc in each st (12, 3 rounds)
Fasten off with long tail.
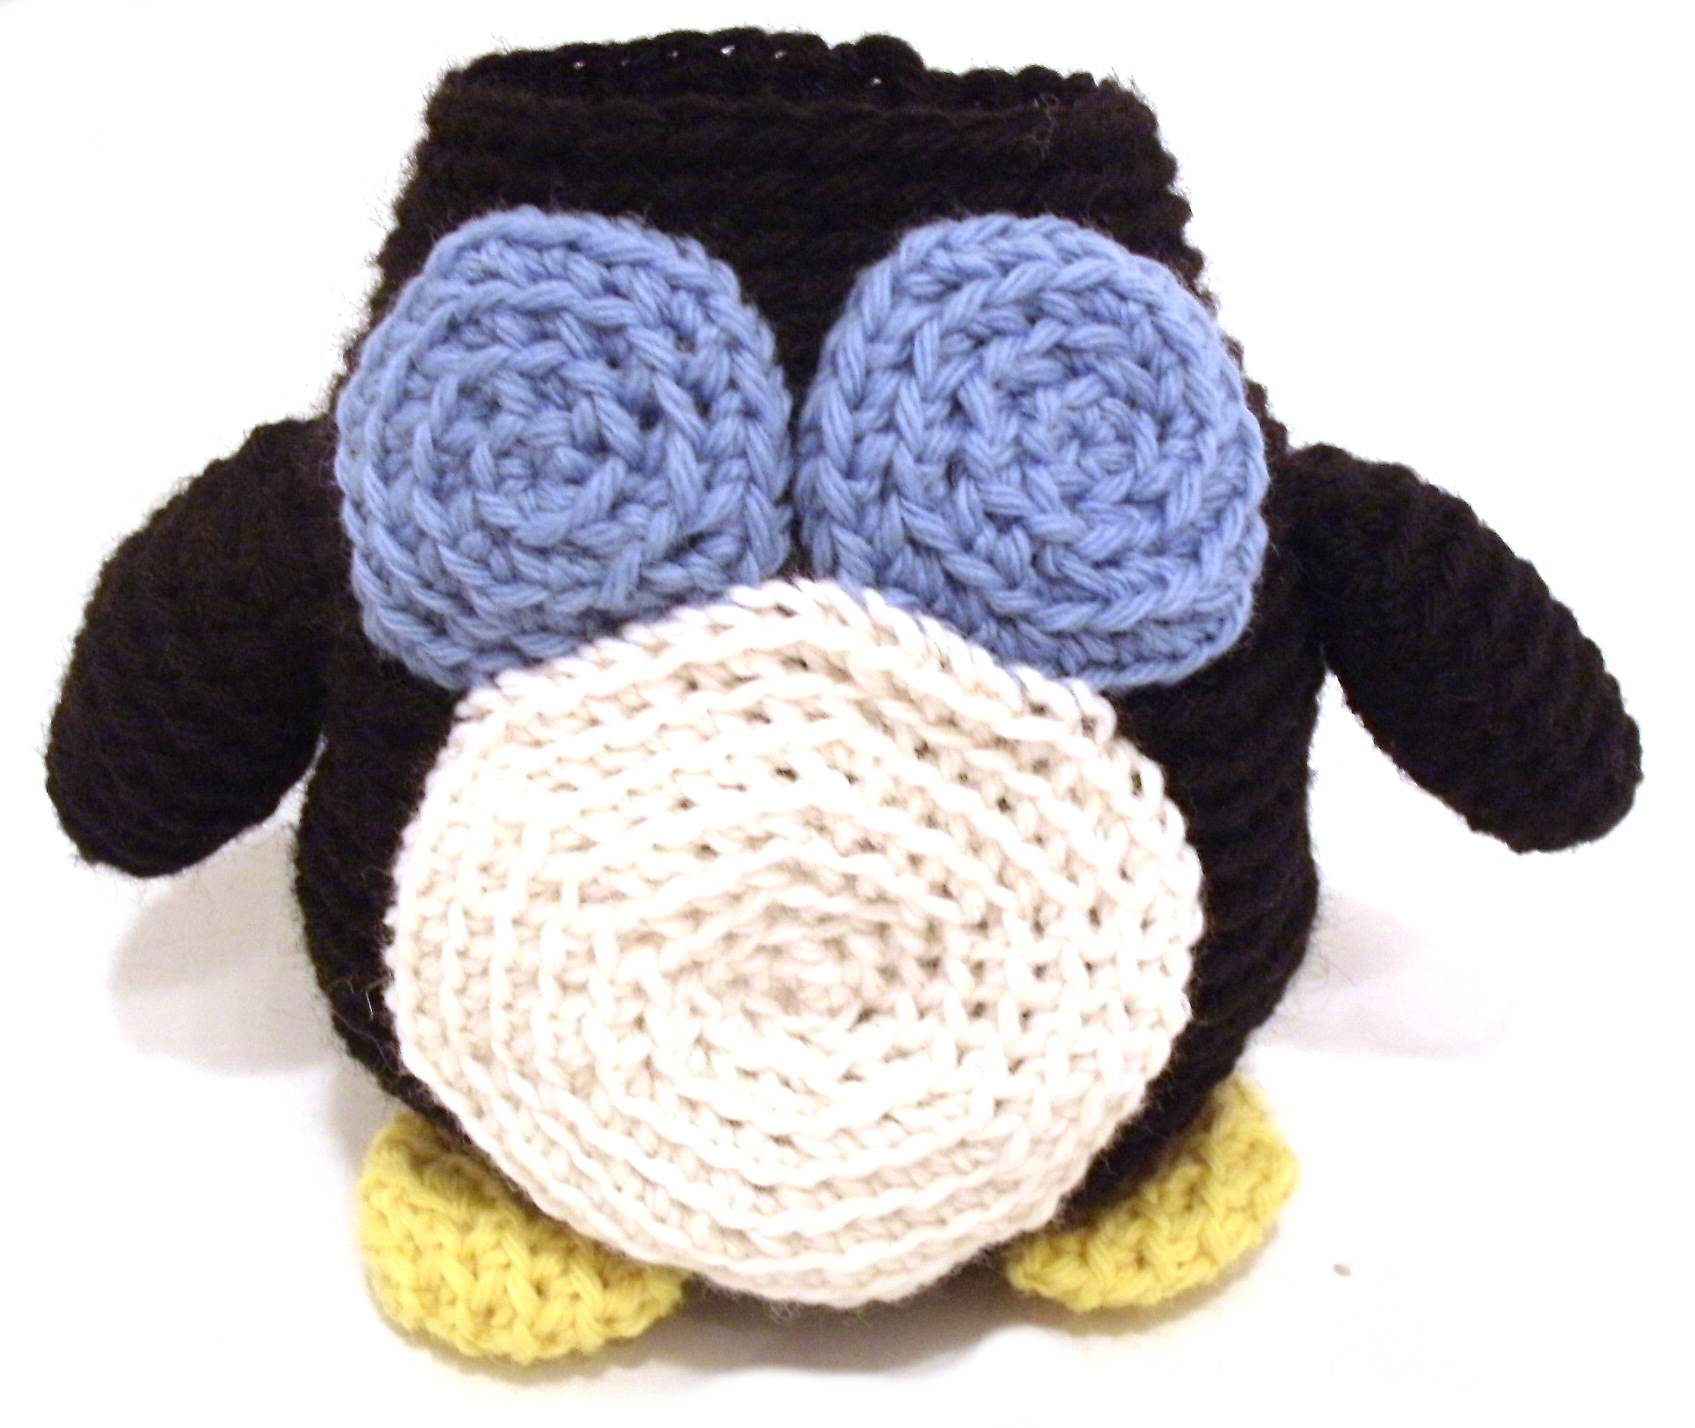
Tummy Circle
With SC, ch 2 Round 1 sc 6 times in 2nd ch from hook (6) Round 2 sc twice in each st (12) Round 3 [sc twice in next st, sc in next st] 6 times (18) Round 4 [sc twice in next st, sc in next 2 sts] 6 times (24) Round 5 [sc twice in next st, sc in next 3 sts] 6 times (30) Round 6 [sc twice in next st, sc in next 4 sts] 6 times (36) Round 7 [sc twice in next st, sc in next 5 sts] 6 times (42) Round 8 [sc twice in next st, sc in next 6 sts] 6 times (48)
Fasten off with long tail.
Body
With MC, ch 2 Round 1 sc 6 times in 2nd ch from hook (6) Round 2 sc twice in each st (12) Round 3 [sc twice in next st, sc in next st] 6 times (18) Round 4 [sc twice in next st, sc in next 2 sts] 6 times (24) Round 5 [sc twice in next st, sc in next 3 sts] 6 times (30) Round 6 [sc twice in next st, sc in next 4 sts] 6 times (36) Round 7 [sc twice in next st, sc in next 5 sts] 6 times (42) Round 8 [sc twice in next st, sc in next 6 sts] 6 times (48) Round 9 [sc twice in next st, sc in next 7 sts] 6 times (54) Round 10 [sc twice in next st, sc in next 8 sts] 6 times (60) Rounds 11-21 sc in each st (60, 11 rounds) Round 22 [sc2tog, sc in next 8 sts] 6 times (54) Round 23 sc in each st (54) Round 24 [sc2tog, sc in next 7 sts] 6 times (48) Round 25 sc in each st (48) Round 26 [sc2tog, sc in next 6 sts] 6 times (42) Round 27 sc in each st (42) Round 28 [sc2tog, sc in next 5 sts] 6 times (36) Round 29 sc in each st (36) Round 30 [sc2tog, sc in next 4 sts] 6 times (30) Round 31 sc in each st (30)
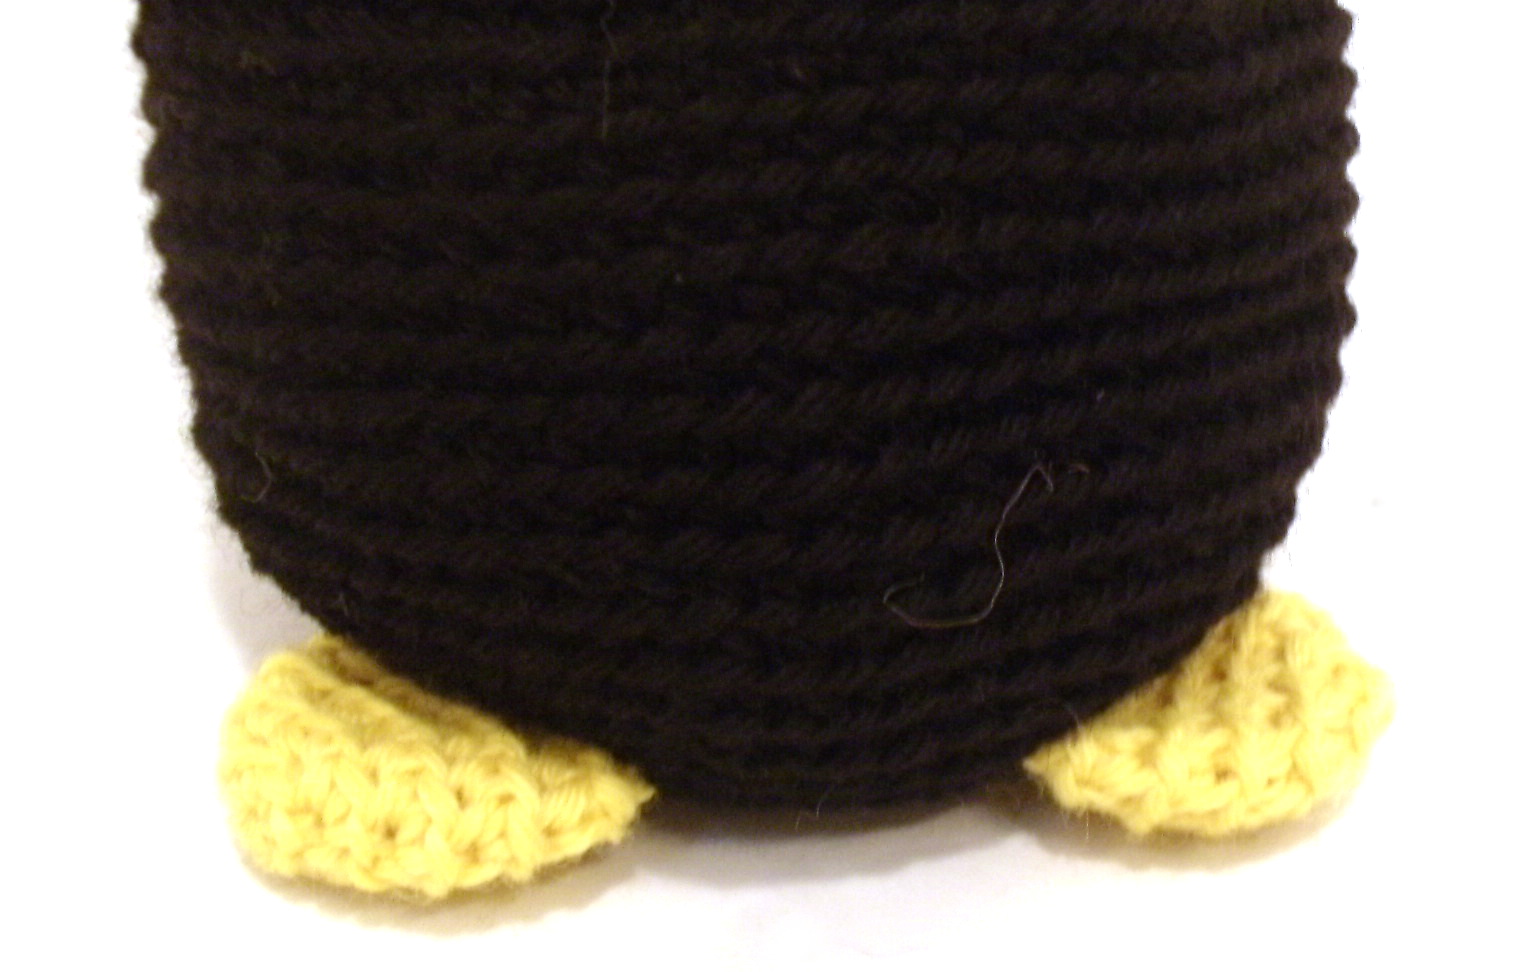
Attach tummy circle to body. The bottom should be attached at round 9 (two rounds above the feet), and slightly overlap the bottom of the eye circles at the top.
Fasten eyes onto the head. To do so, just insert the post where you want the eye to go (for Howie it’s in the center of his eye circles) and press the washer onto the back post to secure. Make sure the washer is pushed on all the way.
Round 32 [sc2tog, sc in next 3 sts] 6 times (24) Round 33 [sc2tog, sc in next 2 sts] 6 times (18) Round 34 [sc2tog, sc in next st] 6 times (12) Round 35 [sc2tog] 6 times (6)
Snap a photo and share it with us over in the Shiny Happy People group! If you share it on social media, tag with with #shinyhappyworld so I can see it. 🙂
Want to learn how to make adorable crocheted stuffed animals with an easy online workshop – totally free?
Sign up for Let’s Make Amigurumi here. You’ll learn how to get started, the tools and supplies you’ll need, and how to make an easy amigurumi from start to finish using simple crochet stitches.
It’s a fun, inexpensive, and totally portable craft. You can do it!
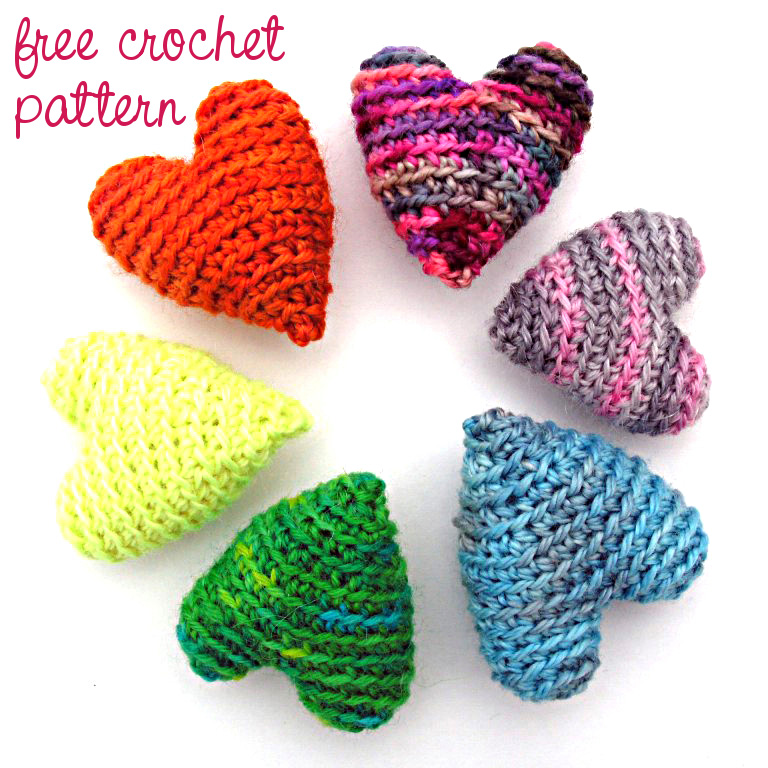
Crochet these fun hearts!
What’s better than hearts for Valentine’s Day? This pattern contains instructions for 3 sizes of stuffed hearts! The small measures 2.5 inches tall, the medium is 5 inches tall, and the large is a whopping 7 inches tall!!
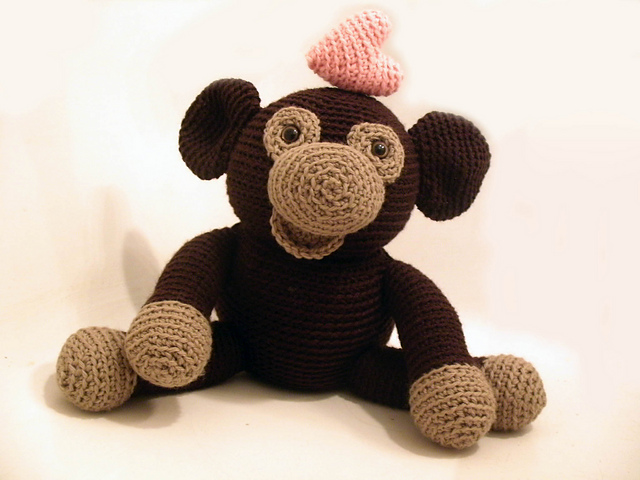
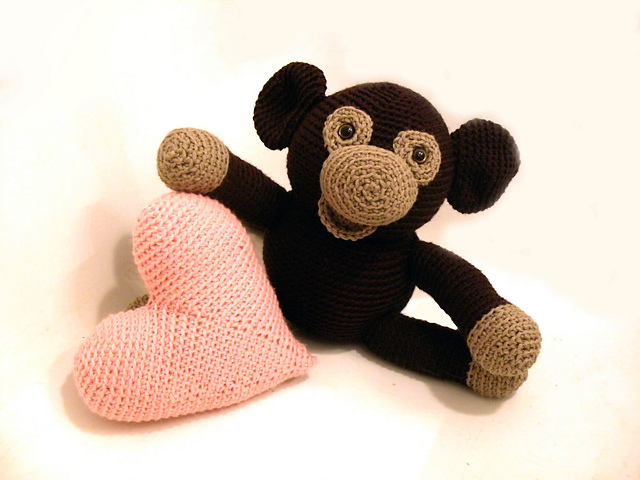
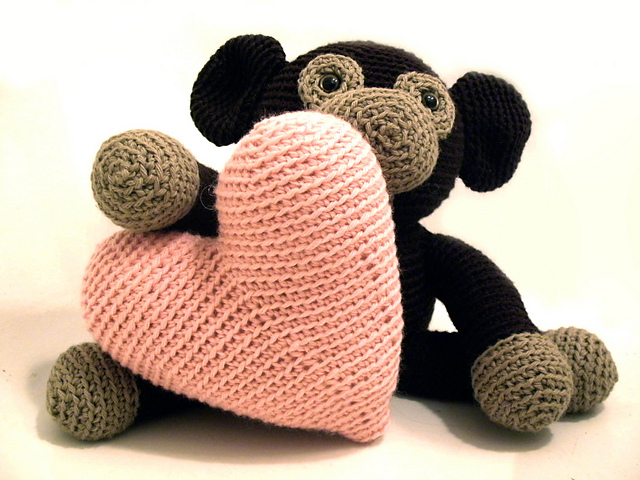
These hearts are adorable plush decorations on their own… but the medium size is specially designed to turn any FreshStitches amigurumi into a Valentine’s Day amigurumi!
Here you can see the same Owen the Monkey with the three different size hearts. 🙂
Make an easy baby gift with this free receiving blanket pattern.
A receiving blanket is seriously the easiest baby gift you can make. Choose fabulous fabric and no embellishment and you can make one in 15 minutes. Even if you add an applique (like the fox shown) you can still make it in less than an hour.
Here’s how. . .
Step 1
Cut two squares of fabric about 36 inches square.
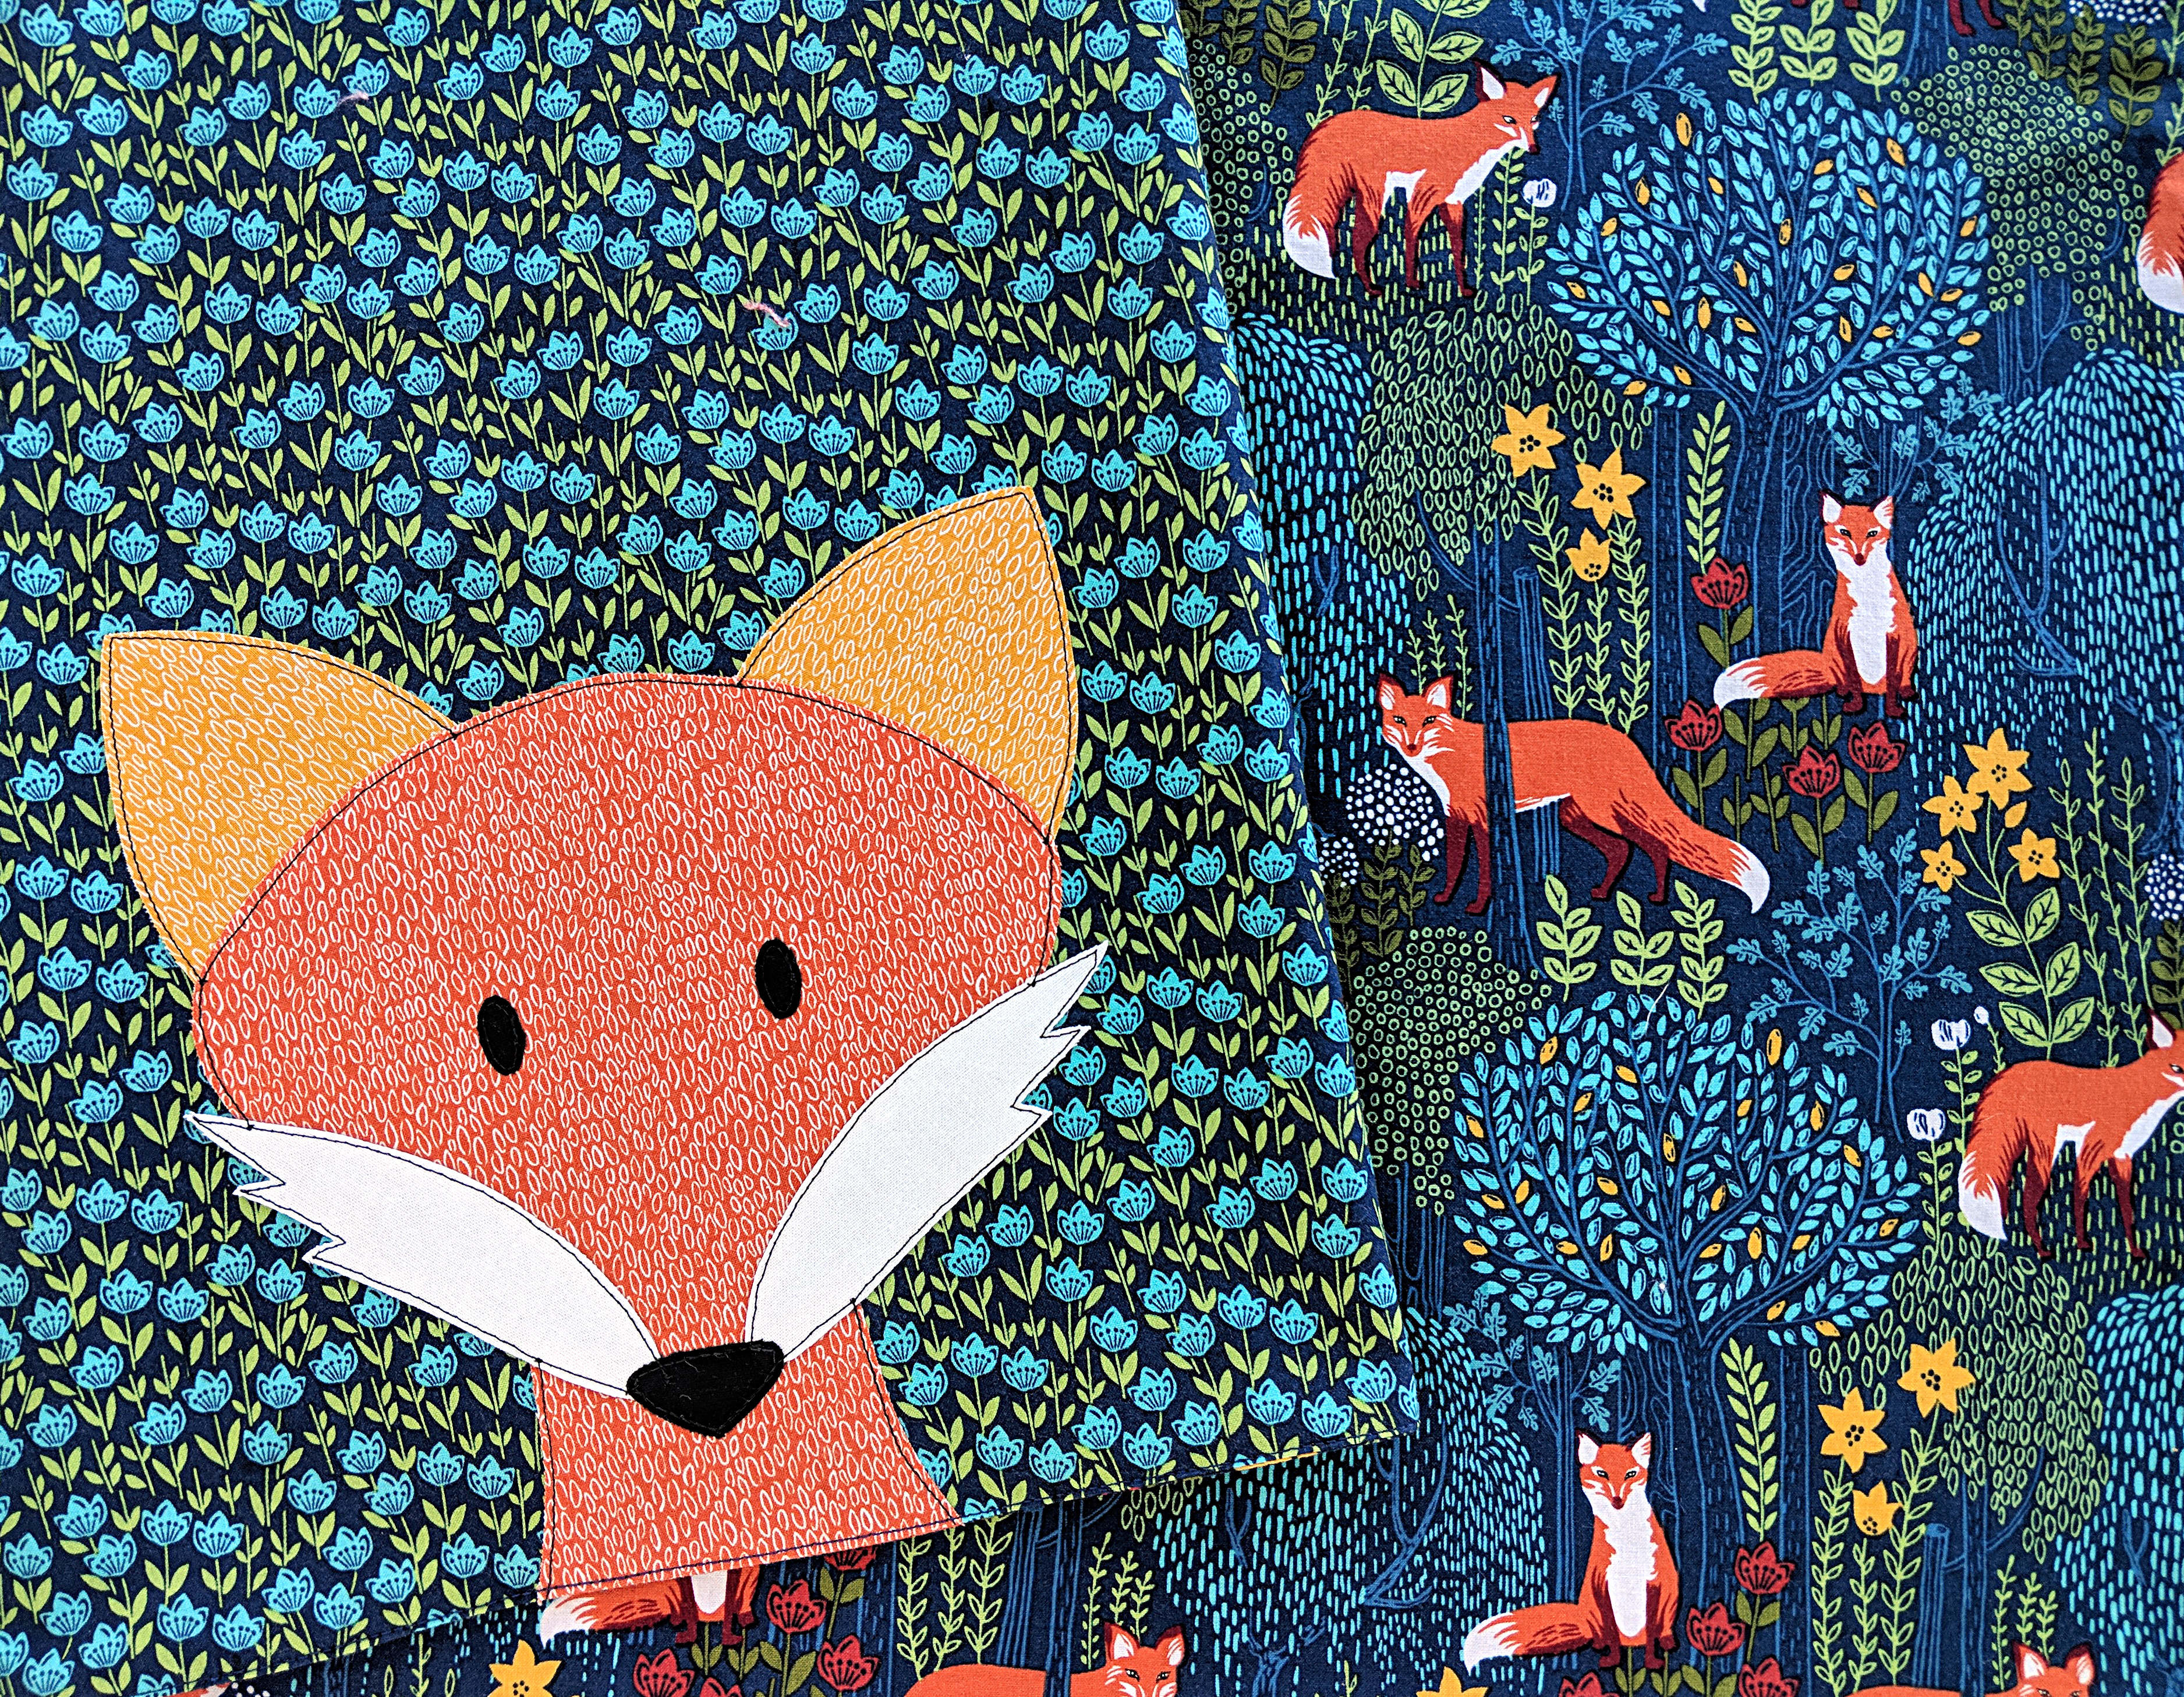
Any kind of fabric is fine. I’m using quilting cotton here (from the GORGEOUS Into the Woods collection from Michael Miller Fabrics) but I’ve also used flannel, terry cloth, baby corduroy, and more. Just about anything goes.
I like to use one fabric for the front and a different fabric for the back, but you don’t have to.
And when I say “about” 36 inches I really mean it. I bought one yard cuts of fabric, but by the time I washed them and squared off the cut ends they were more like 34 inches. So I cut two 34 inch squares. No problem.
Step 2
Put the two squares of fabric right sides together and pin all the way around the edge.
Take a little care here and make sure you get everything laid out and pinned neatly. If your squares aren’t really lined up, it will show in the finished blanket – and make the pressing in Step 5 hard.
Step 3
Sew almost all the way around the edge, leaving an opening big enough to fit your hand for turning right side out. I usually leave 4-5 inches. Use a quarter inch seam allowance – or something close. I use the edge of my favorite presser foot as a guide which makes a seam more like 3/8 inch and that’s just fine. 🙂
Step 4
Clip the corners right up close to the stitching.
This will eliminate bulk in those corners when you turn it right side out.
Step 5
Turn the blanket right side out – taking care to poke out the corners and smooth all the edges. Press the edges flat.
Step 6
Now you have a choice. You can leave the edges as they are and hand sew the opening. I like to use ladder stitch (that links to a video tutorial) for invisible stitching.
Or (if you want a no-hand-work project) you can topstitch your blanket all the way around the edge. That will make your seams extra secure and sew up that opening at the same time.
Here’s how close to the edge I typically stitch.
Finished!
But that’s not all. This receiving blanket pattern is basically a blank slate for you to play with.
Sure – you can use fabulous fabrics and make it just this simple. How beautiful is this?
Honestly – no further embellishment needed at all.
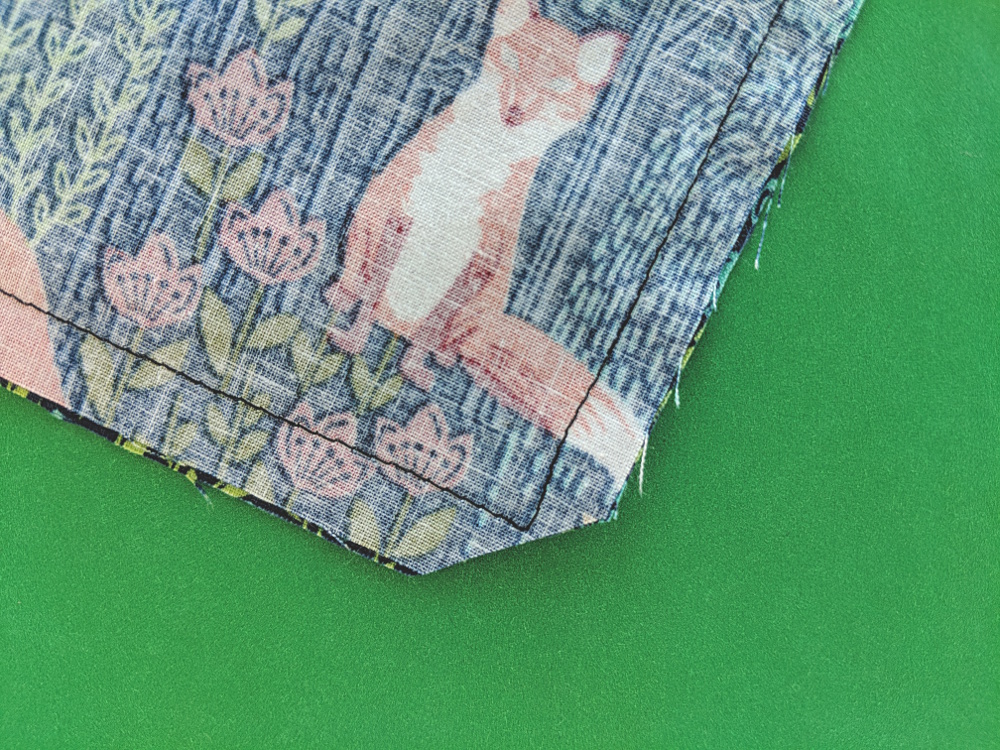
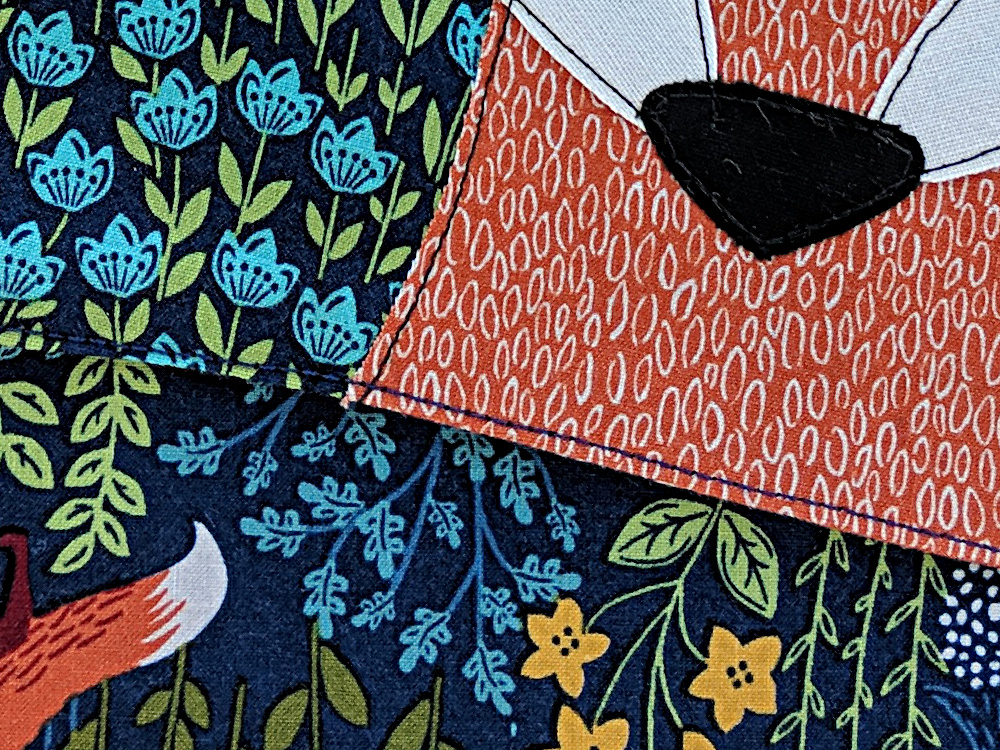
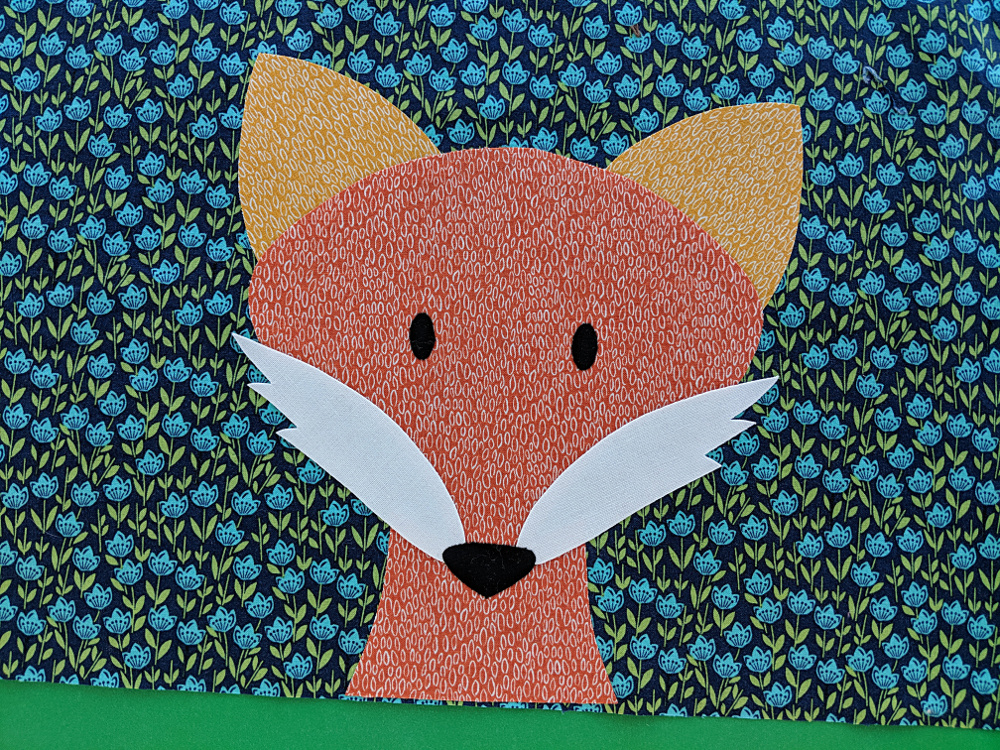
You can add some applique. On this sample I added the Fergal Fox applique pattern in the lower right corner of the blanket.
No resizing needed – and it’s a great way to get extra mileage out of patterns you already own. If you do this, make sure you place the bottom edge of the neck right up against the raw bottom edge of the blanket.
That way the raw edge will get sewn up in the stitching that sews the front and back of the blanket together and it will look like the fox is peeking into the frame rather than like a decapitated head floating in the corner. 🙂
Have fun with this pattern! Be sure to tag any photos of your finished work with #shinyhappyworld – or share it in the Shiny Happy People group on Facebook.
Here are several free patterns that work with my basic 10-inch applique squares – no resizing needed!
Here are several free patterns that work with just some simple resizing. This post about making coasters has info about resizing an applique pattern that can be applied to any of these projects.
I’ve been working on a super fun North Pole quilt by adding a bunch of cute Santa’s Village signs to houses and buildings made with the Shiny Happy Houses quilt pattern.
This was a really popular tutorial and people loved the bags – but I had a lot of people ask how we stuck tags to them.
I’m finally getting around to that post!
For a while we just used paper tags tucked into the ribbon – but that didn’t always stay in place, so a couple of years ago I made a bunch of felt tags and they’ve been AWESOME.
First – a note. Mine is a small family – just three of us – and we all have different initials. So for us it worked really well to just have tags with a first initial. You may need to adapt the idea a bit to work for YOUR family, but the basic technique can be used a lot of ways. 🙂
First cut a 3 inch square of felt.
Why 3 inches? It’s a number that allows me to get 12 squares out of a single sheet of felt with no waste. 🙂
It’s easy to cut shapes like those letters if you use freezer paper.
Trace the letter onto the paper side of the freezer paper
Fuse the shiny side of the paper to the felt.
Cut out the letter – cutting through the felt and the paper at the same time for super accuracy
Peel off the paper and use it again.
Stick the letter to the felt square with a dab of glue stick. Sew around the letter using a simple straight stitch on your sewing machine. You could also hand sew the letter in place using fancier stitches, but I wanted to make a big stack of these in an afternoon. (Keep reading for a no-sew option.)
Cut a slit in the felt on each side of the letter.
I don’t measure these or worry too much about precision – most of the slits are about an inch tall, and roughly half an inch from the edge of the felt.
Done!
Now – here’s how I use them.
I make two kinds of bags. The main kind – the ones I use most often – have the ribbon sewn to the top edge of the bag. They’re designed for the ribbon to wrap all the way around the gift, like this. . .
For those I just slide the tag onto the ribbon anywhere on the front of the package. It looks like this. . .
This is a gift for Jo. 🙂
The other kind of bag I make has the ribbon sewn into a side seam near the top of the bag. Those bags are meant to gather up at the top like a classic Santa sack, with the ribbon tied around the neck of the bag – not the gift itself.
For those I thread the tag onto one of the loops before I finish tying the bow. Here’s what it looks like.
Another gift for Jo! 🙂
Both ways are super easy, and post-gift-opening cleanup is a breeze. The ribbons are attached to the bags, so I just fold up the bags, and make a little stack of the tags. The bags and the tags all fit in one small plastic tub – maybe the size of two shoe-boxes. 🙂
felt (I like wool blend felt because it doesn’t pill and will look nice for years)
freezer paper
glue stick
I like the way the stitching looks, but you could make a completely no-sew version using Heat & Bond Ultrahold fusible adhesive. Remember – this is the heaviest weight they make and you should NOT sew through it. (It will gunk up your needle.) If you use this option, you’ll need to fuse a little hotter/longer than the package directions say in order for the heat to fully penetrate the thick felt and melt the adhesive. Everyone’s iron is a little different, so just experiment with temperature and time until you get a solid fuse.
There’s a new free applique pattern for you! Merry Christmas! 🙂
This Mrs. Claus pattern is the same size and style as the other free Christmas applique patterns (10 inch finished blocks). There are four now so you can make a square wallhanging!
If you’re using Quilt As You Go, quilt the background to the batting. I’m showing mine from the back so you can see the stitching more clearly.
Step 2
Print or trace the pattern pieces onto the paper side of fusible adhesive.
I love these printable sheets of Heat & Bond Lite because I’m lazypants and don’t like to trace.
The pieces have already been reversed, so no need to flip anything.
Step 3
Roughly cut out the pieces, leaving a little extra all the way around each piece. Leave a little extra extra wherever there’s a dotted line. That edge will tuck under other pieces for a clean finish.
Fuse the pieces to the back of your fabric, following the instructions on your fusible.
Step 4
Trace the features onto the front of the face fabric.
If you hold it up to a window, you’ll be able to see the lines very clearly through the fabric.
I trace just inside the lines marking the position of any applique pieces – like the eyes.
I trace directly on any lines to be stitched – the nose and mouth.
I just use a fine tip black Sharpie.
Here’s what it looks like without the light shining through.
Step 5
Cut out all the pieces neatly.
Cut directly on the solid lines. Leave a little extra seam allowance past the dotted lines.
Step 6
Peel off the paper backing and layer up all the pieces.
Remember – those dotted line edges will tuck behind other pieces. For example – the bottom of the bun has a dotted line, showing it tucks behind the top of the head.
Line up the lower edge of her shoulders with the bottom edge of the block. You’ll trim away the excess when you trim your block down to size so you don’t see that cut edge.
Fuse the design in place, again following the instructions on your fusible package.
I like to use a simple straight stitch in thick black thread. I think the cartoony outline suits my simple designs, but you can use matching thread and any stitches you like.
Trim it down to size and you’re finished! I recommend starting with an 11 inch square and trimming it down to 10 1/2 inches if you’re making a quilt or a wall hanging – but you can also use this design to make some placemats (free placemat pattern here) and that will need a different starting block size.
Need to whip up a super easy trick or treat bag for Halloween this year?
Then I have the pattern for you!
It’s fully lined (which actually makes construction easier), requires no hand sewing, can be made with any of my square quilt block patterns with no resizing – and you can make it in an hour or less. 🙂
This project will work with any of my square applique patterns. If you’re using someone else’s pattern, you may need to resize it to fit a 10 inch square.
If you have a farmer who needs a few farm animals, you could use any of the blocks in the Noisy Farm pattern.
If you just want to customize it with a name or Halloween greeting, use a fun Halloween print fabric and this free alphabet applique pattern.
The sky is the limit!
What You’ll Need
1/2 yard medium weight fabric for the main bag (I used black cotton twill)
1/2 yard light weight fabric for the lining (I used a Halloween novelty print)
fusible adhesive (I recommend Heat & Bond Lite)
fabric for your applique
black thread
applique pattern of your choice
Cutting Instructions
Cut two 11″ x 11″ squares from the main fabric.
Cut two 11″ x 11″ squares from the lining fabric.
Cut two 14″ x 4″ rectangle from the main fabric for the handles.
Put It All Together
Step 1
Applique the main fabric squares with the design of your choice. If it’s one of my portrait designs, make sure the cut edge of the body is lined up with the bottom edge of the square.
If you’ve never done applique with fusible adhesive, it’s super easy! You’ll find instructions with video links in any of my patterns, and there’s a general video tutorial here.
Step 2
Fold the rectangles for the handles into double-fold strips and press.
Fold the bag in half to find the center of the top edge.
Pin the handles to the bag so that the inside edge of the handle is 2 inches from the center pin, and the raw edge of the handle is lined up with the raw edge of the bag.
Pin the handles in place on both sides of the main bag. You can baste them in place if you like, but I usually just hold them with pins for the next step.
Step 6
Leave the main bag right side out, and the lining inside out.
Slide the lining over the main bag, so that the right side of the lining is facing the right side of the applique, and the handles are sandwiched between the two layers. Match the side seams and centers and pin the two bags together around the top edge.
Sew around the top edge of the bag using 1/4″ seam allowance and leaving an opening on one side between the inside edges of one of the handles.
This is easiest if you start sewing right at the inside edge of one handle. Sew through that handle, around the side seam, through both handles on the other side, around the second side seam, and through the last handle. Stop as soon as you sew over the last handle (remember to backstitch!) and you’ll have an opening about 4 inches wide.
Step 7
Turn the bag right side out. This step is a little mind-bendy if you’ve never done it before, but it’s actually really simple.
First pull the main bag out of the lining so that both parts are inside out.
Now reach into the opening, grab the main bag and pull it through the opening so that it’s right side out. Keep pulling and the lining will follow – also right side out.
Now just tuck the lining down inside the bag. 🙂
Step 8
Smooth and press the top edge of the bag.
Fold under the seam allowance from the turning opening and press that as well.
Edgestitch all the way around that top edge. This will finish your bag, sew up the turning opening, and reinforce the handles – all in one step. 🙂
Finished!
Now go out and fill your trick or treat bag with lots of yummy candy. 🙂
Here are several free patterns that work with just some simple resizing. This post about making coasters has info about resizing an applique pattern that can be applied to any of these projects.