Sprinkles is a doll quilt pattern I designed especially for the rag dolls in The Dress Up Bunch – but it’s also just the right size for American Girl dolls and lots of random teddy bears and stuffed animals.
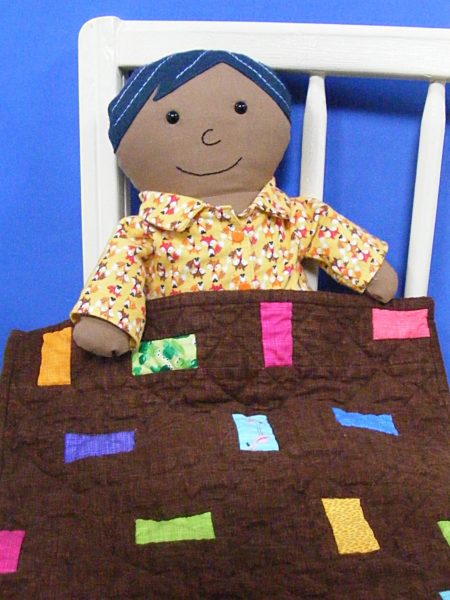
Look at Bean – all ready for bed in his flannel jammies, cozily tucked in under his brand new quilt.
He’s ready for his bedtime story!
The quilt (and the name) are inspired by a river of hot fudge covered with brightly-colored sprinkles. That’s sure to bring him sweet dreams. 🙂
It’s super easy to make – comes together in just a few hours. You can make it during a naptime or two!
If you’ve never made a quilt before, this is a great one to start with. I designed it to be especially easy! The blocks are easy to cut, they go together without any fussy seam intersections, and the quilting is easy.
Here’s how to make it!
Materials
1/2 yard chocolate brown fabric
1 fat quarter backing fabric
small scraps for the sprinkles (less than 1/4 yard total)
Chocolate brown fabric Cut 4 strips 2 1/2″ wide, the full width of the fabric. From those strips cut the following. . .
4 rectangles, each 2 1/2″ x 14″
17 squares, each 2 1/2″ x 2 1/2″
18 rectangles, each 2 1/2″ x 1 1/2″
Cut 2 strips 2 1/4″ wide for the binding
Sprinkles fabrics Cut 18 rectangles, each 2 1/2″ x 1 1/2″
Backing fabric 1 fat quarter, uncut
Step 2
Join your smallest rectangles into squares. For each square join 1 brown rectangle with one sprinkle/colored rectangle. Sew them together with a 1/4″ seam allowance (I very strongly recommend using a 1/4″ foot on your sewing machine for accurate piecing!)
Press the seam allowance flat. It doesn’t matter which way you press it - this quilt has no nested seams. I usually press toward the darker fabric, but in this case, the brown flannel was thicker than the sprinkles fabric so I pressed it toward the thinner fabric.
Repeat with the remaining small rectangles until you have 18 squares.
Step 3
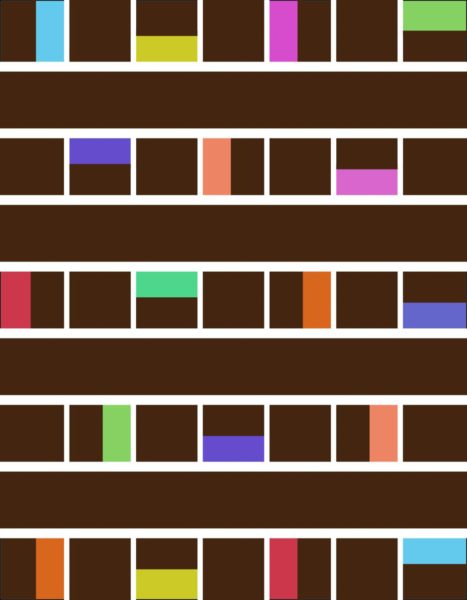
Join all the blocks together as shown in the diagram.
First sew the blocks
into rows, alternating
brown blocks with the
pieced
brown/sprinkles blocks
you made in Step 2.
Press all your seams
flat.
Then sew those rows
together with your long
rectangles between
them. Press your
seams flat.
A small doll quilt pattern like this is also a great opportunity to give Big Stitch Quilting a try.
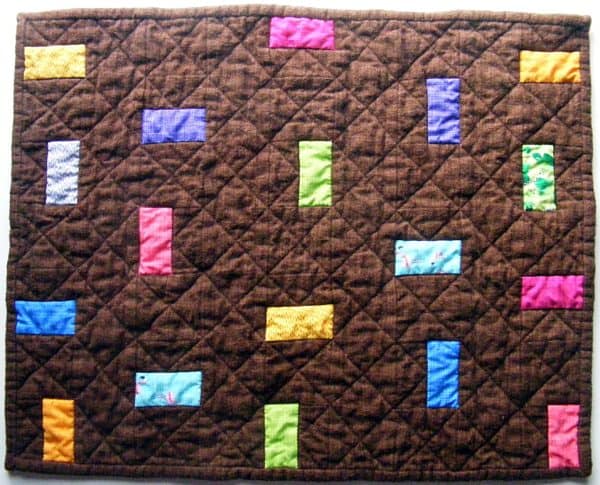
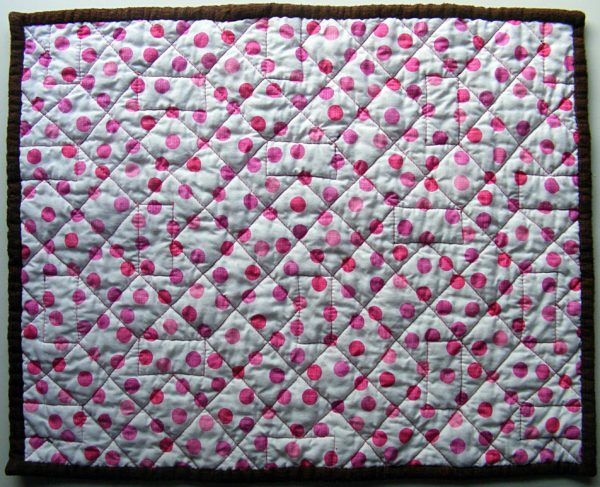
I quilted this top in two steps. First I quilted around each sprinkle. Then I quilted across the surface of the entire quilt with diagonal lines that went corner to corner on all the squares – skipping over the sprinkles.
The squares are small enough that no marking is needed - just eyeball it. You can see the quilting in these photos of the front and back of the quilt.
Dress your doll in their favorite jammies, read them a story, then tuck them in under their cozy new quilt. Then brag a little! Or a lot. :-) You just made a quilt! Pat yourself on the back. Call everyone you know. Take photos and share them in the Shiny Happy People group. Share them other places too – but tag them #shinyhappyworld so I see them too. 🙂
If you like this pattern, sign up for the Shiny Happy News! Members get a weekly newsletter with sewing tips and tricks, links to free patterns, special discounts, and more.
The Dress Up Bunch is a collection of cute and cuddly rag dolls. Get patterns for the dolls, plus all their fun outfits and accessories!
For a while now I’ve been thinking about designing a free scrap quilt pattern that’s as fun, easy and versatile as the Warren the Charity Bear pattern.
Just like Warren, I wanted something that was fast. I know some of you make and give away a LOT of these quilt every year.
I wanted something that was easy. Easy enough for a beginner or a child to make.
I wanted something that was versatile. Something that you could play around with and make a lot of different looks – and not get bored making lots of them.
When Craft Hope announced that they were looking for some quilts for part of their newest project, I jumped right in.
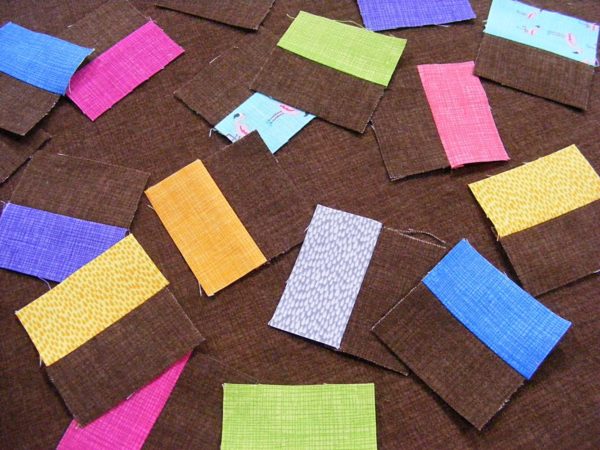
I’m making my quilt entirely from scraps. I sort my scraps by color and I’m tackling one basket at a time, so the blocks so far are all purple and red. When I’m done it’ll include all the colors of the rainbow. 🙂
My quilt also uses Quilt As You Go – but a different technique from what you’ve seen me use for the applique quilts. For this quilt I’m actually quilting as I piece – a huge time-saver and lots of fun. This method also allows me to use batting scraps. Bonus!
Here’s how I build a block. . .
Cut some batting squares a little bit bigger than the size you want your finished blocks to be. My finished blocks will be 10 inches square, which means I’d normally cut them 10 1/2 inches – but I cut mine 11 inches square to give myself a bit of wiggle room. That wiggle room lets you be a bit imperfect in your cutting – see how the fold in the batting made a little jagged pointy bit on the left side? That’s ok – it’ll get trimmed off. 🙂
Important! You must use 100% cotton batting. You’re going to press this a lot and anything with polyester in it will melt to your iron. I always use Warm & Natural – you can read my review of it here.
Pick a piece of fabric to be your center feature and cut it (roughly) into the shape you want. All of mine are four sides – but nowhere near perfect squares or rectangles. I used scissors (not rotary cutting tools) and just eyeballed everything. Slap that piece down in the middle-ish of a batting square.
Now pick another scrap of fabric. Trim it to match the width of the starter scrap, lay it face down over the starter scrap with the raw edges mostly lined up, and sew across the edge using 1/4 inch-ish seam allowance. You’re sewing through both pieces of fabric and the batting.
Flip that piece up and press it flat.
Now we’ll add another strip. I like to work clockwise, but it really doesn’t matter.
Lay a strip face down over both your earlier pieces and trim it (roughly) to fit. Sew it in place just like the first one. (You can click on the photo if you need to see it bigger.)
Flip that piece open and press it flat.
Keep working your way around that center, building up the size of your block. I added the zigzag piece next, then the skinny stripes.
Keep adding strips until the batting is completely covered.
Those first four red strips were pretty uniform, so it’s time for a skinnier strip. I like to keep things mixed up for more interesting blocks.
I also like to make sure some of my strips go slanty – so they’re thicker at one end and thinner at the other. To do that, I don’t line up the raw edges exactly – I let the new strip slope up or down a bit, like in the photo above.
See how that looks when it’s pressed open? It’s not the most efficient use of fabric, but I’m only wasting a tiny bit and I think it makes the block much more interesting.
Sometimes I use a new fabric with every strip and sometimes I’ll use the same fabric a few times in a row to build interesting shapes. Two consecutive strips of the same fabric makes an L. Three makes a U. And four makes a frame.
Sometimes I only have strips that are too short to reach all the way from edge to edge of the block – especially as the center section gets bigger.
When that happens, I just sew two strips together and use the new, longer strip in my piecing. Sometimes I use two strips of the same fabric, and sometimes I use different fabrics (like in the strip on the right in the photo above). It totally depends on my mood at the moment.
Keep going until your batting square is completely covered.
Here it is from the back. See how there’s fabric showing all around the edge of the batting? And look at the nice quilting already done – holding everything together. I’m going to back this quilt with cuddle fleece for special cuddly warmth. There are tips here for using cuddle fleece for the back.
Trim your block down to size from the back, so you can see that you’re getting batting in the entire block. I trimmed mine down to 10 1/2″ square.
And here’s the finished block!
In the very first photo I showed the blocks arranged in a checkerboard-ish pattern, with red blocks alternating with purple. I’m not sure yet what the final arrangement for the quilt will be – it kind of depends on how many blocks I end up with for each color. Here’s an alternate possibility where the blocks blend from one color to another.
Whatever arrangement I choose, the final quilt will be bright and cheerful and cuddly and warm – just what I want to give a child. 🙂
Update! You can see the finished free scrap quilt here. Along with showing the finished quilt, I also answered a lot of questions people had about the process. Click over to get more details.
A couple of final notes. . .
I think improvisational scrap blocks like this look best when you sort your fabrics a bit first. You can see that within the red blocks there’s a brick red block, a red and white block, two bright pink blocks, one light pink block, and several bright red blocks. Within the purples I have one magenta-ish purple block, three lighter purple blocks, and lots of dark purple blocks. Sticking to one shade or tone per block keeps a little order.
This would be a really fun way to make an I Spy quilt – with pairs of center pieces to match up. I have two of the larger blue/green stars and two of the girl in the blue tree.
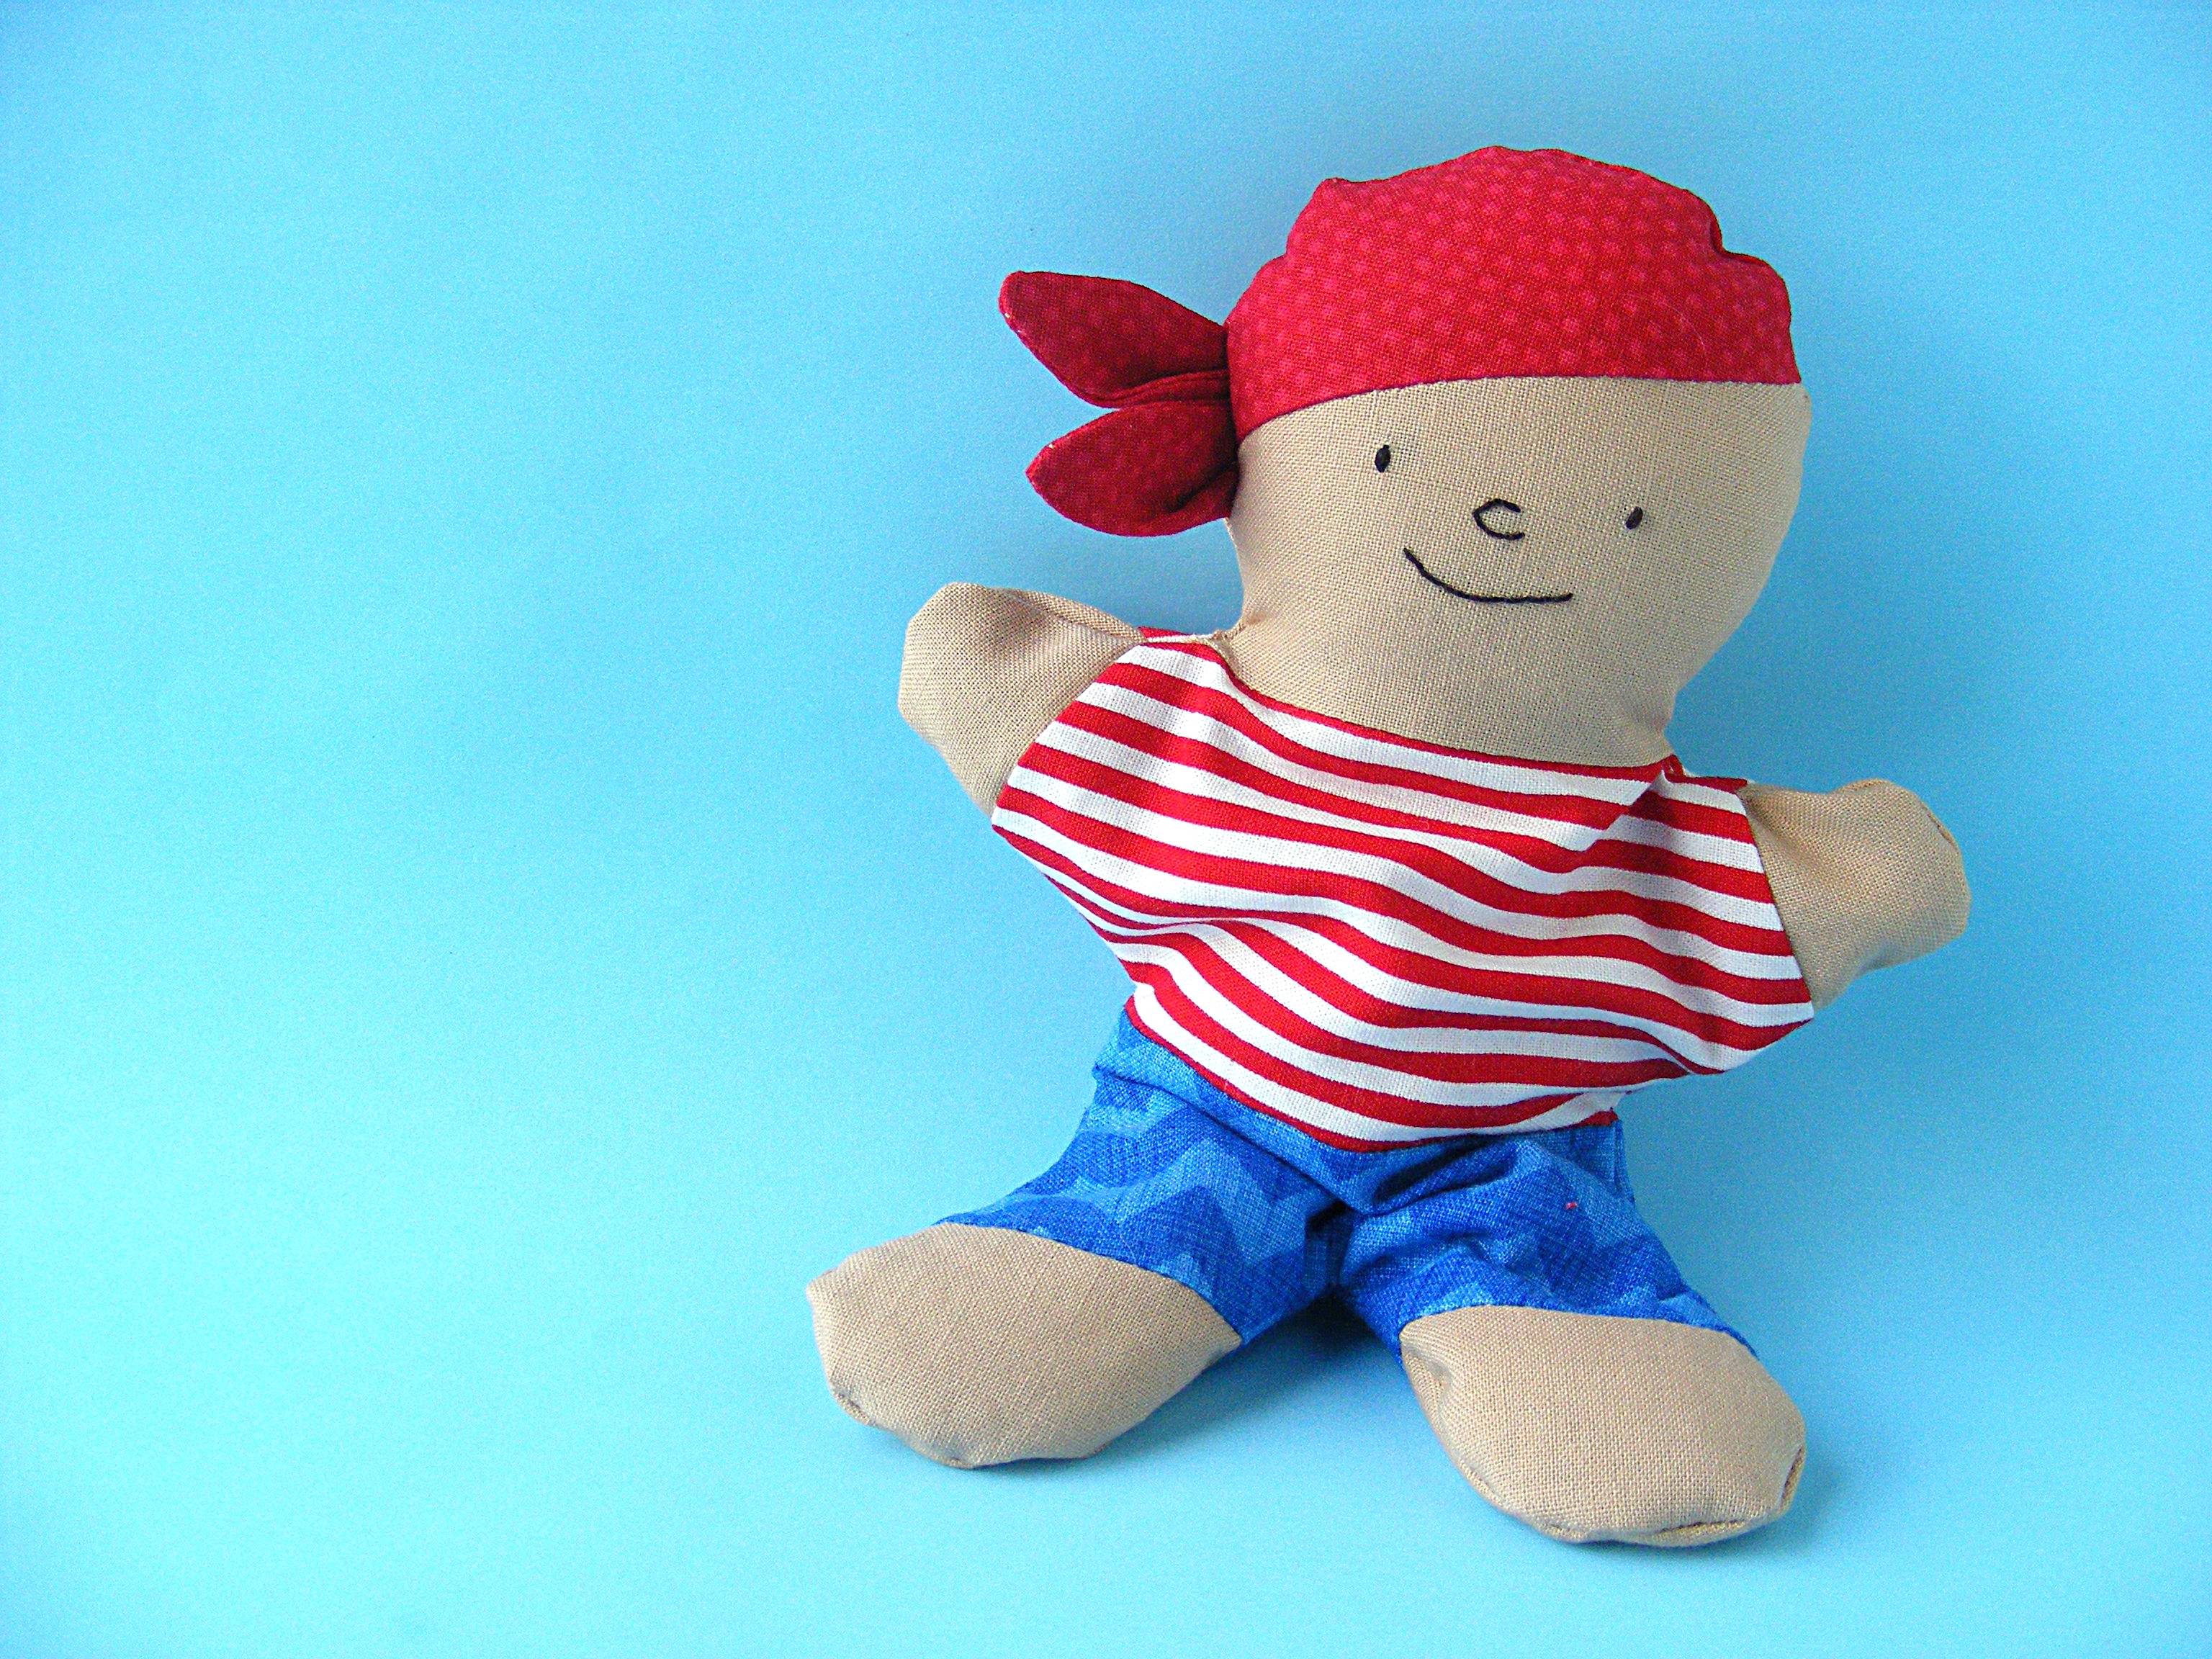
Materials (find links to my favorite tools and supplies here)
scrap of skin-colored fabric
scrap of red fabric for the bandana
scrap of striped fabric for the shirt
scrap of blue fabric for the shorts
embroidery thread for the face (I used Sulky 12wt. cotton thread in dark brown)
plastic pellets (I like PolyPellets Weighted Stuffing Beads)
polyfill stuffing (I like Soft Touch Polyfil Supreme Fiberfill)
Use 1/4 inch seam allowance for all sewing.
Step 1
Cut out all materials as directed on the pattern pieces. You should have. . .
2 head pieces (1 reversed)
2 bandana pieces (1 reversed)
1 shirt front piece
2 shirt back pieces (1 reversed)
2 pants pieces
4 foot pieces (2 reversed)
4 hand pieces (2 reversed)
4 bandana knot pieces
Step 2
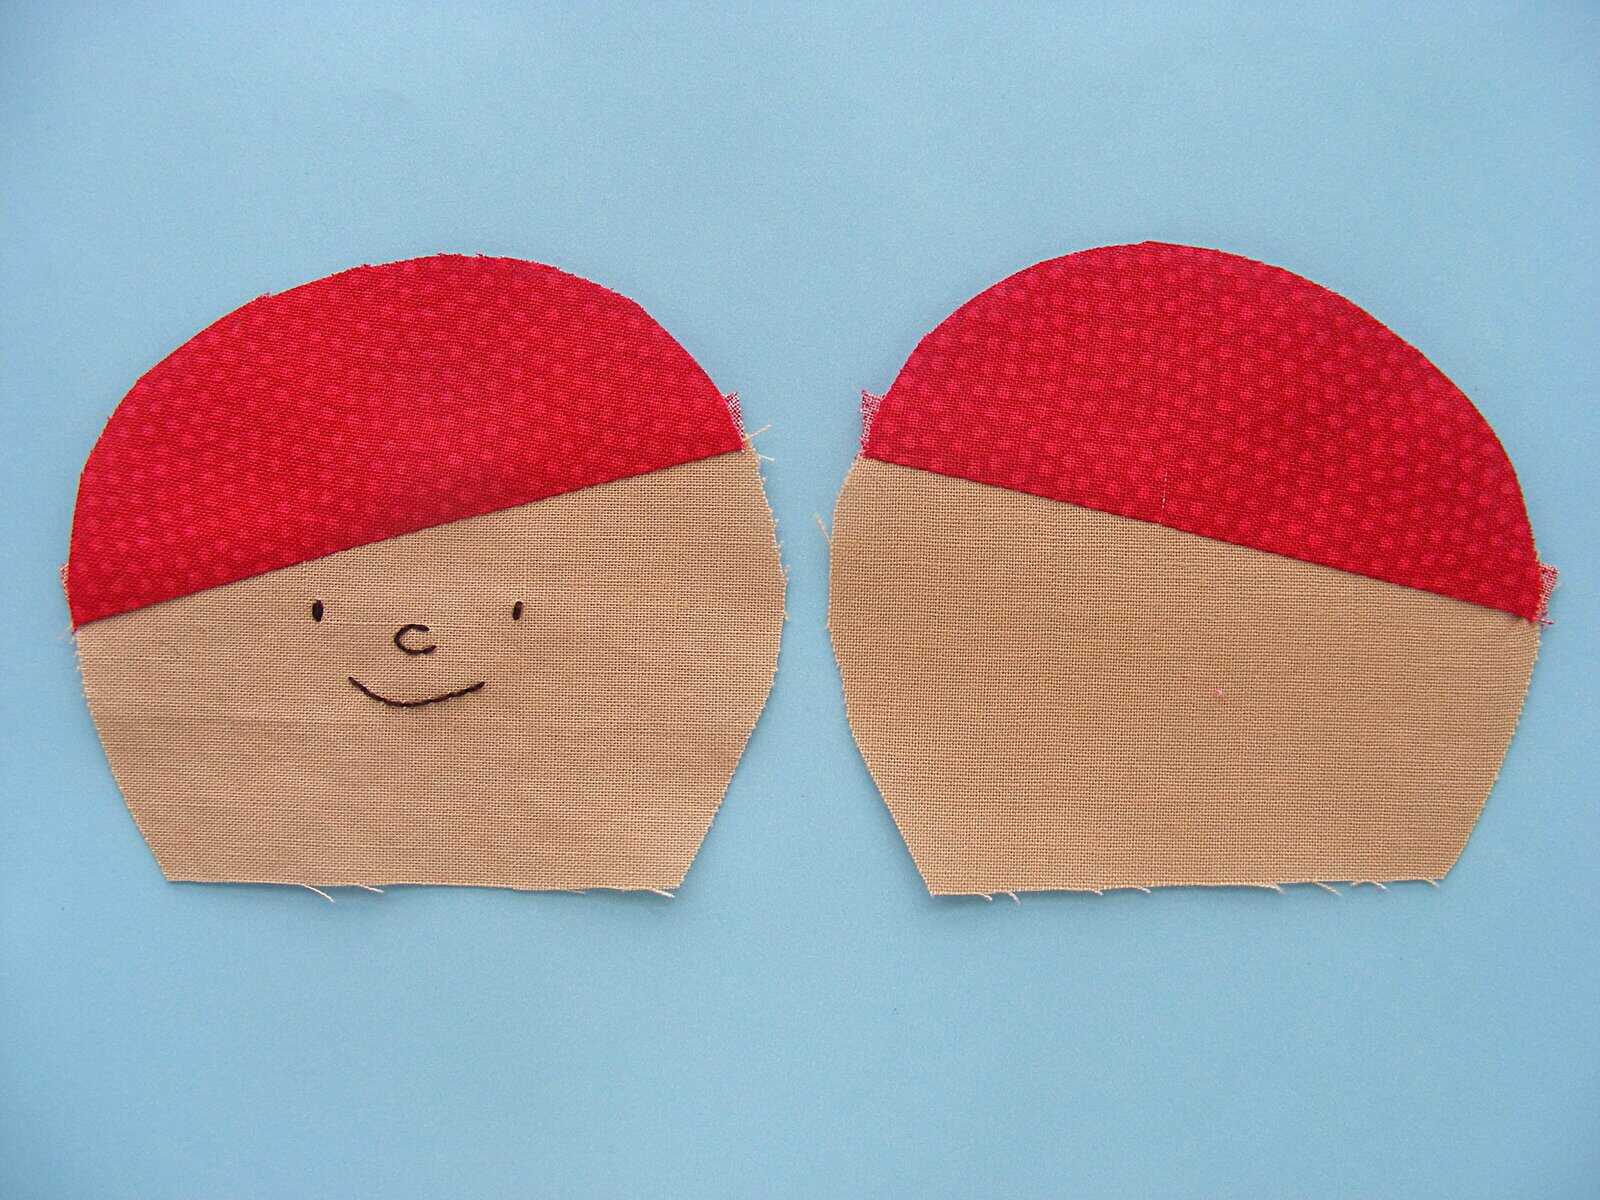
Trace the face onto one head piece.
Embroider the nose and mouth using backstitch and a single strand of Sulky 12 wt. embroidery thread (the equivalent of two strands of regular embroidery thread).
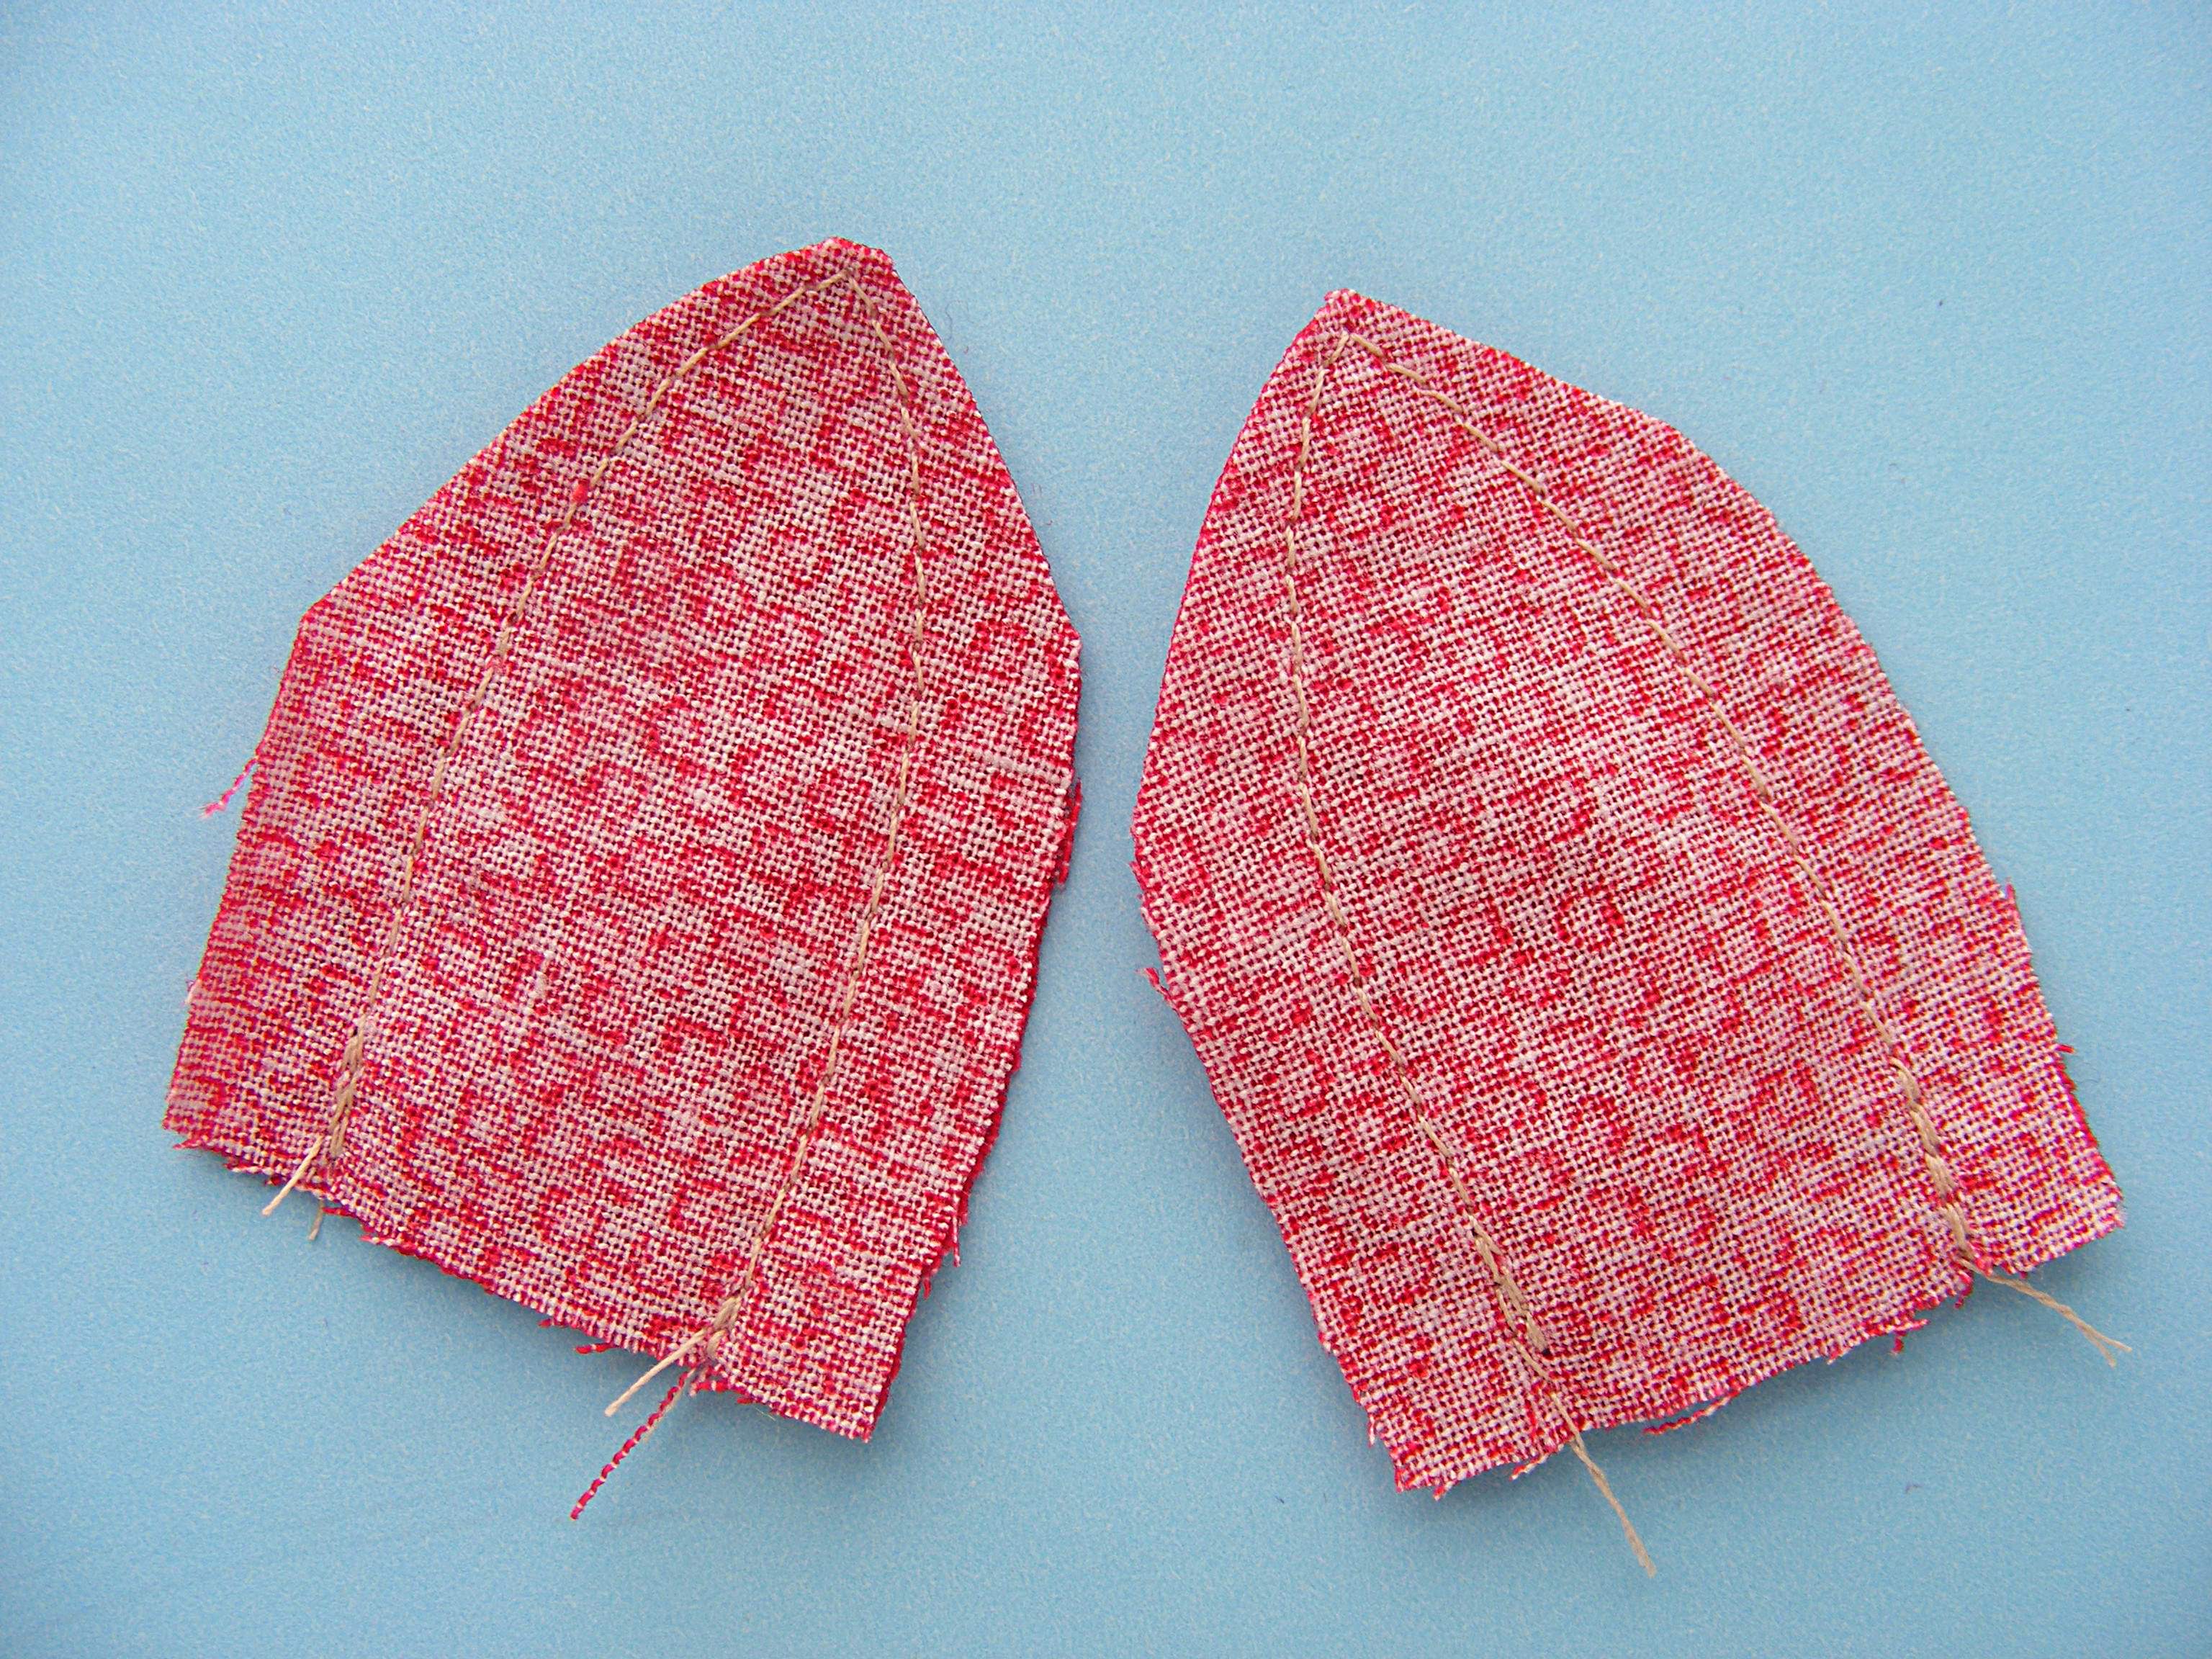
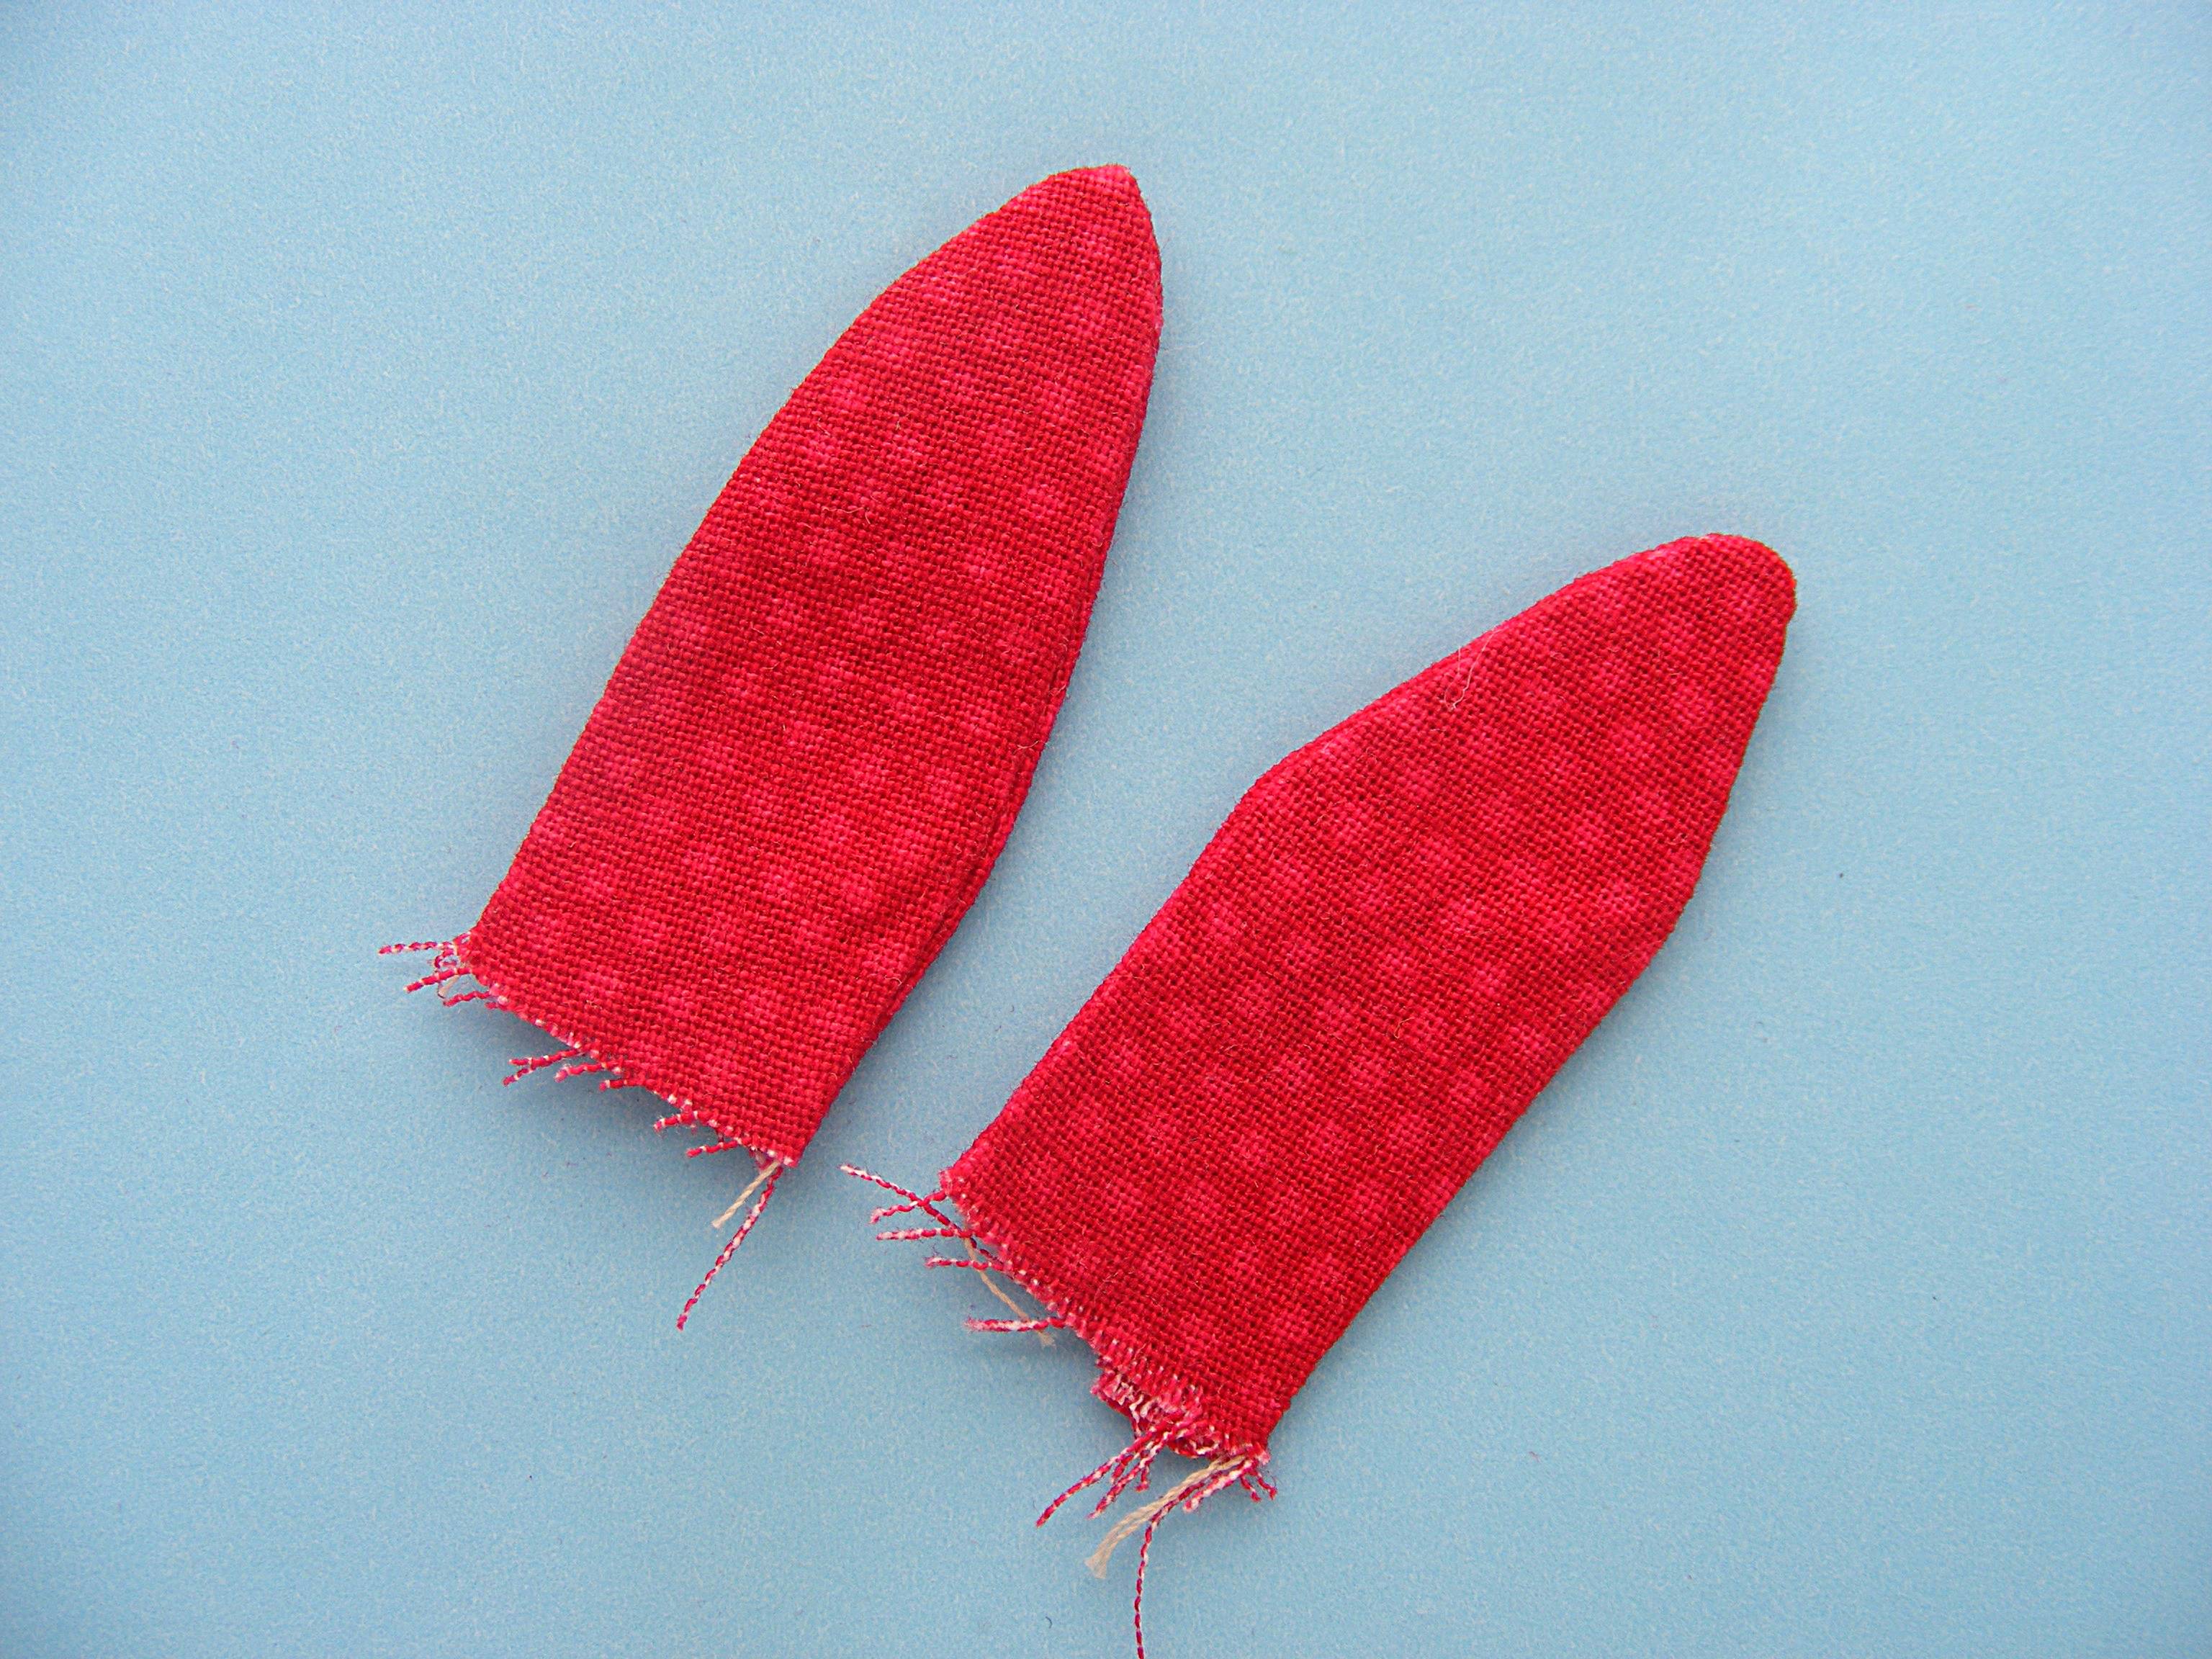
Fold the ends in half, stack the two pieces mostly on top of each other and sew them together 1/4 inch from the raw edge.
It doesn’t have to be pretty - it just has to keep them folded and together. :-)
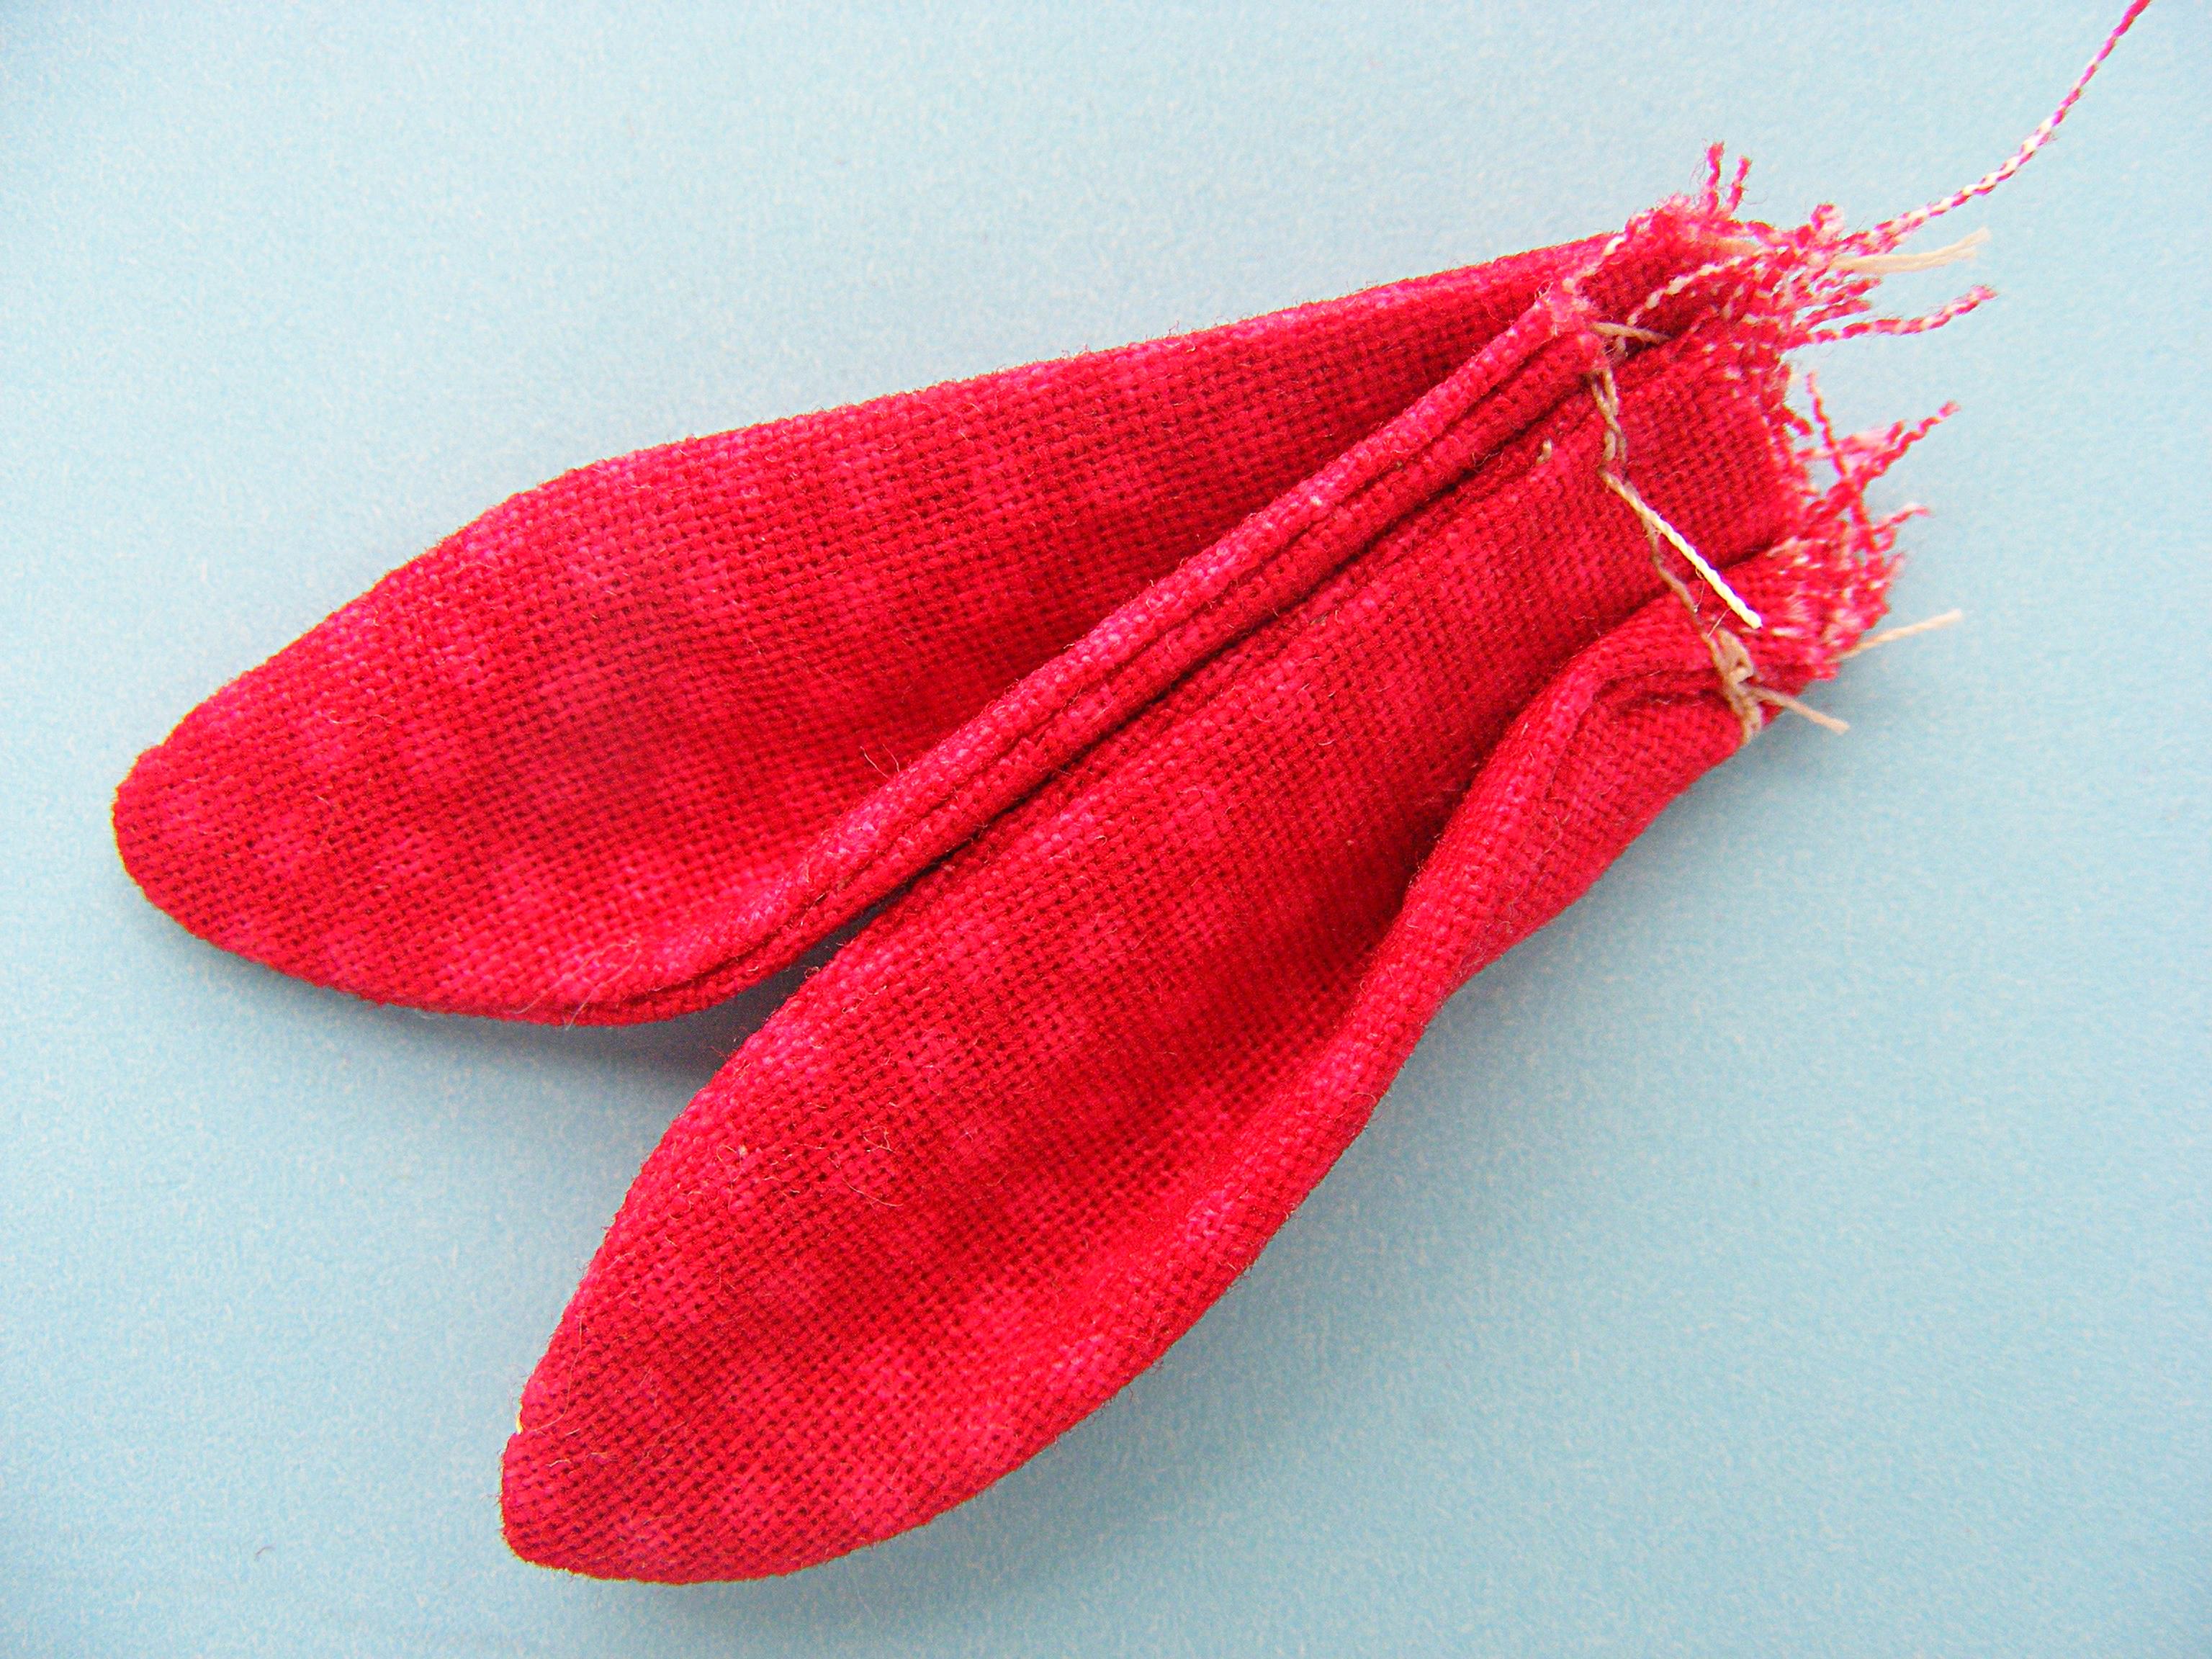
Set the bandana knots aside.
Step 6
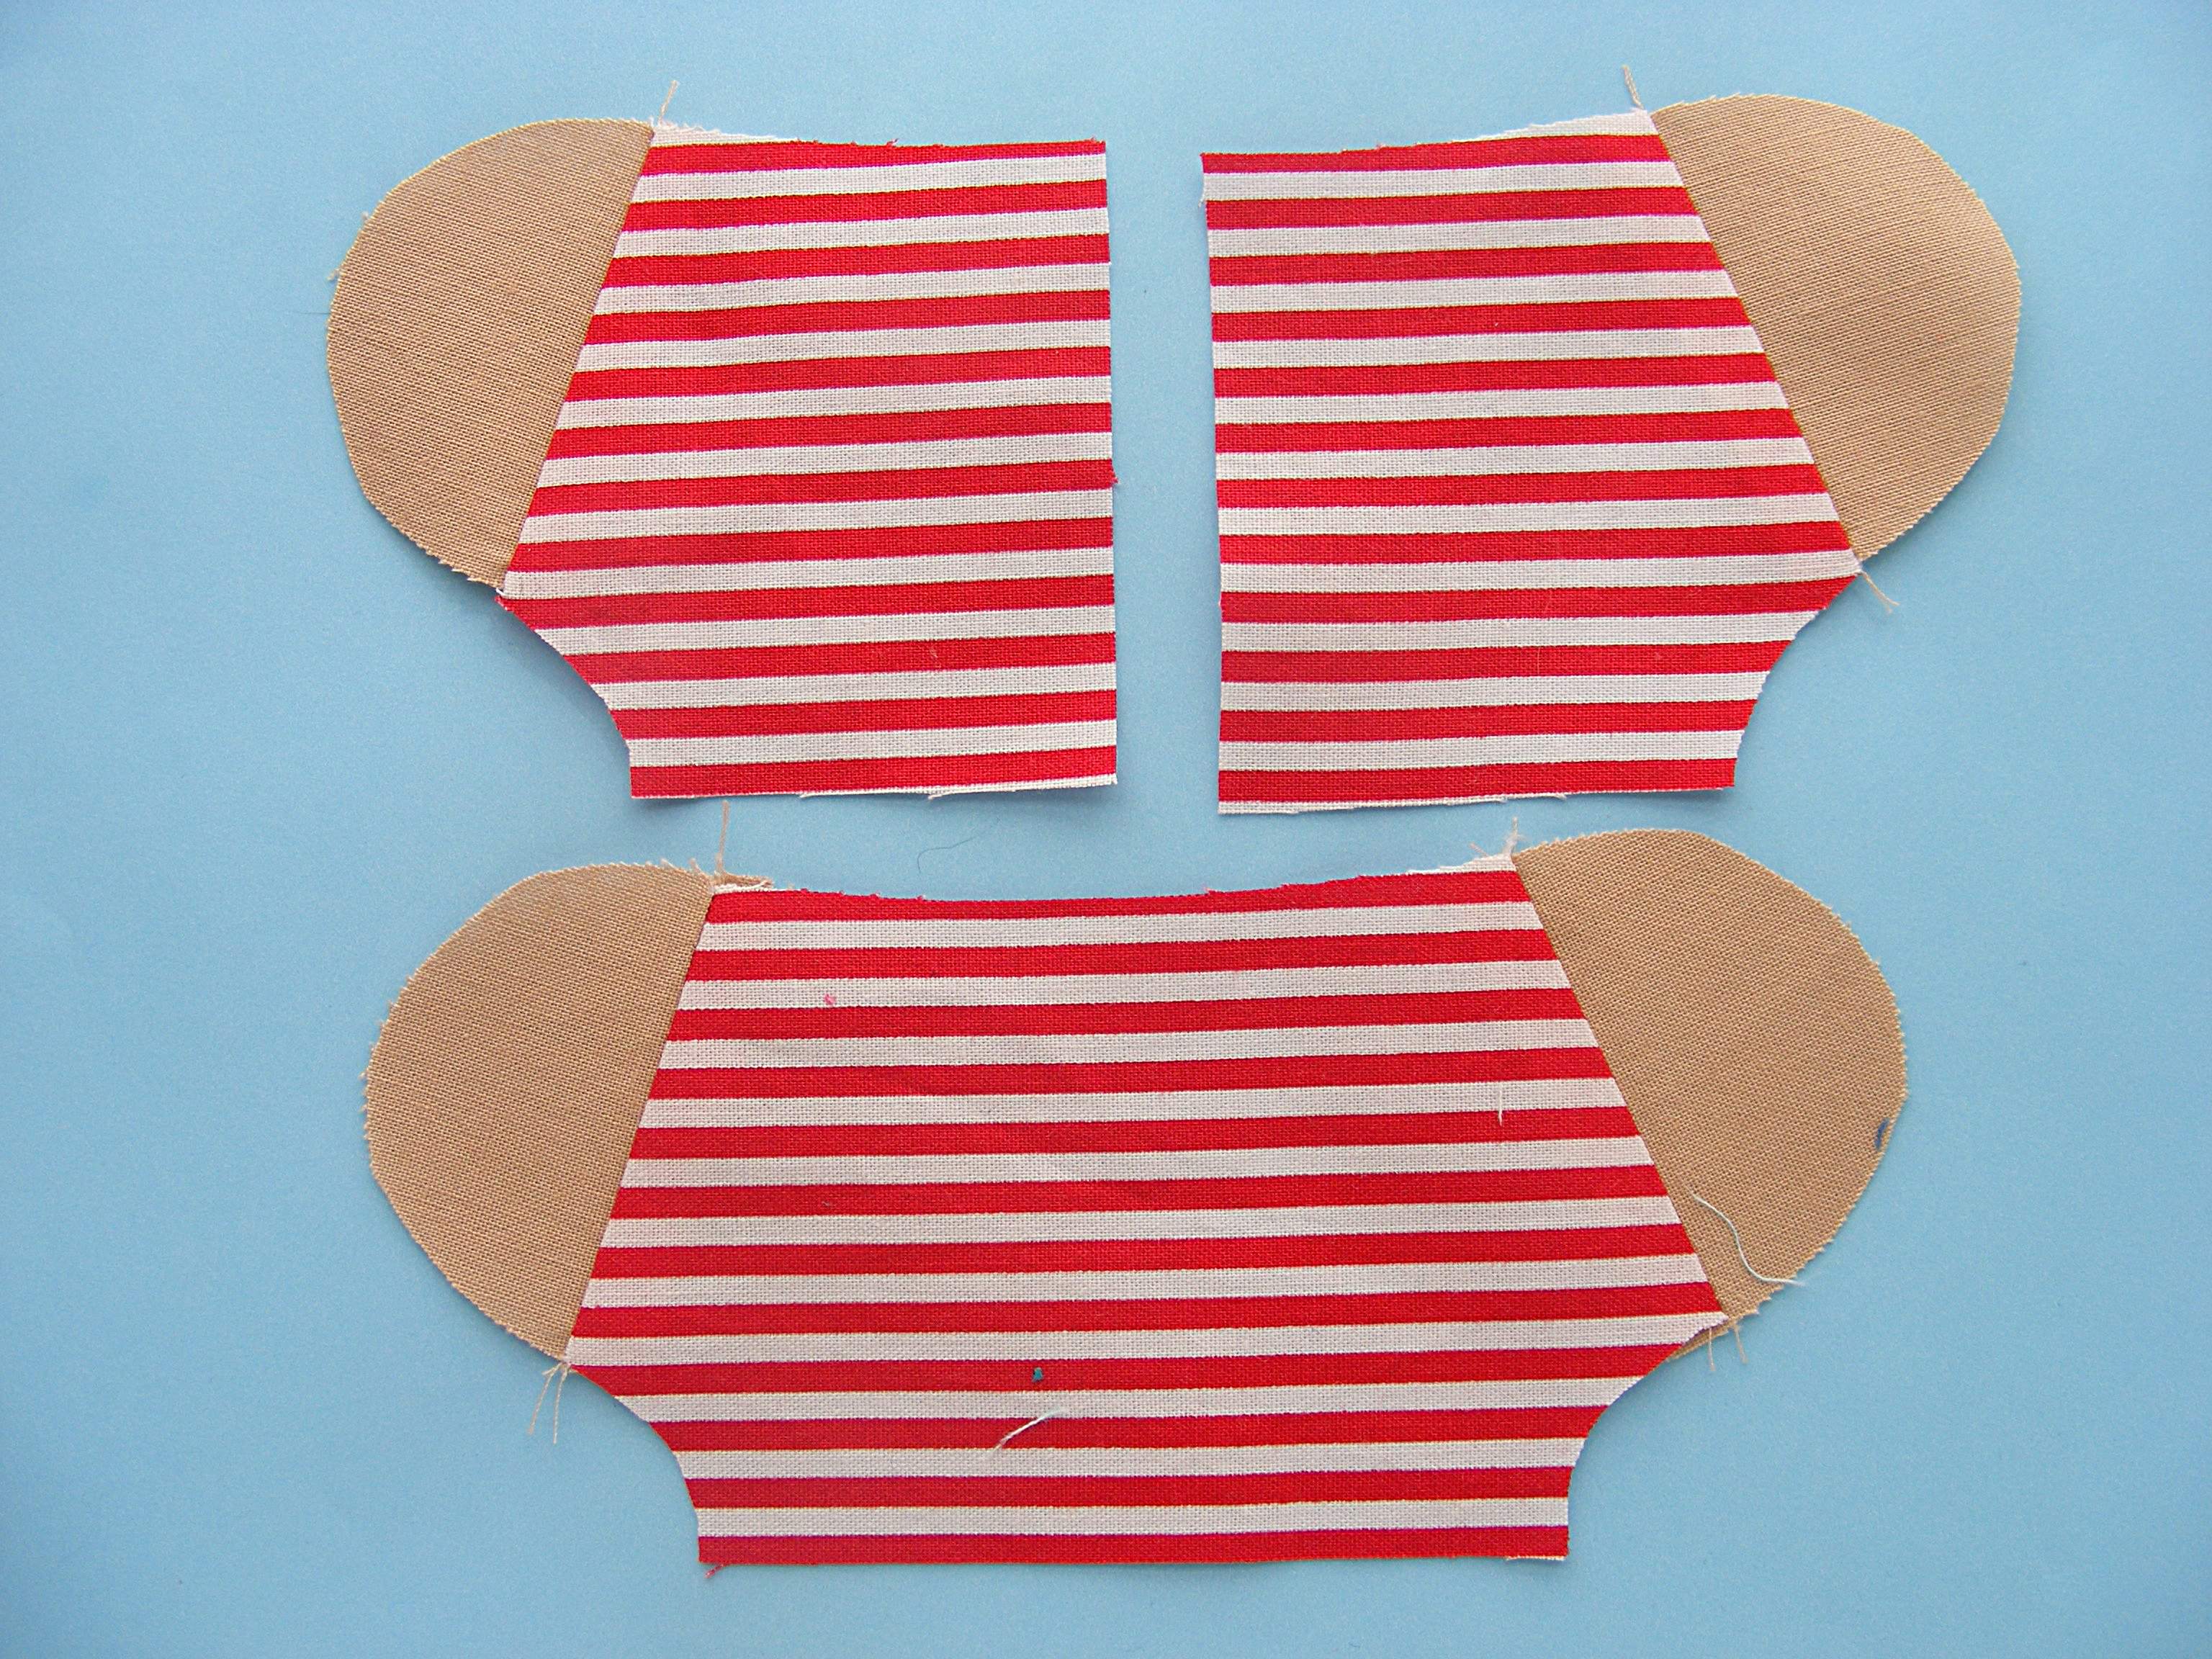
Sew the hands to the shirt pieces.
Press the seam allowance open.
Step 7
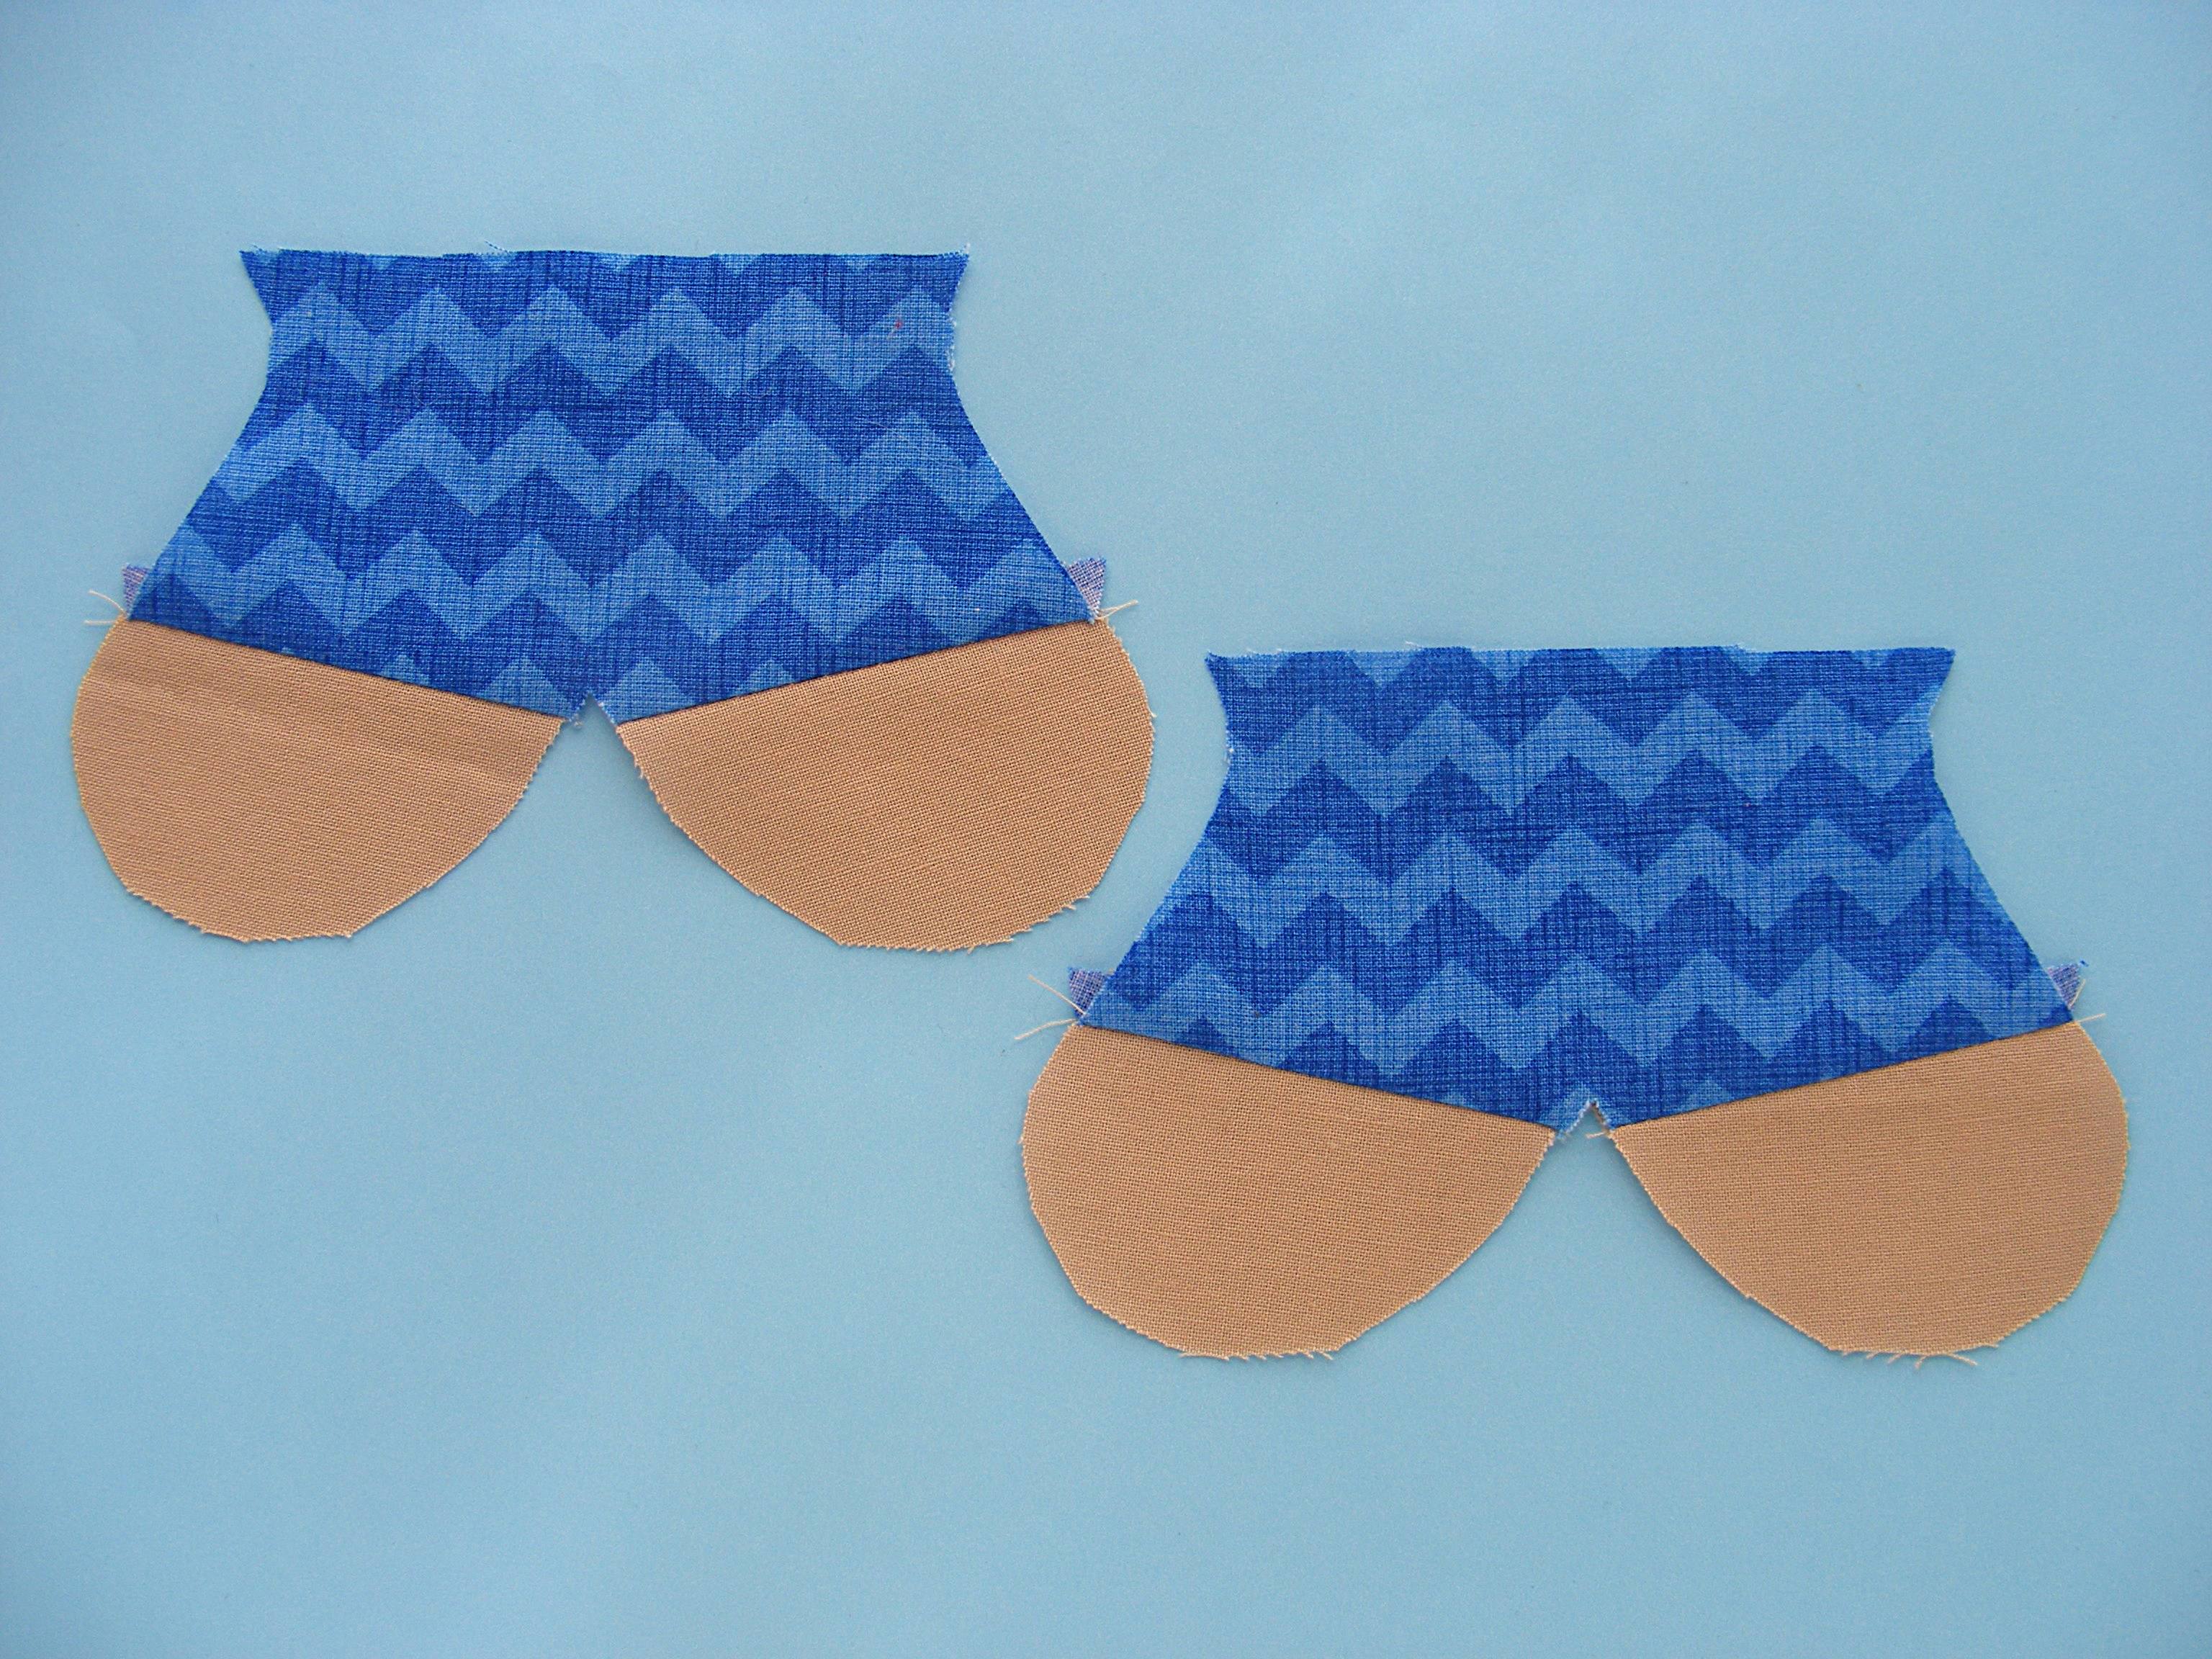
Sew the feet to the pants.
Press the seam allowance open.
Step 8
Sew the bandana pieces to the top of the head pieces.
Press the seam allowance open.
Step 9
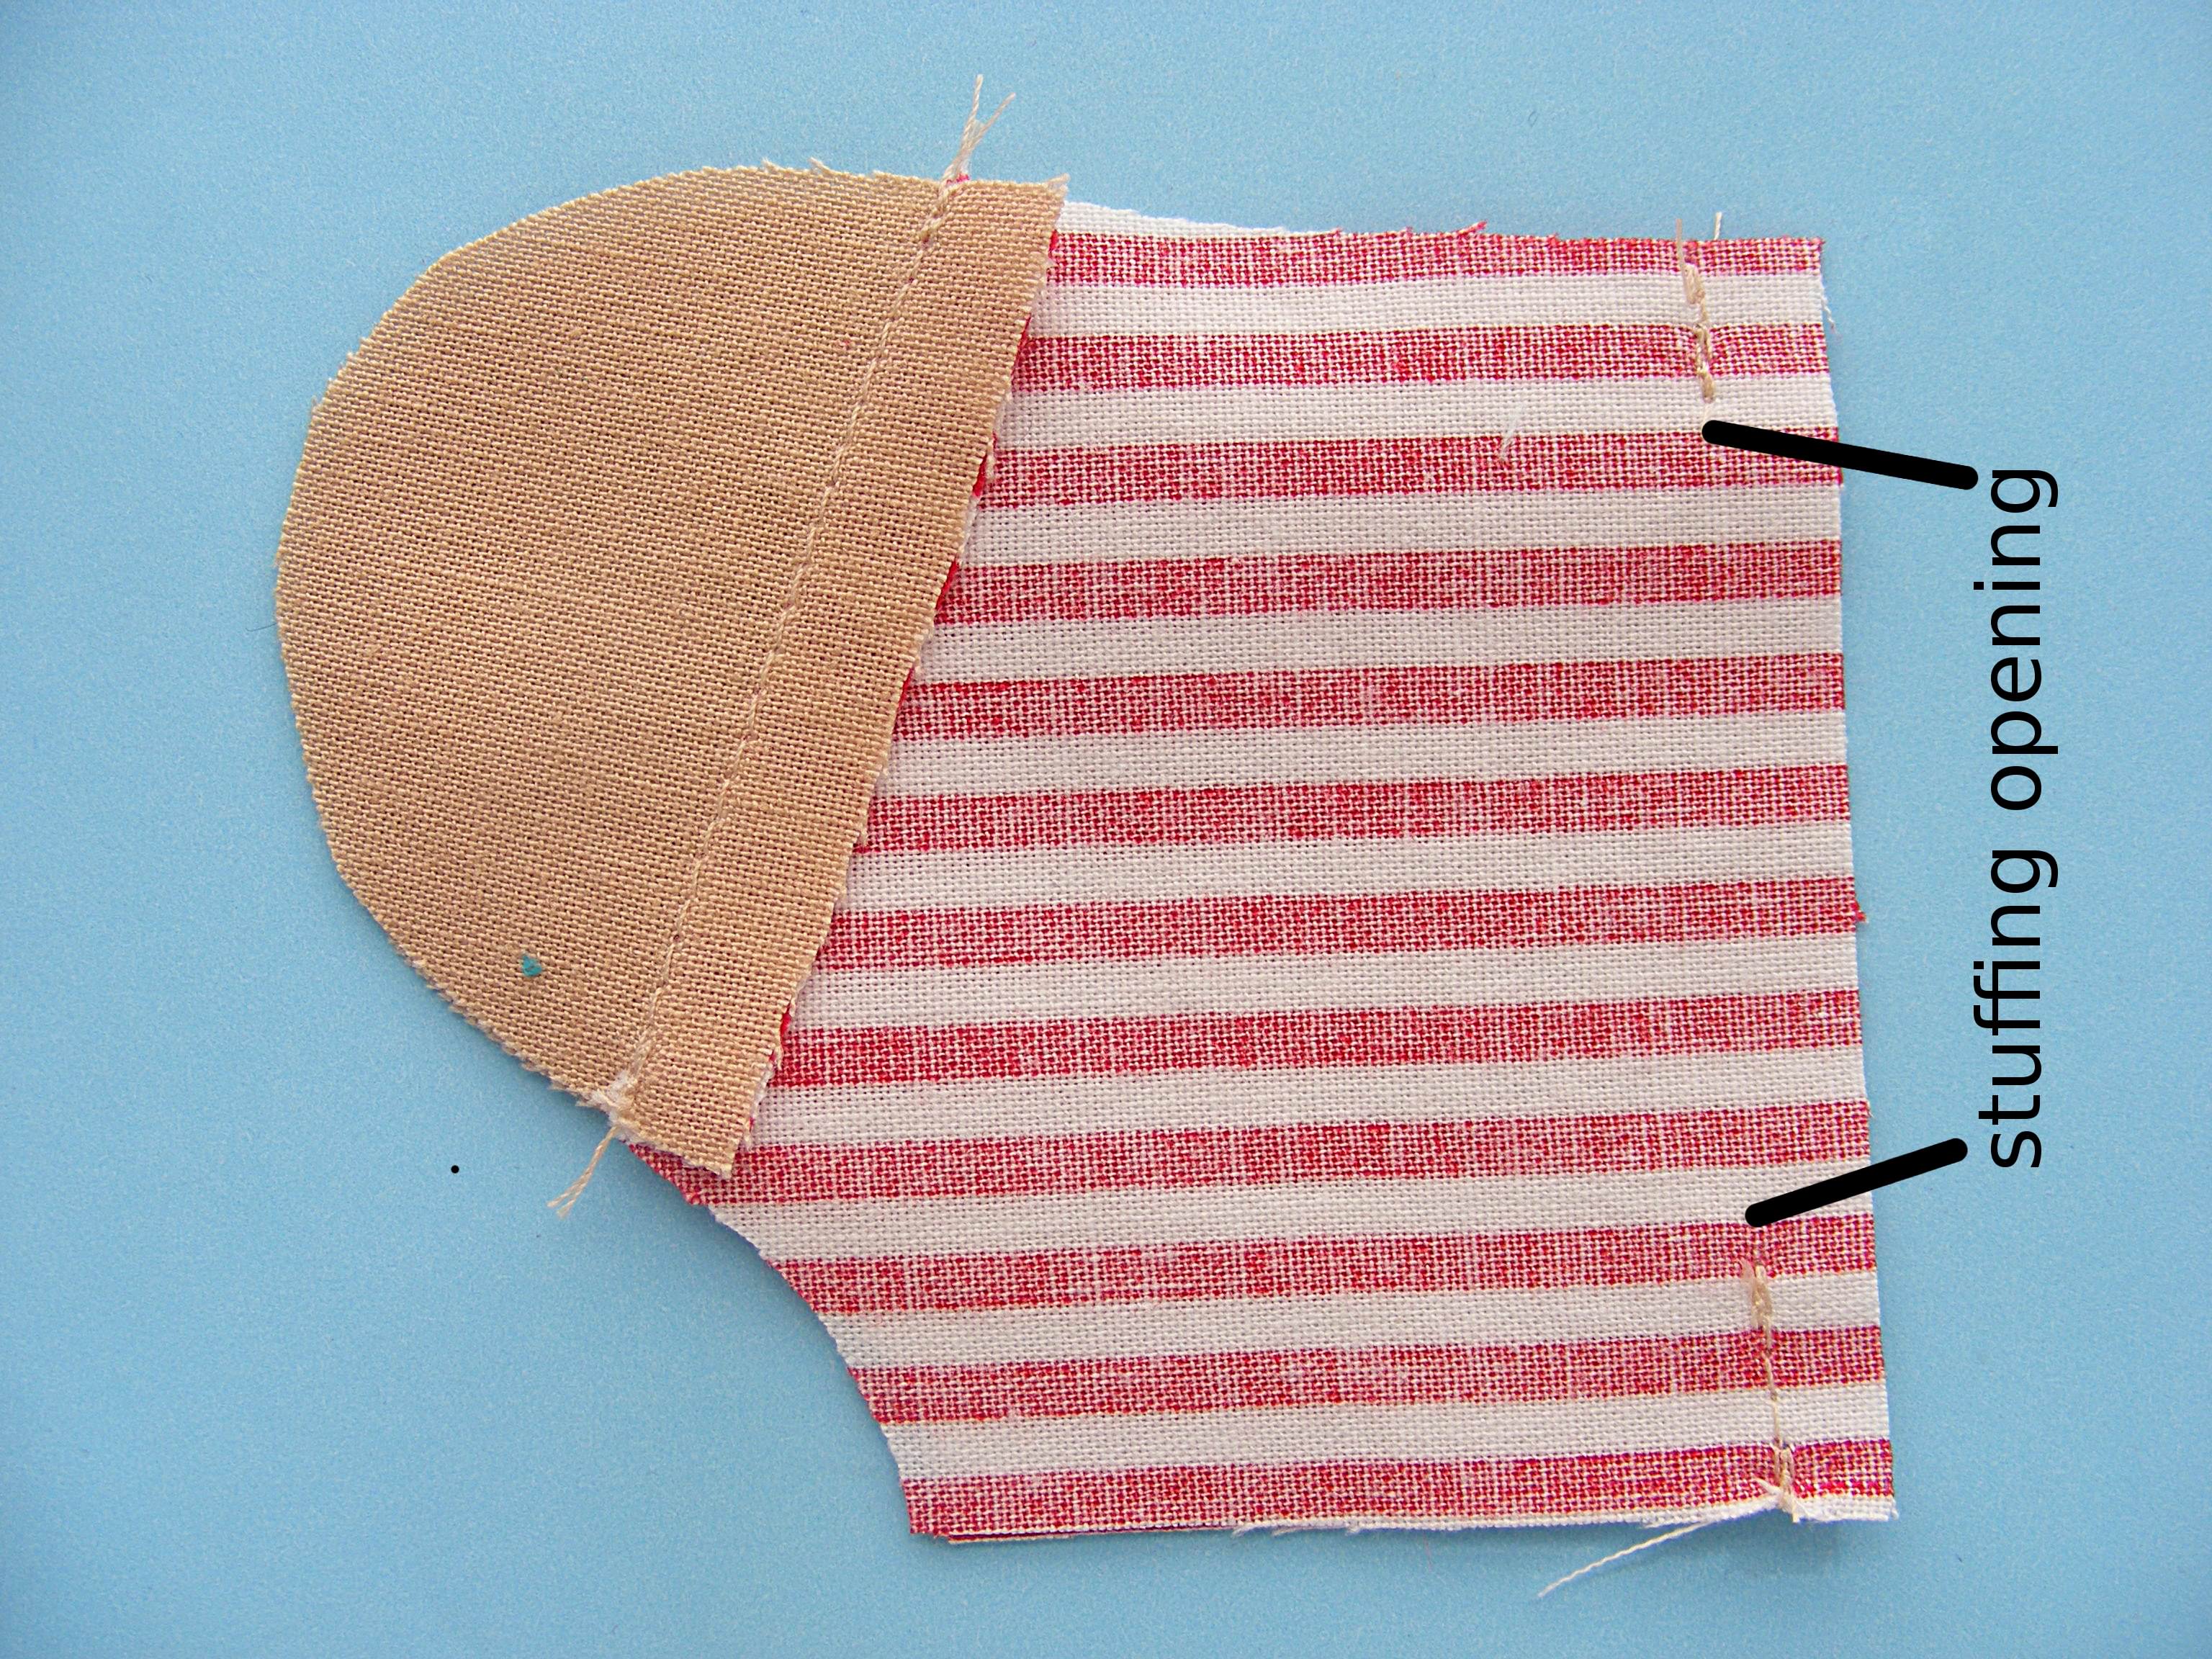
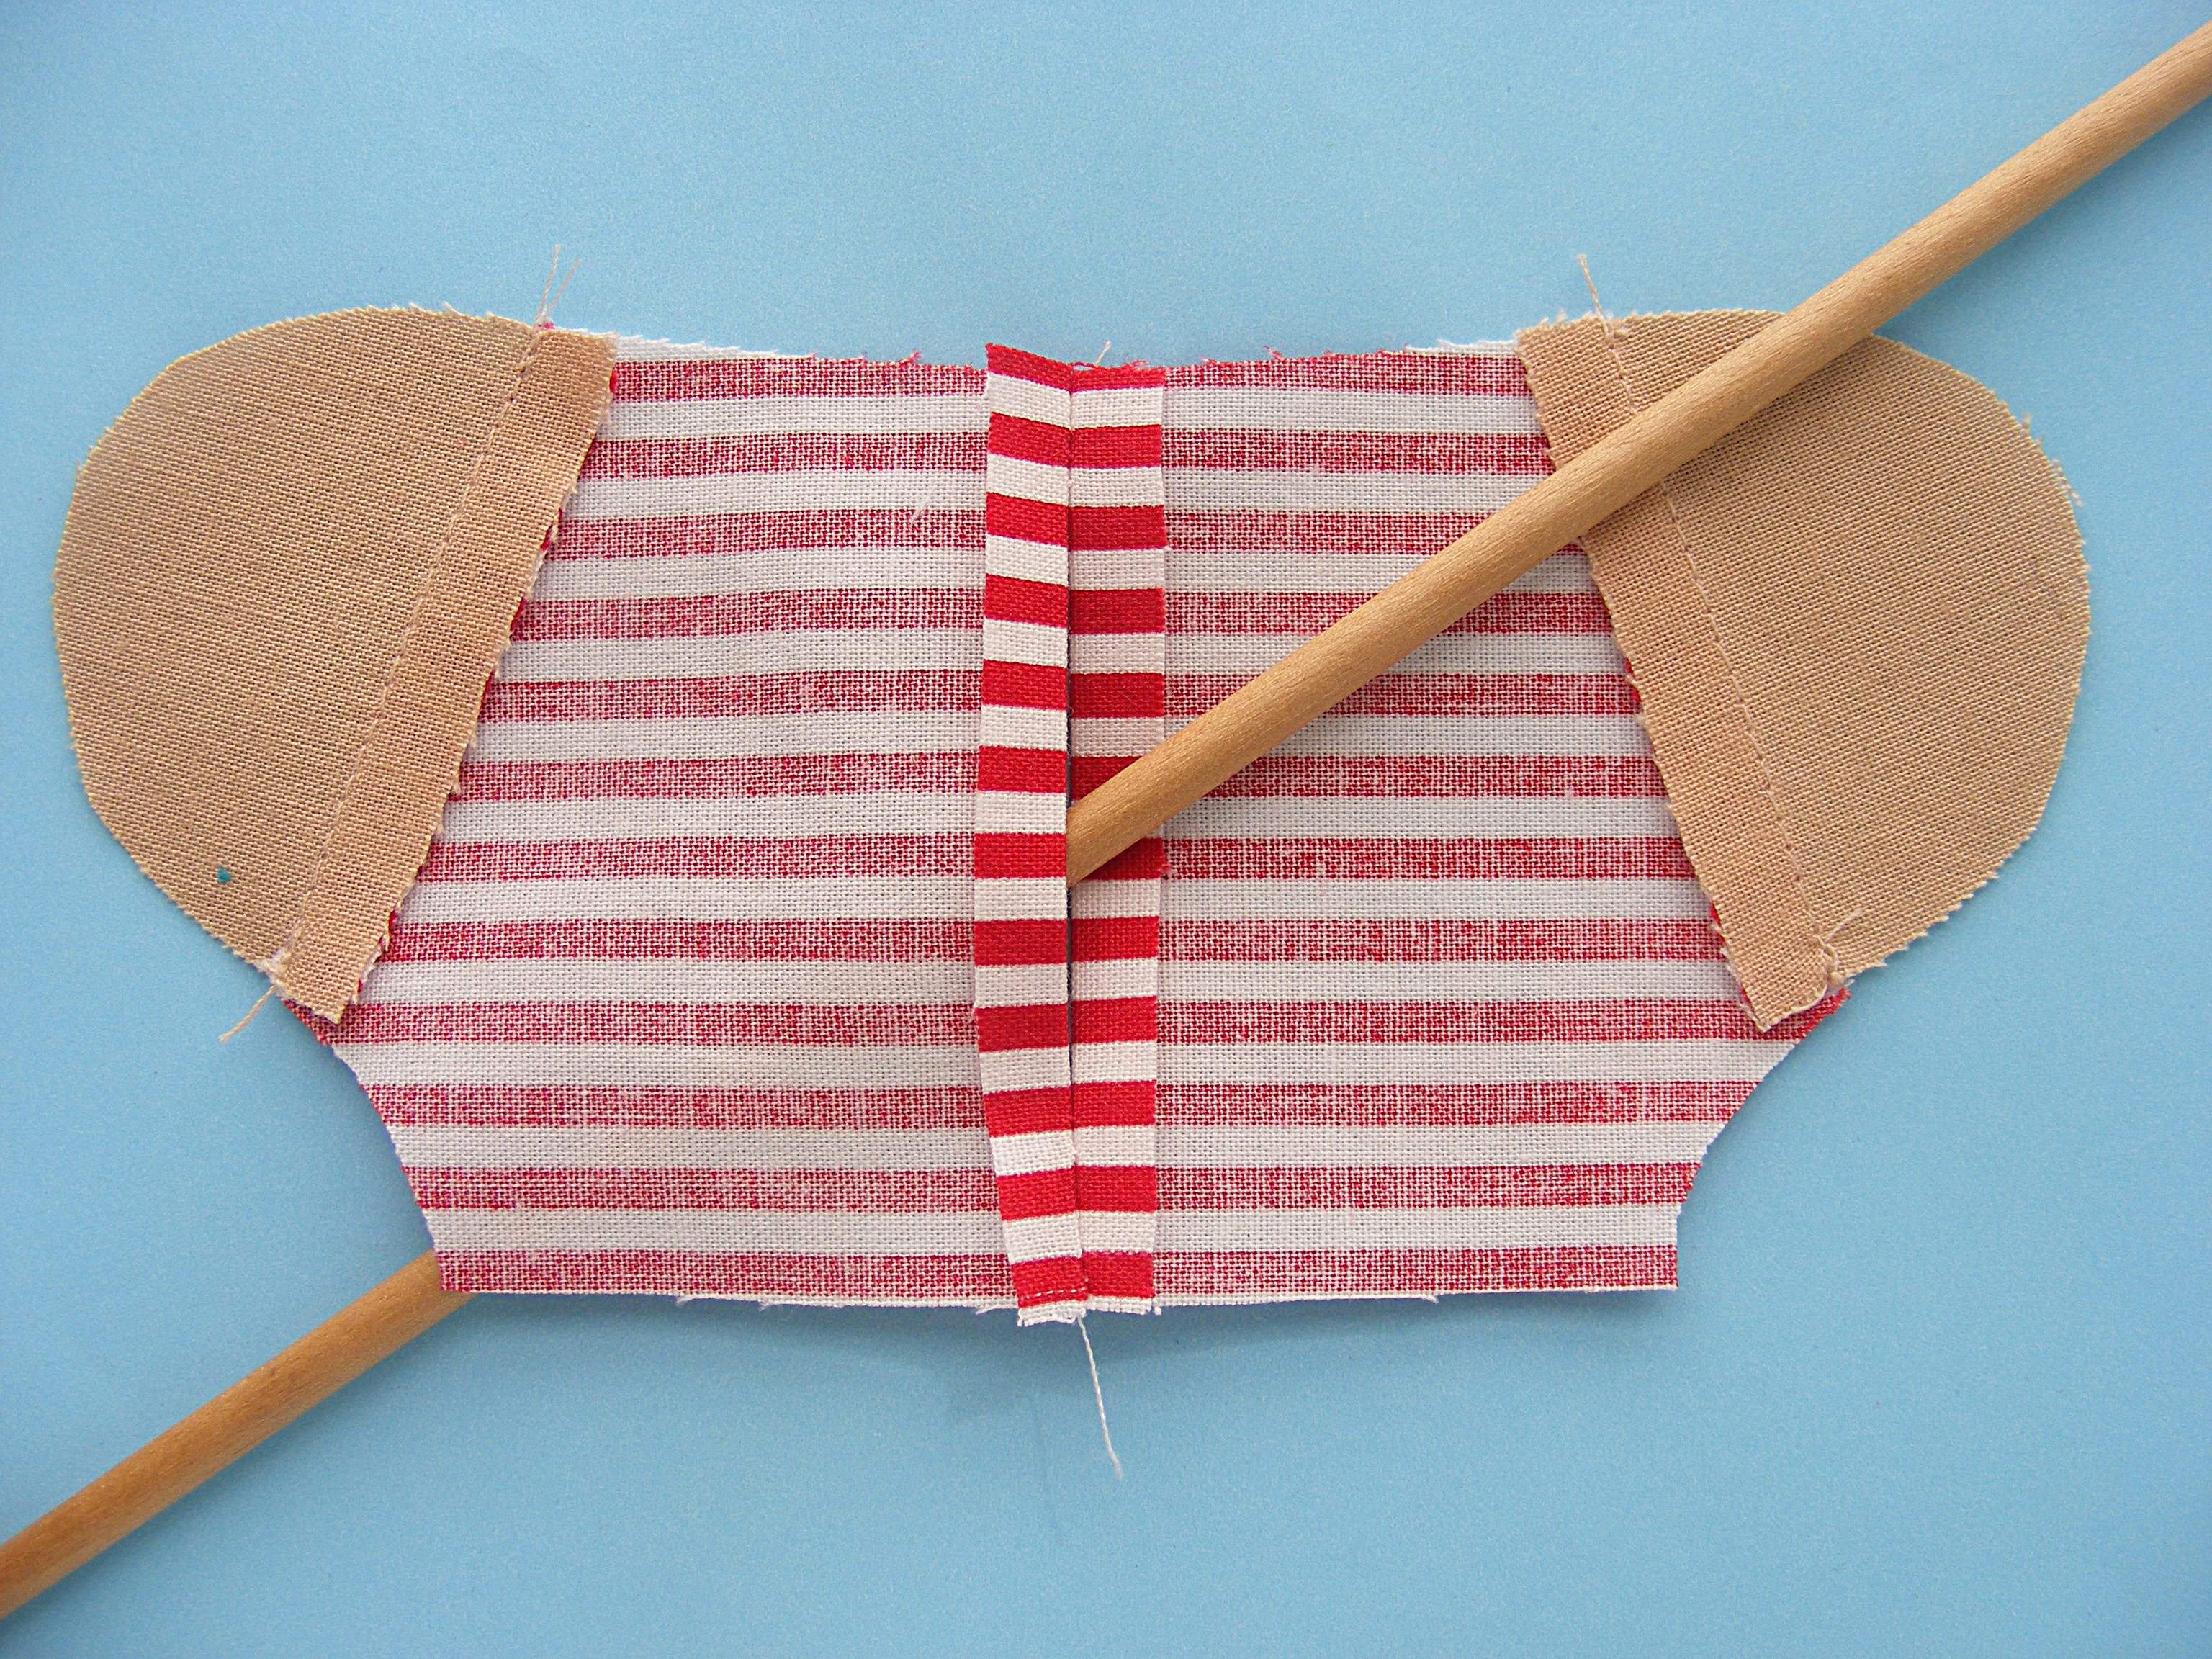
Sew the two shirt back pieces together along the center back line, making sure to leave a few inches open for stuffing.
Don’t forget to backstitch at the beginning and end of your stuffing opening.
Step 10
Open up the center back pieces and press the seam nice and flat, including the edges of the stuffing opening. That will give you a nice clean edge to sew when you’re closing up that opening by hand.
The stick shows where the stuffing opening is.
Step 11
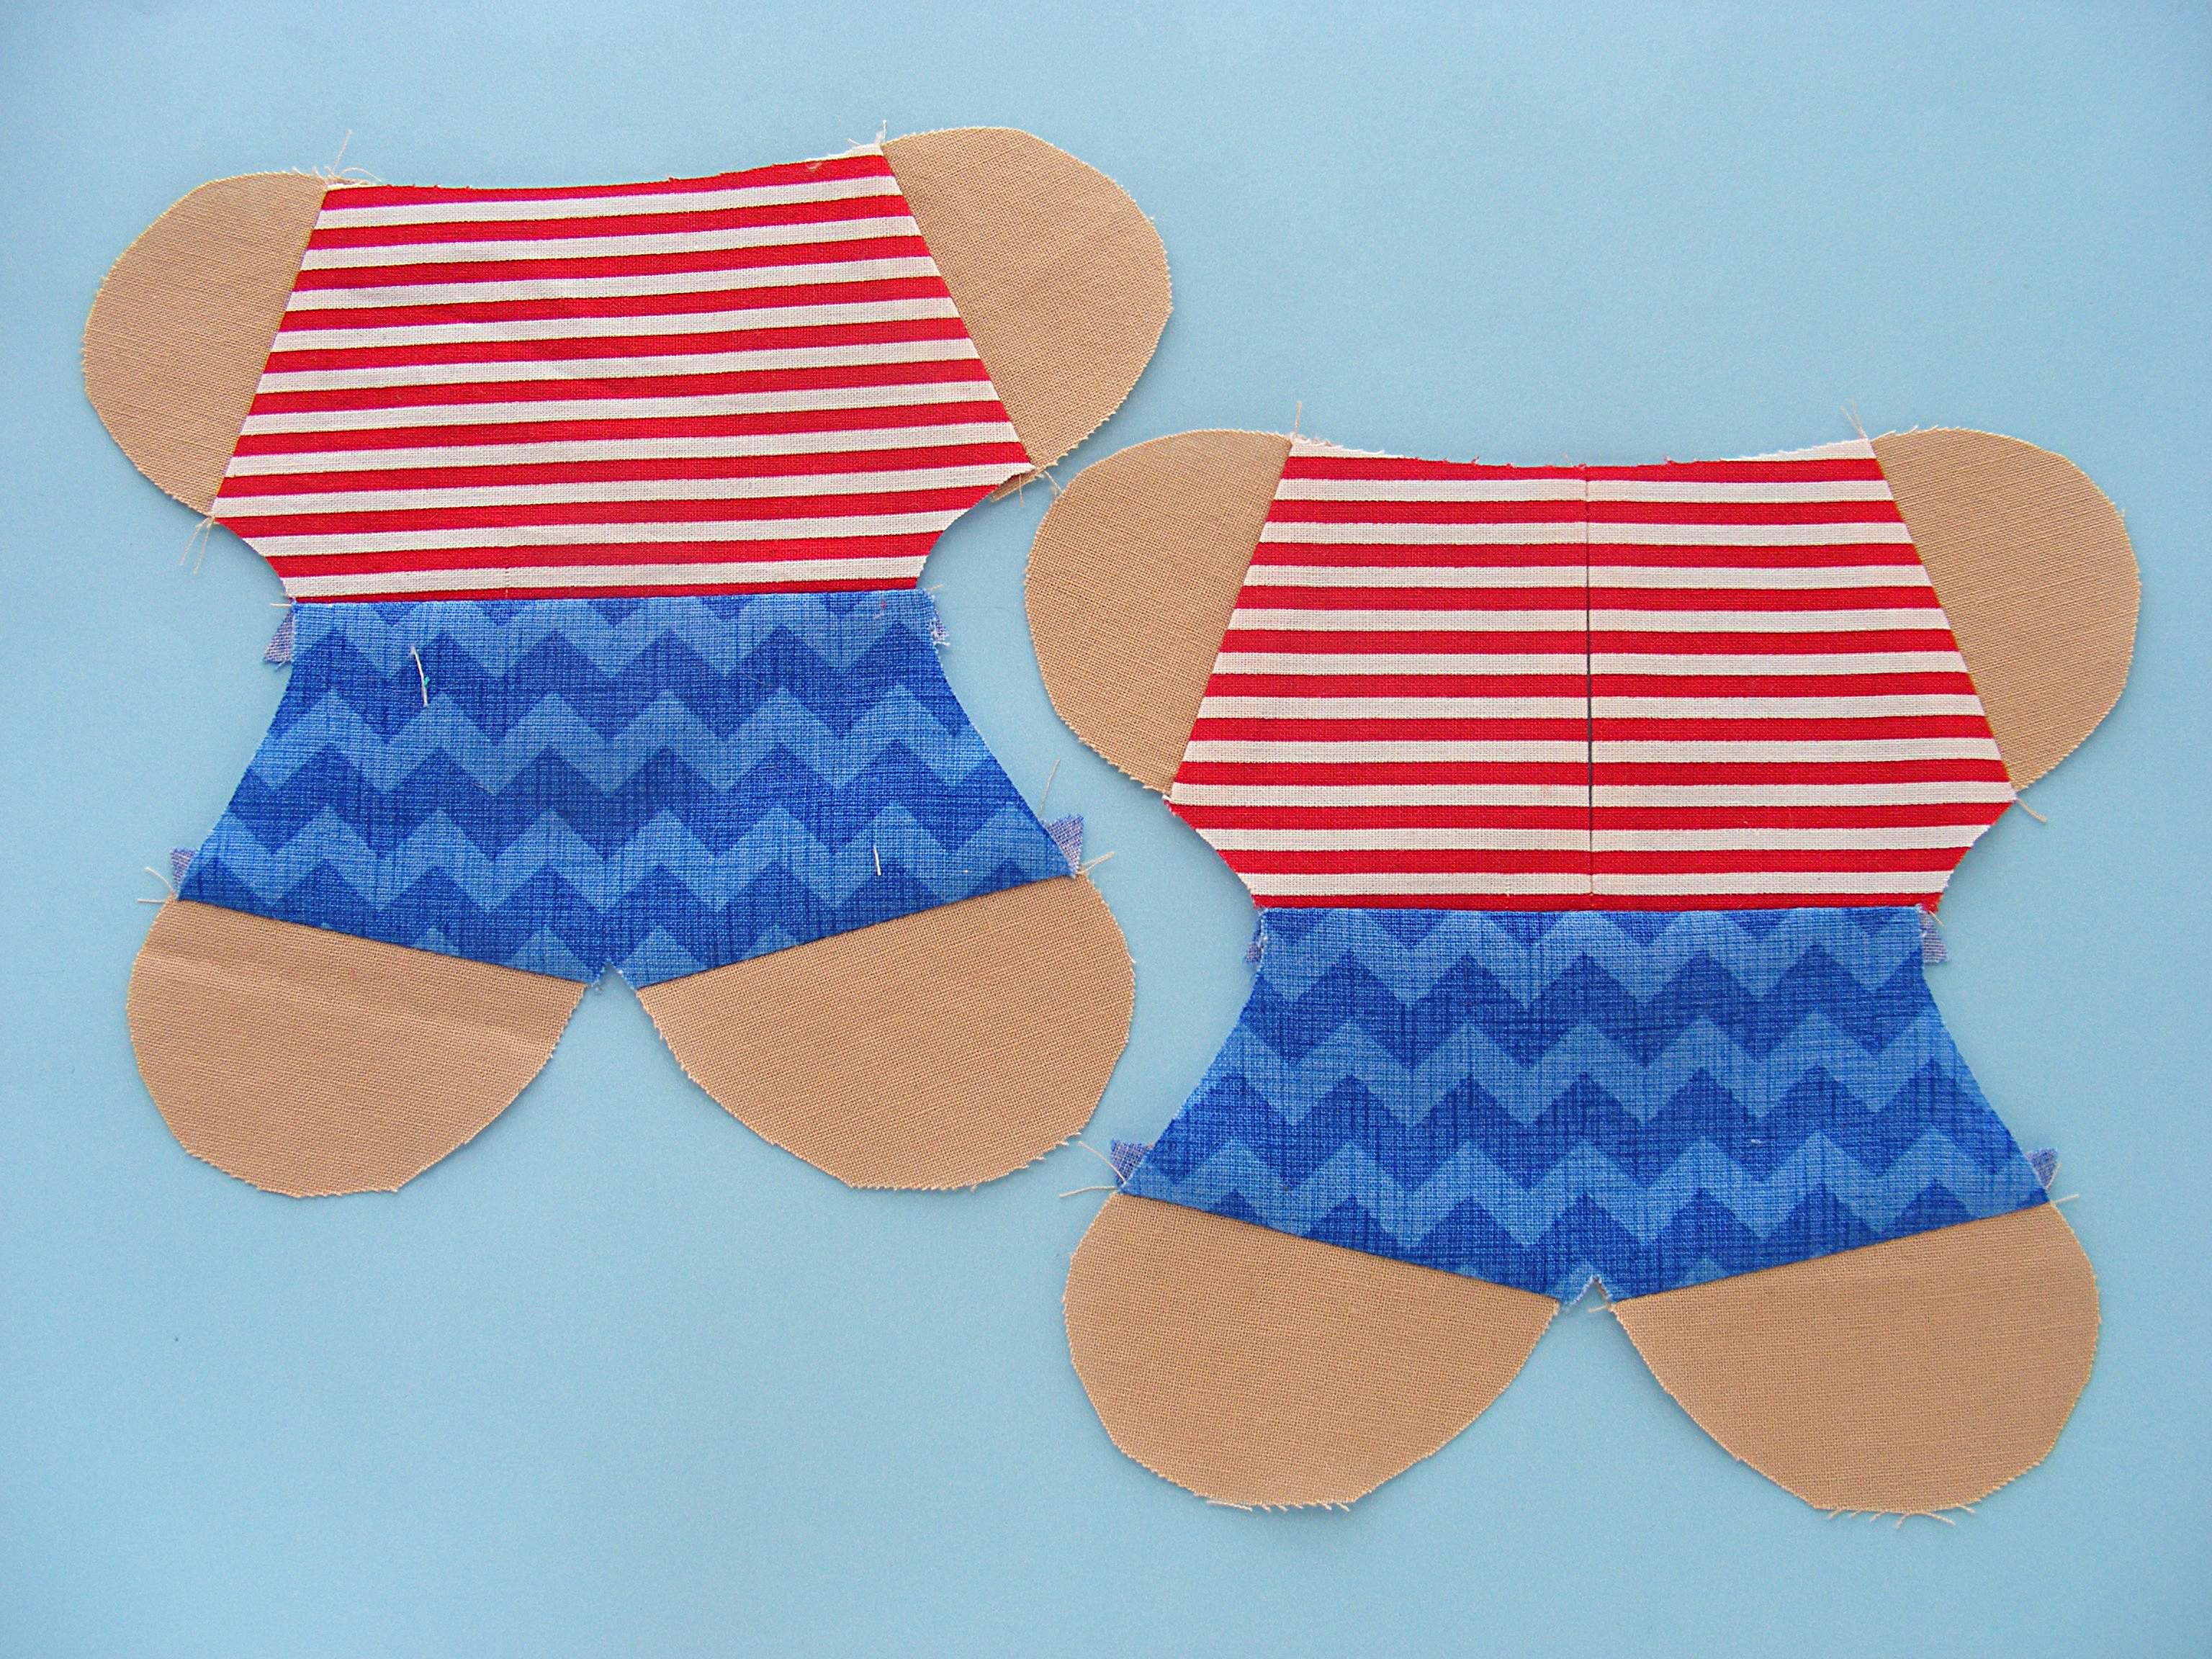
Sew the shirt pieces to the pants.
Press the seam allowance open.
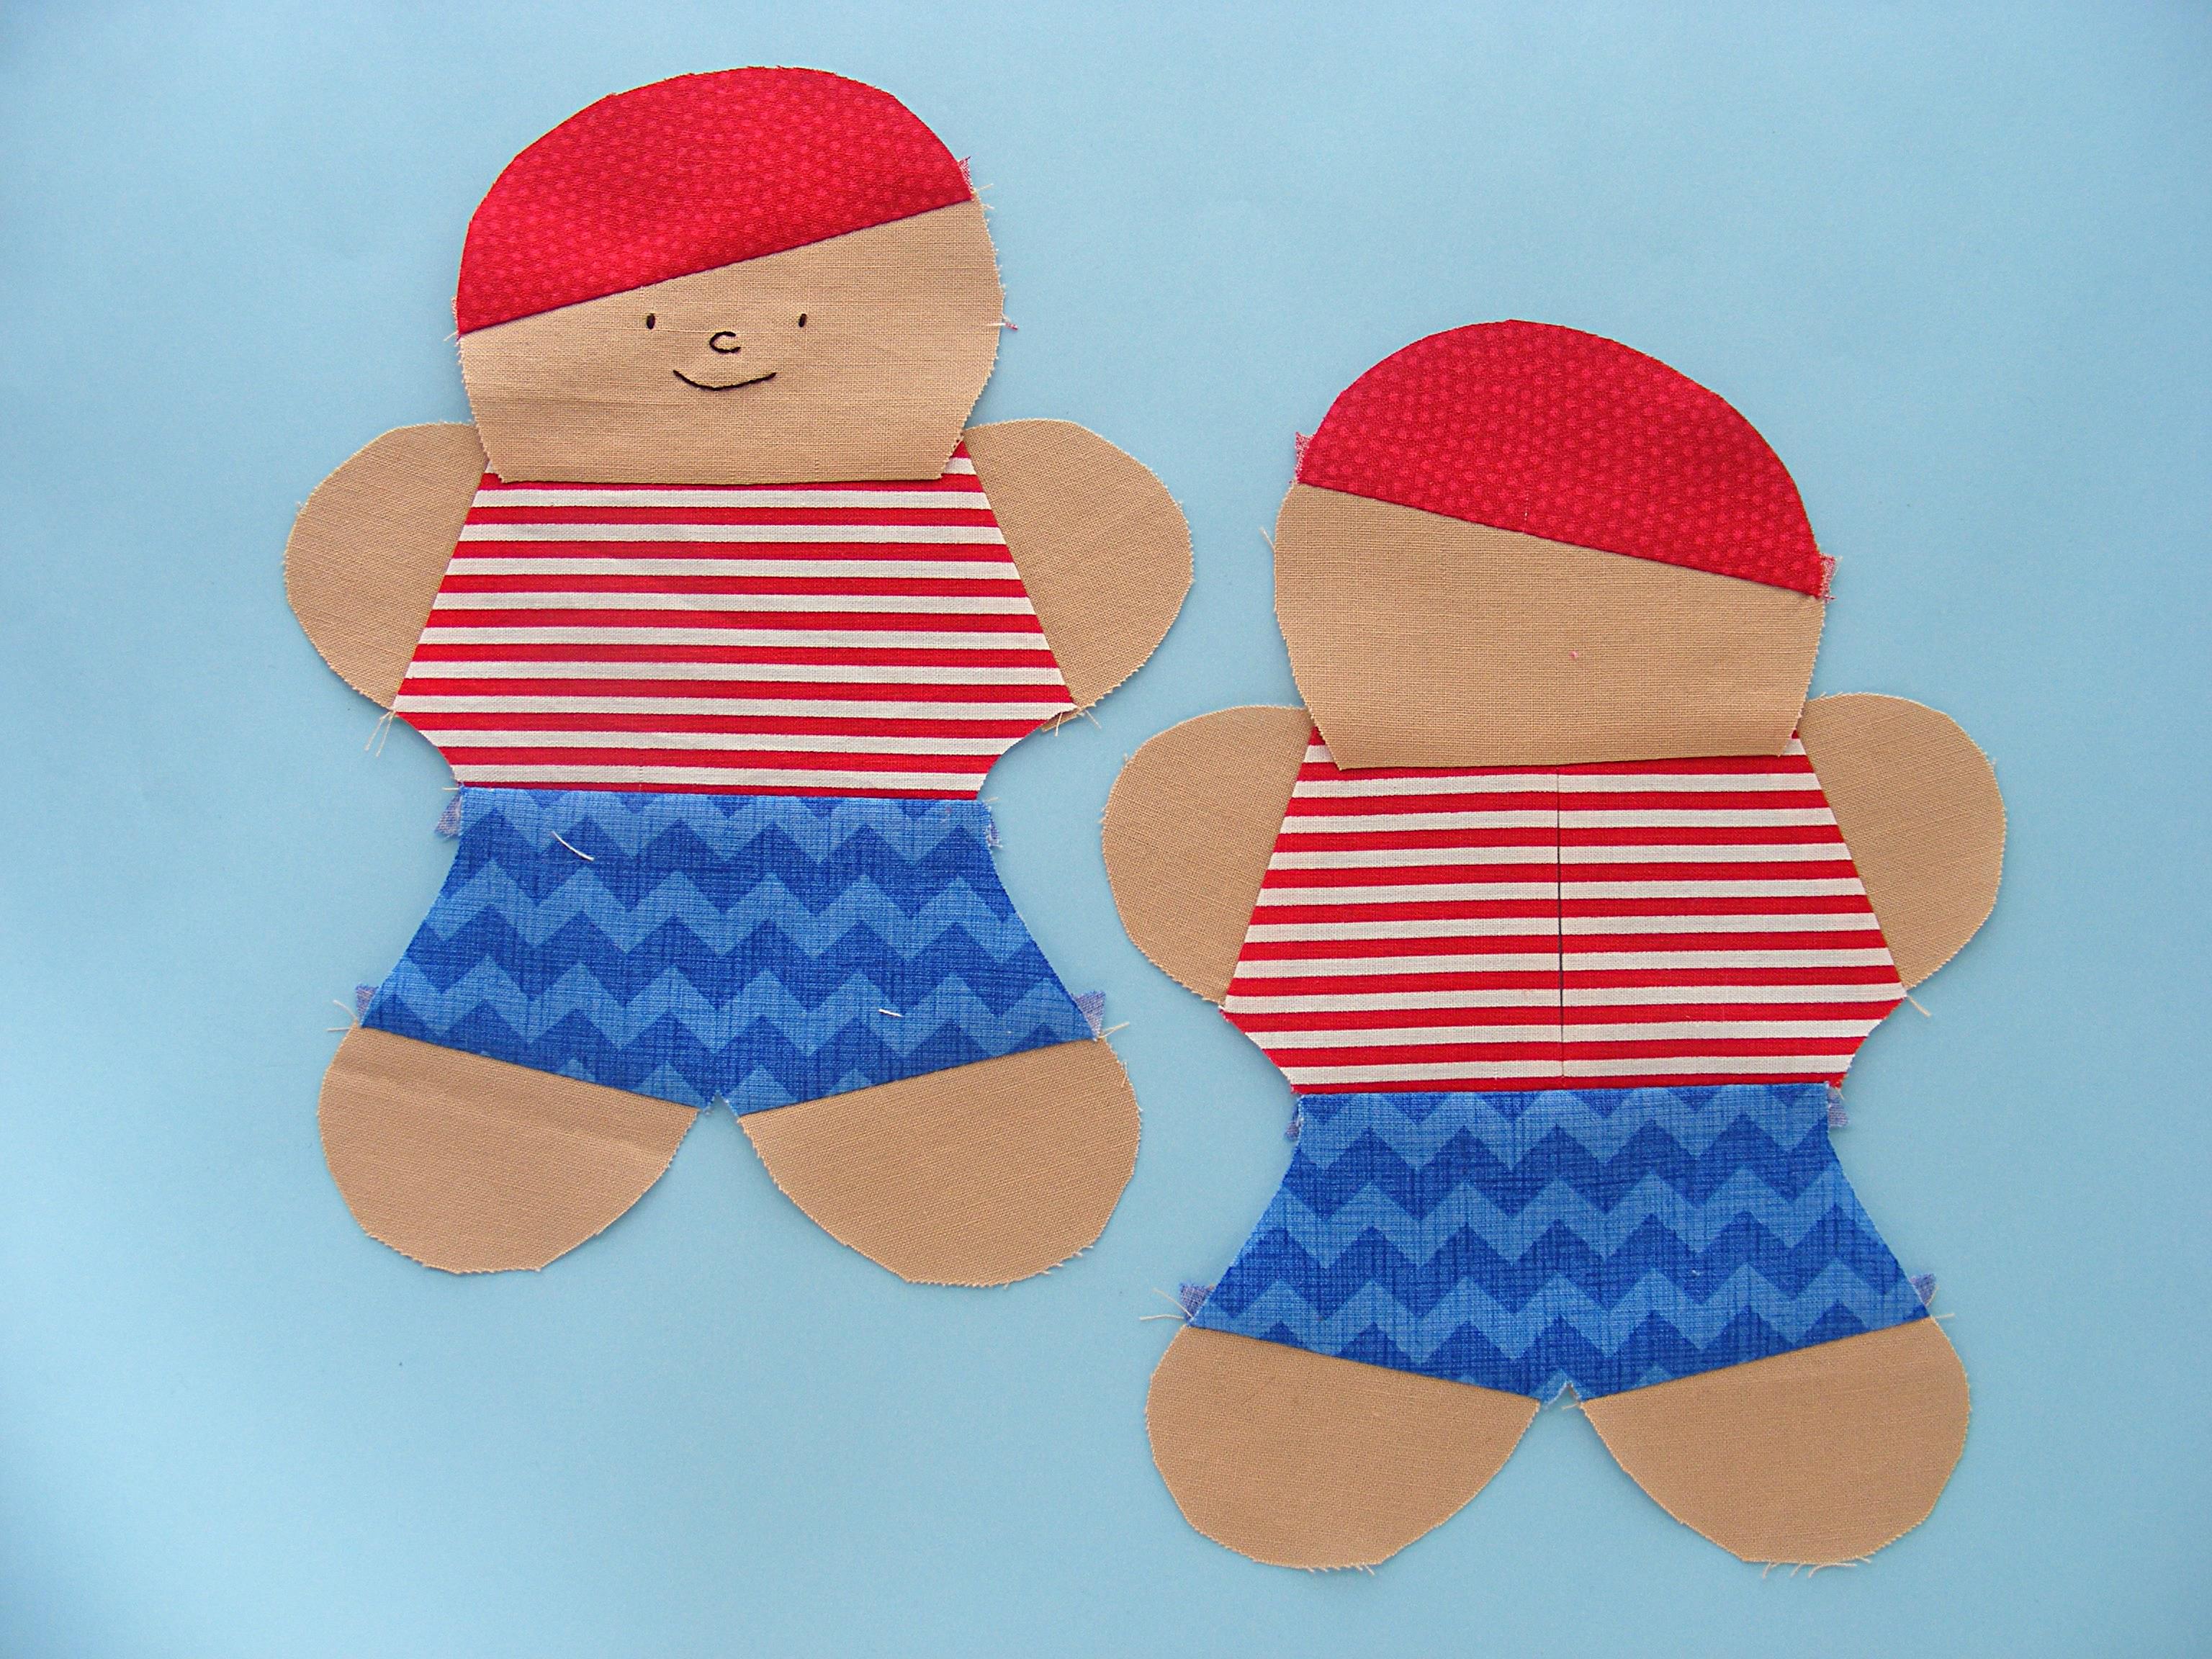
Step 12
Fold the bottom of the head and the top of the body in half to find the centers. Line those centers up so the head is exactly centered on the body.
Sew the face to the body front and the other head piece to the body back.
Flip the heads up and press. The seam allowance should be pressed toward the head so the body remains flat.
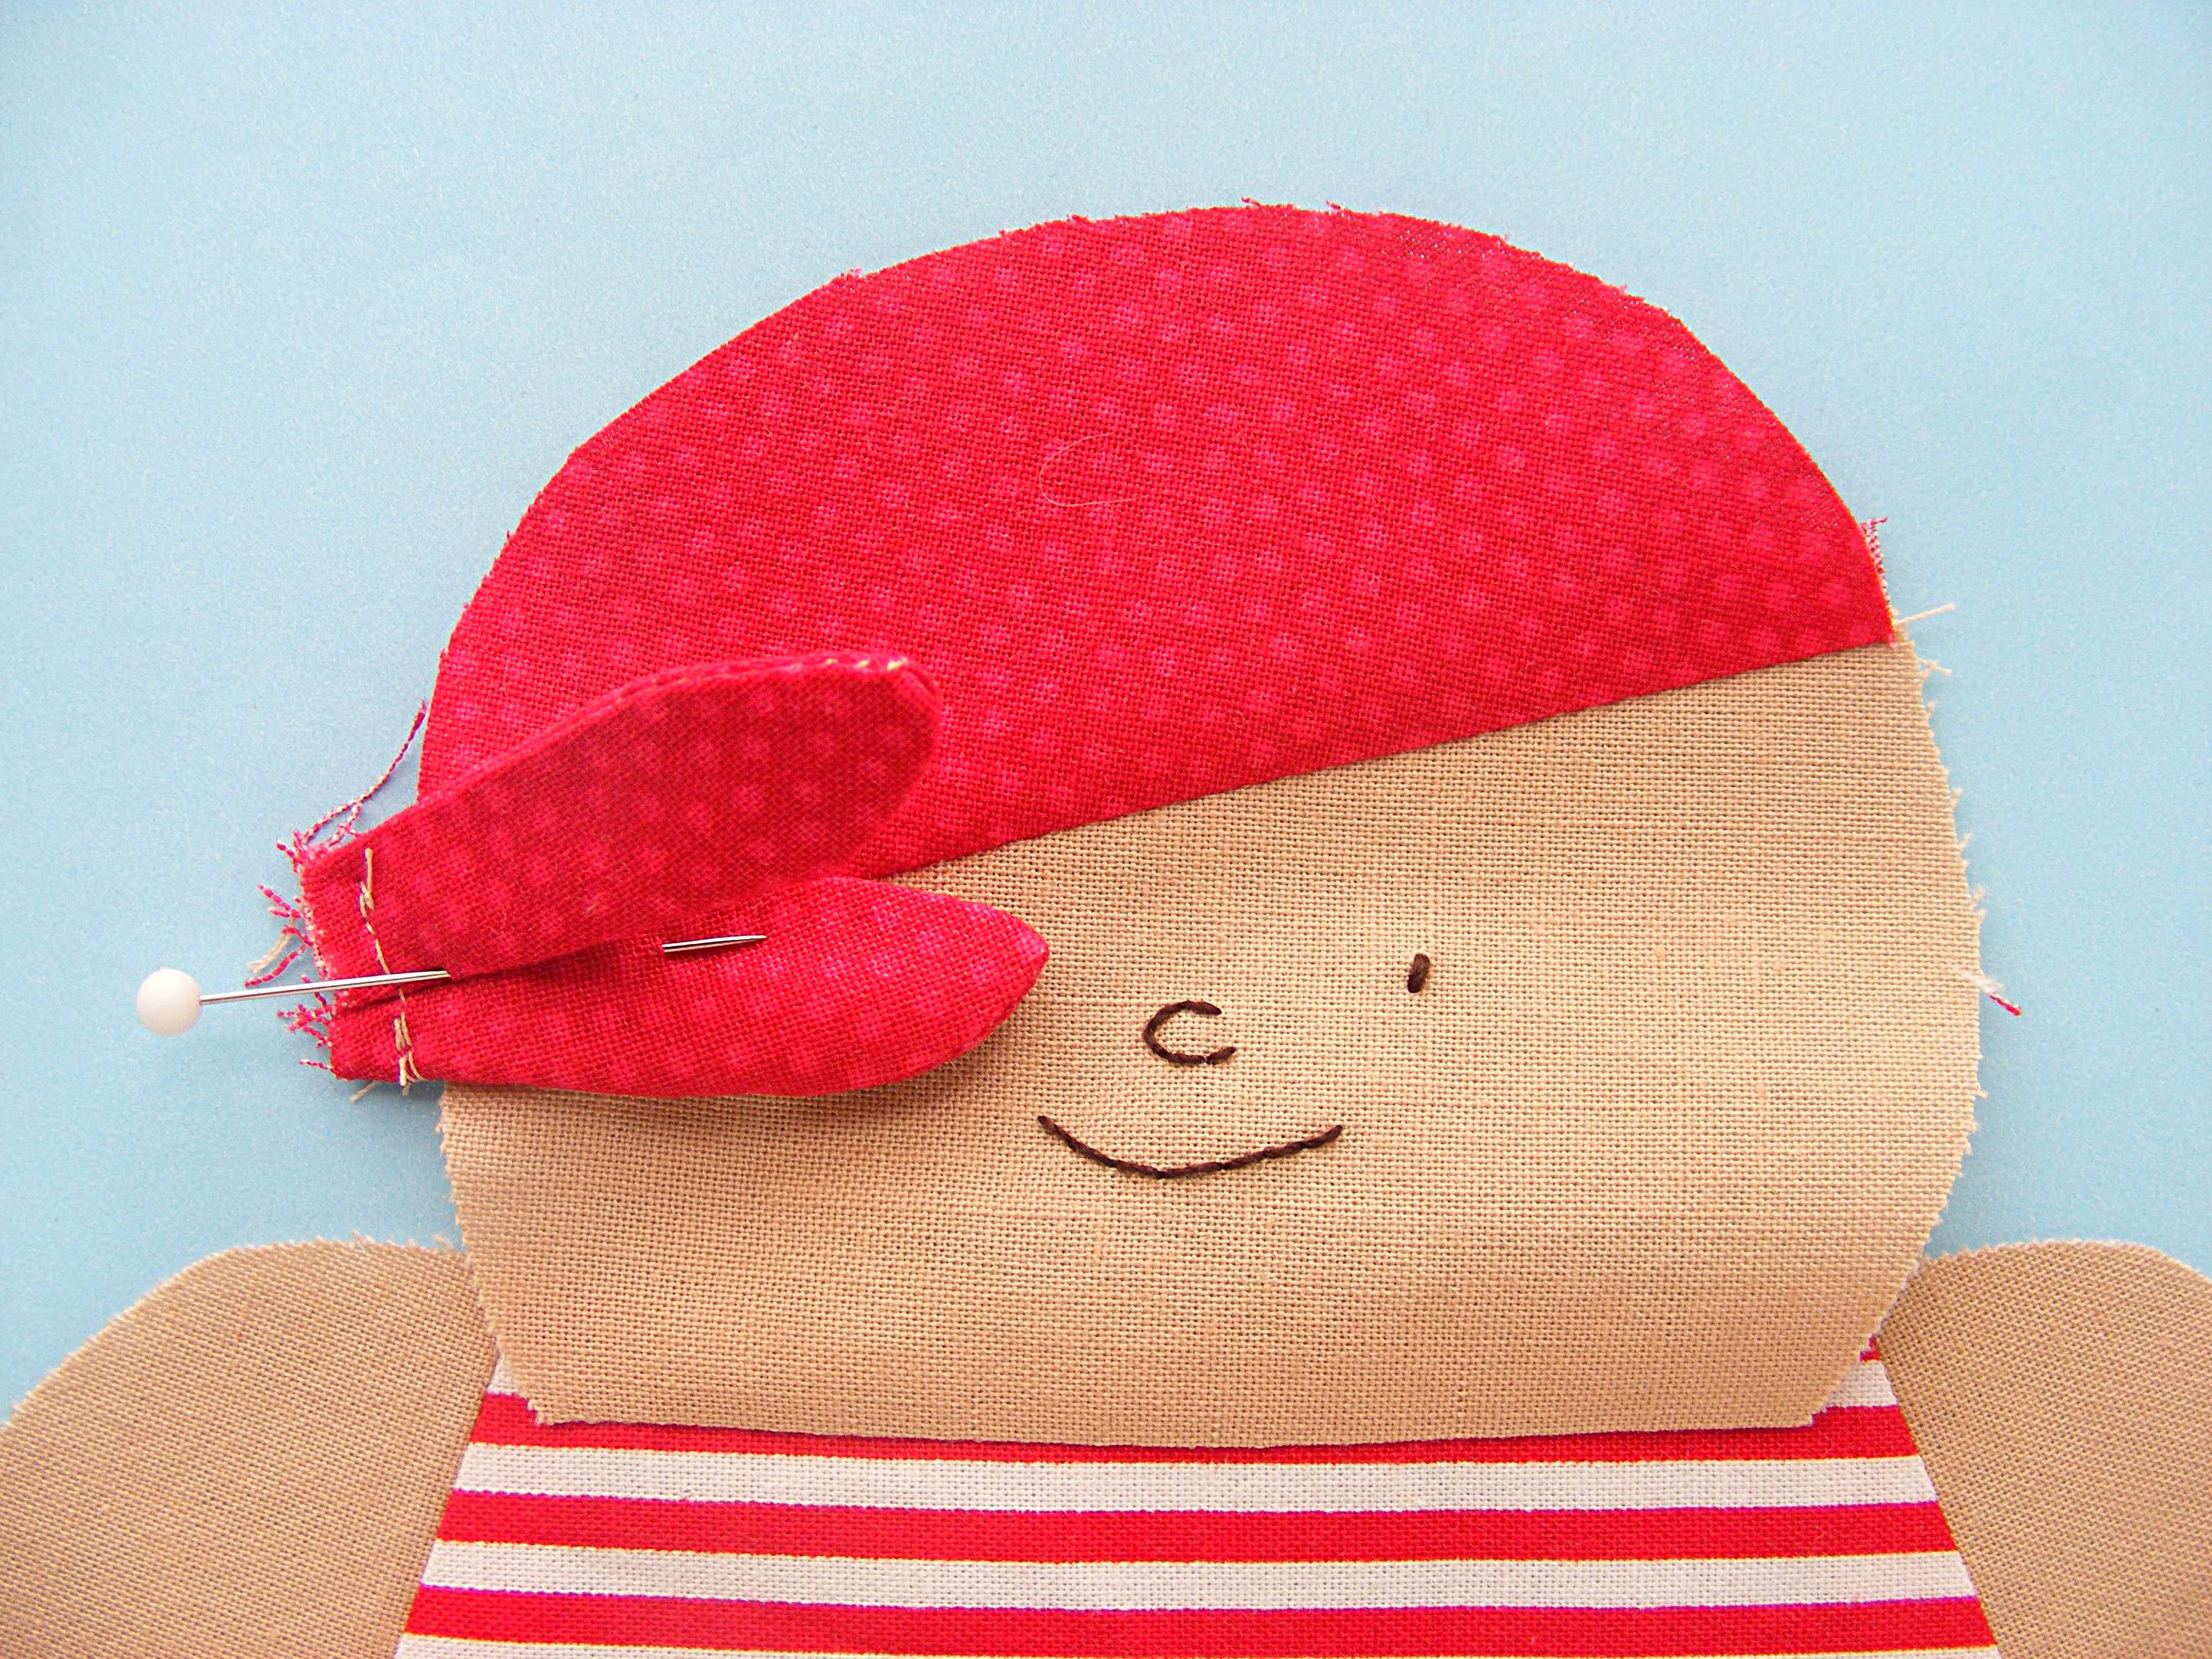
Step 13
Lay the body front face up on a flat surface.
Lay the bandana knot over the face as shown in the photo. It should be right at the seam where the bandana meets the head, with the folds face down and with the raw edge hanging off the edge of the head by about 1/4 inch.
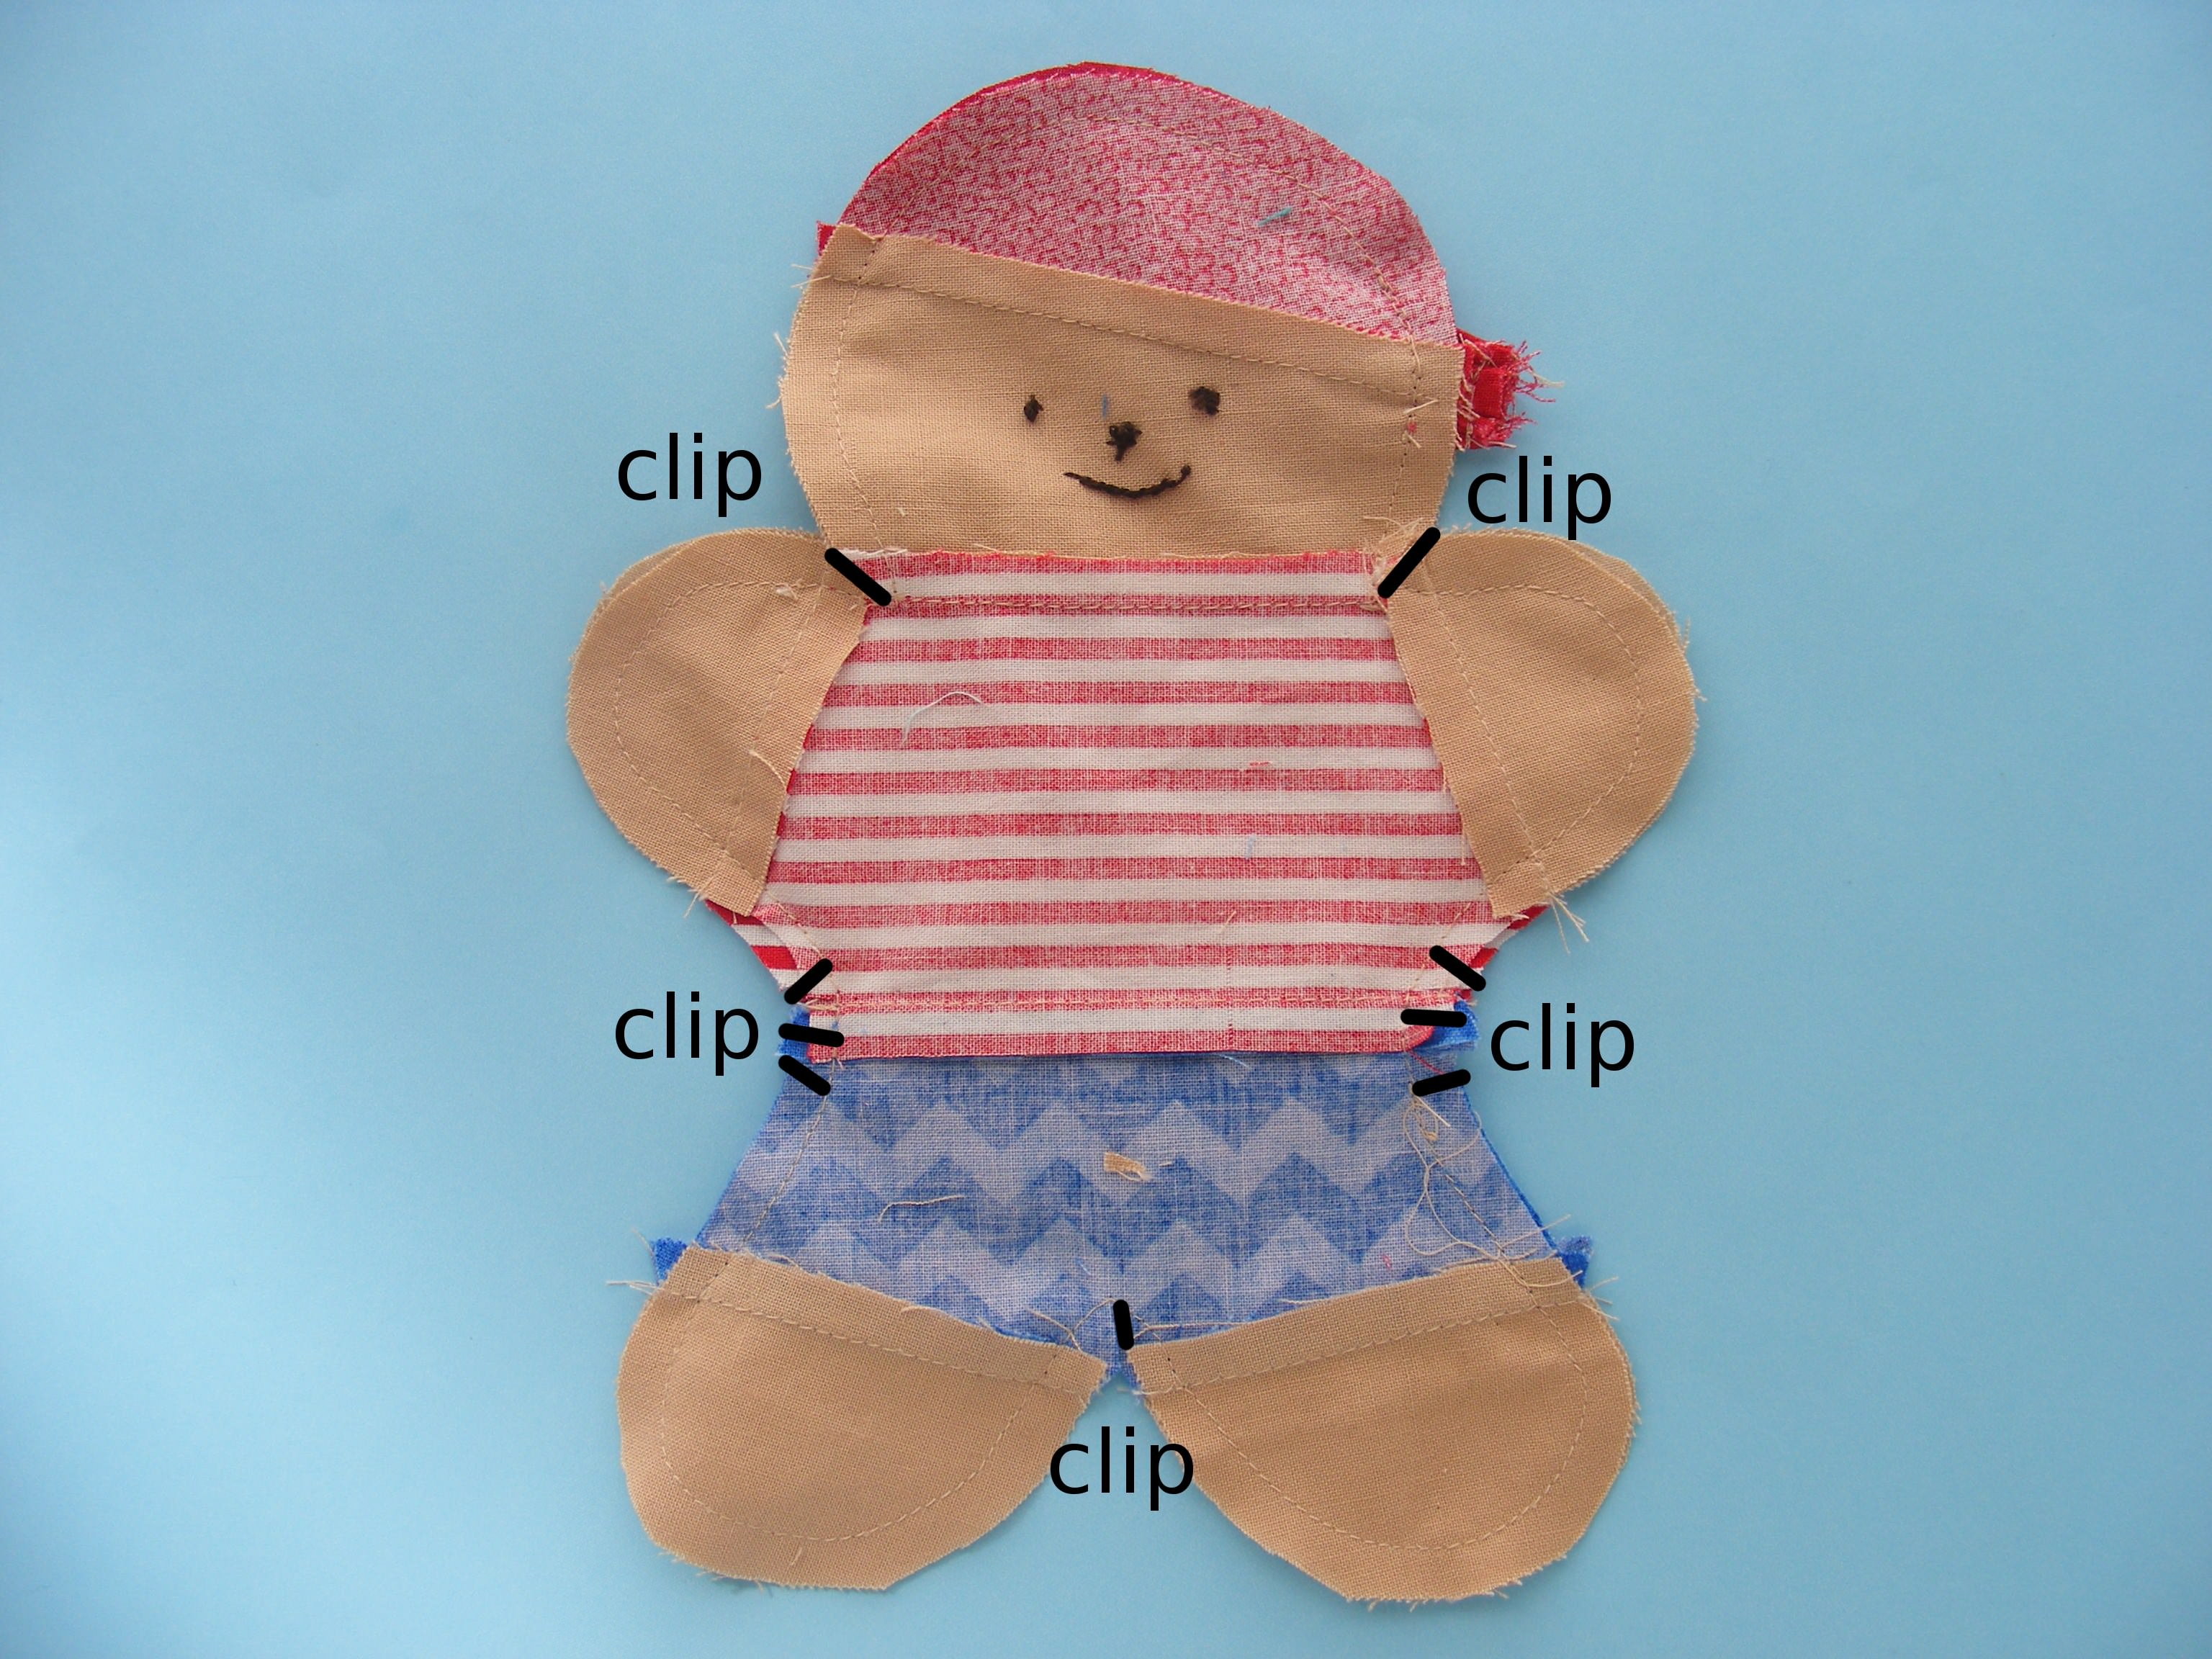
Pin or clip in place.
Step 14
Place the body back face down over the front, sandwiching the bandana knot between the layers.
Pin or clip the layers together carefully, matching all the seams first (the white pins) and then pinning as needed around them (the red and yellow pins).
Step 15
Sew all the way around the body using 1/4 inch seam allowance. Make sure you’re catching the bandana knot in your stitching.
Like this? Sign up for the Shiny Happy News! You’ll get more free patterns, plus sewing tips and tricks, new tutorials, fun videos, yummy recipes, special discounts and more!
Press all the seams. I’m pressing mine open for this quilt. I think it will make things simpler in the end.
Arrange your squares according to the diagram below.
For this block I sewed things up a little differently in order to keep the edges of my chunks of color perfectly straight, even if my seams weren’t lined up perfectly.
We’re going to sew the whole thing into three fat rwos, but we’re going to sew some parts of those rows into chunks first.
1. Sew up the two orange 3×3 squares and 1 orange 4×4 square.
2. Sew up two aqua 3×7 rectangles and two aqua 3×4 rectangles.
Arrange those chunks as you see below.
Now sew all those chunks into rows.
Finally – sew all those rows into one fabulous block. 🙂
I’d like to have a few words with whoever invented the Tooth Fairy.
Seriously.
Let’s start a tradition where a child places a teeny, tiny tooth under their pillow and parents have to retrieve it in the middle of the night without waking the child.
This is madness.
The night after Jo lost her first tooth she caught me frantically scrabbling around under her pillow in the dark, looking for a tooth the size of an apple seed.
She (naturally) asked me what the heck I was doing.
“Ummmmm. . . nothing. Just checking to see if the tooth fairy came yet. I. . . ummmmm. . . couldn’t wait until morning.”
Which she bought, but only because it was her first tooth and she was six years old.
After that somebody gave her a tiny little tooth fairy box that hung from her bedpost. It was just the right size for holding a tooth, but the money still had to go under the pillow.
I kept thinking about making a tooth fairy pillow that would hold tooth and money, but I couldn’t figure out exactly what I wanted to do. By now she’s lost all of her baby teeth, but as soon as I saw this cute new fabric I knew right away that it would make a perfect tooth fairy pillow.
Luckily, you all give me an excuse a reason to keep designing things that Jo outgrew years ago. 🙂
The pocket is big enough for grown-up fingers to reach in and find a tiny tooth. It’ll hold paper money or fun coins (Jo got a dollar coin for every tooth). And being snug up against a plump pillow means teeth and coins won’t just fall out.
The pillow is also big enough that it won’t get lost in the mountain of stuffed animals that help our kids hide those lost teeth. 🙂
If you have an especially light sleeper, you can add that ribbon loop so you can hang the pillow from a bedpost or door handle. It’s easy and the pattern has instructions.
The best part of the project is that you can position the tiny pocket anywhere on the pillow you like. Make sure not to cover up your favorite bit! I especially like this little block showing how many teeth dogs and cats have.(Sorry – this fabric is discontinued now.)
Jo would have latched right on to fun facts like this! She also would have liked the grossness of the picture of tooth decay. 🙂
Press all the seams. I’m pressing mine open for this quilt. I think it will make things simpler in the end.
Arrange your squares according to the diagram below.
For this block I sewed things up a little differently – mainly to keep the edges of my yellow squares perfectly straight, even if my seams weren’t lined up perfectly.
We’re going to sew the whole things into columns, but we’re going to sew some parts of those columns into chunks first.
1. Sew up the four all-green columns.
2. Sew the middle two all-green columns together.
3. Sew all the yellow squares into their 3×3 blocks.
4. Sew eight 1×3 green rectangles.
5. Sew four of the 1×3 green rectangles into two 2×3 green rectangles.
Arrange everything as you see below.
Now sew all those chunks into columns.
Finally – sew all those columns into one fabulous block. 🙂
1 fat quarter of fabric for the outside of the pouch
1 fat quarter of fabric for the inside of the pouch
scraps of fabric for the hair/spikes
two 7/8 inch buttons for the eyes (I stacked smaller black buttons on top of these buttons)
two 3/16″ buttons for the nostrils (optional)
9 inch zipper
The hardest part of this project is getting the fabric facing the right direction, so pay special attention to those parts of the instructions.
Step 1
Cut out all materials.
For the top of the face cut one wide rectangle 3″ tall and 10″ wide. Cut the same size from the lining fabric.
For the bottom of the face cut one narrow rectangle 2″ tall and 10″ wide. Cut the same size from the lining fabric.
Wait to cut the pieces for the back of the pouch. The size will vary depending on the width of your zipper, how close to the teeth your zipper foot lets you get, etc.
For the pointy spikes cut five 3″ squares.
Step 2
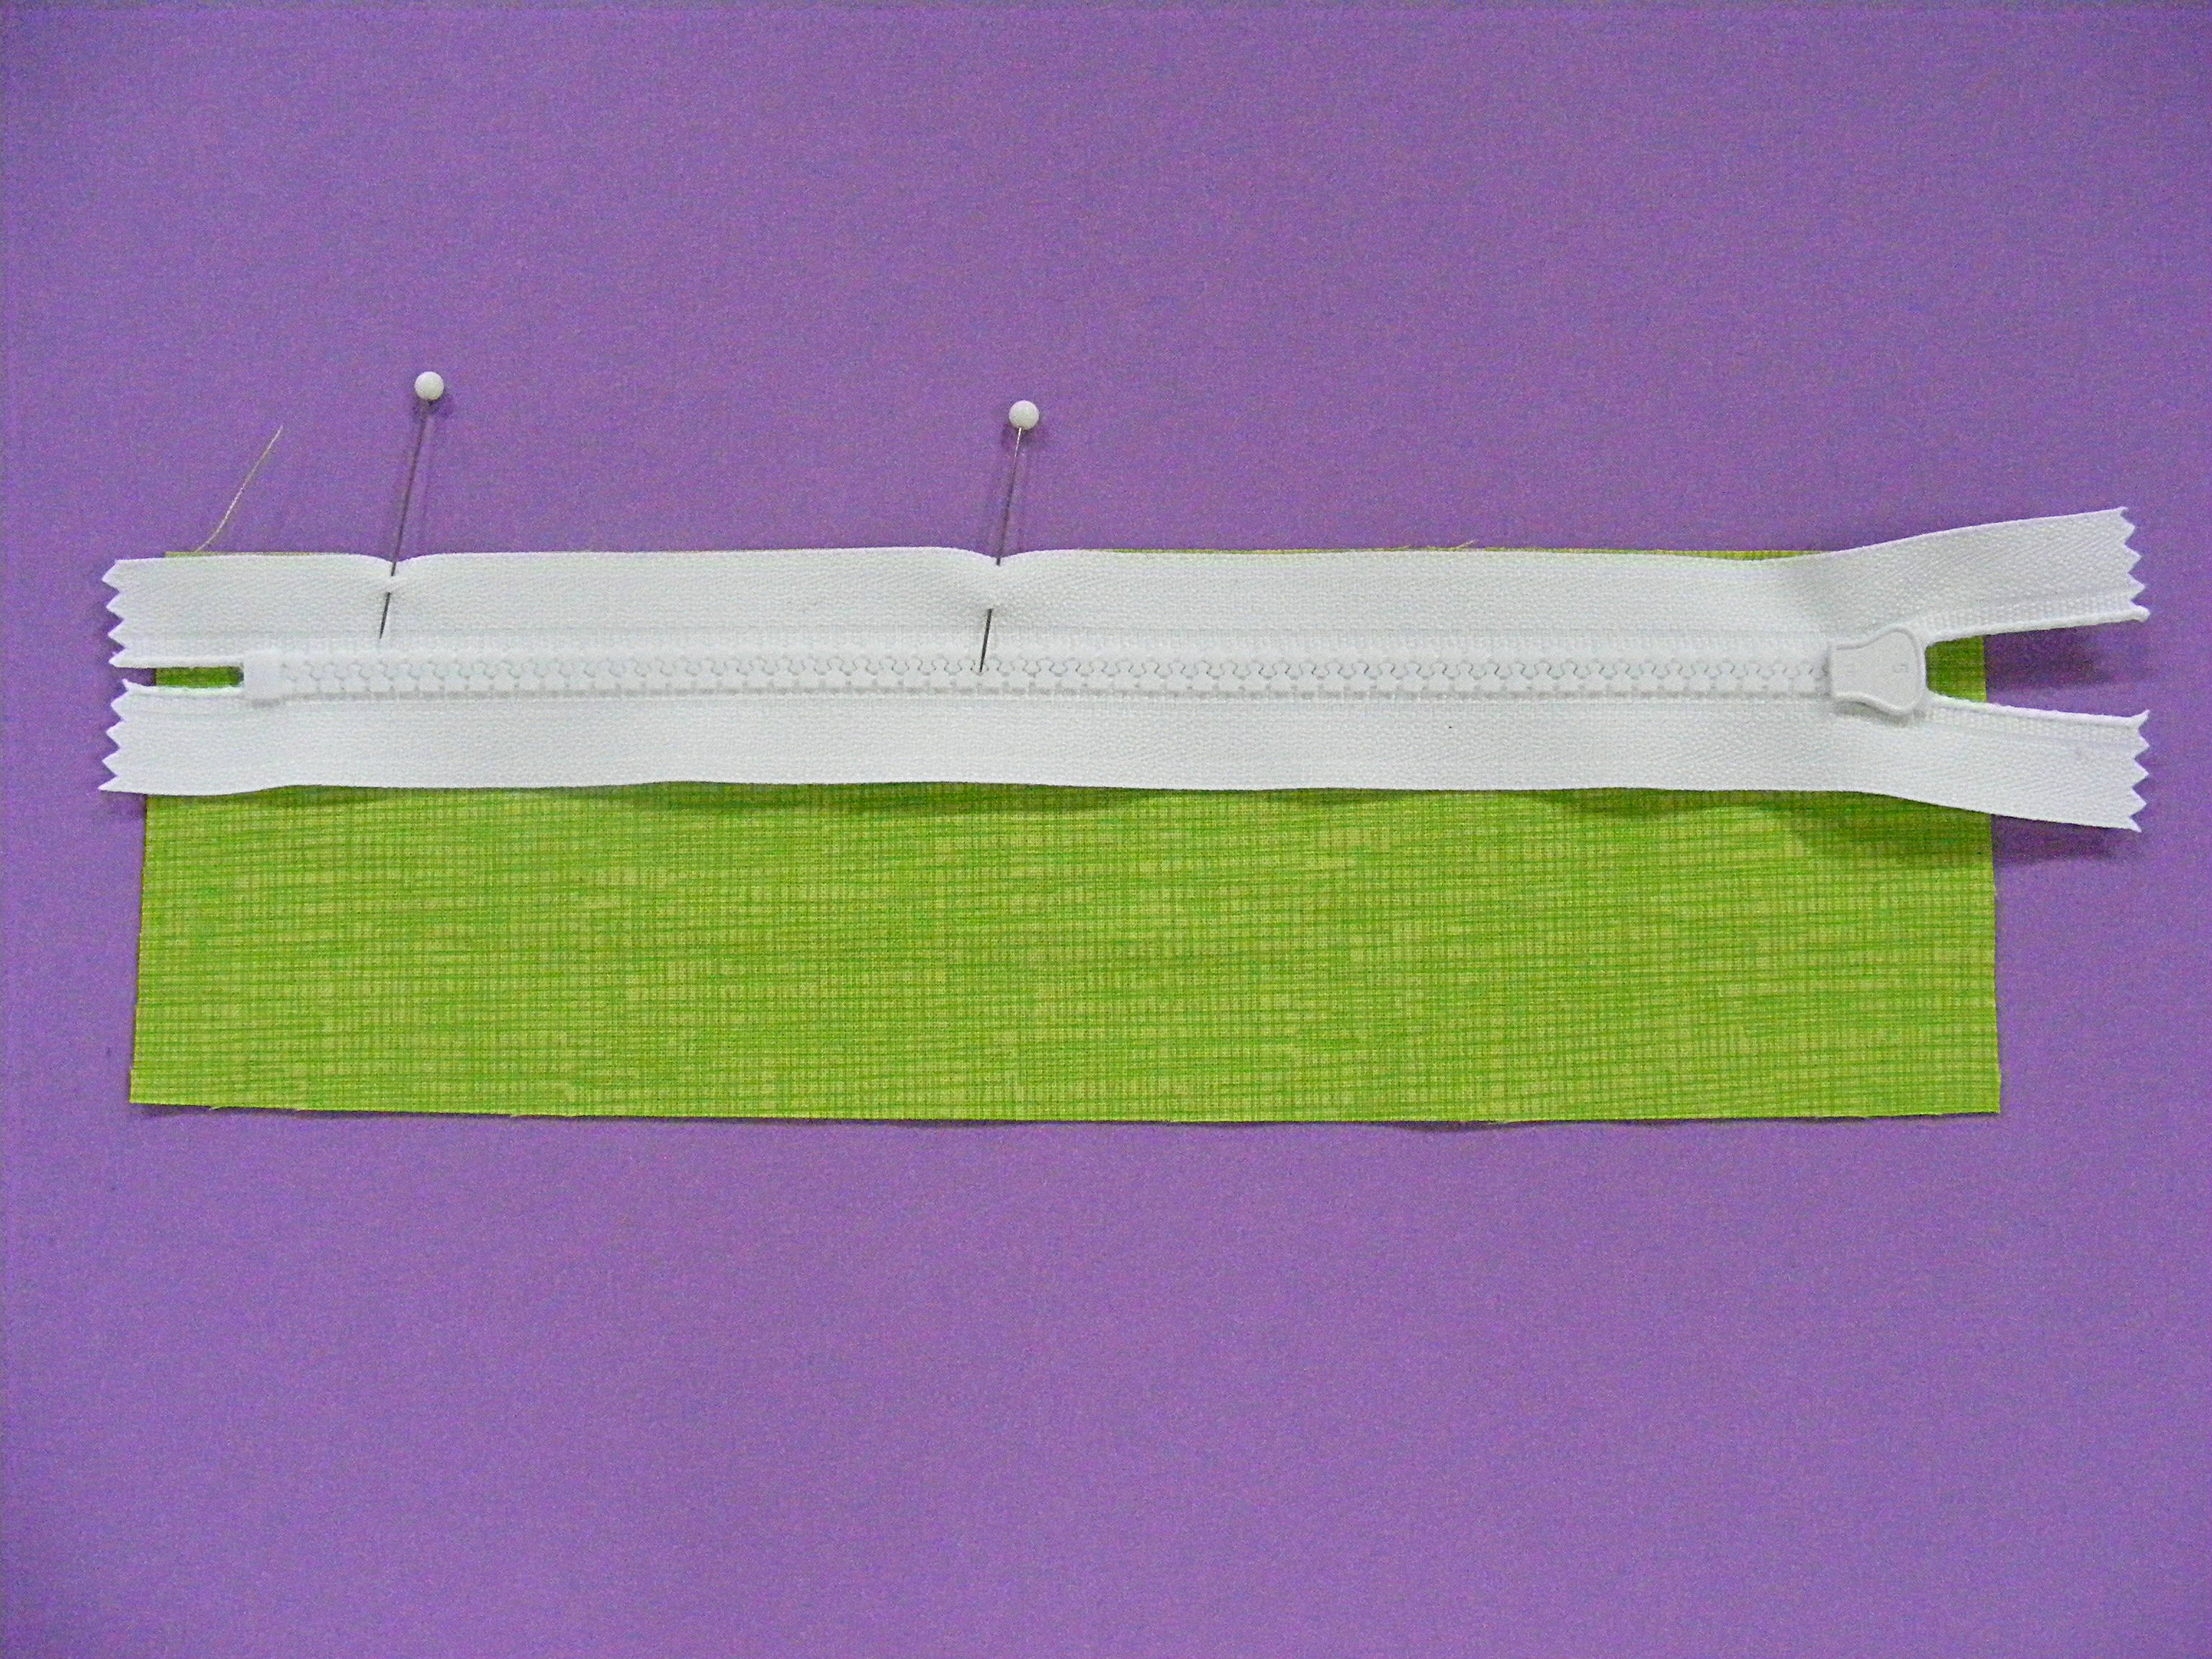
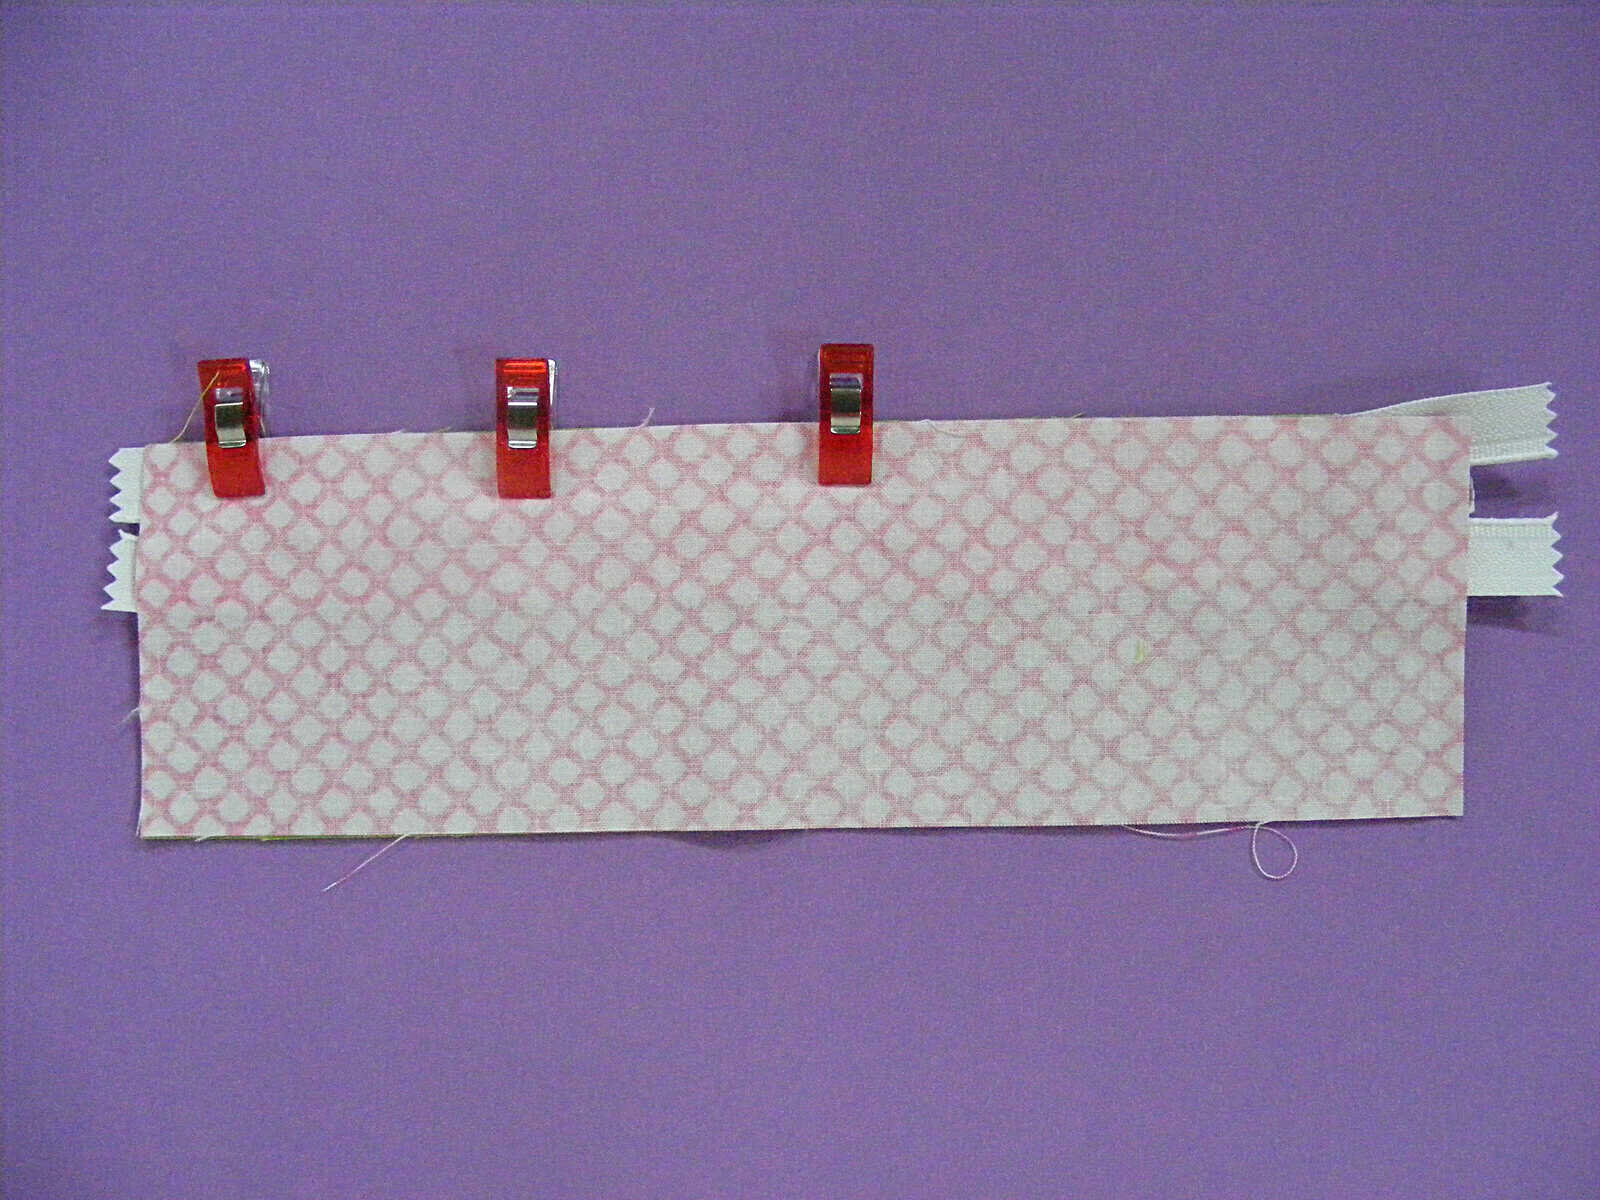
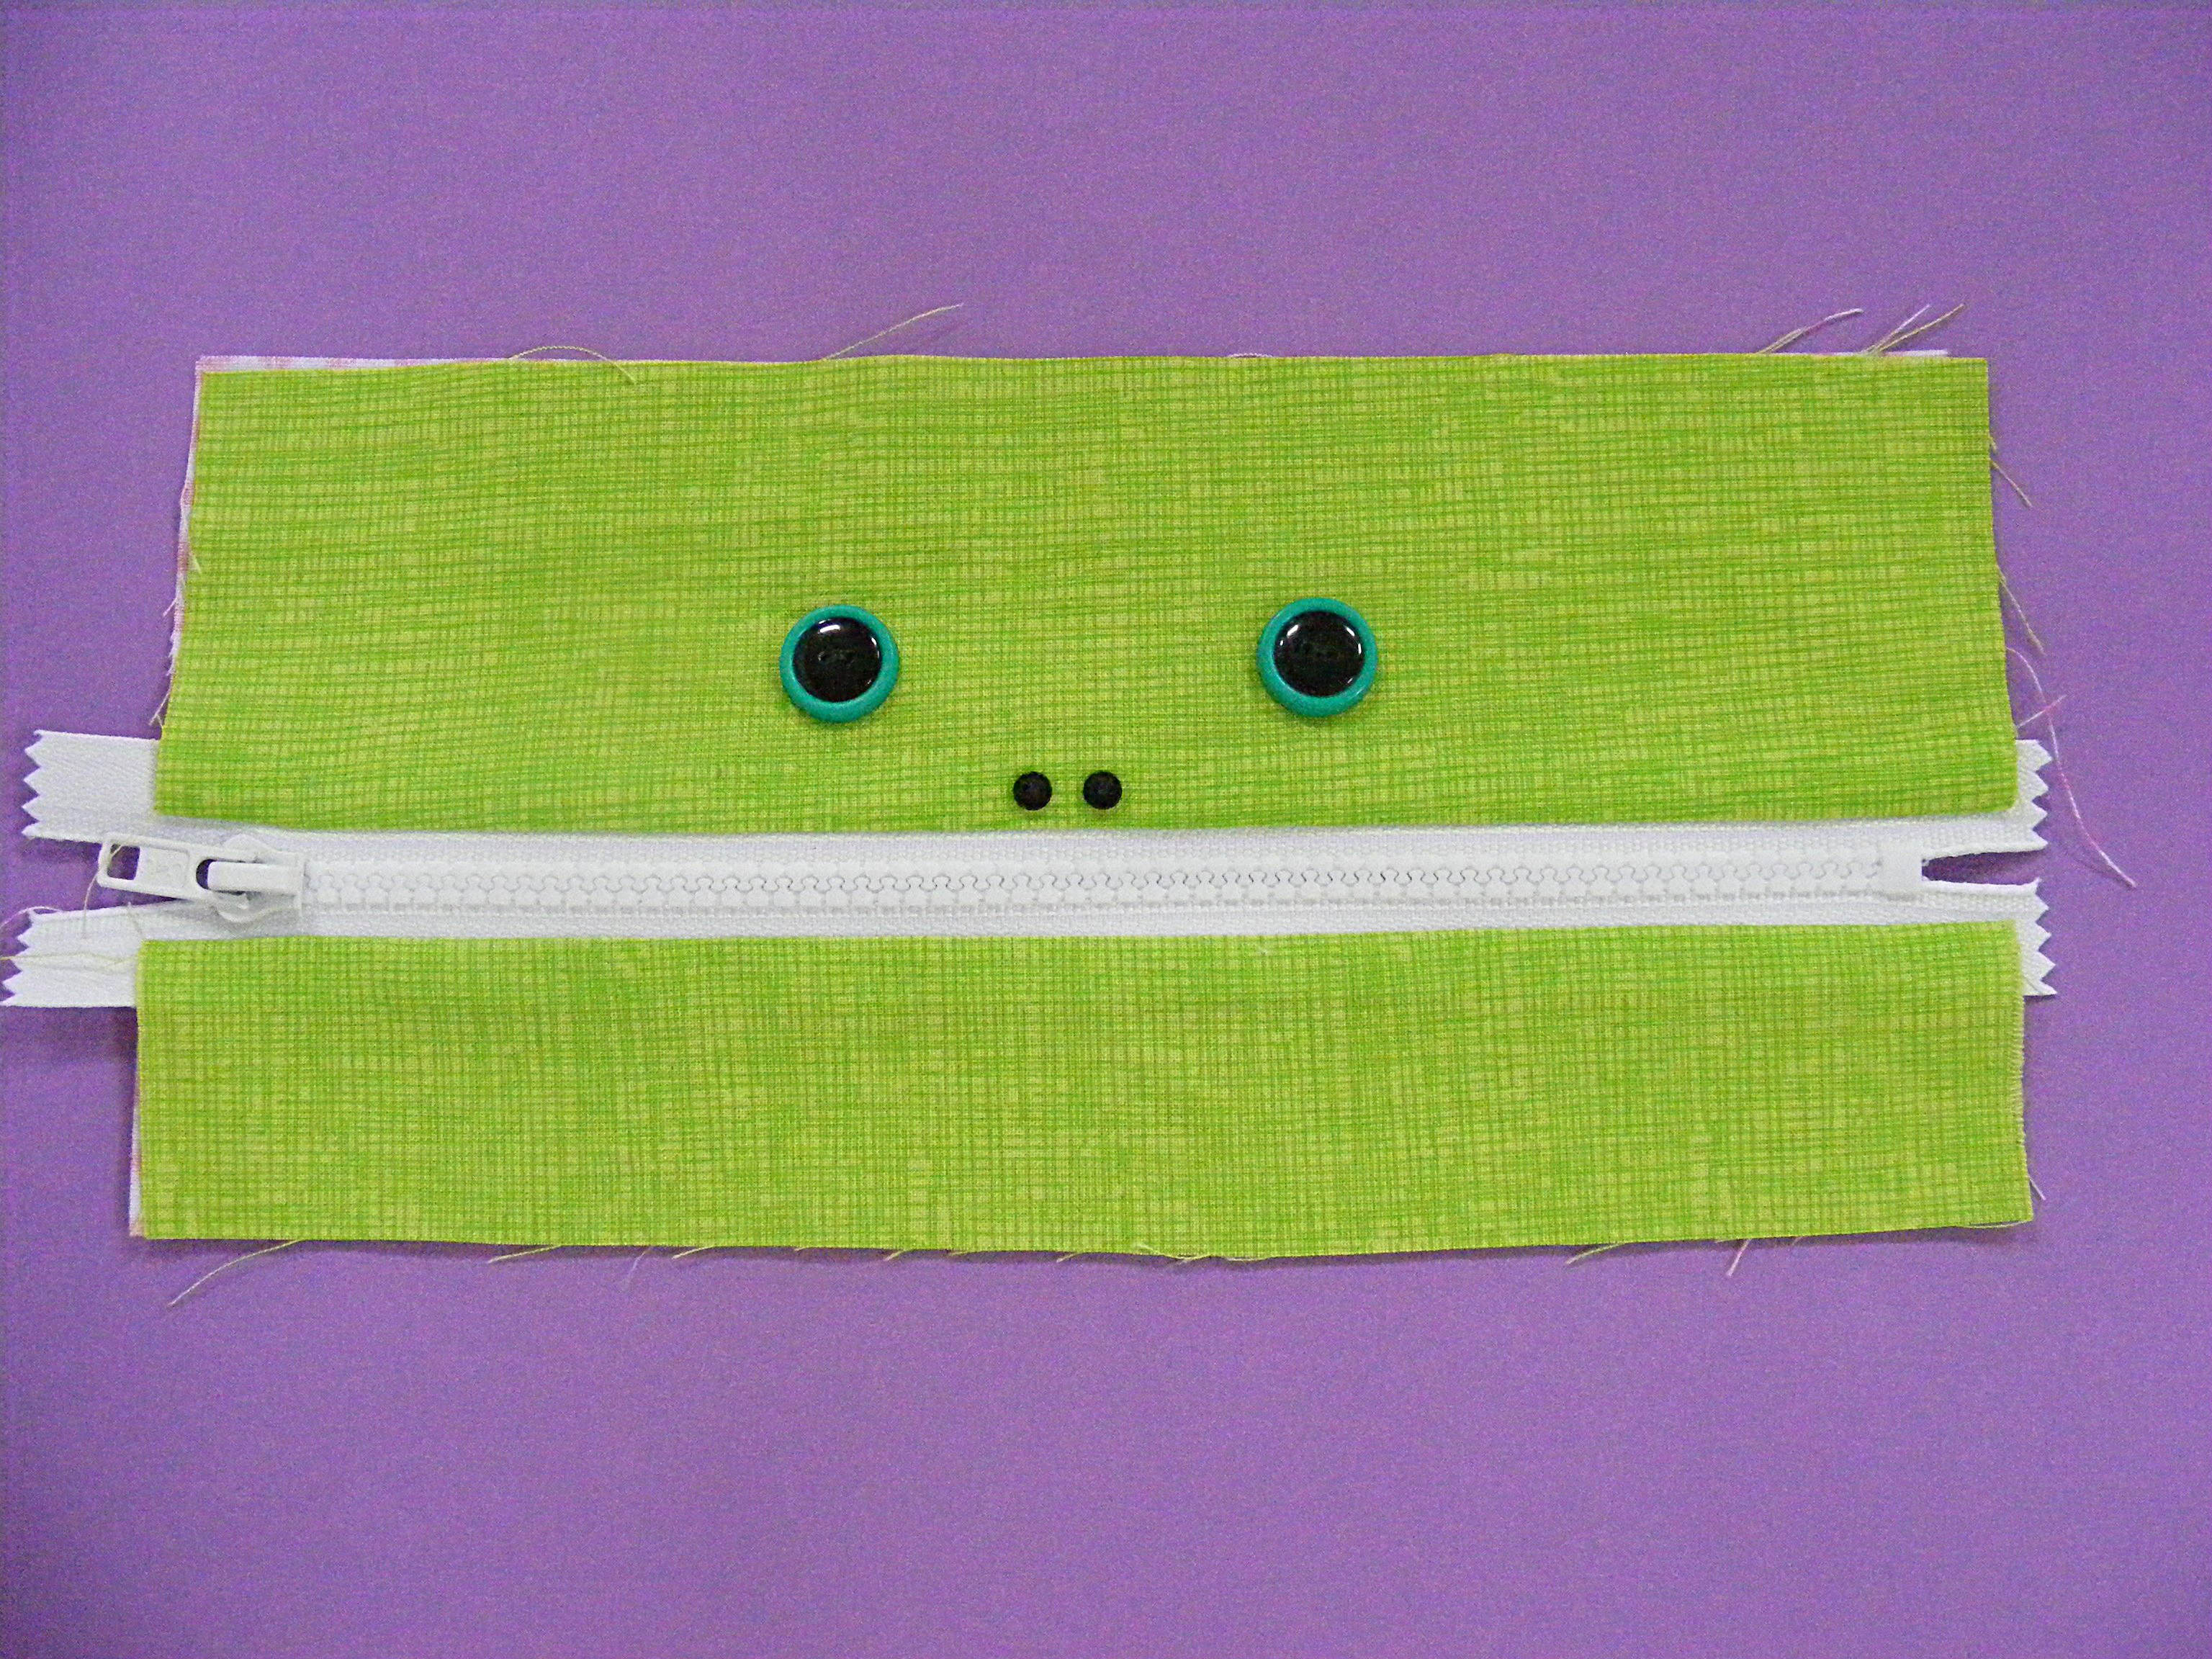
Lay the wider rectangle in the outside fabric face up on a flat surface.
Lay the zipper face down over the fabric. Make sure the teeth of the zipper (not the zipper tape) are centered over the rectangle. Line the edge of the zipper tape up with the edge of the fabric and pin in place.
Lay the wider rectangle in the lining fabric face down over the rectangle from Step 2, with the zipper sandwiched between the two layers of fabric.
Pin or clip the layers in place.
Step 4
Sew the three layers together (outer rectangle, lining rectangle and zipper) getting as close to the teeth of the zipper as possible. You’ll want to stop partway along the seam to move the zipper pull out of your way. Watch this video for tips.
If you have a zipper foot, that will let you get very close to the teeth. If you don’t have a zipper foot, just get as close as you can. You’ll have a little more zipper tape showing in the finished pouch and it will be fine.
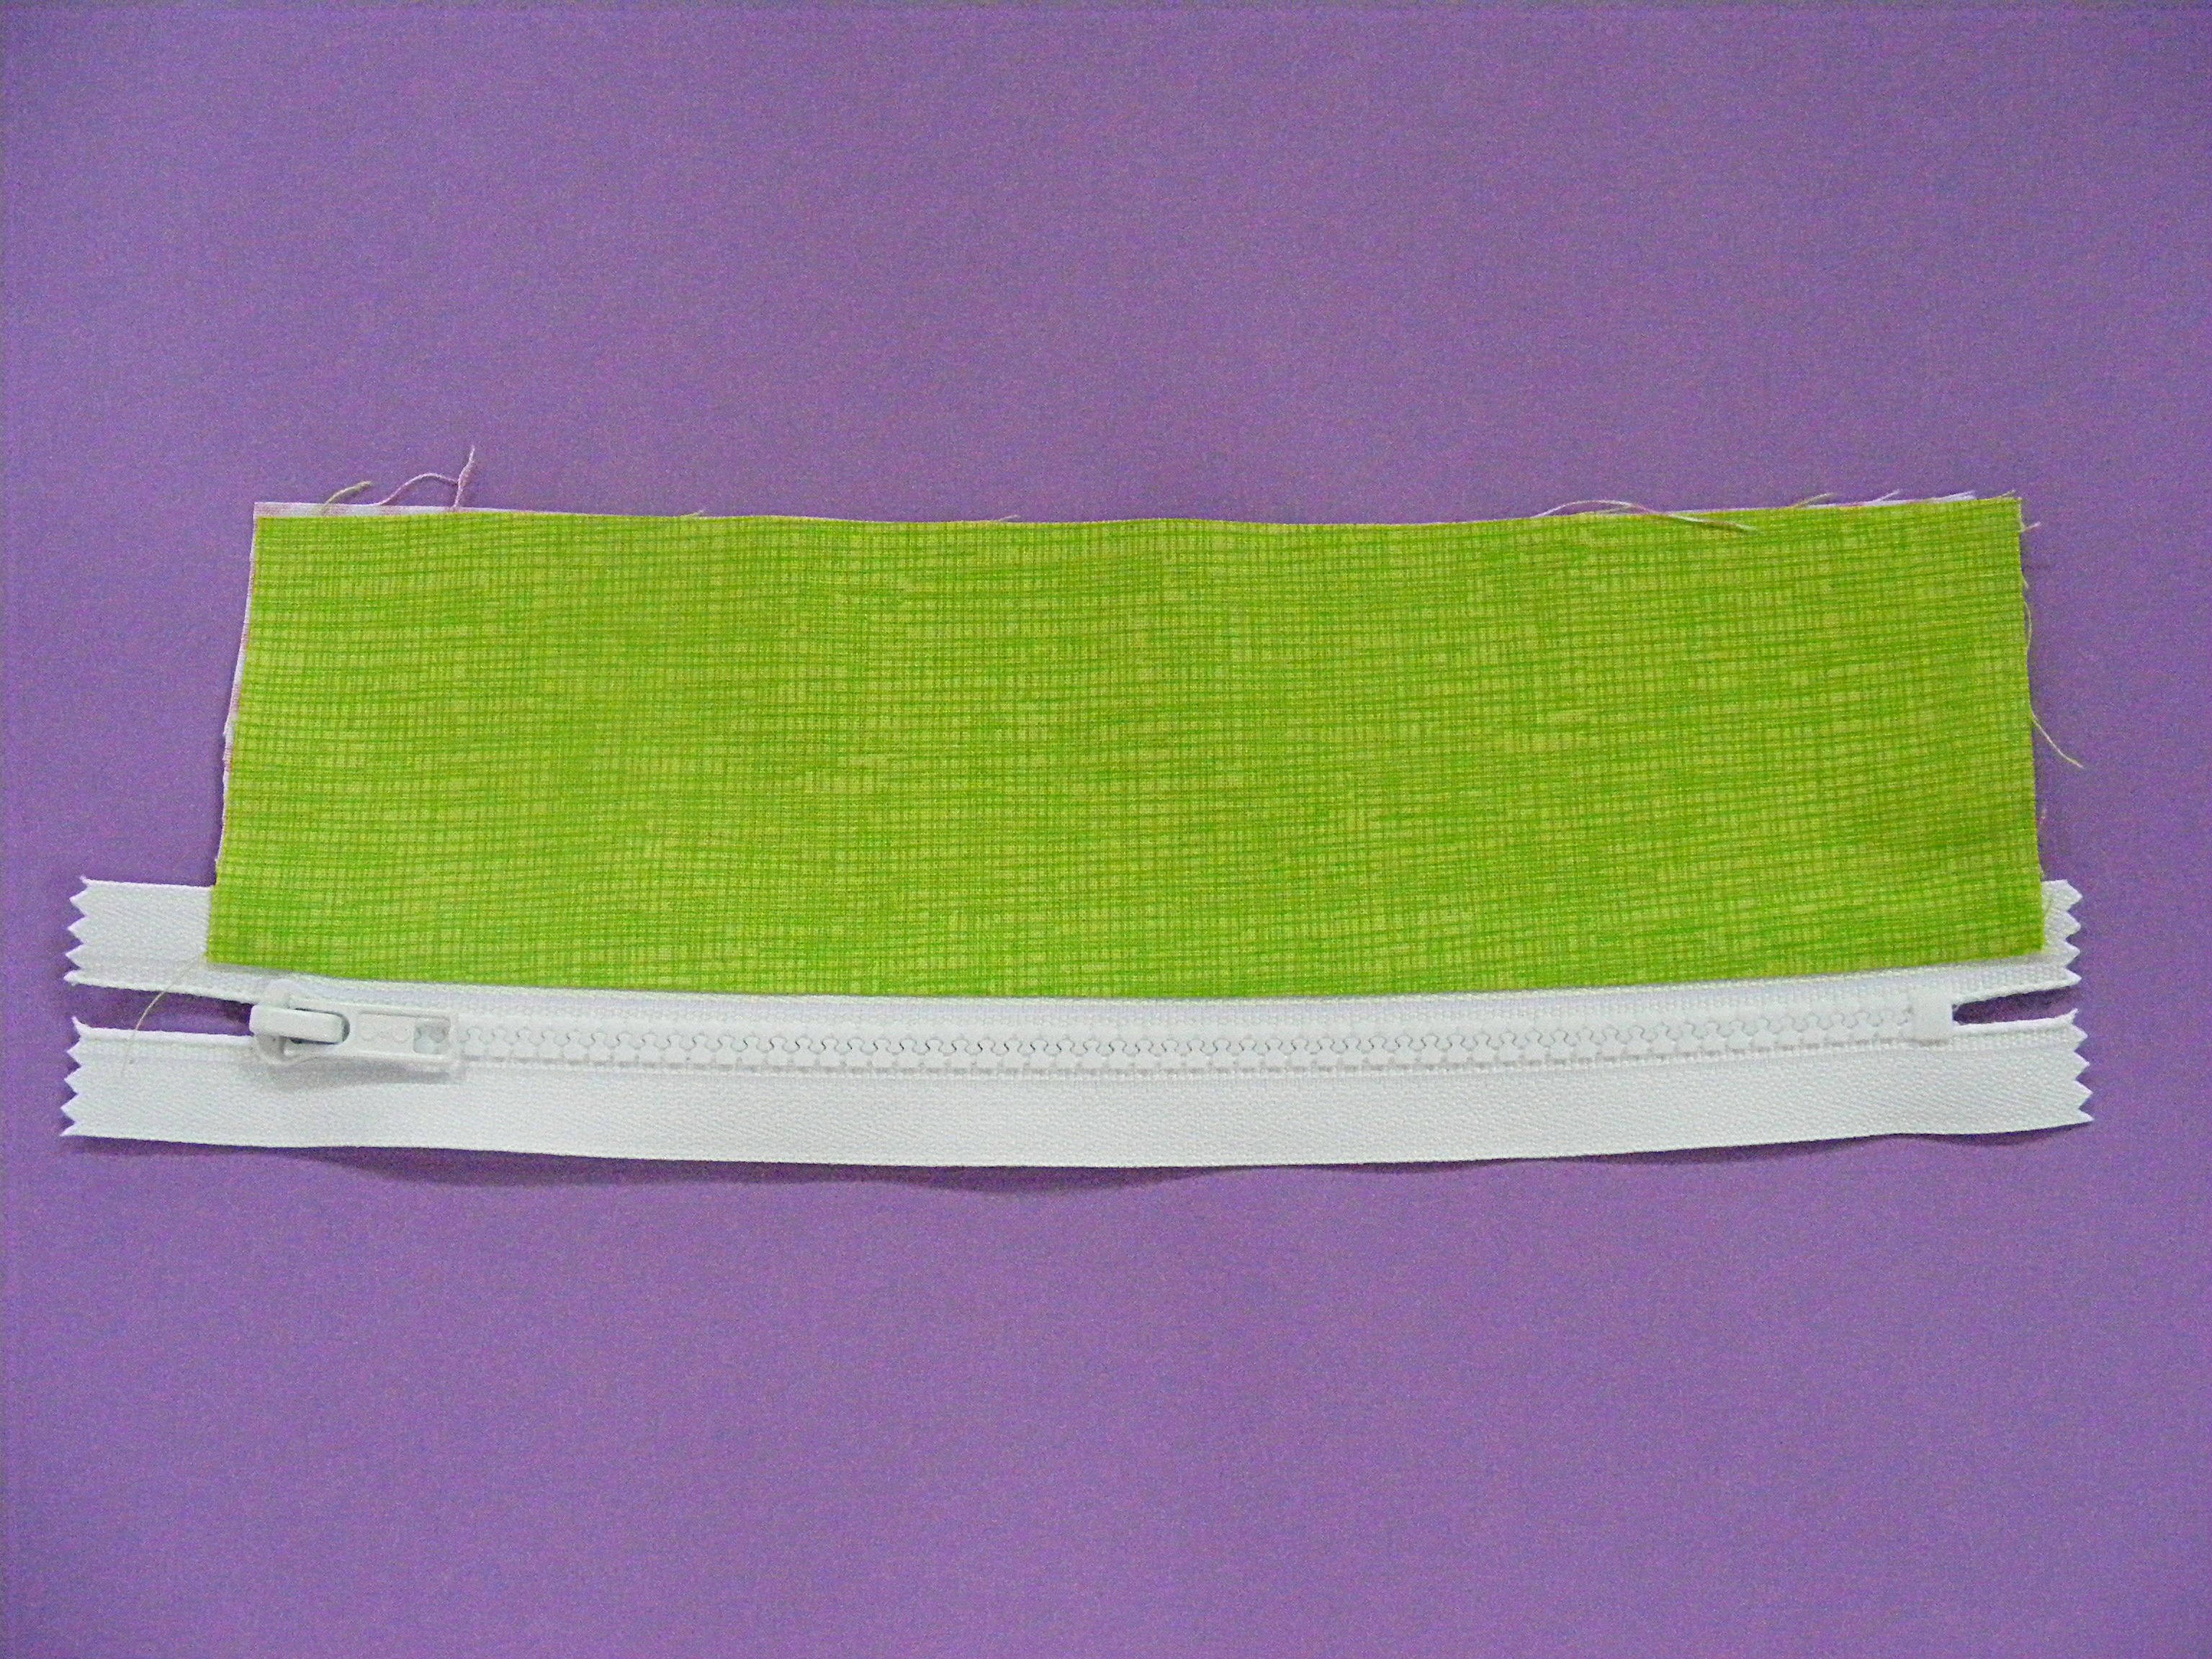
Step 5
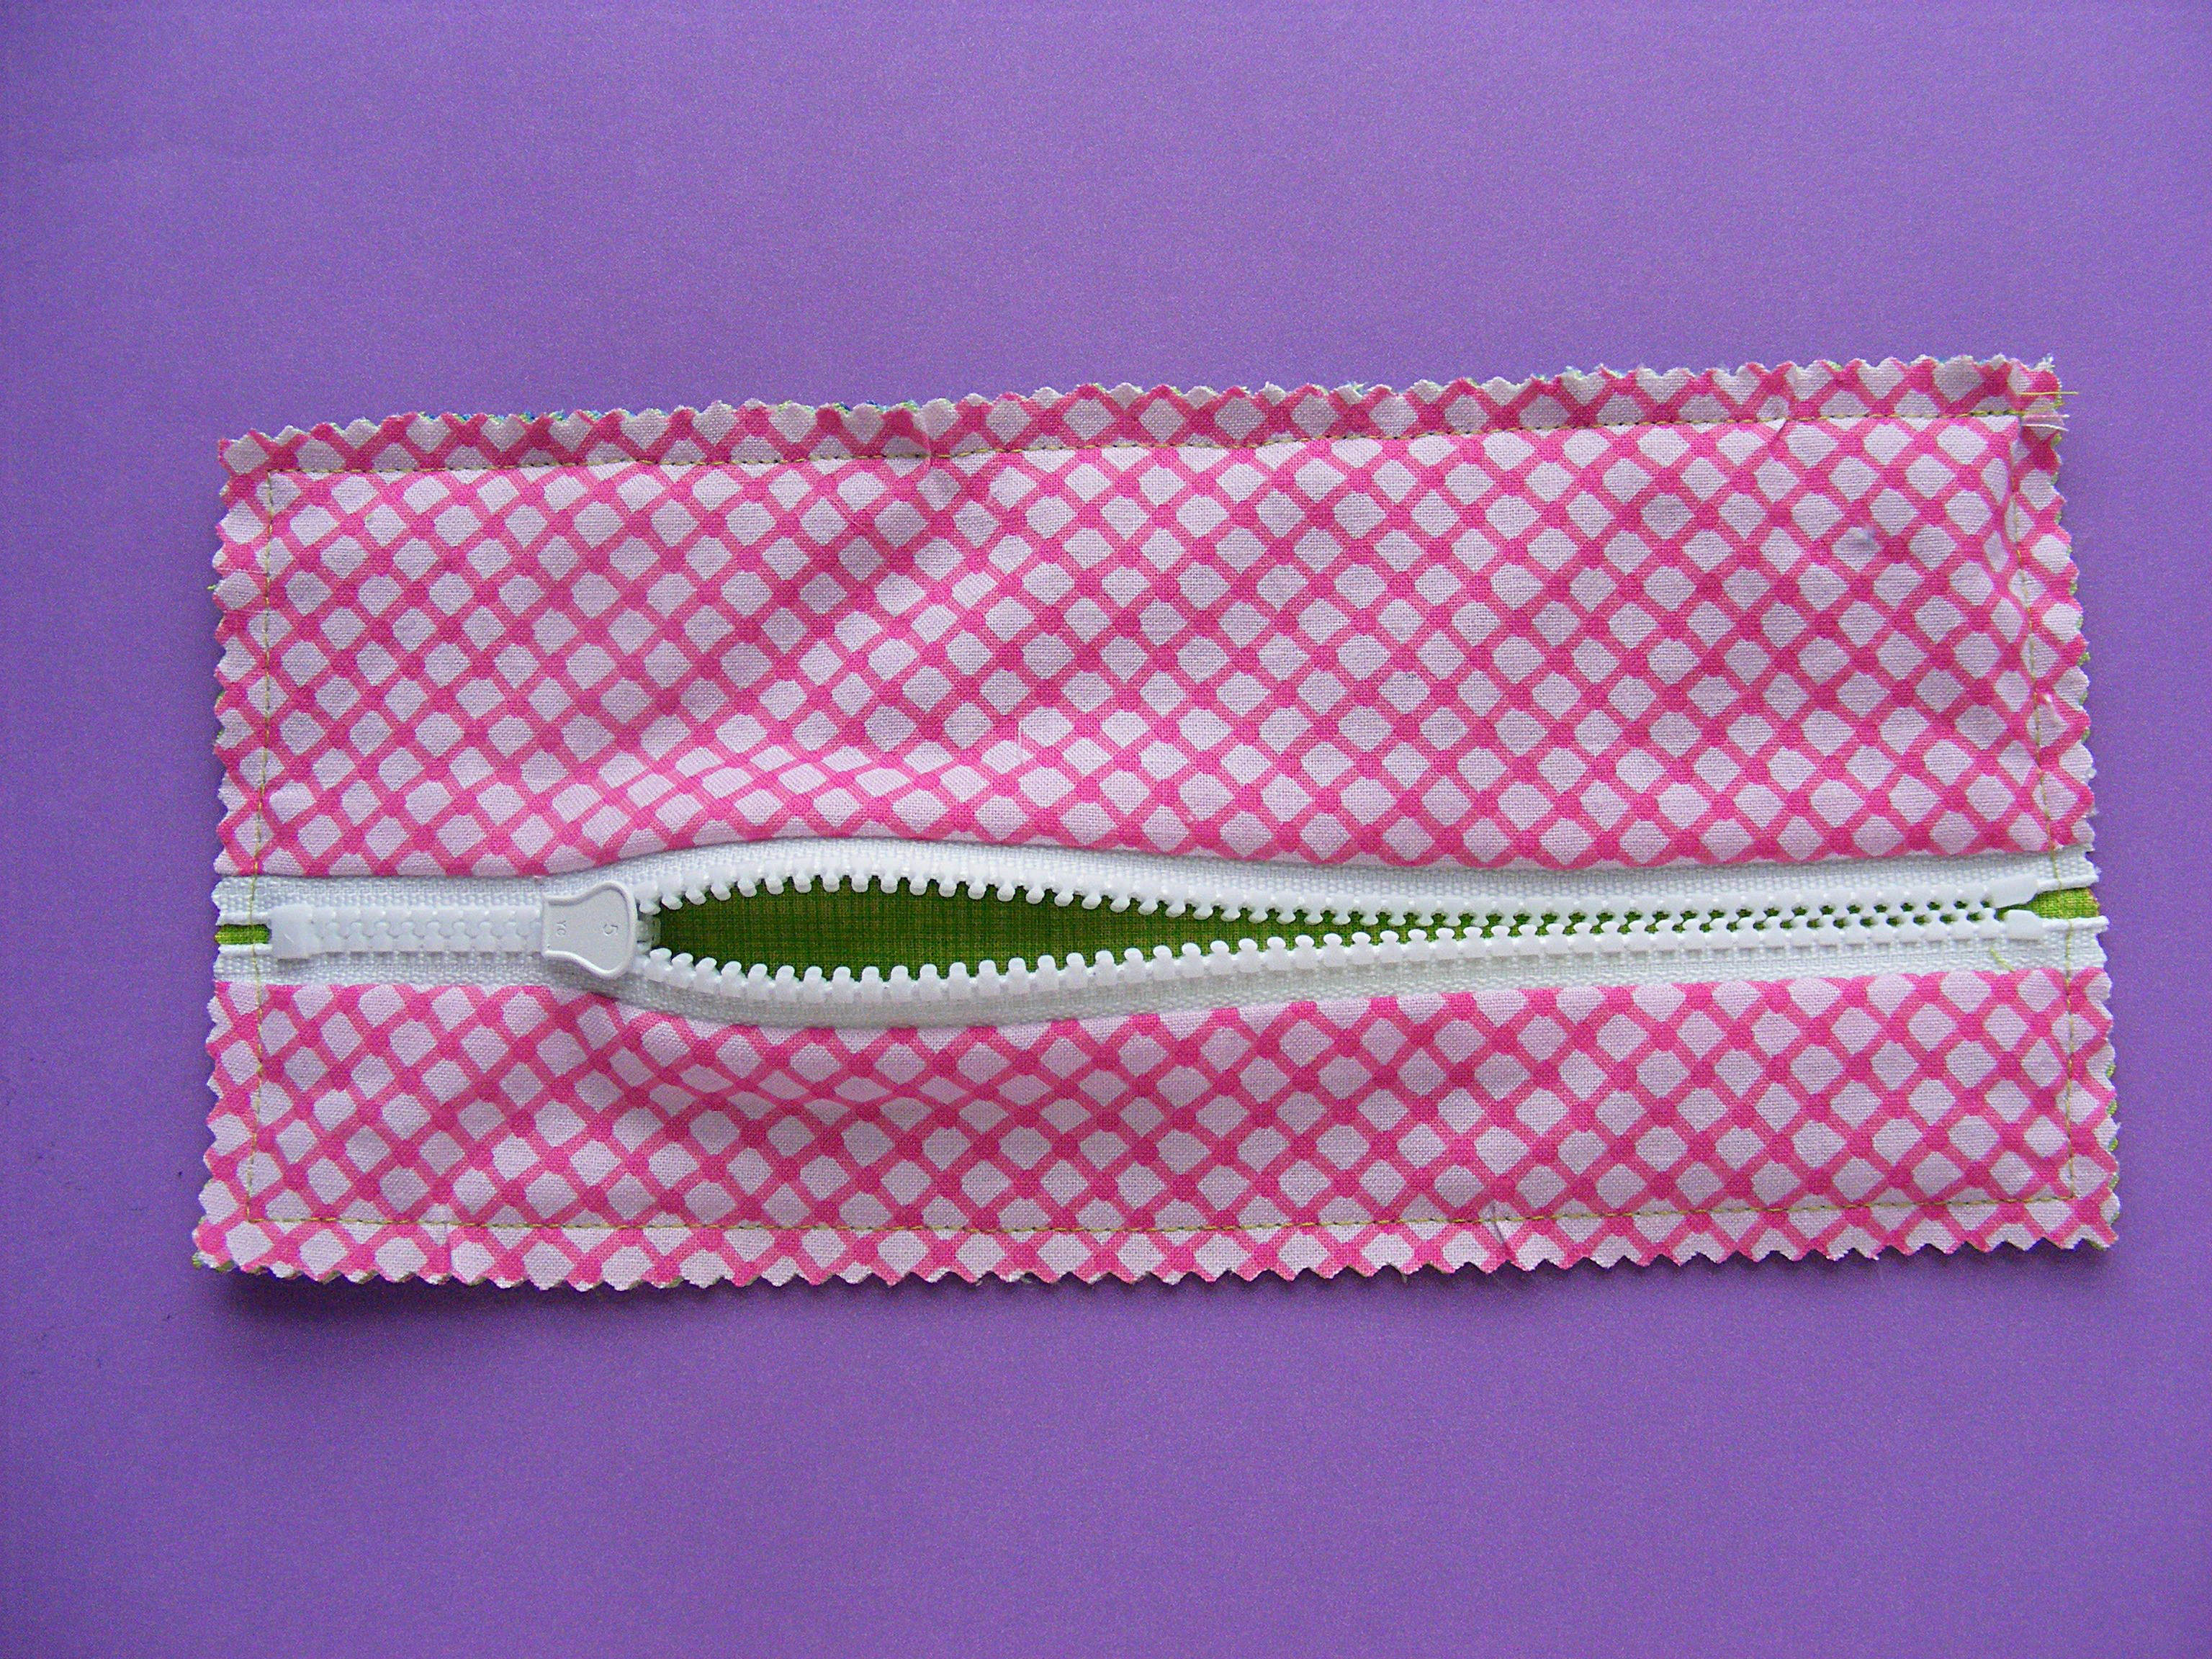
Flip the fabric rectangles right side out and press.
On the right side of the zipper (where the pull is) you should have the right side of the outer fabric showing. If you flip the whole thing over you should have the right side of the lining fabric showing.
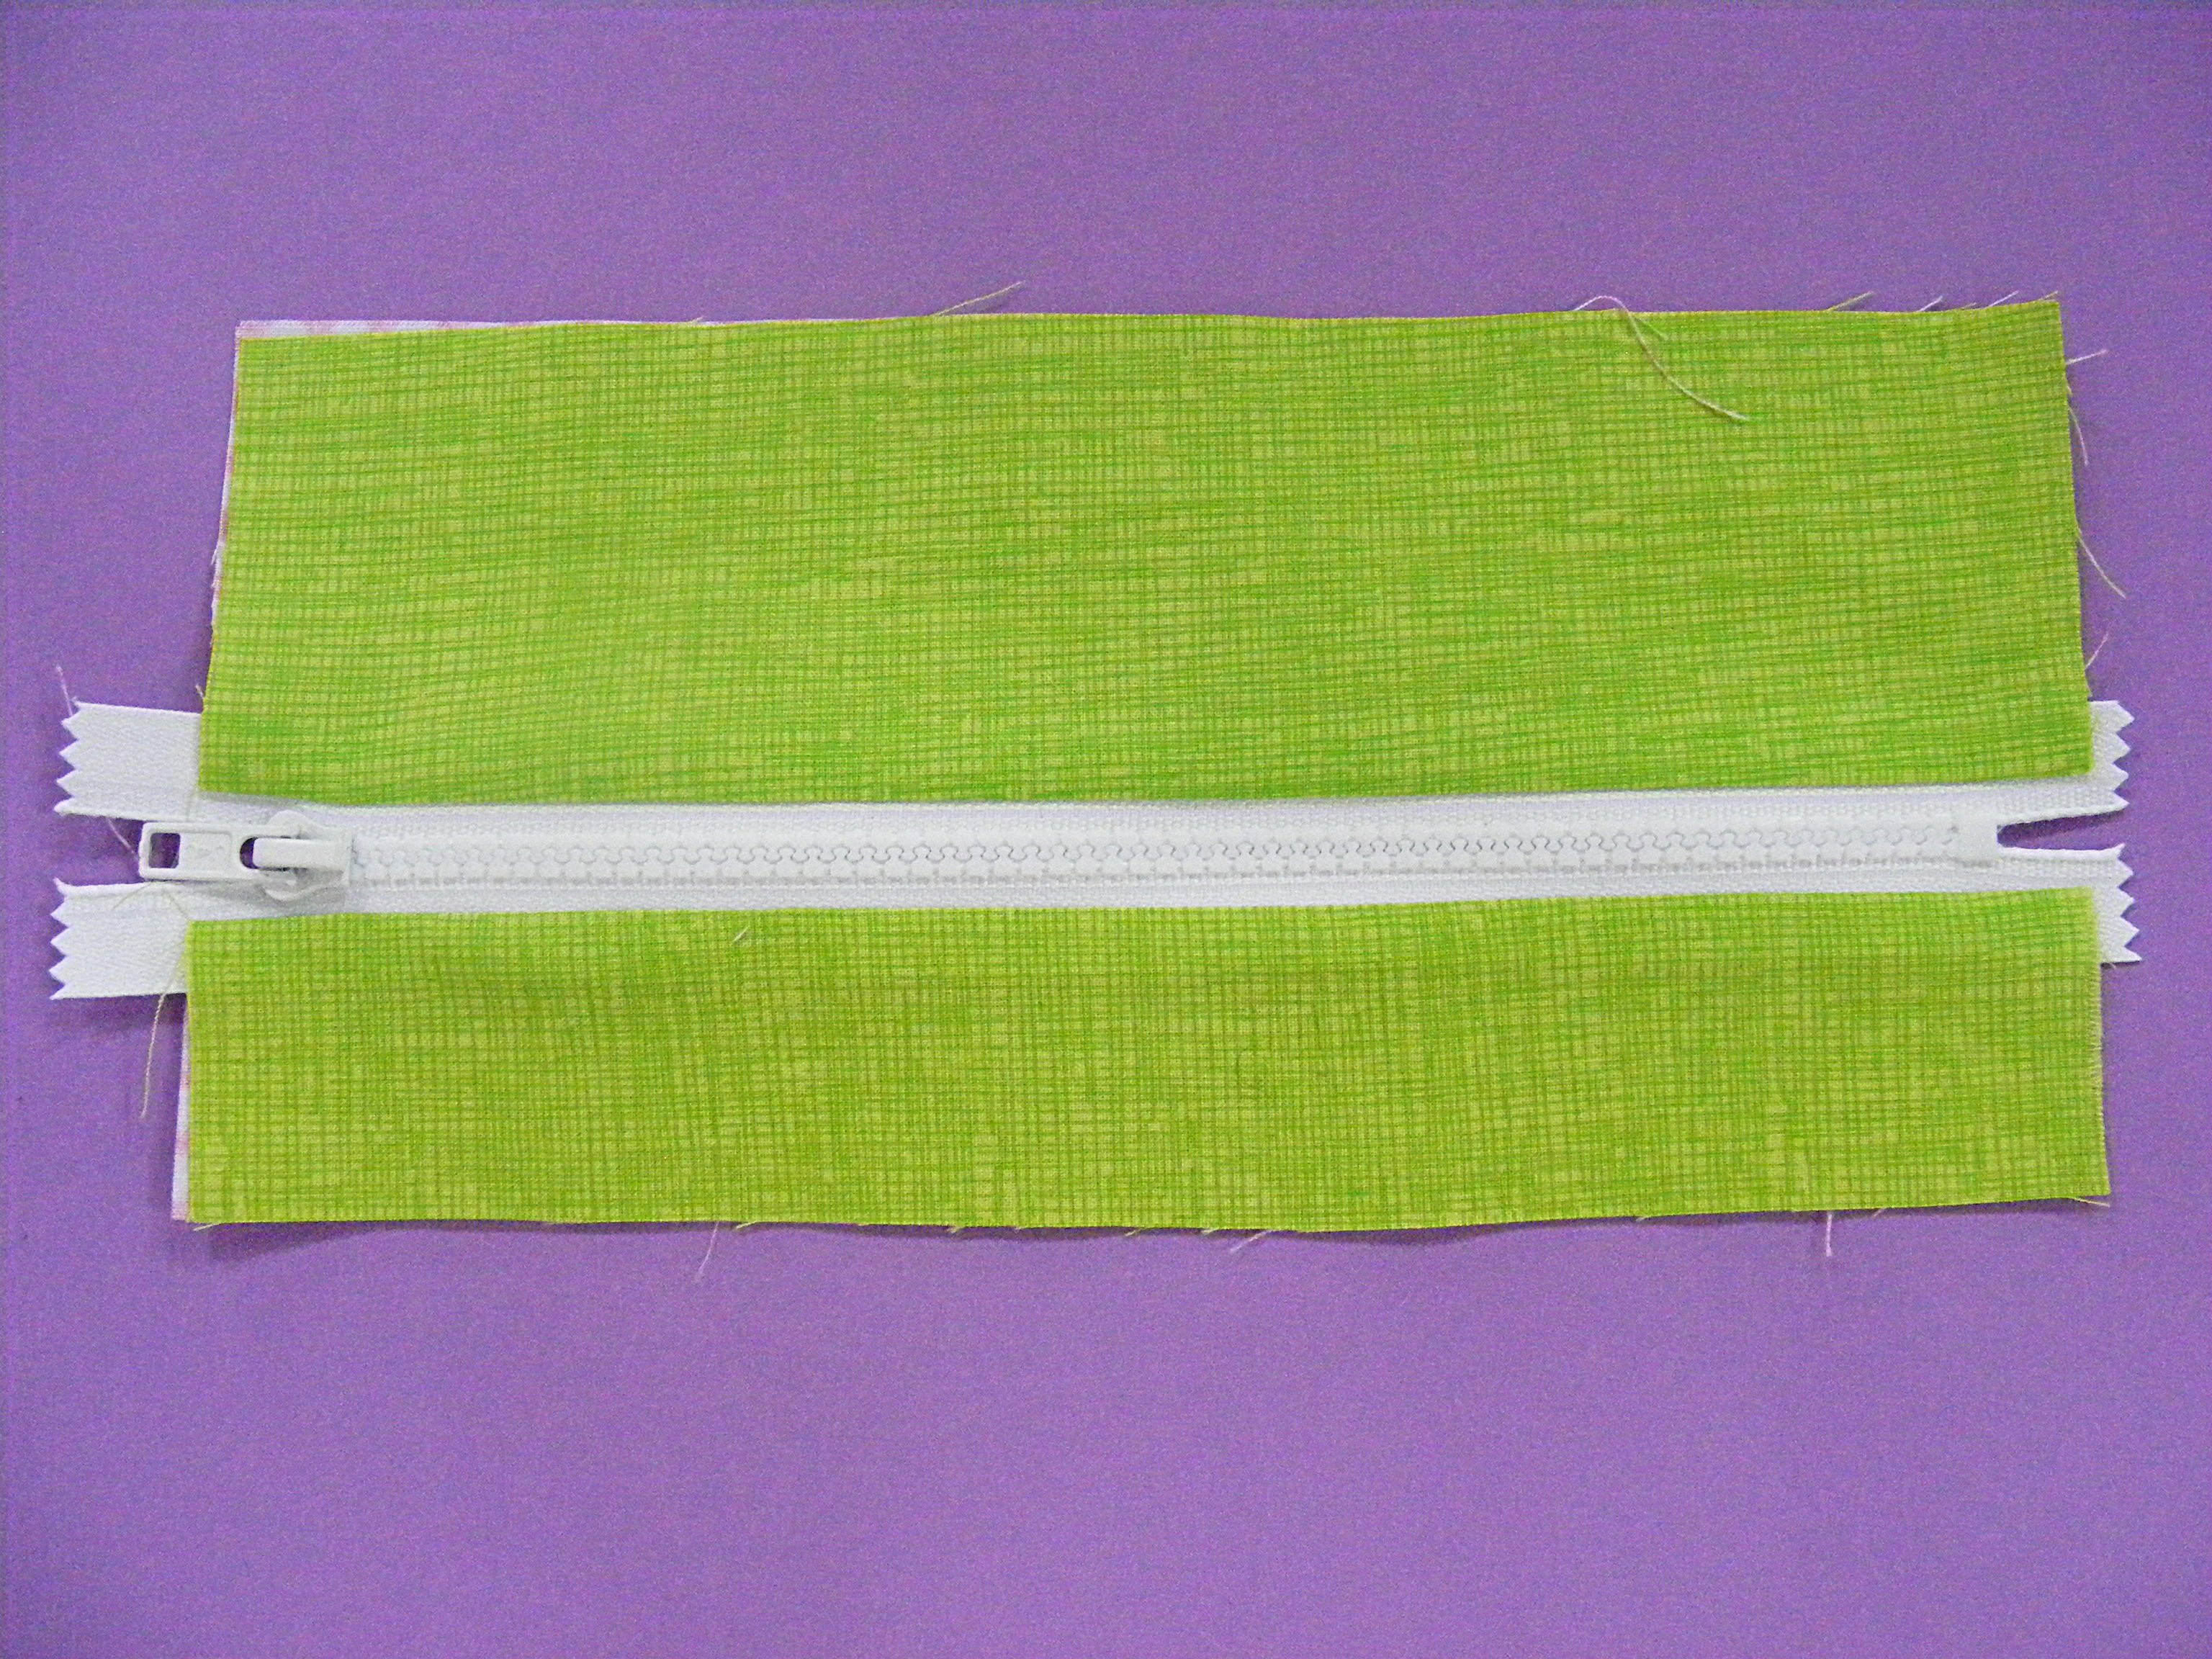
Step 6
Repeat Steps 2-5 with the narrower fabric rectangles and the other side of the zipper for the bottom of the face.
Remember - the right side of the outer fabric should be facing the right side of the zipper and the right side of the lining fabric when you sew.
You’re done with the front of the pouch!
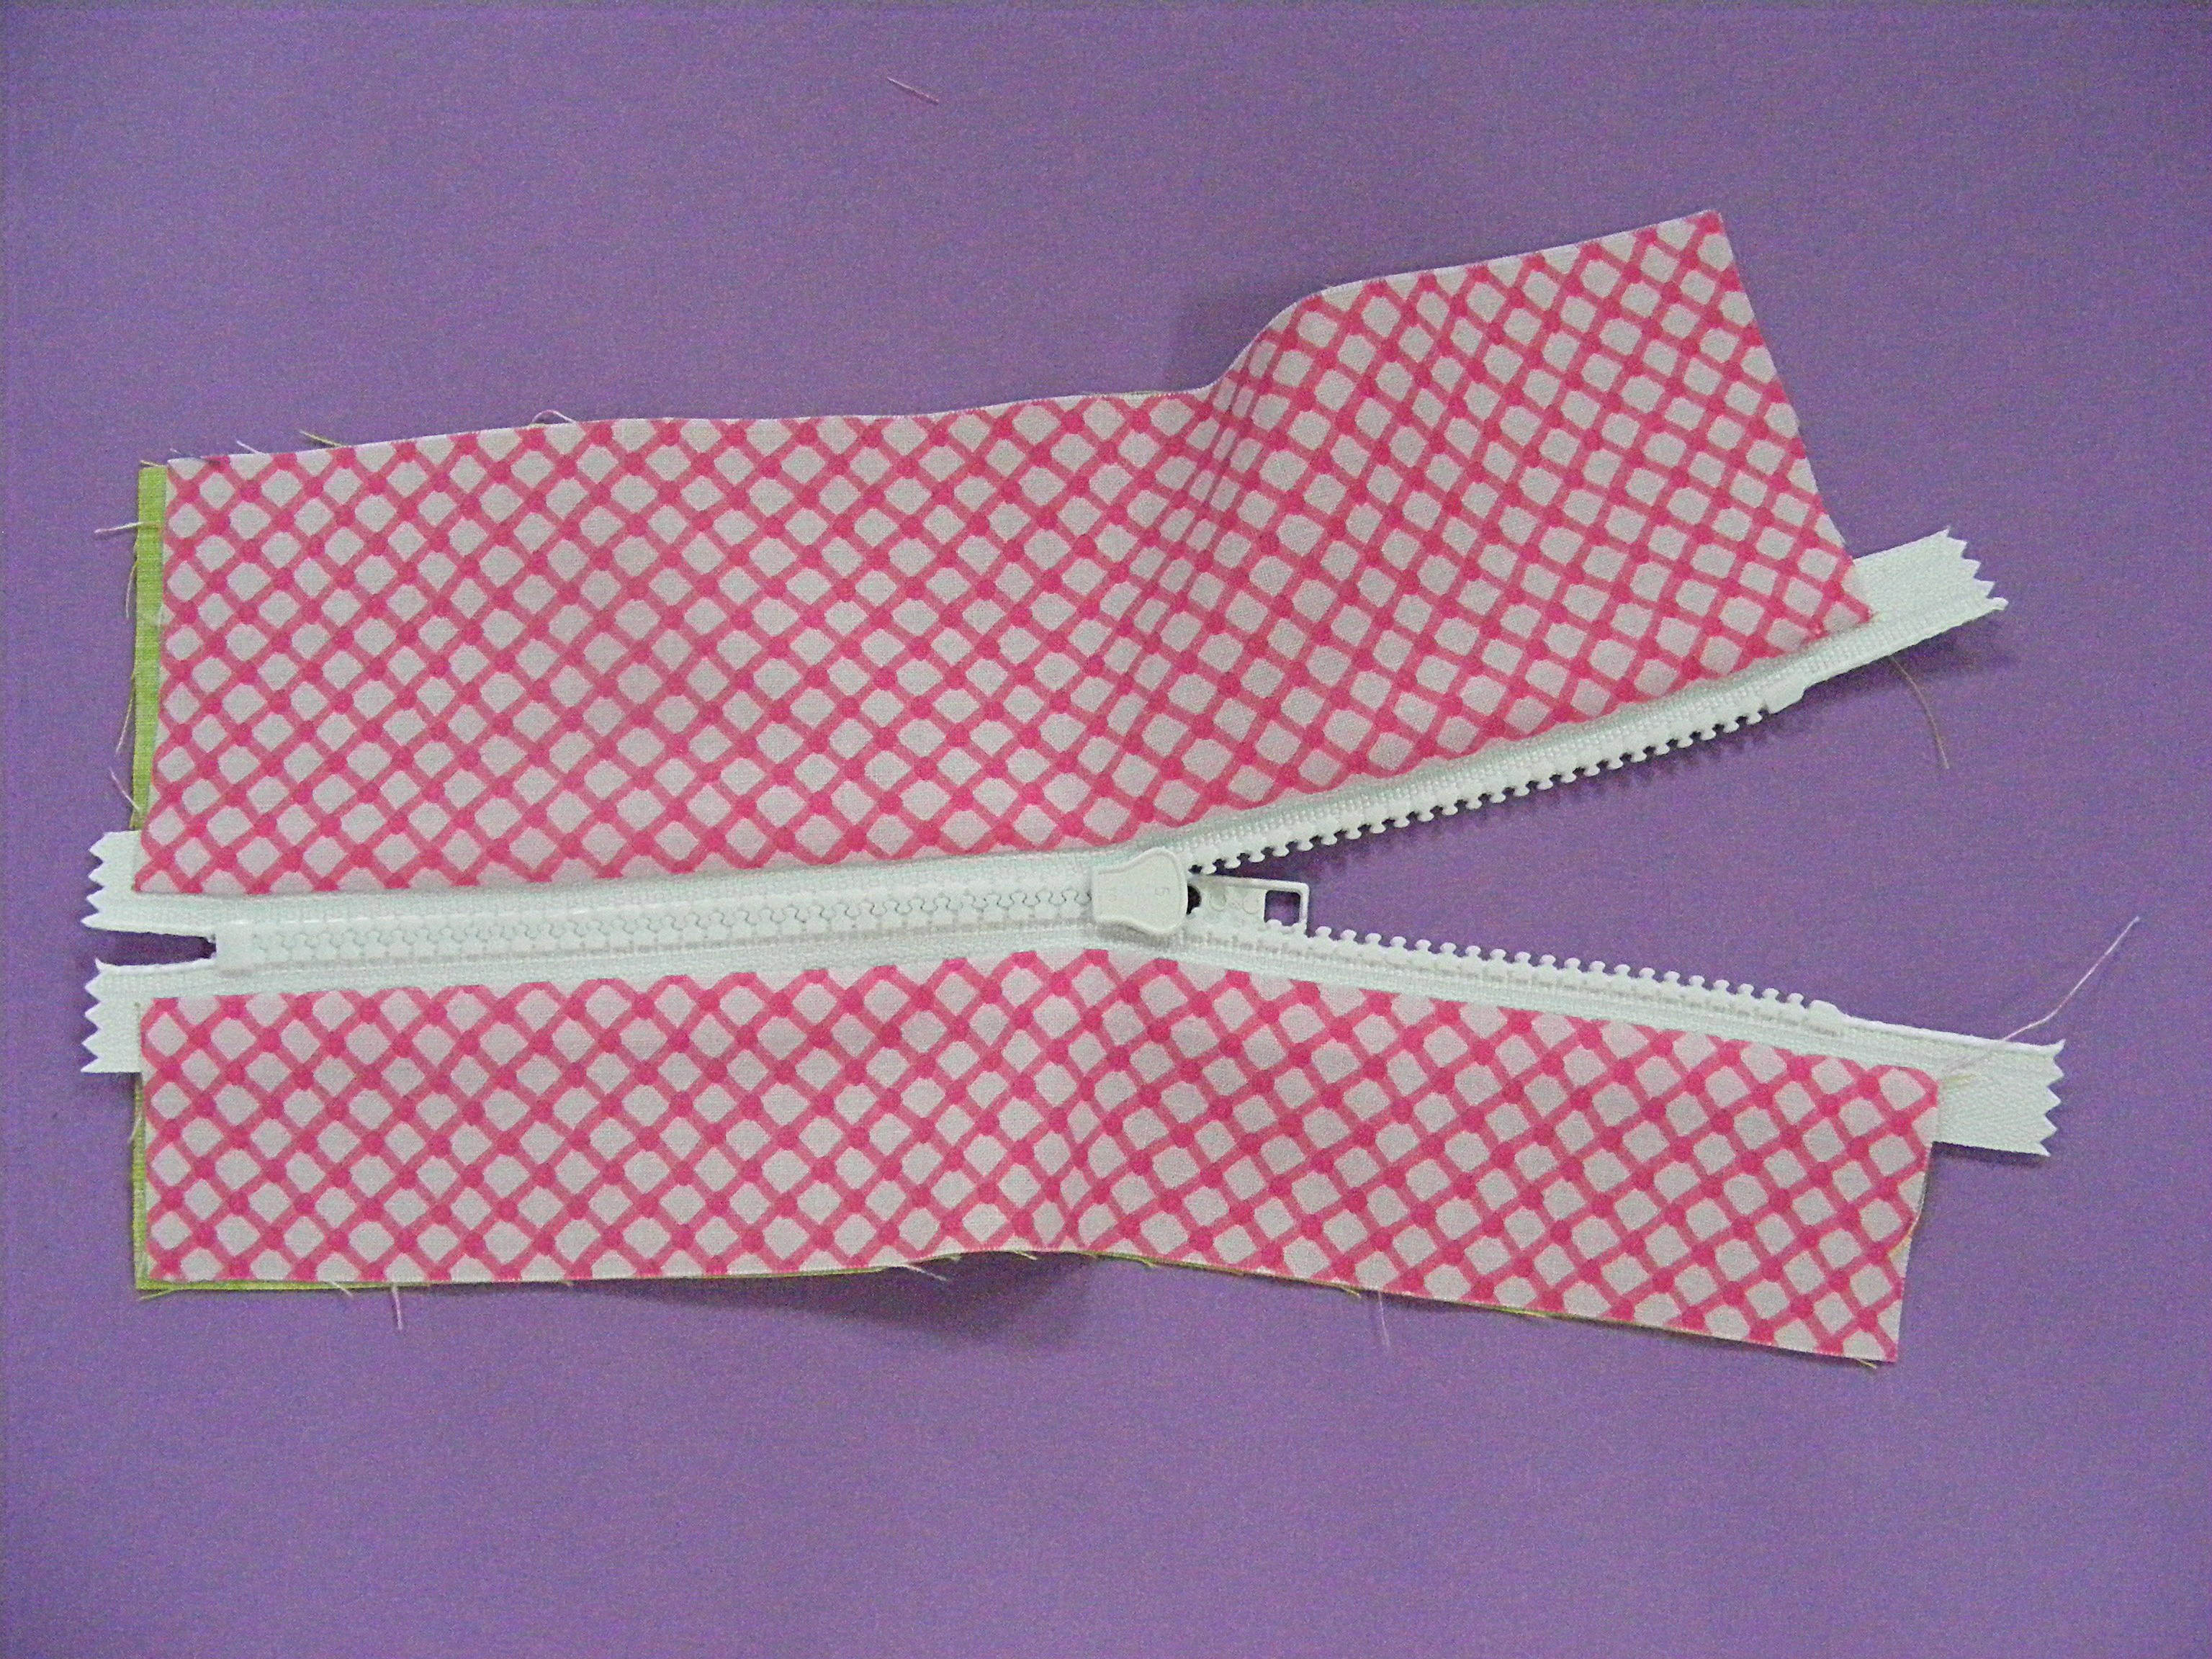
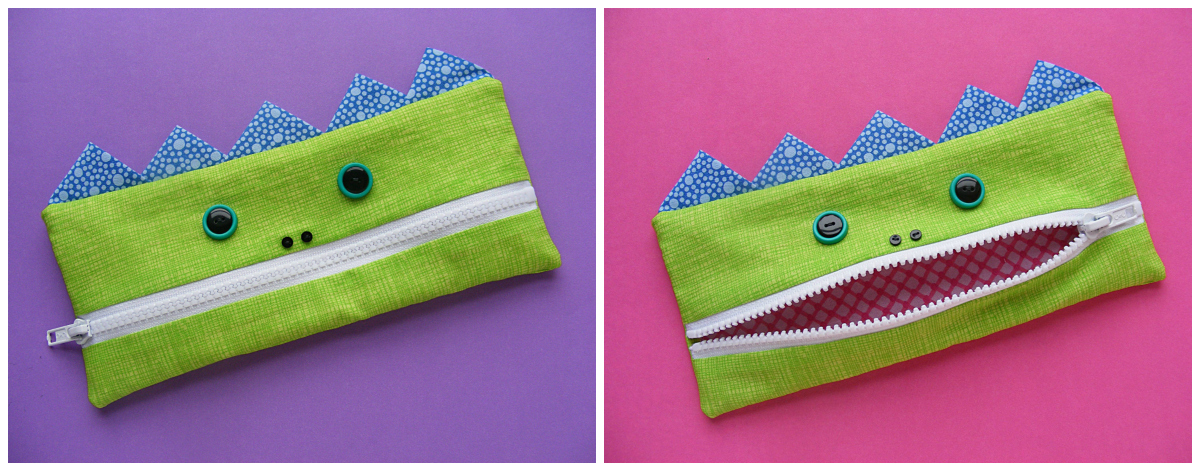
Here’s the view of the same piece from the inside. You should be seeing the right side of the lining fabric.
Step 7
Sew on some fun features! I stacked black buttons on top of larger blue buttons for the eyes, and sewed on tiny black buttons for the nostrils.
Play around and have fun with these! Add one giant button to make a cyclops. Embroider on some eyebrows. Skip the nostrils. Make it your own!
You’ll be sewing all around the outside of the pouch using 1/2″ seam allowance - so make sure to take that into account when you position your eyes and other features.
Flip the lining piece out of the way so you’re only sewing through the outer fabric.
Step 8
Measure the finished piece. It should be 10 inches wide, but the height will vary depending on the chunkiness of the zipper you’re using, and how close to the teeth you were able to stitch. Mine was 10″ wide and 4 7/8″ tall.
Use the measurements of your finished face to cut two back pouch pieces to match it. Cut one from the outer fabric and one from the lining fabric.
Step 9
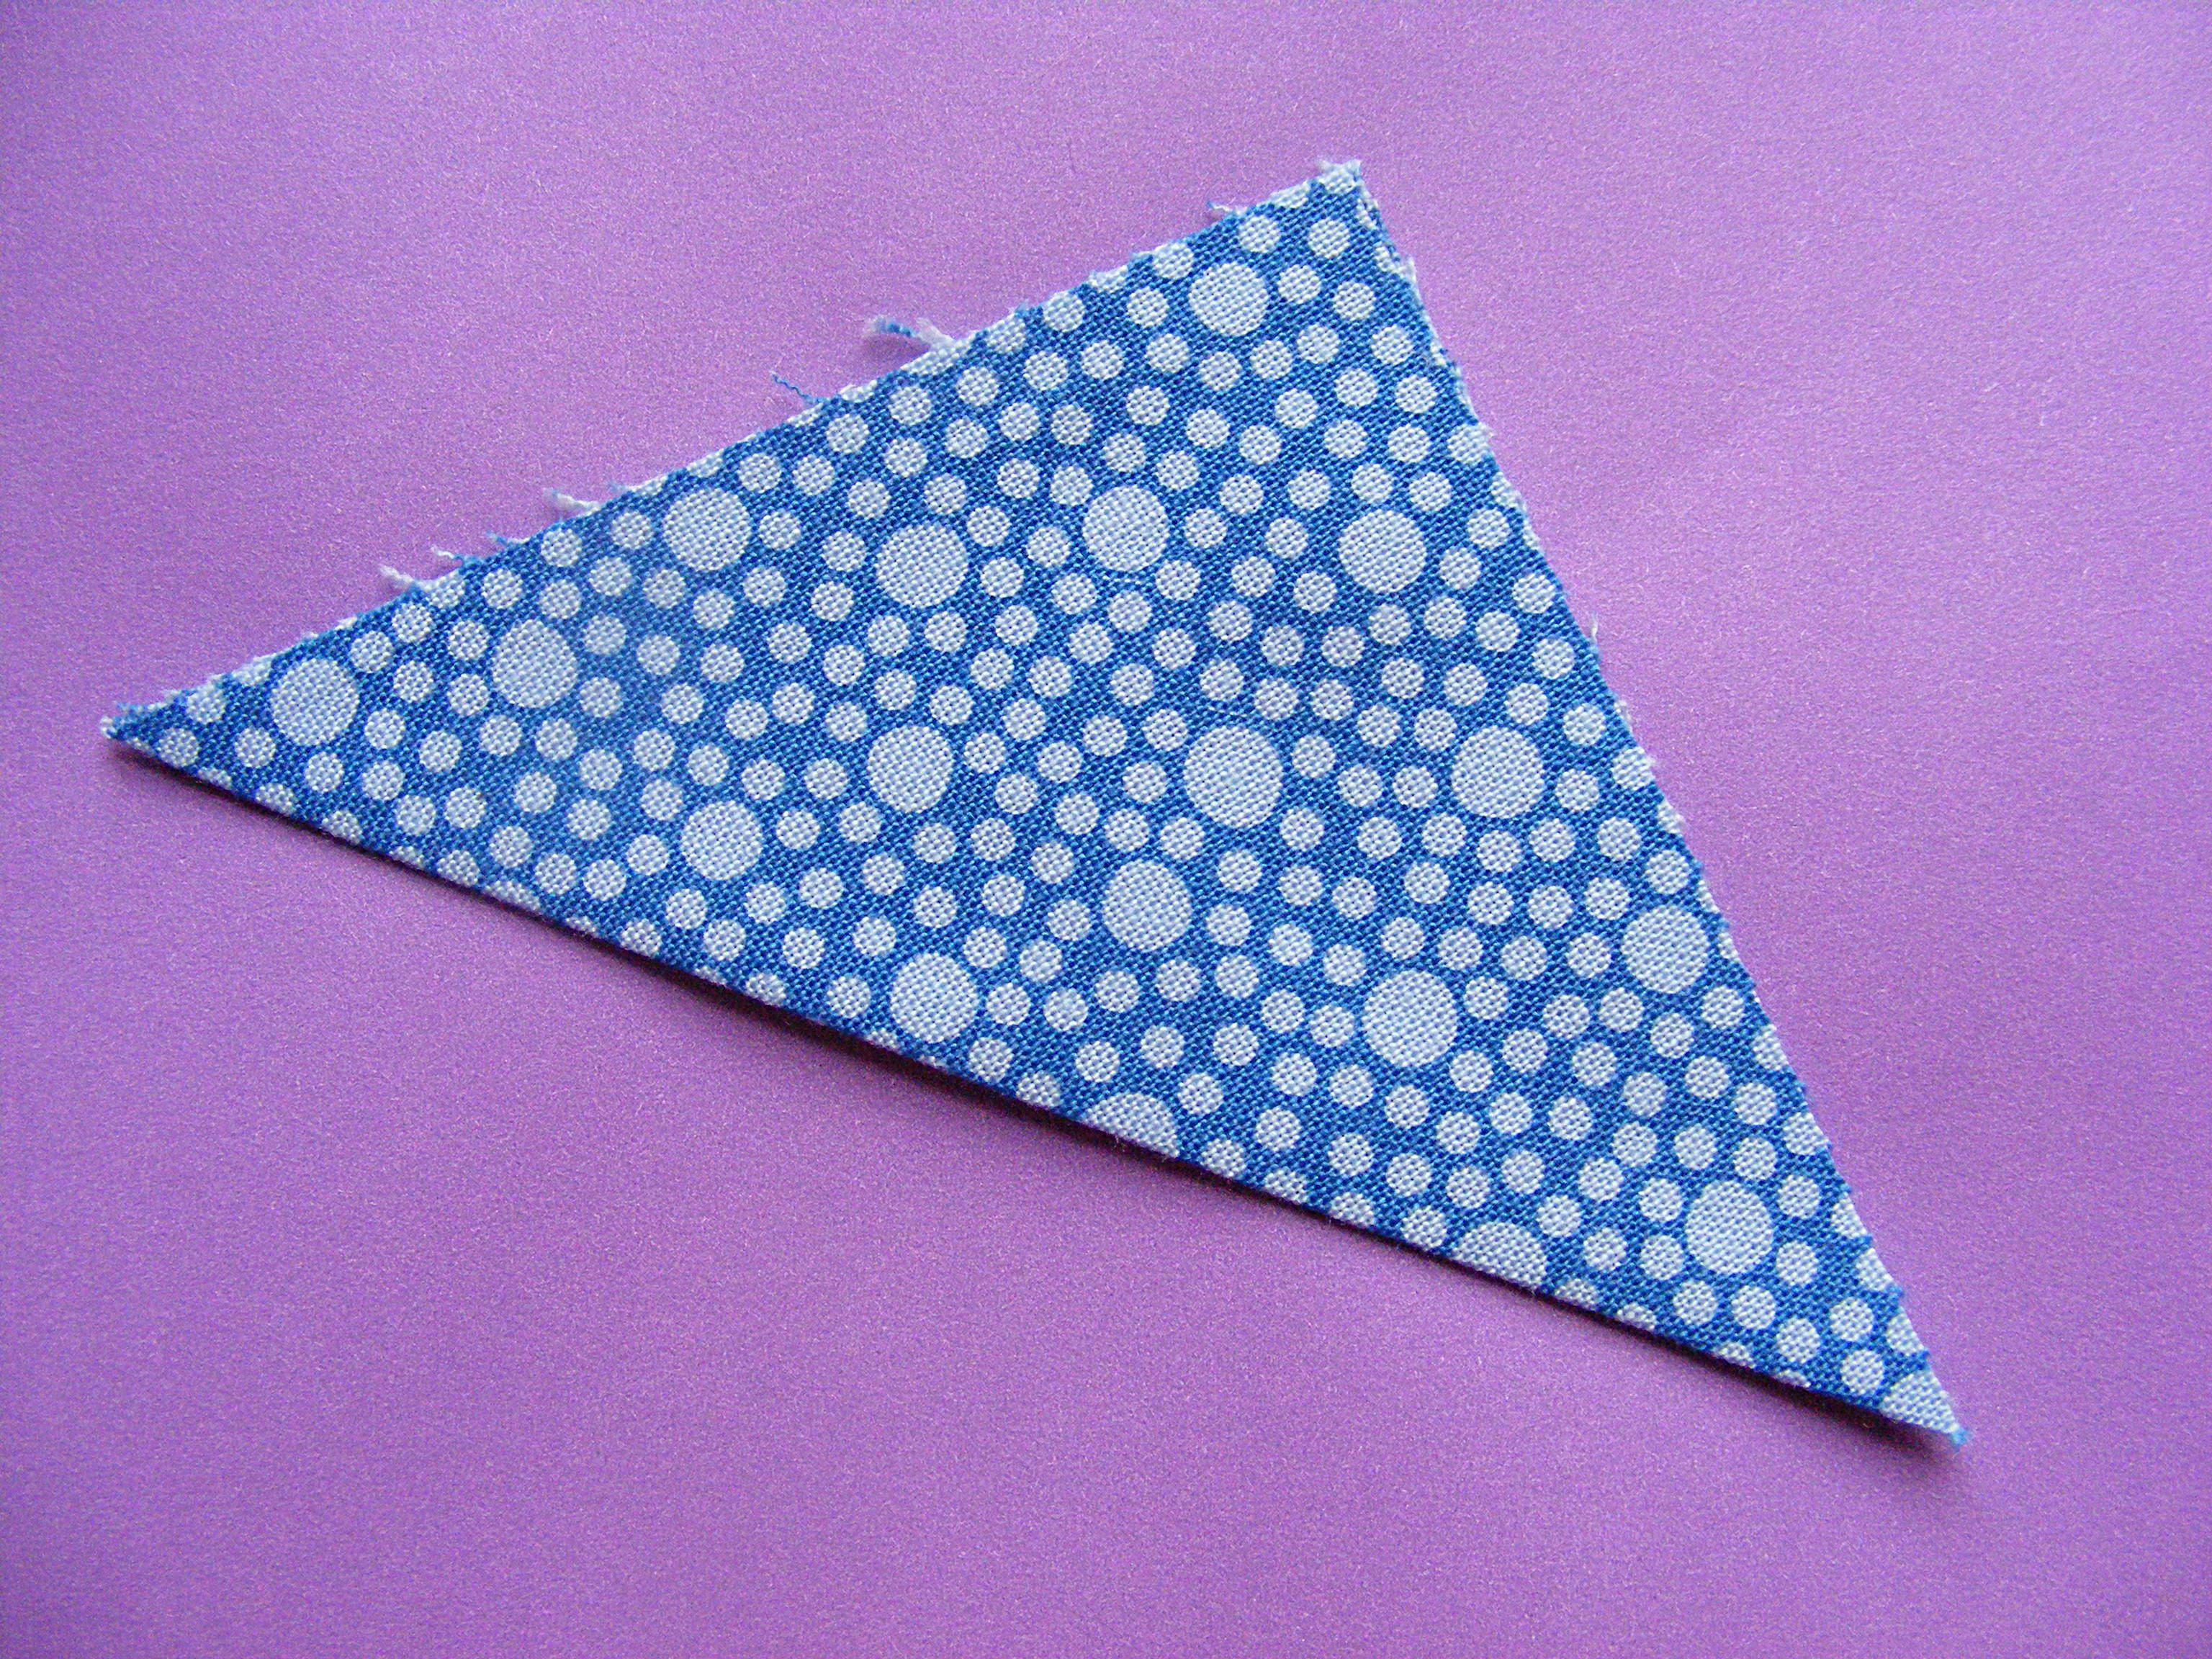
For the hair/spikes we’ll be making some prairie points. It’s really easy - just folding!
Fold one of your squares in half along the diagonal.
Press.
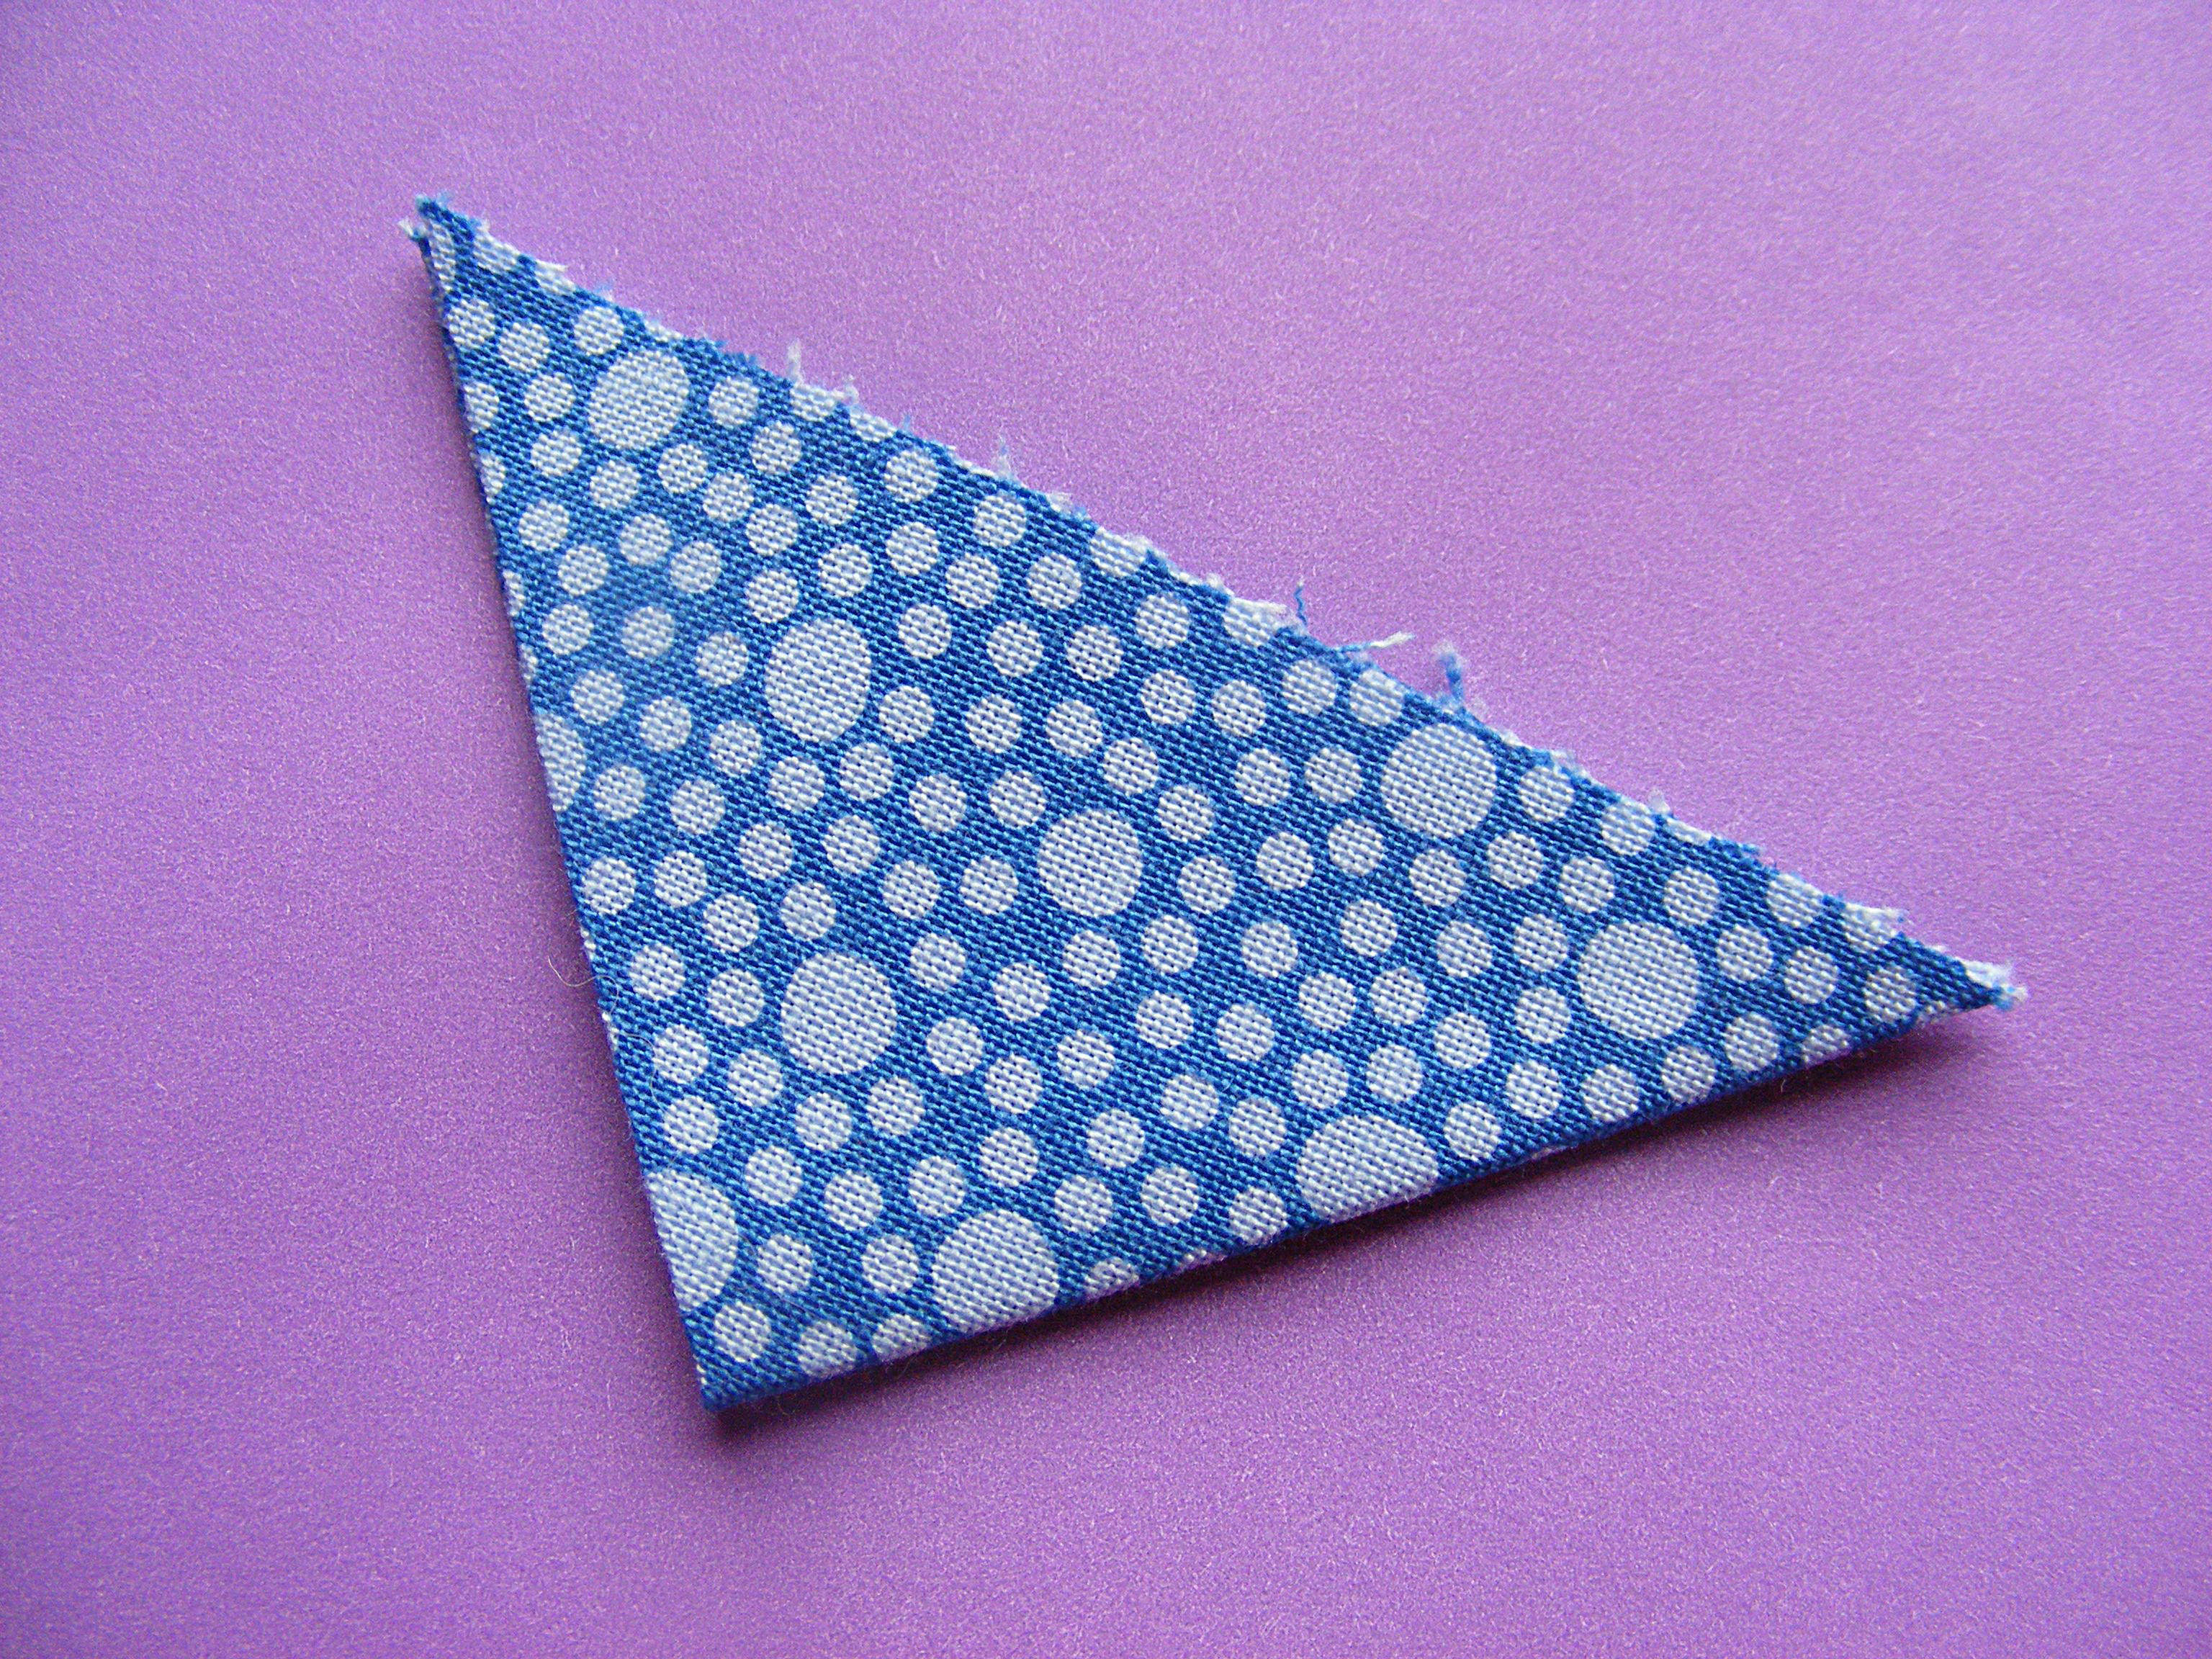
Now fold it in half again, so that all the raw edges are lined up along the longest edge of the triangle.
Press.
Done! Repeat for the other four squares.
Step 10
Ready to put it all together?
Pin the prairie points along the top edge of the face. I start by folding the face in half to find the center. Pin the center point in place first, then pin the two at the edges, then center the last two between them.
All the raw edges of the prairie points should be lined up with the raw edges of the outer and lining fabrics.
Step 11
Unzip the zipper mouth at least part way. This is very important! If you forget, you won’t be able to turn your pouch right side out after the next step!
Lay the outer fabric rectangle (the one you cut in Step 8) face down over the face, with the prairie points sandwiched between the two layers.
Lay the lining rectangle face up over the outer fabric. Pin all the layers together all the way around the edges.
Step 12
Sew all the way around the edge using 1/2″ seam allowance. That should have you sewing right up against the bumpy ends of the zipper.
Trim away your excess seam allowance with pinking shears. That will keep the fabric from fraying too badly - plus it looks cute. :)
Leave about 1/4″ seam allowance.
Step 13
Turn the pouch right side out and poke out the corners with a chopstick. You’re done! See how cute the contrasting lining inside the mouth looks?
Do you like this? Get the weekly Shiny Happy News and never miss a free pattern! Sign up here.