Baby Bib Pattern – Adorable and Free

Baby Bib Pattern - adorable and free from Shiny Happy World

Babies always need bibs.

That means the people who love babies need a go to, easy baby bib pattern.

This is it!

It’s a simple bib shape – very easy to make and customize with any appliquĂ© (or other fancification) you like. This pattern includes that sweet bear. 🙂

Make it out of regular quilting cotton for a basic bib. Back it with laminated fabric for heavy droolers. Make the whole thing out of laminate for those learning to eat solid foods. (The fabrics I used are from Timeless Treasures. The crosshatch is my beloved Sketch collection and the swirly fizzy dots are from the appropriately-named Pop collection.)

Here’s how to make it!

Step 1

Download the baby bib pattern here.

Print it out at 100%.

Overlap the two bib pieces so that the hearts line up and tape them together into one bib piece. There’s a tutorial here showing how.

Cut two bib pieces (one front and one back) on the fold.

Step 2

Print or trace the bear appliqué pieces (the last page of the baby bib pattern PDF) onto fusible adhesive. This is the brand I use.

Baby Bib Pattern - adorable and free from Shiny Happy World

Roughly cut out each shape and fuse them to the back of the fabric, following the instructions for the brand you’re using.

Step 3

Cut out the pieces neatly.

Baby Bib Pattern - adorable and free from Shiny Happy World

Cut right on the solid lines. Leave a little extra seam allowance past the dotted lines. See the extra at the bottom of the ears? That bit will tuck behind the head.

Step 4

Hold the face up to the window so you can see the markings through the fabric and mark the position of the eyes.

Baby Bib Pattern - adorable and free from Shiny Happy World

I just use a fine tip Sharpie – nothing fancy.

Do the same thing with the muzzle, marking the position of the nose and the key points of the mouth.

Baby Bib Pattern - adorable and free from Shiny Happy World

You can also trace over the whole line of the mouth, if you prefer.

Step 5

Peel off the paper backings and layer the pieces together so that the ears tuck behind the head and the bottom of the bear body is lined up with the bottom of the bib.

Baby Bib Pattern - adorable and free from Shiny Happy World

Here you can see it a little closer.

Baby Bib Pattern - adorable and free from Shiny Happy World

Fuse the pieces down according to the instructions of whatever brand adhesive you’re using.

Step 6

Stitch around the edges of all the pieces.

Baby Bib Pattern - adorable and free from Shiny Happy World

I like to use black thread and a simple straight stitch. You can use a zigzag or other decorative stitch if you prefer. If you want a little help knowing where to start and in what order to stitch the pieces, this post should help you out. And this one will help you with managing those tight curves. 🙂

Step 7

Embroider the eyes and mouth.

Baby Bib Pattern - adorable and free from Shiny Happy World

I did it by hand using this stitch for the eyes, and following the instructions for the mouth in the free Warren the Charity Bear pattern. I used a single strand of this thread. That’s the equivalent of two strands of DMC floss, but I love using a single strand of thicker thread so I don’t have to worry about the strands separating on that long stitch connecting the nose to the mouth.

Baby Bib Pattern - adorable and free from Shiny Happy World

You can also sew the face by machine. That’s what I did for this cat bib. You can find info about how I did the eyes here. The mouth and whiskers are just a simple straight stitch, going over all the lines twice to make them a little thicker. (For those I traced the whole line of the mouth and whiskers in Step 4, not just the endpoints.)

Step 8

Cut a 1-inch square of hook & loop tape (or use snaps or a button).

Baby Bib Pattern - adorable and free from Shiny Happy World

Sew it to the bib as shown. Both bib pieces are shown right side up. I attached the loop side to the bib front and the hook side to the bib back, but it doesn’t really matter.

Step 9

Layer the bib front and the bib back right sides together.

Baby Bib Pattern - adorable and free from Shiny Happy World

Using 1/4 inch seam allowance, sew all the way around the edge. Leave a few inches open for a turning hole in the straight part of one of the sides.

Step 10

Clip the seam allowance in the concave curve around the neck.

Baby Bib Pattern - adorable and free from Shiny Happy World

For more on the the how and why of clipping curves, watch this video.

Step 11

Turn the bib right side out. Smooth out all the curves and press it flat. Sew up the opening using ladder stitch. (There’s a video here showing how to ladder stitch.)

Baby Bib Pattern - adorable and free from Shiny Happy World

Finished!

But what about that cat?

Baby Bib Pattern - adorable and free from Shiny Happy World

That’s one of my favorite things about this pattern.

You can use just about any appliqué pattern to decorate it!

If you’re using my cats, dogs, monsters, birds, flowers, farm animals, safari animalscars & trucks, or woodland critters, just print out the pattern page for the face you want at 75% and you’re ready to go. Anything else should be resized to a maximum of 6 inches wide or tall.

Baby Bib Pattern - adorable and free from Shiny Happy World

It would be fun to make a whole set of them with lots of different faces!

Have fun with this pattern! I’d love to see what you make – and I’d really love to see them on some adorable babies. 🙂 Post photos in the Shiny Happy People group so we can ooh and aah over them.

Here are several free patterns that work with my basic 10-inch applique squares – no resizing needed!

Here are several free patterns that work with just some simple resizing. This post about making coasters has info about resizing an applique pattern that can be applied to any of these projects.

Return to the main Let’s Make a Quilt Table of Contents.

Happy sewing!

Everything You Need to Know about the Controlled Chaos Scrap Quilt


Controlled Chaos - a free scrap quilt pattern from Shiny Happy World

I’m completely in love with the Controlled Chaos scrap quilt!

A lot of you are too, because I’ve been getting a lot of emails asking about it lately. 🙂 It’s about time to put all the links together into one handy place!

I’m still working on the quilting, so this is a work in progress. I’ll update it with new info as I get closer to finishing and post more details. 🙂 Read all about the finished quilt here!

The Blocks

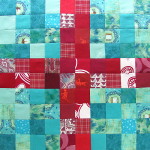
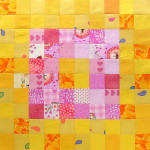
Click on the image to jump to the instructions for that block.

The Quilting

I used Big Stitch Quilting for this quilt, all by hand.

Controlled Chaos - a free scrap quilt pattern from Shiny Happy World

I find it helpful for a project like this, where every block will be quilted a little differently, to establish “rules” for the overall quilt. For this quilt, my stitching within each block runs parallel to the edges of the block. My quilting in the sashing is zigzag angles. I think it helps set that sashing off as different, so it frames the blocks better.

The Tutorials

These are all general tutorials you can use for any quilt project, but they’re especially helpful for the Controlled Chaos quilt.

Choosing Colors (part of the Block #3 instructions)

Cutting Small Squares from Scraps

How to Chain Piece

How to Join Pieced Strips

How to Add Sashing to a Quilt

How to Layer and Baste a Quilt

Big Stitch Quilting

How to Bind a Quilt

There it is! Everything you need to make your own Controlled Chaos Quilt! Of course yours will look totally different because your scrap bins are filled with your favorite colors – the ones you go to again and again. Sew them up into a beauty like this! đź™‚

Happy quilting!

Best,
Wendi
Wendi Gratz from Shiny Happy World

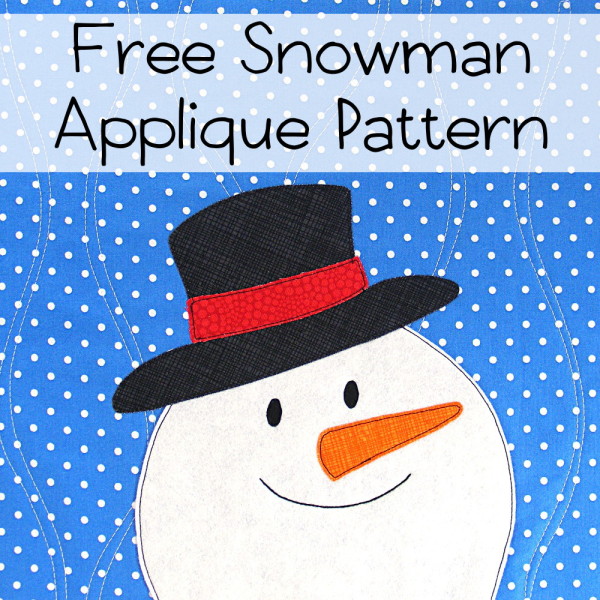
Free Snowman Appliqué Pattern

Free snowman applique pattern from Shiny Happy World.

This is a super easy snowman appliquĂ© pattern – and free! Here’s how to make him. . .

Step 1

Download the pattern here. Print or trace it onto the paper side of fusible adhesive.

Free snowman pattern from Shiny Happy World.

Step 2

Cut a piece of fabric and a piece of batting 11″ square. Layer the fabric over the batting and quilt the two layers together.

Free snowman pattern from Shiny Happy World.

Step 3

Roughly cut out all the pieces and fuse them to the wrong side of the fabric.

Free snowman pattern from Shiny Happy World.

I used white felt for the snowman head, and Timeless Treasure prints for the rest of the fabrics: charcoal Sketch for the hat, red Pop for the ribbon, orange Sketch for the carrot, and solid black for the eyes.

Step 4

Hold the snowman face up to a window so you can see the face markings through the felt and mark the placement of the eyes, nose and the mouth.

Free snowman pattern from Shiny Happy World.

Step 5

Cut out the pieces neatly on the solid lines. Where there’s a dotted line, leave a little extra seam allowance.

Free snowman pattern from Shiny Happy World.

Step 6

Peel off the paper backing and layer the pieces on the background block. The bottom edge of the head should line up with the bottom edge of the block. The hat should overlap the top of the head.

Free snowman pattern from Shiny Happy World.

Fuse the pieces in place.

Step 7

Stitch the edges of all the pieces down. I like to use a simple straight stitch and black thread.

Free snowman pattern from Shiny Happy World.

Step 8

Trim the block to size. Mine is 10 1/2 inches.

Make this easy snowman block. The applique pattern is free from Shiny Happy World!

Finished!

You can use this pattern to decorate this simple stocking. Or combine it with this free Santa appliqué pattern to make a cute table runner or wall hanging.

Combine the free Santa and Snowman appliqué patterns to make a fun Christmas table runner or wall hanging.

Sign up for the weekly newsletter so you don’t miss more free patterns like this one! You’ll also get notifications of new tutorials, sewing tips and tricks, fun videos, yummy recipes, and special discounts.

Happy sewing!

Best,
Wendi
That's me!

Free Christmas Stocking Pattern

Free Christmas stocking pattern from Shiny Happy World.

Use this simple stocking pattern with whatever embellishment you choose. Or none at all! The lined construction is easy enough for beginners, and it works with any quilt, appliquĂ© or embroidery pattern.

Throughout most of the instructions I’m using this free Santa appliquĂ© pattern, but you can use any decoration you like. Here’s the exact same stocking made with three different cats from this quilt pattern.

Free Christmas stocking pattern from Shiny Happy World.

Here’s how to make the stocking. . .

Step 1

Download the stocking pattern here. The pattern pieces print on two pages. Overlap them so that the heart and the edges of the stocking line up and tape them together. There’s more info on joining pattern pieces like this here.

Step 2

Cut two rectangles 9″ wide and 19″ tall from your main fabric, your lining fabric, and 100% cotton batting. My favorite batting is Warm & Natural.

Step 3

Layer one main fabric rectangle with one batting rectangle and quilt the layers together.

Free Christmas stocking pattern from Shiny Happy World.

I’m showing this from the back so you can really see the quilting. Any design will do – it just needs to hold the two layers together.

Repeat with the other main fabric and batting rectangles so you have two pieces.

Step 4

Layer the two quilted layers and the two lining layers right sides together and cut four stocking pieces – two main and two lining.

Step 5

Decorate the front of the stocking however you like. I used my favorite appliqué with fusible adhesive method. You can see how I do that in this video.

If you’re doing floating heads (like the cats) no adjustment is needed. Just print the pieces out at whatever size you like.

If you’re doing a head that’s cropped off at the bottom (like the Santa) you’ll need to make some adjustments because the bottom of the stocking slants.

Free Christmas stocking pattern from Shiny Happy World.

On the original Santa appliqué pattern, the beard is cropped off at the horizontal dotted line. For the stocking I left a lot of fusible adhesive below that dotted line and fused the whole thing to the fabric. That extra fabric will accommodate the slant at the bottom of the stocking.

Free Christmas stocking pattern from Shiny Happy World.

Arrange the pieces on the front of the stocking. Let that extra beard fabric overhang the bottom edge of the stocking.

Free Christmas stocking pattern from Shiny Happy World.

When you’re happy with the arrangement, fuse it down, stitch around the edges, and then trim off the extra beard. You can use this same technique for any animal bodies that you want to use on the stocking from any of my quilt patterns.

Step 6

Now time to start putting the stocking together! Layer the lining pieces right sides together and sew around the edges using 1/4 inch seam allowance.

Free Christmas stocking pattern from Shiny Happy World.

Leave the stocking top open, and also a place on the back seam for turning. The turning hole needs to be big enough to fit your hand through it.

Step 7

Layer the main stocking pieces right sides together and sew them around the edge using 1/4 inch seam allowance – just like the lining. Leave the top open, but do NOT leave a turning opening.

Free Christmas stocking pattern from Shiny Happy World.

Clip the seam allowance in the concave curve of both the main stocking and the lining. Watch this video for the how and why of curve clipping.

Step 8

Turn the lining right side out. Slip it inside the stocking (the stocking should still be inside out) and line up the side seams.

Free Christmas stocking pattern from Shiny Happy World.

Sew the stocking to the lining all the way around the top edge using 1/4 inch seam allowance.

Step 9

Turn the stocking right side out. This can be confusing if you’ve never turned a lined thing right side out before.

Free Christmas stocking pattern from Shiny Happy World.

Start by pulling the lining out of the stocking. Then reach into the turning opening, grab the toe of the stocking, and pull the stocking right side out through that opening.

Free Christmas stocking pattern from Shiny Happy World.

Keep pulling and the lining will start coming through too – right side out. Turn the lining completely right side out. Sew up the opening using ladder stitch, and tuck the lining down into the stocking.

Step 10

You have two options for the top edge. You can work the lining and the stocking so that the seam between them is right at the top edge of the stocking. You only see the lining if you peek inside. Press with lots of steam to set the fold.

Free Christmas stocking pattern from Shiny Happy World.

(If you want to add a hanging loop like on this cat stocking, cut a loop of ribbon and slip it between the stocking and lining layers before you sew them together in Step 8. Be sure to catch the ends of the ribbon in the stitching as you sew those layers together.)

If you want a little bit of the lining to peek out of the top, leave the batting inside standing up (don’t fold it down) and use that as a guide to fold the lining down over it. Press with plenty of steam.

Free Christmas stocking pattern from Shiny Happy World.

Finished!

Here’s a quick list of links to all the patterns I used. . .

The free Santa appliqué pattern is here. I printed it at 60% to fit on the stocking.

The Cats quilt pattern is here. I printed the three cats I used at 80%.

The free alphabet pattern is here. I printed it at 90%. You might need to go much smaller for a significantly longer name, or arrange the letters the long way.

You could make the stocking even simpler by just using a really fun Christmas fabric – no fancification needed! Try embroidering a design instead of using appliquĂ©. Or use a couple of leftover pieced quilt blocks for the main fabric.

Play around with this pattern! It’s completely open-ended so you can do just about anything with it!

Here are several free patterns that work with my basic 10-inch applique squares – no resizing needed!

Here are several free patterns that work with just some simple resizing. This post about making coasters has info about resizing an applique pattern that can be applied to any of these projects.

Return to the main Let’s Make a Quilt Table of Contents.

Happy sewing!
EEP! It’s an EPP Halloween Blog Hop!

Halloween Hexies

I’ve really been having fun playing with English Paper Piecing (EPP) ever since I got Diane Gilleland’s All Points Patchwork and made my very first EPP project.

I reviewed that book here. In a nutshell – it’s absolutely fabulous.

Every time I look at a hexie template – especially when it’s solo and surrounded by other fabric – I see an eyeball. 🙂 So when Diane asked me to participate in a Halloween EPP Blog hop I leaped at the chance.

The design is super easy. Make a bunch of hexies and then start playing around with them.

Halloween Hexies

I made 96 black hexies using all the black-on-black fabrics in my scraps, and 14 green hexies, two each of all my acid green scraps.

Then I started playing around with the arrangement and joining them together.

Halloween Hexies

I put the matching eyes together in pairs, and then added 1/2″ felt circles. If you make them “look” in the same direction, they’ll look like pupils to the eyes.

Halloween Hexies

Frame your eyeballs in a hoop using this method.

Done!

You could make just a single pair of eyeballs for a fast little project in a small hoop, or a whole bunch of eyeballs for a bigger piece.

How many eyeballs do you want to sew?

🙂

Happy Halloween!

Best,
Wendi
That's me!

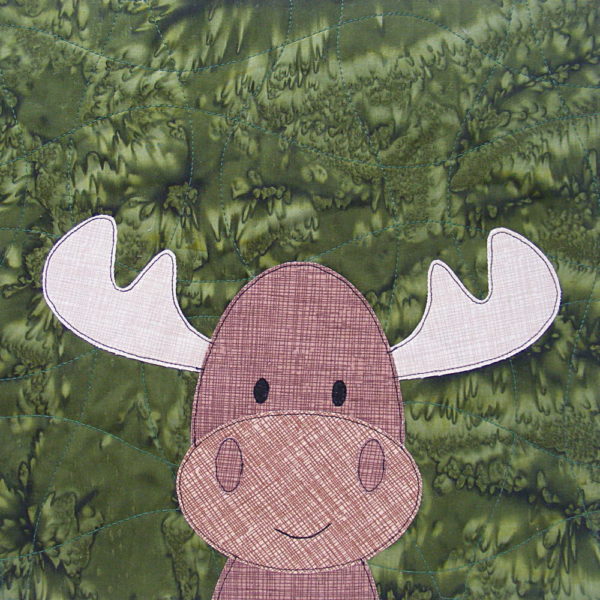
Free Moose Applique Pattern

Free Moose Applique Pattern from Shiny Happy World

Every time I release a pattern I get requests for additional blocks. It’s usually just one or two people with very specific requests, but when I released the Woodland Critters pattern I got a LOT of requests for a moose block.

Clearly I should have included a moose!

I can fix that. 🙂

So here’s a moose pattern!

It’s sized to fit on the same size block as the rest of the animals in the Woodland Critters quilt, but you can easily size it up or down to use it in all kinds of different projects. (This post about using my quilt patterns to make coasters has more info about resizing.)

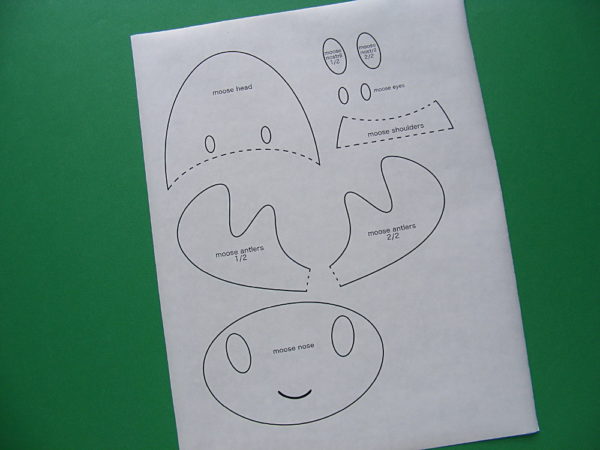
Download the pattern pieces here.

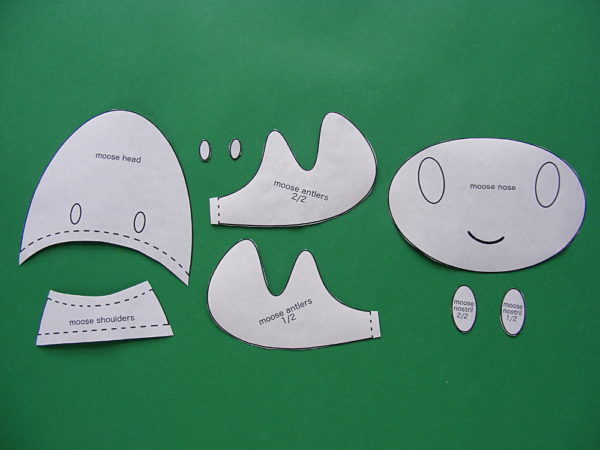
Trace the moose pattern onto the paper side of your favorite fusible adhesive. I’m head over heels in love with these printable fusible adhesive sheets because I can skip the tedious tracing and get right to the fun part– choosing fabric!

The pattern pieces have already been reversed so just trace or print them as they are.

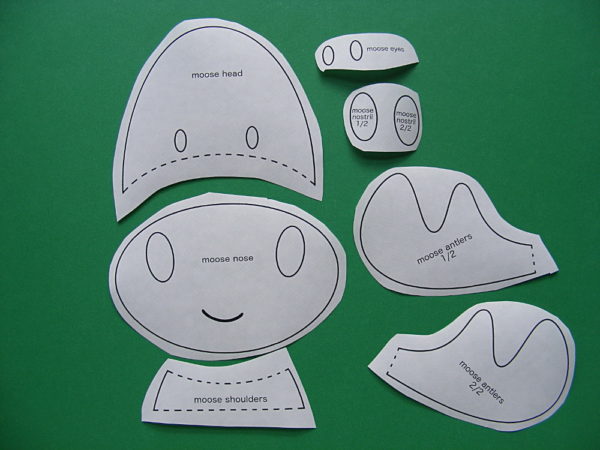
Roughly cut all the pieces out, leaving a little extra all the way around each piece.

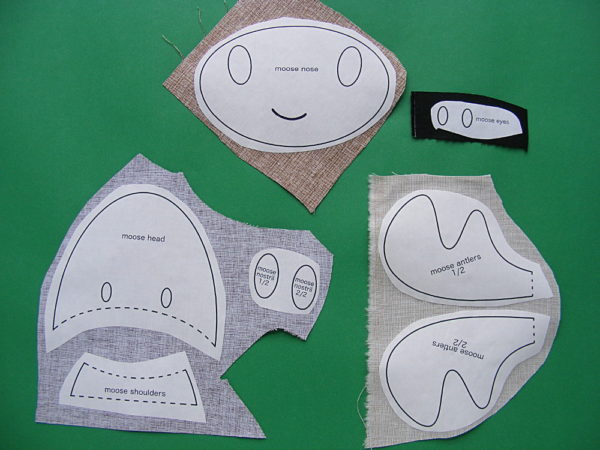
Following the manufacturer’s instructions for time and steam, fuse the pieces to the back of the fabric. (I use Heat & Bond Lite for all my quilts.)

Cut each piece out neatly. Cut directly on the solid lines. Leave a little extra seam allowance (roughly 1/4”) past all the dotted lines. Those bits will tuck behind other pieces for a nice, neat finish.

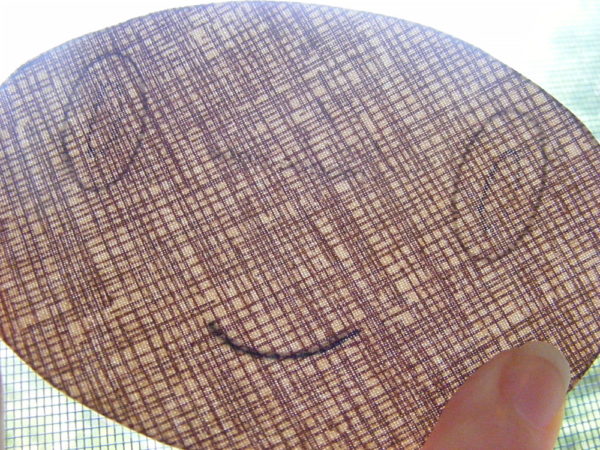
Trace the features onto the front side of the face pieces. If you hold it up to a window you’ll be able to easily see the features shining through.

I like to trace a little inside the eyes and nostrils– just so I have a rough guide where to position those pieces– and trace right over the line for the mouth. I just use a fine-tip sharpie or a pencil, nothing fancy.

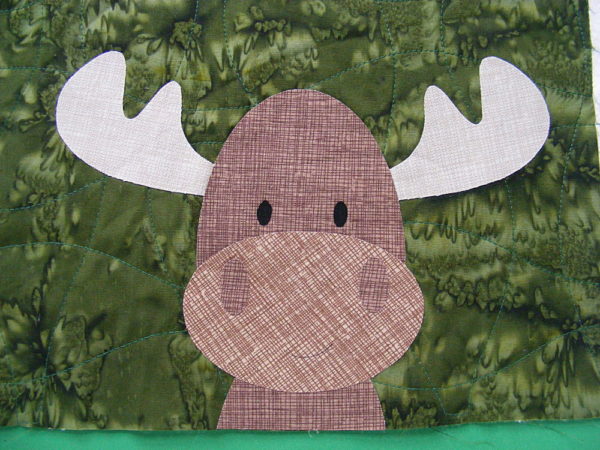
Peel off the paper backing and arrange the pieces as shown. Line the bottom of the shoulders up with the bottom edge of the block. Remember: the dotted lines show which pieces tuck behind other pieces.

(I quilted my background block to the batting before I started, so that’s what you see here. You can find more info about the “quilt as you go” (QAYG) method I use here.)

Following the manufacturer’s instructions for time and steam, fuse the pieces to the background fabric. Important note: For some brands the fuse time and steam settings for fusing fabric to fabric are different from the time and steam setting to fuse the paper to the fabric. Check your package.

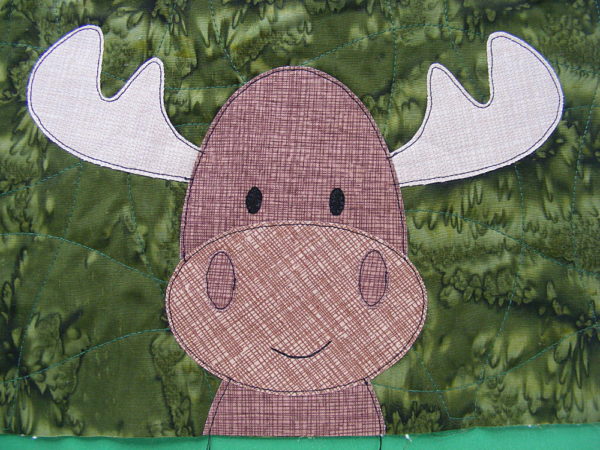
Stitch around each piece as desired.

I like to use a simple straight stitch with black thread. (I go over the mouth three times for an extra thick line.) It’s a great cartoony look that suits my designs, and it holds up very well through multiple washings. Some people prefer the look of a zigzag or blanket stitch. It’s all good!

Trim the block to size if it’s for a quilt, or proceed with whatever other awesome thing you’re making.

Here you can see my block in the Woodland Critters quilt

Have fun with it!

Woodland Critters quilt with added free moose block

Happy quilting!

Best,
Wendi

That's me at Craftsy!

Show & Tell Time!

It’s Show & tell Time again! Today I’m sharing some AMAZING quilts that Shiny Happy People have been making. 🙂

Melinda

Take a look at the lovely Woodland Critters quilt that Melinda made!

Woodland Critters quilt made by Melinda

She writes. . .

I learn more with each quilt. This was the first time I cut blocks larger and quilted first. I don’t think I will ever quilt after appliquĂ© again. So much easier. Thank you for making quilting fun!!!

She made one too many owl blocks, so made the extra into a terrific pillow too.

Owl pillow made by Melinda

And – as if that’s not enough – she also made this gorgeous Safari Quilt!

Safari quilt - made by Melinda

Look at how great the quilting shows up on those solid-colored background blocks!

Patterns: Woodland Critters Craftsy Class (this is a discounted link just for my readers), Safari Quilt

Connie

Connie made this cute monster quilt.

Connie's monster quilt

I love how she adjusted the position of the pupils to make them look at each other. 🙂

Pattern: Scary Squares

Jan

Look at the fun flower quilt that Jan made using a single block pattern!

Jan's sweet Repotted Posies quilt

She writes. . .

I enjoyed making your cute free pattern. I used men’s shirts for the background and the posies are recycled from a piece of 70’s clothing. I named it Repotted Posies. Thank you for sharing the pattern

Look closely! She added a button to the block intersections. So perfect with the men’s shirting fabric!

Pattern: Pretty Posy (free)

Kathi

Kathi sent photos of two Shiny Happy Quilts she’s made. Take a look at these puppies first!

Kathi's cute puppy quilt

I love the improv-pieced strip of scraps on the back!

And take a look at these monsters!

Kathi's adorable monster quilt

I especially love the green/orange one at the bottom. Such a fun idea!

Patterns: Puppies Quilt, Scary Squares Quilt

Anne-Marie

Anne-Marie also sent a couple of projects! First – look at the cute playmat!

Anne-Marie's adorable playmat

Anne-Marie writes. . .

I’ve just finished making a baby play mat from your craftsy quilt pattern!  It’s not perfect, but it is very cute. I hope my friend’s new son will like it!

I bet he loves it! I especially love the way she added a big monogram to that center tree block. 🙂

She showed us her Chirp quilt before. (Her first quilt! You can see it here.) Now she’s made some cushions to match!

Anne-Marie Chirp sofa

She writes. . .

I decided to use up my last few scraps of material from my crazy Chirp quilt to make a few cushions. I went as crazy as usual and made four cushions to match my couch quilt and I thought I’d send you a few pictures. Thank you so much for providing the perfect escape from my hectic life.

I love them!

Pattern: Patterns: Woodland Critters Craftsy Class (this is a discounted link just for my readers), Chirp Quilt

Cindy

I love this Princess Puppy tote bag!

Cindy's Princess Puppy tote bag

Cindy writes. . .

I couldn’t resist adding a little embellishments. 🙂 Love your patterns!

The addition of the jeweled crown is so cute!

Pattern: Puppies Quilt

Michelle

This is Michelle’s first quilt!

Michelle's very first quilt!

She writes. . .

Just wanted to show you a couple of pictures from my first (ever!) quilt. I used your Thick & Thin pattern and made it for my daughter. While I really loved the original colour scheme you used, my daughter is much more of a pink girl, so we chose the Sunrise palette instead. I backed it in hot pink fleece similar to cuddle fleece called nursery fleece, which is much easier to get in Australia. I’m really pleased with how it turned out and she loves it. Thank you for such a wonderful (and easy to follow) pattern.

It’s lovely!

Pattern: Thick & Thin (free)

Diane and Friends

Diane and her friends get together every Tuesday to make things that they raffle off for charities. Look at the puppies!

Diane's fabulous dog quilt for charity

Diane writes. . .

We made this quilt in just 3 weeks, to raffle for funds for our off-leash dog park. We sold 200 tickets at $3.00 each, and I am now making another one for a person who bought 64 of the tickets and did not win! She just has to have one!

I just love how many of the cat and dog quilt have been made to raise money for animal shelters and other good causes! It makes my heart happy. 🙂

Pattern: Puppies Quilt

Ginette

I love, love, LOVE this farm quilt Ginette made!

Ginette's fantastic farm quilt!

She writes. . .

Is this not the cutest little girl farm quilt! It was received with ooo’s and ahhhh’s. Three newbie quilters snatched it up for detailed examination much to my pleasure. Thank you, Wendi, for a well written, fun, versatile pattern.

It IS the cutest little girl farm quilt!

Pattern: Noisy Farm

Kati

Look at this pretty embroidered quilt!

Kati's pretty embroidered quilt

Kati writes. . .

I used the butterfly and a flower pattern of yours to try embroidering on felt for the first time while we were traveling last year. Then I came home and attached them to fabric to make this little quilt for my daughter.

It’s beautiful!

Patterns: Flutterby and Blossom (both free)

Carol

We’ve seen lots of puppies so far, but Carol is sharing some kitties!

Carol's beautiful cat quilt

She writes. . .

On seeing your cat quilt pattern, my daughter was desperate to have a large floor cushion with this design. Here it is. It just made me smile all the time that I was working on it. I am still smiling! Thank you.

I love hearing that so much! My goal is always to make patterns that make people smile. 🙂

Pattern: Cats Quilt

Jordana

Jordana has been making some fun doll quilts!

Jordana's fun doll quilts (and pillow)

She writes. . .

I got a huge bag of random scrap fabric at a thrift store for $3 that’s been perfect for doll clothes and quilts. Not great for color coordination but excellent for practicing!

I love them!

Patterns: Sprinkles Quilt (free), Dress Up Bunch Bedtime Collection (quilt, pillow, pillowcase and pajamas)

Ann

I love this project from Ann!

Anne's adorable mug rugs

She writes. . .

I had a number of 2.5 inch squares (at least I think that is what I started with) from trying out a friend’s Accuquilt cutter. So I decided to try out doing Disappearing 9-Patch with a few more twists. I really liked the way they turned out but didn’t want to make enough for a quilt. So, with thinking cap on, realized that if I reduced the size of some your appliqued quilt blocks they would be a perfect match.
Result: 6 mug rugs, or maybe 6 place mats for a teddy bear’s picnic. Thanks for all the patterns and tutorials.

I love this idea! It’s a great way to get a totally new project out of your appliquĂ© patterns!

Patterns: Chirp, Wild Flowers, Cats

Marge

I love this quilt mixing and matching blocks from several patterns!

Marge's pretty quilt - cats and dogs and flowers
It’s so much fun when people play with the patterns like that!

Patterns: Puppies, Cats, Wild Flowers

Deb

I love this bear quilt from Deb!

Deb's cute peekaboo bear quilt
She writes. . .

I just need to quilt it! Donated to my school, Paddington Station Preschool in Denver for our annual auction! Had so much fun making it. Your videos were great!

The bright primary colors for the background blocks are so perfect for a school!

Pattern: Peekaboo Bear

What a fantastic and inspiring collection of quilts! Thanks so much to everyone for sharing!

Happy sewing!
Best,
Wendi
That's me!

You Can Stitch Your Child’s Drawings!

Stitch Your Child's Art

Did you know that once you’ve got the basics of appliquĂ© under your belt, you can appliquĂ© anything? Including your child’s awesome drawings?

You can!

This is one of Jo’s drawings.

Jo's dragon and princess

I never put a date on it, so I don’t know exactly how old she was when she drew it, but it’s in a sketchbook full of lots of similar gems – and a lot of random scribbles. 🙂

I enlarged it just a bit (so it would fit nicely into a standard 8″ x 10″ frame) and then I used all my basic fusible appliquĂ© techniques to make a stitched version. This required no special skills, materials or techniques.

I left a little extra for pieces to tuck under other pieces – just like in my regular appliquĂ© patterns.

I held the picture up to a window to trace all the line work (the words and the princess’s stick body) and then stitched over those lines with my sewing machine – just like I do the faces for my regular appliquĂ© patterns.

If you can make any of my quilts, you can do this!

You could just watch this free video tutorial and jump into it – especially if your child’s drawings are fairly simple shapes.

If you’re a little nervous about that, or if the drawings are more complex, I recommend making one of my quilts or taking my Craftsy class first. That way you’ll have a bit more of a grounding in the techniques. That experience will help you make good design decisions – like what overlaps what, when to use stitching and when to use appliquĂ©.

It’s super fun – and your kids will be thrilled to see what you do with their work!

AppliquĂ© it to a T-shirt or tote bag for school. Make a pillow for Grandma – holidays are coming up soon! Add a drawing to a receiving blanket for a new baby brother or sister. Put a whole bunch of drawings together into a magnificent quilt! The sky’s the limit. 🙂

Happy stitching!
Best,
Wendi
That's me!


Controlled Chaos Scrap Quilt – The Last Block!

Controlled Chaos Scrap Quilt - the last block!

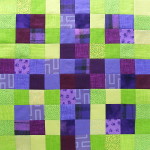
Here it is! The very last block in the Controlled Chaos scrap quilt!

What You’ll Need

  • 52  two-inch squares in color A (shown in purple)
  • 48 two-inch squares in color B (shown in green)

Instructions

Use 1/4″ seam allowances for all sewing.

Press all the seams as you go. I’m pressing mine open for this quilt. I think it will make things simpler in the end.

Arrange your squares according to the diagram below.

block 20 template

For this block I worked in big chunks. I sewed things up in the following order. . .

  • Sew all your individual squares into pairs of matching colors. You should have 26 purple pairs and 24 green pairs.
  • Sew the purple pairs into 2 x 2 squares.
  • Pull out four of those purple squares. Sew two green pairs to opposite sides of each purple square. Sew the remaining green pairs into eight 1 x 4 rectangles.
  • Sew these rectangles to the top and bottom of your purple squares, so that there’s a green ring around each of the four purple squares.
  • Sew the rest of your purple squares into one 2×10 rectangle and two 2 x 4 rectangles.
  • Sew a 2 x 4 purple rectangle between two purple/green squares. Repeat with the last 2 x 4 purple rectangle and the last two purple/green squares
  • Assemble your chunks in rows and sew the long 2 x 10 purple rectangle between your other two rows.

Finished!

Well – finished with the blocks. 🙂 I still need to join them all together with sashing strips between them and then quilt the whole thing. Here’s what it’s going to look like. . .

Controlled Chaos Scrap Quilt

I’ll have a tutorial showing how to do the sashing strips (there’s a little trick to that!) and then tutorials showing basic hand quilting, quilting without marking, and big stitch hand quilting. Yes – I’m going to spend the winter hand-quilting this beauty!

But all of that is going to have to wait just a little bit. I have a new and improved website that I’m really close to launching, so that’s taking a lot of my attention behind the scenes these days. It’ll be worth it! While you wait – finish all your blocks!

Remember – you don’t have to make your quilt the same size or number of blocks as my quilt. You can make fewer quilts for a crib size, or repeat some of the designs in different colors (or make up your own additions!) for a larger quilt. Mine is going to be just the right size for curling up on the couch. 🙂

Click here for all the Controlled Chaos posts.

Happy piecing!
Best,
Wendi

My Craftsy Quilting Class Is Live – and I have a HUGE discount for you!

My Craftsy Class!

Woo hoo!

My Craftsy class is LIVE!

And have I got a deal for you!

But first – let’s move my big head out of the way so you can see the whole quilt. 🙂

You guys saw bits and pieces in the sneak peeks last week, but here’s the entire thing – my Woodland Critters Quilt.

Woodland Critters Quilt

There are 9 different animals, 6 mushrooms, and 4 trees. You also get an alphabet so you can add animal sounds like this. . .

Woodland Critters Quilt

These examples are crib size, but I also include layouts for napping and twin size quilts. That’s the napping size hanging on the wall behind me in the top photo – my favorite size for couch use.

What’s that in front of me? It’s an owl quilt!

Owl Quilt - using one block from the Woodland Critter Quilt pattern

I took just one block from the Woodland Critters Quilt and went crazy with all my favorite colors and fun decorative stitches and made this beauty. I love how some of the owls are sleepy and some of them are grumpy. It’s super easy to make the change and I show you how in the class.

The class! Let me tell you what’s in the class!

(I can’t believe how much we packed into seven video lessons!)

I get a lot of emails from people saying they wish I could just come to their house and show them how to make a quilt from start to finish.

This is the next best thing. I show EVERYTHING!

  • How I choose fabric
  • How I true up my fabric and cut background blocks
  • How I quilt my blocks before adding applique
  • Fusible applique basics – my favorite products and how to use them
  • My tricks for marking faces and how to handle overlapping bits
  • Lots and lots of options for doing the eyes (the hardest bit)
  • How I outline stitch all the pieces
  • Fancy stitching options
  • How to appliquĂ© on knits (you’ll see me appliquĂ© a fox on an adorable baby onesie)
  • How to join those already-quilted blocks
  • How to back the quilt and finish quilting it
  • How to bind the quilt

See what I mean? It’s not just an appliquĂ© class – it’s also a beginning quilting class and a QAYG class. You get to keep the class forever and watch it as many times as you like. You can pause it at any time. There’s a handy “go back 30 seconds” button. And you can ask me questions at any time. It’s fantastic!

Update – Please be aware that Craftsy (now Bluprint) has added a subscription plan to their offerings, which changes the way instructor support happens. If you buy the class for your Forever Library, you get instructor support – which means your questions are posted to a special instructor dashboard where I can see them and answer them. If you watch the class as part of the streaming subscription, any questions you post go to the larger class community – not to me. I never even see them, so I can’t answer them.

It’s normally $34.99 (which I think is a terrific price for an exclusive pattern plus all that video content) but for the first week of the release I have a special discount for you. $20 off!

Use this link to get the discounted price.

And use it now – because that is a crazy price and it’s only available until midnight EST on Monday 8/10.

The crazy launch discount is expired now, but Craftsy is almost always having some kind of sale. Use this link to get the best current price. 🙂

You can also get the PDF pattern here. It has links to videos I made myself without the fancy Craftsy video production. 🙂

Happy quilting!
That's me at Craftsy!
Best,
Wendi

a href=”http://wendigratz.wpengine.com/wp-content/uploads/2015/08/tall-craftsy-for-pinterest.jpg”>
Fusible Appliqué Made Easy - my class on Craftsy