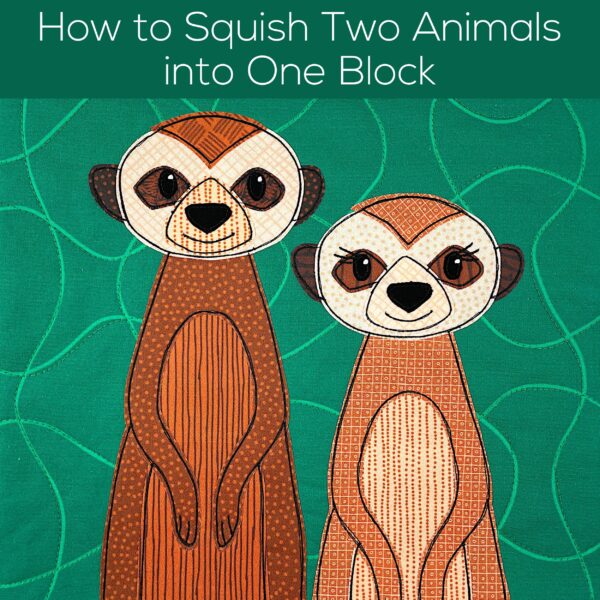
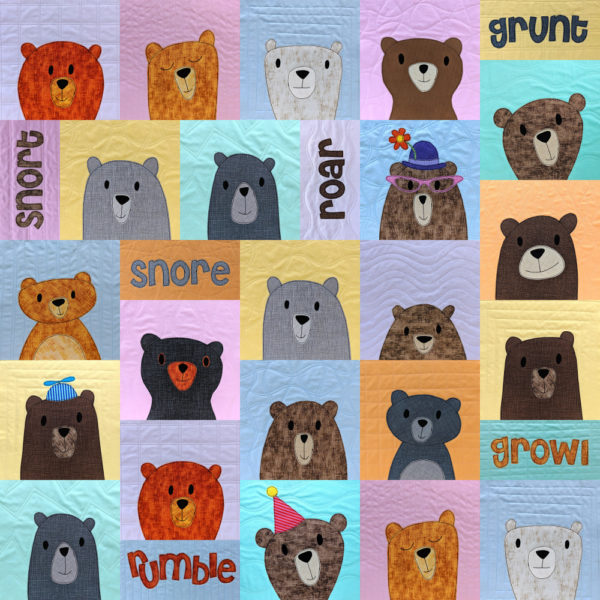
All of my applique quilt patterns (except the Paper Dolls) are built on a 10-inch grid, and I almost always design one animal for each block. But sometimes you may want to squish two animals into one block!
Maybe it’s a social animal like those meerkats in the first photo.
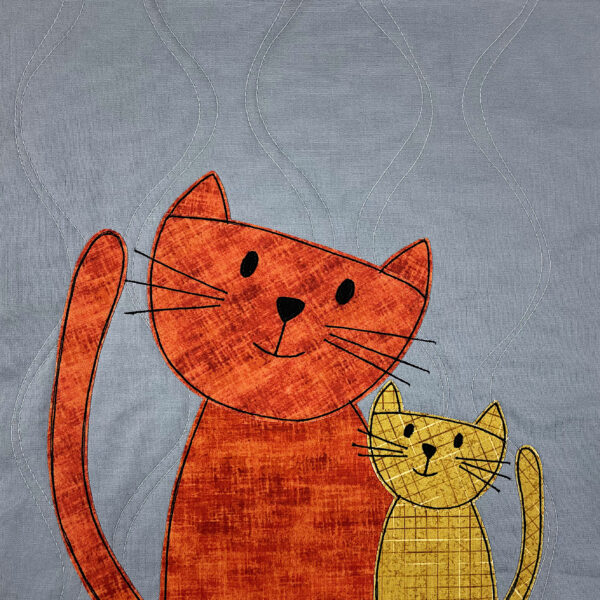
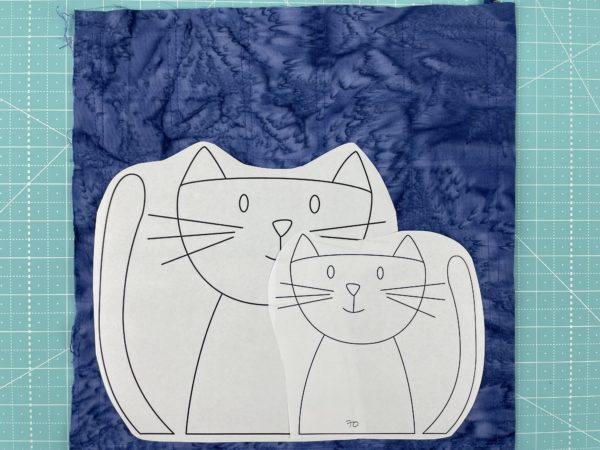
Maybe you want to add a baby animal, like these cats.
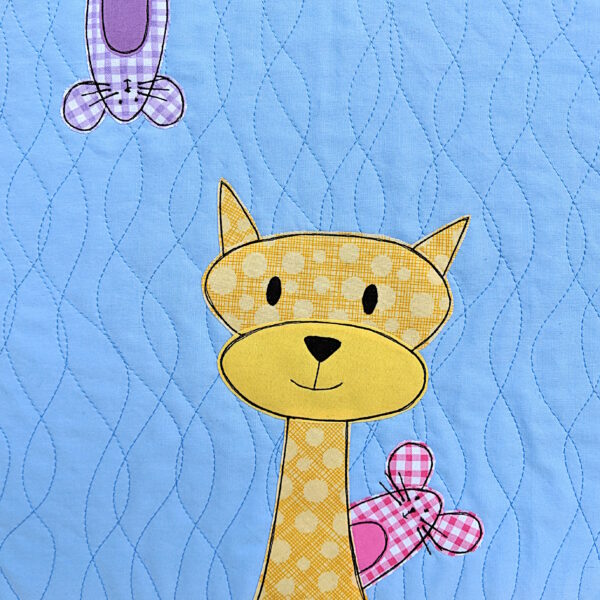
Or maybe you want to use the Peekaboo Mouse pattern to have a little mouse photobomb one of your other blocks.
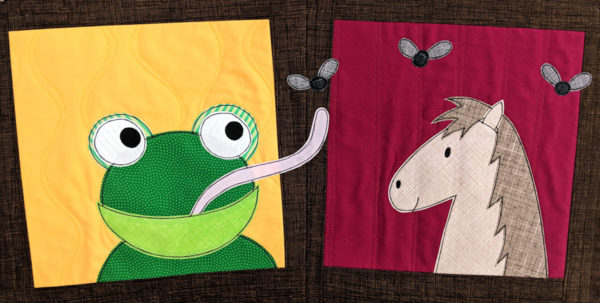
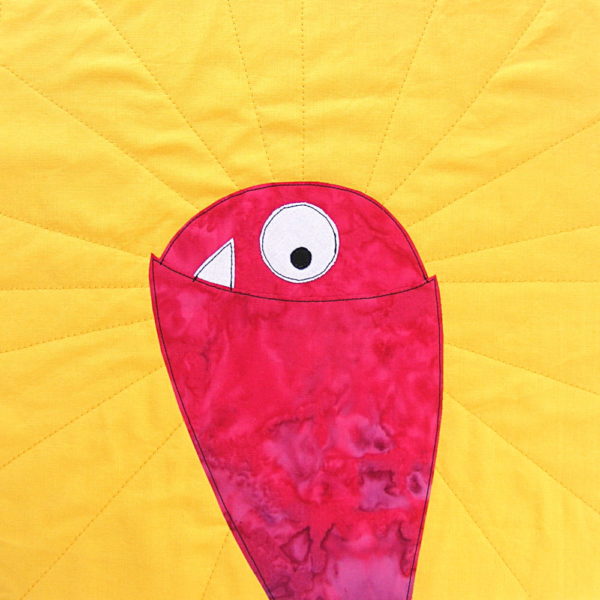
Or maybe you want to add something that will deliberately bust out of its 10 inch frame, like this frog flicking his tongue into a neighboring block.
It’s easy to play with your blocks like this – but you want to make sure it still fits in a 10-inch square, and since I advise you to start with an 11-inch block and then trim it down to 10 1/2 inches and sew it together so it finishes as 10 inch – you need to know where those 10-inch edges are.
I used to just use one of my square rulers to measure. I’d lay out the block, then check to make sure it all fits properly, then make adjustments (if needed) and measure again. It worked, but I wanted a way that let me see the edges AND move things around to adjust them at the same time.
So here’s what I do. I made a little tool that’s quick, easy, and free.
So there you go. How to squish two animals into one block – and know that they’re going to fit beautifully!
Have fun with this!
Here are links to all the posts showing how to applique with fusible adhesive – my favorite method. It’s fast and easy and (with the right materials) it holds up beautifully to rough use and repeated washing.
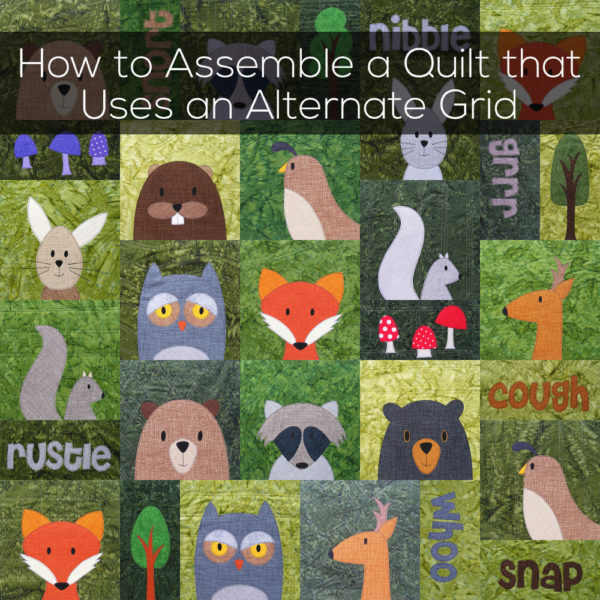
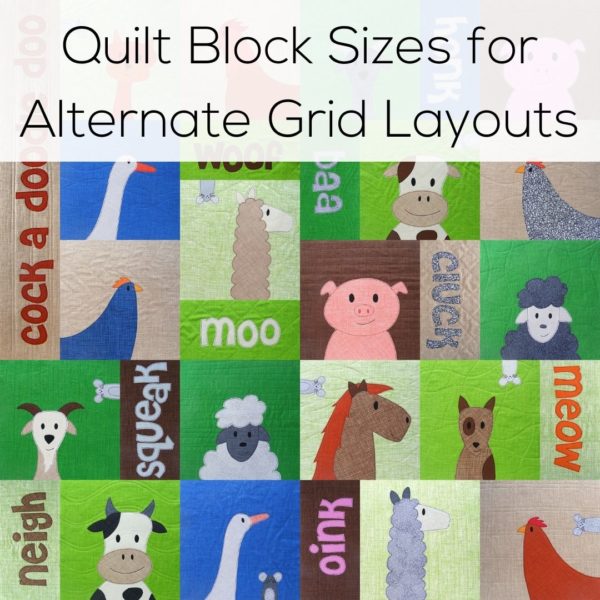
One of the easiest ways to make your quilt more dynamic is to use an alternate grid instead of a simple checkerboard.
And one of the easiest ways to make an alternate grid is to add half blocks!
It can be tricky to plan and assemble these quilts, but there are really only a few things to keep in mind – fabric requirements, block size, and how to sew those blocks together without any dang Y-seams.
The fabric yardage for my quilt patterns really doesn’t change – so that’s easy.
The size for half-blocks is also easy – once you remember to account for seam allowance. For my quilts (which are all based on a 10-inch grid) the half blocks will finish at 5 x 10 inches. That means you need to trim them (before sewing them together) to 5 1/2 x 10 1/2 inches. That means you need to cut your initial blocks 6 x 11 inches.
That leaves layout and assembly.
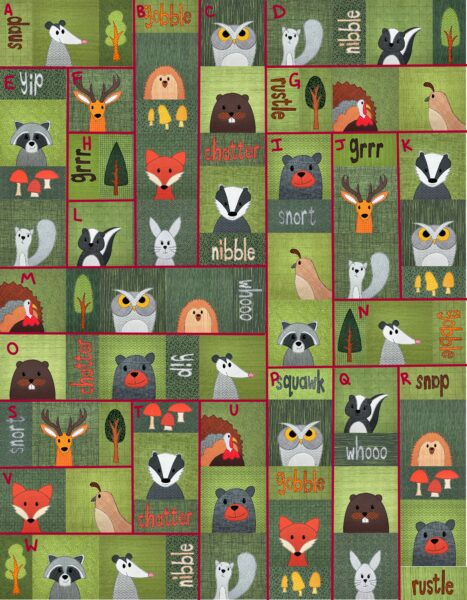
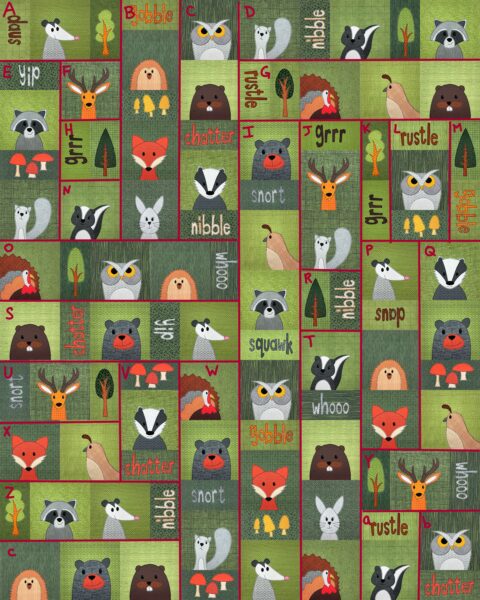
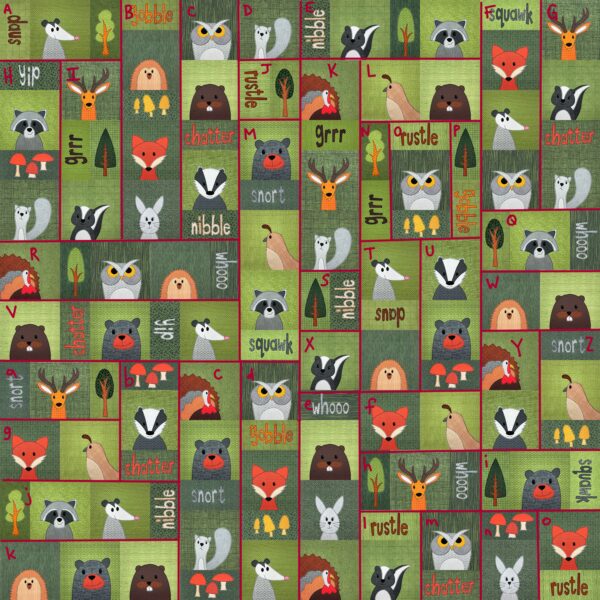
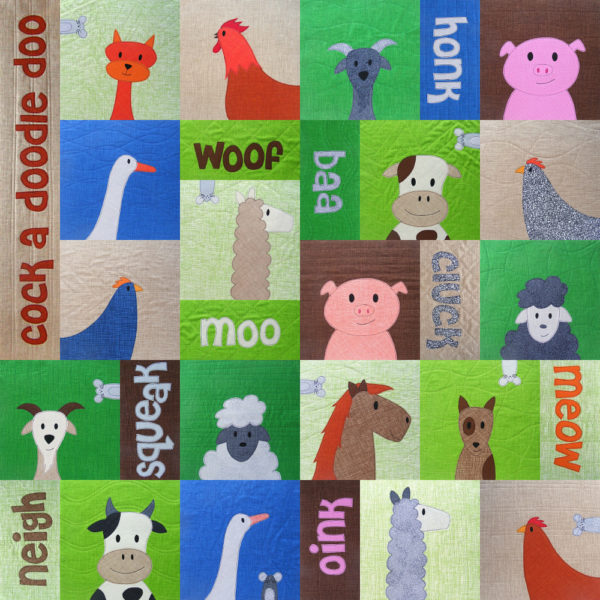
To make things extra easy for you, I’ve created basic templates you can use for six different quilt sizes. The samples all use the Woodland Critters quilt pattern, but you can use these layouts to add half-blocks to any of my patterns. Use the free alphabet pattern to add barks and yips and whines to the Lovable Mutts pattern, add snores to the Silly Sloths pattern, add a name and birth date to a baby quilt. You get the idea!
For each size below I tell you how many full blocks and how many half blocks to cut, give a template you can follow to assemble your blocks in a no-Y-seam layout, and explain in detail how to assemble the blocks. (It looks more complicated than it is – basically I’m just starting with the smallest units and adding to them with each step.)
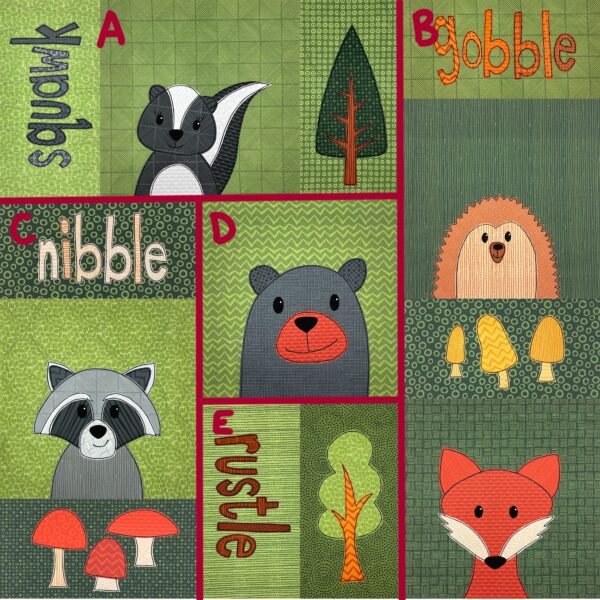
Instead of cutting nine square blocks, cut 5 square blocks (11 x 11) and 8 half blocks (6 x 11).
Sew each “chunk” you see in the diagram, then assemble them as follows:
Sew D to E
Sew C to DE
Sew A to CDE
Sew B to ACDE
Crib Size
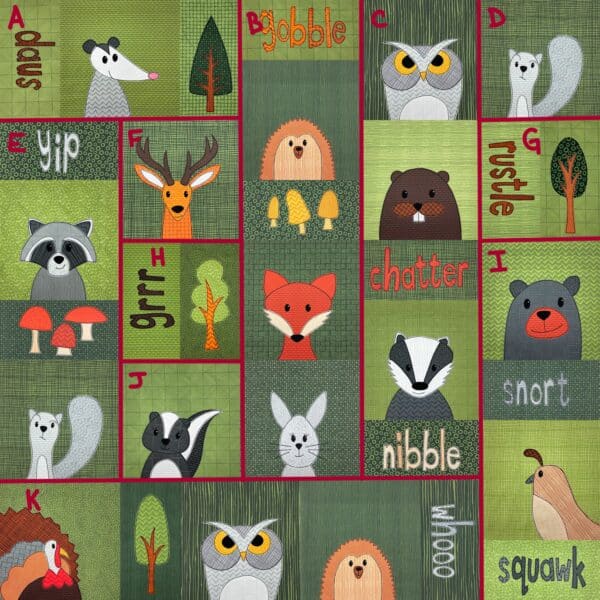
Instead of cutting 25 square blocks, cut 17 square blocks (11 x 11) and 16 half blocks (6 x 11).
Sew each “chunk” you see in the diagram, then assemble them as follows:
Sew F to H to J
Sew D to G to I
Sew E to FHJ
Sew A to EFHJ
Sew B to AEFHJ
Sew C to BAEFHJ
Sew K to CBAEFHJ
Sew DGI to KCBAEFHJ
Nap Size
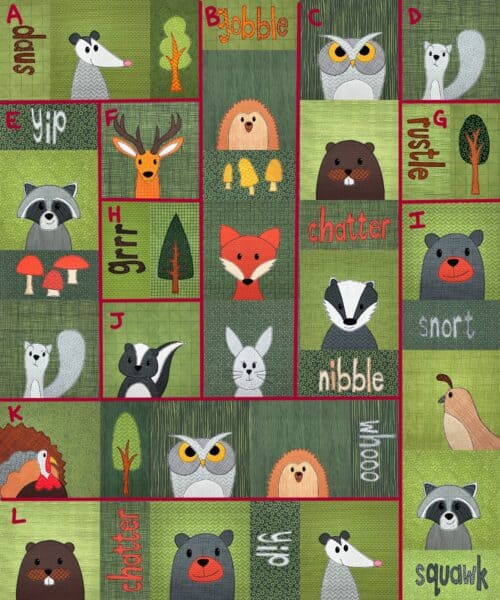
Instead of cutting 30 square blocks, cut 21 square blocks (11 x 11) and 18 half blocks (6 x 11).
Sew each “chunk” you see in the diagram, then assemble them as follows:
Sew F to H to J
Sew D to G to I
Sew E to FHJ
Sew A to EFHJ
Sew B to AEFHJ
Sew C to BAEFHJ
Sew K to CBAEFHJ
Sew L to KCBAEFHJ
Sew DGI to LKCBAEFHJ
Twin Size
Instead of cutting 63 square blocks, cut 45 square blocks (11 x 11) and 36 half blocks (6 x 11).
Sew each “chunk” you see in the diagram, then assemble them as follows:
Sew F to H to L
Sew E to FHL
Sew A to EFHL
Sew B to AEFHL
Sew C to BAEFHL
Sew M to CBAEFHL
Sew O to MCBAEFHL
Sew S to V
Sew T to SV
Sew W to TSV
Sew U to WTSV
Sew UWTSV to OMCBAEFHL
Sew J to K
Sew N to JK
Sew I to NJK
Sew G to INJK
Sew D to GINJK
Sew P to Q
Sew R to PQ
Sew RPQ to DGINJK
Sew UWTSVOMCBAEFHL to RPQDGINJK
Queen Size
Instead of cutting 80 square blocks, cut 57 square blocks (11 x 11) and 46 half blocks (6 x 11).
Sew each “chunk” you see in the diagram, then assemble them as follows:
Sew F to H to N
Sew E to FHN
Sew A to EFHN
Sew B to AEFHN
Sew C to BAEFHN
Sew O to CBAEFHN
Sew S to OCBAEFHN
Sew U to X
Sew V to UX
Sew Z to VUX
Sew c to ZVUX
Sew W to cZVUX
Sew WcZVUX to SOCBAEFHN
Sew D to G
Sew J to R
Sew T to JR
Sew I to TJR
Sew K to L
Sew M to KL
Sew P to Q
Sew a to b
Sew Y to ab
Sew Yab to PQ
Sew MKL to YabPQ
Sew MKLYabPQ to ITJR
Sew DG to MKLYabPQITJR
Sew DGMKLYabPQITJR to WcZVUXSOCBAEFHN
King Size
Instead of cutting 100 square blocks, cut 72 square blocks (11 x 11) and 56 half blocks (6 x 11).
Sew each “chunk” you see in the diagram, then assemble them as follows:
Sew H to I
Sew A to HI
Sew B to AHI
Sew C to BAHI
Sew R to CBAHI
Sew V to RCBAHI
Sew a to g
Sew b to ag
Sew j to bag
Sew k to jbag
Sew c to kjbag
Sew ckjbag to VRCBAHI
Sew D to J
Sew M to DJ
Sew d to MDJ
Sew dMDJ to ckjbagVRCBAHI
Sew N to O
Sew P to NO
Sew L to PNO
Sew T to U
Sew TU to LPNO
Sew f to TULPNO
Sew h to fTULPNO
Sew l to m
Sew lm to hfTULPNO
Sew K to S
Sew X to KS
Sew e to XKS
Sew eXKS to lmhfTULPNO
Sew E to eXKSlmhfTULPNO
Sew EeXKSlmhfTULPNO to dMDJckjbagVRCBAHI
Sew F to G
Sew Q to FG
Sew W to QFG
Sew Y to Z
Sew YZ to WQFG
Sew n to o
Sew i to no
Sew ino to YZWQFG
Sew inoYZWQFG to EeXKSlmhfTULPNOdMDJckjbagVRCBAHI
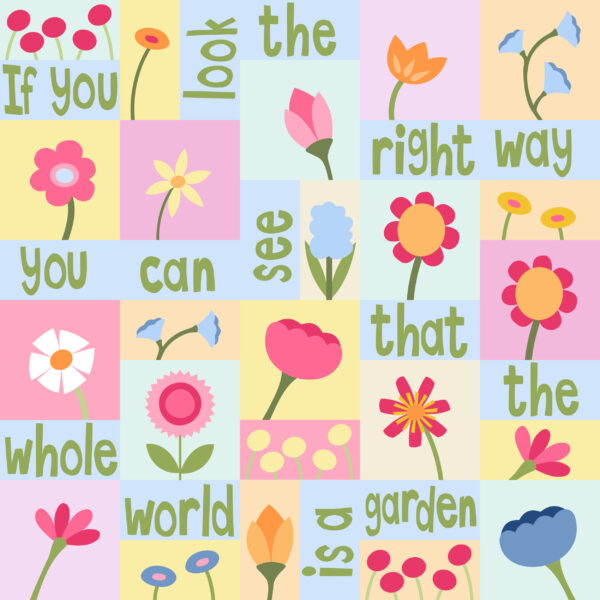
Whew! That King size looks a little crazy – but it’s the same principle as the smaller alternate grids. Just start with the smallest units and build up into larger chunks. There’s a video here walking you though the reasoning and process – especially helpful if you want to create your own alternate grid design and don’t want to end up with Y-seams. Maybe you want to incorporate a quote into a quilt, like I did in this version of the Wild Flowers pattern?
I can’t wait to see what you create with alternate grids!
Find links to all the posts about pattern size and layouts here.
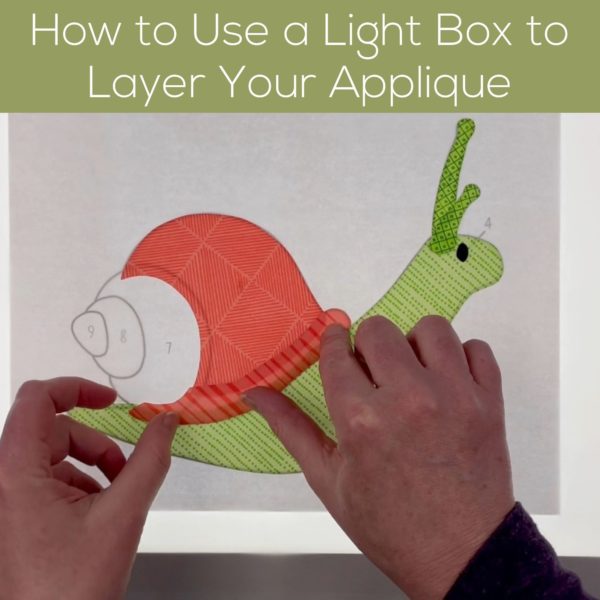
In my never-ending quest to to make applique as easy as possible, I recently bought a light box.
Wow!
My mind is blown!
No more tracing those placement markings to the right side of the fabric. (***ahem*** I may have mentioned here how much I hate to trace.)
This makes layering applique SO EASY and SO ACCURATE!
How did I not get one of these sooner?
Somehow I had it in my head that this was going to be a Very Expensive Purchase.
The one I bought is 15.5 inches x 11.8 inches and cost $26.99. I’m going to use it a kajillion times just in the next year, so that is well worth it to me.
Those are both affiliate links to Amazon. If you buy something using them, I get a small commission at no extra cost to you – but if you have a local store that sells these things, please support them!
Want to see how awesome it is in action? You’re going to love this!
Wow!
I’m going to say it again – wow!
This makes the process so easy! Especially for folks who are using cutting machines and have had a bit more of a laborious process to transfer those placement markings in the past.
I know some of you have been using a light box forever and can’t believe I didn’t know already how awesome they are.
I’m usually really slow to use new gadgets. I just don’t want a studio full of tools I’ll rarely use.
I’ve used a light box exactly once before – in a Craftsy class I taught several years ago. It was really huge and cumbersome and not something I had space for in my studio. I had no idea how slim and lightweight and inexpensive they are now!
Moving forward, all of my patterns will have numbers on the reference images and corresponding numbers on the template pieces.
I’m in the process of a year-long project to update all my quilt patterns. That update will include adding SVG files for use with cutting machines, and these numbered templates.
I’ll continue to include the placement markings for those who don’t want to get a light box. You can find a tutorial showing how to do that method here.
Update! One thing that can be tricky about using a lightbox is if you’re working with very dark fabrics AND you need the light to show through several layers. If this is the situation you’re in, you can actually fuse your faces in batches, so you never have to see through more than one layer of fabric at a time. I demonstrate this with the Billy Bison pattern made in very dark purple fabrics.
For those of you about to get a new light box – enjoy!!!
Here are links to all the posts showing how to applique with fusible adhesive – my favorite method. It’s fast and easy and (with the right materials) it holds up beautifully to rough use and repeated washing.
I get a lot of questions about sewing machine feet. Mostly people want to know one of two things. What kind of specialty feet should they buy for their machine? And do they really need to have a walking foot?
Well – it all depends on what you want to sew!
There are so many specialty feet out there! I have a few I’ve bought for specific projects – a ruffling foot when my daughter was little and liked ruffles and gathered skirts, a piping foot for I-don’t-even-remember-what. You get the idea.
But there are a few feet that I use ALL THE TIME – and they’re what I want to talk about here.
Zipper Foot
I don’t sew much clothing, but I do like to make little zippered pouches and pillows with zippered backs. A zipper foot is pretty essential if you’re going to sew zippers. I guess technically you can do without it – but I wouldn’t want to. 🙂 The good news is that most machines come with a zipper foot, and if yours doesn’t, there are lots of inexpensive universals available.
A zipper foot is also really handy for sewing piping or other fancy trims where you want to sew right up against a chunky bit.
If you like to machine quilt, a walking foot is essential. Basically, what a walking foot does is give you feed dogs that sit on top of your fabric, pulling it through at the same rate as the feed dogs built into your machine below the throat plate. This keeps the top and bottom layers feeding evenly through the machine. Genius!
A lot of fancier machines now have a built-in walking foot, but there are universals available for every brand and some of them are pretty inexpensive. I highly recommend getting one!
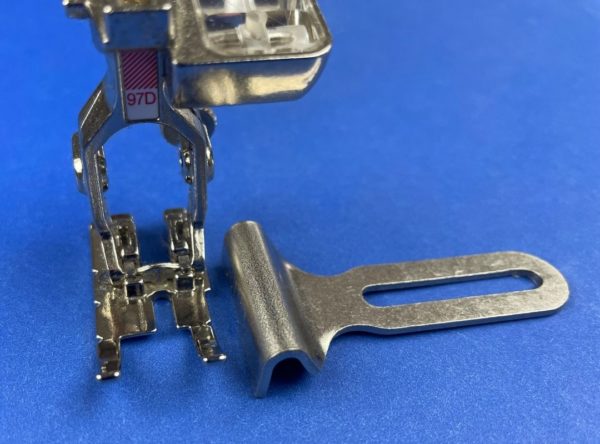
This isn’t one of the essential sewing machine feet, but I really love it for when I want to be super precise in my seam allowance.
Here’s what mine looks like.
That weird piece sitting beside the foot actually screws into the machine and becomes a wall that you butt your fabric against, to help you get an exact 1/4-inch seam allowance (or whatever depth you set it to). This is perfect for joining quilt blocks – especially for quilts with half blocks and double blocks where the seam allowance needs to be really accurate.
For some machines, the quarter-inch foot has the “wall” built right into the foot, but those aren’t adjustable. They ONLY do a quarter inch seam allowance.
I saved my very favorite sewing machine foot for last – a clear applique foot.
If you do ANY machine applique (or any topstitching or edgestitching) this foot is absolutely necessary.
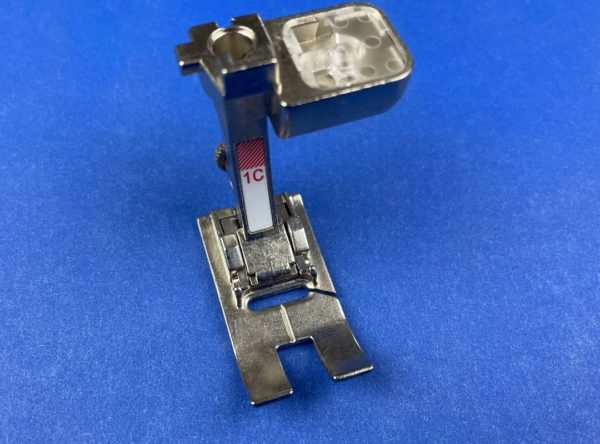
Here’s what a typical sewing machine foot looks like.
It’s metal and it might have a small opening like this one – but you can’t see much. And there’s very little visibility where the needle is actually going in – that smaller slot behind the main “toes.” It’s REALLY hard to see where you’re stitching with this foot.
Here’s a clear applique foot.
Look at that! The base of the foot is made entirely of clear plastic – giving you total visibility as you stitch. That ability to see what I’m doing is what allows me to outline applique shapes like this so neatly.
When I say 10-inch square – that means that’s the FINISHED quilt block size. After you sew it all together, then the block is ten inches square.
To get those finished 10-inch squares, I like to cut my blocks 11 inches square. That way I have a little wiggle room – and I LIKE wiggle room. I quilt my block, then applique it, and then trim it down to 10 1/2 inches square so that when I sew the blocks together using a quarter inch seam allowance, my finished blocks are ten inches.
Easy peasy. Cut all blocks 11 inches square.
But what about half blocks? And double blocks?
Varying quilt block sizes is a great way to break up that straightforward grid.
You can do that with any of my quilt patterns! Half blacks are an especially easy way to add words to the layout using this free alphabet applique pattern.
There’s also a tiny little trick to cutting these different quilt block sizes.
If you cut the square blocks 11 inches square, you might think you just cut that in half for a half block – but you have to remember to allow for a seam allowance!
To do that we need to start with the finished block size.
So. . .
Your half block will finish at 10 inches x 5 inches.
Cut your starting block 11 inches x 6 inches.
After you do your applique and quilting, trim to 10 1/2 x 5 1/2 inches.
All set!
Do the same thing for double blocks.
Your finished size will be 10 inches x 20 inches.
Cut your starting block 11 inches x 21 inches.
After you do your applique and quilting, trim to 10 1/2 x 20 1/2 inches.
Done!
Now that you’ve got some different quilt block sizes you can use to play with – try breaking up the grid on any of your standard quilt patterns!
Find links to all the posts about pattern size and layouts here.
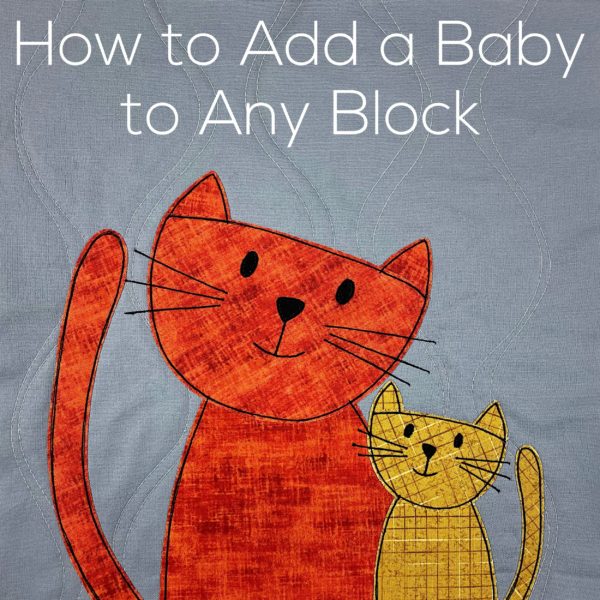
Want to add a baby to any block in my quilt patterns?
It’s easy!
You just need to print the baby at a reduced size!
There’s a post here with more info. (scroll down to the section called “Print at 100% Size – No Scaling”)
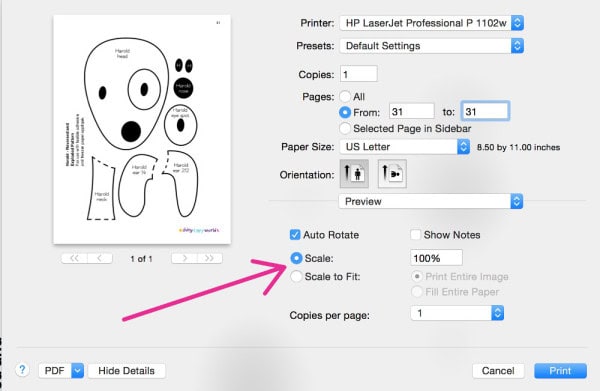
In a nutshell – tell your printer you DON’T want to print at 100%.
Here’s an example of my print screen. The exact layout and terminology will be different for every printer and operating system, but they all have the same basic info.
In order to print patterns at the “correct” size you make sure the scale is set at 100% – but really you can set it at anything you like!
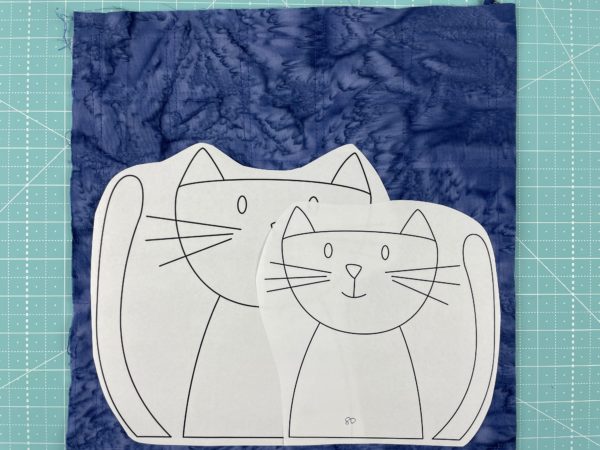
How do you know what size to use? Well, that takes a little trial and error and I recommend doing some test printouts on inexpensive paper before you print on your fusible adhesive. Here are some samples I tried for my cats. In all the samples below, the mama is printed at 100% size – I just changed the size of the baby.
Here’s a mama at 100% and a baby at 90%. Too close. It looks more like a mama and papa – which would also be fun!
Here’s the mama at 100% with the baby at 80%. Maybe the baby is a teenager?
Here the mama cat is 100% and the baby is at 70%. This is getting closer to what I was imagining.
Here the baby is printed at 60% size. This might be perfect! But I’m going to go down one more step just to see. The eyes might be too small to work with if I go smaller.
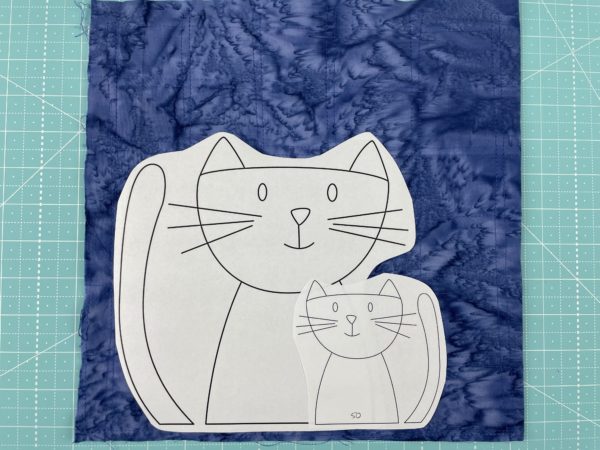
This is it! The baby is printed at 50% to make a tiny little kitten. The eyes are JUST big enough that I can still applique them, and I love the look.
And here’s the link to the Cuddly Cats quilt pattern where this cutie is just one of the fourteen cats included. But you can do this with any blocks from any of my applique patterns. Just play around with the sizes until you’re happy with the look you get!
Here are links to all the posts showing how to applique with fusible adhesive – my favorite method. It’s fast and easy and (with the right materials) it holds up beautifully to rough use and repeated washing.
Fusible applique is my favorite applique method. It’s fast and easy and it really lets me play with my designs.
I’ve been using this method for some time now, and I’ve refined the method I use. The most recent big change was adding SVG files to my patterns for use with electric cutting machines like Cricut and Silhouette – and that meant a change in how I design some of my template pieces.
Time for a new tutorial! This video shows all the steps for how I do fusible applique. It’s on the long side, and I mention several other tutorials, so scroll past the video for a list of topics at each timestamp, and all the links I mention in the video.
I give a quick nutshell view of my method. Visit this post for much more detailed info – Quilt As You Go: Everything You Need to Know. I also mentioned the following tutorials.
Printing or Tracing the Pattern onto Fusible Adhesive (5:33)
I use Heat & Bond Lite for all my quilts. You can get it at most big box fabric stores, either in a roll, by the yard, or in printable sheets. All of my applique patterns are formatted to work with the printable sheets.
Rough Cutting and Clean Cutting the Applique Pieces (7:15)
I show what I mean by rough cut and clean cut in my patterns, and explain why rough cutting, then fusing, then clean cutting gives you the best results.
I mentioned that I use the same artist’s eraser to clean my cutting mat. Here’s more info about that – How to Clean a Fuzzy Cutting Mat
If you want to skip the placement markings, there’s a tutorial here showing how to get perfect placement without them.
Layering and Positioning the Fusible Applique Pieces (14:43)
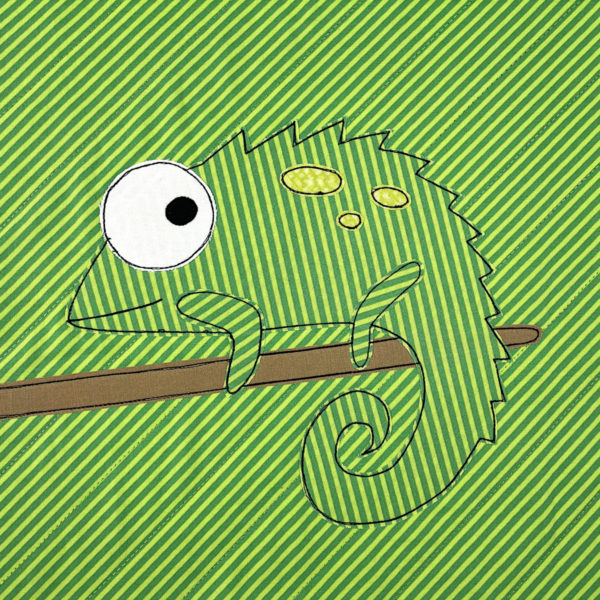
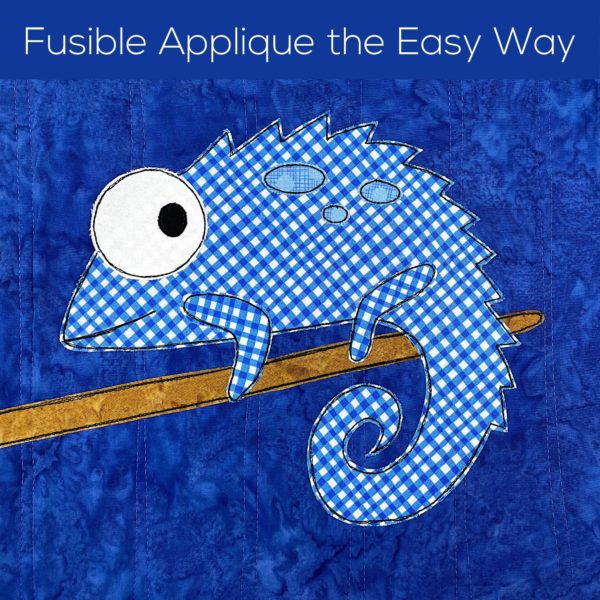
I show how I layer all the pieces together – with extra info about how to mark your fusible adhesive to help you get a directional pattern to run in different directions to help create contrast between overlapping pieces. (Look at the legs on the chameleon block at the top of this post to see what I’m talking about here.)
I do love fusible applique – and I hope this helps you love it too. 🙂
Here are links to all the posts showing how to applique with fusible adhesive – my favorite method. It’s fast and easy and (with the right materials) it holds up beautifully to rough use and repeated washing.
All of my quilt patterns are really just starting places. I design everything based on a 10-inch square grid, so that you can mix and match individual block patterns however you like.
Even if you buy one of my multi-block patterns or bundles, the layout I use for my samples is just one way to put your block together. I may show the Lovable Mutts laid out in a simple grid, but you might want to add half blocks full of barks and yips and howls and woofs. Go for it!
If you purchase your own collection of individual block patterns, or decide to use a different layout than the sample I made for a pattern, you lose the handy materials list, cutting instructions, and assembly guide for all the different quilt sizes I show in my samples.
That’s where these guides come in!
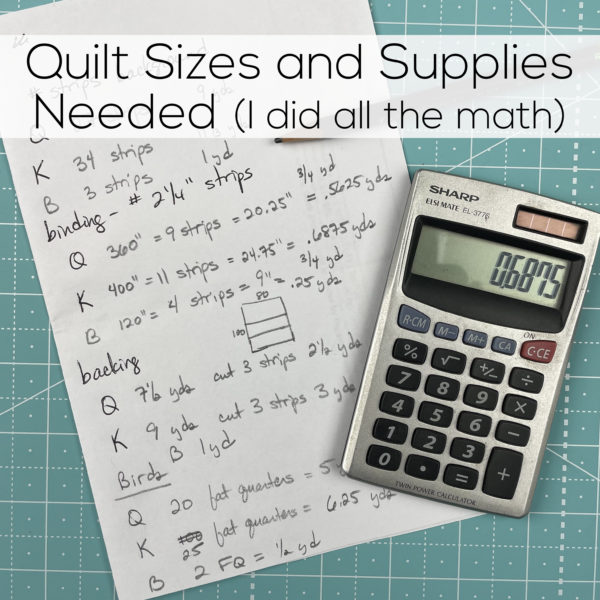
There’s no reason for every individual to have to calculate all the math for all the different quilt sizes and layouts. I can do that once and then share it for everyone!
Each of the guides below is a downloadable PDF for one layout style. It includes all the following information for six different quilt sizes, from Itty Bitty Baby to King size.
fabric requirements
cutting instructions for background blocks, backing, and binding
quilt assembly diagram
backing assembly diagram (where any piecing is needed)
links to tutorials for quilt assembly and finishing
All fabric requirements are based on 40-inch wide fabric.
Pick Your Layout
If you need more info about what the different layouts look like, you can see lots of examples of each layout style in this post – Play with Your Layouts.
Choose your layout and click on the link below to download your PDF.
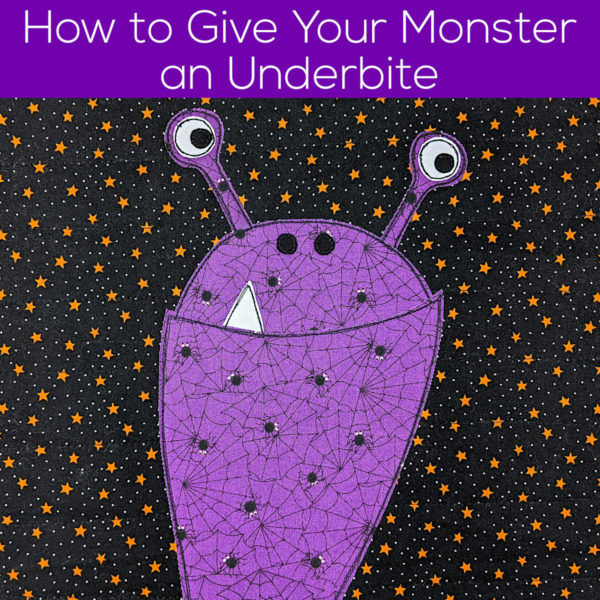
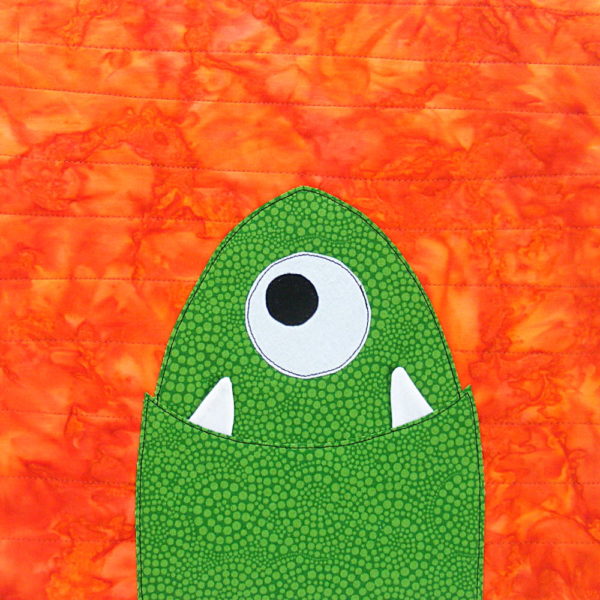
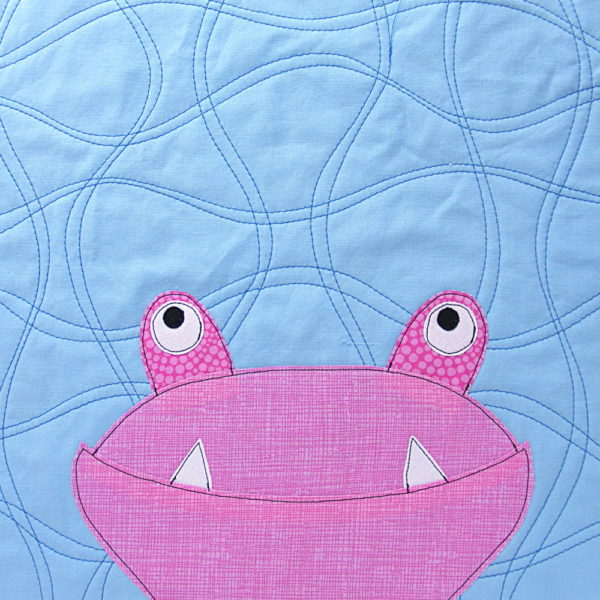
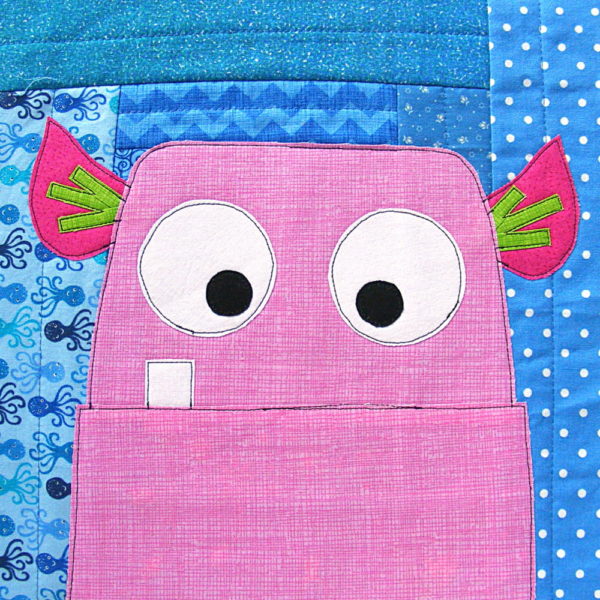
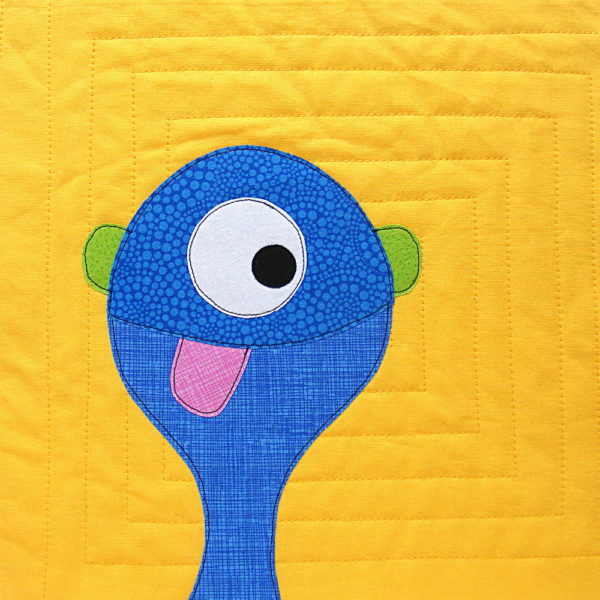
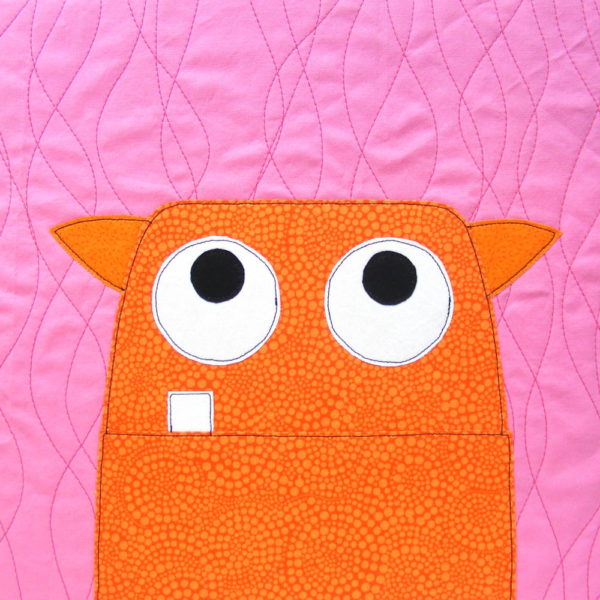
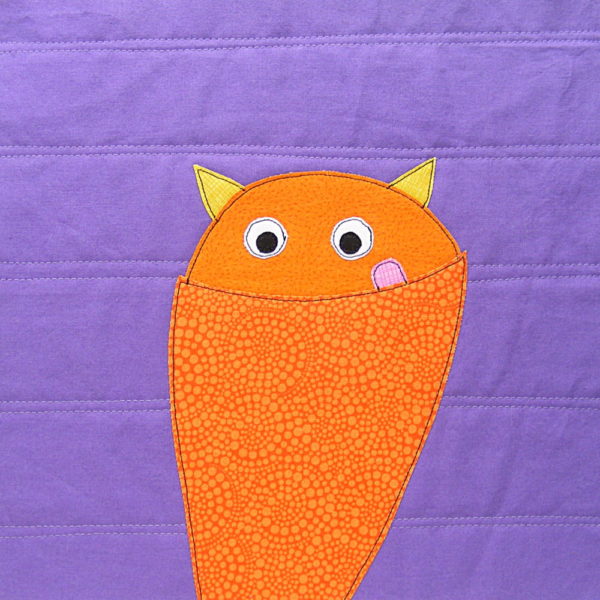
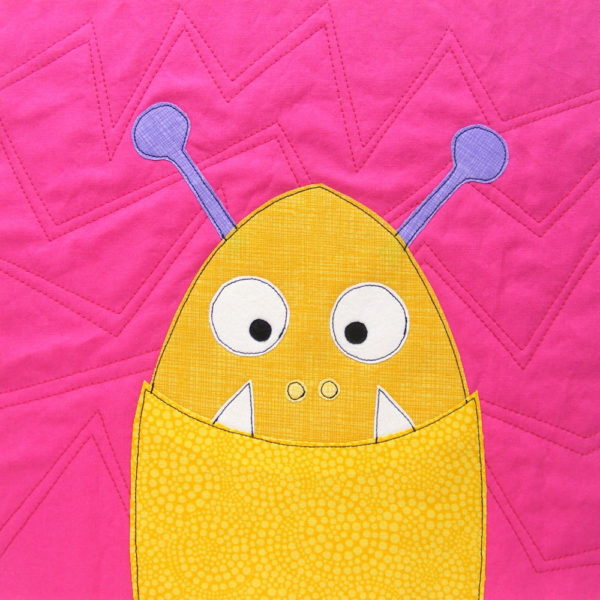
In this video I show you how you can use that line to give your monsters underbites and overbites and add teeth and tongues.
Here are a bunch of the samples you see at the end of the video. You can click on the images to see them closer.
Here are links to all the posts showing how to applique with fusible adhesive – my favorite method. It’s fast and easy and (with the right materials) it holds up beautifully to rough use and repeated washing.
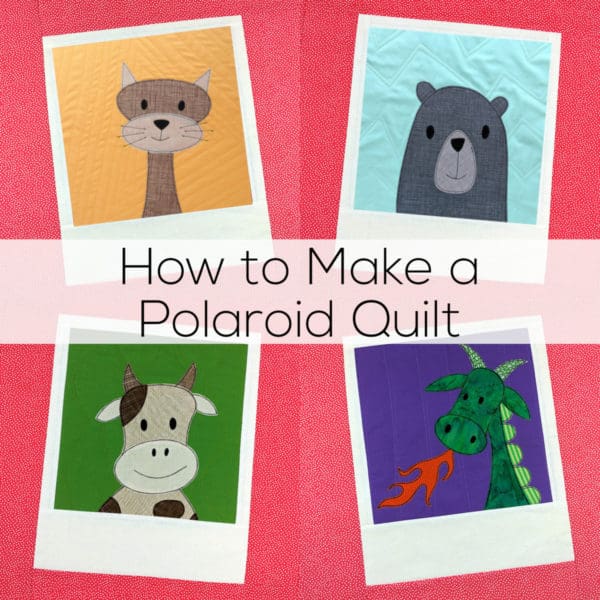
Choose any of my square applique patterns. They’re all designed to finish at 10 inches, so they’ll all fit in the Polaroid frame dimensions we’ll be working with here.
If you don’t have any of my quilt patterns, you can buy one here, or choose one of the free patterns available here.
Step 2
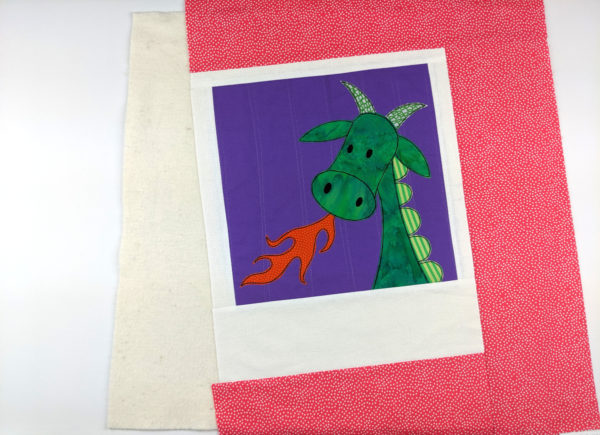
Prep your materials. For a single block (good for a pillow cover) you’ll need. . .
1 piece of cotton batting cut 18 inches square (or a little larger)
1 piece of fabric for the background of the “photo” cut 10 1/2″ square
scraps of white fabric (I like using white on white prints for a tiny bit of texture) cut into the following strips
two strips 1 1/4″ x 10 1/2″
1 strip 1 1/4″ x 12″
1 strip 3 3/4″ x 12″
1/3 yard background fabric (the part around the Polaroid frame) – for best results, use a fabric that is a random scattered pattern that works in all directions. I love the speckly polkadots I used and I’ve got them on order in a bunch of great colors for the shop.
Press your batting square (with steam) and let it cool before you move it.
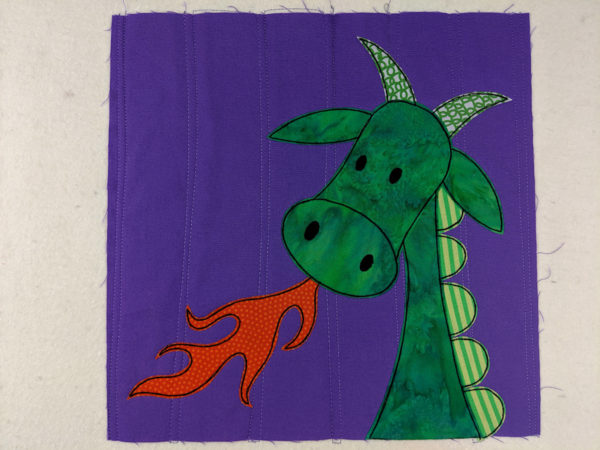
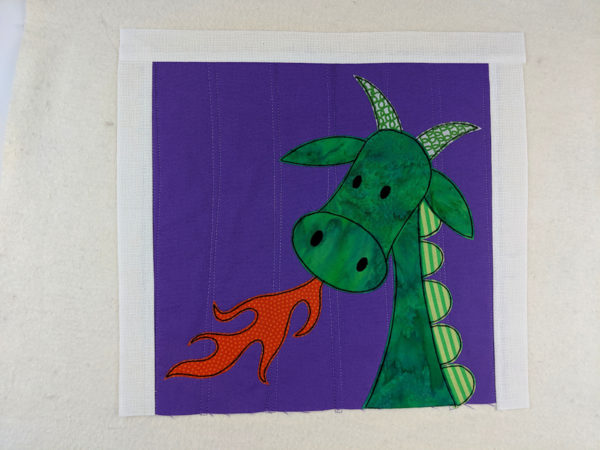
Layer your “photo” background at a slight angle (you’ll want to vary the angle a bit in each block of your quilt) and quilt it to the batting.
There’s a post here showing some of my favorite no-marking straight line quilting patterns here, and wavy quilting patterns here.
Press the block again and let it cool.
Step 4
Layer, fuse, and outline your applique.
Making sure that the raw edges at the bottom of the shoulders are lined up with the raw edge at the bottom of your background block.
Note – I’m zoomed in now to the “photo” that will be inside your Polaroid, just to get you the closest view possible. Your “photo” will be surrounded by bare batting – for now.
Let’s start building the frame!
Step 5
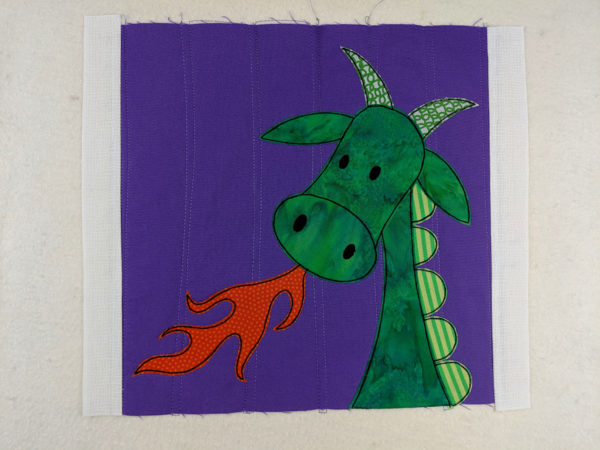
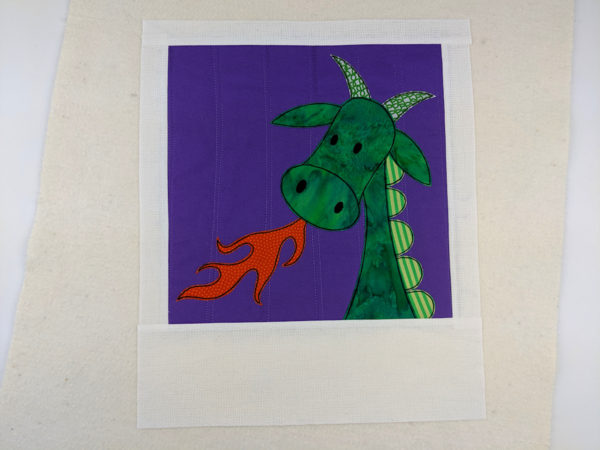
Using your 1 1/4″ x 10 1/2″ white strips and 1/4″ seam allowance, sew a strip to each side of your block.
Sew the 1 1/4″ x 12″ strip to the top of your block, opening and pressing the strip like the side strips.
Step 7
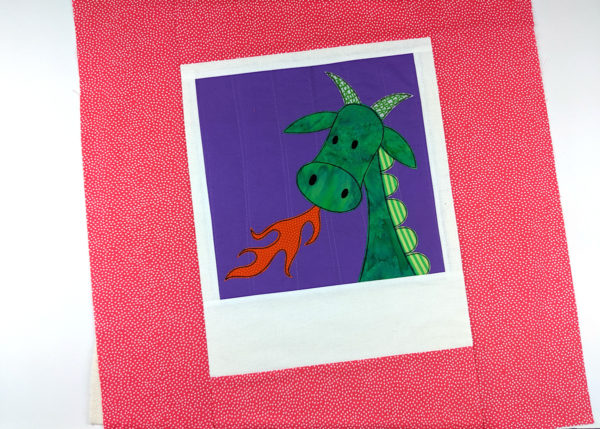
Complete the Polaroid frame by adding the 3 3/4″ x 12″ strip to the bottom of the photo.
See how the raw edges at the bottom of your applique are all hidden now? It looks just like a photo!
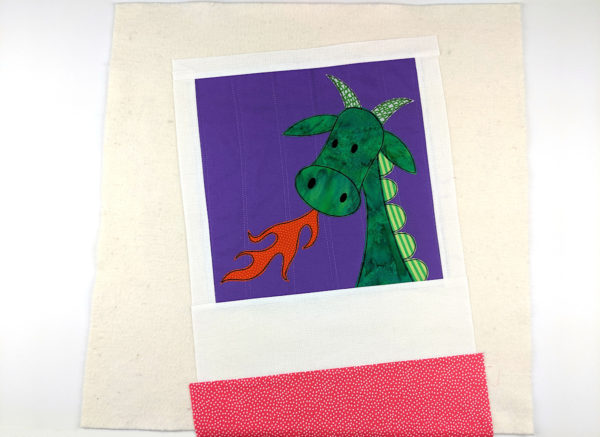
Now it’s time to cover up the rest of the batting.
Step 8
Pick any side of your Polaroid and sew on a strip of the background fabric, using the same “stitch & flip” method.
The rest of the photos will be zoomed out like this one so that you can see the whole block. The background fabric should completely cover the batting and there will be some overhang.
Step 9
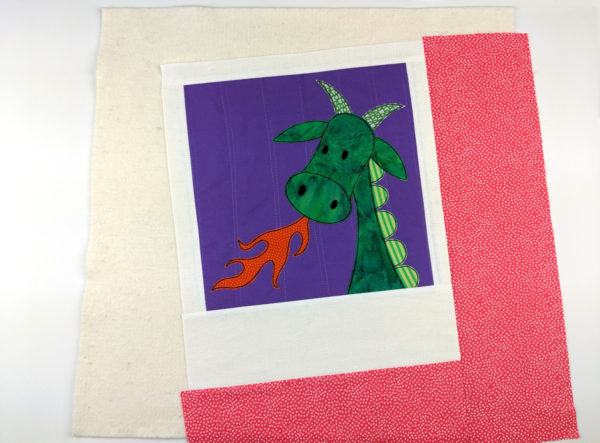
Continue adding strips to cover the batting. I moved on to the right side next.
And then the top.
And finally the last side.
You can go in any order you like – just continue until the batting is covered.
Oops! I still have a little sliver exposed!
I’m not going to worry about it. I know I cut my batting square on the big side, and my next step is going to be to trim the block down to size. I’ll keep an eye on that sliver. If it doesn’t get trimmed away, I’ll use a scrap of the same fabric to add one more strip to cover it.
Step 10
Trim the block to 17 1/2″ square. That way when you sew it together with other blocks to make a quilt, it will finish at 17″ square.
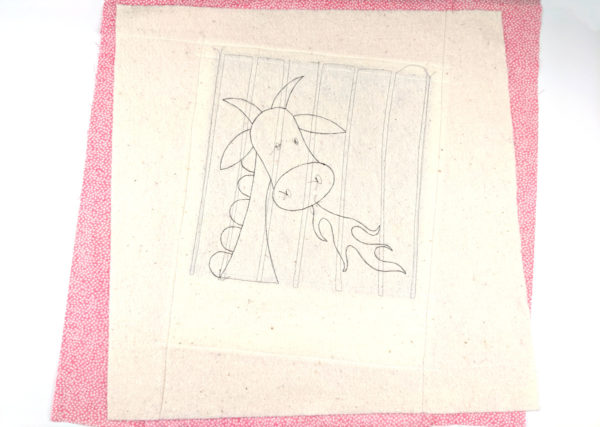
My first step in trimming is always to flip the block over and trim away the excess background fabric from the batting edges. That way I know exactly where the batting ends.
I just use my rotary cutting tools to cut away those red triangles showing around the batting square.
Then flip your block back over and trim to size. make sure you leave at least 1/4″ of background fabric around each corner of your Polaroid frame. You don’t want those corners to get buried when you sew your blocks together!
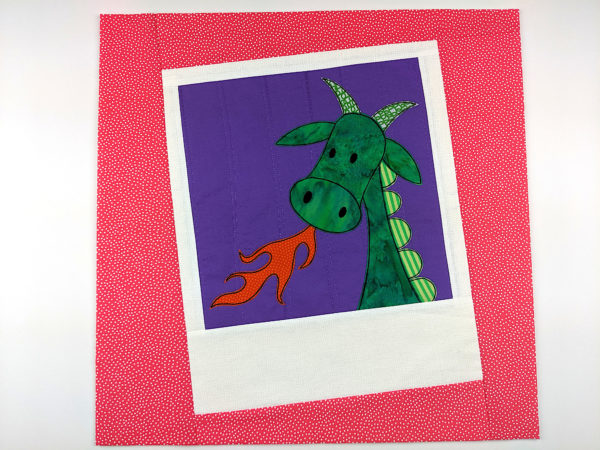
Done!
I was careful to trim away that uncovered sliver of batting.
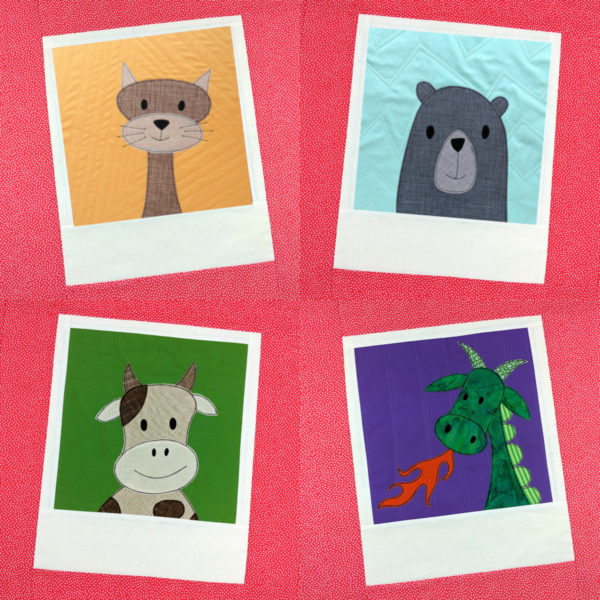
Here’s a little mockup showing just four blocks together. If you use the same fabric for all the backgrounds, it looks like a page in an album with a bunch of Polaroids scattered on it!
Here are some dimensions and yardage requirements for all three of my standard quilt sizes.
Crib Quilt
My crib quilts are usually 50″ x 50″ but for the Polaroid version it will be 51″ square. Make 9 blocks total, arranged 3 x 3.
1 1/4 yard total of fabrics for the “photo” backgrounds
3/4 yard white fabric
2 3/4 yards background fabric
at least 3 fat quarters for applique, though you’ll probably want more for variety
Napping Quilt
My napping quilts are usually 50″ x 60″ but for the Polaroid version it will be 51″ x 68″. Make 12 blocks total, arranged 3 x 4.
1 1/2 yards total of fabrics for the “photo” backgrounds
1 yard white fabric
3 1/2 yards background fabric
at least 3 fat quarters for applique, though you’ll probably want more for variety
Twin Quilt
My twin quilts are usually 70″ x 90″ but for the Polaroid version it will be 68″ x 85″. Make 20 blocks total, arranged 4 x 5.
2 1/4 yards total of fabrics for the “photo” backgrounds
1 1/2 yards white fabric
5 3/4 yards background fabric
at least 5 fat quarters for applique, though you’ll probably want more for variety
You can get a lot of the fabrics you need in my shop.
For the white fabric, I really like using white-on-white prints. That gives them just a little bit of texture, which I like, but you can use solid white if you prefer.
For the background I recommend a small-scale print that looks great turned in any direction.
I can’t wait to see your Polaroid blocks!
Find links to all the posts about pattern size and layouts here.