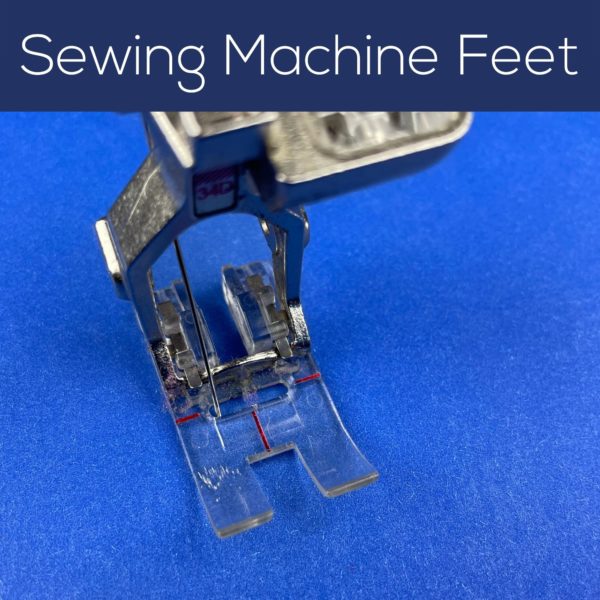
Sewing Machine Feet

photo showing a close-up of a clear plastic applique sewing machine foot. text reads: Sewing Machine Feet

I get a lot of questions about sewing machine feet. Mostly people want to know one of two things. What kind of specialty feet should they buy for their machine? And do they really need to have a walking foot?

Well – it all depends on what you want to sew!

There are so many specialty feet out there! I have a few I’ve bought for specific projects – a ruffling foot when my daughter was little and liked ruffles and gathered skirts, a piping foot for I-don’t-even-remember-what. You get the idea.

But there are a few feet that I use ALL THE TIME – and they’re what I want to talk about here.

Zipper Foot

I don’t sew much clothing, but I do like to make little zippered pouches and pillows with zippered backs. A zipper foot is pretty essential if you’re going to sew zippers. I guess technically you can do without it – but I wouldn’t want to. 🙂 The good news is that most machines come with a zipper foot, and if yours doesn’t, there are lots of inexpensive universals available.

A zipper foot is also really handy for sewing piping or other fancy trims where you want to sew right up against a chunky bit.

Handy links. . .

Walking Foot

If you like to machine quilt, a walking foot is essential. Basically, what a walking foot does is give you feed dogs that sit on top of your fabric, pulling it through at the same rate as the feed dogs built into your machine below the throat plate. This keeps the top and bottom layers feeding evenly through the machine. Genius!

A lot of fancier machines now have a built-in walking foot, but there are universals available for every brand and some of them are pretty inexpensive. I highly recommend getting one!

Handy links. . .

Quarter Inch Foot

This isn’t one of the essential sewing machine feet, but I really love it for when I want to be super precise in my seam allowance.

Here’s what mine looks like.
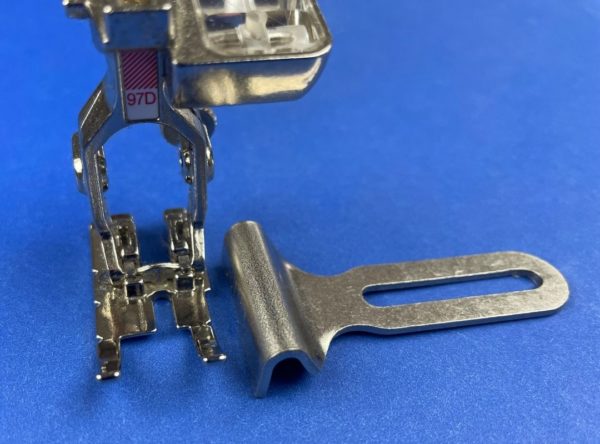
close-up photo of a quarter inch sewing machine foot for a Bernina

That weird piece sitting beside the foot actually screws into the machine and becomes a wall that you butt your fabric against, to help you get an exact 1/4-inch seam allowance (or whatever depth you set it to). This is perfect for joining quilt blocks – especially for quilts with half blocks and double blocks where the seam allowance needs to be really accurate.

For some machines, the quarter-inch foot has the “wall” built right into the foot, but those aren’t adjustable. They ONLY do a quarter inch seam allowance.

Handy links. . .

Clear Applique Foot

I saved my very favorite sewing machine foot for last – a clear applique foot.

If you do ANY machine applique (or any topstitching or edgestitching) this foot is absolutely necessary.

Here’s what a typical sewing machine foot looks like.
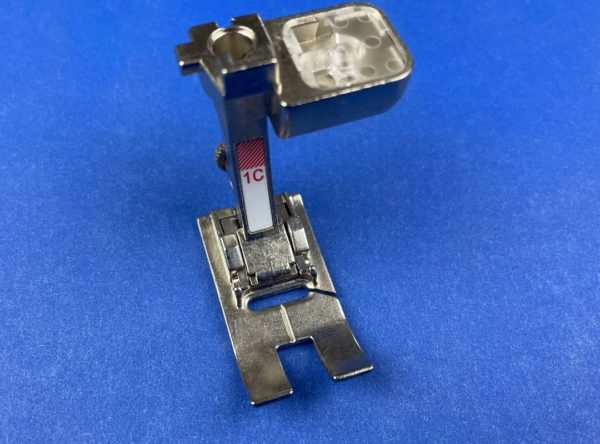
It’s metal and it might have a small opening like this one – but you can’t see much. And there’s very little visibility where the needle is actually going in – that smaller slot behind the main “toes.” It’s REALLY hard to see where you’re stitching with this foot.

Here’s a clear applique foot.
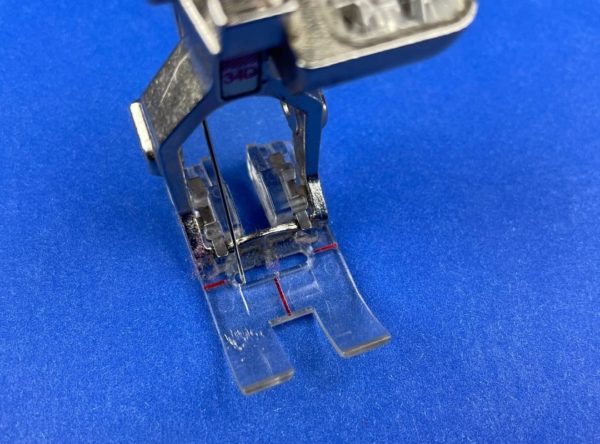
Close up photo of a clear applique foot - one of my favorite sewing machine feet.

Look at that! The base of the foot is made entirely of clear plastic – giving you total visibility as you stitch. That ability to see what I’m doing is what allows me to outline applique shapes like this so neatly.
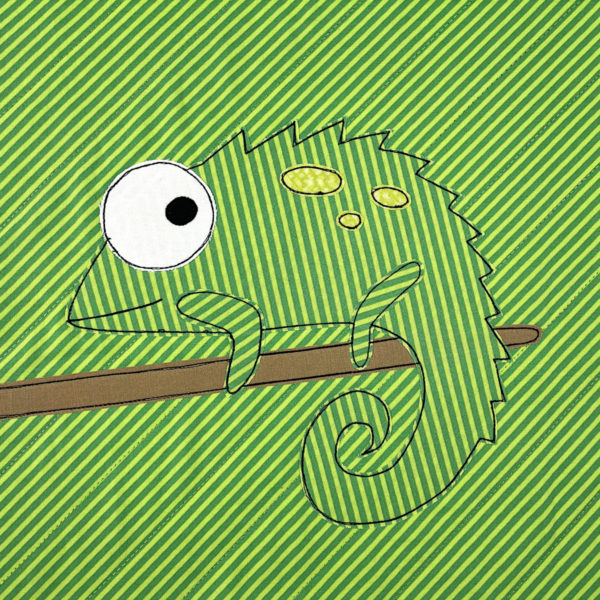
cute applique chameleon made with striped green fabric and the Carter Chameleon - easy applique pattern from Shiny Happy World

Handy links. . .

So there you are – the four sewing machine feet I use most often.

Here are handy links to all the posts about quilting tools and supplies.

Sewing Machine

Iron

Rotary Cutting Tools

Scissors

Other General Sewing Room Supplies

One More Hugely Popular Post that Seems to Fit Here Better than Anywhere Else

Return to the Let’s Make a Quilt main Table of Contents.

Move on to the posts about choosing your quilt pattern.

Happy stitching!

Cuddle Fleece Is Discontinued – and a Suggested Substitute

I have sad news today. I can’t reorder cuddle fleece any more, so it’ll be going away from the shop.

The company has been discontinuing colors over the last few years, and they finally discontinued the line completely. 😢

I love this stuff! I use it for softies and all my quilt backs. It’s not hard to sew with, and it wears beautifully. But I just can’t get it anymore. 😢

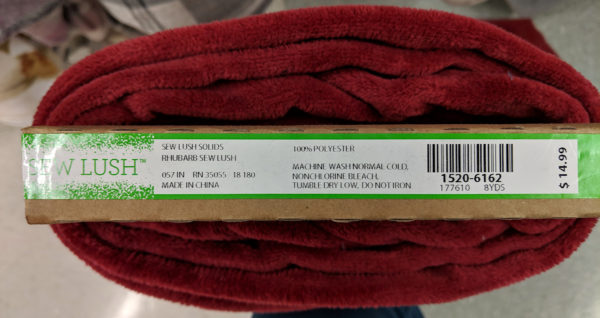
The good news is – I’ve found a good replacement. I can’t sell it in my shop – it appears to be exclusive to Joann’s. But I can point you to it and let you know that it appears to be the same as my beloved Cuddle Fleece. It’s called Sew Lush and it comes in some really terrific colors. Here’s what the bolt end looks like.

At $14.99 per yard it’s a dollar cheaper than what I carried – and Joann’s always has good coupons. You’ll find it near all the polar fleece. In my local store there’s a short case near the aisle that has their “specialty” fleeces – the ones that are really nice quality.

For most of my softies, you need just 1/2 yard.

For bear and bunny lovies you need a full yard.

For most of my quilt patterns you need 1 1/2 yards to back a crib quilt, 2 yards to back a napping size, and 4 yards to back a twin size.

I hope Joann’s continues to carry/manufacture the Sew Lush fleece. It really does come in some lovely colors!

If you’re looking for some sewing tips for this very special fleece, here are a few. . .

These links go to all my posts about quilt supplies.

Finished with this topic?

Return to the Let’s Make a Quilt main Table of Contents.

Move on to the lessons about cutting and quilting your background blocks.

Happy stitching!

New Colors for the Noisy Farm

I get a lot of emails from people asking for advice choosing quilt colors. I always point them to the Shiny Happy People group where they can see many, many different quilts made with my patterns – usually using different colors than what I used in my samples. Really – seeing a finished quilt is the very best way to imagine it in different colors!

So I’ll be making more of an effort to show my quilt patterns in new color combinations – just to show as many options as possible. 🙂

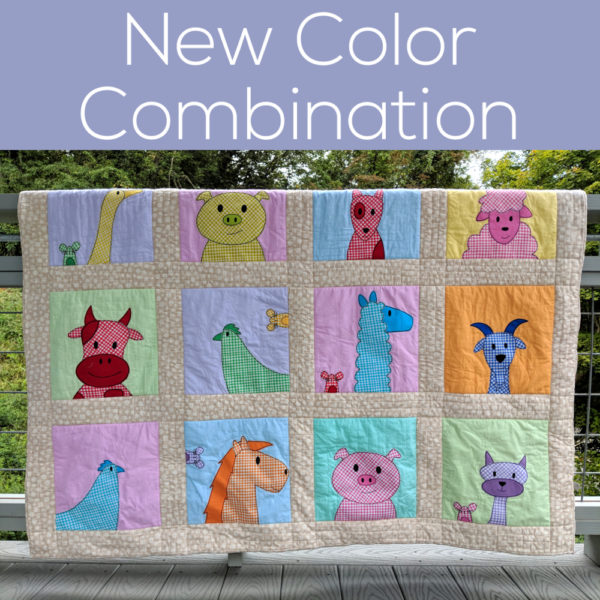
I recently remade the Noisy Farm quilt, using it as an example to how you can add sashing to any of my quilt patterns. While I was at it – I changed the colors too!

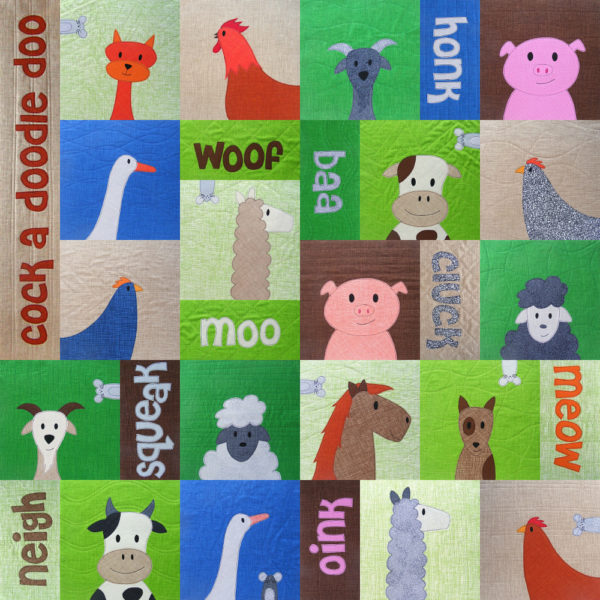
Here’s the original quilt in a crib size.

Noisy Farm made in the original quilt colors

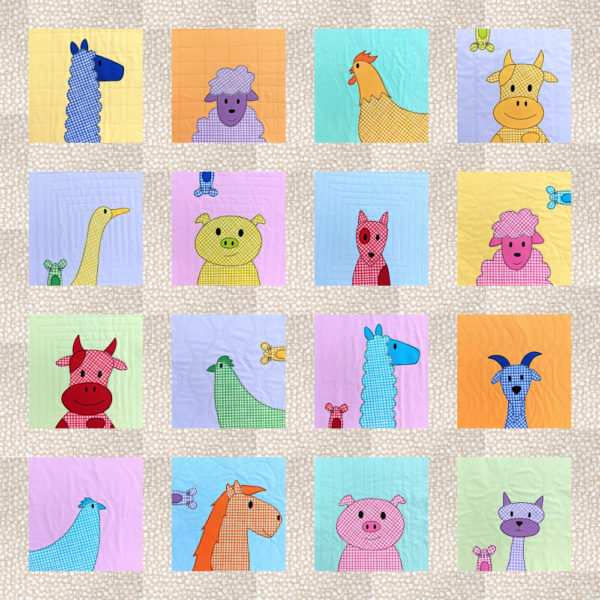
And here’s the new version.

Noisy Farm pattern with added sashing and new quilt colors

In addition to adding the sashing – I used radically different colors!

I made the original sample before I had fabric bundles in my shop, so it’s not easy to say exactly what fabric packs they’d use now, but the Warm Neutrals would be the best choice for those natural-colored animals. The backgrounds are mostly greens and blues, so the closest match would be the Green Batiks and Blue Batiks.

The new version uses the Rainbow Sherbet bundle for the background blocks – pretty pale pastel solids. They really do look like soft sherbet colors. 🙂 

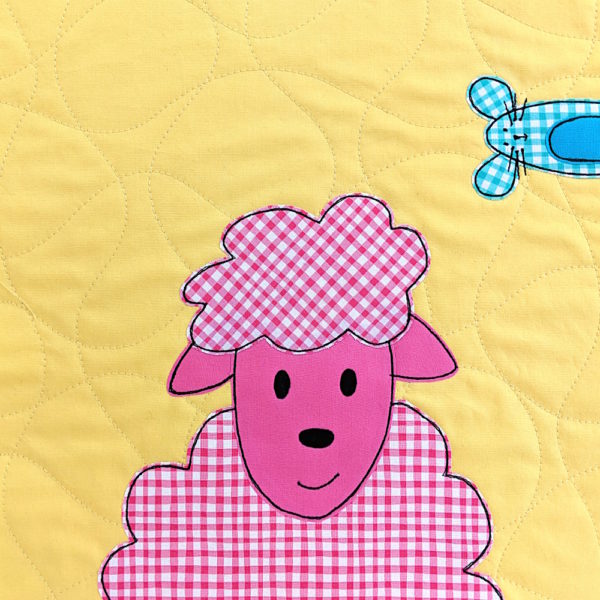
For the animals I went totally UNnatural with all kinds of fun colors and a wobbly, hand-painted gingham print. Here’s a close-up view of a silly pink sheep with a little turquoise mouse popping into the frame.

I love it!

That fabulous gingham print is called Gingham Play from Michael Miller fabrics. I sell bundles of my favorite Gingham Play colors here.

For the sashing I used Hash Dot in linen, also Michael Miller Fabrics. I liked how it has a slightly barn-ish feel while still balancing nicely with the soft pastel background fabrics. Sorry – I don’t sell that one in my shop, but you can search for Linen Hash Dot and lots of online sellers will pop up.

So there you go! New colors and a new layout for a totally new look for a favorite quilt pattern.

Want to know how to add that sashing? Here are the posts you’ll need for that.

Happy stitching!

Best,
Wendi

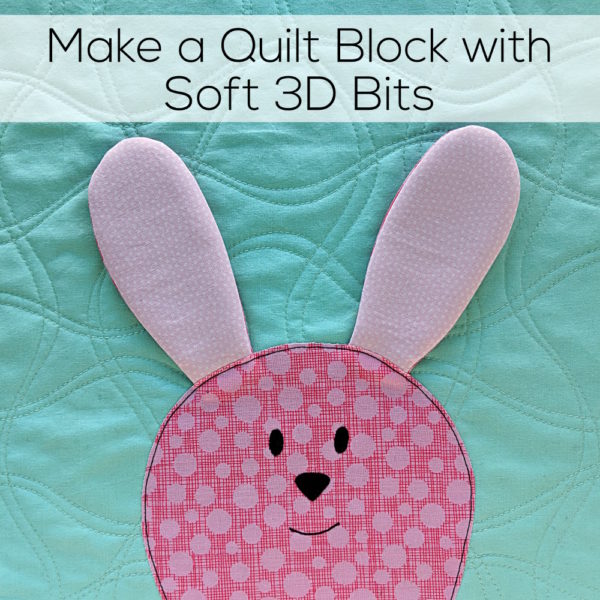
Make a Quilt Block with Soft 3D Parts – video tutorial

Make a Quilt Block with Soft 3D Parts - a video tutorial from Shiny Happy World

It’s so much fun to make a 3D quilt! You can add soft 3D embellishments to any applique pattern – like the bunny ears you see above.

There’s a post here showing how to add small 3D pieces to an applique quilt – teeth and small bear ears.

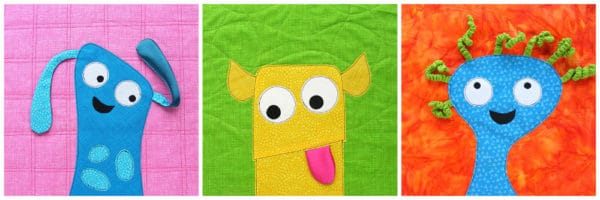
And I teach several 3D options in my Cute Quilt-As-You-Go Applique Monsters class on Craftsy. Here are a few examples showing flappy ears, a silly satin tongue, and springy elastic curls.

Applique quilt blocks with 3D pieces - tutorial from Shiny Happy World

You can see that these are mostly longer 3D pieces that you want to flap and dangle. But what if you want them to stand up – like bunny ears?

You can do that for quilts – just like you can do it for stuffed animals.  Here’s the tutorial showing how to make stuffed animals with stand-up ears.

The technique for 3D quilts is basically the same – but it’s a tiny bit more involved because applique template pieces have no seam allowances – and you need to account for that if you’re going to sew them into flappy ears.

Don’t worry – it’s easy. I show you how to do it in this video.

See? Not hard at all.

Get the free Mix & Match Bunnies pattern here. That’s the pattern I used for the bunny in the demonstration.

Here are links to all the posts showing how to applique with fusible adhesive – my favorite method. It’s fast and easy and (with the right materials) it holds up beautifully to rough use and repeated washing.

Here are links to special posts about eyes.

Here are links to some extra fun things you can do with your applique.

Other Applique Methods

Finished with this topic?

Return to the Let’s Make a Quilt main Table of Contents.

Move on to the lessons about outline stitching.

Happy stitching!

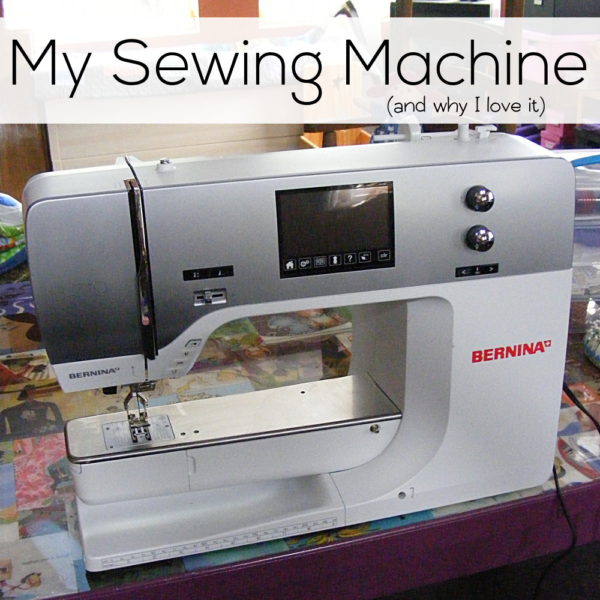
My Sewing Machine and Why I Love It

My Sewing Machine - a Bernina 710 - Shiny Happy World

I get a LOT of people asking me to recommend a sewing machine and I never really feel like I can answer that.

Before I recommended a fusible adhesive – I tested a bunch of different brands.

Before I recommended fabric paints or markers for eyes, I tested a bunch of different brands.

I just haven’t sewn on enough different sewing machines to recommend one. Plus – a machine that’s perfect for me might not be perfect for you. It all depends on what you like to sew!

What I CAN do is tell you what I sew on and why it’s perfect for me. 🙂

My current machine is a Bernina 710.

Before that I had a Pfaff Lifestyle (no longer made) that I really liked, but I went shopping for a new brand when we moved to the mountains and I was suddenly 3 hours from the nearest place that would service Pfaffs. So – number one – make sure whatever brand you buy is one you can easily get serviced. You should take your machine in once a year for a deep clean and you don’t want to have to drive for hours. 🙂

So – back to my Bernina.

I LOVE HER!

Here’s why. . .

I mostly sew quilts – and mostly applique – so these features knock my socks off:

  • I can set my machine to stop with the needle down and it automatically raises the presser foot halfway so I can pivot my work. This is my favorite feature!
  • My machine ties knots for me at the beginning and end of my stitching. And at the end of my stitching it also pulls the threads to the back and clips them. Magic!
  • I can adjust the amount of pressure on my presser foot – which is handy when I’m quilting really wavy lines without basting the layers first. This is also nice when I’m sewing softies and sometimes need to sew through 6 layers of cuddle fleece. 🙂
  • I love the built-in walking foot. I basically keep it engaged all the time.
  • It has a supersized bobbin which is great for quilting. Not as much running out of bobbin thread in the middle of a long line of stitching! (The next level up has an alarm that lets you know when you’re about to run out of thread – but I wasn’t willing to pay extra for that.)

It’s got a lot of general features that I really love too – not specific to quilting:

  • It’s quiet (for a sewing machine) and doesn’t shake the table too much.
  • It’s easy to change the needle and the feet.
  • It has a nice big slide-on table (not shown in the photo).
  • I don’t sew much clothing, but the free arm is great for sewing softie heads. (Most people use it for hemming pants and sleeves.)
  • It’s got a good strong light.
  • The controls are easy to use. (Though – honestly – it has a LOT of features that I never use.)
  • It handles any fabric I throw at it with no problems.

It does NOT have the built-in Bernina Stitch Regulator. I’ve tried it and think it’s pretty awesome, but I don’t do free motion quilting so I didn’t want to spring for that expense. I might try free motion in the future, though, so I made sure to get a model I could add that to at a later date.

My advice if you’re shopping for a machine is to test sew – a LOT. Do not be afraid to take up the people’s time at the sewing machine store! It’s a big investment and you should make sure you’re getting something that will work for you.

Bring in swatches of any specialty fabrics you like to sew with and make sure the machine you’re considering can handle them. I’ve heard several reports of Brother machines simply not feeding cuddle fleece through. We think maybe their feed dogs are less grippy than other brands? I LOVE using cuddle fleece for quilt backs so that would be a deal breaker for me – but it might not matter at all to you.

My last bit of advice is to ask other sewists. Nobody can recommend one machine above all others, but we can all tell you what we like and don’t like about what we use. The Shiny Happy People group is a great resource and I’ve seen many helpful discussions of different machines there. Hop in and ask about a machine you’re considering!

A few more helpful links. . .

If you’re choosing a sewing machine for a child, take a look at this post – How to Choose a Sewing Machine for a Beginner.

If you want to know how to clan and take care of your new machine, here’s a post that will help – Basic Sewing Machine Maintenance.

If you want a bit more info about what feet you might want to get for your machine, this post is helpful – Sewing Machine Feet.

Here are handy links to all the posts about quilting tools and supplies.

Sewing Machine

Iron

Rotary Cutting Tools

Scissors

Other General Sewing Room Supplies

One More Hugely Popular Post that Seems to Fit Here Better than Anywhere Else

Return to the Let’s Make a Quilt main Table of Contents.

Move on to the posts about choosing your quilt pattern.

Happy stitching!

How to Clean a Cutting Mat

blue rotary cutting mat with fuzz embedded in it

I love Quilt As You Go and use it for almost all of my quilts – but cutting the batting squares and then trimming the finished blocks to size makes a real mess of your cutting mat. All those cotton fibers get embedded in the mat and no amount of rubbing with a rag will get them out.

But there’s a really easy solution – easy, fast, and cheap.

rotary cutting mat with fuzz embedded in it and a white artist eraser

Yep. One of those inexpensive white artist erasers.

Just rub it on the mat wherever it’s fuzzy, like you’re erasing the fuzz.

blue rotary cutting mat with white artist eraser and balls of fuzz

It pulls all the fuzz right out of the cuts and balls it up so you can just brush it into the trash.

Easy peasy.

clean blue rotary cutting mat

In five minutes your cutting mat will look almost like new, all ready for your next quilt. 🙂

Here are some related posts about rotary cutting tools and how to use them. . .

Here are handy links to all the posts about quilting tools and supplies.

Sewing Machine

Iron

Rotary Cutting Tools

Scissors

Other General Sewing Room Supplies

One More Hugely Popular Post that Seems to Fit Here Better than Anywhere Else

Return to the Let’s Make a Quilt main Table of Contents.

Move on to the posts about choosing your quilt pattern.

Happy quilting!

Using Fabric Markers and Paints for Small Eyes

detail of applique dinosaur face with shiny black eye

For years I’ve been recommending fabric markers and paints as an option for people who don’t want to applique small eyes, but I’ve never recommended a particular brand.

Until now.

On a recent trip to Joann’s I grabbed one of every black fabric marker and paint they carried. Then I brought them home and tested them out on some dinosaur quilt blocks.

First, let’s talk about the markers. That’s definitely the easiest option for eyes.

Dinosaur eye made with a Tulip fabric marker - recommended by Shiny Happy World

Of all the brands I tested, I liked this Tulip fine-tip marker the best.

Tulip fabric marker - recommended by Shiny Happy World

It has a bullet tip, which is nice. I used the fine tip to outline the eye, and then filled in the center using the broader side of the tip. It took two coats (I let it dry between coats) to get the really opaque coverage I wanted – but that wasn’t a problem. Here’s a close-up of the finished eye.

Dinosaur eye made with a Tulip fabric marker - recommended by Shiny Happy World

Nice tip. No bleeding. Good coverage.

Now – what if you want to get a little fancy with a 3D eye?

Applique Dinosaur eye made with Scribbles fabric paint - recommended by Shiny Happy World

About a year ago I got an email from a customer telling me she had done her eyes using fabric paint, and I’ve been wanting to test that out ever since. I think she had used a puff paint, but I wanted to try the shiny finish, thinking that would add a nice spark of life to the eyes.

I tested out several brands and this one from Scribbles was my favorite.

Scribbles fabric paint - recommended by Shiny Happy World

The black was truly black, not just dark grey. It had a nice shine on it after it dried, and the bottle has a VERY fine tip which made it easier to control. It does take a little skill to use these squeeze bottles – I recommend practicing on some paper before you try it on your almost-finished blocks.

Here’s a close-up of a finished eye.

Dinosaur eye made with Scribbles fabric paint - recommended by Shiny Happy World

A couple of things to note. . .

This finishes to a nice smooth dome – but be aware that the dome is a lot taller when the paint is wet. It will compact down as it dries.

I tried – and was unable – to pick off the eye after it was dry. Just a little testing for kids who like to pick at textures like this. 🙂

You won’t be able to iron over the applique after you apply the paint – your iron will melt it. So you need to fuse down all the applique pieces, then outline stitch, then paint the eyes. You could possibly paint the eyes before outlining, but some of the edges of the dinosaur heads are pretty close to the eyes and I was afraid the rubbery eyes would grab at my presser foot and keep things from flowing smoothly.

Yes – it’s more than a little nerve-wracking to add paint to an otherwise finished block. I wasn’t joking about practicing on paper first. It took me a few eyes to get a feel for how it squeezes out of the bottle.

So there you go – my favorite fabric markers and paints perfect for small eyes if you don’t want to do tiny applique. 🙂

There’s a round-up of all my different ways to do the eyes here.

And you can find that dinosaur quilt pattern here. 🙂

Here are links to all the posts showing how to applique with fusible adhesive – my favorite method. It’s fast and easy and (with the right materials) it holds up beautifully to rough use and repeated washing.

Here are links to special posts about eyes.

Here are links to some extra fun things you can do with your applique.

Other Applique Methods

Finished with this topic?

Return to the Let’s Make a Quilt main Table of Contents.

Move on to the lessons about outline stitching.

Happy quilting!

Silly Sloth Fabrics

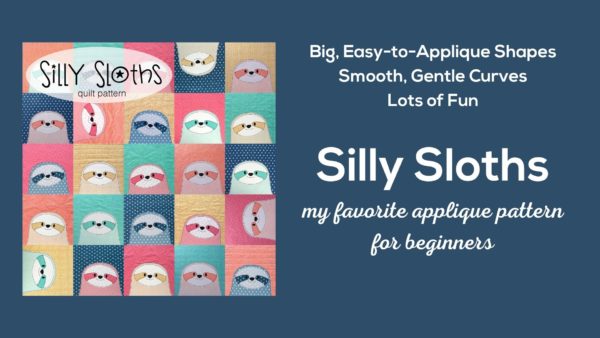
Silly Sloths Quilt Pattern from Shiny Happy World

A lot of people have asked about the fabrics I used for the Silly Sloths quilt pattern.

They’re all from Dear Stella Design.

I used five different prints, with three colors (a dark, medium and light) for each print.

I used the darks for the background blocks and the eye patches.

I used the mediums for the bodies.

I used the lights for the faces.

I used solid black for the eyes and noses.

Here are the specific prints I used. . .

Scallop Dot Fabrics from Dear Stella

Scallop Dot

  • dark – Tangerine
  • medium – Sorbet
  • light – Whisper

Wee Gallery Hearts fabric from Dear Stella

Wee Gallery Hearts

  • dark – Turquoise
  • medium – Mint
  • light – Smoke

Positive fabric from Dear Stella

Positive

  • dark – Ink
  • medium – Atlas
  • light – Smoke

Net fabrics from Dear Stella

Net

  • dark – Mustard
  • medium – Butter
  • light – White

Polka Dot fabrics from Dear Stella

Polka Dot

  • dark – Coral
  • medium – Blush
  • light – Silver

Here’s a photo showing the binding and a bit of the back.

Finished Sloth Quilt - pattern from Shiny Happy World

I used charcoal Cuddle Fleece for the back and Steam Texture in Smoke (also from Dear Stella) for the binding.

Happy quilting!

Best,
Wendi
Wendi Gratz from Shiny Happy World

Working with Flannel Fabric – Durability

Working with Flannel - I found some that doesn't pill


When I told folks that I was working with flannel on my next quilt, I got a lot of questions.

How do you keep it from pilling? Is it going to hold up to a lot of use? What about durability?

I got some variation of this question over and over and over again.

I understand! When my daughter was little, I made her a lot of pajama pants using all of those cute flannel prints you can find at the fabric store. Sometimes they held up really well, and sometimes they were very badly pilled after just one washing. And it seemed so random!

A lot of people also wanted to know about how well flannel would work for raw edge applique – particularly how badly it might fray.

I was worried about that too! So I decided to run a test.

I made two sample blocks – one flannel background with a cotton applique, and another flannel background with a flannel applique.

I tossed these blocks in every load of laundry I did for the last month. Everything – clothes, towels, sheets – everything. I put the blocks through both the washer and dryer with each load. That’s a lot of laundry and a pretty rugged test.

I was stunned by the results! In a good way. 🙂

Flannel background and cotton applique - a durability test

Here’s the flannel background with the cotton applique.

No pilling! Not even a tiny bit! It gets a beautiful crinkle and the applique looks great. And did I mention that there’s no pilling?

Flannel background and flannel applique - a durability test

And here’s the flannel block with the flannel applique.

No pilling – and no additional fraying on the applique!

I really expected to see more fraying around the edges but it’s pretty much the same as the smooth cotton.

The only difference I see is that the black outline and mouth line get a teeny bit lost in the fuzzier flannel surface. When I make a finished quilt (get the Peekaboo Bears quilt pattern here) I’ll use 12 wt. thread to outline the applique to get a slightly thicker line.

You know why the results are this good? I used good quality flannel! It makes such a difference.

For this test I used flannel from Timeless Treasures – a well-established manufacturer sold in quilt shops. I’m so excited with how terrific the results are that I’m planning two quilts using it.

The first is a remake of the Peekaboo Bears quilt with flannel backgrounds and non-flannel applique. Here are just a few of those blocks.

Peekaboo Bear quilt in progress from Shiny Happy World.

And someday I’m going to make an applique rag quilt. Oh yes! I think it’ll work great to use my applique patterns for a rag quilt and I can’t wait to give it a try!

Update! I made the applique rag quilt and it turned out great! So cuddly and soft! There’s a tutorial here showing exactly how I made it.

Here are links to all the posts about choosing fabric.

And here are links to posts about using specialty fabrics.

Finished with this topic?

Return to the Let’s Make a Quilt main Table of Contents.

Happy quilting!

Tips for Quilting a Cuddle Fleece Back – video tutorial

 alt text


I love using cuddle fleece for my quilt backs.

When I made the first cat quilt for my daughter Jo, she asked for cuddle fleece on the back. Until then I had only used it for stuffed animals, but she thought it would make an exceptionally cuddly quilt.

She was right.

After sleeping under it the first night she came to me and very seriously said, “Mommy. You should never use anything else on the back of your quilts.”

She was right again. 🙂

Wonderfully – I’ve found that it’s no harder to work with than a woven fabric on the back!

Note – I’ve heard from a few people with Brother machines that they do NOT like pulling the cuddle fleece through. We think it might be that the Brother feed dogs are less “grabby” than other manufacturers? Just be aware – if you have a Brother machine you may need to give it some extra help to get it to move through the machine.

A lot of people have asked me whether they have to do anything special to use cuddle fleece on the back of their quilts.

  • Do they need to use a special needle?
  • Do they needle to use a particular thread?
  • Do they have to use a walking foot?
  • Can I show actually doing some of the quilting?
  • Can I show what it looks like from the back?

I can show you all of that!

I’ve made a bunch of these now and I’ve found that I don’t really need to treat it any different from using a woven fabric background. In fact – I think it’s even less likely to get tiny folds or puckers in it. 🙂

A note about the fluff. . .

By the time I get to the backing/quilting/binding step of a project I’m always super excited to finish – and I don’t take the time to tumble the backing in the dryer to get rid of the fluff on those cut edges. 😛 If you’re more patient than me. . .

  • Cut the backing to size
  • Toss it in the dryer on air dry for 15-20 minutes. That will pull almost all of the fuzz off the edges and catch it in the lint trap.
  • Proceed as normal – baste, quilt and bind wearing whatever you want and not worrying about getting too messy. 🙂

Cuddle fleece makes an extra cuddly quilt with (in my opinion) the perfect weight. And it washes and wears beautifully!

Here are all my posts about layering and basting your quilt, and the final round of quilting.

Here are all my posts about hand quilting and Big Stitch quilting. I don’t use these techniques with fusible applique or Quilt As You Go, but I LOVE using Big Stitch Quilting with my cheater fabric.

Finished with this topic?

Return to the Let’s Make a Quilt main Table of Contents.

Move on to the lessons about binding and finishing your quilt.

Happy quilting!