I loooove using Cuddle Fleece for making softies!
I discovered it at Quilt Market last year and fell in love – and then couldn’t find it in any shops. It was even hard to find online! So I ordered a few bolts to carry in my shop and I’ve been using it for softies and quilt backs ever since.
Update – I’m not able to carry Cuddle Fleece in the shop anymore, but I found a good substitute! More details here.
It’s mostly very easy to work with – similar to polar fleece – but I do get some questions about it. Here are the answers to the most frequently asked questions. . .
It’s so shifty! How do you keep the layers from moving around?
The layers come in two times in the process – when you’re cutting and when you’re sewing. I prefer to cut mine one layer at a time instead of folding and cutting through two layers. That way I get the most accurate cut possible. Do be sure to flip the pattern pieces for the second cuts so you’re still getting one reversed!
When you’re sewing two layers together you have to deal with layers. There’s no way around it. That’s when I use Wonder Clips. You can use pins instead, but Wonder Clips handle the fat fabric really well and without distorting the layers at all. You can clip them really close together (every inch or so) and just sew slowly, unclipping each one as you get to it.
It’s so fat! Do I have to do anything special to sew through it?
Cuddle Fleece shares one of the same challenges as polar fleece.
It’s fat.
The thickness of the fabric can make the layers shift while you’re sewing – especially when you’re sewing through two layers plus the additional layers of an arm or leg in there. There’s a video showing how I deal with the fatness here. It’s specifically about polar fleece, but all those tips also apply to Cuddle Fleece.
Do I need a special needle?
I sew mine with a basic universal needle and have no problems. If you find your machine is skipping stitches I recommend switching to a stretch needle.
If you have a walking foot – use it!
If you don’t have a walking foot – pin like crazy.
Which is the right side of the fabric?
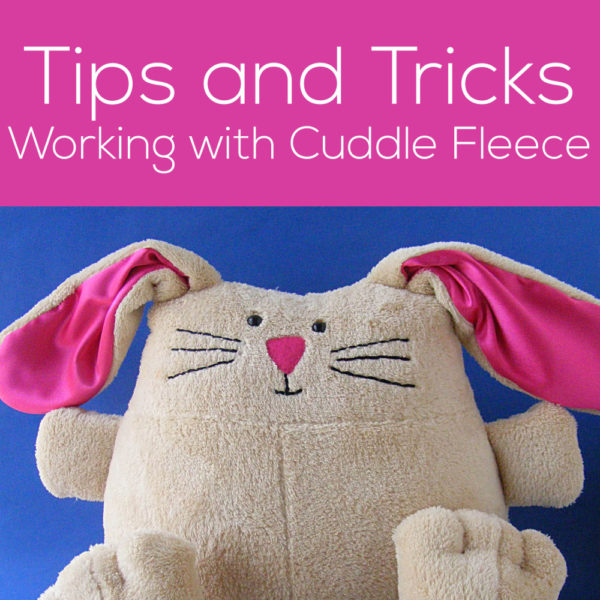
They’re both good – but they are different. You just have to choose what works best for you for a particular project. One side has a shorter, smoother pile. That’s the one I often choose as the “right” side. It’s what you see on the bunny up there.
The other side is a little shaggier looking. The pile is a bit longer, and a teeny bit more irregular. Use this as the right side when you want a rougher look.
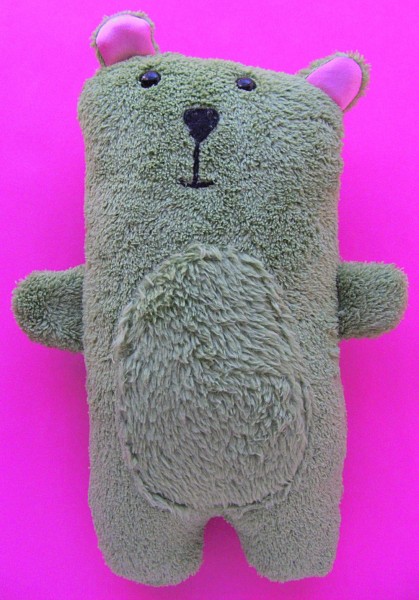
You can also combine the two textures in one softie like I did with that green Bailey Bear. I used the shaggier side on his belly patch.
How do you mark on it?
Cuddle Fleece, like polar fleece, can also be difficult to mark on. With polar fleece the problem is that it’s basically made out of plastic, so markers tend to bead up on it, take a long time to dry, and smear easily when wet.
The problem with marking on Cuddle Fleece is that it has a bit of a nap to it.
Marking eyes is easy – I just punch holes in my pattern piece and then mark through the holes with a fabric marker.
Marking lines is a bit trickier. For them I turn to The Magical Embroidery Stuff (aka Sulky Sticky Fabri-Solvy).
Seriously – is there anything this stuff isn’t good for?
For the bunny you see at the top of the post I marked the eyes as mentioned above. I could have eyeballed the nose and mouth, but I wanted to make sure I got those whiskers balanced. That meant sticking to my pattern piece exactly as drawn. 🙂
I traced the entire face on a scrap of Sulky Sticky Fabri-Solvy and then stuck it down to the fabric, using those eye markings to guide my placement.
Yes – it sticks just fine to the Cuddle Fleece. It’s amazing stuff!
I embroidered right through the stabilizer, then soaked it away in cold water and tossed it in the dryer for a quick dry and fluff.
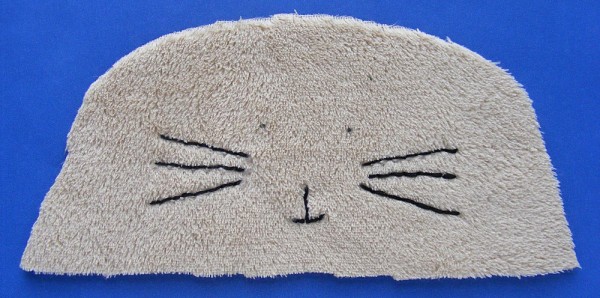
Perfect! And since I used a fabric marker to mark those eyes, the dots are still there after rinsing The Magical Embroidery Stuff away.
The fluff! Is there any way to keep the fluff under control?
That’s the most common question people have. Cuddle Fleece is fluffy and soft – and when you cut it that fluffiness can go everywhere!
When I cut pieces to make a softie, I walk them straight to the dryer and toss them inside. I tumble it all with no heat for about 10 minutes. When I pull them out – all the fluff is gone. The edges won’t fray after cutting, so once you get that initial cutting fluff off, you can continue work on the rest of the project with no more shedding.
Awesome!
If you have any other questions about this lovely fabric, just let me know in the comments. I’ll either update this post or (if there are enough additional questions) I’ll do a follow-up post.
Here’s one of those follow-up posts. 🙂 A video answering lots of reader questions about using cuddle fleece for quilt backs. Watch it here.
Happy sewing!

