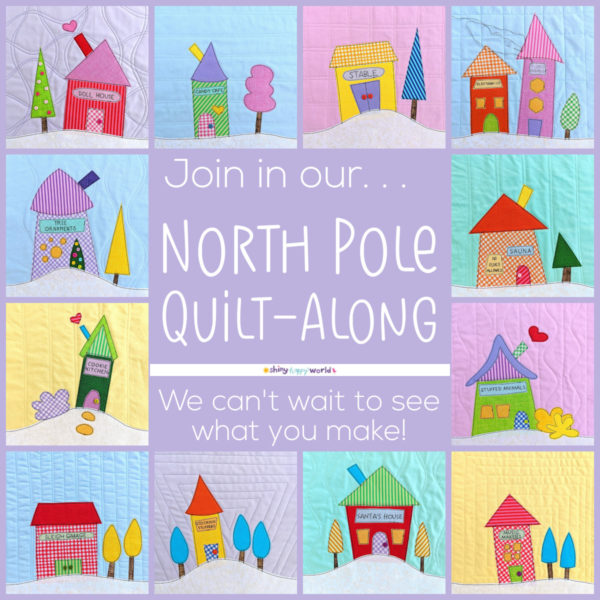
North Pole Quilt-Along

Ready for a fun project? We’re having a Quilt-Along through the end of the year!

Build a house! Or two. Or a whole neighborhood. 🙂

I’m going to make a quilt – but you can make anything you like. Here are a bunch of free patterns that would work great with these houses.

Get the Shiny Happy Houses quilt pattern here.

Get the free signs to make North Pole buildings here.

I’m also going to add sashing strips between my rows of houses, to make an extra snowy landscape. ☃️ There’s a tutorial showing how to do that here.

Tag your photos #WinterCAL2019 and post them to the Shiny Happy People group. The Winter Craft-Along is a larger craft-along for projects that use any Shiny Happy World or FreshStitches winter or holiday pattern. There will be lots of prizes in lots of different categories – including a prize just for North Pole projects.

Happy stitching! I can’t wait to see your houses!

Best,
Wendi

A New Version of the Noisy Farm Quilt!

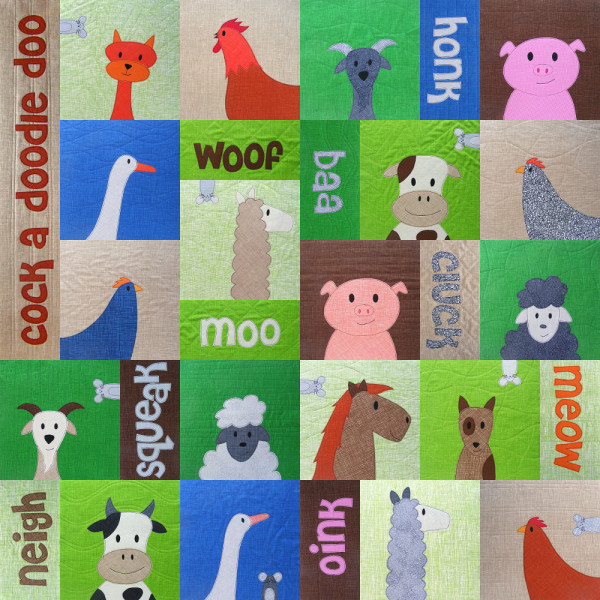
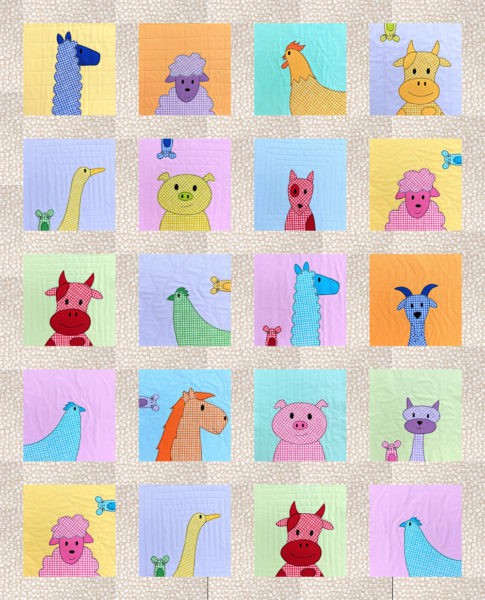
Noisy Farm Quilt pattern from Shiny Happy World

I’ve gotten a lot of questions lately asking for suggestions for the background colors of the Noisy Farm quilt pattern.

The cover sample you see above is from before I had fabric bundles in my shop, and most of the fabrics I used are no longer available.

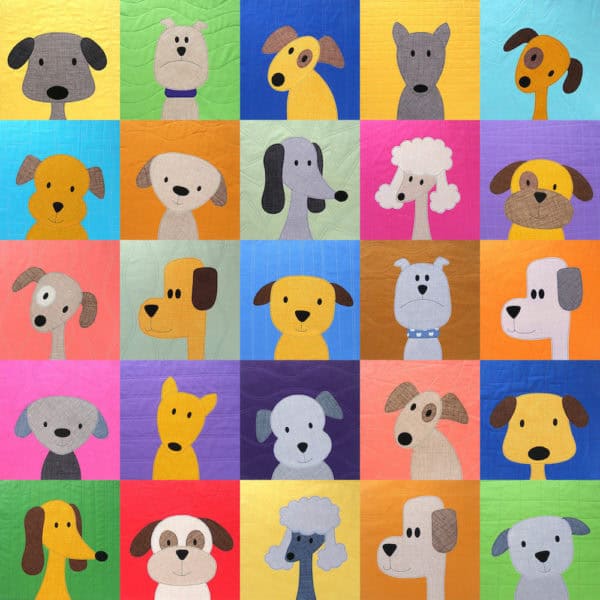
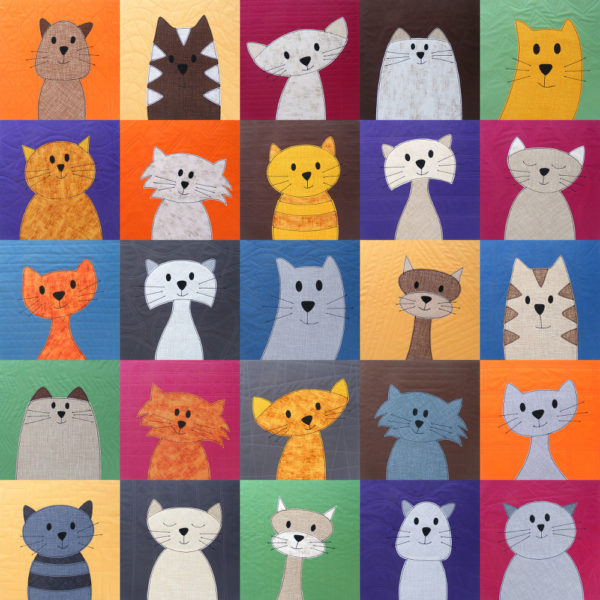
One of the things I love about the way I do fabric bundles now is that you can use any bundle for any quilt. Here’s an example of three quilts that all use the Warm Neutrals fat quarter bundle for the animals – but different bundles for the background colors.

Here are the Playful Puppies made with Solid Rainbow for the background blocks.

And here are the Cuddly Cats with the slightly-more-grownup-but-still-colorful Box of Crayons for the background blocks.

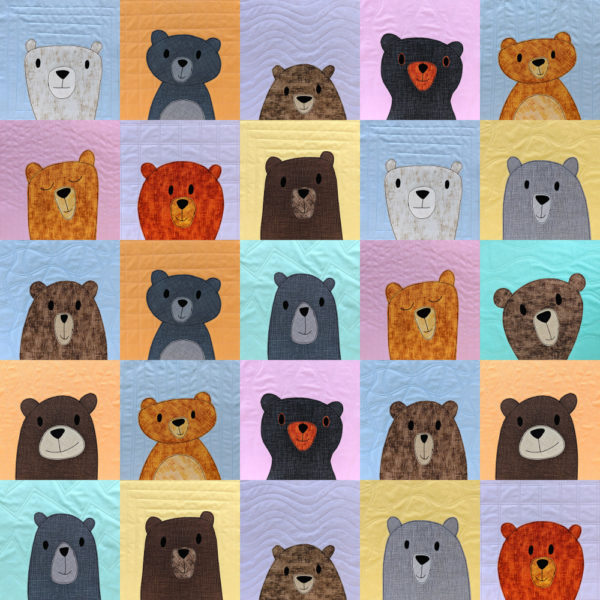
And here is the Bunches of Bears pattern made with the Rainbow Sherbet bundle for the background blocks.

See what a difference?

Changing just the background colors really changes the whole feel of the quilt – and I love them all!

So when people ask for suggestions for background colors for the Noisy Farm pattern – I want to tell them they can use anything! Go totally bright with the Solid Rainbow! Go a little more subdued with Box of Crayons! Go baby sweet with Rainbow Sherbet! Go natural with Green Batiks! Want even more suggestions? Go to the Noisy Farm pattern listing and look at the additional photos. There are a bunch showing finished quilts that other people have made with different fabrics than my samples.

For my new version of the Noisy Farm quilt I used Rainbow Sherbet for the background blocks. I went totally wild with the animals and using the Gingham Play fat quarter bundle. Gingham always says “farm” to me and I can’t wait to make the animals in fantasy colors.

Pastel version of the Noisy Farm quilt pattern

One more change – I made this one a silent farm. 🙂 I left off the half-blocks with animal sounds and added sashing. I get a lot of requests about adding sashing to a Quilt As You Go quilt. There’s a tutorial here showing how you can reset (almost) any of my quilt patterns with added sashing. I even did the math for you for all the sizes. 🙂

If you’ve made any of my quilt patterns using a different color scheme – please share! Seeing all the different versions of my patterns makes me Muppet-arms-flailing happy – and it’s a great resource for your fellow makers out there to see different options. 🙂

Happy stitching!

Best,
Wendi

Playing with Improv Piecing – Stripes

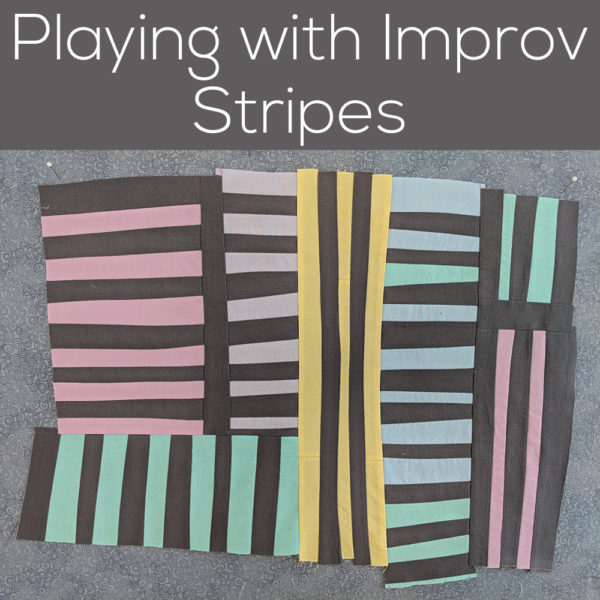
Playing with Improvisational Piecing - Stripes (from Shiny Happy World)

I finished my design wall (you can get instructions here) and immediately started sewing some blocks to pin up there.

You see – I have a specific project in mind and I’m sooooo eager to get to it!

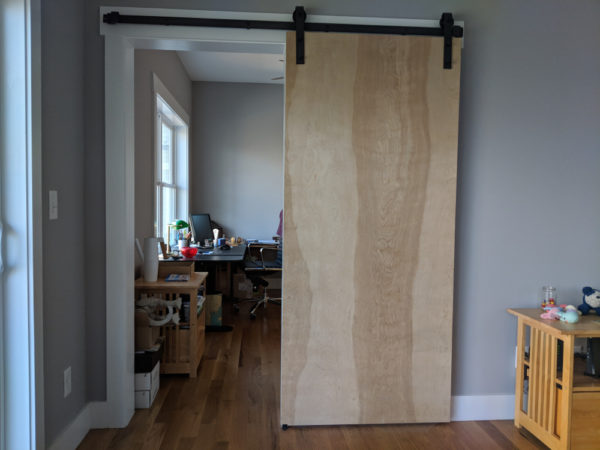
This is the door between my office and my husband’s office.

barn door before upholstering with improv quilt - Shiny Happy World

I love that barn door – and from the very beginning we planned to cover it with a quilt. Basically, I’m going to make two quilts – one for the front and one for the back, and I’m going to hand-sew the door into them (like a model on Project Runway) with a strip of solid fabric all around the thickness of the door.

I want to improv piece the quilts – but I’ve never really done that before. So I want to practice a bit and try some things out before I start on the big door project. And for that – I really wanted to have a design wall. It helps so much to be able to see the design straight on as it’s growing!

For my practice pieces I’m making some placemats. Each one will use a different basic shape so see what I like – and what’s fun to do. 🙂

I’m starting with stripes. I love stripes!

Here are my rules for this one. . .

  • No rulers. I’ll use my rotary cutter and scissors – but no rulers, either for measuring or cutting. I want my lines to be slightly wobbly/crooked.
  • A limited color palette of rich grey mixed with pastels. (All the pastels are all from my Rainbow Sherbet fabric bundle. Such pretty colors!)
  • Big Stitch quilted with really dense stitching. Yay! I haven’t done any big stitch quilting for months and I’m itching to get back to it.

The first thing I did was measure out a space on my design wall – a little bigger than a placemat needs to be – and mark the four corners with pins. That way I can see what space a need to fill.

Then I started cutting and sewing. Remember – no rulers. I just grabbed some pastel scraps, cut a chunk of grey, cut them into strips, and sewed them together. This is so much fun! Once a finished a little chunk of pink, I moved on to other colors. Here’s a super short video showing each little chunk going up onto the wall.

After I was happy with all the chunks, I sewed them together. Easy peasy – nothing fancy.

At the end of the video you see it hooped up in a square frame all ready for stitching, stitching after one evening, and stitching after two evenings. So here’s a little more info about that part of the process.

It’ll probably take me about a week to do the quilting on this piece. It’s small (standard placemat size) but I only get to do hand work for an hour or two most evenings.

Happy stitching!

Best,
Wendi

Shiny Happy Haunted Houses

Haunted Houses - quilt pattern from Shiny Happy World

If you have the Shiny Happy Houses quilt pattern, you can use it to make a whole different quilt just by switching out the fabrics. Make a fun haunted house quilt!

For this block the arch templates that I usually use for doors and windows became fun tombstones! I used ghost and creepy eyeball buttons for extra Halloween fun. And of course – the Halloween-themed fabrics make it easy. 🙂

There’s a tutorial here showing how to do some fussy-cut applique.

Shiny Happy Haunted House with fussy cut trick-or-treaters. Fun!

That’s how I made these adorable trick-or-treaters!

It’s Haunted House Week here at Shiny Happy World. The Shiny Happy People group on Facebook is already on board – I’ve seen two awesome haunted houses over there already!

Happy Monday!

Best,
Wendi
Wendi Gratz from Shiny Happy World

A Peek at My Shiny Happy Neighborhood-in-Progress

Shiny Happy Houses Quilt Club - the blocks so far

I’m putting the finishing touches on the new house block patterns going out this weekend and I thought I’d share a look at all my house blocks so far. Remember – I’m working on three different house quilts in three different styles and color palettes. Most people in the club are only making one. 🙂

Up top is my whimsical neighborhood – with houses in colors that most people don’t use in real life. I love them! There’s an extra house in this group because it’s what I used to make the video demo showing how to put everything together. 🙂

Shiny Happy Houses Quilt Club - the blocks so far

This is my more conventional neighborhood. The houses are still wonky and fun, but the colors are more like what you’d see driving down the streets of an actual neighborhood.

Shiny Happy Houses Quilt Club - the blocks so far

And this is my gingerbread quilt. 🙂 All the houses are gingerbread color with candy trim and lots of extras – like beading, extra stitching, buttons, and rickrack “snow” on the roof.

I’m having so much fun with these blocks! And it’s been absolutely fantastic to see the houses that members are making! Pop into the Shiny Happy People group on Facebook to see! Here’s just one fabulous example – this one from Terri.

Terri's awesome houses from the Shiny Happy Houses quilt club

Want to join the club? It’s never too late! If you sign up now you get instant access to all the pattern pieces and all the emails that have gone out so far. The next mailing goes out this Sunday 4/3.

Updated – The club has finished, so if you order the pattern now you get it all in one big download.

Get the Shiny Happy Houses pattern here.

Happy quilting!

Best,
Wendi
Wendi Gratz from Shiny Happy World

Controlled Chaos Scrap Quilt – The Last Block!

Controlled Chaos Scrap Quilt - the last block!

Here it is! The very last block in the Controlled Chaos scrap quilt!

What You’ll Need

  • 52  two-inch squares in color A (shown in purple)
  • 48 two-inch squares in color B (shown in green)

Instructions

Use 1/4″ seam allowances for all sewing.

Press all the seams as you go. I’m pressing mine open for this quilt. I think it will make things simpler in the end.

Arrange your squares according to the diagram below.

block 20 template

For this block I worked in big chunks. I sewed things up in the following order. . .

  • Sew all your individual squares into pairs of matching colors. You should have 26 purple pairs and 24 green pairs.
  • Sew the purple pairs into 2 x 2 squares.
  • Pull out four of those purple squares. Sew two green pairs to opposite sides of each purple square. Sew the remaining green pairs into eight 1 x 4 rectangles.
  • Sew these rectangles to the top and bottom of your purple squares, so that there’s a green ring around each of the four purple squares.
  • Sew the rest of your purple squares into one 2×10 rectangle and two 2 x 4 rectangles.
  • Sew a 2 x 4 purple rectangle between two purple/green squares. Repeat with the last 2 x 4 purple rectangle and the last two purple/green squares
  • Assemble your chunks in rows and sew the long 2 x 10 purple rectangle between your other two rows.

Finished!

Well – finished with the blocks. 🙂 I still need to join them all together with sashing strips between them and then quilt the whole thing. Here’s what it’s going to look like. . .

Controlled Chaos Scrap Quilt

I’ll have a tutorial showing how to do the sashing strips (there’s a little trick to that!) and then tutorials showing basic hand quilting, quilting without marking, and big stitch hand quilting. Yes – I’m going to spend the winter hand-quilting this beauty!

But all of that is going to have to wait just a little bit. I have a new and improved website that I’m really close to launching, so that’s taking a lot of my attention behind the scenes these days. It’ll be worth it! While you wait – finish all your blocks!

Remember – you don’t have to make your quilt the same size or number of blocks as my quilt. You can make fewer quilts for a crib size, or repeat some of the designs in different colors (or make up your own additions!) for a larger quilt. Mine is going to be just the right size for curling up on the couch. 🙂

Click here for all the Controlled Chaos posts.

Happy piecing!

Best,
Wendi

Block 12 in the Controlled Chaos Scrappy Quilt-Along

Block 12 in the Controlled Chaos Scrappy Quilt-Along

Here’s block #12 in the Controlled Chaos Quilt!

What You’ll Need

  • 64  two-inch squares in color A (shown in red)
  • 36 two-inch squares in color B (shown in yellow)

Instructions

Use 1/4″ seam allowances for all sewing.

Press all the seams. I’m pressing mine open for this quilt. I think it will make things simpler in the end.

Arrange your squares according to the diagram below.

Block 12 in the Controlled Chaos Scrappy Quilt-Along

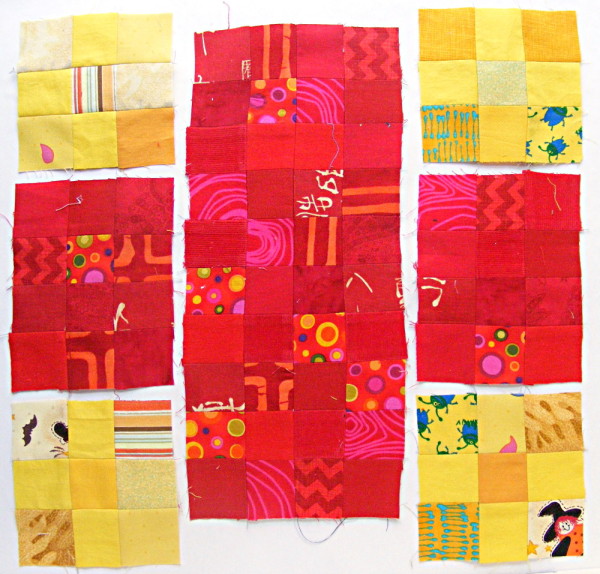
For this block I sewed things up in chunks in order to keep the edges of each color perfectly straight, even if my seams weren’t lined up perfectly.

We’re going to sew the whole thing into three fat columns, but we’re going to sew some parts of those columns into chunks first.

1. Sew up four yellow 3×3 squares.

2. Sew up two red 3×4 rectangles and one red 4×10 rectangle.

Arrange those chunks as you see below.

Block 12 in the Controlled Chaos Scrappy Quilt-Along

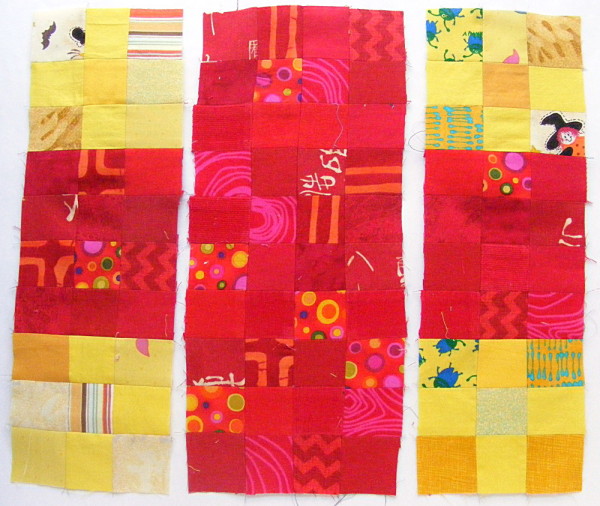
Now sew all those chunks into columns.

Block 12 in the Controlled Chaos Scrappy Quilt-Along

Finally – sew those three columns into one fabulous block. 🙂

Here’s what my twelve blocks look like so far. Just eight more to go!

Controlled Chaos scrappy quilt-in-progress

Click here for all the Controlled Chaos posts.

Happy piecing!

Best,
Wendi
That's me!

Making a T-shirt Quilt – Part 4

Today I’m going to share a bit of problem-solving with you for your T-shirt quilts.

Most T-shirt designes are pretty well centered, with some room all the way around.

But sometimes the design of a T-shirt goes right up to the armhole, making it difficult to cut a square corner and get all the important bits.

Take, for example, this Fraggle design.

Making a T-shirt quilt

I cut this out as close to the arm seam as possible, but Mokey Fraggle is right up against the cut. The sleeve fabric was kind of yucky and worn there – so I definitely wanted to cut it away – but I didn’t want to lose Mokey!

I made the cut and did the interfacing as though there was fabric there. (I didn’t press that loose corner of interfacing – that would have fused it to the ironing board. I just left it unpressed while I fused the rest down.) Then I cut out the image – again pretending that there was fabric in that corner.

Of course, the next step is to sew in some real fabric to replace the pretend stuff. 🙂

Making a T-shirt quilt

I cut a strip of fabric big enough to cover the missing corner, laid it along the edge of the armhole cut, and sewed it in place with a straight seam.

Making a T-shirt quilt

Then I flipped the strip over the corner and pressed the seam flat (from the back so I didn’t smear the image).

Making a T-shirt quilt

Trim the corner to square up the block.

Making a T-shirt quilt

Then frame it out just like all the other blocks.

Problem solved!

I ran into the same issue with the Nyan Cat T-shirt.

Making a T-shirt quilt

And solved it the same way. 🙂

Here’s what the blocks look like so far.

Making a T-shirt quilt

I’m hoping to finish all the blocks this week, so next week will be joining, basting, quilting and binding. In my dreams I’m handsewing the binding while I watch Diane Gilleland’s T-shirt Quilt class and learn all the things I could have done better. (It looks amazing and it’s free! Sign up here and watch with me!) In reality I’ll probably be doing it in the car on the way to drop Jo off at school. 😛

Read all the posts about my T-shirt quilt here.

Happy quilting!

Best,
Wendi
Applique Wendi (with fabulous hat)

Making a T-shirt Quilt – Part 3

Making a T-shirt quilt

Here’s where things stand right now on Jo’s T-shirt quilt. I’ve fused the interfacing and cut images from all the T-shirts in the stack, and I’ve got finished, framed blocks for eight of them.

I wrote about the tools and supplies I’m using for this quilt here.

And I wrote about the hows and whys of the interfacing here.

Today I’ll show you how I’m framing the images to make uniform blocks.

The shirts I’m using in this quilt range from children’s XS to men’s XL. That, my friends, is a big range of sizes.

There are some amazingly complex T-shirt quilts out there that fit all those sizes together like a jigsaw puzzle. You can see some of them in this Pinterest board I’ve been building.

Frankly – the thought of planning that out made my head hurt. And then the cutting and piecing would have to be really precise and I would be quickly getting far away from the kind of quilts I like to make.

(One of the things I’m most eager to hear in Diane Gilleland’s class about T-shirt quilts is how she plans the layouts. Her T-shirt quilts have a lovely harmony and simplicity to them, and I can’t figure out how she does it just by seeing the finished quilts. I can’t wait to learn more about her approach! RSVP for the free video workshop happening on August 21 and 22 and take the class with me!)

Until I learn Diane’s magic secret – I decided to keep things simple.

1. I already own a 15 inch square ruler – so all the blocks will be 15 inch square blocks. Easy.

2. I cut the T-shirt images whatever size works best for the image. Then I add fabric around the image until it’s bigger than 15 inches. Then I use that handy-dandy ruler to trim it to the exact right size.

Today I’m going to show how I do that framing.

Here’s where we left off in the interfacing post.

Making a T-shirt quilt

The T-shirt has interfacing fused to the back and it’s trimmed where I like it.

I hit my stash and pulled some blue that very closely matched the blue of the T-shirt.

My original plan was to use contrasting fabric for the frame – like pulling out the green of her tail or the orange of her hair – but in the end I decided that would be too busy. I want the focus to be on the T-shirt images, so my frames add a bit of extra texture (none of them are solids) without adding additional color.

I added strips all the way around the image until the block was bigger than 15 inches. I added strips to the top and bottom first, then pressed it and added strips to the two sides and pressed again.

You can add to the sides first and then the top and bottom. Or you can work your way around the block log-cabin-style. It doesn’t really matter – just get fabric on all four sides.

Press all your seams away from the T-shirt center. And press everything from the back so you don’t smear your image!

Making a T-shirt quilt

Here’s the framed block with my 15 inch ruler set on top so you can see the extra all the way around.

Now – position that ruler where you want it and cut around all four sides. I wanted my blocks off center – but straight – so I lined one of the ruler lines up with a seam between the T-shirt image and the frame so everything stays nice and straight. If you look closely (click on the image to zoom in) you can see that the one-inch line on the ruler is lined up with the seam on the right side of the block.

I think it would be fun to have the images at interesting angles in the quilt, but Jo wanted them straight. 🙂

Making a T-shirt quilt

And here’s the finished block!

You can see I added wider strips to some sides, and narrower to others. I don’t want the image centered in the block, so unevenness is good. Also – then I don’t have to measure anything. 🙂 The effect is even more noticeable in some of the blocks with smaller images. Scroll back up to the top of the post to see the rest of the blocks so far.

Tony the Tiger was the only image big enough to cut 15″ square with no framing – so he’s in there just just from the T-shirt. Everything else is getting at least some framing.

Next week I’ll be back with a post about handling T-shirts whose images go right up to the armholes.

See all the T-shirt quilt posts here.

Happy quilting! Have a great weekend!

Best,
Wendi
Applique Wendi (with fabulous hat)


Making a T-Shirt Quilt – Part 2

How to Make a T-shirt quilt

Yesterday I wrote a bit about the tools and materials I’ll be using to make Jo’s new T-shirt quilt.

Today I’m actually getting started!

As I mentioned yesterday – the main challenge in making a T-shirt quilt is that T-shirts are stretchy. Stretchy fabric is usually the LAST thing you would choose to make a quilt. It stretches – which makes precise measuring hard. And the edges curl when they’re cut which is really annoying.

So the first step is to make your stretchy T-shirts no longer stretchy.

For that I used interfacing.

Specifically – Pellon 906F. It’s the lightest weight interfacing I could find.

Here’s how the interfacing works. . .

The Pellon 906F is a fisuble interfacing. That means you iron it to the back of your fabric and it creates a permanent bond. You’re basically gluing a non-stretchy fabric to the back of a stretchy fabric – which makes the stretchy fabric no longer stretchy.

Clever!

I chose the lightest weight interfacing I could find because I didn’t want to make my fabric overly heavy or stiff. With the 906F it still drapes nicely – so that’s good!

Here’s the step-by-step. . .

Step 1 – Cut away the front of the shirt

How to Make a T-shirt quilt

I cut right up the side seams and across the shoulder seams, as close as I could get to the seams without being too crazy fussy about the whole thing.

Step 2 – Add interfacing

How to Make a T-shirt quilt

See the interfacing peeking out where the armholes were? That gives you a sense of how big I cut the piece of interfacing. From the back it’s just a big square of white fabric stuck to some blue fabric – not the most useful image.

Cut a piece of interfacing larger than the image on the front of your shirt.

Lay the shirt front face down on your ironing board.

Iron the interfacing to the back of the image. Follow the package instructions as best you can.

This involves slowly counting to ten over and over and over and over again. It’s very boring – but it’s not hard and it’s what makes the whole thing work. Just listen to some music or a podcast or watch TV while you do it. 🙂

Important note – the instructions for the Pellon 906F say to flip the fabric over after the initial fuse and iron again with steam from the front.

Don’t do that!

A lot of the inks and image transfers used on T-shirts will melt and smear if you iron directly on them. Instead I lightly spritzed the back all over with water and pressed the whole thing again until it was dry.

Step 3 – Cut the image however you like

How to Make a T-shirt quilt

I’m cutting all the images for this quilt with square corners. That’s easy if you use clear rulers and rotary cutting tools. You don’t have to do it – but it will make for easy framing.

For the technique I’m using I’m not measuring at all. Easy peasy! I’m just cutting around the image in a way that looks good to me for that image.

And that’s it! The T-shirt is no longer stretchy. The cut edges don’t curl. And I have a nice, easy shape to frame out for the final block. Tomorrow I’ll show you that step – how I frame the images to get blocks that are all the same size. With no measuring!

Disclaimer – This is my first T-shirt quilt ever. I’ve made a lot of quilts and I’ve worked with knit fabrics – so I’m not starting from nowhere. But I am in no way an expert! If you want to learn from an expert, sign up for Diane Gilleland’s class here. She makes some BEE-YOO-TEE-FUL T-shirt quilts and I’m definitely taking the class myself. It’s free if you RSVP for the live version!

Happy quilting!

Best,
Wendi
Applique Wendi (with fabulous hat)