Book Review: Flip Dolls & Other Toys That Zip, Stack, Hide, Grab & Go

Flip Dolls cover

As soon as I saw the name of this book I knew I had to have a closer look.

I LOVE softies that do something! And the toys in this book do the most clever things!

There’s a stacking tree that unstacks to make a forest of individual trees.

There’s a frog with an elastic tongue that can grab things.

There are cars with wheels that turn.

There are some trule amazing flip dolls. It’d be more accurate to call them reversible dolls – but that’s nitpicking. They’re incredibly fun and creative no matter what you call them! And she includes terrific instructions for a base doll to use to design your own. Score!

There’s a ukelele with elastic strings. Love! Speaking of ukeleles – here’s a link to my favorite ukelele video. Yes. I have a favorite ukelele video. Ukeleles are cool.

There’s a terrific crocodile with zipper teeth.

There are so many fun projects in here!

FD turtles

I asked my daughter which one she thought I should make for this review.

She flipped through the book – oohing and aahing a lot.

She tagged a ton of projects, including these incredibly cute turtles with removable shells.

So sweet!

FD horse

She also really liked this horse with the button-on wings.

But I’ve been working on a removable wing thing of my own for a few weeks now and didn’t want to start looking at a whole other technique.

Plus, I’m not crazy about making standing stuffed animals like that. I know they’re great to play with – I just don’t enjoy making them and I’m ok with that.

Gulp the Whale from the book Flip Dolls

Jo’s favorite toy in the whole book was Gulp the Whale.

So anxious-looking!

And so weirdly cute!

Now – I recently made a whale from a Zooguu pattern. And I have a whale pattern in my own book (Creature Camp, coming in November). I didn’t really feel like making another whale right now.

But that pocket! When I was a kid my favorite teddy bear had a hole in her neck. I used to hide things in there even though it wasn’t a pocket and they sometimes got lost in the stuffing. In fact – my diary key is still in there somewhere. 🙂

Ever since I started making softies I’ve wanted to make one with a proper pocket for hiding secret treasures. I included one in the proposal for my book but ended up cutting it for space reasons before I actually made it. This is a project I’ve sketched out and made in my head a hundred times, but never actually made in real life.

The time had finally come!

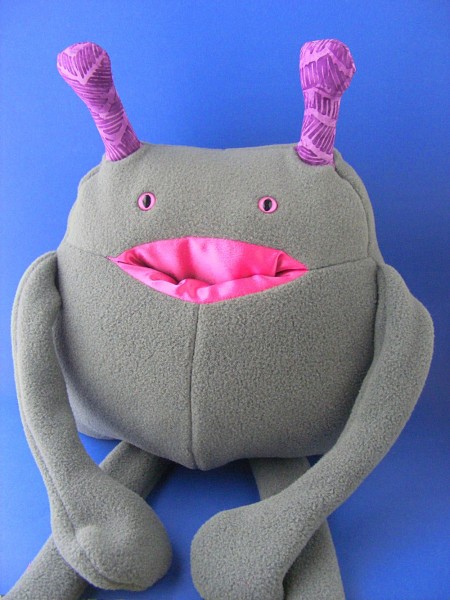
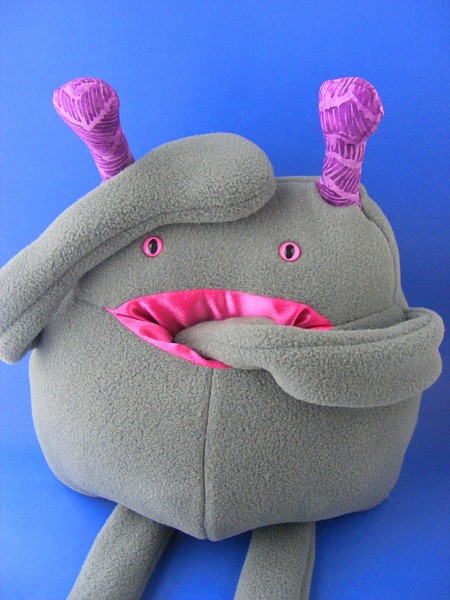
So I made a doll with a pocket mouth using the construction technique in the book, but my own pattern. Laura’s technique was very similar to what I had envisioned, and her instructions were very clear with just enough illustrations. And she had a nice tip for stuffing the softie before tucking the pocket inside which really helped keep things nice and full and smooth.

Want to see a sneak peek at my guy?

Glutton softie from Shiny Happy World
Hi there! I’ll be a pattern soon!

I’m not happy with the antennae and – now that I’ve played with him a bit and have a better idea of his personality – I have an idea that I like better.

Oh yes, I played with him. 🙂 A lot. I wanted to make his limbs long enough to really be playful. What I didn’t anticipate was how expressive he would be!

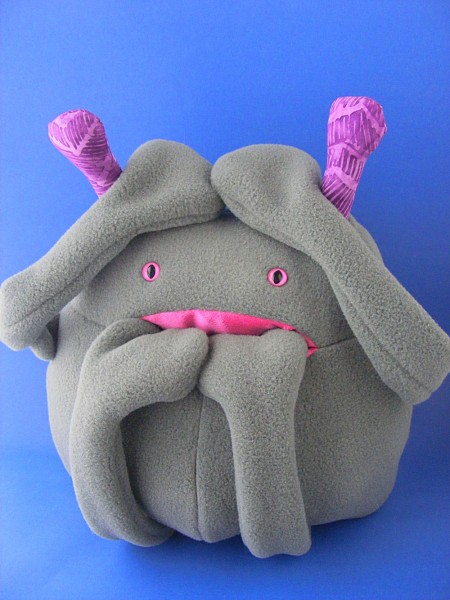
Scared Glutton softie from Shiny Happy World
“Sometimes when I’m scared I chew on my toes.”

This little photo shoot was so much fun!

Hand-eating Glutton from Shiny Happy World
Now what did I have for lunch?

The first thing Jo did was stuff one of his hands down into his belly. 🙂 Updated to add: You can find the pattern for Munch here!

I rarely make actual projects from the many (MANY) craft books I buy. They’re a source of inspiration and a way to learn new techniques – and Flip Dolls & Other Toys is all kinds of inspiring.

Maybe your kid isn’t into cars, but he LOVES windmills. Use the technique for spinning wheels from the book to make a windmill with spinning vanes!

Maybe your kid doesn’t care for robots (is that even possible?????) but loves those I Spy books. Use the very cool technique for the nuts & bolts robot to make pocket search games for the car. Or a little aquarium with fish that swim in and out of view!

That’s the thing about this book. The ideas are so clever and so fresh – the possibilities for spinning off the ideas are endless! For me that’s a great book – one that doesn’t just give me instructions for a handful of projects, but one that fires my imagination and gives me instructions for techniques I can use a lot of different ways.

For those who DO want to make the projects just as they see them in the book – here’s a little tip. The patterns all need to be enlarged. As someone who lives in a remote area a long way from a copy shop this is a real pet peeve. BUT! Lark now has full-sized templates on their website that you can easily download and print. Yay! Just save this link because I couldn’t find this nice feature or the link mentioned anywhere in the book itself.

So. Are you ready for some really clever softie designs unlike any I’ve seen before? Get this book! Flip Dolls & Other Toys That Zip, Stack, Hide, Grab & Go by Laura Wilson of We Wilsons. And get ready to have some fun!

Happy sewing!

Best,
Wendi

Applique Wendi (with fabulous hat)

Free Pattern! A Simple Skirt for The Dress Up Bunch

Free Simple Skirt Pattern for The Dress Up Bunch

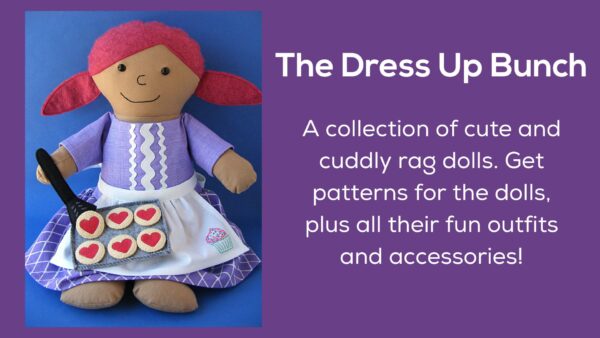
The Dress Up Bunch dolls now have a quick and easy skirt pattern you can make.

And it’s FREE!

Psst! I designed the skirt especially to fit all the dolls in The Dress Up Bunch collection – but it’ll also fit a ton of other dolls. It fits the American Girl dolls really well, and I guarantee it’ll also fit a bunch of random teddy bears and softies piled on any kid’s bed.

It pairs really well with the shirt from the free Play Clothes pattern.

So. The skirt. IT’S SO EASY!

Bean in free skirt pattern
No trim – just fabulous fabric.

You can make it super basic – with no trim. That’s what Bean is wearing here on the right. Just choose a fabulous fabric and you’re done.

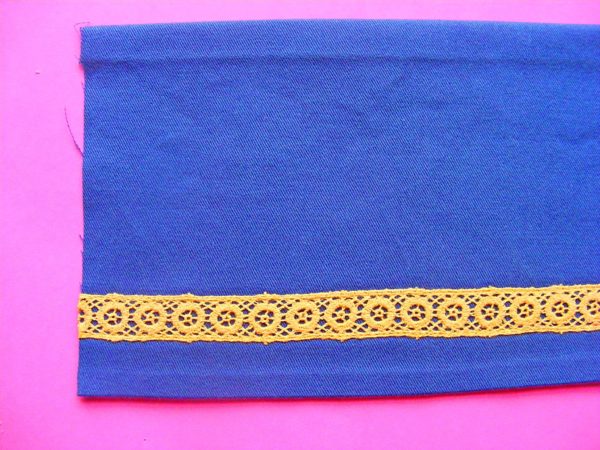
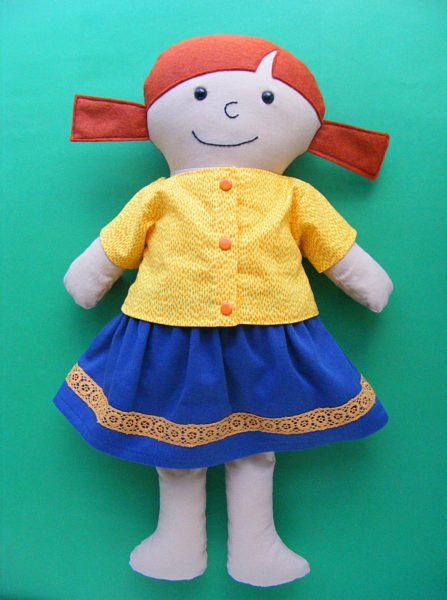
Poppy’s skirt – the one you see on the cover – is made from mid-weight cotton twill and has a band of trim added above the hem. That’s a great way to add flat trims, like lace or rickrack or pretty ribbon. The pattern includes instructions for adding these. Of course.

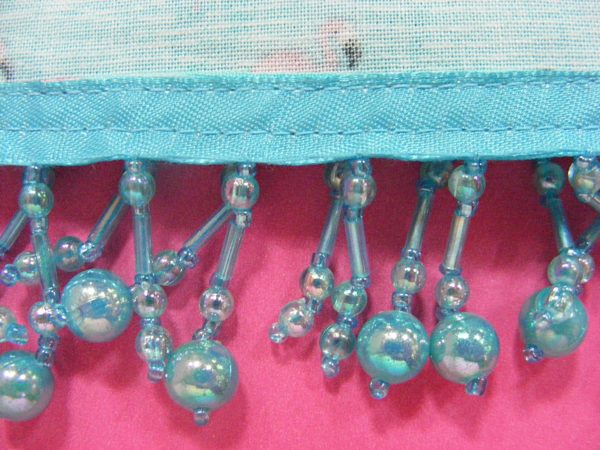
The pattern also includes instructions for adding trim to the hem at the bottom of the skirt. That’s where you’d add any dangly trims, like fringe, tassels, pompoms, or these pretty beads.

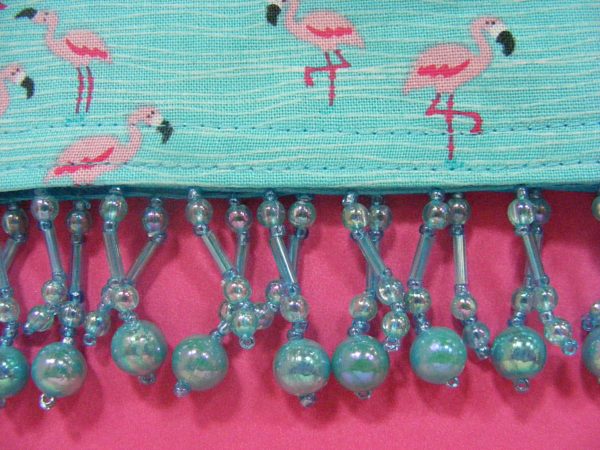
pretty beaded fringe on the free Simple Skirt Pattern for the Dress Up Bunch
Ohh! Pretty beaded fringe!

I love the shiny blue beads with these tiny flamingos. Very beachy and fun.

Of course, like all my doll clothing patterns, there are instructions for leaving a tail opening for the critters in the collection. They like to have their waggin’ room!

Ready to make a fun skirt? They’re so easy – I bet you can’t make just one! 🙂

Materials

  • less than 1/4 yard fabric
  • 12 inches 3/8″ elastic
  • 24 inches fancy trim (optional)

Step 1

Cut a rectangle 7 inches tall x 24 inches wide.

Step 2

Prep the top and bottom edges for hemming.

Turn the top edge down 1/2″ and press. Turn it down another 1/2″ and press. Turn the bottom edge up 1/4″ and press. Turn it up another 1/4″ and press.

Don’t stitch the hems down yet ­- it’s just easiest to do all the pressing while it’s one flat piece.

Step 3

If you want to add trim to the middle of the skirt (like Poppy’s on the cover) now is the time to add it.

Sew it in place all along the 24 inches of the skirt. For wider trim like this, stitch it down at the top and the bottom. For something like rickrack I might use a zigzag stitch down the middle. It depends on the trim and the size. Use your best judgment.

Step 4

Unfold the creases you made in Step 2.

Sew up the center back seam of the skirt using 1/4″ seam allowance.

If you’re not leaving an opening for a tail, just sew the whole edge.

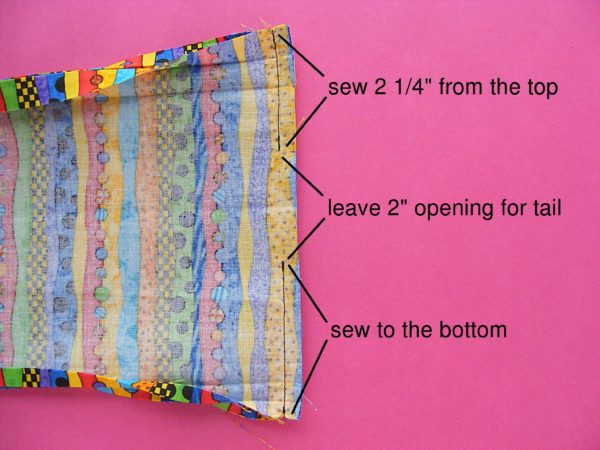
If you’re leaving a tail opening for critters, sew as shown in the photo.

Make sure to backstitch at the top and bottom of the tail opening so it’s nice and strong and holds up to lots of dressing and undressing. :­-)

Step 5

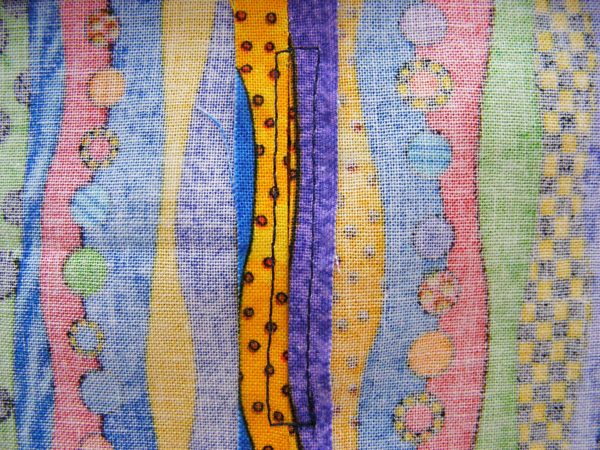
Press the center back seam open.

If you are leaving a tail opening, stitch a box around the opening to stabilize it.

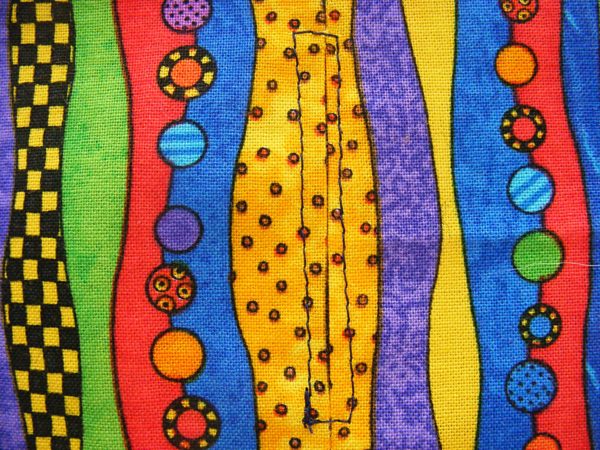
Here’s that boxed­-in tail opening from the outside.

You’ll probably use a matching thread color ­ I just wanted to make sure you could see the stitching. 🙂

Step 6

Refold the creases.

Stitch the hem down all the way around the skirt. If you’re adding trim to the bottom of the skirt, now is the time to add it.

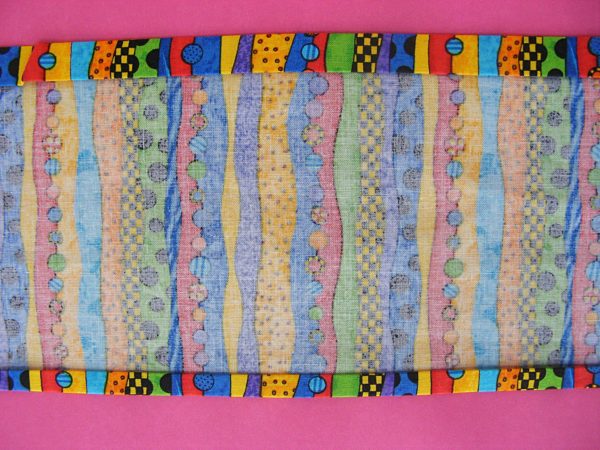
I sewed this beaded fringe in place as I stitched down the hem. The beads are attached to a ribbon. I just laid the ribbon down over the folded hem and stitched through all the layers at once.

Here it is from the inside.

I stitched along the top and the bottom of the ribbon. I needed to use a zipper foot to stitch along the bottom of the ribbon, so I could get that close to the beads.

I could have sewed it so the ribbon was on the outside of the skirt. Use your best judgment based on the trim you’re using.

Step 7

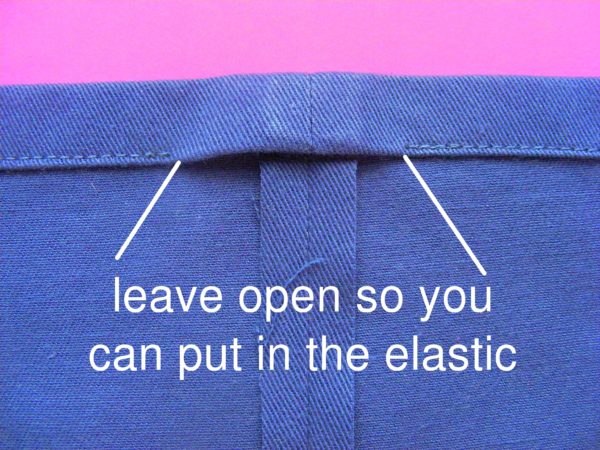
Sew the casing at the top of the skirt.

Leave a couple of inches open at the top ­- at the back seam -­ so you can put in the elastic.

Step 8

Cut a 12″ piece of 3/8″ elastic and thread it through the casing. (A bodkin is SO MUCH EASIER than the safety-pin method I used to use!)

Overlap the ends of the elastic 1 inch and sew them together. Slip the stitched elastic up into the casing and finish sewing the casing closed.

Watch this video for more info on using elastic in a waistband.

Done! Press everything neatly, turn the skirt right side out and try it on.

With trim or without, these skirts are so quick and easy to make!

Need that shirt pattern? There’s a free pattern for the shirt (and a pair of shorts) here.

Have fun! And happy stitching!

Designing a Rag Doll – a Peek at the Design Process

Designing a Rag Doll - a Peek at My ProcessToday’s post is part of the Let’s Talk Process Blog Hop! Eight different designers are each choosing a recent project and talking about the process of designing that project. Our approaches are all likely to be really different – and all inspiring! I love peeking behind the scenes at the process that goes into a finished design – and I always come away with some ideas I apply to my own work.

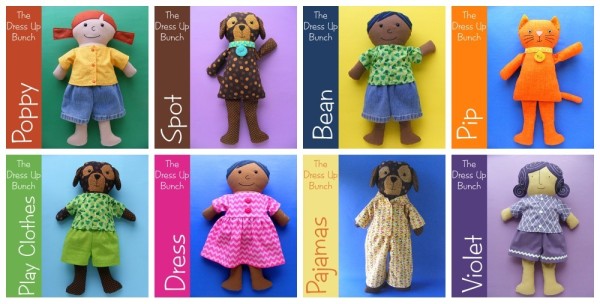
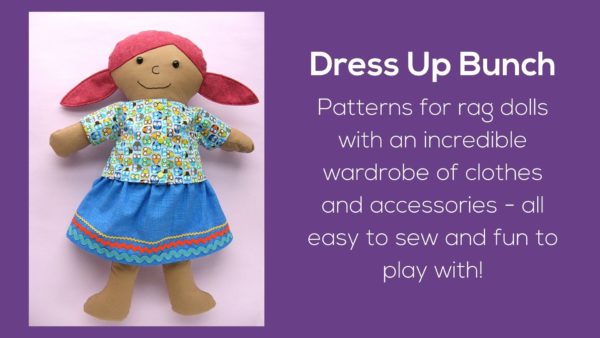
I’ll be writing about the new Dress Up Bunch rag dolls. Years ago – back when Shiny Happy World was about selling finished dolls and softies instead of patterns – I had the idea to design a dressable rag doll. I already had a rag doll that sold well, but I wanted one that was designed to be easier to dress, with a large wardrobe of possible clothing patterns. It wouldn’t hurt if she was easier (and faster) to make, too. 🙂

That idea sat on the back burner for a long time while I transitioned to selling patterns and  teaching, but a few months ago I finally got serious and designed what would become The Dress Up Bunch.

dress up bunch collage

The Dress Up Bunch – so far

I had a LOT of time to think about what I wanted from this pattern collection.

  1. Very easy to make.
  2. Arms and legs that would go in any direction for easy dressing.
  3. Cute, playable and fun.

Any time you design something, even something simple (especially something simple) there are countless small decisions to make along the way.

In many cases there are several good options – but one is the best choice for that particular project. I like to start with a list like this that I can use as a reminder to keep myself on track.

The Old Rag Doll Pattern

Abigail Darcy full

Usually I start with a blank page – but this time I had a successful rag doll pattern that I could use as a jumping off point.

This is Abigail Darcy. I think she’s adorable and the pattern had been a strong seller for me. I love her gangly coltishness, her subtle asymmetry, her cartoony face, her striped tights, her changeable skirt.

But she’s not Very Easy to Make.

She’s more of an advanced beginner pattern and I wanted something that would also work for people who are still getting acquainted with their sewing machines.

The way her arms are attached also greatly limits their movement – making her harder to dress and play with.

Very Easy to Make

The number one problem I see with handmade softies is that people don’t put enough stuffing in them. On some designs it doesn’t really matter, but with dolls it can matter quite a lot because less stuffing makes the necks go floppy very quickly. I gave the Dress Up Bunch dolls wider heads, wider bodies – and especially wider necks – so they would be forgiving of being too lightly stuffed.

If you don’t add enough stuffing, this doll still looks good and functions well.

The wider body also solved another problem.

There is a point in the original rag doll pattern where she looks like this.

17 an unholy mess

Her body is so skinny that it won’t hold all the arms and legs and they have to hang out the stuffing hole while sewing up the outside.

It looks worse than it is, but it’s definitely not fun and I want every step of my new pattern to be easy and fun.

The same stage in the Dress Up Bunch rag doll pattern looks like this.

16 pin back

See how neatly (and easily) all the parts fit inside the body?

In addition to making the head, neck and body wider, I also made the arms and legs shorter so they’d fit more easily inside the doll. The arms, in particular, are quite short. In real life a human’s head is much narrower than the shoulders, the neck is much narrower than the head, and hands hang down past the hips.

I decided against anatomical accuracy in favor of a body type that was easier to make.

One more detail you can see in this photo is the center back seam. Most rag doll patterns don’t have that, but I added it for two reasons. One – a stuffing opening in a nice straight seam like this makes the final handsewing a snap. I find it significantly easier than sewing up a seam in the side of the body – especially if that body is well-stuffed. Two – it provides a great seam where makers can easily and securely attach a waggy tail to the animal bodies.

Usually more seams means more complicated, but this is a case where adding a seam actually made the construction easier – in two ways!

Finally – I made the Dress Up Bunch doll pattern symmetrical. I love the casual charm of a little bit of asymmetry, but skin colored fabrics and felt have no easily identifiable front or back. It was very easy for pattern pieces to get flipped over during construction so they didn’t all match up at the end.

For this pattern – where Very Easy to Make was my #1 guideline – I was happy to sacrifice quirky asymmetry for ease of construction.

Super Flexible Arms and Legs

Pip - a kitty cat doll softie pattern for The Dress Up Bunch

On the old rag doll pattern you can see that her arms are attached at an angle. That’s pretty typical of rag dolls – but it definitely limits the flexibility of those arms. It’s hard to raise them over the doll’s head and the seams have a tendency to tear under the arms. It also makes them hard to dress.

Now look at Pip over there on the left. I left the tops of his arms completely unstuffed and attached them at a right angle to the side of the body. Bingo! Arms that can go in any direction – making for fun play and easy dressing. They don’t look as neat and tidy as the typical angled arm attachment of a rag doll, but they function much better.

Neat and tidy was not on my list. Easy dressing and playing was.

I originally tried sewing elbow and knee joints into the arms and legs (like on the legs of the old rag doll) but my daughter said they looked ugly – like sausages. I tried them unjointed, but very lightly stuffed and with some plastic pellets added to give them good flop. She pronounced that version “very huggable and soft, good for playing, and not ugly.” Success. 🙂

Playability

Spot in jammies back

This was a big one for me. I’ve watched kids play with my dolls for years and I’ve seen how they interact with them. They want to carry them around by the arm (another reason the arms need to be flexible). They want to cuddle them. They want to sit them up and have them stay sitting. They want their arms and legs to bend. And if they have tails – they want to wag them. 🙂

A lot of dressable animal dolls have no tails – or they have applique tails that are covered by the clothing. I wanted actual waggable tails.

It added an extra few steps to the construction of the critter dolls – and their pants – but it adds a ton to the playability. It’s always a balancing act.

In this case I was happy to add a tiny bit of difficulty to the construction in order to have a doll that would be a lot more fun to play with.

The Process is Never Done

Old Violet - a Dress Up Bunch doll from Shiny Happy World

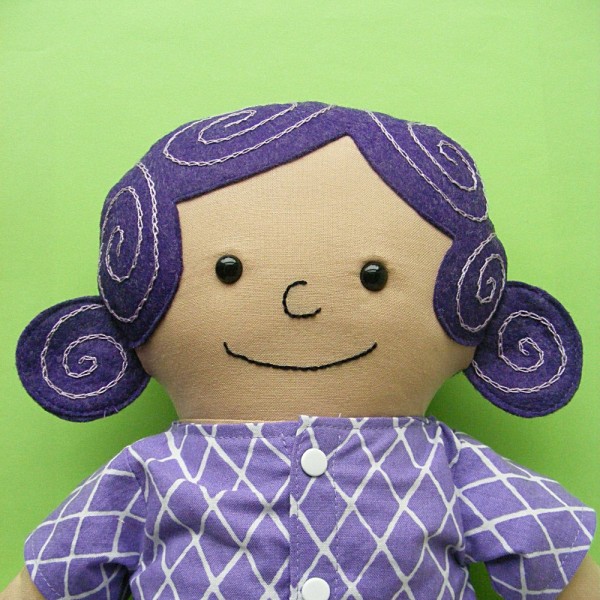
The first human doll in The Dress Up Bunch was Violet. Here she is.

I love her purple curls, but when I got ready to make the second doll in the collection I realized that the face still needed some work.

The new, wider body shape was chunky and cute, but she still had the smaller/finer features of the original rag dolls. They didn’t go together.

I played around so much with the face for the second doll!

(I have a whole post here about how I test faces on my prototypes).

I drew and erased and drew and erased and drew and erased until the face was a yucky grey mess. Then I flipped it over and did the same thing with the back of the head.

Spot - Dress Up Bunch Dog Softie Pattern

I had a nose and mouth I liked – but the eyes were killing me. No matter what I did they were too small. I tried pinning on some felt eyes, but I wasn’t happy with any of them. I had used plastic safety eyes for Spot – and I loved them – but I had it stuck in my head that they would look bug-eyed and goofy on a human doll.

Finally – in desperation – I grabbed a seam ripper, poked a hole where the prototype’s eye should go, and stuck in a safety eye to test it out.

The whole face suddenly came to life.

Poppy face

It didn’t look bug-eyed or goofy! The larger size looked friendly and young. And the shiny half-domes had a sparkle to them that I hadn’t gotten with felt eyes. I loved them!

So this is the new face of The Dress Up Bunch.

Try everything – even things you’re pretty sure will fail.

I redesigned Violet so she would have the younger, cuter face that the newer dolls have.

New_Violet_Rag_Doll_Face

One More Bit of Advice

I do all my prototyping with white muslin.

  • It’s cheap and easy to find.
  • It’s the least forgiving fabric I could possibly sew with – pieces that could be stretched to fit with fleece will not match up with muslin. I’ll know there’s a problem that needs fixing.
  • You can draw and write on it – like I do when I’m designing faces.
  • Every mistake will show. My daughter might not have noticed sausage-looking arms on a patterned fabric, but she sure hated them on the white prototype.

If your project looks good in white muslin it will look good in any fabric. 🙂

Let's Talk Process blog hop
I hope you enjoyed this look at the design decisions that went into a single project. Ready to see the approaches of some other designers? Take a look at the other posts in today’s hop and gather up enough tips and inspiration to keep you designing for weeks.

Happy stitching!

Best,
Wendi
Applique Wendi (with fabulous hat)

Zsa Zsa Loves the Bling on Her Collar

Zsa Zsa - kitty cat rag doll pattern for The Dress Up BunchThis is Zsa Zsa.

Am I dating myself that when someone suggested a collar with bling I immediately thought of Zsa Zsa Gabor? 🙂

Anyway – I made Zsa Zsa using the Pip pattern, a shortish pile white fur, and a couple of scraps of pink satin for the ear linings.

I made Zsa Zsa to show you a few things.

How to Make a Fancy Collar with Bling

I bought that ribbon with the jewels already sewn on it. Fancy and easy. 🙂

But it was kind of flimsy.

To make a sturdy collar that could withstand lots of play, I made the regular collar from the Pip pattern, then sewed the blingy ribbon onto it.

I had to make the collar a little wider so it would accommodate the full width of the ribbon. You can do that too – just cut your fabric strip 4 times the width of the ribbon you want to use.

I also had to use a zipper foot to sew down the edges of the ribbon. The zipper foot let me keep the presser foot out of the way of the bumpy bling. If you don’t have one you can just sew the ribbon on by hand. The easiest and strongest way would be to whipstitch it around all the edges. Use this tutorial to see how.

You Can Use Fake Fur to Sew a Zsa Zsa from the Pip Pattern

Zsa Zsa - kitty cat softie doll patternYou don’t have to make any adjustments to the pattern.

You can find all my video tutorials about working with faux fur (along with other special fabrics) here.

I recommend using the optional muzzle applique piece included in the pattern. Otherwise the cute embroidered smile will get lost in the fur.

The pattern includes instructions for how to prepare the muzzle piece and how to applique it onto fur.

Please get the good stuff!

It’s going to take you a couple of hours to make this toy and someone is going to love it. Make it out of materials that feel good and will last!

I sewed Zsa Zsa up with junky fur that I had on hand for some reason. It’s white – which is exactly what I wanted for this project – but that’s the only good thing I can say about it. I bought this at Joann’s and it’s awful. It feels like plastic. I can tell it’s going to get terribly matted if this toy actually gets played with. The backing fabric is so thin that you can see my light pink pattern-tracing lines right through it. Awful stuff! I gave the leftovers to Jo to use for making rugs in her doll house. That’s the only thing it’s good for. 🙁

But you’ll use the good stuff, right?

You can find info about my favorite source for faux fur here. I haven’t tried all their furs – not by a long shot – but every single one I’ve tried had been terrific quality.

So – ready to make a furry cat?

Get the Pip pattern here.

Happy sewing!

Best,
Wendi
Applique Wendi (with fabulous hat)

How to Make Denim Shorts for The Dress Up Bunch

How to Make Doll-Sized Denim Shorts with all those cool details - a tutorial from Shiny Happy World

Here’s how to make some denim shorts for a doll and give them that cool hem and seam treatment that jeans have.

Steal it!

Start with the legs from a cut-off pair of jeans (you do save those, don’t you?) and the free Play Clothes shorts pattern.

How to Make Doll-Sized Denim Shorts with all those cool details - a tutorial from Shiny Happy World

The instructions for the shorts say to turn up the bottom hem 1/2 inch and then another 1/2 inch. We’re going to steal the already-made hem so we need to shorten the pattern by 1 inch. Just turn up the bottom edge one inch and crease it to hold.

How to Make Doll-Sized Denim Shorts with all those cool details - a tutorial from Shiny Happy World

Make sure the edges of the cut-off denim leg are all lined up – the outside seam running right up the side and the front and back edges of the bottom lined up with each other.

Place the pattern on the bottom of the cut-off denim leg. The folded hem of the bottom of the pattern should be lined up with the bottom edge of the pants, and the edge of the pattern that says to place it on the fold should be butted right up against the flat-felled seam at the side of the cut-off leg. Cut around the pattern. It should look like the photo up there. Repeat with the other leg for the other side of the shorts.

How to Make Doll-Sized Denim Shorts with all those cool details - a tutorial from Shiny Happy World

Follow the rest of the pattern instructions without any more changes. You’ve got a cool pair of denim shorts with nice hem and seam details!

I call them Cheater Pants. 🙂

Here they are, modeled by Bean.

How to Make Doll-Sized Denim Shorts with all those cool details - a tutorial from Shiny Happy World

I used the same technique to give Karl here that classic hem treatment to his denim shorts too.

Karl (with a K) - boy doll wearing denim shorts

You can use this technique with any doll-clothes pattern!

Happy stitching!

Meet Hadley the Horse/Zebra/Unicorn :-)

Six Months of Softies

Yesterday I reviewed a fabulous new book by Abby Glassenberg. Today I’m sharing her newest softie pattern with you.

Hadley the Horse softie pattern

Meet Hadley the Horse, the next pattern in the Six Months of Softies Club.

Hadley is a real cutie, made of super soft cuddle fleece with a snappy red bandana around his neck.

But look!

Make him up in black and white fabric and you have a zebra!

Hadley the Zebra softie pattern

Oooh! Look again!

Change the fabrics again and add a twisty horn and you have a unicorn!

unicorn softie patternDo you have three children or grandchildren? Make all three versions of this one pattern! Or just do it because it’s fun. 🙂

I think I’m going to make myself a blue horse in honor of Eric Carle – one of my very favorite artists.

Six Months of Softies

Want to make your own? Join the club! Everything you need is right here. Sign up now and you’ll get instant access to all four patterns released so far.

Sorry – the club is closed now – but you can get this pattern here on Abby’s site!

Happy sewing!

Best,
Wendi
That's me!

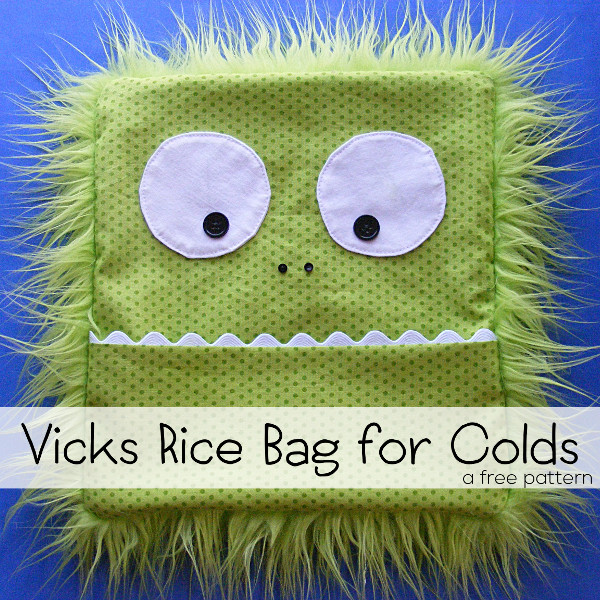
Make a Vicks VapoRub Rice Bag and a Free Monster Rice Bag Cover

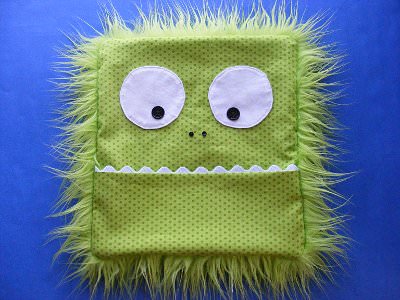
Vicks-Scented Rice Bag - to ease a cough and sniffles without having to use the sticky stuff - a tutorial from Shiny Happy World

Everyone knows that a little Vicks Vapo-Rub smoothed onto a kid’s chest can help ease a cough and clear up a stuffy nose. But some kids (and some adults too) don’t like the sticky stuff smeared on their skin. And some grown-ups are concerned about using a petroleum jelly-based rub.

I recently had a major Mom-lightbulb-moment. I make rice bags for bedtime – usually scented with orange oil, cinnamon stick and cloves. I will sometimes put one on my “I don’t like sticky stuff on my skin” daughter’s chest to help ease a cough and soothe her to sleep when she’s sick. What if I make a special rice bag for sick times and scent it with the aromatics in Vicks VapoRub?

Awesome – if I do say so myself. Cue the chorus and trumpets please. 🙂

Here’s what to do.

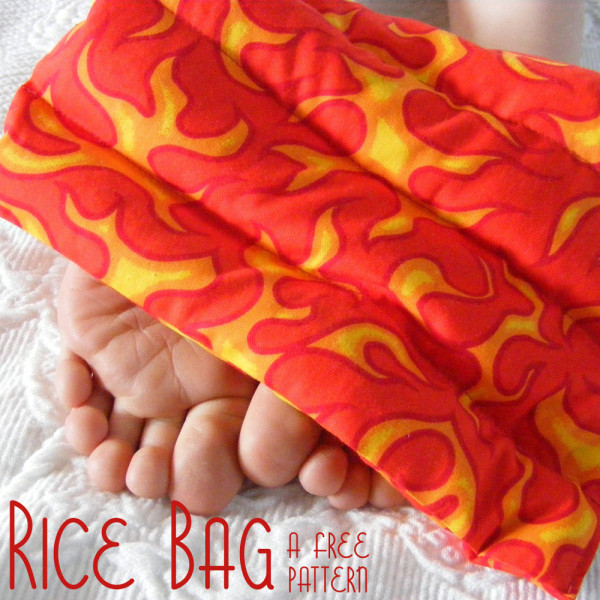
Use this free pattern to make a rice bag. Don’t worry, it’s super easy – all straight lines and no handwork.

Free Rice Bag Pattern from Shiny Happy World

The pattern calls for 2 1/2 cups of rice. Before you put the rice in the bag, stir in 20 drops of eucalyptus oil and 20 drops of rosemary oil.

Put the rice in the bag and sew it closed. Ta daa!

The smell will be very strong at first – keep it stored in a ziplock bag to help preserve it. After a couple of months it will seem like it’s lost its scent, but microwaving will bring it right out again.

Microwave at 1 – 1 1/2 minutes (depends on the strength of your microwave and how hot you like it) and lay it on your child’s (or your) chest. The warmth will help soothe a cough, and the aromatics will help clear a stuffy head. No stickiness needed. 🙂

For extra comfort – sew up this rice bag cover.

Vicks-Scented Rice Bag - to ease a cough and sniffles without having to use the sticky stuff - a tutorial from Shiny Happy World

I designed it especially to fit the rice bag I linked to above. Sometimes having a special critter like this monster to help scare away a cold does as much good as the aromatics and the chicken soup. 🙂

Here’s how to make it. . .

Step 1
Cut 1 square of fabric or faux fur 10 1/2 inches square, for the back of the rice bag cover.

Step 2
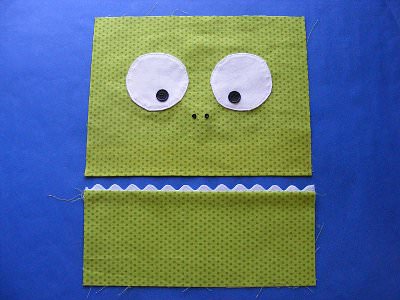
For the lower jaw, cut two rectangles, each 4 3/4 inches tall and 10 1/2 inches wide. Cut a piece of white jumbo rickrack 10 1/2 inches long.

Step 3
For the top of the face, cut one rectangle 8 1/2 inches tall and 10 1/2 inches wide.

Step 4
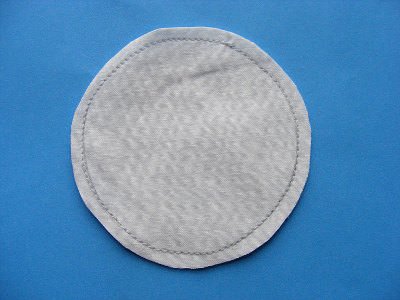
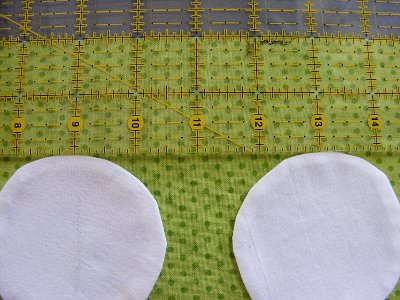
Make the eyes. Trace a 3-inch circle on the back of one scrap of white fabric. (I used the inside of a roll of masking tape.) Layer that scrap and another scrap of white fabric right sides together. Sew around the circle, right on the line you drew. Sew all the way around. Trim away the excess fabric, leaving about 1/4 inch seam allowance all the way around. It doesn’t need to be exact.

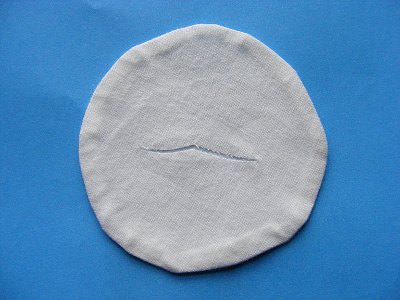
Pul the two layers of fabric apart slightly and cut a slit in the center of one of the layers. Turn the eye right side out through the slit, smooth out the curves, and press the eye flat.

You can see the slit in this photo. It’s OK for it to be unfinished since it’ll be the underside of the eye. You can see this whole process in more detail in this video showing how to applique onto faux fur.

Repeat for the second eye, or make a cyclops!

Step 5

You’ll need to add the rickrack teeth to the bottom of the face. Draw a line 1/8′′ from the long edge of one of the smaller rectangles, on the right side of the fabric.

Lay the rickrack on the right side of the fabric so the valleys line up with the line you drew. Stitch the rickrack in place along the 1/8′′ line.

Lay the second small rectangle over the first, right sides together, with the rickrack sandwiched between the layers. Stitch them together using 1/4′′ seam allowance.

Flip the two rectangles right sides out and smooth them down where the rickrack comes out of the seam. Press. You can watch a video demonstrating the technique here.

Step 6
Hem the bottom edge of the larger rectangle for the monster’s face. Turn up the bottom edge of the rectangle 1/4 inch and press. Turn it up another 1/4 inch and press. Sew the seam in place. This video will help with that hem if you’ve never done it before.

Step 7
Position the eyes on the rectangle so they’re centered, and the top edge of the eyes is 2 inches down from the raw edge at the top of the face rectangle. Stick them in place with a quick swipe of fabric glue stick. Sew around the edges of the circles with matching thread. This video will help if you have trouble sewing those curves.

Step 8
Add a couple of black buttons (I used 5/8″) to make pupils in the eyes, and a couple of tiny black buttons (I used 3/8″) to make nostrils below the eyes. You’re almost ready to sew all the pieces together!

Step 9
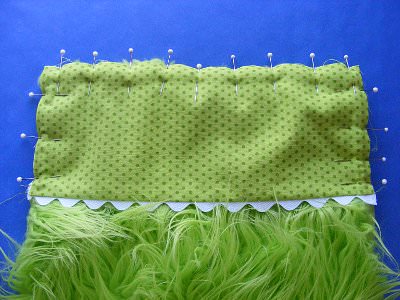
Lay the back of the rice bag right side up on a flat surface. Layer the jaw rectangle over the fur so that the bottom edge of the jaw rectangle is lined up with the bottom edge of the fur square. Smooth all the fur to the inside, so it’s sandwiched between the two layers and pin or clip into place.

The bottom of the face is it the top of the photo here; I like to pin toward myself. See how all the fur is tucked inside the pinned edges? That’s what you want.

This video will be a big help if you’ve never worked with faux fur before.

Step 10
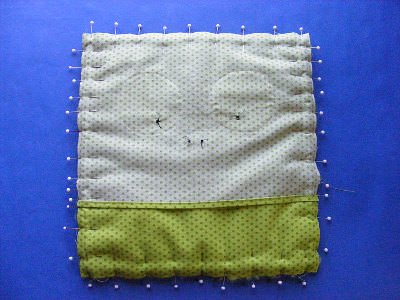
Layer the rectangle with the eyes face down over the top of the fur. Smooth the fur to the inside and pin or clip into place. The bottom of the eye rectangle should overlap the top of the teeth rectangle.

Step 11
Sew all the way around the edge using 1/4 inch seam allowance.

Using 1/2′′ seam allowance, sew again up the two sides (not across the top and bottom). That will help reinforce the stress points at the sides of the “mouth.”

Turn the cover right side out and slip a warm rice bag inside!

Happy sewing! And to everyone fighting the cold and flu this season – get well soon!

Free Pattern – Fire-breathing Handwarmers

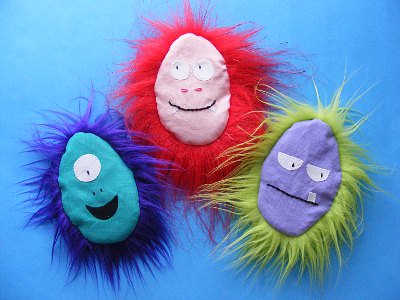
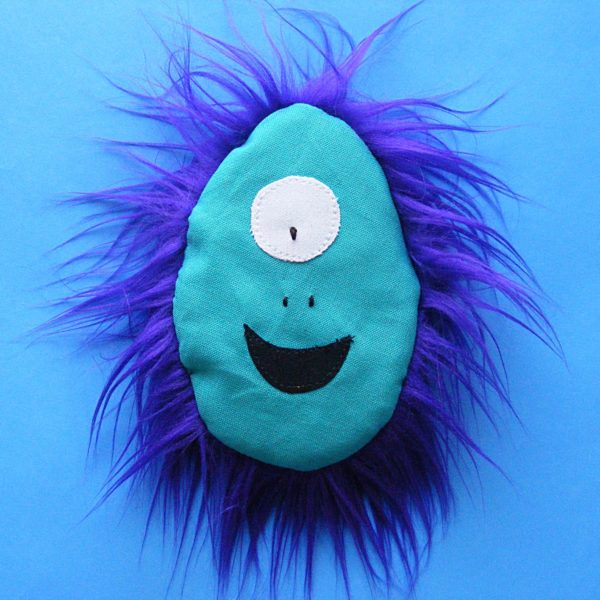
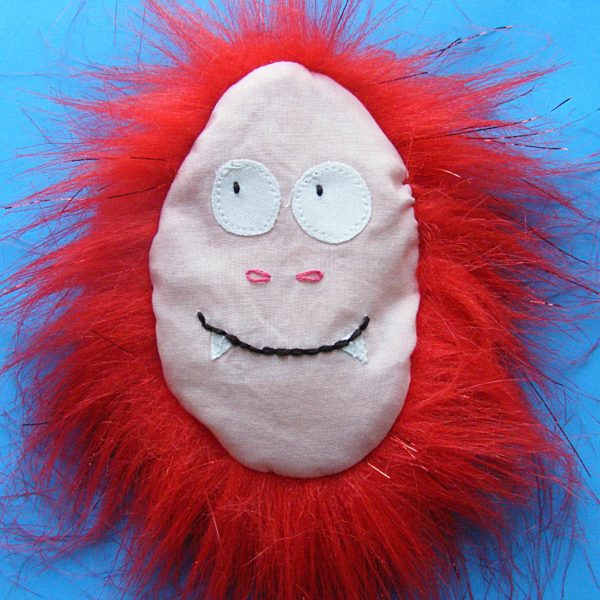
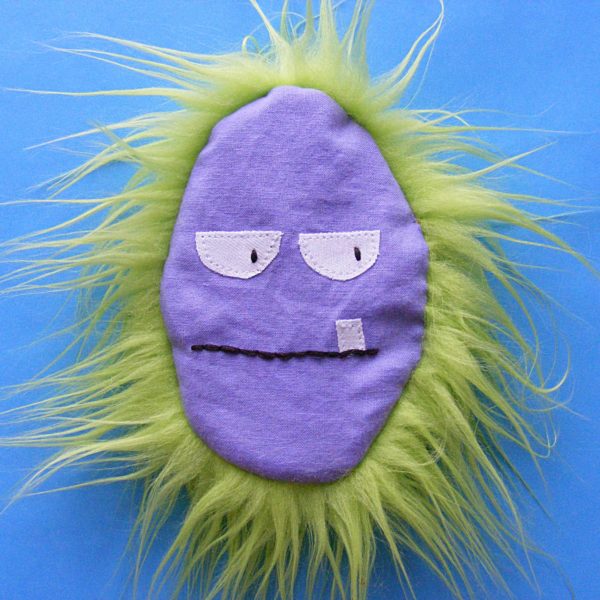
Monster Handwarmers - free pattern from Shiny Happy World

‘Tis the season for chilly fingers.

Unless you have these fire-breathing hand warmers, of course!

These pocket-sized monsters are easy to whip up, use scraps of fabulously fun faux fur, and are filled with rice so you can pop them in the microwave for hand-warming goodness. Add a few drops of essential oil or a bit of herb or spice to the rice and you get scented breath from your fire-breathing beasts!

For each pocket monster you’ll need:

  • Scrap of faux fur
  • Scrap of solid woven cotton
  • Small amount of paper-backed fusible adhesive
  • Pattern template
  • White fabric for eyes
  • Black fabric for mouth (optional)
  • Embroidery thread for eyes, mouths and nostrils

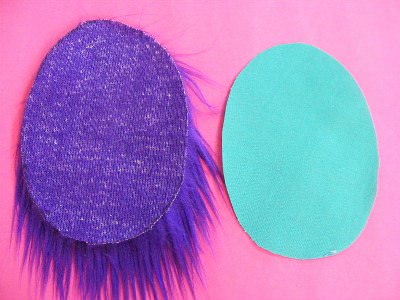
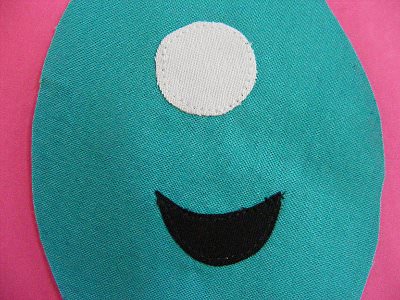
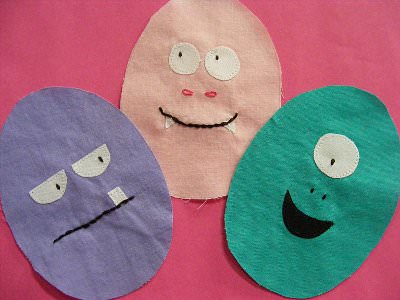
Trace around the pattern template (I like to glue mine to cereal box cardboard before I start) and cut out one oval from from the woven fabric and one from the faux fur. If you’ve never worked with faux fur before, watch this video before you cut to eliminate the flying furry bits.

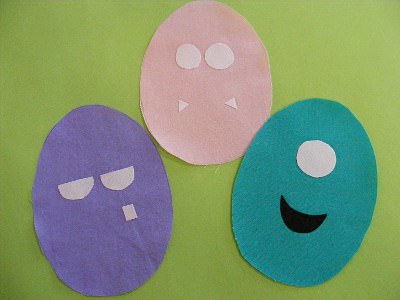
Trace the face onto the non-furry fabric. Use paper-backed fusible adhesive to applique eyes, teeth and/or mouth onto the face. If you’ve never used paper-backed fusible adhesive, you can see how to use it in this video.

You’re going to heat these babies up, so be sure to stitch around them so the pieces don’t come unstuck when they get hot. I just straight stitched around all the edges in matching thread.

Use embroidery thread to hand stitch the pupils of the eyes, the line mouths and the nostrils. I used 6 strands of DMC #3371– a very, very dark brown.

Just take simple straight stitches for the pupils of the eyes and the small nostrils. Use lazy daisy stitches for the pink nostrils (this video shows how) and backstitch the mouths. Watch this video if you don’t know how to backstitch.

If you don’t want to fuss with hand embroidery, no problem. You can use satin stitch on your machine or even use a fabric marker. It’s all good.

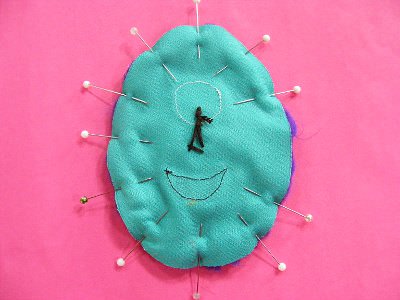
Pin the face to the furry back, right sides together. Tuck all the fur to the inside of the layers so you get a nice furry halo around the edge of your monster. Watch that Intraux to Faux Fur video to see how and why.

Sew the two layers together around the edge using 1/4 inch seam allowance. Leave a small opening on the side to turn it right side out. Keep that opening as small as possible – the faux fur is not fun to sew up by hand. I left about two inches.

That opening won’t be fun to hand sew, but the fur is totally worth using because…

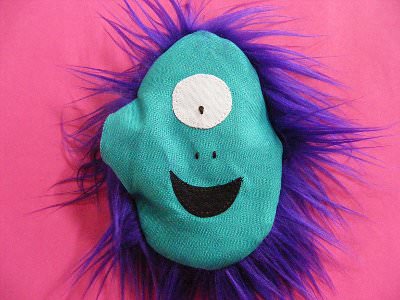
Holy Wow! Look at that fur explosion! Tell me that’s not fun and totally worth the swearing you’ll do in a few minutes!

Fill him up with 1/4 cup of uncooked rice and any scents you want to add. This guy got 1/2 teaspoon of dried rosemary leaves (my daughter’s current favorite scent).

Sew up the opening. I think ladder stitch is the easiest to do on faux fur; watch this video to see how. Make sure you stitch through the backing of the faux fur, not just the furry pile.

Done!

This fiery redhead has two drops of orange essential oil stirred into the rice, along with a few bits of broken cinnamon stick and some whole cloves. My favorite.

This guy looks grumpy so I gave him a less pleasant scent: a few peppercorns mixed in with the rice. Mustard seed is a good angry option too.

Recommended microwave times to heat them up will depend on the strength of your oven. I do mine for 15-30 seconds each.

Happy sewing!

How to Replace the Cover on Your Ironing Board – video

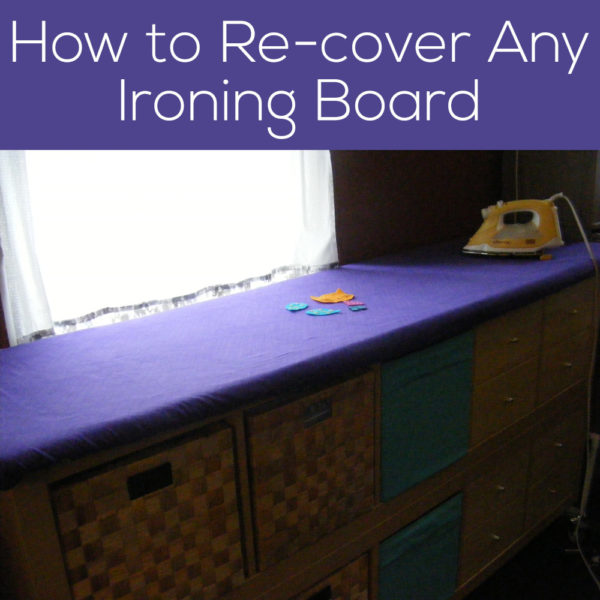
There’s no reason to settle for the bland fabric that comes on most ironing boards – making a new cover is super easy!

I loved my old ironing board cover, but it had gotten badly waterstained and really faded in the sun. Plus – I made all kinds of new sewing room accessories using the Ed Emberley Happy Drawing fabric collection and I wanted my ironing board to match. So time for a new cover!

This time I needed to replace the pad too, so it was a great time to shoot a video showing you how to do the whole thing from start to finish.

If you want even more padding, I recommend a couple of layers of 100% cotton terry cloth. A towel won’t fit the length of most ironing boards, but you can buy it by the yard at the big box fabric stores.

Here are handy links to all the posts about quilting tools and supplies.

Sewing Machine

Iron

Rotary Cutting Tools

Scissors

Other General Sewing Room Supplies

One More Hugely Popular Post that Seems to Fit Here Better than Anywhere Else

Return to the Let’s Make a Quilt main Table of Contents.

Move on to the posts about choosing your quilt pattern.

Happy sewing!

Free Tutorial – Easy Pattern Weights

Easy Pattern Weights - a free pattern from Shiny Happy World

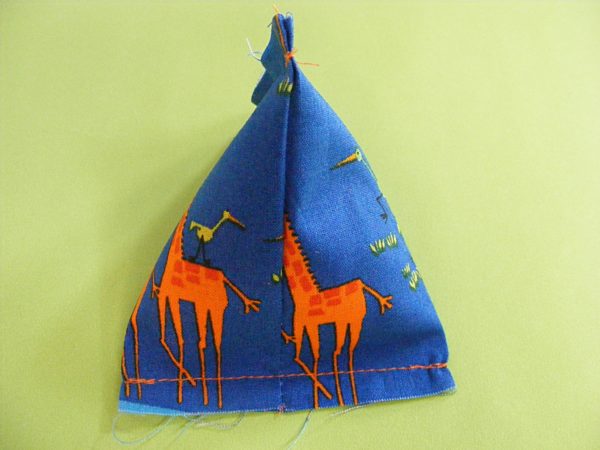
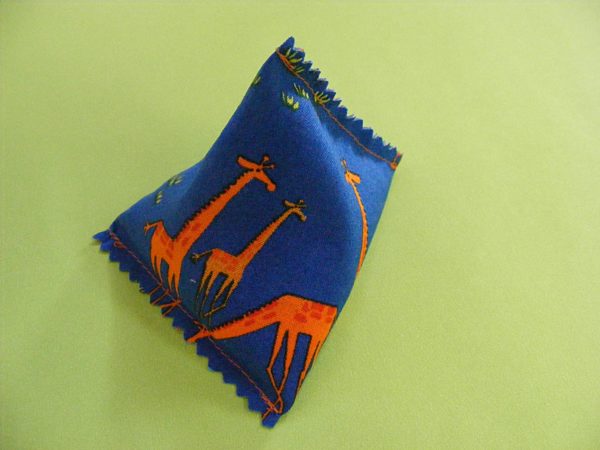
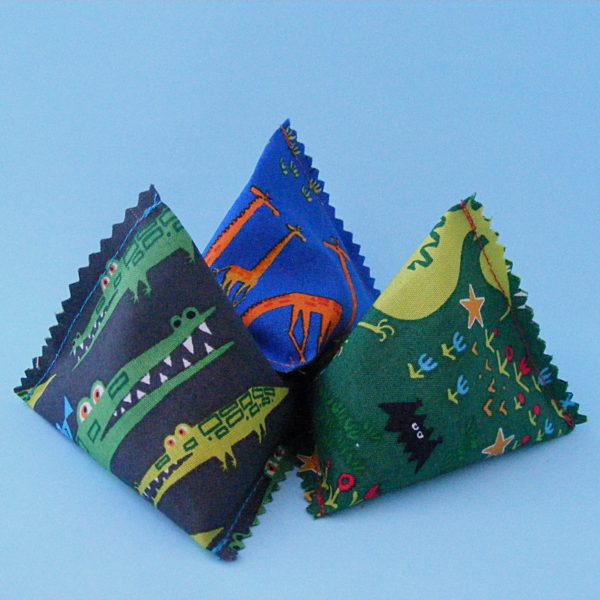
These pattern weights are sooooooooo easy to make. Seriously. Each one takes less than five minutes. Dig into your fabric scraps and make a big batch of them for a sewing friend. This fabric (to match the rest of my sewing room) is designed by Ed Emberley for Cloud 9 Fabrics.

I’ve tried a lot of different styles of pattern weights and these are, hands-down, my favorite. The pyramid shape makes them really easy to grab, and they’re super heavy. My secret ingredient is aquarium gravel. I actually weighed all kinds of possible fillers to see which one weighed the most by volume. Gravel weighed more than twice as much as the next closest option!

Ready?

Cut a piece of fabric 6 1/2 inches wide x 3 1/2 inches tall.

Fold it so the right sides are together. Sew across the short ends using 1/4 inch seam allowance.

Turn the little tube right side out. Flatten it so the seam is running up one side. Sew across one end using 1/4 inch seam allowance.

Using contrasting thread is fun. 🙂

Fill it with 3 tablespoons of aquarium gravel. Flatten it this time so the seam is running up the center. Sew across the end using 1/4 inch seam allowance.

Careful not to spill the gravel while you’re getting it under the presser foot. 🙂

Trim up the edges using pinking shears. Not too close to the seam!

Done!

If you’re making these for a friend, 6-10 is a nice quantity. That’s enough to hold down just about any pattern.

These are really handy for more than just cutting patterns. I especially love using them for holding down the corners of freezer paper when I’m tracing applique designs.

Here are handy links to all the posts about quilting tools and supplies.

Sewing Machine

Iron

Rotary Cutting Tools

Scissors

Other General Sewing Room Supplies

One More Hugely Popular Post that Seems to Fit Here Better than Anywhere Else

Return to the Let’s Make a Quilt main Table of Contents.

Move on to the posts about choosing your quilt pattern.

Happy sewing!