Sewing Machine Feet

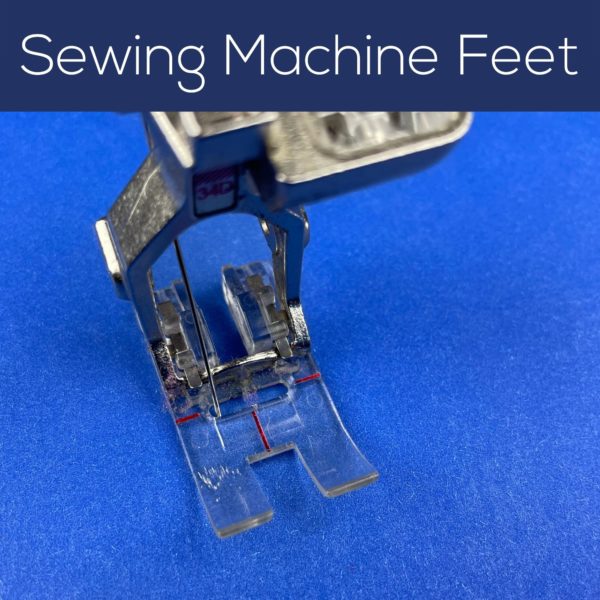
photo showing a close-up of a clear plastic applique sewing machine foot. text reads: Sewing Machine Feet

I get a lot of questions about sewing machine feet. Mostly people want to know one of two things. What kind of specialty feet should they buy for their machine? And do they really need to have a walking foot?

Well – it all depends on what you want to sew!

There are so many specialty feet out there! I have a few I’ve bought for specific projects – a ruffling foot when my daughter was little and liked ruffles and gathered skirts, a piping foot for I-don’t-even-remember-what. You get the idea.

But there are a few feet that I use ALL THE TIME – and they’re what I want to talk about here.

Zipper Foot

I don’t sew much clothing, but I do like to make little zippered pouches and pillows with zippered backs. A zipper foot is pretty essential if you’re going to sew zippers. I guess technically you can do without it – but I wouldn’t want to. 🙂 The good news is that most machines come with a zipper foot, and if yours doesn’t, there are lots of inexpensive universals available.

A zipper foot is also really handy for sewing piping or other fancy trims where you want to sew right up against a chunky bit.

Handy links. . .

Walking Foot

If you like to machine quilt, a walking foot is essential. Basically, what a walking foot does is give you feed dogs that sit on top of your fabric, pulling it through at the same rate as the feed dogs built into your machine below the throat plate. This keeps the top and bottom layers feeding evenly through the machine. Genius!

A lot of fancier machines now have a built-in walking foot, but there are universals available for every brand and some of them are pretty inexpensive. I highly recommend getting one!

Handy links. . .

Quarter Inch Foot

This isn’t one of the essential sewing machine feet, but I really love it for when I want to be super precise in my seam allowance.

Here’s what mine looks like.
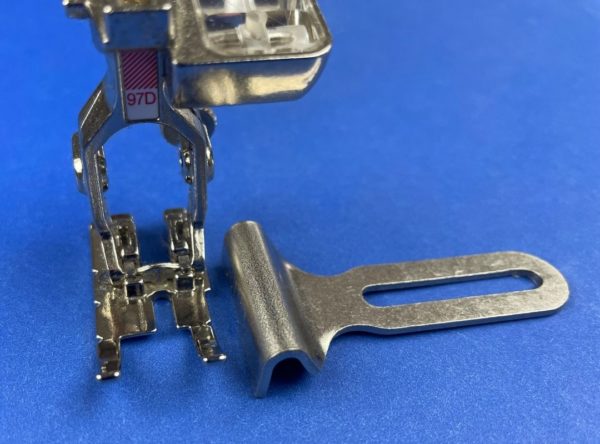
close-up photo of a quarter inch sewing machine foot for a Bernina

That weird piece sitting beside the foot actually screws into the machine and becomes a wall that you butt your fabric against, to help you get an exact 1/4-inch seam allowance (or whatever depth you set it to). This is perfect for joining quilt blocks – especially for quilts with half blocks and double blocks where the seam allowance needs to be really accurate.

For some machines, the quarter-inch foot has the “wall” built right into the foot, but those aren’t adjustable. They ONLY do a quarter inch seam allowance.

Handy links. . .

Clear Applique Foot

I saved my very favorite sewing machine foot for last – a clear applique foot.

If you do ANY machine applique (or any topstitching or edgestitching) this foot is absolutely necessary.

Here’s what a typical sewing machine foot looks like.
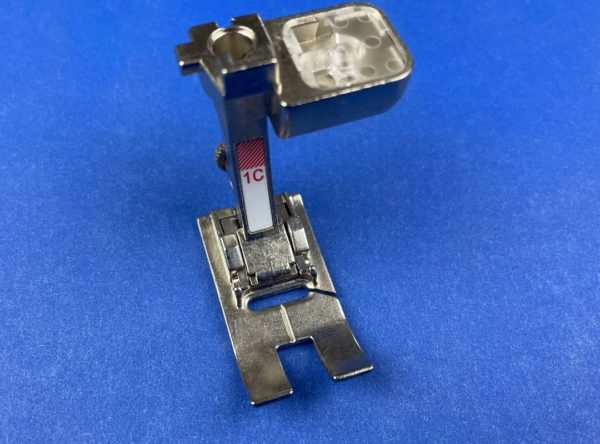
It’s metal and it might have a small opening like this one – but you can’t see much. And there’s very little visibility where the needle is actually going in – that smaller slot behind the main “toes.” It’s REALLY hard to see where you’re stitching with this foot.

Here’s a clear applique foot.
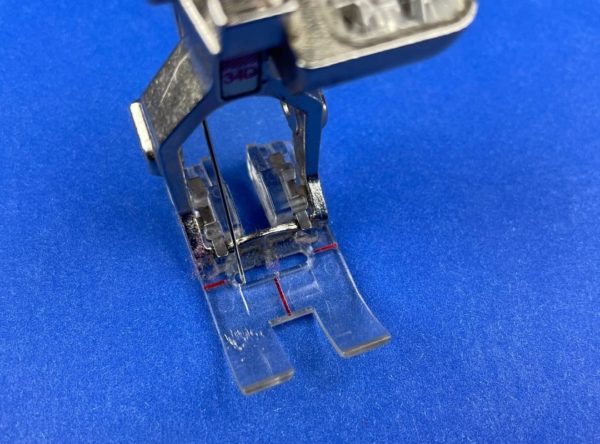
Close up photo of a clear applique foot - one of my favorite sewing machine feet.

Look at that! The base of the foot is made entirely of clear plastic – giving you total visibility as you stitch. That ability to see what I’m doing is what allows me to outline applique shapes like this so neatly.
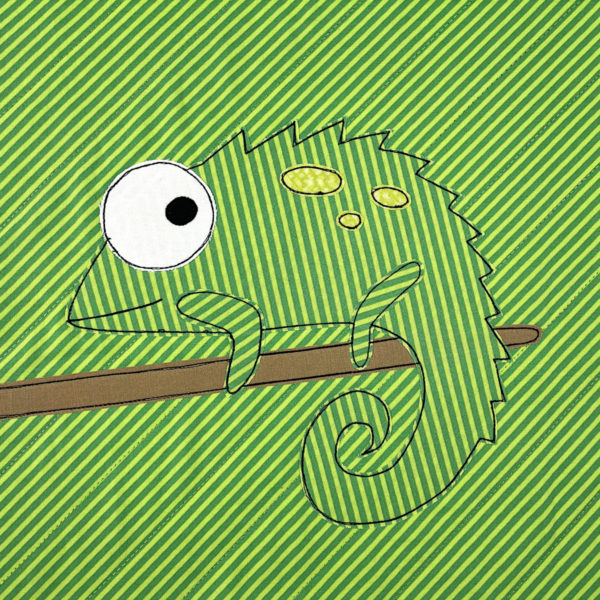
cute applique chameleon made with striped green fabric and the Carter Chameleon - easy applique pattern from Shiny Happy World

Handy links. . .

So there you are – the four sewing machine feet I use most often.

Here are handy links to all the posts about quilting tools and supplies.

Sewing Machine

Iron

Rotary Cutting Tools

Scissors

Other General Sewing Room Supplies

One More Hugely Popular Post that Seems to Fit Here Better than Anywhere Else

Return to the Let’s Make a Quilt main Table of Contents.

Move on to the posts about choosing your quilt pattern.

Happy stitching!

How to Declutter a Craft Room

A peek inside my Shiny Happy World studio

I recently posted some photos of my newly tidy studio and a bunch of people asked for more details. A BUNCH of people. They all wanted to know how to declutter a craft room – exactly what I did.

I’m happy to share! Especially because this time I feel like I finally got it right. 🙂

Sure, I’ve “decluttered” before – but only with moderate success. This time I swore things would be different – and they were!

The number one change in my approach was a change in my attitude. Instead of asking “What can I get rid of?” I asked “What do I want to keep?”

On the surface that seems like it’s really the same question – but the subtle difference was key for me. First, let’s look at a before photo. It’s not taken from the same angle (it’s actually from the other side of the room) but it’ll give you a pretty clear picture of what things looked like.

How to Declutter a Craft Room

And this was a good day! Every horizontal surface is full of stuff. There are plastic tubs stacked under my sewing table and in front of my storage shelves. There are permanent piles of stuff stacked on the corners (out of the way, right?) of my work tables. There is stuff everywhere – and I wasn’t using even close to half of it.

No more!

Here’s what I did. . .

Start with one thing. The experts say to do one room at a time – but even that was too much for me. I tackled one piece of furniture at a time.

Remove everything from that piece of furniture. Stack it on the floor, pile it on a table – whatever you have to do to get down to an empty piece of furniture. As you unload, you’ll spot some things you know you need to get rid of. Bag them up if they’re trash, box them for donating – go ahead and get rid of them now. But know that this is the easy stuff – things like the jar of bobbins that went to a sewing machine I got rid of over ten years ago, or the water damaged tablet of nice drawing paper. This is where I’ve stopped before – the things with an easy reason to get rid of them. This time I went deeper.

Clean it. Clean it really well. Dust it, polish it, vacuum out all the weird nooks and crannies full of Cuddle Fleece fuzz. Make it look (and feel) like a new piece of furniture.

Now – start “shopping” in that pile of stuff. Pull out the things that you actually WANT. The knick-knacks that make you really happy when you pick them up. The supplies that you love to use. I used the word shopping very deliberately. If you were strolling through Joann’s and you saw this stuff – how much of it would you actually put in your cart and buy today? Probably not much.

The best example of this was when I went through my yarn bin. I don’t use much yarn. I’ll crochet something every once in a while, and sometimes I need yarn for hair or a tail – but that doesn’t add up to much. You wouldn’t know that from looking at the huge (overflowing – the lid wouldn’t fit on it) bin of yarn I had. I called Jo in (because she crochets sometimes) and we dumped it out on the floor. We very quickly picked the 5-6 skeins of yarn we actually liked – and got rid of everything else. Yarn in ugly colors, scratchy yarn, fluffy yarn that I loathe crocheting with – it all went away. And I breathed a huge sigh of relief!

Don’t ignore the emotional difficulty. Decluttering like this can be hard because it often means letting go of dreams. I had kept a bunch of small skeins of eyelash yarn (given to me by someone who was decluttering – ha!) because I thought I might someday use them in amigurumi. They’d be cute manes or tails, or be great for little hedgehogs or porcupines. The problem with that is that I don’t crochet amigurumi. I could learn – and I’d like to – but the realistic side of me knows that I probably won’t. Or – to be more precise – I will definitely NOT take the time to learn every single craft I’ve hoarded supplies for for the last two decades. I already sew, quilt, and embroider – I’m very unlikely to also learn amigurumi, knitting, jewelry-making, garment sewing, printmaking, watercolor painting, acrylic painting, and all of the other kajillion crafts I was storing supplies for, just in case I decided to try them out. And if I really do decide to crochet a cute little hedgehog, I will go out and buy the single skein of grey eyelash yarn I will need. None of the 20 skeins I had were grey anyway. 😛

Put the things you really want back where they go. Make sure they’re stored in a way you can easily access them – both to get them out when you want them, and to put them away again when you’re done. No storing things stacked on top of other things!

Move on the the next room/piece of furniture.

I did this over and over again, touching every single thing in my studio. And I mean every single thing. I went though my pencil cups and got rid of the hard pencils, the pencils with hard erasers, the pencils that were too short to get out of the cup without digging. I touched every single thing in the room and asked myself if I really wanted it. Not if I could think of a reason to keep it – you can always think of a reason to keep something. The question is – Do you really want it?

Two more decluttering tips for you. . .

Be fast. You know in your gut if you really want something. As soon as you touch it – pay attention to your gut. Do not start listening to your head. Your head will start telling you, “Well – you could use it for this or that or some other thing.” That’s what you told yourself when you picked it up at a rummage sale 10 years ago and you haven’t used it yet. You’re probably not going to. Get rid of it! If you find yourself dithering, you don’t really want it – but for some reason you feel bad about getting rid of it. Which brings me to. . .

Be ruthless. Some of your best decisions will be the hardest. Letting go of some things means letting go of dreams or might-have-beens. Sometimes there’s a lot of guilt attached – money spent on supplies for a craft you ended up not enjoying, time and money spent on a partially-finished project that’s been sitting on the corner of your sewing table for years. Sometimes people you love give you things you don’t like very much, but you feel like you need to keep them. It’s all hard – but I feel so good about every tough decision I made! Especially getting rid of the things that had guilt attached to them – talk about burdens lifted!

And now – I work in a lovely, inviting space that I’m not embarrassed to show you. My supplies are easy to reach and easy to put away. I don’t have to clear off a corner of my table to work on a project.

I have never experienced this before. Never!

But I love it – and I find that it’s spreading. I recently started on my kitchen – one cabinet at a time – and the results are fantastic. I can’t wait to finish that room and move on to my closet! I’ll have to move more slowly – decluttering my studio was basically a full-time job for a week – which means the results aren’t quite as dramatic, but they’re soooo satisfying. 🙂

So there you have it – my tips for how to declutter a craft room. Have fun!

Here are handy links to all the posts about quilting tools and supplies.

Sewing Machine

Iron

Rotary Cutting Tools

Scissors

Other General Sewing Room Supplies

One More Hugely Popular Post that Seems to Fit Here Better than Anywhere Else

Return to the Let’s Make a Quilt main Table of Contents.

Move on to the posts about choosing your quilt pattern.

Pins and Needles

Pins and Needles

This week I’m on vacation. While I’m gone I’m showing off my new super-tidy sewing room, and sharing my solutions to some common craft supply storage challenges. On Tuesday I shared how I store and organize all my favorite sewing tools. On Wednesday I showed you my embroidery thread. Yesterday I showed how I store all my fabric – including scraps. Today we’re talking pins and needles. 🙂

I have three pincushions I use all the time. I keep one at my sewing machine, one at my ironing board, and one at my work table. The ones at my ironing board and work table tends to empty as I work, and the one by the sewing machine tends to fill up, so I just switch full ones for empty ones as needed. And by having several pincushions at all the places I pin and unpin, I’m never looking for pins or letting them pile up on the table.

There are a lot of super cute pincushion patterns out there, but I love the look of these – and they’re very functional. There’s a free pattern for this pincushion here.

The needle cushions are another of my favorite things. I keep one with commonly used needles at my work table, one with weird needles at my sewing table, and another one with commonly used needles downstairs by the sofa where I do a lot of hand work.

I used to have a bad habit of sticking needles into the arm of the sofa (and leaving them there), sticking needles into my clothing (and leaving them there) and occasionally mistaking my thigh for the arm of the sofa and sticking them there. No more!

These needle cushions are great because they have a hard bottom so the needles can’t disappear inside them. There’s a free pattern to make them here.

And that’s it! My favorite solutions for common craft supply storage issues. I hope you enjoyed the tour through my studio this week! I’m back from vacation on Monday and I can’t wait to get to work in my awesomely tidy space!

Have a great weekend!

Best,
Wendi
That's me!

How I Store and Organize My Fabric

How I store my fabric - including scraps

This week I’m on vacation. While I’m gone I’m showing off my new super-tidy sewing room, and sharing my solutions to some common craft supply storage challenges. On Tuesday I shared how I store and organize all my favorite sewing tools. Yesterday I showed you my embroidery thread. Today I’m going to show how I store all my fabric – including scraps.

I store most of my fabric under my main work table in plastic milk crates.

How I store my fabric

I divide it by color. . .

  • red
  • orange and yellow
  • green
  • blue
  • purple
  • browns and tans
  • black, white and grey

I also have one crate that holds works in progress. By that I mean things I’m really and truly making progress on – not unfinished objects that are just piling up somewhere that I’ll never get back to. 🙂

So that’s for regular woven cottons. I keep other fabrics under the other side of the table.

How I store my fabric

The bins on the right side hold polar fleece, cuddle fleece, satiny fabric that makes good ear linings, and tulle that makes good tutus. That’s a roll of batting and my cuddle fleece color swatches rolled up between the bins.

The right side holds my colored backdrop paper for photo shoots (top shelf), painted paper for making cards for Jo (middle shelf), and some more paper, a basket of felt scraps, and my stuffing tub on the bottom shelf.

Now – about scraps. . .

How I store my fabric

I used to have twice this space devoted to scraps. Now it’s just these three bins, sorted by color. I have one for warm colors, one for cool colors, and one for neutrals.

I went on a bit of a scrap quilt binge last year and realized the six bins I was using had enough scraps in them to make three quilts – and have more than half left over. I do NOT need enough scraps for six quilts, so I pared down what was left, got rid of the ugly stuff and the too-small pieces, and this is what I have left. When the bins fill up (like they are now) I need to make another scrap quilt.

So that’s how I store all my fabric – including my scraps. 🙂

Tomorrow – pins and needles.

Best,
Wendi
That's me!


How I Store and Organize My Embroidery Thread

embridery thread storage cover

I get a lot of questions about how to store embroidery thread in an organized way.

I recently decluttered my craft room so now I have multiple posts about storing and organizing craft supplies!

See my new super-tidy studio here.

See how I store my sewing tools here.

Today it’s all about storing embroidery thread.

I struggled with organizing my embroidery floss for a long time. A couple of years ago a reader suggested storing each color in a ziplock bag and IT TOTALLY WORKED. I love it, and I posted about it here.

I still use the same basic system to organize my thread, but I’ve made a couple of changes in the last year. Most of the thread I use is matched to one of my wool felt colors, so I bagged those up with the wool color AND the DMC thread # written on the label, like this. . .

How I organize my embroidery thread

Then I put all of those baggies on one binder ring, so all my felt colors are together in one place.

How I organize my embroidery thread

The rest of my thread is bundled by color and kept in a shoebox – just like I described in the other post.

So that’s my embroidery thread! Tomorrow – fabric!

Here are links to all my posts about embroidery tools and supplies.

For Beginners

Specialty Fabrics

Threads

Stabilizers and Pattern Transfer Tools

Return to the Learn to Embroider main Table of Contents.

Move on to the posts about working with patterns.

A Peek Inside My (Tidy!) Studio

A peek inside my clean sewing room at Shiny Happy World

Look! It’s a clean sewing room!

Over the years I’ve thought a lot about showing the space I work in here on the blog. But – frankly – it’s always been a bit of a mess. More than a bit, actually. If you follow along on Facebook you know I spent the last week doing a MASSIVE declutter. My husband has been doing the same thing in his office and between us we’ve gotten rid of five carloads of stuff.  (Now it’s time to tackle the rest of the house.)

I put a lot of thought into my decluttering this time and I was far more successful than I’ve ever been before. I wrote a post about how to declutter a craft room here – and you can see some scary before photos. 🙂 But for now, I’m (finally!) going to share photos of my clean sewing room, followed the rest of the week with more specific posts about how I tackle some of the most common craft-supply storage issues.

First up is a bird’s-eye view of my space.

A peek inside my Shiny Happy World studio

I took this photo from the top of the stairs to my husband’s office, which overlooks my studio. He writes children’s books and also works from home. It’s nice having our spaces adjacent so we can holler back and forth at each other throughout the day.

I love my space! It has lots of windows and terrific natural light. Please ignore the fact that none of those windows have trim yet. It will happen someday, but the fact that it took me five years to remove all the factory stickers from  the windows might be an indicator of something. . .

I’m going to start my tour at the ironing board (the purple bit at the right of the photo) and take you counterclockwise around the room. But first – look up!

A peek inside my Shiny Happy World studio

Technically I guess you’d be looking straight ahead from your stop at the top of the stairs. The corner over my ironing board has this support beam that I painted a pretty blue and then wrote “make” in purple. That’s what I do here! I love the glass baubles hanging from the support. And just to the left of the windows hangs my very first quilt. (More info about that here.)

A peek inside my Shiny Happy World studio

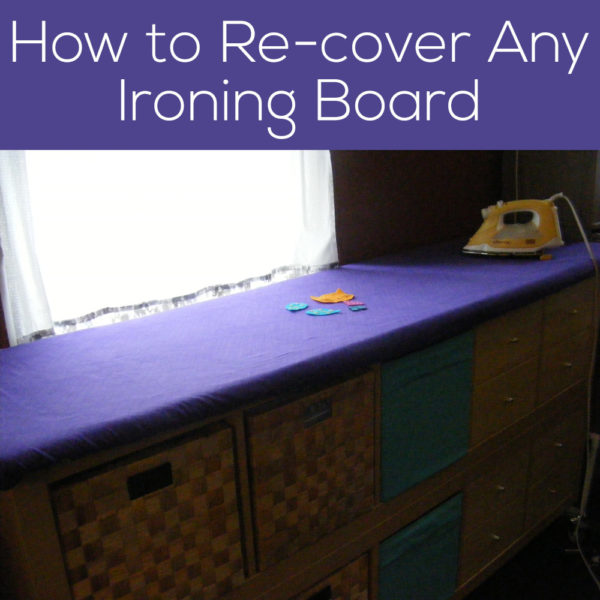
If you walk down the stairs you’ll run into my supremely awesome ironing board. It’s an Ikea hack and I posted all the details and instructions here.

The baskets and drawers are a later addition. (More Ikea stuff). All my wool felt is stored in the drawers. The blue cubbies are for general supplies (starch, water bottle for filling my iron, embroidery hoops, etc.). The natural baskets hold a lot of the tools and supplies I sell in the shop.

Keep moving to the left and you come to my desk, with some things I love hanging over it. I especially love these toys by Amanda Visell.

A peek inside my Shiny Happy World studio

And here’s my desk itself. It’s a hollow-core closet door from Home Depot sitting on two glass-fronted end tables from Target. It’s the best desk ever!

A peek inside my Shiny Happy World studio

The scanner and two printers used to be stored under my old desk so that I had to sit on the floor every time I wanted to use them. My back is very glad I don’t have to do that anymore. 🙂

See the tiny bit of orange hutch in the top left corner? That’s next.

A peek inside my Shiny Happy World studio

The jars in this hutch hold buttons, trim, elastic, eyeballs and more fun stuff – but it’s also a place where I put random things I love, like this. . .

A peek inside my Shiny Happy World studio

Behind the doors at the bottom of the hutch are random office supplies and all my shipping supplies.

If we keep moving left we’ll zoom past a tall bookcase full of kids nonfiction books. . .

A peek inside my Shiny Happy World studio

. . . and come to these low bookshelves where I store all my kits.

Turn the corner and this is where I store Cuddle Fleece.

A peek inside my Shiny Happy World studio

The quilt over the top keeps the bolts safe from sunlight and dog hair. 🙂

Turn the corner again and you’ll pass my washer and dryer, the door to Jo’s room, and a (probably overflowing) laundry hamper before you come to this.

A peek inside my Shiny Happy World studio

The right bookcase is all my picture books – great reference for when I need to know what a crocodile might look like standing upright on his back legs. 🙂

The left bookcase is all my craft/sewing/drawing/design reference books and sketchbooks, plus a few favorite things like the Party Animals.

A peek inside my Shiny Happy World studio

There’s a new guy ready to join the party soon!

Continue left and there’s this long row of low bookcases along the half-wall overlooking my dining room.

A peek inside my clean sewing room - Shiny Happy World studio

This is where I keep thread, beads, markers, paints, glue, my tool basket, files of patterns in progress, and other stuff. It’s just a step away from my main work table so it’s really handy. If I want to keep a clean sewing room – I need to make it easy to put things away properly. Otherwise I’ll let those supplies pile up.

Now we’re back to the stairs. Under the stairs is some pretty art. . .

A peek inside my Shiny Happy World studio

. . . and this piece of furniture.

A peek inside my Shiny Happy World studio

The striped bins hold my scraps and behind the doors you’ll find paper, extra printer ink, and random, bulky weird-shaped things like my tripods.

On the wall above the stairs (as you head back up to my husband’s office) is a collection of some of my favorite children’s book art.

A peek inside my Shiny Happy World studio

It’s impossible to shoot a photo without getting sun glare – I’ve tried every time of day and every time of year. But there’s some great stuff up there!

We skipped a couple of tables in the middle of the room.

A peek inside my clean sewing room - Shiny Happy World studio

This is my main work table with a big cutting mat up top, and fabric storage underneath. (And Augie Dog peeking in the side of the photo.) It’s between my desk and the low storage shelves.

Just past it you can see my sewing table – the magenta one.

A peek inside my clean sewing room - Shiny Happy World studio

That table top is a collage of picture book pages with a layer of clear epoxy over it. I love it! You can see how I did it here. There’s a futon backed up to the sewing table, because my studio is also the guest room. 🙂

And that’s it! My clean sewing room! More details coming every day this week about fabric storage, tool storage, embroidery floss storage, and pins & needles.

I hope you enjoyed the tour! Happy Monday!

How I Care for My Fabric Scissors

The Great Scissor Rotation - how to get the most use out of every pair of scissors

Everyone knows not to use your good fabric scissors on paper, right?

RIGHT?

Today I thought I’d go beyond that very basic info with some extra detail on how I manage all my scissors – including my fabric scissors. This is going to answer a few questions that I get all the time.

Do you use expensive scissors?

Nope. Don’t get me wrong – I’m a big fan of high quality tools. I KNOW that quality scissors are better than cheap ones. But I also know that I am terrible at things like. . . bringing scissors in to get them professionally sharpened.

Good quality scissors that are painfully dull because I don’t know how to sharpen them myself and I can’t seem to coordinate my life well enough to get them professionally sharpened are worse than cheap scissors.

I can get a decent pair of Fiskars sewing shears at any big box fabric or craft store for under $20 – and then replace them every year. More on that replacement in a bit. . .

Which scissors do you use for cutting fabric and paper together – like with fusible adhesive or freezer paper?

Ah – that brings me to The Great Scissor Rotation.

I keep three pairs of big scissors in my fabric room. (This is only about the big scissors (shears, if you want to get technical) – I also have spring-loaded snips at the sewing machine and an assortment of tiny scissors for precision work.)

My newest pair of scissors is for fabric only.

When I bring in a new pair, the old fabric scissors become the scissors I use for fabric fused to paper.

(Update! I’ve discovered some specialty scissors that I REALLY love for cutting applique pieces, so now I use these for that purpose exclusively, and I leave this step out of my rotation)

The old fabric-fused-to-paper scissors become my paper scissors.

My old paper scissors move into the kitchen for snipping herbs, cutting waffles into dipping strips, cutting open packaging, etc.

And my old kitchen scissors move into the toolbox for real heavy duty work.

The scissors that were in the toolbox are usually totally destroyed by this time and they finally go in the trash.

I buy a new pair of scissors about once a year. While that may seem wasteful at $20 a pair when I could buy a quality pair that will last a lifetime for just under $100 – every pair of scissors I bring in gets used for about five years. Not bad at all! And I never need to coordinate bringing them in to be sharpened. 🙂

I mentioned above that this rotation only applies to basic shears. I do have some other specialty scissors that I love and am very particular about.

By the way – because I know someone is going to ask. I do sharpen my kitchen knives – but sharpening scissors is a different matter, one that I’ve been told repeatedly is best left to professionals. The angle of the sharpening is very different and you need to get both blades to work together. It’s more complicated and beyond my rudimentary knife-sharpening skills.

Here are handy links to all the posts about quilting tools and supplies.

Sewing Machine

Iron

Rotary Cutting Tools

Scissors

Other General Sewing Room Supplies

One More Hugely Popular Post that Seems to Fit Here Better than Anywhere Else

Return to the Let’s Make a Quilt main Table of Contents.

Move on to the posts about choosing your quilt pattern.

Happy stitching!

My Awesomely Huge Ironing Board – An Ikea Hack How To

Awesome Extra Wide Ironing Board from Shiny Happy World

There are three things I LOVE about my awesome new ironing board.

One is obviously the fabric for the cover. This is The Land that Never Was designed by Lisa Congdon for Cloud9 Fabrics. I love the whole collection!

Two is the size. I can iron an entire piece of fabric – selvedge to selvedge – on this baby – with room to set my iron on the board too.

Awesome Extra Wide Ironing Board from Shiny Happy World

Please admire the vastness. 🙂

Three is the storage underneath.

Awesome Extra Wide Ironing Board from Shiny Happy World

I never take my ironing board down – so the easily collapsible X bottom was just a waste of space for me. This ironing board sits on some handy dandy Ikea Expedit shelving!

Here’s how I made it. . .

1. Start with your shelves. I was going to use a different piece from Ikea. When we went they had plenty in stock, but they were all on the top shelves of the storage area and they said they couldn’t get them down until after hours and we’d have to come back the next day. The Ikea is 2 1/2 hours away. Coming back the next day wasn’t an option – so we went with two of these instead, laid them on their sides and screwed them together in the back. It’s even longer than I had planned – but that’s ok with me! (Edited to add: Ikea no longer stocks the Expedit shelving. Their replacement is the Kallax, which would also be suitable for this project.)

I also added the wheels to the bottom for easy moving and vacuuming.

2. Now measure the top of your shelves. Find some small L-brackets and measure them too. You’re going to cut a piece of plywood big enough to hang over the edge of the shelf on all sides by the width of a bracket. These next pictures will make it clear.

Awesome Extra Wide Ironing Board from Shiny Happy World

Here’s a bracket (the ones I found were 1 1/2 inches) attached to the edge of the plywood. It’s attached to what will be the underside of my ironing board.

Awesome Extra Wide Ironing Board from Shiny Happy World

In this photo I’ve flipped my board over. It’s resting on the top of the shelving unit and the brackets are holding it in place so it doesn’t slide around. You could screw the brackets to the shelving unit too, but I wanted the whole top to be easily removable and I found that six brackets around the edge (two on each long side and one on each short end) held it in place nicely.

I wrapped the lower (not screwed in) part of the brackets with a layer of masking tape so they wouldn’t scratch the surface of the shelving unit. You never know – I might take this whole thing apart at some time in the future and use the shelves in another way.

Awesome Extra Wide Ironing Board from Shiny Happy World

Here’s the wooden top seen from above, before adding padding and the cover. Yes – that’s a seam down the middle. No – I don’t recommend doing the top in two pieces. I had a bunch of kids with me in the car the day I bought the wood and I couldn’t put the back seat down to accommodate a larger piece of plywood. I should have waited.

Awesome Extra Wide Ironing Board from Shiny Happy World

I rounded the corners of the wood just a tiny bit. I set a can of spray paint on the corner and traced that curved edge to use as a guide. This isn’t necessary – but I’m going to use a drawstring cover and it will wrap more neatly around a curve.

Now I’m ready to add some padding and the cover.

Awesome Extra Wide Ironing Board from Shiny Happy World

I covered the top with six layers of white cotton terry cloth. I usually use cotton batting, but I think this terry cloth might hold up better (compress less) over time. Cut the terrycloth so it hangs over the edge of the tabletop by 1-2 inches. Smooth out any folds or wrinkles.

Awesome Extra Wide Ironing Board from Shiny Happy World

Round the corners of the terrycloth too.

Awesome Extra Wide Ironing Board from Shiny Happy World

Now it’s time to add the pretty! A good selvedge on fabric makes me happy in the same way that good endpapers in a book make me happy.

From here on out it’s just like covering any ironing board. I’ve got a video here showing how.

Cut the fabric to cover the top plus 1-2 inches all around the edge – just like the terry cloth. Round the corners of the top fabric, too.

Sew bias tape all around the edge of the new cover. Use that bias tape as a tube and thread it with a long piece of cord. I like using a smooth nylon cord – it draws up easily.

Center your cover over your ironing board. Draw up the drawstring and use a toggle to hold it in place.

Awesome Extra Wide Ironing Board from Shiny Happy World

Ta daaaa! I love my new ironing board!

Here are handy links to all the posts about quilting tools and supplies.

Sewing Machine

Iron

Rotary Cutting Tools

Scissors

Other General Sewing Room Supplies

One More Hugely Popular Post that Seems to Fit Here Better than Anywhere Else

Return to the Let’s Make a Quilt main Table of Contents.

Move on to the posts about choosing your quilt pattern.

Happy sewing!

How to Replace the Cover on Your Ironing Board – video

There’s no reason to settle for the bland fabric that comes on most ironing boards – making a new cover is super easy!

I loved my old ironing board cover, but it had gotten badly waterstained and really faded in the sun. Plus – I made all kinds of new sewing room accessories using the Ed Emberley Happy Drawing fabric collection and I wanted my ironing board to match. So time for a new cover!

This time I needed to replace the pad too, so it was a great time to shoot a video showing you how to do the whole thing from start to finish.

If you want even more padding, I recommend a couple of layers of 100% cotton terry cloth. A towel won’t fit the length of most ironing boards, but you can buy it by the yard at the big box fabric stores.

Here are handy links to all the posts about quilting tools and supplies.

Sewing Machine

Iron

Rotary Cutting Tools

Scissors

Other General Sewing Room Supplies

One More Hugely Popular Post that Seems to Fit Here Better than Anywhere Else

Return to the Let’s Make a Quilt main Table of Contents.

Move on to the posts about choosing your quilt pattern.

Happy sewing!

Free Tutorial – Easy Pattern Weights

Easy Pattern Weights - a free pattern from Shiny Happy World

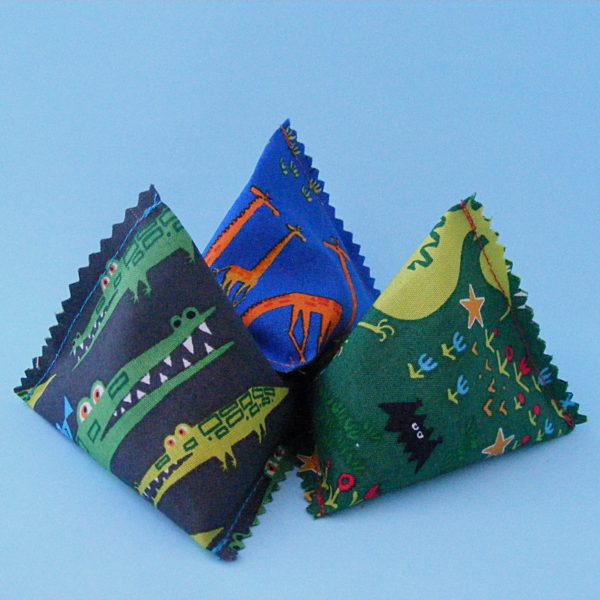
These pattern weights are sooooooooo easy to make. Seriously. Each one takes less than five minutes. Dig into your fabric scraps and make a big batch of them for a sewing friend. This fabric (to match the rest of my sewing room) is designed by Ed Emberley for Cloud 9 Fabrics.

I’ve tried a lot of different styles of pattern weights and these are, hands-down, my favorite. The pyramid shape makes them really easy to grab, and they’re super heavy. My secret ingredient is aquarium gravel. I actually weighed all kinds of possible fillers to see which one weighed the most by volume. Gravel weighed more than twice as much as the next closest option!

Ready?

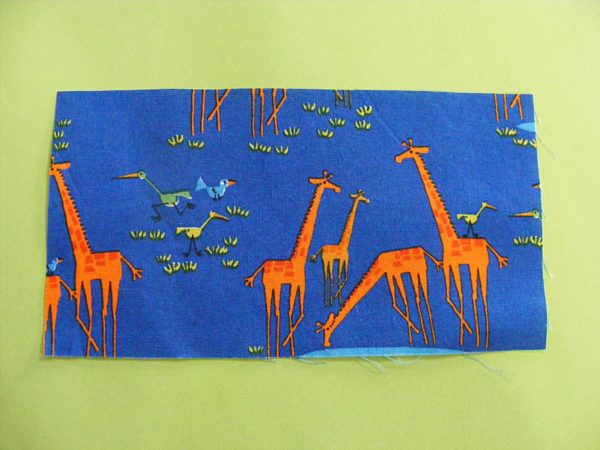
Cut a piece of fabric 6 1/2 inches wide x 3 1/2 inches tall.

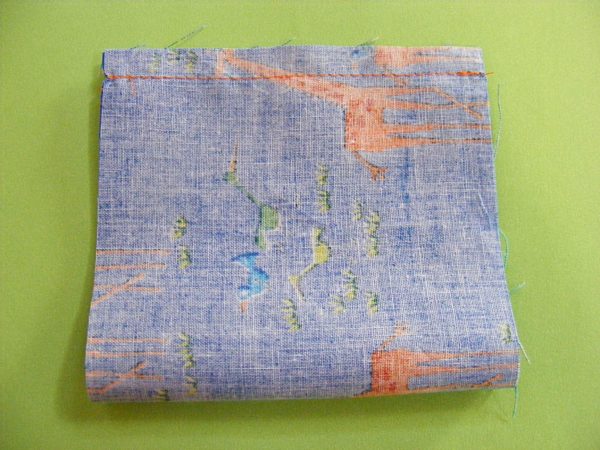
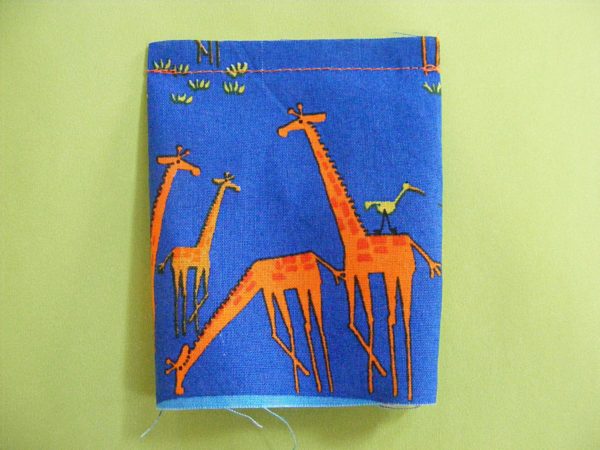
Fold it so the right sides are together. Sew across the short ends using 1/4 inch seam allowance.

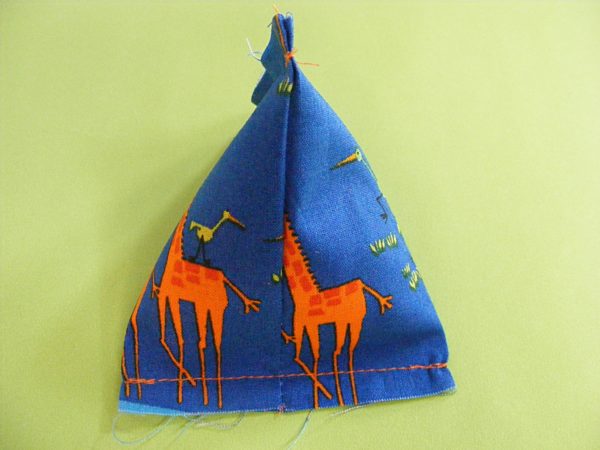
Turn the little tube right side out. Flatten it so the seam is running up one side. Sew across one end using 1/4 inch seam allowance.

Using contrasting thread is fun. 🙂

Fill it with 3 tablespoons of aquarium gravel. Flatten it this time so the seam is running up the center. Sew across the end using 1/4 inch seam allowance.

Careful not to spill the gravel while you’re getting it under the presser foot. 🙂

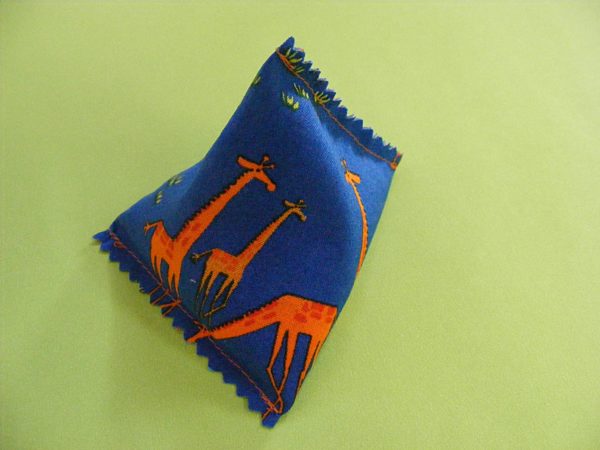
Trim up the edges using pinking shears. Not too close to the seam!

Done!

If you’re making these for a friend, 6-10 is a nice quantity. That’s enough to hold down just about any pattern.

These are really handy for more than just cutting patterns. I especially love using them for holding down the corners of freezer paper when I’m tracing applique designs.

Here are handy links to all the posts about quilting tools and supplies.

Sewing Machine

Iron

Rotary Cutting Tools

Scissors

Other General Sewing Room Supplies

One More Hugely Popular Post that Seems to Fit Here Better than Anywhere Else

Return to the Let’s Make a Quilt main Table of Contents.

Move on to the posts about choosing your quilt pattern.

Happy sewing!