How I Care for My Fabric Scissors

The Great Scissor Rotation - how to get the most use out of every pair of scissors

Everyone knows not to use your good fabric scissors on paper, right?

RIGHT?

Today I thought I’d go beyond that very basic info with some extra detail on how I manage all my scissors – including my fabric scissors. This is going to answer a few questions that I get all the time.

Do you use expensive scissors?

Nope. Don’t get me wrong – I’m a big fan of high quality tools. I KNOW that quality scissors are better than cheap ones. But I also know that I am terrible at things like. . . bringing scissors in to get them professionally sharpened.

Good quality scissors that are painfully dull because I don’t know how to sharpen them myself and I can’t seem to coordinate my life well enough to get them professionally sharpened are worse than cheap scissors.

I can get a decent pair of Fiskars sewing shears at any big box fabric or craft store for under $20 – and then replace them every year. More on that replacement in a bit. . .

Which scissors do you use for cutting fabric and paper together – like with fusible adhesive or freezer paper?

Ah – that brings me to The Great Scissor Rotation.

I keep three pairs of big scissors in my fabric room. (This is only about the big scissors (shears, if you want to get technical) – I also have spring-loaded snips at the sewing machine and an assortment of tiny scissors for precision work.)

My newest pair of scissors is for fabric only.

When I bring in a new pair, the old fabric scissors become the scissors I use for fabric fused to paper.

(Update! I’ve discovered some specialty scissors that I REALLY love for cutting applique pieces, so now I use these for that purpose exclusively, and I leave this step out of my rotation)

The old fabric-fused-to-paper scissors become my paper scissors.

My old paper scissors move into the kitchen for snipping herbs, cutting waffles into dipping strips, cutting open packaging, etc.

And my old kitchen scissors move into the toolbox for real heavy duty work.

The scissors that were in the toolbox are usually totally destroyed by this time and they finally go in the trash.

I buy a new pair of scissors about once a year. While that may seem wasteful at $20 a pair when I could buy a quality pair that will last a lifetime for just under $100 – every pair of scissors I bring in gets used for about five years. Not bad at all! And I never need to coordinate bringing them in to be sharpened. 🙂

I mentioned above that this rotation only applies to basic shears. I do have some other specialty scissors that I love and am very particular about.

By the way – because I know someone is going to ask. I do sharpen my kitchen knives – but sharpening scissors is a different matter, one that I’ve been told repeatedly is best left to professionals. The angle of the sharpening is very different and you need to get both blades to work together. It’s more complicated and beyond my rudimentary knife-sharpening skills.

Here are handy links to all the posts about quilting tools and supplies.

Sewing Machine

Iron

Rotary Cutting Tools

Scissors

Other General Sewing Room Supplies

One More Hugely Popular Post that Seems to Fit Here Better than Anywhere Else

Return to the Let’s Make a Quilt main Table of Contents.

Move on to the posts about choosing your quilt pattern.

Happy stitching!

How to Care for your Craft Scissors

I have three pairs of scissors: a pair for cutting fabric, a pair for cutting tape and an all-purpose pair (that happen to be child-safe so I can use them for travel).

scissors

Having different pairs for different craft purposes allows you to keep them in tip-top-shape, and makes your crafting easier! Here are some tips I have for keeping your scissors healthy.

Mark your Scissors

Do you have a family member who might be tempted to use your fabric-only scissors for cutting construction paper? Add a label to them! And consider keeping your special scissors away with your fabric stash.

Clean Scissors with Rubbing Alcohol

I have a pair of scissors just for cutting packing tape. Because tape leaves a residue that makes scissors icky!

When mine get too icky, I use rubbing alcohol and a cotton ball to clean the blades. The sticky comes right off!

Get them Sharpened

Many craft stores have an occasional sharpening service. Just like nice knives, it pays to get your scissors sharpened!

Any tips to share?

How many scissors do you have? And what types are they?

Do you have any care tips you’d like to share?

Read about Wendi’s “Great Scissor Rotation” here.

Tips and Tricks for Working with Cuddle Fleece

Tips and Tricks for Working with Cuddle Fleece - from Shiny Happy World

I loooove using Cuddle Fleece for making softies!

I discovered it at Quilt Market last year and fell in love – and then couldn’t find it in any shops. It was even hard to find online! So I ordered a few bolts to carry in my shop and I’ve been using it for softies and quilt backs ever since.

Update – I’m not able to carry Cuddle Fleece in the shop anymore, but I found a good substitute! More details here.

It’s mostly very easy to work with – similar to polar fleece – but I do get some questions about it. Here are the answers to the most frequently asked questions. . .

It’s so shifty! How do you keep the layers from moving around?

The layers come in two times in the process – when you’re cutting and when you’re sewing. I prefer to cut mine one layer at a time instead of folding and cutting through two layers. That way I get the most accurate cut possible. Do be sure to flip the pattern pieces for the second cuts so you’re still getting one reversed!

When you’re sewing two layers together you have to deal with layers. There’s no way around it. That’s when I use Wonder Clips. You can use pins instead, but Wonder Clips handle the fat fabric really well and without distorting the layers at all. You can clip them really close together (every inch or so) and just sew slowly, unclipping each one as you get to it.

It’s so fat! Do I have to do anything special to sew through it?

Cuddle Fleece shares one of the same challenges as polar fleece.

It’s fat.

The thickness of the fabric can make the layers shift while you’re sewing – especially when you’re sewing through two layers plus the additional layers of an arm or leg in there. There’s a video showing how I deal with the fatness here. It’s specifically about polar fleece, but all those tips also apply to Cuddle Fleece.

Do I need a special needle?

I sew mine with a basic universal needle and have no problems. If you find your machine is skipping stitches I recommend switching to a stretch needle.

If you have a walking foot – use it!

If you don’t have a walking foot – pin like crazy.

Which is the right side of the fabric?

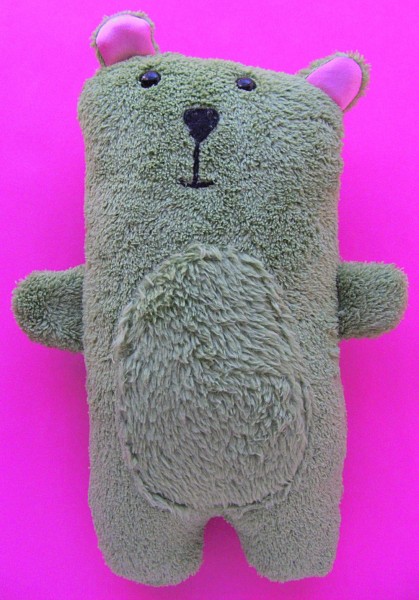
Cuddly Bailey Bear - fabric and pattern from Shiny Happy World

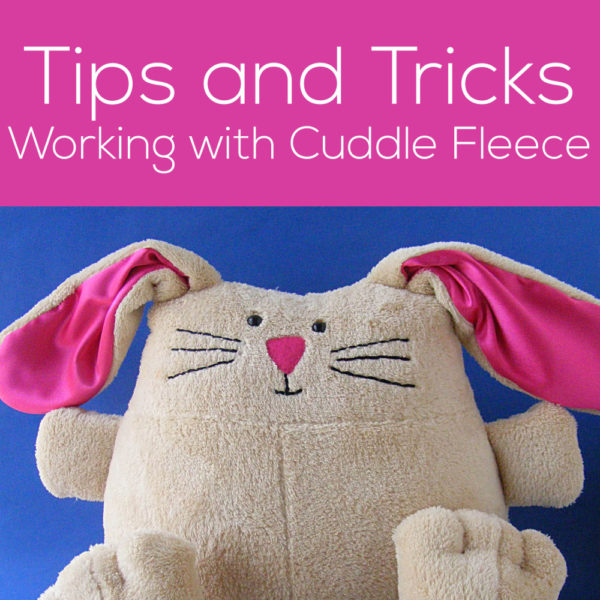
They’re both good – but they are different. You just have to choose what works best for you for a particular project. One side has a shorter, smoother pile. That’s the one I often choose as the “right” side. It’s what you see on the bunny up there.

The other side is a little shaggier looking. The pile is a bit longer, and a teeny bit more irregular. Use this as the right side when you want a rougher look.

You can also combine the two textures in one softie like I did with that green Bailey Bear. I used the shaggier side on his belly patch.

How do you mark on it?

Cuddle Fleece, like polar fleece, can also be difficult to mark on. With polar fleece the problem is that it’s basically made out of plastic, so markers tend to bead up on it, take a long time to dry, and smear easily when wet.

The problem with marking on Cuddle Fleece is that it has a bit of a nap to it.

Marking eyes is easy – I just punch holes in my pattern piece and then mark through the holes with a fabric marker.

Marking lines is a bit trickier. For them I turn to The Magical Embroidery Stuff (aka Sulky Sticky Fabri-Solvy).

Seriously – is there anything this stuff isn’t good for?

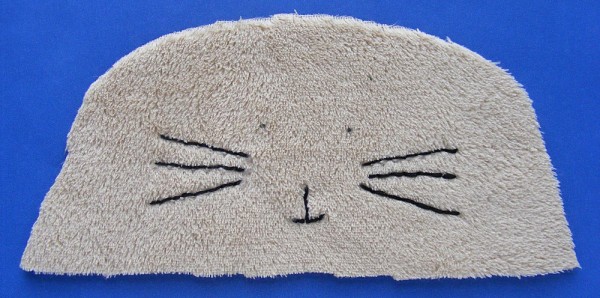
For the bunny you see at the top of the post I marked the eyes as mentioned above. I could have eyeballed the nose and mouth, but I wanted to make sure I got those whiskers balanced. That meant sticking to my pattern piece exactly as drawn. 🙂

I traced the entire face on a scrap of Sulky Sticky Fabri-Solvy and then stuck it down to the fabric, using those eye markings to guide my placement.

Yes – it sticks just fine to the Cuddle Fleece. It’s amazing stuff!

Sulky Sticky Fabri-Solvy is great for transferring a face to cuddle fleece.

I embroidered right through the stabilizer, then soaked it away in cold water and tossed it in the dryer for a quick dry and fluff.

Sulky Sticky Fabri-Solvy is great for transferring a face to cuddle fleece.

Perfect! And since I used a fabric marker to mark those eyes, the dots are still there after rinsing The Magical Embroidery Stuff away.

The fluff! Is there any way to keep the fluff under control?

That’s the most common question people have. Cuddle Fleece is fluffy and soft – and when you cut it that fluffiness can go everywhere!

When I cut pieces to make a softie, I walk them straight to the dryer and toss them inside. I tumble it all with no heat for about 10 minutes. When I pull them out – all the fluff is gone. The edges won’t fray after cutting, so once you get that initial cutting fluff off, you can continue work on the rest of the project with no more shedding.

Awesome!

If you have any other questions about this lovely fabric, just let me know in the comments. I’ll either update this post or (if there are enough additional questions) I’ll do a follow-up post.

Here’s one of those follow-up posts. 🙂 A video answering lots of reader questions about using cuddle fleece for quilt backs. Watch it here.

Happy sewing!

Secrets of Sensational Softies

The Secrets of Sensational Softies (shhh. . . it's the fabric!)

When was the last time you walked into a store and saw an appealing stuffed animal sewn from quilting cotton? Dolls yes – the smooth fabric makes it easier to dress and undress a doll. But cuddly stuffed animals? They’re ALWAYS made from softer stuff.

And they’re almost always made from fabric that you can’t buy at your regular fabric store. Super soft stuff that’s made especially for these toy companies.

Cordy Roys

I would dearly love to find a source for the fabric Jellycat uses in their Cordy Roys collection!

Polar fleece and minky fabrics are usually as close as home sewists can come – and it’s just not the same.

But I found a source!

When I was at Quilt Market last spring I met with a company (Shannon Fabrics) who makes amazing plush fabric. They sell to a few specialty fabric stores, but none of the big box stores. They mostly sell to manufacturers.

I knew as soon as I touched their fabric that this was what I had been looking for to take my softies to the next level. I touched every kind of minky and fleece they made (and they make a lot!) and I kept coming back to something called Cuddle Fleece. It was amazing! Super soft, slightly stretchy, with a nice drape. I knew it would make terrific stuffed animals – and also blankets and quilt backs.

I searched for a few months, but I had a heck of a time finding reliable sources for anything but their dimple minky. I wanted cuddle fleece and I wanted to buy it by the yard!

You know what I do when I can’t find the materials I want to use? I find them at wholesale and add them to my shop. I figure if I’m having a hard time finding them, then so are you.

So I rearranged my studio, hemmed and hawed over color choices, and bought six enormous bolts of fabric. Now I’m going to have to rearrange my studio again because they. . . ummmm. . . don’t fit in the space I had made for them. 🙂

Super soft cuddle fleece from Shiny Happy WorldBut they are here! And they’re available for you to make the most amazing softies ever!

Over the next few weeks I’ll show you some of my favorite patterns made up in these fabrics. I can’t wait to play! And Jo is already claiming the samples. 🙂

In the meantime, you can find this super-soft cuddle fleece here and start making your own super soft softies!

I’m convinced that the fabric is the key to a sensational stuffed animal – but there are a few other materials that play a strong supporting role.

Safety eyes make your handmade softies look really special. I love the way the light glints off those shiny black domes – it makes the whole face come to life!

Make sure you’re using a good quality stuffing – it makes a far bigger difference than I ever anticipated – until I actually tried it. Here’s a post about my favorite kind and where you can find it.

I don’t make a lot of baby toys – but Abby Glassenberg at While She Naps is a master at it. Most store-bought baby toys have extra interactive bits: rattles, music buttons, squeakers, etc. Did you know you can add those to your handmade softies? I’ve never seen any of these components in a brick & mortar store, but Abby carries a few special supplies in her shop. Give some of these a try the next time you’re making a gift for a baby!

High end mass-produced stuffed animals are made pretty much the same way you make yours at home. Yes – they’re made assembly-line style by low-paid workers in a factory, but the process of sewing and stuffing is essentially the same. They just get softer results because they’re using softer materials. Materials not readily available to home sewists. Until now. 🙂

Happy sewing!

Best,
Wendi
Wendi_Gratz_Shiny_Happy_World

Get Stuffed! A Stuffing Review and Giveaway

Stuffing_Softies_Creature_CampThere are a lot of different kinds of stuffing you can use in your softies – wool, bamboo, corn, polyester, excelsior, sawdust – and probably lots of others I can’t come up with at the moment. I always use polyester fiberfill (often in combination with weighted pellets). It’s inexpensive, readily available, has a nice springy feel, and is washable.

I’ll be honest. Once I decided what material I would use for stuffing, I never gave much thought to the quality. I figured that threads of spun polyester are threads of spun polyester and I always just bought whatever was cheapest.

I was wrong.

When I started writing Creature Camp I contacted a few manufacturers to ask if they would provide some materials for use in the samples in the book. Fairfield sent me a few bags of their plastic Poly Pellets (I love that weighted feel and flop) and an ENORMOUS box of stuffing.

Twenty-five pounds of stuffing.

That is a LOT of stuffing! That’s enough stuffing – packed as tight as I can get it – to fill two trash cans to overflowing, requiring a bungee cord to keep the lids on.

As soon as I opened the package I noticed that it was very different from my usual stuffing. It was very smooth and the fibers had a kind of a silky glide to them. The spun threads felt finer and it didn’t clump up at all.

With my old stuffing I had to spend a good bit of time pulling the stuffing apart into tiny bits before stuffing in order to keep the finished softie smooth and lump-free. No need to do this with the new stuffing. I can just pull out big handfuls and stuff them in. Nice!

Jo’s response was absolutely priceless.

She raved about the new stuffing. “It’s sooooooo soft!” “It’s sooooooo silky!” “My softies are sooooooooo smooth!”

But the best was the moment I came into my sewing room and found her, head down, buried up to her chest in my trash can full of stuffing, bouncing up on her tiptoes trying to “swim” even deeper into it.

I wish I had a photo. 🙂

When I asked her what the heck she was doing she said, “It’s just so soft and fluffy. I couldn’t resist!”

After we had used the new stuffing on a few projects she asked me if I would please give away what we had left of the old stuffing because she just didn’t want to use it anymore.

I did. My Dad always said to use the right tool for the job and I had found the right tool.

So. You’re probably wondering what this magical stuffing is. It’s Fairfield brand Poly-fil Supreme Fiberfill. I recommend it by name in almost all of my softie patterns. You can find it in Walmart under a different name and with different packaging. There it’s call Poly-fil Supreme Ultra Plush. I’m including a photo of both kinds of packaging so you know what you’re looking for.

stuffingI really, really love this stuff and feel like it has made my softies noticeably better. Not only is it really pleasant to touch and work with, the finished softies are smoother with a lot less effort on my part. Also, it allows me to get a nice smooth fill without packing the stuffing in as tightly and I really like the squishier softie that results.

Squishy = Huggable = Good.

I wanted to share it with some of you and asked Fairfield to send some samples I could give away. They said yes! So this will be one of the giveaways for folks who pre-order Creature Camp from my shop. In addition to getting a free pattern, a few randomly selected people will also get a bag of this stuffing – enough to make several softies! Thanks, Fairfield!

Edit – Sorry – the giveaway is over now.

And I’ll leave you with one more photo from the making of the book. Jo says the stuffing is her favorite part of making softies. “It’s like feeding them.” Here are Jo and her friend, Hana, feeding their new softies some silky smooth fluffy stuffing. 🙂

stuffing_softies_Creature_CampHappy sewing!

Best,
Wendi
That's me!

Tutorial – Using Safety Eyes with Woven Fabric

Using Safety Eyes with Woven FabricUsually I use safety eyes with polar fleece or fake fur.

You can see a video showing how to use them here.

They really stand out from the fabric and look great – and there’s nothing you need to fuss with.

But when I was designing Bean I decided I wanted the face to look younger. That means bigger eyes and I knew safety eyes would give me just the shine and roundness I wanted.

The problem is the 9 mm safety eyes (the size I wanted to use) have a back that’s larger around than the eye itself.

That’s not an issue with fabrics with a bit of pile to them (like fleece or fur) but I didn’t like the way it looked with the woven cotton I was using for the face.

You can see the sharp edge of the backing in a little ring around the eye on the finished doll. It doesn’t look too bad – until you stuff it. Then it looks very pronounced.

Luckily – the solution is super easy!

safety eyes tipCut a circle of felt for each eye, just a little bit bigger around than the washer used on the inside of the eye.

It doesn’t have to be perfect.

If you’re using fabric in a light color, make sure to use felt in a light color too so it doesn’t shadow through.

safety eyes tip

When you insert the eyes, slip the little felt circle between the fabric and the washer. It’ll be on the inside of the doll head.

Make sure you lock the washer down tight.

Now when you stuff your doll the felt will act like a little layer of stuffing between the washer and the “skin” – softening the hard edge of it.

See? I told you it was easy!

Happy sewing!

Best,
Wendi
Applique Wendi (with fabulous hat)

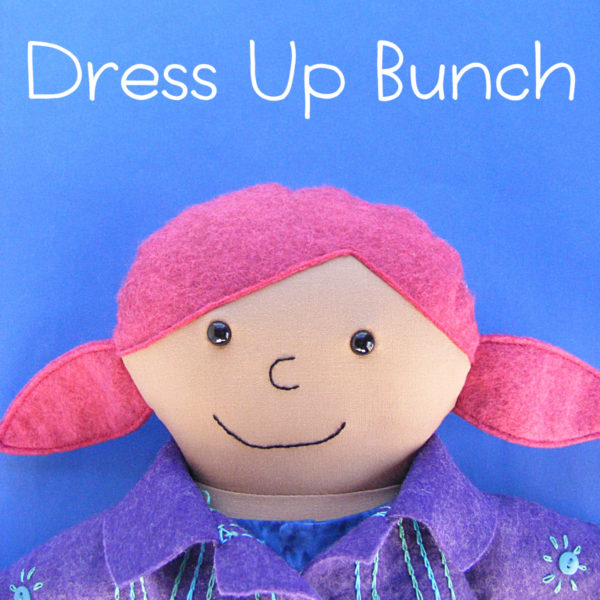
The Dress Up Bunch is a collection of cute and cuddly rag dolls. Get patterns for the dolls, plus all their fun outfits and accessories!

Intraux to Faux Fur Fabric – video

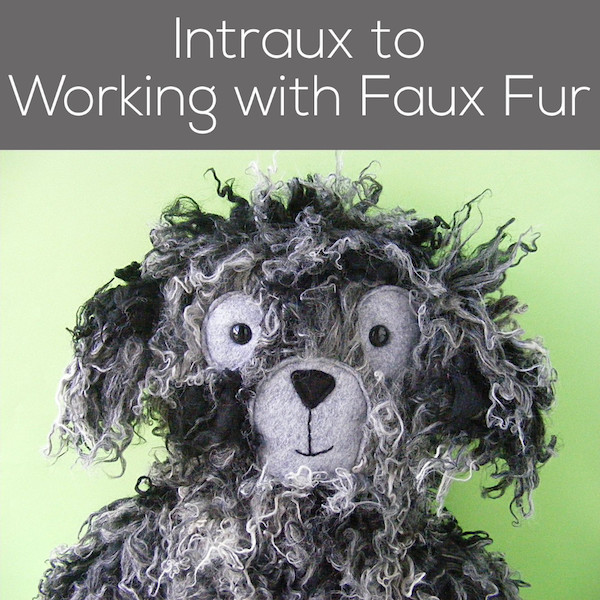
Close up of a grey shaggy dog stuffed animal. text reads "Intro to Working with Faux Fur." Post about working with fake fur fabric - a video tutorial from Shiny Happy World

Using faux fur (or fake fur) can add a really special – and professional – look to your handmade stuffed animals and quilt. Furry dogs! Furry cats! Furry monsters! They’re all wonderful!

But fake fur is not an everyday fabric, and a lot of people feel like it must require a lot of special knowledge or skill to use it, so they avoid it. That’s such a shame because it’s actually fairly easy to use – if you know just a couple of simple tricks.

So here’s the first in a little series of videos showing you some tips and tricks for working with faux fur. This video covers the most basic basics – how to cut it out without having fur fly all over your sewing room, and how to sew it together so the fur ends up on the outside of your softie, instead of hidden inside your seams. 🙂

Here are a few more helpful posts about working with faux fur. . .

My favorite sources for buying fabulous fake fur

How to applique faux fur fabric (video)

How to applique onto faux fur fabric (video)

And here are some of my favorite patterns that can be used with fake fur. . .

Spot the Dog – that’s Spot made up in a fabulous scruffy grey fur in the top photo. He’s actually a dressable rag doll, so you do need to be careful when making him with fur. If your fur is too full and shaggy, his clothes will be quite tight. 🙂

Scary Squares Monster Quilt Pattern

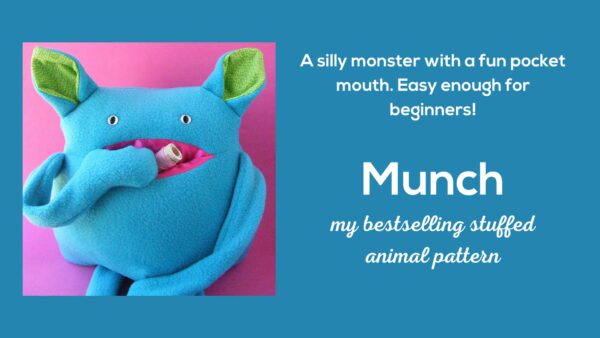
Munch – a stuffed monster with a pocket mouth

Eggheads – mix & match monster softie pattern

Knuckleheads – mix & match monster softie pattern

Happy sewing!

What are the different kinds of sewing needles?

What are the different kinds of sewing needles?

Want to learn the basics of hand embroidery with an easy online workshop – totally free?

Sign up for Embroidery 101 here. You’ll learn how to get started, the tools and supplies you’ll need, the four most basic stitches, how to transfer your pattern and how to display your work.

If you already know the basics – sign up for Embroidery 201. It’s also free! You’ll learn how to stitch on specialty fabrics like felt and stretchy T-shirts. Plus you’ll learn lots and lots and LOTS more stitches – all my favorites!

Liz recently asked me. . .

I have a question for you – what sort of sewing needles do you use? I am experimenting with different sorts but haven’t yet found the  perfect one. It looks like you are using six strands in your eyes video – which needle are using for that? And what would you recommend for three strands?

I’m going to use this as an opportunity to talk about sewing needles in general. See that photo up there? I loaded it up in a large file size so you can click on it to see it closer – and that’s a sewing bobbin in there for size reference. The three needles there are the ones I use most often (which is why they’re the hand sewing needles I sell in my shop).

Types of Hand Sewing Needles

Let’s start from the top. . .

The top needle is a size 5 embroidery needle. That’s the size I most often use for regular embroidery because I like to stitch with 4 strands of thread and it’s perfect for that. It doesn’t hurt to use fewer, and if I concentrate really hard (and remove my glasses) I can get six strands through that eye.

I often use a size 8 embroidery needle when I’m sewing or embroidering on felt. The needle hole can actually be visible in felt, and I’m usually only stitching with 2 strands of thread – so it’s better to switch to a smaller needle for that.

I also use a size 8 embroidery needle for Big Stitch quilting.

The middle needle is a size 4 sharp. That’s a basic sewing needle. (Basic sewing needles are called sharps – just to confuse you. All the needles in the photo are sharp, but the middle one is actually called a sharp.) If you click on the photo to see it larger I hope you can see that the eye is much smaller than the embroidery needle. In a pinch you could maybe fit 3 strands of embroidery thread through there, but it would be tough. That said, I have used a sharp to embroider with 1-2 strands of thread and lightning didn’t strike me for using the wrong needle. 🙂

The bottom needle is a size 8 between or quilting needle. I have no idea why quilting needles are called betweens. I think it’s just one more thing to scare away the people who opted out of Home Ec. Anyway – this is a good small size for traditional hand quilting, but I often recommend for beginners to start with something larger and work their way down. That’s why the quilting needles I sell in my shop come in a pack of assorted sizes.

This needle is also sharp, with a small eye like a sharp, but it’s shorter and thinner. I’ve been known to sew with a between, but I never quilt with a sharp.

And now one more thing to confuse you – as needle size numbers get bigger, the needles get smaller and vice versa. So a size 5 embroidery needle is smaller than a size 3. It’s like wire gauges.

So there you go – an intro to the basic types of sewing needles I use most often – along with many (many!) asides reminding you that you can use whatever kind of needle you like best. The needle police will not come and lock you up. 🙂

Got any other sewing or embroidery questions? Send them to me here.

Happy stitching!

Best,
Wendi
Applique Wendi (with fabulous hat)


A Question About Scissors

Michelle Erfurt wrote in with a question about her scissors. . .

I’m having an issue with a pair of my scissors and I’m hoping you can help. They are becoming difficult to open/close and are even starting to squeak a little. Otherwise they are cutting fine. What do I do?

It took me a while to answer this because I had to wait for my next trip to the Farmer’s Market, where I asked the guy who sharpens my knives.

He doesn’t sharpen my scissors because (for my main cutting shears) I buy cheap scissors that aren’t worth sharpening. My routine is to buy new scissors about once a year. My old scissors become my paper scissors, and my old paper scissors move to the kitchen, the garden, or the toolbox. You can read more about The Great Scissor Rotation here.

He told me it sounded like you have something caught up in the joint between the two blades – maybe some thread or some gunk from cutting something with a residue on it? Are your scissors joined together with a screw? If yes, this will be an easy fix. Take them apart and give them a good cleaning. If there’s gunk, use some fine steel wool to help clean it out. Put them back together and adjust the screw so that you can hear the blades working against each other for the whole length. He said that action actually helps keep them sharp – the blades sharpen each other if everything is lined up right.

If you can’t take the blades apart, it’s going to be harder – but you need to do the same thing. Clean out anything that might be wedged in the joint. He suggested a steel brush to get in the crack, or running a fine wire around the joint like dental floss, trying to work out anything in there. He also thought you might need to spray it really heavily with WD40. Let the stuff sit for a while to dissolve any gunk, then work the blades and brush or floss out anything you can.

If you end up using WD40, don’t forget to really clean that oil off before cutting good fabric. He suggested cutting through something really absorbent (like flannel) several times to make sure every trace of the oil is gone.

Does anyone else have any suggestions for Michelle?

Rotary Cutting – How to Square Up Your Fabric and Cut Strips

How to Use Rotary Cutting Tools - video tutorial

Welcome to the world of rotary cutting!

It’s pretty awesome.

In this video I show you how to square up your fabric and how to use basic rotary cutting tools to cut strips – on the straight grain and on the bias.

You use straight grain strips to attach to straight edges – like the edges of a quilt.

If you need your strips to curve (like around a curved hem, or to enclose the raw edges of armholes) then you use bias-cut strips.

Remember – that rotary cutter is razor sharp. Keep your fingers away from the blade at all times, and always remember to close the blade (or engage the safety) before you set it down. No blood on the fabric – that’s my motto. 🙂

Want to put those new rotary cutting skills into action?

Buttonholes easy quilt pattern
This quilt is super easy to make.

I designed this quilt especially for beginners and it’s really easy to make. As in – I don’t care if you just took your first sewing machine out of the box and haven’t even threaded it yet – you can make this quilt. 🙂 Get the Buttonholes quilt pattern here.

If you want to learn some more advanced rotary cutting skills, here are some posts that show you how to use additional rulers. . .

One more link. If you do much rotary cutting at all, you’ll notice your cutting mat gets pretty fuzzy over time – especially if you cut batting like I do! This post shows you an easy way to clean a fuzzy cutting mat.

Here are handy links to all the posts about quilting tools and supplies.

Sewing Machine

Iron

Rotary Cutting Tools

Scissors

Other General Sewing Room Supplies

One More Hugely Popular Post that Seems to Fit Here Better than Anywhere Else

Return to the Let’s Make a Quilt main Table of Contents.

Move on to the posts about choosing your quilt pattern.

Happy stitching!