


You can always enlarge or reduce the size of any of my applique patterns, but if you make them really big you can introduce some challenges.
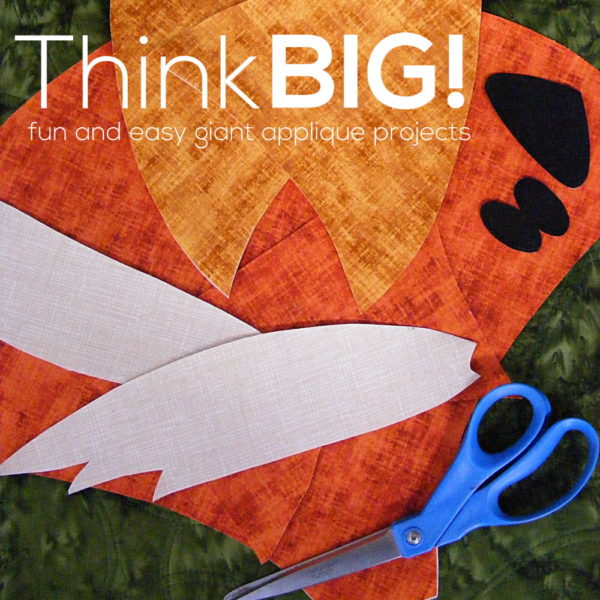
In this series of posts we’re going to learn some easy techniques for working with extra-large applique.
It’s fun! And the large size means the projects come together super fast. 🙂
Add appliques to large patterns of almost any size.
Here are just a few samples I made. . .
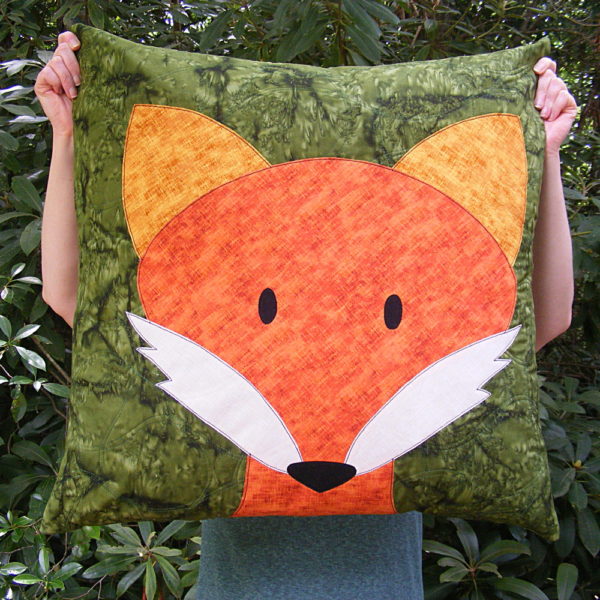
I made a giant floor pillow using the Fergal Fox pattern. This is a 26-inch pillow.
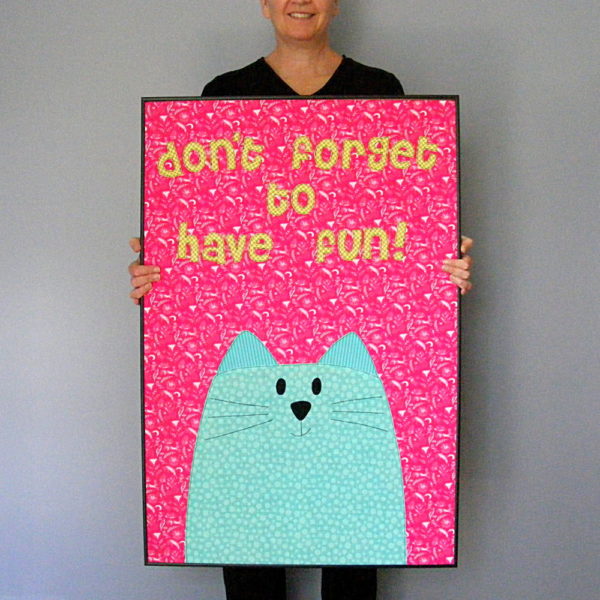
Not every applique has to be quilted! I made a giant (24 x 36 inch) poster using one of the cats from the Cuddly Cats pattern.
This would be a great project to coordinate with a new baby quilt. Enlarge one of the blocks to giant-size and add baby’s name and birth date using this free alphabet and numbers pattern. Then hang it in the nursery! This post tells you how to make a hanging sleeve, and this one tells you how to frame textiles.
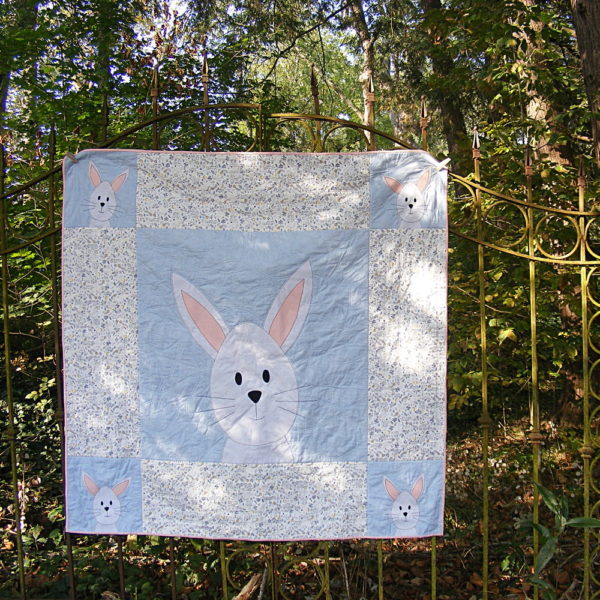
Most applique patterns use a lot of smaller blocks – but you can super enlarge your favorite and use it as the center block of a medallion-style quilt. For this bunny quilt, the corner blocks are my usual 10 x 10 inches, and that center block is 30 x 30 inches.
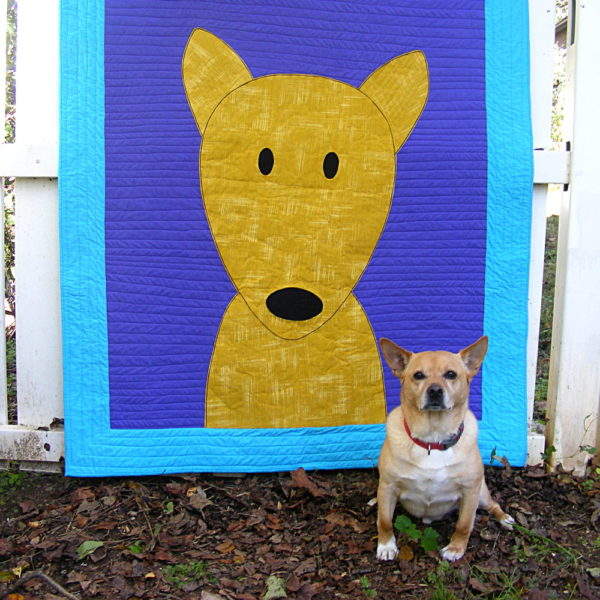
Or maybe you want to make just one giant block! The center of this quilt is 40 x 50 inches and the borders are 5 inches wide. If you want to match your dog as closely as possible, I recommend the Playful Puppies and More Playful Puppies patterns. They’ve got loads of templates that you can mix and match to create almost any dog breed!
I’ve always thought it would be really fun to create a nap quilt for a child using the Paper Dolls pattern and sizing it to be the exact height of your kid! 🥰
There are so many possibilities! Get ready to have fun!
Tools & Supplies
For the most part, the tools and supplies you’ll need for giant applique are the same as what you’d use for any regular applique project – with just a couple of exceptions.
Printer
You won’t be able to print giant patterns on your regular printer – and tiling is impractical because the designs have lots of empty space, which makes assembling the tiles confusing. It works GREAT to save your designs to a flash drive and take them to your local print shop or office supply store. Near me, the Office Max, Staples, and Kinkos all have large printers that are inexpensive to use. There’ll be more info on how to enlarge your patterns in a later lesson, but for now just know that you’ll need access to a large printer.
Fusible Adhesive
Usually I use printable sheets of Heat & Bond Lite because I hate tracing and love the ease of printing out my templates all ready for fusing down. That’s not an option for giant applique, but luckily you can buy Heat & Bond Lite off the bolt at most fabric stores, including Joann Fabrics. It’s just 17″ wide, but you can buy pieces as long as you need. (We’ll cover what to do if your design is wider than 17″ in a later lesson.)
Thread
I like to outline my giant applique with thicker-than-usual thread, so that the outline is scaled up like the design itself. For that I use Sulky 12 wt. thread. It’s the thickest thread that can go through a regular machine. I use black for all my outlining, and a single spool has a lot of thread on it, so it lasts a LONG time. If you want a range of colors in the same weight, you can look for Sulky Petites, which are smaller spools.
To handle the thicker thread, you’ll also need a bigger needle. 90/14 topstitching needles are perfect for the Sulky 12 wt. thread.
There’s a post here with all the info you need about using thicker thread.
That’s it! All the other supplies are the same as for regular applique. You can find links to all my favorite tools and supplies here.

Here are links to all the Think BIG lessons. . .
- Intro and Tools and Supplies – a look some samples of projects made with giant applique, plus an overview of any special tools and supplies you’ll need
- Enlarging Your Pattern – how to figure out how big you’ll need it to be, and how to print giant template pieces
- Tips and Tricks for Giant Applique – what do you do if the pattern piece is bigger than your fusible adhesive, if it won’t fit on your ironing board, and how to scale up your outline stitching
Pingback: Think BIG! – How to Enlarge Any Pattern - Shiny Happy World
I love it–just love it!
Wendi,
Just so angry about people stealing your hard work. I know Funky Friends has had an incredible amount of copyright violations this past year also. I hope you are able to make these companies stop using your patterns and have to pay for their theft. Why do people feel entitled to creativity they did not do ?